Tips for using car air conditioning more effectively in hot weather
Using a car’s air conditioning in hot weather can be a tricky task, as the car’s air conditioning system is put to the test during the summer season. When the temperature rises so high that it seems to melt even the road asphalt, it’s tempting to crank the air conditioner to high speed, hoping to beat the heat. Most people don’t know how the system works, so they use it incorrectly and consume more fuel than necessary.
Using the car’s air conditioning in hot weather: tips to maximize performance
It’s a sunny summer afternoon and you just want to get home from the office. Well, get in the car and you’ll feel like you’re being roasted in an oven! It takes a few minutes for the air conditioner to kick in and run at full capacity. However, you no longer need to sweat because these tips will help cool the vehicle faster. Let’s look at some best ways to use a car’s air conditioning in hot weather.
1. Pump out the hot air
Opening the rear windows expels hot air. [Photo: Rusty Clark via Flickr]
No one likes to sit in an oven, even if it’s just for a few minutes. So, your first step is to cool down the interior (or expel the very hot air inside the vehicle). Before getting in the car, roll down the rear windows and open and close the driver’s door several times in succession. This will expel hot air in seconds.
2. Pump out more while driving
The air conditioning works much better while you are driving because the compressor spins faster with the engine’s rotation. Turning on the air conditioning before driving will only waste time and fuel. Keep the passenger seat windows open for half a minute to expel hot air from the cabin. Don’t make the mistake of opening the front windows, as this will only clear the front area while the rear cabin is still hot.
It will be faster if your car is equipped with a sunroof. While driving, leave it open for a minute and all the hot air will rise and escape through the opening.
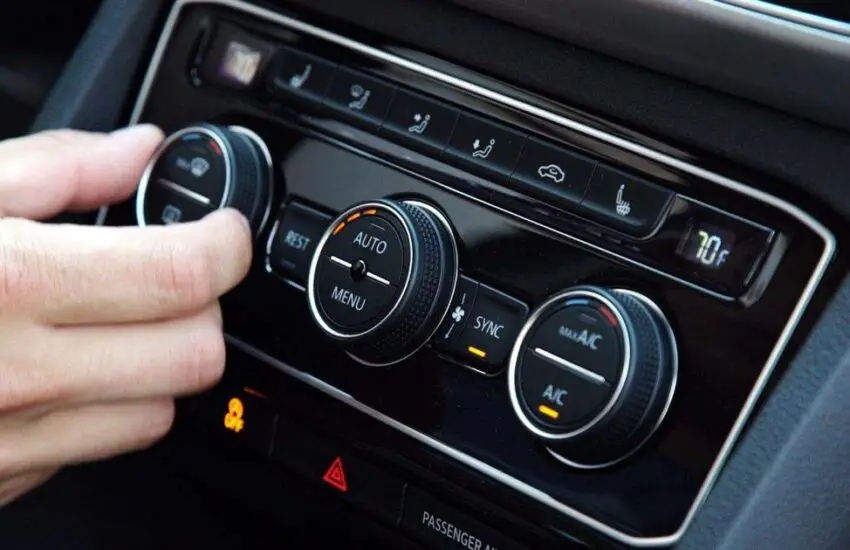
3. Turn on the AC at low speed
First, set the air conditioning to the lowest level. (Photo: cars.com)
You already know that the temperature inside a vehicle tends to be higher than outside. Set the air conditioner to the lowest temperature so that it draws air from outside the car and cools it. On the other hand, turning it to “Max” will force the machine to take air from the passenger cabin, which is hotter than the outside air. Thus, the air conditioner has to work harder if you set it to maximum speed at the beginning.
4. Change the dirty filter
To effectively use a car’s air conditioning in hot weather, you not only need to adjust the system but also check a few components. You won’t get optimal airflow if the cabin air filter is dirty. Check it regularly to see if it’s clear or contains dirt. You will need to change it if it becomes dirty and greasy. It is relatively easier to access and change on newer cars, but you need to call a mechanic for an older model.
The video will show you how to prepare the automatic air conditioning on hot summer days.
5. Turn off the automatic system
The air conditioning in newer vehicles turns off automatically when the engine is not running. This saves fuel, but doesn’t help in hot weather, when a long traffic light could make you sweat. Disable the function so that the interior stays cool even when you have to stop the engine for a few minutes.
6. Use the recirculation mode
When you start the air conditioner, set it to “recirculation” mode. This prevents hot air from outside from being drawn into the cabin, thus allowing the system to cool the air more quickly. Once the interior temperature is comfortable, you can switch to “fresh air” mode to introduce outside air.
7. Park strategically
Whenever possible, park your car in shaded areas or use sunshades to block direct sunlight. This helps prevent excessive heat buildup inside the car, thus reducing the time and energy needed to cool it down.
8. Set the temperature correctly
Set the AC temperature to a comfortable level rather than the lowest setting. Overcooling the air can strain the air conditioning system and waste fuel. Aim for a temperature that allows you to stay comfortable without having to wear heavy clothing.
9. Maintain your air conditioning system
Regularly maintain your car’s air conditioning system by cleaning or replacing the cabin air filter as recommended by the manufacturer. A clogged filter can reduce airflow and efficiency.
Watch more in this video:
In summary
By implementing these tips, you can improve the efficiency of your car’s air conditioning system, resulting in a more comfortable and enjoyable driving experience while reducing fuel consumption and environmental impact. Stay cool and drive safely.
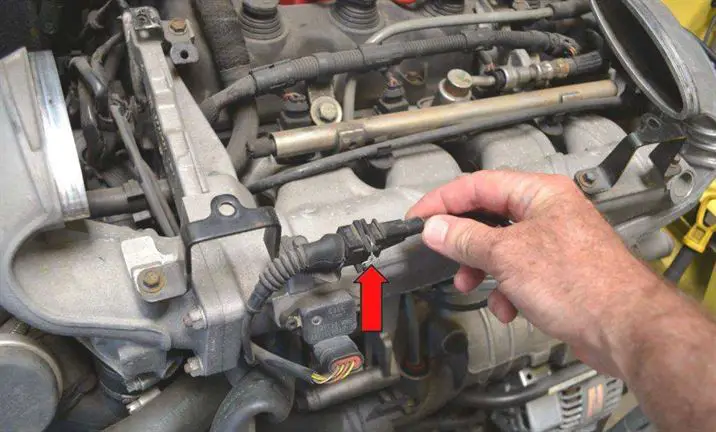
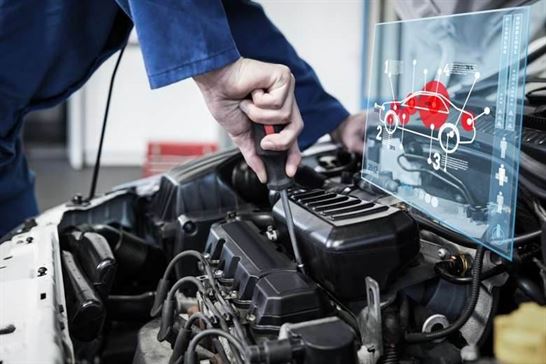
How a Knock Sensor Works
Located in the lower engine block, cylinder head, or intake manifold, knock sensors are designed to create the voltage signal based on vibrations caused by detonation. The sensors essentially generate the voltage signal based on the vibrations caused by detonation. The computer then simply uses this signal to adjust the ignition timing whenever the spark occurs. For those still wondering how a knock sensor works; here is a complete overview to understand how it actually functions.
What is a Knock Sensor?
1. Definition
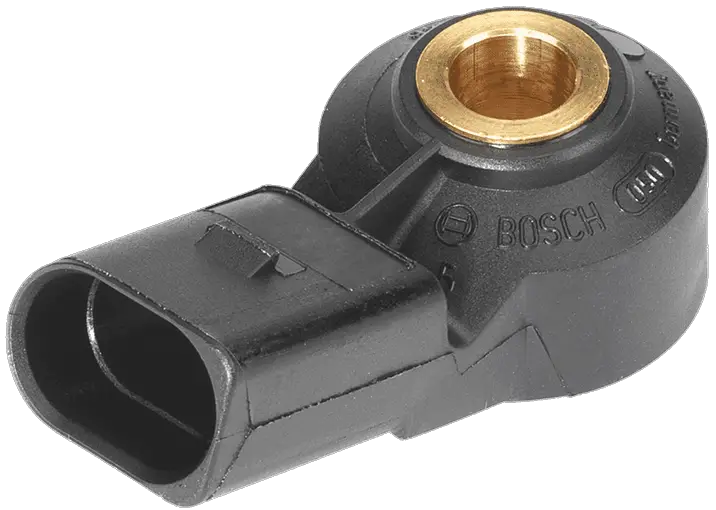
In a second simple and in-depth explanation for all those ignorant of mechanics, the knock sensor is the car computer’s ear to listen for any unusual pulsation that could damage the engine and to check if the engine is running properly. Being essentially a microphone, the knock sensor detects “spark knock,” which is the condition inside the engine where fuel starts to burn before it is supposed to. “Spark knock” is also called detonation, pre-ignition, or ping. I hope this definition helps you with some ideas about what a knock sensor is and what a knock sensor is used for.
A Bosch knock sensor (photo source: Amazon)
2. Function
So we know this “sensor,” which is a microphone, listens for the “knock,” but what does it sound like? The answer is like a can full of marbles being shaken and producing a rattling noise. This unusual pulsation creates a rattling noise and damages the engine’s internal components. Therefore, it must be detected by the computer when it happens. That’s why knock sensor functions came into being, to assist the computer in this detection task.
When an irregular knock occurs and is detected by the sensor, the computer will know and immediately make small adjustments to prevent it from happening while maintaining optimal performance as usual. And if the sensor fails, the computer simply won’t perform any engine adjustments, and thus optimal engine performance cannot be guaranteed.
3. Uses
Well, the knock sensor has two main uses:
First, it detects spark knock, which helps optimize engine performance.
Second, it also protects the engine from power loss.
Thus, the knock sensor ensures vehicle safety, allowing you to drive safely on the roads.
How Does a Knock Sensor Work?
This part will inform you about the technical details of the operation or the working of a knock sensor. In technical terms, the knock sensor is a piezoelectric sensor that contains a piezoelectric sensing crystal and a resistor. This crystal creates a small amount of voltage when shaken by the aforementioned knocking noise. The knock sensor then takes advantage of this unique property.
The Knock Sensor starts working as soon as it detects knocks and noises from the engine. So, the sensor simply picks up the noise, which is usually not audible in the engine. The low-volume reverberations range from 6 to 8 kHz. The resonator plates inside the knock sensor are responsible for these faint reverberations. Furthermore, this is then transmitted to the sensor’s piezoelectric crystal element. As soon as the element receives this signal, or as it’s called the shock wave, a small voltage is generated, which simply goes to the Electronic Control Unit of any vehicle.
Your vehicle’s Electronic Control Unit will simply delay the triggering of that spark in the chamber. As a result, the spark or spark triggering is simply delayed. In short, if you know a few maintenance tips to keep your knock sensor healthy, no spark knock will occur in the vehicle.
Now that we know how a knock sensor works, let’s explore some of the failure symptoms.
Knock Sensor Troubleshooting: The Symptoms
After learning how a knock sensor works, it’s time for us to know how it doesn’t work. There are common to rare symptoms of a bad knock sensor that every driver should know to ensure smooth and efficient driving.
1. Driving Feel
First, trust your instinct, trust your inner self when driving at high speed or carrying a light or heavy load in the car. There will be something wrong. Your car isn’t performing as it should be or at least you think it should be. By listening to the engine noise, observing the gear change, comparing the weight of your accelerator pedal pressure with last time, or simply the steering speed. Regarding the feel, only your skills, experience, and familiarity with your cars can tell.
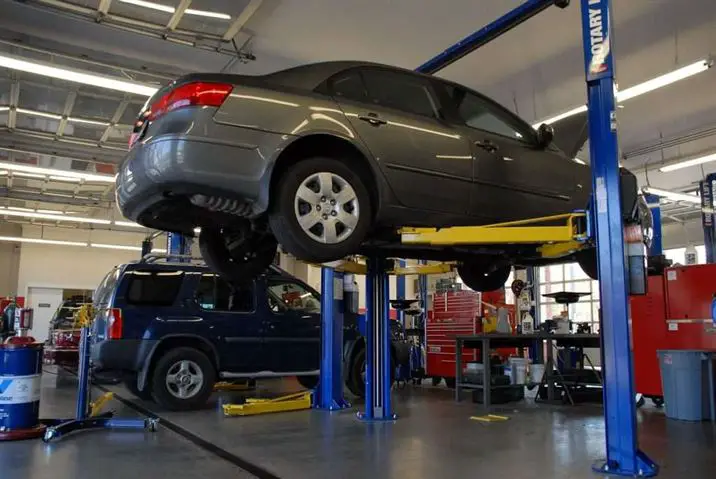
Then after confirmation, take your car to the garage immediately for a quick check.
2. Slow Acceleration
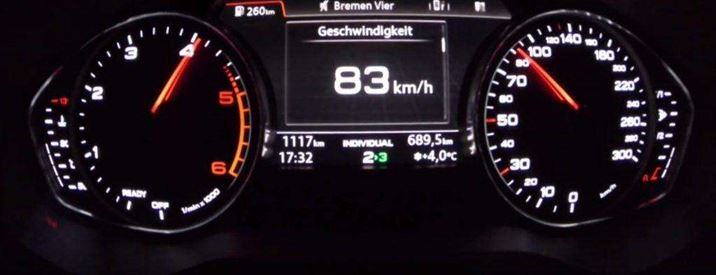
You will notice a loss in fuel economy, especially during acceleration on highways. A deeper accelerator pedal no longer means as fast a speedometer. In other cases, with the same distance you usually cover, the fuel gauge drops from F to E faster than it’s supposed to. And for you, it’s the pain in the pocket, and you might find more money spent on fuel this week, but no change in the total distance traveled. You feel it clearly and painfully.
The dashboard can be used to confirm slow acceleration (photo source: Wonderful Cars @ Youtube)
So don’t wait any longer, let’s head to the garage before further engine damage occurs.
3. Check Engine Light
A Malfunction Indicator Lamp (MIL), or check engine light, is an indicator that a computerized engine management system uses to indicate a malfunction. Found on the dashboard of most automobiles, it is usually labeled Check Engine, Service Engine Soon, or displays a pictogram of an engine – and when illuminated, it is typically amber or red in color.
In this case, the computer can detect different sounds in the engine, and when there is no usual signal from the knock sensor, the computer will get the information and assume there might be a problem with the knock sensor. Then the Check Engine light will turn on. Of course, there are dozens of reasons why the Check Engine light comes on, but it’s still worth taking your car to the mechanic. Whether it’s a faulty knock sensor or not, you will save your money.
4. Loss of Power
When the knock sensor is not working properly and the computer realizes it, the vehicle will lose engine power. The most damaged engines are normally those with high compression and mixed fuel. The result would be to slow down the timing and keep the transmission off-road. Replacing the knock sensor will solve this problem.
Our Expert Tips
In any vehicle, the knock sensor can detect noise at different levels. And of course, the spark plug color can also be identified in the vehicle. So, when a light knock occurs, you will probably hear the pinging noise, which will sound like a small ball bouncing around the vehicle’s engine. Well, this level of detonation is easily identified by the knock sensor.
If you don’t take good care of your engine and vehicle, it’s likely these noises will reach a higher level, leading to more severe knocking and noises in the engine. It might even feel like someone is knocking very hard on the door. After that, you can only expect your engine to be damaged and break down.
Check your knock sensor once a month (photo source: Pelicanparts.com)
Effective ways to keep your car in perfect condition
Just as we take care of ourselves, eat properly, and stay fit, the same basic concepts apply to keeping our cars in the best possible condition. It’s always painful to have to dip into savings to pay for car repairs, and even more difficult lately with the performance of the economy. But to ensure we maintain the value of our cars (perhaps your most important asset) and minimize repair costs, here are some simple and easy-to-remember tips to keep your car in good condition.
10 Car Tips: How to Keep Your Car in Good Condition.
Owning a favorite car for work as well as for long trips is no longer too difficult. However, while driving, car owners sometimes forget an extremely important step, which is to care for and maintain the car to help it always operate under the best conditions and extend the vehicle’s lifespan. The consequences are that your car deteriorates quickly, is likely to damage important parts, leading to costly repair bills, a loss in the vehicle’s value, and no longer ensuring safety for long journeys.
It’s a fact that no vehicle can last long without periodic care and maintenance. Even the most reliable cars. So how do you keep a car in good condition? Pocket the following 10 tips to keep your car shiny like new and save on many unexpected costs.
10 car tips will help you maintain your car’s value and minimize repair costs (Photo: pinterest.com)
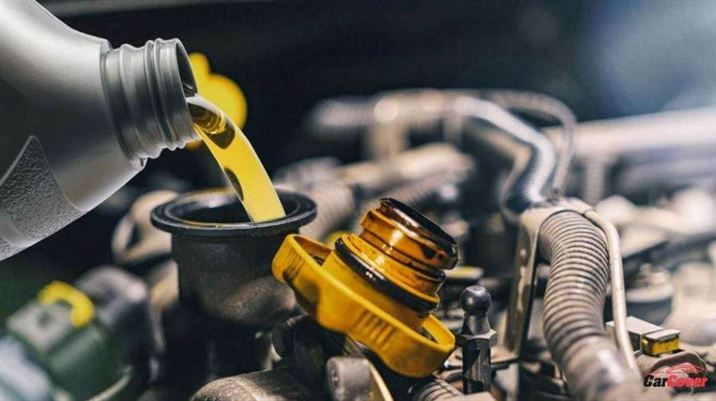
1. Check Your Oil
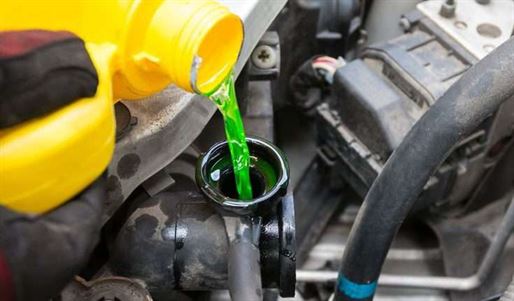
Oil is the lifeblood of your car, and without it, the car won’t go far or quietly. After a period of use, the oil will become dirty and won’t lubricate as well as the original. Therefore, regular oil changes are essential for your car to continue running properly and more durably. The engine oil level, transmission fluid, power steering fluid, and brake fluid should be checked regularly. If you don’t remember the last time you changed your car’s oil, do it immediately.
Ask your mechanic to show you how to properly check your oil and have the oil changed every 3,000 to 3,500 miles. While oil manufacturers claim their oil can last 10,000 miles, it’s generally best to use the same oil for a maximum of 5,000 miles to maximize the engine’s long-term reliability and efficiency. Check the oil regularly, about once a week, and change it or have it changed when you reach the 4,000 to 4,500 mile (6,400 to 7,200 km) limit.
Remember that periodic oil checks are key to your car’s “health.” The easiest way to check the oil is to do it directly at home. Using a clear plastic container or a dipstick, the antifreeze can be pink, green, or yellow. If you see a brown color, the oil must be changed immediately.
Note: before replacing the oil, you should start the car and let it run for a few minutes to warm it up, then turn off the engine, then use the dipstick to check the oil level to see if the oil level is low or possibly needs renewing.
2. Keep the Brakes in Good Condition
Maintaining your car’s brakes is one of the useful tips to help protect your life and that of your passengers. (Photo: pinterest.com)
When traveling by car, drivers must pay attention to whether the car’s braking system is working well or not. And this should become a habit because the brake is a very important component. It takes on the task of protecting your life and that of the car’s passengers. Modern car braking systems are designed to be replaced periodically to maintain maximum braking efficiency. If you notice any problems with the brakes, take your car to have the brakes checked immediately. If the brakes fail, you could have a very serious accident.
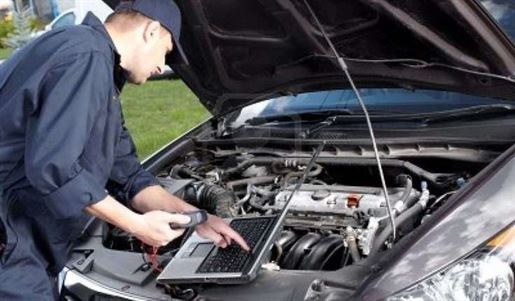
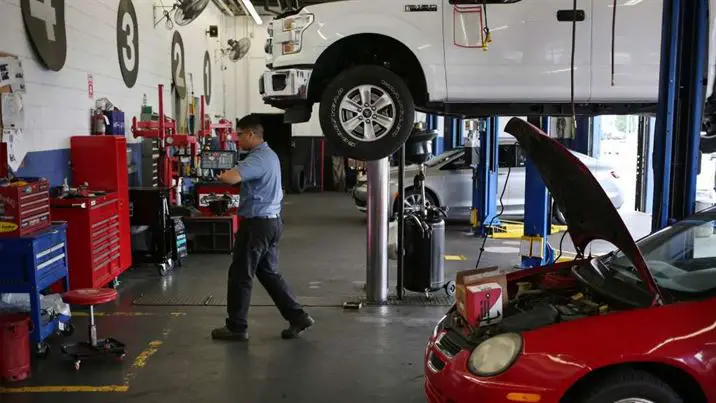
3. Pay Attention to Warning Lights and Regular Car Maintenance
To protect your car, you must first understand it and, most importantly, detect abnormal alerts in your vehicle. Strange noises, smells, or anything unusual are some of the signs that your vehicle needs to be taken to a garage for repair.
If the warning lights on your car’s dashboard come on, call your trusted mechanic. (You can also consult your handy owner’s manual – “learning the basics about your car and the repairs it needs will help you build a rapport and show your mechanic that you know what you’re talking about.). Delaying a repair could cause irreparable damage to the car and result in a painfully more expensive repair.
To detect unusual signs earlier and take timely preventive measures, we recommend periodically entrusting your vehicle to a reputable mechanic for maintenance. Most car owners don’t place much importance on scheduling maintenance for their car. This causes your car to become increasingly degraded without you even knowing it.
If your vehicle is under warranty, be sure to take it to a service workshop for timely maintenance. Usually around 3,000 to 5,000 km or every 3 to 6 months. Furthermore, some parts need to be replaced over time, not based on mileage. Please ask the technician to check several items such as the lubricating oil filter, as well as the flywheel seals, the ball joints… to ensure your car is still running stably.
4. Don’t Ignore Your Tires
The condition of the tires greatly affects safety, which is why tires must be used in the best condition to ensure safety and save money on every repair. Whether you like it or not, according to manufacturer and expert recommendations. Car tires, after traveling approximately 40,000 km to 50,000 km, will undergo technical changes. To ensure the best safety, it is recommended to replace the tire if your tire has reached this period; in the case where the tire is found to be cracked before even reaching the aforementioned limit, the car owner should consider a replacement option for the safety of the vehicle owner on every upcoming trip.
You must ensure you regularly check the tire pressure and inflate to the pressure specified by the manufacturer. Additionally, tire rotation is a very important step to make your tires last longer. This will help the car operate more balanced and with better anti-skid properties.
Checking car tires will be much more convenient for some modern cars equipped with a tire pressure monitoring system and tire information on the central dashboard. Conversely, the driver must equip themselves with a tire pressure gauge if the vehicle does not have this system. And regularly monitor its standard pressure parameters for each tire, usually posted on the driver’s side door jamb.
5. Keep the Bodywork Intact
How do you keep your car’s bodywork as shiny as new? It’s simple. Sometimes you realize that even though most people don’t appear unkempt in public. The aesthetic aspect of our car is also essential. Simple things, like keeping your car washed regularly, waxing it, and making sure dents and dings are taken care of, will better preserve your vehicle’s value and avoid long-term problems like rust and discoloration.
Protecting the car’s paint is one of the extremely important elements in keeping your car’s bodywork intact, especially when you’ve just bought a car and need to know how to keep it shiny and durable. The beauty of a car depends mainly on the exterior paint color, which not everyone knows about and protects correctly. If not well maintained, the car is prone to discoloration and aging.
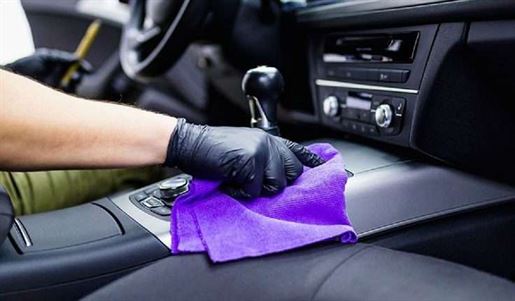
6. Keep the Interior Clean
Cleaning the interior makes your car shiny and durable (Photo: pinterest.com)
After a process of about 6 to 8 months, cars will have a thick layer of dust clinging to every corner of the car. The car’s interior, although located in an enclosed space, is still attacked by these tiny dust particles. This has caused the car to lose its aesthetics and created a bad odor that affects the health of the car’s occupants. In this case, clean and vacuum the interior as needed. As we know, the interior of a car has many details and nooks, which can sometimes be difficult to clean.
Therefore, whether it’s effective or not depends on the car owners. If the meticulous person knows how to choose specialized tools and chemicals for cars to avoid damaging the interior parts of the car. In addition to cleaning the interior. You should deodorize the space inside the car so that it is always fresh and gives a pleasant feeling throughout the journey.
The interior is often a selling point when it comes time to trade in or sell the car. While many don’t care about the oil or tires. If the CD player doesn’t work or the interior looks a bit dirty, the deal is off. It is said that the car’s value is preserved in the cabin, and this statement is true. If you ever want to trade in the car or sell it, every quarter spent on vacuuming will be returned to you with interest!
7. Check the Lighting System
The car’s lighting system not only ensures road safety but also contributes to the aesthetics and value of the car’s exterior. In addition to lighting, this system is also responsible for notifying and providing signals. Therefore, vehicle owners must pay special attention to signs of malfunction in the vehicle’s headlights. Faulty or damaged car lighting systems can lead to risks of dangerous driving, as well as inconveniences during use.
If other parts of the vehicle such as the engine, oil filter, tires, air conditioning, etc., have periodic maintenance schedules (e.g., every 5,000 km or 12 months). The lighting system generally only needs repair when it malfunctions. Therefore, to ensure that the car’s headlights operate stably and minimize unexpected incidents. Vehicle owners must remember to check the lights every time they start the car and regularly monitor the operating status of the system. If you notice the lights are slow, flickering, dimly lit, or flashing frequently. You will likely need to check the lighting system (wires, relays, fuses, bulbs, …)
8. Ensure the Windows and Wiper Blades are Clean and Functional
Periodically check all door and window systems and replace damaged parts as soon as possible, for example, by detecting cracks in the glass. A single hole or crack in the windshield is dangerous for the vehicle’s occupants.
Especially for wiper blades, visibility is guaranteed to be good or not depending on this small part. Its role is very important in cleaning the windshield. After 1 year to 1 and a half years of use, it should be replaced once, preferably before the rainy season. While driving, if the wiper blade vibrates, makes noise, or doesn’t clean properly. The driver should check the rubber blade and replace this part with a new one. Hot and humid weather will cause the rubber surface of the wiper blade to wear out and the pins to rust.
9. Keep the Engine Topped Up with Coolant
Topping up the coolant at least once every 2 years will keep the car always in good condition. (Photo: pinterest.com)
The engine coolant acts as a bridge to transfer heat from the engine to the radiator, meaning a car cannot operate stably without coolant. Naturally, a lack of engine coolant will cause the metal components inside the engine to expand. Because when the car is running, the heat generated by the engine is very significant, requiring coolant to manage this reaction.
To avoid altering the chemical components of the engine coolant. You should flush the radiator and refill the coolant at least once every 2 years. Or change this fluid after 40,000km (Depending on the level of use). Checking is very simple, open the engine compartment when the engine is cold and check the coolant level to ensure its level in the reservoir is between the “Min” and “Max” marks.
A small tip for detecting a car with a coolant leak is to observe. When the car is parked for a while, there is a small puddle of water under the car. If this happens, you should immediately take the car to the repair shop.
10. Limit Rust
Surely no car owner wants their car to appear rusty, which looks very unsightly. Therefore, you should not park in overly hot garages. A spacious and cool parking space will help you limit further risks. Additionally, you should also limit parking in the sun. If left in the sun for a long time, the paint will age, fade, or peel. In particular, the materials inside the cabin will also warp, leading to a loss of aesthetics and reducing the vehicle’s lifespan.
After driving in the rain, you should always wash your car when it’s in the sun to prevent the salt, acid, and dirt present in rainwater from rusting the car’s metal components.
Watch to learn how to make your car last a long time:
Final Thoughts
If it’s the first time we’re using a car, we can be very “confused” about maintaining and servicing our car. Not only newcomers but also those who have used cars a lot may not know how to care for their new cars in the most reasonable way possible. We hope this sharing will be useful for your car to keep running like new and as durably as possible. To conclude the topic ” How to keep your car in good condition? ” We want to share that every car
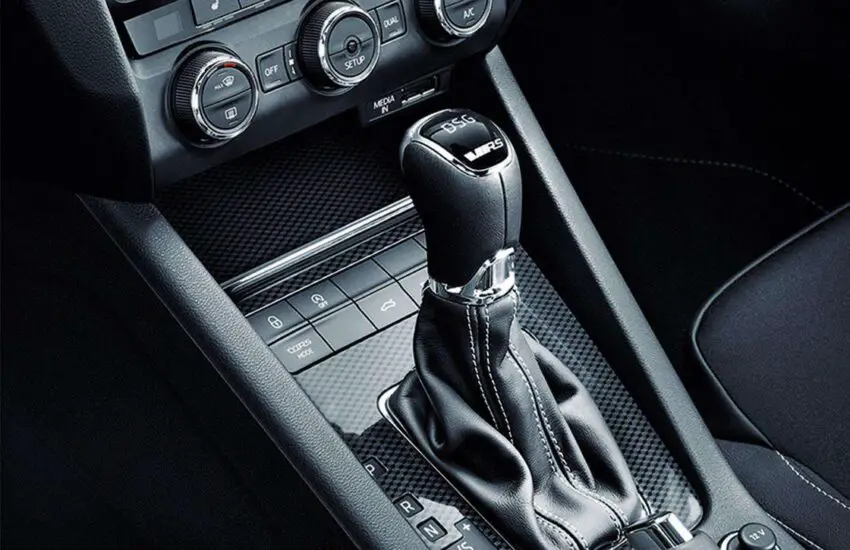
Common 6-Speed DSG Transmission Problems You Might Not Know About
DSG or Direct Shift Gearbox is available as a semi-manual or fully automatic transmission without a clutch pedal system. It is responsible for controlling the speed and torque in a vehicle such as a car based on the terrain’s demands. Eliminating the need for the user to manually control the transmission system, the DSG system is used in brands like Audi, Volkswagen, Skoda, etc. However, being such a charismatic mechanism in a vehicle, DSG transmission problems are no exception. And some of the most common transmission issues are mentioned here:
Common 6-Speed DSG Transmission Problems
Let’s see how an automatic gearbox or transmission can trouble you and what the possible solutions might be.
1. Shuddering When Starting the Engine
People often think this is one of the DSG transmission problems. However, it is actually related to the transmission area and not the transmission itself. If you feel shaking when the car is idling, the dual-mass flywheel may be the cause. You can find this part between the transmission and the engine, where two plates work together to provide damping.
When the flywheel is worn, the damping becomes limited or even non-existent, and you feel the shuddering. So, before approaching the transmission, make sure to have the flywheel checked. This is especially noticeable during gear shifts, and replacing the part is the ultimate solution in this case.
2. Mechatronic Failure
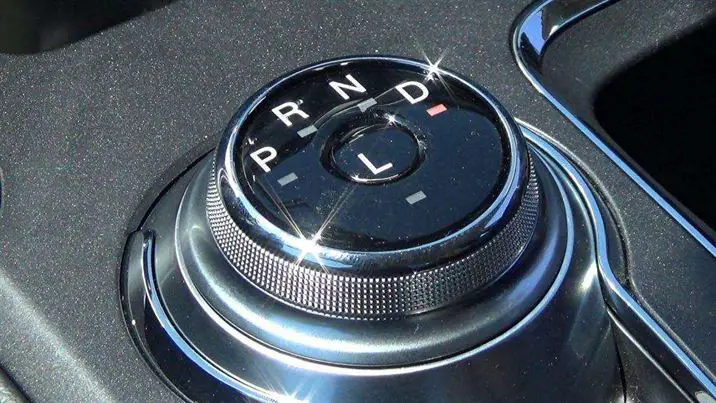
The Truth About DSG Transmission Problems
The condition where gear shifting becomes limited is called mechatronic failure; in most cases, the gear remains in third. The problem can be detected by looking at the dashboard and checking the indicator. The PRNDS lights can be useful in displaying the specific code. Then, you need to have it checked using a diagnostic device or call a professional.
For better car maintenance, visit Maintenance Tips.
The code might be “clutch limits reached,” meaning there is a fault in the clutch. Another code could be “adaptations,” indicating that you need an adaptation reset. If the codes indicate sensor or speed issues, it means you need a repair of the electro-hydraulic control unit that manages the gearbox.
Well, if that’s the case, it can be expensive, and repair companies are also limited. If you lose reverse gear partially or entirely, it’s a clear indication that the mechatronics need to be replaced.
3. Noisy Bearings
Sometimes, the mechanical components of the DSG transmission fail, and most of the time, it’s due to bearing wear. In this case, you may notice an annoying noise while driving. The issue can be postponed or left untreated for a while, but it shouldn’t be ignored in the long term.
You should replace the bearings with a professional or get the bearing kit yourself and do it as a DIY project. The sooner you fix the problem, the less risk there is of additional damage.
Overall
These are some of the common DSG transmission problems that need to be addressed as they arise. In a complicated case, replacement or repair can be expensive; you should resolve the issue to continue the luxurious driving experience.
Can a faulty car battery cause misfires
Engine misfires can sometimes be frustrating. Knowing that your engine is not delivering the intended power can cause you trouble. Most of the time, people associate engine misfires with faulty car batteries, but is this true?
Can a faulty car battery cause engine misfires?
When there is a problem with your car’s ignition system, it can lead to engine misfires. This implies that there may be an imperfect combustion process likely inside the cylinder.
When looking for the reasons for such misfires, one thinks of a faulty car battery. Read on to discover the truth behind this.
1. How can a faulty car battery lead to a misfire?
You know what a fuel pump is, right? If not, it would be interesting to know that a fuel pump is a device that helps pump liquid fuel to the internal combustion engine. It is your car’s weak battery that can negatively affect this fuel pump.
Simply put, a weak car battery can slow down the operation of fuel pumps. This condition can further lead to a “lean fuel” condition.
Another thing that a faulty battery can lead to is the poor opening of certain injectors. All these conditions combined can cause engine misfires.
A weak car battery can slow down the operation of fuel pumps. (Photo: Youtube)
So next time you wonder how a faulty car battery can cause engine misfires, we hope you have the answer.
2. Consequences of misfires
If cylinder misfires occur due to faulty car batteries, it can significantly damage the engine. The lean fuel condition, as mentioned in the section above, would lead to engine overheating. This could further damage the valve or piston.
Thus, you will experience a loss of power when driving. The internal components of the engine would rotate unevenly, causing wear that would become expensive to repair.
Another thing that can be a consequence of misfires is emissions. Black exhaust is particularly visible and can significantly reduce your carbon footprint. You can also explore maintenance tips to learn more about emissions.
3. Things to keep in mind
A normally charged battery is built-in at 12.65 volts. You can check it using a voltmeter.
If the reading varies up to 12.45 volts, it should be quite fine. But anything below that line could be a warning sign. That’s where a battery replacement is needed.
It is also important to know that sometimes, even a fully charged battery can prove to be bad due to a lack of overall power.
That’s where a conductance tester could be helpful. In a conductance tester, a frequency signal is sent through the battery.
This helps to know which part of the plate does not have good conductance. The process allows for accurately knowing the battery’s condition.
A normally charged battery is built-in at 12.65 volts. (Photo: Getty Images)
If all these tests produce results indicating that a battery replacement is necessary, it must be done as a priority. Remember to install batteries with the same or higher CCA ratings and that the batteries must be fully charged before installation.
FAQ on car battery causing engine misfires
Can a faulty battery damage the engine?
It is unlikely that a faulty battery itself causes direct damage to the engine. However, if unresolved, the misfires it triggers can potentially lead to damage over time due to unburned fuel contaminating the catalytic converter or fouling the spark plugs.
How can I determine if my battery is causing engine misfires?
Start by checking the battery voltage and ensure it is within the recommended range. Additionally, perform a diagnostic scan to identify fault codes related to misfires or electrical issues.
What should I do if I suspect my battery is contributing to engine misfires?
If you think your battery is a factor in engine misfires, it is essential to address the battery issue first. This may involve recharging or replacing the battery. After that, if the misfires persist, further diagnostics may be needed.
Are there preventive measures to avoid battery-related misfires?
Regular battery maintenance, such as cleaning the terminals and ensuring a strong charge, can help prevent battery-related issues that may lead to misfires. Additionally, keeping your vehicle’s electrical system in good condition is crucial.
Can factors other than the battery cause engine misfires?
Yes, engine misfires can result from various factors, including faulty spark plugs, ignition coils, fuel injectors, and sensors. It is important to consider these components when diagnosing.
Should I seek professional help if I suspect engine misfires or battery problems?
Yes, it is advisable to consult a qualified mechanic or technician if you suspect engine misfires or battery-related issues. They can perform a comprehensive diagnosis and recommend the necessary repairs.
Conclusion
Can a faulty car battery cause engine misfires? Yes, it can! Although some people might suggest otherwise, it could be a probable reason. Getting your car checked and replacing the batteries could be of great help when looking for a reliable solution.
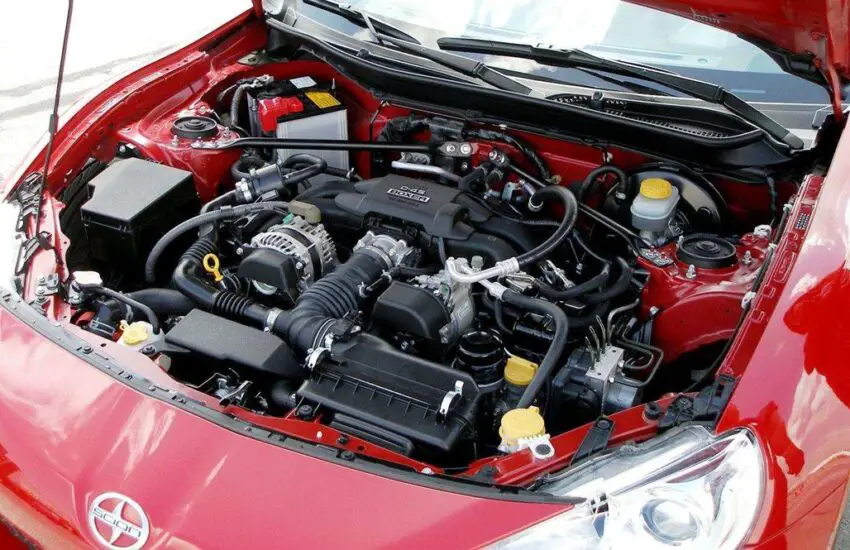
How to Detect the Symptoms of a Faulty Coil Pack
The ignition coil pack plays a major role in starting the car and keeps the engine running without any problems. The engine spark plug requires high voltage to create a spark and start the combustion process. The coil pack does the job of producing the required high voltage. The engine will not start and your car will not run properly if there is a problem with this component. Therefore, you must be aware of the bad ignition coil pack symptoms, as any problem will lead to engine performance issues.
What is a Coil Pack?
A coil pack is an electronic device integrated into the ignition system. This electronically controlled pack consists of ignition coils controlled by the car’s main computer. The main function of the coil pack is to increase and build the necessary energy, and then release the voltage through the spark plug wires. When the energy reaches the spark plugs, it starts the combustion process.
Be aware of the symptoms of a bad coil pack, as any problem with it will lead to engine performance issues (Photo: way.com)
Reading here, many drivers will ask the question: Are ignition coils and coil packs the same thing?“ Our answer is “No.” Coil packs and ignition coils are not the same thing in a car, although they serve a similar purpose.
An ignition coil is a component of the ignition system that transforms the low voltage from the battery into the high voltage needed to create an electrical spark in the spark plugs. Typically, a vehicle with a traditional distributor-based ignition system will have one ignition coil, which generates the high voltage for all the spark plugs.
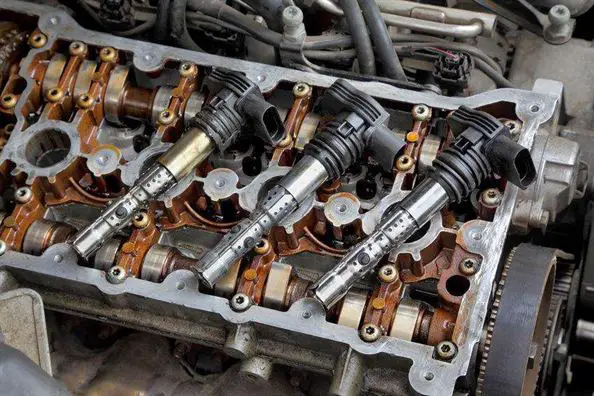
On the other hand, a coil pack (also known as an ignition coil module) is a component found in vehicles equipped with a Distributorless Ignition System (DIS) or a Coil-On-Plug (COP) system. In these systems, each cylinder has its own ignition coil, and the coil packs are usually mounted directly on or near the spark plugs. This configuration eliminates the need for a distributor and allows for more precise control of ignition timing.
In newer car models. The coil pack replaces the distributor. This is generally because the coil pack is more reliable and consistent than the distributor. Furthermore, the coil pack provides a better spark, which leads to more efficient and faster combustion, as well as higher power.
Symptoms of a Bad Coil Pack That You Should Not Ignore
Your car will not run properly if there is a problem with the coil pack. The usual signs of a bad coil pack are the answer to the question of whether the coil pack is bad.
The car engine makes louder noises than usual
The engine idles roughly
Flames coming from the carburetor
Backfire
Flashing check engine light
A drop in RPM during acceleration
Gasoline smell blowing from the exhaust
The check engine light comes on
The car won’t start
1. Engine Misfires
Engine misfires are one of the symptoms of a bad coil pack. Trying to start the engine of such a vehicle will result in engine misfires that sound like a coughing and sputtering noise. When driving at high speed, shaking and sputtering will be visible in the vehicle’s behavior. A vehicle with a faulty ignition coil will also cause vibrations when idling at a stop sign or traffic light.
Trying to start the engine of such a vehicle will result in engine misfires that sound like a coughing and sputtering noise.
2. The Engine Idles Roughly
Another symptom of a weak coil pack is rough engine idling. You feel like your vehicle is lacking power when you are driving. Rough idling is what happens when the coil pack deteriorates, so you should repair it right after finding this symptom.
3. Backfire
Backfires caused by your vehicle can indicate the symptoms of a failing ignition coil in its early stages. A car backfire occurs when unused fuel in the engine’s combustion cylinders escapes through the exhaust pipe. If this issue is not checked and resolved, costly repairs can result. If your car backfires, you will notice black smoke being emitted from the exhaust pipe.
4. Exhaust Smoke Comes Out
Symptoms of a bad coil pack can also be determined by the exhaust smoke that escapes when the vehicle is running. The smoke comes out intermittently instead of a regular, normal flow.
5. A Drop in RPM During Acceleration
If you have a faulty coil pack, a drop in RPM during acceleration can occur. It can be determined by watching the RPM gauge while driving. During acceleration, the check engine light comes on intermittently or flashes.
6. Reduced Fuel Economy
If your ignition coil is not delivering enough power to your car’s spark plugs, your vehicle will have to burn and use extra fuel. This is the only way for the vehicle to keep running: by burning the extra and residual fuel. If your car has very low and well below normal gas mileage, you might have coil problems.
7. The Check Engine Light Comes On
So, how to check for a bad coil pack? You can check the check engine light! Usually, the check engine light comes on on your dashboard and the engine code is P0351 when scanned using a car diagnostic tool. The easiest way to detect ignition coil pack symptoms is to scan the error code. So, by seeing the error code, you can check the check engine light and determine what the coil pack problem is.
8. The Car Won’t Start
The car not starting is also one of the symptoms of a bad coil pack. If you try to start your car and it doesn’t seem to start, it’s possible that your car has a problem with the coil pack.
How to Diagnose a Faulty Coil Pack
Ignition coils are reliable but they can fail for various reasons such as vibrations and extreme heat. However, voltage overload caused by faulty spark plug wires or spark plugs is the most common reason for their failure.
If you notice any of the symptoms of a bad coil pack, you need to diagnose them to see if they have problems. A few methods for testing a coil pack have been described below:
Use an Ohmmeter
You need to measure the primary and secondary resistance of the coil to know if it is fully functional, and you need to use an ohmmeter to do this.
Connect the ohmmeter to the high voltage output terminal and the positive (+) terminal to measure the secondary resistance. A reading between 6,000 and 8,000 ohms is normal if the coil is new, while some coils may read over 15,000 ohms.
Measure the secondary resistance by connecting the ohmmeter to the high voltage output terminal and the positive (+) terminal. A reading between 6,000 and 8,000 ohms is normal if the coil is new, while some coils may read over 15,000 ohms.
Two other ways to test resistance are to use either an inexpensive spark tester available at most auto parts stores, or an ignition coil bench tester available at auto repair shops.
Whichever method you apply, never try to remove the high voltage output wire or a spark plug wire to test for a spark. An open wire is risky as it can cause a severe shock. Furthermore, suddenly disconnecting the wire can damage the coil by increasing the voltage demand. So, when you detect symptoms of a bad coil pack, follow a proper method to test the coil’s resistance.
Summary
The 8 symptoms above are the symptoms of a bad coil pack. You can check your car; if your car exhibits one or more symptoms, your car may have a faulty coil pack. Take your car to a mechanic to diagnose your car and perform the repair if necessary.
How to clean a car ceiling?
A common mistake many car owners make when cleaning their vehicle is simply vacuuming debris from the seats and carpet while neglecting the interior ceiling or headliner. The surface of car headliners is porous and therefore absorbs odors and smoke. Without regular cleaning, it can retain an unpleasant smell for days or weeks. Learning how to clean the ceiling or headliner of a car, along with other basic maintenance tasks, will keep your vehicle looking and smelling fresh.
Even if you know how to clean car upholstery and carpet, the headliner is quite delicate in comparison. You must be extremely cautious and use different cleaning products and techniques to ensure it isn’t damaged when you attempt to remove stains or odors. This comprehensive guide will teach you different methods for cleaning a car’s interior roof, from removing minor stains to a full surface cleaning, including deep cleaning and eliminating unwanted odors.
Understanding Your Car’s Headliner
The material covering your car’s ceiling is called the headliner. Before moving on to the actual cleaning method, you need to be aware of something to perform proper cleaning later.
The headliner is made of 3 layers that can be damaged if they get wet. (Photo: Kardboard604 / Flickr)
The headliner consists of more than just fabric (otherwise it would fall from its mounting points on the ceiling). It is composed of a hardened backing, usually made of fiberglass or another custom-molded fibrous board, and glued to this backing is a thin layer of foam. Finally, the exposed material of the headliner is evenly glued to the foam. When cleaning, care must be taken not to overly wet the headliner to avoid compromising the adhesive.
Note: The headliner, made up of these three pieces, is manufactured as a single unit. Therefore, if the exposed surface of the headliner is stained, damaged, or sagging, it must be replaced as one piece. Extra caution is thus needed, but don’t worry, learning how to clean a car’s ceiling is quite simple if you strictly follow our methods below.
How to Clean a Car Ceiling: What You Need
For headliner cleaning, you will need:
Microfiber cloth
Soft-bristled brush
Car interior roof cleaner: An upholstery cleaner or an all-purpose cleaner will work on your headliner. If you buy an upholstery cleaner, it’s better to get an aerosol one as it is more effective than the pump type.
Or you can make your own cleaner: simply mix 1⁄4 cup of white vinegar and 1⁄2 tablespoon of liquid soap with 1 cup of warm water in a spray bottle. Shake well to mix the solution. This cleaning solution is also useful as a general cleaner for soft fabrics and is effective for cleaning upholstery and removing stains from the inside of your car.
For stubborn stains or deep cleaning: a steam cleaner or a deep cleaning system.
How to Clean a Car Ceiling: Cleaning Minor Stains
Spot cleaning can be effective for small stains or minor dirt. (Photo: CarCareHunt0)
Minor stains can include dirt, food or drink spills, or water stains caused by leaving your sunroof open when it rains. To remove dirt or minor stains from your headliner:
Open your car window and preferably work in a well-ventilated area so the headliner dries as quickly as possible.
First, always try to gently remove any loose particles without rubbing them deeper into the fabric. Gently wipe the dirty stain with a microfiber cloth or use a soft-bristled brush to remove any loose dirt stuck to the headliner.
If the dirty stain is no longer visible at this point, you’re done. If it’s still visible, you will need to apply the cleaner, either a commercial solution or your homemade one. Spray a small amount of cleaner onto a corner of the microfiber cloth, leaving the rest dry for later use.
* Important Note: Never spray the headliner directly as it will become too wet and could lead to mold later.
Applying very gentle pressure, dab and wipe the stain on the headliner with the damp corner of your cloth. You only want to apply the cleaner to the surface of the headliner without wetting the adhesive and foam layer underneath.
Use the clean, dry part of the microfiber cloth to remove excess moisture from the area.
Wait for the upholstery cleaner to dry completely, then check if the stain has been completely removed.
If the stain is still visible, try a thorough surface cleaning or, as a last resort, a deep clean.
How to Clean a Car Ceiling: Thorough Surface Cleaning
For more stubborn and larger stains, follow the steps below:
Evenly spray the entire surface of the headliner with a cleaner. Pay close attention to the edges and crevices around the lights.
* Pro Tip: An aerosol upholstery cleaner has a foaming action that helps break up dirt trapped just beneath the surface, making it more effective than a pump liquid cleaner.
Let the cleaner sit on the upholstery for the duration specified on the container.
Then, use a small soft-bristled brush to lightly agitate the entire surface of the headliner. Remember to brush every part of the headliner surface so that once the cleaner dries, the surface is even.
Let the headliner dry completely, which should take an hour or two depending on how much cleaning solution you applied.
If your headliner is more stained, you may need to perform a second cleaning. If stains are still visible, you will need to perform a deep clean.
How to Clean a Car Ceiling: Deep Cleaning
As mentioned above, your headliner is more delicate than the rest of the upholstery. Therefore, when it comes to cleaning your car’s headliner, deep cleaning should really be the last resort.
This is because deep cleaning requires steaming, and the heat and moisture from the steaming process wet the adhesive that holds the three layers together. This could cause permanent damage or cause the headliner fabric to detach from the foam and sag or droop, which is absolutely a nightmare.
For steam deep cleaning, you will need a steamer or a deep cleaning system and some hot water in addition to a cleaning solution. Remember to work in a well-ventilated area while steam cleaning your headliner.
Using hot steam for deep cleaning. (Photo: Dupray / Youtube)
Fill the deep cleaning machine with hot water and a bit of cleaning solution. Follow the instructions provided with the machine to mix the correct water/cleaner ratio.
* Important Note: If your steamer specifies a particular brand and type of cleaning solution, it is safer to consistently use the specified product. Using a different cleaning solution could cause the machine to produce excess foam or leave residues in the fabric that could further stain your headliner.
Turn on the steam cleaner. If it needs to preheat, wait until it’s ready.
Attach the narrow upholstery cleaning adapter to the hose. Then place the tip of the upholstery cleaning tool on the headliner.
Starting from a corner of the headliner, press the trigger to spray the cleaner onto the fabric surface and move along the headliner at a steady pace. For your information, moving at a speed of 3 to 4 inches per second will prevent oversaturating the headliner too deeply and damaging the adhesive and foam underneath. If the headliner seems too soaked, adjust your pace.
Move across the headliner making long strokes in the same directions to achieve an even, uniform surface when the cleaner dries. Remember to release the trigger between strokes so the soapy water doesn’t spray everywhere inside your car. Also, overlap the next stroke with the previous one by half an inch.
*Important Note: Ensure you maintain the same pace and technique as indicated above for the sake of appearance.
Leave your car in a well-ventilated area and lower your window if you park your car in a secure environment, of course. It may take a full day for the headliner to dry completely, or faster if you use fans to circulate air inside your car.
You’re not done yet. A crucial step you must not skip when steam cleaning your headliner is once the headliner is completely dry, run the palm of your hand over the entire surface in the direction of the fabric grain. This will remove any dried lines left by the deep cleaner and give your headliner a smooth, like-new appearance.
How to Remove Bad Odors from Your Car’s Headliner
In addition to learning how to clean car ceilings, knowing how to eliminate unpleasant odors will keep your beloved vehicle looking and smelling fresh.
Due to its fabric coating, the headliner can absorb certain unpleasant odors that won’t go away, such as accumulated cigarette smell from years. To refresh your car’s headliner, you only need a simple homemade deodorizer made from ingredients found in your kitchen.
You can make homemade deodorizers with vinegar and baking soda. (Photo: MSN)
What you’ll need for a homemade deodorizer:
1 cup of water
1/4 cup of white vinegar
1 tablespoon of baking soda
Add 3 to 5 drops of essential oil if you can’t stand the smell of vinegar. This can be used as an essential oil-based deodorizing spray that you can keep for regular vehicle maintenance or use in your home.
Mix the solution and shake well in a spray bottle. Spray the deodorizer onto a microfiber cloth and gently dab the solution onto the headliner, being careful not to oversaturate it or spray it directly onto the fabric surface.
Work on one small section at a time. Once the deodorizer is dry, use a vacuum with an upholstery attachment to vacuum the entire surface of the headliner to remove any remaining baking soda residue.
What is the cost of replacing connecting rod bearings
Knock! Knock! Do you hear a strange knocking noise coming from inside the engine and are you struggling to find the connecting rod bearing replacement cost? Then you’ve found the right place! This article will answer all your questions on this issue!
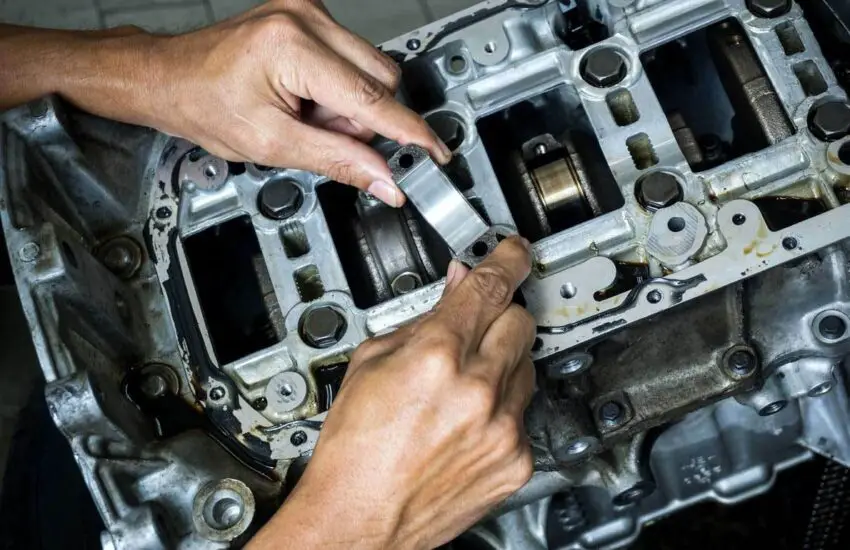
What are Connecting Rod Bearings in an Engine
Connecting rod bearings are also called rod bearings, which are split bearings, consisting of two identical semi-circular halves. When installed in the engine, they form a circle.
The rod bearing is carefully installed in a separate cavity. Usually, the cavity cover and the engine block have recesses that allow the bearing to slide inside.
So, what is the purpose of this component? And why is installing the crankshaft without connecting rod bearings not recommended?
Each piston in your engine is connected to connecting rod bearings, and these components play an essential role in maintaining engine balance and lubrication. The main reason you cannot simply install the crankshaft without them is twofold.
First, connecting rod bearings ensure that the piston maintains proper balance with the crankshaft, thus ensuring smooth and stable operation. Their role is to eliminate any excessive play or movement, as any imbalance inside the engine can lead to performance issues.
Second, these connecting rod bearings play a crucial role in keeping your engine’s crankshaft well lubricated. Each bearing is designed with enough clearance to allow for a controlled oil flow.
This controlled flow creates a protective layer between the connecting rod bearing and the crankshaft, thereby preventing excessive wear and promoting long-term engine health.
If there is a lack of oil or if the oil is contaminated, it can significantly impact the lifespan of the bearings. In such cases, the bearings may wear out prematurely and require replacement. This raises the question of connecting rod bearing replacement costs, which we will address next.
Connecting rod bearings are also called rod bearings, which are split bearings. (Photo: HG Performance)
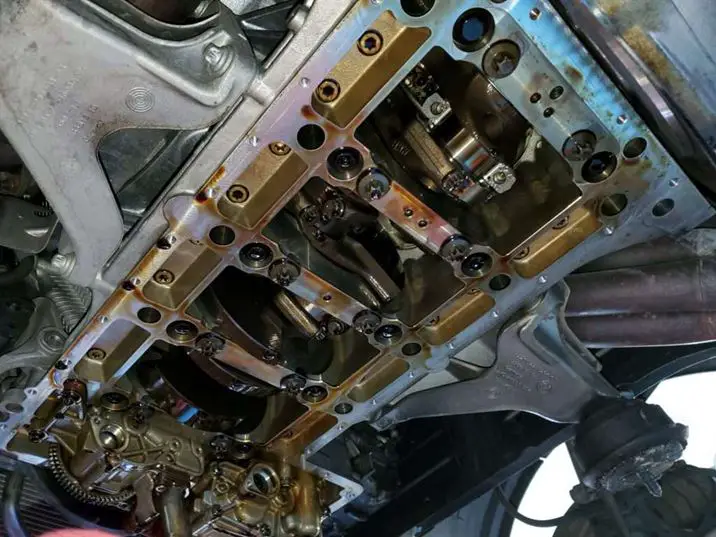
What is the Connecting Rod Bearing Replacement Cost
Connecting Rod Bearing Replacement
Understanding the average connecting rod bearing replacement cost can be overwhelming, but this detailed breakdown will help you navigate the process like a pro!
Connecting Rod Bearings
Engine type and brand: The cost varies depending on factors such as the car model and performance.
Standard or performance: Performance bearings offer higher load capacity but cost more.
Price range: $50 to $400+ for a full set of bearings.
Gaskets and Seals
Replacement needs: Some gaskets can be reused, while others must be replaced depending on their condition. Cost range: $20 to $100 depending on the specific parts needed.
Engine Oil and Filter
Essential for clean lubrication: Always use high-quality oil and a filter recommended by your car manufacturer. Price range: approximately $30 to $50 for both.
Miscellaneous Parts
Fasteners, clips, etc.: Depending on your car’s condition, some minor replacements may be necessary. Cost: $10 to $20 on average
Shop Supplies and Fees
Some shops add fees for supplies such as cleaning products and waste disposal. Expect around $10 to $20
Expect shop supplies and fees for the connecting rod bearing replacement cost. (Photo: Auto Trend)
Taxes and Fees (Location-specific add-ons)
Varies by region: Depending on your location, applicable taxes and fees may add a small percentage to the total cost.
In short, you should always get quotes from multiple mechanics and be upfront about your budget constraints. Remember, a higher price doesn’t always guarantee better service, so research your options carefully!
Labor Cost
Labor costs for connecting rod bearing replacement typically represent the largest portion of the expenses for replacing connecting rod bearings.
You will need to consider your mechanic’s hourly rate, which is between $95 and $100. However, hourly rates can vary, ranging from $15 to $210 depending on your location.
Additionally, if you leave your vehicle at the center, you might have to pay daily parking fees, usually $5 to $25 per day. Since this repair can take up to 20 hours of work, these fees can add up quite quickly.
Finally, there are often shop fees, which can be 5% to 20% of the total bill. If you pay $3,000 in labor costs, an additional 20% fee for the repair center can be a substantial addition.
Other Parts Included
If your connecting rod bearings show signs of wear, simply replacing the bearings may not be enough. It is often necessary to replace additional components such as head bolts and gaskets.
Furthermore, if the damaged bearings have damaged the pistons or crankshaft, more extensive repairs may be needed, potentially requiring the replacement of both components.
For example, in cases where a bearing has spun, it may fuse with the crankshaft, making repair impossible. This situation would require replacing the crankshaft, as well as resurfacing the engine block and possibly installing new pistons.
If your connecting rod bearings show signs of wear, sometimes, replacing the bearings alone may not be enough. (Photo: Alex Roy Photography)
What Causes Connecting Rod Bearing Failure
Besides the connecting rod bearing replacement cost, you should take a closer look at some main causes of this component’s failure.
As you may know, connecting rod bearings can wear out over time, leading to significant engine problems. So, what exactly causes this wear? Let’s explore these factors in the upcoming sections.
Below-Average Bearing Quality
The initial cause of connecting rod bearing failure, and consequently the need to understand the connecting rod bearing replacement cost, often stems from using poor-quality bearings.
Some engines are particularly vulnerable to premature connecting rod bearing failure. Although not all engines are affected, some experience bearing wear sooner than expected. Notably, high-performance BMW engines, such as the S62, S54, S65, and S85, are known to encounter connecting rod bearing issues.
Therefore, when considering purchasing an M5 or M3 equipped with one of these engines, it is crucial to check if the connecting rod bearings have already been replaced.
If not, a thorough engine inspection is essential to determine if any damage has occurred to the crankshaft. Let’s now move on to other contributing factors before discussing the connecting rod bearing replacement cost.
Low Oil Level
Another frequent cause of connecting rod bearing failure is inadequate oil level. Low oil levels can harm any type of bearing, whether main bearings or connecting rod bearings.
Insufficient lubrication can lead to increased engine wear. This is because oil not only lubricates the bearings but also helps dissipate heat.
Without adequate oil flow to the crankshaft, the bearings become dry, leading to friction between them and the crankshaft. This friction causes significant wear on both the bearings and the crankshaft.
Infrequent Oil Changes
The last likely cause of connecting rod bearing failure and the associated cost of engine bearing replacement is infrequent oil changes.
Inadequate maintenance practices are often the main problem leading to bearing issues. Some people extend their oil change intervals to up to 20,000 miles, even though it is recommended to do so every 10,000 miles or less.
In such cases, the bearings tend to wear out much faster than normal. This is mainly because the engine oil does not fulfill its primary function of lubrication.
Engine oil contains deposits that need to be removed during oil changes. (Photo: Car Cover)
What are the Symptoms of Failing Connecting Rod Bearings
If your connecting rod bearings are deteriorating, you will likely hear noticeable sounds before detecting other signs. However, there are other symptoms to be aware of:
Oil Problems
When connecting rod bearings fail, you may encounter oil-related problems. These include low oil pressure, frequent oil changes due to contamination, or the presence of metal shavings or a silver sheen in the oil.
Modern engines use sealed systems where the bearings operate immersed in fluid to reduce friction and prevent bearing failure. If problems occur, you might observe oil containing shavings, thinning due to gas contamination, or low oil pressure.
Noisy Engine
Faulty connecting rod bearings produce distinctive knocking noises, hence the term “engine knock.” These noises become noticeable when the engine starts and stops and, in severe cases, even at idle.
If you hear a metallic knocking noise, it’s often a sign of problems, and you should then prepare for the upcoming connecting rod bearing replacement cost.
Transmission Problems
Squealing in the transmission or frequent belt wear can be related to connecting rod bearing issues. As the connecting rods fail to smoothly transfer force to the crankshaft, it puts increased pressure and strain on the transmission.
Engine Failure
Connecting rod bearing problems can lead to engine failure, with cases such as a rod punching through the engine block being a common cause. In such cases, you will need to consider whether repairing the engine is worth it or if replacing the short block is a more cost-effective solution.
These symptoms serve as indicators of potential connecting rod bearing problems, requiring timely inspection and repairs to prevent further damage to your engine.
Connecting rod bearing problems can lead to engine failure (Photo: Expert Car Care Inc.)
FAQ on Connecting Rod Bearing Replacement
1. Can I replace just one connecting rod bearing or do I need to replace them all?
It is recommended to replace all connecting rod bearings at the same time, even if only one appears damaged or worn. Replacing all ensures consistent performance and avoids future problems.
2. Can I use aftermarket connecting rod bearings or should I stick with OEM parts?
Although aftermarket connecting rod bearings are available and may be more economical, using OEM (Original Equipment Manufacturer) parts is often recommended for optimal engine performance and longevity.
3. How can I avoid connecting rod bearing problems in the future?
Regular maintenance, including oil changes, using high-quality engine oil, and avoiding excessive engine strain, can help extend the life of your connecting rod bearings and prevent future issues.
4. Can replacing connecting rod bearings improve engine performance?
Replacing worn connecting rod bearings can restore proper engine operation and improve performance by reducing friction and ensuring smooth crankshaft rotation.
5. Are there warranties on connecting rod bearing replacement parts or labor?
Warranties can vary by manufacturer or repair shop. It is recommended to inquire about warranty coverage for parts and labor when planning the replacement.
6. Is it possible to upgrade connecting rod bearings during replacement for better durability?
You can choose upgraded or performance-oriented connecting rod bearings during replacement to enhance durability and performance, depending on your needs and budget.
Conclusion
In conclusion, understanding the connecting rod bearing replacement cost and the factors that influence it is essential for responsible vehicle ownership.
Although the cost can vary depending on several factors, including the vehicle’s make and model, labor rates, and the choice between original and aftermarket parts, one thing remains clear: it is crucial to address worn or damaged connecting rod bearings to prevent greater engine damage and costly repairs down the road.
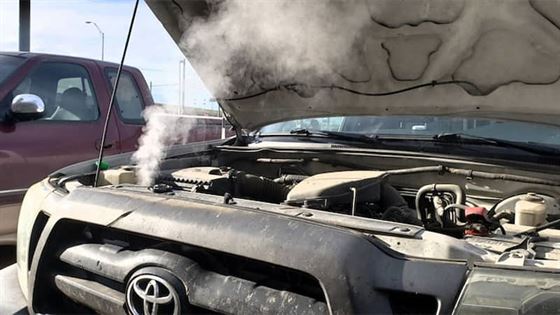
Reasons why your car overheats and then returns to normal
What should you do if your car overheats and then returns to normal? Overheating leads to many serious consequences for your car, which is why it is absolutely necessary to resolve this issue. If you notice your engine overheating periodically, don’t worry! We will cover everything on this topic:
Why Does Your Car Overheat and Then Return to Normal?
While driving, the engine temperature will rise to a certain temperature level to ensure the most efficient operation. Then, the cooling system begins to intervene to help the engine maintain that stable temperature without continuing to increase. Generally, there are many reasons why a car overheats. The most common cause is a problem with the cooling system or the engine system. So, if the car overheats and then returns to normal, is it as serious as other overheating cases? Find out Why My Car Overheats So Suddenly:
Is a car overheating and then returning to normal as serious as other overheating cases? (Photo: aamcoutah.com)
1. Carrying Heavy Loads
This is a very common reason for temporary overheating. Fortunately, there is no mechanical problem in this situation. Carrying heavy loads, such as towing cargo or a trailer, puts extra strain on your car’s engine and makes it overworked. At this point, your engine has to work harder to carry more weight, meaning the engine generates more heat while the cooling system cannot dissipate enough heat, and the consequence is that your car overheats. If you observe the car’s dashboard, you will see the warning light turn on and off until you unload the goods from your car. Towing or carrying too much weight not only causes the engine to overheat but also overheats the transmission system and puts excessive load on the car’s brakes.
2. Driving in Traffic Jams
In some situations, when driving in heavy traffic jams, your car will start to overheat. Normally, your car gets hotter when the engine runs faster than when idling, but at the same time, the car’s movement produces more airflow through the radiator to cool the engine. The lack of airflow will prevent the cooling system from maintaining the temperature at a normal level, causing overheating.
Whenever drivers stop their vehicle, they have to brake at least once and then accelerate again, thus putting the engine into a high-load operating state. This is not good for the engine and causes immediate engine overheating. Furthermore, high-speed braking and continuous braking will soon lead to car brake failure. Similarly, continuously pressing the clutch pedal to change gears also causes that part to break quickly.
3. Climbing Steep Hills
Your engine likely overheats when driving up a long, steep slope. The reason is that to climb a hill, the car’s engine will have to work harder to resist the force of gravity and maintain the same speed, meaning your engine generates more heat, but the speed of the air passing through the radiator and into the engine has not increased. Engine overheating is an unavoidable thing in these situations.
4. A Faulty Thermostat
The second cause that can lead to a car’s engine overheating and then returning to normal is a bad thermostat. The thermostat is part of the cooling system, responsible for regulating the coolant. When the engine temperature reaches a certain threshold, the thermostat opens to allow coolant to flow to the hot part of the engine. Therefore, when the thermostat gets stuck, it may operate sporadically and prevent coolant from being distributed to the engine for cooling, causing temporary engine overheating.
5. The Fan Not Working Properly
A common cause of a car’s engine overheating is poor fan performance. The fan is the part responsible for dissipating heat, working with the coolant and thermostat to cool the engine. If the fan is damaged, the engine’s cooling efficiency will be reduced and lead to overheating. Therefore, to ensure the fan always operates stably, car owners should periodically check the fan, detect, and promptly handle any issues that arise.
How long can a car overheat before being damaged (Photo: outbackequipment.com.au)
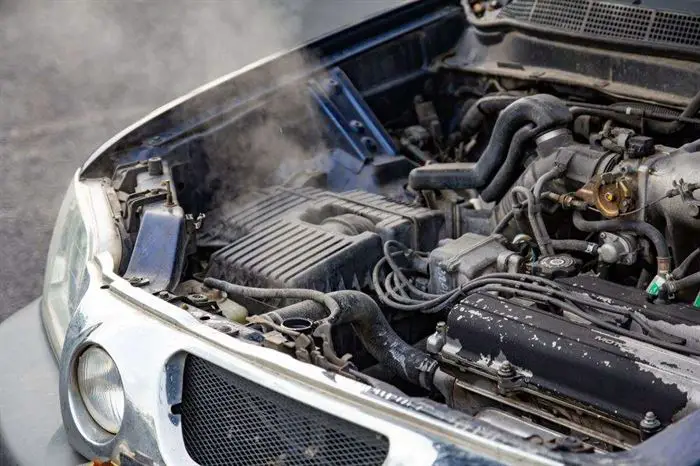
6. Engine Problems
In addition to the reasons above, problems within the engine system can easily cause the vehicle to overheat. For the engine to operate efficiently, good coordination between many parts is needed. Most important is the coordination of the air intake system and the ignition system.
If just one part has a problem, it will affect the entire fuel combustion process and lead to many associated issues, such as vehicle overheating. According to experts, common errors include clogged injectors/misaligned injection angles, delayed spark plugs, faulty pressure regulators, engine cylinder combustion chambers with a lot of soot (obstructing the heat dissipation process), a clogged air filter,… can easily cause the vehicle to report a high temperature.
When you drive on the road, the engine is under load and burns more fuel, thus creating heat. This heat must be removed from the coolant by the radiator. If the cooling system is malfunctioning, your car will overheat. A faulty water pump can also cause this phenomenon.
When you stop and let the engine idle, much less heat is released by the engine, allowing the cooling system to catch up and cool things down.
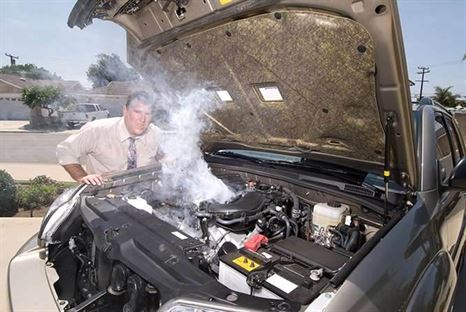
Car Overheating Then Returning to Normal: How to Fix It?
Although it is only a temporary situation, whenever you notice your engine overheating, you need to address the problem as quickly as possible. Driving with an overheating engine can damage your car. If you see the temperature gauge go past the red line or the H level, steam escaping from under the hood, or if there is a smell of oil leak, you should immediately stop the car and check the car’s engine. Here are some tips to help you handle the situation:
Turn off the car’s air conditioning and simultaneously open all the windows to lower the car’s temperature.
Turn on the heater and the fan if the air conditioner still isn’t working. This might sound wrong, but believe me, they are extremely effective and will not damage your car at all.
When you are in traffic, you can shift into P or N, and then rev the engine a little. This will help speed up the water pumping and ventilation process.
If you have followed the steps above but there is still no change, you should pull the car over to the side of the road and turn off the engine to let it cool down. Then wait about 15 to 30 minutes for the boiling water to evaporate before opening the hood to check.
If you have engine coolant prepared in your vehicle, you can add it before heading to the nearest garage or maintenance center.
To prevent engine overheating, your car should be maintained periodically, especially by checking and changing the coolant solution, ensuring the coolant level is always at a safe level, and not letting the coolant fall below the “min” mark. Furthermore, the engine oil should also be changed regularly.
Advanced Driver Assistance Systems
The amount of technology built into a vehicle can turn buying a vehicle into a confusing experience. Automakers have invested millions of dollars in high-tech safety systems designed to protect vehicle occupants, but without a universal naming convention, consumers have to sift through an alphabet soup to develop an understanding of the technology.
The first concept to decipher is ADAS, which stands for Advanced Driver Assistance Systems. The basic definition of ADAS is technology that assists the driver when driving or parking. In a broader sense, ADAS enhances automotive and road safety by minimizing human error. It is also acceptable to refer to ADAS as advanced safety technology. Advanced safety technologies fall into two categories: active and passive.
Seat belts and airbags, once innovative safety devices, fall into the passive category. These systems spring into action as soon as they are called upon – often at the moment an accident occurs – and do not actively work to prevent a collision.
Conversely, active safety systems work proactively to prevent collisions. Some active safety technologies are not new either. Electronic Stability Control, which helps drivers keep their cool during extreme maneuvers, has been mandatory on all new cars in the United States since 2012.
Active safety systems work in different ways, but all rely on sensors (like radar or LiDAR detecting light) to communicate two essential pieces of information: what is happening outside the car and the state inside the cabin. The sensors can see what other vehicles and pedestrians on the road are doing relative to their own position, as well as detect driver distraction or inattention.
It’s in the “advanced” part of advanced safety technology that things get complicated. Many systems are automated and, when activated, can give the impression that the car is acting independently of the driver. Advanced driver assistance systems also come with a host of new terminologies. To add to the confusion, most automakers use brand names for their versions of these technologies, similar to how manufacturers do for their infotainment systems (Toyota’s Entune, Fiat Chrysler’s Uconnect).
These elements create a barrier to consumer adoption that only time and familiarity can solve. However, armed with the right information, car buyers can make more informed decisions about the benefits of these technologies.
To kick-start the acceptance process, here is a list of some common advanced active safety features, their function, and their acronyms.
Staying in the Lane
A vehicle’s lane keeping function stays centered in traffic. Photo: Getty
Lane Departure Warning (LDW) is a passive technology that looks for painted lane lines on the road and warns the driver if they are crossing them (sometimes called lane departure alert). The sensors used for LDW can also be used for Lane Centering Assist (LCA) or Lane Keep Assist (LKA). Both are active technologies that automatically adjust steering to keep the vehicle centered in the lane (LCA) or relative to crossing lane markers (LKA).
It’s Called a ‘Blind Spot’ for a Reason
A side view assist system prevents a collision during a lane change. Photo: Getty
Seeing behind the vehicle is an important part of advanced safety technology (rearview cameras have been mandatory in new cars since 2014). A blind spot monitor looks for other vehicles to the side or rear of the vehicle. Alerts from this technology can be audible, visual, or haptic (vibrations in the steering wheel or seat cushion). Rear Cross Traffic Alert or Rear Cross Traffic Alert is a warning that sounds when it detects vehicles or objects approaching from the side or rear when the vehicle is in reverse. Rear Automatic Emergency Braking (Rear AEB) automatically applies the brakes when it detects approaching vehicles or objects (including pedestrians). Cameras that display a 360-degree view of everything surrounding the vehicle are also commonly used to prevent accidents in all directions at low speeds.
Preventing Frontal Collisions
An automatic braking system slows a vehicle in traffic. Photo: Getty
Systems such as Forward Collision Warning (FCW) look ahead of the car when forward movement is intended or occurring. FCW calculates if the car is getting too close to another vehicle directly in its path and sends an alert to the driver. Automatic Emergency Braking (AEB) responds by automatically applying the brakes. AEB systems can vary by speed (some only work at “city” speeds while others will engage at highway speeds).
Adaptive Cruise Control (ACC) is another system that looks ahead. ACC has many unique names (dynamic cruise control, radar, or intelligent), but they all have the same functionality. Regular cruise control requires driver intervention to adjust the travel speed; ACC automatically slows the travel speed and maintains a respectful distance at the adjusted pace. For example, if ACC is set to 60 mph but the lead car is traveling at 45 mph, ACC will not exceed 45 mph.
Combating Driver Fatigue
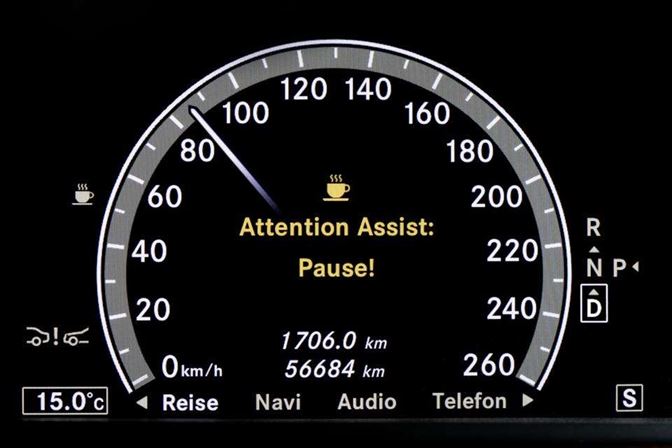
Mercedes-Benz’s Attention Assist system detects if a driver may be too tired to drive a vehicle safely. Photo: Mercedes-Benz
Some safety systems monitor trends inside the vehicle. Driver Drowsiness Detection tracks the driver’s gaze or steering wheel movement to detect drowsy, distracted, or inattentive behavior. Some cars equipped with LKA or LCA leverage the steering wheel sensors to detect a lack of human interaction. Many systems use an icon that lights up on the dashboard to get the driver’s attention. Others use a bright light accompanied by a tone.
Current research indicates that systems such as ACC and LKA work harmoniously to create a safer driving environment through technical automation. Nevertheless, there is a school of thought that drivers may develop a false sense of security due to over-reliance on technology. Despite the current hype, it is important to remember that modern cars do not drive themselves. And, as almost every owner’s manual states, “the operator is responsible for the safe operation of the vehicle.”