How to Reset the BMW Computer After a Battery Change

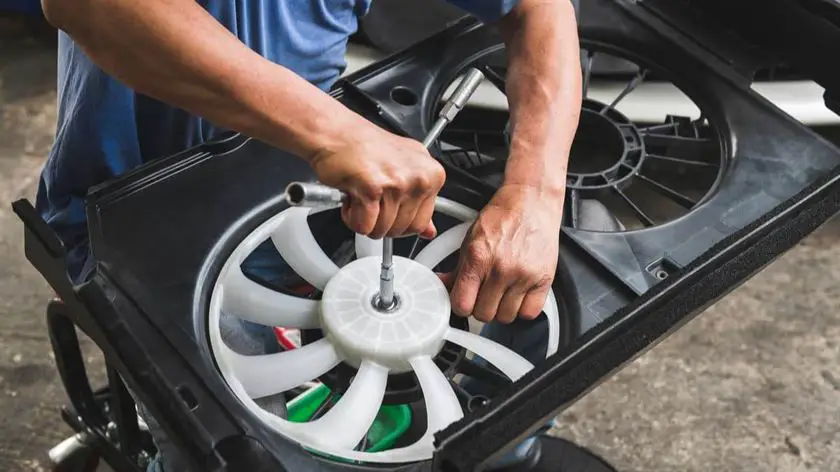
BMW cars have a computer system that handles most of the vehicle’s diagnostics and displays. After maintenance tasks like an oil change or battery replacement, it becomes necessary to reset the BMW computer. If you don’t want to use a professional service for this, you need to know how to reset the BMW computer after battery replacement.

Why does the BMW computer need a reset?

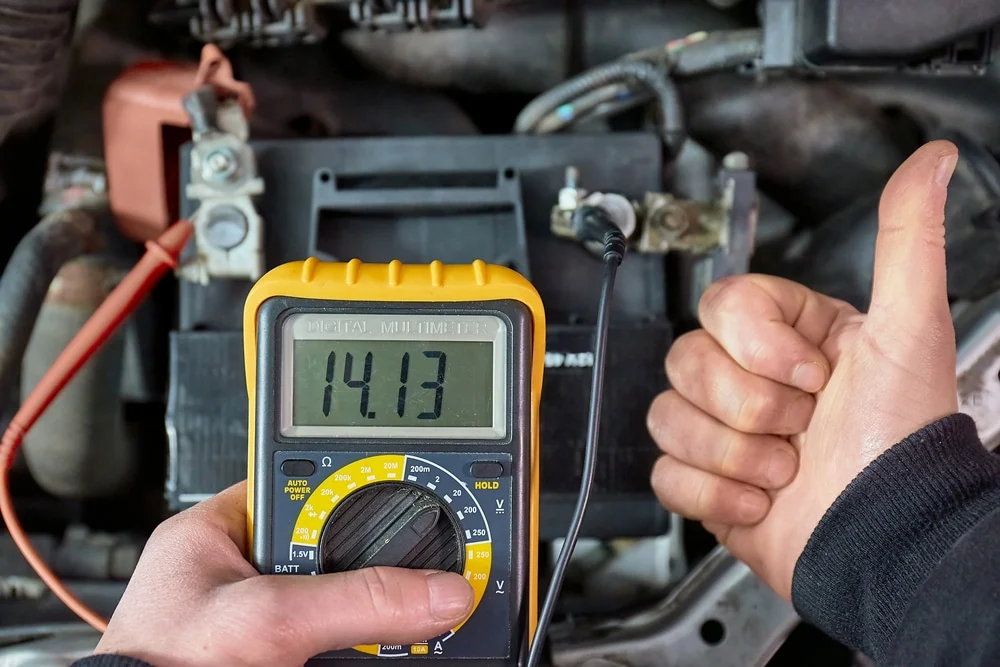
Nowadays, BMW cars are equipped with a complex electrical system consisting of a computer that controls the alternator. After replacing the battery, this computer needs to be informed of the change so that its software has updated information. The main reason is that the computer stores electrical energy, which is different from the main battery.

A BMW computer. (Photo: Heynneman European)

There are certain benefits to performing a computer reset in BMW cars.

  • Resetting the computer is a way to inform the computer of the successful registration of a new battery.
  • The reset ensures that the BMW car’s battery registers 80% of its capacity as a reference point.
  • This process also confirms the restoration of the current odometer readings.
  • It also allows the computer to delete the storage allocation of battery information, such as temperature, voltage, current, and battery charge level.

Which BMW models need a computer reset?

In modern BMW models, various modules and electronic control systems are interconnected and rely on computer software to function effectively. In some situations, a computer reset may be necessary to resolve issues or restore optimal functionality. When changing the battery on any of these models, resetting the computer becomes essential. However, the need for a computer reset may vary depending on the specific model, year, and the nature of the problem you are experiencing. Below, we will list some specific BMW models that need to be reset after a battery change:

  • 7 Series cars from 2002 and later (E65/E66 chassis)
  • X5 cars from 2007 and later (E70 chassis)
  • 6 Series cars from 2003 and later (E54/E63 chassis)
  • X5 cars from 2005 and later (E53 chassis and N62 engine)
  • X6 cars from 2008 and later (E71 chassis)
  • 3 Series cars from 2006 and later (E90/E91/E92/E93 chassis)
  • 5 Series cars from 2004 and later (E60/E61 chassis)

How to reset the BMW computer after a battery change

As you can understand the importance of resetting the BMW computer from the previous discussion, here are the steps.

  1. First, turn the BMW car’s ignition key to the accessory position once the lights and radio are on. You must do this before starting the vehicle. Then, press and hold the “Trip” button, located on the dashboard, until the red light comes on.
  2. Again, press and hold the “Trip” button until Reset appears.
  3. Then, press the same button a third time. Now, the BMW computer will be reset in no time.

The entire process of changing the battery and resetting the computer in BMW cars is not expensive. Doing it on time will allow you to drive your BMW car without any problems. Despite all these facts, do not take this procedure lightly. There are auto workshops with qualified technicians who adhere to the manufacturer’s warranty standards. Consult these shops for safe and secure service.

Watch more:

https://youtube.com/watch?v=l-bQI016JQs%3Ffeature%3Doembed

Some situations where you need to reset the BMW computer

Here are some cases where a BMW computer reset may be recommended or necessary:

  • Disconnecting the battery: If you disconnect the vehicle’s battery for maintenance or replacement, it may be necessary to reset certain systems, such as power windows, sunroof, radio, or air conditioning, to restore their proper functioning.
  • Software updates: BMW periodically releases software updates called “firmware” or “programming” updates to fix system bugs, improve performance, or introduce new features. After updating the software, a reset of specific modules may be necessary to ensure proper integration and functionality.
  • System malfunctions: In case of certain electronic system malfunctions or errors, resetting the associated modules or performing a system reboot can help resolve temporary issues or errors. This can be done using specialized diagnostic tools available at authorized BMW service centers.
  • Adaptation reset: Some BMW models have adaptive systems that learn and adapt to driver behavior or environmental conditions. In some cases, resetting these adaptations can help recalibrate the system settings for optimal performance.

It is important to note that while a computer reset can resolve some issues, it is not a universal solution to all problems. If you are experiencing persistent or significant issues with your BMW’s electronic systems, it is recommended to consult an authorized BMW service center or a qualified technician who can diagnose the specific problem and recommend the appropriate course of action.

Conclusion

You can avoid a lot of trouble if you know how to reset the BMW computer after a battery change. By following these steps, anyone can reset the computer in BMW cars without any difficulty.

Engine Spraying: Common Causes and How to Fix It

An engine that sputters at idle or during acceleration can be very annoying. Here are some common causes and how to fix them.

Among all the things you can face while driving, engine sputtering is one that can cause a lot of worry. Once it starts, it’s hard to know if the car will reach its next destination or not. Yet, there are sometimes simple solutions to fix the problem, even if it seems like a major issue.

In this guide, we cover the most common reasons why the engine sputters. We also show you some ways to resolve this issue and answer your main questions.

Common Reasons Why Your Car’s Engine Sputters

The engine can sputter due to faulty spark plugs, a clogged fuel filter, or a defective fuel pump. It also happens with a vacuum leak or a dirty MAF sensor. You may also want to check for clogged fuel injectors, a faulty catalytic converter, or a bad oxygen sensor.

Let’s examine these possibilities a bit more in-depth.

1. Bad Spark Plugs

The most common reason the engine sputters is that it needs a tune-up. Spark plugs are one of the most important parts to replace during a tune-up because they don’t last forever. Depending on the type of spark plug you use, you may only get 30,000 miles out of them.

However, platinum and iridium plugs can last 100,000 miles without being changed. Regardless, carbon buildup can foul the plugs and cause the engine to sputter, so you should start by checking these parts first. If left unaddressed, the engine may start misfiring.

2. Clogged Fuel Filter

Sputtering can also occur due to a problem with the fuel system. Within this system, there is a fuel filter that is meant to be changed periodically. Over time, it fills up with contaminants, debris, and dirt that it has trapped and prevented from reaching the engine.

However, when the filter is clogged, the engine lacks fuel and may start to sputter. The engine will act as if it’s not getting fuel, even if your fuel gauge shows a full tank.

3. Bad Fuel Pump

The fuel pump is not a part that needs to be replaced during regular maintenance, but it can fail. Since the pump is necessary to move fuel from the tank to the engine, any problem can lead to engine starvation.

The pump can fail if you continuously let your tank run low and it starts sucking debris from the bottom. It can also fail simply due to old age.

4. Vacuum Leak

Since the engine operates like an air pump, a complete vacuum system helps it function. If any of the hoses or parts lose vacuum or create a leak, the engine won’t get what it needs to run.

The engine will inject unmeasured air, leading to a faulty air-fuel mixture. Again, the engine weakens and sputtering occurs.

5. Dirty or Faulty MAF Sensor

The Mass Air Flow (MAF) sensor is responsible for monitoring all incoming air to ensure there’s enough in the combustion chamber. This helps create the perfect air-fuel ratio in the engine.

If the MAF sensor sends inaccurate data to the Engine Control Unit (ECU), the wrong mixture ends up in the engine. If the results cause less fuel to be injected, the engine starves and starts to sputter.

6. Clogged Fuel Injectors

Injectors are another essential part of the fuel system. Their job is to spray a steady stream of fuel into the engine. The amount of fuel injected is determined by sensors and the ECU.

If the fuel injectors are clogged or dirty, fuel cannot flow properly. The engine starts to sputter when it fails to get a sufficient amount of fuel.

7. Bad Catalytic Converter

The catalytic converter is essential to the emissions system. However, it also tends to clog over time, especially if the air-fuel mixture isn’t correct.

Since the exhaust needs a clear path to exit the tailpipe, a clogged converter can cause a backup. When exhaust can’t escape, your engine suffers. You may notice sputtering and lack of acceleration until you fix the clog.

8. Bad Oxygen Sensor

The same results occur when the oxygen sensor is faulty. Since this sensor is needed to check the amount of oxygen from the exhaust gases, any inaccurate data provided to the ECU can alter the mixture in the combustion chamber.

More air may be injected, leading to a lack of fuel. Without fuel, the engine will sputter, just as if the car were running out of gas.

How to Fix a Sputtering Car Engine

Once you know what’s wrong with the engine, it’s easy to fix. Start by reading the fault codes. Then, check and replace the spark plugs or diagnose the fuel pressure. You can also look for vacuum leaks or clean the MAF sensor. Otherwise, you may need to call a professional mechanic.

Here are some suggestions to get you started.

1. Read the Fault Codes

The first step in determining any car problem is to read the DTCs. If the Check Engine light is on, you can be sure a code has been set in the computer. With your compatible scanner, you can see the meaning of the codes.

Not all of them are easy to understand, which is why we offer a fault code library for your reference. If there are too many to look at, reset the codes and take the car for a short drive. The most recent codes will be reset, making it easier for you to figure them out.

2. Check the Spark Plugs

If you haven’t changed the spark plugs in a while, you’ll want to take a look at them. Here are some basic steps to consider.

  • Remove the spark plug and inspect it visually. If it looks new, there’s nothing wrong with the plug.
  • If the plug has damaged electrodes, you may not have used the correct octane fuel. Replace the spark plug.
  • If there’s carbon buildup on the plug, you might be able to clean it. Use a spray cleaner for the spark plug and a wire brush.
  • Use a spark plug tester to determine if they need to be replaced.

When choosing a new set of spark plugs, you might prefer to upgrade to a set of platinum or iridium plugs, which guarantee a longer lifespan.

3. Check the Fuel Pressure

Use a fuel pressure tester to check how much fuel is flowing. The proper specifications will be listed in your service manual, as they differ by model.

For example, older throttle body systems may run on only 10 psi, while multiport injection systems may show 60 psi. Even the same vehicles with different model years can be different. For instance, the 1996 Corvette LT1 V8 shows 40 to 42 psi, while the 1997 LS1 V8 should be at 58 psi.

If there’s a fuel pressure issue, you need to determine where the problem is coming from. Perhaps you just need to replace the filter or need a new pump. Otherwise, you might be able to clean the injectors with an additive and be on your way.

4. Look for Vacuum Leaks

It’s not always easy to find a vacuum leak, but some steps can help.

  1. Start by finding the vacuum lines and connections. You can find a diagram in your service manual.
  2. Visually inspect the lines and connection for any obvious issues. If there’s a crack or disconnection, you can replace it quickly.
  3. Take a propane torch and run it along the lines without lighting it. If the idle increases, you know you’ve found your fault.

You can also use carburetor cleaner to test for a leak. Follow the same steps as with the propane torch. Just be careful not to spray a surface that could ignite the cleaner or the propane torch.

5. Clean the MAF Sensor

If the MAF sensor is causing problems, you might be able to clean it. Follow these steps.

  1. Disconnect the sensor. Make sure the engine is off and the keys are removed from the ignition. Perform this step only when the engine is cold.
  2. Slide the sensor out of the mounts holding it in place.
  3. Clean the sensor with a product intended for the MAF sensor.
  4. Let the sensor dry completely.
  5. Reinstall it and tighten the mounts.

If cleaning didn’t solve the problem, you may need to replace the sensor.

6. Contact a Professional

If you can’t figure out the problem or don’t know how to fix the fault, contact a professional. Whenever the engine sputters, you want to fix it immediately.

As professional mechanics, we’ve seen far too many people ignore the problem and it turned into something serious. If you don’t want to end up stranded on the side of the road or facing expensive repair bills, it’s best to have it checked out the first time it sputters.

Is Engine Sputtering Bad?

Not necessarily. Sputtering indicates that the engine isn’t getting the fuel it needs. In some cases, the repair is simple and won’t take much time. However, it could be something more serious, which is why professional diagnosis is needed to avoid further issues.

How Do I Know If My Engine Is Sputtering?

A sputtering engine can occur to varying degrees. At first, you might just feel like it’s hesitating or lacking power, especially during acceleration. In extreme cases, sputtering can turn into misfires or backfires, which are even more serious.

Can Low Oil Cause Sputtering?

Low engine oil levels won’t normally cause the same type of sputtering sensation as a lack of fuel. However, low oil levels can lead to misfires. Worse, without the right amount of oil, the engine lacks the lubrication it needs and damage will surely follow.

Is Sputtering a Misfire?

Not necessarily. Sputtering could just be due to a lack of power or delayed acceleration. It feels like the engine is stumbling when pushed. However, when sputtering becomes more severe, it can turn into misfires or backfires, which are much more alarming situations.

Can Spark Plugs Make Your Car Sputter?

Yes, when spark plugs are fouled or defective, your engine can start to sputter because one or more cylinders aren’t functioning properly. This condition is also known as misfiring, which can damage the engine and must be addressed promptly.

Conclusion

At the first signs of engine misfiring, you should immediately have the vehicle inspected. Even if it’s just a slight sputter at first, the problem can quickly become major. While the engine is fuel-starved, you’re allowing more wear than necessary.

Symptoms of a Bad Car Condenser Fan

The AC condenser fan removes heat from the condenser when you are driving slowly. Here are the common symptoms of a bad AC condenser fan.

When you are driving on a hot summer day, you want cold air coming out of the vents. With so many functional parts in the car’s air conditioning system, any failure can cause problems. That is why it is important to know the symptoms of a bad car AC condenser and how they differ from other malfunctions.

In this guide, we look at what happens when the car’s air conditioning condenser fan fails and discuss its purpose. We also show you where it is located, how to test it, and give you an estimated replacement cost.

Symptoms of a Bad Car Condenser Fan

When the AC condenser fan fails, you may notice hot air coming from the vents. There could also be irregular temperatures pumping into the cabin or a refrigerant leak. A burning smell may also occur, as well as engine overheating, especially at idle.

Let’s look at these five most common symptoms.

1. Hot Air from the Vents

Whenever you face an air conditioning problem, your first sign of trouble might be hot air coming from the vents. This issue can occur slowly over time or suddenly, depending on the severity of the problem.

The reason the air warms up is that the condenser becomes too hot to convert the refrigerant back into liquid form. However, this same problem occurs when there is not enough refrigerant in the system, which is why you want to perform a full diagnosis to understand what is wrong.

2. Irregular Air Temperature from the Vents

If the fan only works intermittently, you may notice that hot air only comes out occasionally. A few minutes later, you might get cold air again, making the situation very confusing.

The other cause of this problem could be a loose connection, wire, or short circuit. For this reason, you might instead be dealing with an electrical system issue. We cover more when explaining how to diagnose the problem.

3. Refrigerant Leak

The AC condenser contains pressurized refrigerant. When the fan stops cooling the condenser, heat and pressure begin to build up.

The result is usually some kind of damage to the condenser, leading to a leak. However, a leak can be caused by any damage to the lines or other components of the AC system.

4. Burning Smell

What you never want to smell while driving is burning. This smell can indicate a multitude of problems, including issues related to the condenser fan.

When the condenser starts to overheat, the entire air conditioning system suffers. As the parts get hot enough, you might start to smell them. The hotter the components get, the more likely damage is to occur. That is why you should stop driving and investigate the problem at the first signs of an issue.

5. Car Overheating at Idle

When the air conditioning system struggles to function, it can put a strain on the entire vehicle. When the engine has to work harder, it may start to overheat, especially when the car is idling and there is no airflow to cool the engine.

The overheating situation might resolve itself once you start moving again, but you should still look into the problem. Letting your engine overheat will only lead to serious engine damage and expensive repair bills.

What is the Function of an AC Condenser Fan?

For the air conditioning system to function as expected, heat must be exchanged for cooler air. To achieve this, the refrigerant is converted from its liquid form to gas. In the closed loop, it also goes from gas to liquid and the process continues to repeat.

Understanding each part of the air conditioning system helps you understand what the fan is responsible for. The AC compressor is powered by the crankshaft. Its role is to pressurize the refrigerant. This is where the AC switches to a high-pressure state compared to its previous low-pressure state.

This high-pressure refrigerant now enters the condenser. Consider the condenser as a smaller radiator. Heat is extracted from the refrigerant through the airflow provided by the fan. Once the heat is removed, the gas condenses and becomes liquid again.

Without the fan, it would be much harder to remove this heat from the refrigerant. The pressure would not be relieved, so the gas would attempt to move through the system, even though it should be liquid at this stage. Because the gas cannot pass through the dryer/accumulator, as well as the orifice tube or expansion valve, the pressure will be too high.

Where is the AC Condenser Fan Located?

You can find the AC condenser fan under the hood of your car. It should be located closer to the front as it will draw air from outside. In some vehicles, you will find two fans. One will be for the radiator and the other will be used by the condenser. However, there could also be a single fan used by both.

For this reason, you want to reference the diagram found in your service manual. You should also find good instructions for troubleshooting the fan, or you can continue with our suggestions.

How to Test an AC Condenser Fan?

When the air conditioning system is running, the condenser fan should also be running. If it is not, there might be a problem, but it does not automatically mean you need to replace the fan. Instead, you want to rule out other issues, such as a wiring problem. Here are some steps to consider.

  1. Check the car fuses. If the fuse has blown, the condenser fan may not work. You can find the fuse diagram in the service manual or on the cover. Remove the one that operates the fan and replace it with a new one if it is blown.
  2. Visually inspect the wiring and connectors. Look for any signs of damage and replace anything that appears worn.
  3. Look for obstructions. Since the fan is located at the front of the vehicle, debris could have gotten lodged inside. If you see dirt or grime, try cleaning the fan and see if it works again.
  4. With a multimeter, you can check if there is a signal to the fan. If the fan is receiving power but it is not running, it is time to replace it.

If any of these steps are beyond your skills or if you need help with the repairs, contact a professional in your area. As mechanics, we have seen many people attempt AC repairs only to make the problem worse. For this reason, it is always best to be cautious if you are unsure.

How Much Does it Cost to Replace an AC Condenser Fan?

On average, expect to spend between $300 and $475 for AC condenser fan replacement. Parts can cost between $225 and $350, while labor would add an additional $75 to $175, depending on the ease of installation.

It is difficult to give an exact estimate for the cost of a new AC condenser fan. First, you must consider the make and model of your vehicle, as some luxury cars have much more expensive parts. Additionally, labor costs must be taken into account. Mechanical labor rates vary depending on where you live. If you can do the job yourself, you could save a good amount of money.

Some people want to try to repair the condenser fan, but it does not make much sense. The condenser cooling fan is sold as a complete unit. It comes with a motor, blades, and housing. You might as well replace the entire assembly, given the cost.

However, it is important to ensure you have the correct diagnosis. If you mistake the problem for a faulty condenser fan and there is something else wrong, you will have wasted time and money. You should always verify that the air is not blowing hot due to a refrigerant leak or another faulty component.

Can I Drive My Car Without a Condenser Fan?

You could drive without the condenser fan working, but it is not always advisable. First, the cabin will get hot, especially if you are traveling in the summer. You also will not be able to use the defrost setting, which may be necessary for visibility. Additionally, if the engine overheats, you will have bigger problems on your hands.

Does the Car AC Condenser Fan Always Run?

Yes, when you turn on the car’s air conditioning, the condenser fan should run. It is necessary to cool the hot refrigerant so it can be liquefied. If it cannot cool, you will not be able to get cold air out of the vents and you might start to smell something burning. You want the air conditioning to be checked immediately.

What Does a Bad Condenser Fan Sound Like?

After a complete condenser fan failure, you will not hear any noise because it will not be running. However, if you catch it as it starts to deteriorate, you might hear a humming sound. The same humming can be heard if there is an electrical short interfering with normal operation.

When Should a Car Condenser Fan Turn On?

The AC condenser fan should always be on when the air conditioning is running. After turning on the air conditioning, the condenser fan should turn on shortly after. It is necessary to cool the hot refrigerant so it becomes liquid again. If it does not change from a gas to a liquid, it will not be able to circulate freely through the system.

How Long Does a Condenser Fan Last?

The condenser fan undergoes a lot of abuse, so it usually will not last forever. You might even need to install a few throughout the car’s lifespan, depending on how many miles you drive. However, it is not usual for the condenser fan to fail before reaching the 100,000-mile mark.

Conclusion

If you are struggling to get cold air conditioning while driving, it might be time to take a look at the condenser fan. Although many parts can cause the same problems, this one is relatively easy to diagnose because the fan should run whenever the AC is on.

Best cars for teenagers

When it’s time to put your teenager behind the wheel, you want to make sure it’s safe and affordable – that’s why we’ve compiled a list of the best cars for teenagers.

When it comes time to put your teenager behind the wheel of a car, you want to make sure it’s safe and affordable. Very often, the best cars for teenagers are not small cars at all, but crossovers or SUVs.

In this guide, we review the best cars for teenage drivers and show you why they are so highly rated. We also explain what you should look for and answer your most frequently asked questions.

Depending on the teenager’s needs, you might consider the Toyota Corolla Hybrid, Hyundai Kona, Kia K5, or Honda Civic. It’s also wise to take a look at the Hyundai Tucson, Subaru Forester, Mazda CX-5, Toyota RAV4, Honda HR-V, and Subaru Ascent models.

Let’s see what makes each of them a good candidate for teenage drivers.

1. Toyota Corolla Hybrid

If you don’t want to spend a lot of money on fuel, the Toyota Corolla Hybrid is an excellent option. It’s a smaller car, so it’s maneuverable, but it’s also one of the IIHS’s Top Safety Picks and has a five-star safety rating from the NHTSA. Plus, JD Power gives it a score of 81/100, meaning it’s reliable.

Even though it’s an economy sedan, the Corolla Hybrid still includes many high-tech features. Even the base model includes top safety features, such as automatic braking with pedestrian detection.

  • MSRP: $22,800
  • Fuel Economy: 50/43 mpg

2. Hyundai Kona

On the subcompact SUV side, the Hyundai Kona takes the prize. It offers great reliability combined with good safety scores. It received a Good rating in IIHS crash tests and a five-star rating from the NHTSA. JD Power also gives it a score of 79/100.

The Kona is also affordably priced, but the base model lacks nothing. Most impressive is the standard Bluelink system that allows parents to remotely control where teenagers are driving and their speeds.

  • MSRP: $22,140
  • Fuel Economy: up to 30/35 mpg

3. Kia K5

If you prefer a car, the K5 is an excellent option from Kia. Not only is it an IIHS Top Safety Pick+, which is the highest possible designation, but it also has a five-star rating from the NHTSA. JD Power further agrees by giving it a score of 82/100.

The K5 continues to be one of the best values for what comes with it. Even the base model includes safety features, such as blind-spot monitoring, as well as front and rear automatic braking. Plus, you can use the My Car Zone feature with the infotainment system to monitor your teenager’s driving.

  • MSRP: $25,290
  • Fuel Economy: 27/37 mpg

4. Hyundai Tucson

Another compact SUV choice is the Hyundai Tucson. The IIHS rates this SUV as a Top Safety Pick+, while the NHTSA gives it a five-star rating. Additionally, JD Power offers a score of 79/100, proving it’s a reliable option.

Among the key safety features, the base model includes automatic braking and lane-keeping assist. We also like the Hyundai Bluelink feature, which gives you access to your teenager’s driving habits.

  • MSRP: $26,900
  • Fuel Economy: up to 25/32 mpg

5. Honda Civic

The new Civic is a complete package, ideal for any busy teenage driver. It’s not too expensive but offers the features and ratings you’re looking for. The IIHS gives it the Top Safety Pick rating, and it also received a five-star rating from the NHTSA. JD Power also offers a score of 82/100.

Not all models include the top safety features, but you can add them. We recommend looking into blind-spot monitoring and lane-keeping assist, to start.

  • MSRP: $23,750
  • Fuel Economy: up to 33/42 mpg

6. Subaru Forester

The Subaru Forester is considered one of the safest models for teenagers, thanks to its IIHS Top Safety Pick rating and its five-star rating from the NHTSA. This SUV also has one of the best JD Power ratings at 84/100.

Even at the base level, Subaru’s EyeSight suite comes standard. This innovative package includes lane departure warning, adaptive cruise control, and lane centering.

  • MSRP: $26,395
  • Fuel Economy: up to 26/33 mpg

7. Mazda CX-5

The Mazda CX-5 is a stylish multi-segment SUV. It has also earned a spot among the IIHS Top Safety Picks and has five stars from the NHTSA. Additionally, JD Power has a score of 83/100 for the CX-5.

You can save money by choosing the base model while still benefiting from many safety features. This model includes blind-spot monitoring, lane-keeping assist, and automatic high beams.

  • MSRP: $26,500
  • Fuel Economy: 22/27 mpg

8. Toyota RAV4

The RAV4 is a popular choice among young drivers because it has a new look and excellent safety ratings. The IIHS rated it as a Top Safety Pick, while the NHTSA gave it a five-star rating. Additionally, JD Power gave the RAV4 a score of 82/100.

All RAV4 models include the Toyota Safety Sense 2.5 (TSS 2.5) package. This innovative suite includes features such as forward collision warning, automatic high beams, and pedestrian detection.

  • MSRP: $28,275
  • Fuel Economy: 27/35 mpg

9. Honda HR-V

Another excellent Honda option is the cute HR-V. This SUV is an IIHS Top Safety Pick+ and received a five-star NHTSA rating. The JD Power score drops a bit to 75/100, but not enough to worry us.

With the base model, you also receive the standard Honda Sensing suite. With features such as adaptive cruise control, automatic emergency braking while moving forward, and lane-keeping assist, you’ll have peace of mind while your teenager is driving.

  • MSRP: $23,800
  • Fuel Economy: up to 26/32 mpg

10. Subaru Ascent

To round out our list, the Subaru Ascent. This model is also an IIHS Top Safety Pick+ and it has a five-star rating from the NHTSA. Additionally, JD Power offers a reliability score of 82/100. Even better, this model comes with standard all-wheel drive, which is perfect if you live on a dirt road or your teenager drives in the snow.

Among the standard driver assistance features, you get forward collision warning and pedestrian detection. This three-row SUV is also equipped with lane departure warning, automatic high beams, and adaptive cruise control.

  • MSRP: $33,895
  • Fuel Economy: up to 20/26 mpg

Tips for Buying a Car for Teenagers

How can you find a good car for your teenager without this list? There are several things to consider. Look at the driver assistance features offered, predicted reliability ratings, safety scores, value for money, and fuel economy to find the best overall package.

Driver Assistance Features

Today’s cars have many driver assistance features that provide better protection

The car stops while driving

A car that stops suddenly while driving can be very frustrating. Here are the most common causes and how to fix them!

Are you experiencing this annoying problem when your car shuts off out of nowhere? Don’t worry, we’re here to help!

In modern vehicles, there are many sensors and functions to ensure your car runs properly. Having a basic knowledge of your vehicle can help you counter a mechanical issue, such as your car shutting off while driving. So, what can cause a car to stop while driving?

The most common reasons a car stops while driving are a faulty crankshaft position sensor or fuel supply issues. This can also happen due to a faulty alternator, ignition switch, or an empty fuel tank. Because of the many possible causes, it’s important to diagnose it properly.

Even though this list gives you an idea of the most common signs, it’s far from exhaustive. Here is a more detailed list of the six most common reasons your car shuts off while driving:

6 Reasons a Car Stops While Driving

1. Faulty Crankshaft Position Sensor

The most common reason a car dies while driving is a faulty crankshaft position sensor. The crankshaft sensor is necessary for your car’s engine to operate in most car models.

You also have a camshaft position sensor on some car models, which the car uses if the camshaft sensor is faulty. However, a faulty crankshaft position sensor may not cause the vehicle to stop completely.

However, if your car has a crankshaft position sensor but not a camshaft sensor and you get a trouble code, you need to replace it.

2. Faulty Fuel Pump or Fuel Supply System

A fuel pump supplies the engine with the correct amount of fuel to the fuel injectors. If the fuel pump doesn’t supply the right fuel to the engine, the engine will stop, and you’ll be stranded.

The bad news is that there’s no workaround for a faulty fuel pump; you must repair it or buy a new one. Another reason could be that your fuel filter is clogged, so the fuel pump can’t pump fuel through it.

A fuel filter is a small component whose only role is to clean the fuel entering the engine. If the fuel filter is clogged, the fuel entering the system will be insufficient, and the engine will stop. Fortunately, it’s easy for you to replace a fuel filter.

Most fuel pumps are installed inside the fuel tank. A little mechanic’s secret is to kick or hit the fuel tank when the car stops. If the car starts then, there’s likely a problem with your fuel pump.

Be careful not to hit it with a sharp object, though, as fuel tanks are plastic, and you could make a hole – and that’s the last thing you want to do!

If your car shuts off while driving and then immediately restarts, it can often be due to a faulty fuel pump.

3. Empty Fuel Tank

Most car owners probably know that you need to check your fuel level from time to time while driving.

If you have enough fuel for your trip, that’s perfect, but if your fuel gauge or fuel level sender is faulty and doesn’t show the actual fuel level in your car, you could have a big problem.

A simple way to see if there’s a problem with your fuel gauge or fuel level sensor is to add 1 gallon (4 liters) of fuel to see if it starts.

4. Alternator Problems

An alternator manages your vehicle’s electrical power. If your car stops suddenly, the alternator might be faulty. A faulty alternator will cut off power to vital car components, and you’ll notice the lights going out on the dashboard or the engine suddenly losing power.

If your alternator fails, one of the main symptoms you’ll experience is the occasional illumination of the red battery light on your dashboard.

If your car still has electrical power and the starter works after it stops while driving, there’s another issue. In this case, the alternator is not to blame.

5. Faulty Ignition Switch

Sometimes, a faulty ignition switch can cause your car to stop while driving. The ignition switch is located behind the ignition lock and is turned when you turn the key to start the car.

Inside this switch, tiny metal plates can accumulate corrosion and rust. If this happens and one of these plates loses connection, the entire contact will be cut off.

This will also cause the entire engine to stop immediately. Fortunately, it’s easy to check. When the car stops, check if there are still ignition lights/indicators on your dashboard. If the dashboard instrument is dead, there’s a good chance it’s a faulty ignition switch.

6. Faulty Sensors

Modern cars have many sensors to optimize the air-fuel mixture for optimal fuel consumption. If a sensor fails and is off, your car’s engine could stop completely. If you notice your car shuts off while driving but restarts afterward, or if it shuts off at idle or when slowing down, it could be due to a faulty engine sensor, which could cause a bad air-fuel mixture or idle RPM.

Fortunately, most of these sensors cannot completely stop the engine. Sensors such as the MAF sensor, coolant temperature sensor, and oxygen sensor could disrupt the air-fuel mixture so much that the engine dies.

How to Fix a Car That Shuts Off While Driving

If your car shuts off while driving, the first thing to do to fix it is to check the engine control module for error codes and all sensor data. You also want to make sure there’s fuel in the tank and that the alternator is charging.

Here is more detailed information on how to solve the problem of your car stopping while driving:

1. Check Trouble Codes

With older car models, you had to diagnose the car with a multimeter or just common sense to find a problem. Fortunately, modern cars have built-in diagnostic software that detects when there’s a problem with one of the engine sensors and then stores an error code, triggering a check engine light.

This makes diagnosis much easier, and you don’t have to waste time measuring every sensor in your car’s engine. You also don’t need to guess and replace the wrong parts.

So, the best way to find out why your car shuts off while driving is to check these trouble codes in the engine control module and see if there’s a recorded issue. However, to read the error codes, you need an OBD2 scanner. You can either buy one yourself or go to a repair shop, and they’ll read the codes for you.

Continue troubleshooting with the information you received from the diagnostic scanner. For example, if you find a misfire trouble code, it could be due to faulty spark plugs, the ignition coil, or the ignition system.

2. Check Alternator Voltage

If you don’t have an OBD2 scanner or find no trouble codes stored, the next thing you want to do is check the alternator voltage with the engine running.

Basically, you need to apply the emergency brakes, start the engine, and measure the car battery voltage with a multimeter. If you get a reading below 12.5 volts, there might be a problem with your alternator or charging system.

3. Fill the Fuel Tank

Even though it might seem obvious that you need to refuel, you might actually be running out of fuel even if you don’t know it. A low fuel level can cause the engine to stall in turns at higher speeds because the fuel pump sucks in air instead of fuel.

There’s also a risk that your fuel tank’s fuel gauge sensor is faulty and your fuel level is low even if your fuel gauge indicates it’s full. So, that’s definitely something you want to check by opening the fuel cap and adding a bit of fuel.

4. Check Fuel Pressure

Low fuel pressure is another common issue when your car stops while driving, so you’ll want to check the fuel pressure in your car. The best way to check fuel pressure is to connect a manual pressure gauge to the fuel rail or line.

You can also use a diagnostic scanner to measure the pressure from the vehicle’s pressure sensor if there is one, but there’s always a risk that this sensor is faulty. Check your car’s fuel pressure specifications, and if you notice the fuel pressure is low, you need to inspect the fuel filter, fuel pump, and fuel pressure regulator.

5. Inspect the Tachometer

The RPM gauge or what’s called the tachometer on your dashboard receives information from the crankshaft position sensor in most car models.

If you notice your tachometer isn’t working when your car stops while driving, or if it doesn’t move when you start the engine, it could mean there’s a problem with the crankshaft position sensor

The car shakes at idle or when stopped – Why does this happen

Swinging back and forth in a rocking chair can also be fun and relaxing. But it’s annoying when you’re sitting in a car and it shakes seemingly for no reason. It’s time to conduct a thorough inspection and diagnosis if you notice your car shaking at idle.

What is Rough Idle?

When you start the car’s engine and leave it there, without pressing the accelerator, without acceleration, or without shifting gears, this is called idling. An idling engine will be able to maintain a stable rotational speed of around 1,000 RPM. At the same time, your tachometer should remain stable and not jump. An engine running at idle can provide enough power to operate the vehicle’s basic systems, such as power steering, electrical systems, or cooling systems. It can be stated that your engine receives an unmatched amount of fuel to burn while keeping the engine idling smoothly.

Have you ever encountered a rough idle situation? Let’s find out the reasons (Photo: Shutterstock)

And in case you’re asking: Why is my car shaking at idle? This is when your car has problems with the car shaking when idling, such as surging up and down or struggling to maintain a constant speed. It’s time to examine the causes and solutions. When we know that to maintain an idling engine, a sufficient amount of fuel and air is required, otherwise the vehicle will experience this condition. Let’s find out below some of the causes to know why the car shakes when stopped.

Car Shakes at Idle – What are the Reasons?

Unlike car vibrations during acceleration, the tires are not the obvious culprits in this case. This indicates a problem in the engine – a broken or damaged part. Problems in the fuel system could also be a reason why the car shakes when stopped.

1. Spark Plugs

Damaged spark plugs could make this car shake at idle (Photo: Carolus)

These are the components you should check first. The car shakes at idle. Dirty or worn spark plugs cannot ignite properly, meaning they don’t ignite the fuel in the piston cylinder when you start the car. This leads to engine misfires and vibrations.

Cleaning or replacing the faulty plug will solve this problem. It’s an inexpensive repair, but the mechanic must calibrate it correctly.

2. Vacuum Hoses

A broken hose can be the reason why the car shakes when stopped (Photo: wikihow)

Every vehicle has several connected to different points of the engine. Their job is to transport and dump gases derived from different parts. A loose, damaged, leaking, or broken hose can create several problems, and one of them makes the car shake at idle. Other problems could be misfires, stalling, or even the engine shutting off! However, this is a minor issue and any automotive expert can fix it in a short time. So don’t be too worried when this car shakes at idle.

3. Engine Mount

The engine mount is also a part to watch

What is this component for? It holds the engine in place while driving. A broken or disconnected engine mount makes the car or engine shake when parked idling or stopped at a red light. To find out if the mount is causing the problem, shift into neutral to see if the shaking decreases. This is a sure indication that there is a problem with the mount.

4. Fuel Intake System

A dirty fuel intake system is another reason. (Photo: Shutterstock)

Another reason why my car shakes when I stop is probably the fuel intake system. It can get dirty over time. A new model could also be the cause of the problem if it is not set correctly. In both cases, it will make the engine shudder, leading to car shaking at idle. The fuel intake accumulates sludge and debris after traveling thousands of miles. A clogged or improperly installed system cannot provide the required amount of clean fuel to the engine. This results in car shaking at idle.

Remember that similar symptoms can also be the result of a cracked or worn fuel pump. So, don’t forget to include it on your checklist as well when your car shakes at idle.

5. Timing Belt

Car shaking at idle can also be due to this car part (Photo: Car Throttle)

This one, along with other types of belts such as V-belts and serpentine belts, could create this annoying problem. So, if your car shakes at idle, check if any of these parts are broken or loose. A damaged belt will hinder the rotation of the fans and other components connected to it. What will be the result? Noises and pulsations in the engine!

6. Engine Misfires

Engine misfires can be another reason why your car shakes at idle. An engine misfire occurs when one or more of the engine’s cylinders fail to properly ignite the air-fuel mixture, resulting in uneven combustion. This can lead to rough idling, vibrations, and shaking. When this problem occurs, the Engine Control Unit (ECU) can detect it and trigger the Check Engine light. It is important to diagnose and repair the problem quickly to avoid further engine damage and ensure optimal performance.

Besides all the reasons mentioned above, you can also check out this video below to learn how to fix this engine shaking at idle problem.

https://youtube.com/watch?v=deypkLZpRRk%3Fstart%3D4%26feature%3Doembed

So that’s the end of car shaking in case of an idle problem, let’s take this as a way to solve and recognize whenever this situation appears. If you are interested in our maintenance tip topics, follow us for more and more articles updated daily. Together for safe driving and meeting your car requirements.

How to Solve the Problem of a Stuck Car Brake Caliper

Brake Caliper Seizing can cause serious braking problems if left unaddressed. This issue is relatively rare, but it can affect your vehicle’s safety if not diagnosed and resolved immediately.

How to Detect Brake Caliper Seizing Problems

There are various factors that affect a car’s brakes, however, most of them are due to something being stuck or seized inside the system.

For example, the piston has become stuck. In this situation, the engine and brakes will warn you with small red flags about brake seizing issues.

Symptoms may include:

The Engine Has Trouble Maintaining Speed

When brake caliper seizing problems occur, or when the brake pad is stuck, the car will lose power and be unable to maintain its speed. It feels as if the parking brake is engaged.

The Brakes Do Not Release Smoothly After Releasing Pressure from the Pedal

This is another common symptom to know if a brake is seized or not. Unused vehicles are often the target of this problem. In some cases, the brakes are so tight that the car cannot even move.

Your Car Seems to Pull More to One Side When Braking

In many situations, brakes seize on one wheel so often that some drivers may not even notice it. Most of the time, car owners only discover this symptom when automotive mechanics test the brakes.

The Seized Brake Becomes Hot

Last but not least, brake overheating is a symptom that any driver can notice. Sometimes, you can even see smoke coming from the brakes.

So, when this happens, stop driving now! Not only can a seized brake cause a fire, but it can also damage car components and the discs connected to the wheel hub.

Reasons for Brake Caliper Seizing

Many drivers wonder: what would prevent the brakes from releasing? Some of them know that the caliper sticks after brake work, but what are the factors that lead to seizing?

Well, seized brake calipers can occur for various reasons. If you are knowledgeable about automotive mechanisms and have a knack for fixing things yourself, knowing the reasons will help you solve problems easily. The car’s brake caliper can stick when:

  • The caliper’s brake pads are stuck or corroded because they cannot move in and out smoothly.
  • The brake caliper bolts are not sufficiently lubricated to allow smooth movement in or out. This happens when their protective rubber boots are damaged or torn.
The brake is essential for drivers and must therefore function perfectly. (Photo: Toyota of North Charlotte)
  • The caliper piston’s rubber boot is torn by rust.
  • The brake hose deteriorates internally.

How to Fix a Car Brake Caliper Seizing

Fixing brake seizing problems is a complicated task and you may need professional help. However, you can do it if you have good knowledge of automotive mechanisms.

Removing sticking brake calipers will require a professional mechanic if they are semi-loaded. However, you can attempt it if yours is not loaded.

Tools and Supplies Needed for Brake Caliper Seizing Repair

In order to answer the question: how to fix a sticking caliper? Tools and supplies are essential. Here is our list of what you might need to fix the seizing instead of buying a brand new brake caliper that sticks:

  • A set of ratchets
  • Pliers
  • Brake pads
  • Screwdrivers
  • A wrench
  • Brake bleeding tools
  • A brake caliper piston turning tool
  • A catch pan
  • Brake fluid
  • Brake lubricant

Instructions for Brake Caliper Seizing Repair

Removing the wheels. Remove the wheel and loosen the lug nuts with the ratchet. Remove the wheel and lug nuts and set them aside.

Removing the caliper. Loosen the banjo bolt that connects the brake caliper to the brake line. Loosen and remove the bolts that hold the caliper attached to the wheel assembly. Remember to place a catch pan under the brake mechanism to collect brake fluid. Remove the bolts, rubber boots, and caliper sliders and lubricate all these mounting components.

Installing the new caliper. Compress the piston of the new caliper with the brake caliper piston tool. Attach it to the end of the brake line. Lubricate the caliper bolts, place the new brake pads on them, and attach them to the wheel assembly. Finish the job by attaching the brake hose and tightening the banjo bolt.

Brake caliper seizing is a big problem, even for expert mechanics. (Photo: Jaguar Forum)

Bleeding the brakes. Fill the master cylinder and connect a hose to the bleeder valve. Now, open the valve and have someone else press the brakes at that moment. Close the valve when you see air bubbles in the jar. Repeat this process until there are no more bubbles in the jar. Fill the cylinder and close the bleeder valve.

Installing the wheel. Use your hands to tighten the lug nuts after putting the tire back on the wheel assembly. Once you have lowered the car to the ground by removing the jack, tighten the lug nuts with the ratchet.

Congratulations! You have just gotten rid of your brake caliper seizing problem!

FAQ on Brake Caliper Seizing

The brake is the most crucial part of the car, so it is essential for all car owners to understand its operation as well as the problems surrounding it. Here are the FAQs and answers for each one:

1. What would cause a brake caliper to stick?

One of the most common reasons a brake caliper sticks is the combination of a caliper piston and a brake hose. Normally, the piston can function thanks to a rubber boot lubricating and protecting it.

However, the rubber will tear over time, causing rust and debris to form inside the caliper.

2. Can I spray WD-40 on my brake calipers?

Furthermore, the cleaner can be used on brake linings, brake shoes, rotors, drums, calipers, pads, and other areas of the brake system as long as they are still intact. Remember to cover other areas of the car when applying the brake cleaner.

3. Can a stuck caliper fix itself?

Yes. Stuck caliper pistons can be repaired by the hydraulic pressure of the system itself. Even though car owners can take their vehicle to the auto shop and request a quick check, they can also fix it at home.

After that, drivers can pump the brake pedal to move the piston past the corroded section.

4. Can I drive with a sticking caliper?

If you have a sticking caliper, you can still drive with the brakes slightly engaged all the time.

Since the brake pad cannot fully disengage from the brake disc surface, the vehicle will move with a stuck caliper and create stress on the transmission.

5. Which way should I turn my caliper piston?

Clockwise. This is the correct direction for turning rear calipers. Before performing the turn, remember to use the rear caliper tool and align the piston notches.

6. How much does it cost to repair a seized brake caliper?

From $60 to $200. If only the caliper is broken and nothing else, car owners only need to replace the caliper and possibly the rest of the brake work (rotors and pads).

Watch this video from AutoEclinic to learn how to diagnose and repair a sticking brake caliper!

https://youtube.com/watch?v=C3N-aBP0fcs%3Ffeature%3Doembed

7. Should I grease the brake caliper piston?

Yes, you should. And drivers are recommended to use brake fluid often. Not only can it help install the piston more easily, but it also lubricates the rubber brake components.

8. Should I open the bleeder valve to compress the piston?

Yes. Drivers must open the bleeder valve in order to compress the piston, because they want to reinstall the piston on the vehicle instead of pushing fluid back up into the ABS unit.

9. What is the best lubricant for caliper pins?

Our recommendation is Permatex Ultra Disc Brake Caliper Lubricant. It is an environmentally friendly synthetic lubricant that does not melt.

10. What is the best brake lubricant?

Mission Automotive Dielectric Grease/Silicone Paste/Waterproof Marine Grease. It is undoubtedly the best automotive brake lubricant.

Not only is it waterproof, but it also protects brake caliper pins as well as other car components. Permatex Ultra Disc Brake Caliper Lubricant is another option for drivers.

11. What can I use instead of brake grease?

Instead of brake grease, silicone grease is the perfect substitute. Car owners can purchase it at auto parts and home improvement stores.

For automobiles, it is an amazing lubricant for all brake systems. It also works on rubber and plastic surfaces.

Final Words

In conclusion, brake caliper seizing is a critical issue that requires prompt attention to ensure both vehicle safety and performance. Ignoring this problem can lead to uneven brake wear, reduced braking efficiency, and potential safety risks.

Regular maintenance, such as lubricating caliper components and monitoring brake fluid levels, can help prevent caliper seizing.

If you suspect a seized caliper, it is essential to have it inspected and repaired by a qualified mechanic. Timely intervention will not only restore proper brake function but also contribute to the overall longevity and reliability of your vehicle!

The 5 Main Reasons Behind the Lack of Spark

Nowadays, people are very dependent on their vehicles. Whether it’s for going on vacation, to work, or to school, vehicles make our lives easier and more comfortable. It often happens that car engines do not start. When a car engine cranks but does not start, it is very likely that there is no spark from the distributor. When troubleshooting the problem, it is essential to know the exact reason.

No Spark from the Distributor: Why Does This Happen?

Many car owners struggle to start their vehicle’s engine. First, it is imperative to confirm that the car’s engine has no spark. Initially, ensure you have a fully charged battery before proceeding with tests.

You will need to disable the fuel system and use a spark plug tester. Finally, ask someone to help you crank the engine and look for a spark. You can stay informed about your car’s maintenance tips to improve the operation of your car’s engine.

Once it is clear that the engine has no spark, the second step is to find the reason. Here are some important reasons to help you identify the problems.

Crankshaft Position

First, check if there is a broken or loose wire connecting the sensors to the power control module. The crankshaft position sensor can help you find the crankshaft problem. This sensor tracks the rotational speed of the crankshaft. If the sensor stops working, it fails to send a signal to the ECU.

The crankshaft position sensor helps find the crankshaft problem (Photo Source: Pixabay)

A Problem with the Ignition Module

When you fail to start a car, you should check the ignition modules. The transistor helps these semiconductor switching devices control the current flow and turn the primary winding of an ignition coil on and off. So, it would not be wrong to say that they act like mechanical points.

An external input is needed to help the ignition modules accomplish the task. Loose, broken, or corroded wires in the ignition module can be the reason for no spark from the distributor. Cleaning oxidized terminals and replacing broken wires is a good decision.

A Problem with the Ignition Coil

The ignition coil transforms the battery’s low power into a powerful spark. Sometimes, a car runs for a while, and then the engine stops working. A faulty ignition coil could be the sign of such a problem in the vehicle. Due to the increase in temperature of the coil or ignition module, this issue arises. The good news is that it starts working again once cooled. A problem with the ignition coil prevents the vehicle from starting.

Cracked Distributor Cap

Checking the distributor cap is crucial when a vehicle stalls suddenly and fails to restart. Check if the inside or outside is dirty. It must be free of rust or corrosion. Also, consider checking the rotor’s operation and any cracks on the distributor cap.

Faulty Ignition Switch

Mounted in the engine’s combustion chamber, the ignition switch is the weakest part of a vehicle’s ignition system. There are three positions in the ignition switch, which you will notice after inserting the key. When moving to the “ON” position, the dashboard lights should illuminate. If they do not light up, it could be a sign of a bad ignition switch.

Ignition modules act like mechanical points in a car. (Photo Source: Pixabay)

Final Note

Many people face the problem of their car’s engine not starting. No spark from the distributor can be due to the reasons mentioned above. It is highly recommended to entrust your car to experts as they can diagnose the problem and resolve it as quickly as possible.

Is it possible to convert a manual transmission to automatic in a car

It is possible to install a manual transmission in an electric car. We have already seen an electric Ferrari get a makeover with an old-school manual transmission. But is it possible to convert a manual transmission to automatic?

It is possible to make any mechanical modification to almost any car provided enough money, time, and expertise have been invested. What you need to have on hand is a donor car that has all the parts identical to your car except for the automatic transmission (in case it is computerized like OBD or OBDII systems). It doesn’t have to be an exact match if it’s not computerized.

Is it possible to convert a manual transmission to automatic?

Well, you already have the answer. But how to do it? If it’s a modern car, dated from the mid-1990s or later, the process will require something more than just swapping transmissions to be complete. It will need a new ECU/computer in addition to a new wiring harness, transmission mount, engine mount, and firewall renovation.

To simplify things, what you will need to convert the transmission from manual to automatic are:

Transmission Reconfiguration

It is necessary to reconfigure the entire transmission because the functions of an automatic transmission are completely different from those of a manual transmission.

You need to reconfigure the entire transmission. (Photo: Naija Car News)

Gearbox Replacement

This is entirely logical because you are changing the type of transmission. It is not easy because you need to perform a series of modifications and repairs to place the new gearbox in your car. The newly added gearbox must be compatible with your car’s engine configuration.

Other Changes

You need to replace and modify a few other parts to install the new gearbox in the car. The body and engine wiring harness must be replaced if it is not compatible and cannot transmit signals and electrical power to the new transmission.

If the gear shift mechanism is floor-mounted, you must either remove the floor panel or drill a hole in the carpet. You need to do similar things for the column for a column-mounted mechanism.

You may also need to replace components like a pump, torque converter, and a few others for the housing and proper functioning of the new gearbox.

Converting Manual Transmission to Automatic – The Problems

The conversion is not a question of possibility but of feasibility. You should only undertake it if you have enough money and enthusiasm for such experiments. Otherwise, you will find a very large hole in your pocket after the project is finished.

Here are some other problems you will face:

Finding the Right Repair Shop

You won’t find many garages in the country with skilled mechanics to perform such a complex procedure. The possibility of finding an authorized service center for this job is almost out of the question. Even if you find one, the exorbitant expenses will make selling the car and buying an automatic a cheaper option. If you choose to do it in an unauthorized workshop, the vehicle’s warranty will be voided.

Finding the right garage for this job will not be easy. (Photo: SmartCheck)

Some Components are Irreplaceable

Some parts cannot be replaced later because they come only from the manufacturers. For example, there is no way to replace the ABS or anti-lock braking system with an aftermarket product.

Modern Cars Don’t Have Enough Space

Nowadays, most vehicles are smaller than their older counterparts. They have the transmission and engine components installed in a small space. So, even a minor change could be impossible due to the space issue.

What Should You Remember When Converting a Manual Transmission to Automatic?

When switching from a manual transmission to an automatic transmission, many “new drivers” often make fundamental mistakes by operating the accelerator pedal and the brake pedal… which leads to a risk of insecurity and easily damages car parts.

Below are some notes to help drivers switching from a manual transmission to an automatic transmission to be safer and avoid accidents.

Use Both Feet to Control the Vehicle

For vehicles with automatic transmission, there will be no clutch pedal, only the accelerator and brake pedals. Therefore, when driving the car, the driver will only need their right foot to operate between the brake and the accelerator. The left leg will be completely free.

However, in reality, many people are so used to driving and using manual transmission cars that it is difficult to ignore the habit of using the left foot. Therefore, even if you are driving an automatic car, you still use your left foot to press the brake and your right foot to press the accelerator.

According to experts, when using both feet to drive an automatic car, in many unexpected cases, it is possible to mistakenly use the accelerator and brake pedals, causing sudden acceleration and loss of control…

Confusing the Accelerator Pedal with the Brake Pedal

There have been many cases where accidents occurred because drivers mistakenly pressed the accelerator and brake pedals. After all, they were not used to driving automatic transmission vehicles.

Therefore, experts advise that when driving an automatic transmission vehicle, if it is not necessary to press the pedal, the driver should apply light pressure to the brake pedal. This way, if an unexpected situation arises, the driver will not be surprised and mistakenly press the accelerator.

Shifting from D to N

According to the habit of manual transmission drivers, they often shift all gears to N when stopping at a red light or parking on a slope… However, this is something to give up when using an automatic transmission if you don’t want to reduce the lifespan of your transmission.

The brake caliper piston does not compress common causes and solutions

Car owners may encounter the issue of “brake caliper piston not compressing” in their vehicles. They might notice that their vehicle pulls more to one side during braking or that the brakes do not fully release after letting go of the pedal.

Such situations must be addressed immediately so they do not affect your vehicle’s safety. To help you resolve the caliper piston issue, here are some potential causes and reasons listed below.

How does a caliper piston work?

Caliper pistons operate through hydraulic pressure, forcing the brake pads to press against the rotor, thereby slowing or stopping the vehicle’s movement.

The caliper, an enclosing housing, accommodates the piston (or pistons) as well as other brake components.

When the brakes are engaged, hydraulic fluid from the master cylinder propels into the caliper, pushing the piston(s) outward.

Consequently, the brake pads exert pressure against the rotor, generating friction and facilitating the reduction or cessation of the vehicle’s speed.

When the brakes are released, the hydraulic fluid pressure decreases, prompting the piston(s) to retract, allowing the pads to disengage from the rotor. This cyclic process repeats with each braking action.

Causes of “The caliper piston does not compress”

There are many potential reasons responsible for the caliper piston not compressing issue. Before taking your vehicle to an auto repair shop, let’s explore some possible causes of these problems.

1. Worn caliper bolts

The solution to the caliper piston will not compress problems. (Photo: YouTube)

Caliper bolts consist of slides that require lubrication. The protective rubber boots on them help retain lubrication.

But sometimes, these boots are torn off by rushed mechanics when installing new brake pads. As a result, the caliper piston fails to compress.

Sticky pistons

During braking, the brake piston seal deforms slightly. When car drivers release the brakes, they unroll and help compress the pistons for drag-free operation.

If the piston does not slide properly on the seals, it prevents the piston from compressing permanently.

Vehicle inactivity

One of the main causes of the caliper piston not compressing is inactivity. If you do not use your vehicle for months, the piston may rust.

Consequently, the corrosion that accumulates on the caliper prevents it from compressing fully, thereby hindering the proper functioning of your vehicle.

Solving the caliper piston compression problem

Repairing the caliper piston will not solve problems. (Photo: tueursoundz)

It is necessary to carefully diagnose and resolve these issues immediately, as they could endanger your vehicle. One of the main ways to fully compress your caliper piston is to take care of the brakes.

If you top up the brake fluid and replace the brake pads as needed, you may not encounter any issues with the caliper piston.

For a stuck caliper piston, there is a special tool that allows applying force and compressing the pad. You can use a simple C-clamp to solve this problem.

To learn how to use a C-clamp to repair such a problem, you can read some car maintenance tips on the web. Additionally, you must also properly clean the piston and apply a light layer of grease to compress the caliper well.

FAQ on the caliper piston not compressing

  1. How can contaminated brake fluid affect caliper piston compression?

Contaminated brake fluid, often due to moisture or debris, can lead to caliper piston corrosion and restricted movement, resulting in poor compression.

  1. How does air in the brake lines contribute to this problem?

Air in the brake lines can make the brake pedal feel spongy and hinder the proper compression of the caliper piston, thereby reducing braking efficiency.

  1. What role does a corroded caliper play in this problem?

Corrosion on caliper components, such as the slide pins or caliper housing, can obstruct piston movement and prevent it from compressing smoothly.

  1. How does a faulty master cylinder affect caliper piston compression?

A faulty master cylinder may not distribute hydraulic pressure correctly, leading to insufficient force for caliper piston compression.

  1. What can cause a caliper piston to seize?

Lack of maintenance, exposure to moisture, or debris intrusion can cause the caliper piston to seize, preventing adequate compression.

  1. What are potential solutions for a non-compressing caliper piston?

Solutions include bleeding the brake system to remove air, flushing and replacing contaminated brake fluid, cleaning and lubricating caliper components, and inspecting for corrosion. In severe cases, caliper replacement or rebuilding may be necessary.

Watch this video by ScrewsNutsAndBolts to learn a simple way to compress a brake caliper piston without needing special tools!

https://youtube.com/watch?v=E6iso9mVi8g%3Ffeature%3Doembed
  1. Can I repair a non-compressing caliper piston myself?

Some basic maintenance tasks, like bleeding brakes or cleaning caliper components, can be performed by DIYers. However, for complex issues, it is recommended to seek professional help.

  1. Is it safe to drive with a non-compressing caliper piston?

It is dangerous to drive with compromised braking performance. A caliper piston that does not compress can lead to reduced braking efficiency, uneven wear, and potential safety risks. Address the issue promptly.

  1. How can I prevent caliper piston compression problems?

Regular maintenance of the brake system, including checking fluids, inspecting pads and rotor, and keeping components clean and lubricated, can help prevent caliper piston compression issues.

  1. Should I replace the caliper if the piston does not compress?

Depending on the severity of the issue and the condition of the caliper, replacement may be necessary. Consult a professional mechanic to determine the best course of action.

Conclusion

So, you may now know the possible causes and ways to resolve the caliper piston not compressing issue. In case you think the problem is quite difficult to handle, remember to ask for help from an automotive professional.

These certified mechanics will provide the best solution to the problem of your caliper piston compression.