Transmission Flush vs Fluid Change: Which is Best for Your Car

Transmission Flush vs Fluid Change: Are the Services the Same? We know that many drivers are still confused between these forms of fluid maintenance and don’t know which one will best suit the vehicle. We understand your concern and that’s why we want to delve deeper and highlight the differences between a transmission flush and a change to help you keep your transmission fluid always in good condition.

Transmission Flush: Everything You Need to Know

What is a Transmission Flush?

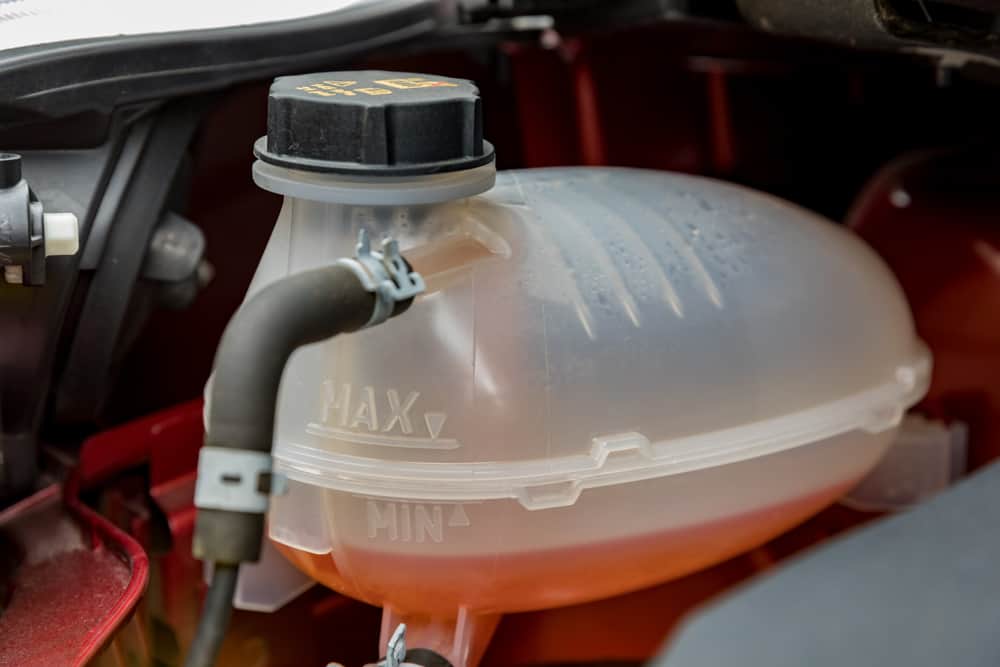
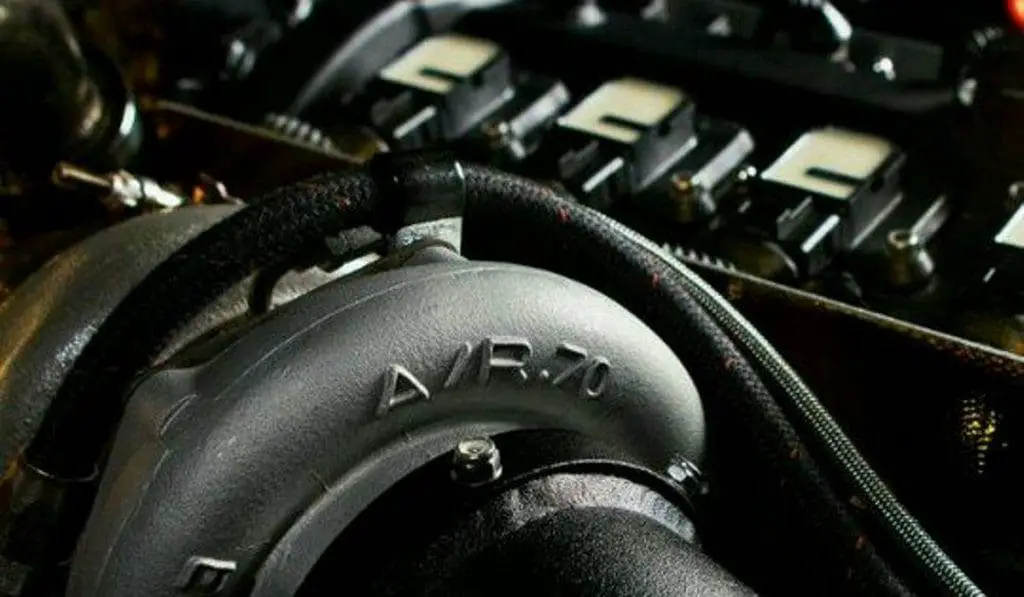
Transmission fluid is the compound that lubricates the machine’s parts and especially the gears inside the gearbox, helping the transmission to operate smoothly and stably. Additionally, it also has anti-wear and anti-rust effects. Maintaining the gearbox fluid at a stable level not only helps the car run better and more powerfully but also increases the transmission’s lifespan. Over time, due to high-temperature work, oil molecules break easily, the oil oxidizes, the oil quality is no longer the same, and lubrication capacity and cooling are reduced.

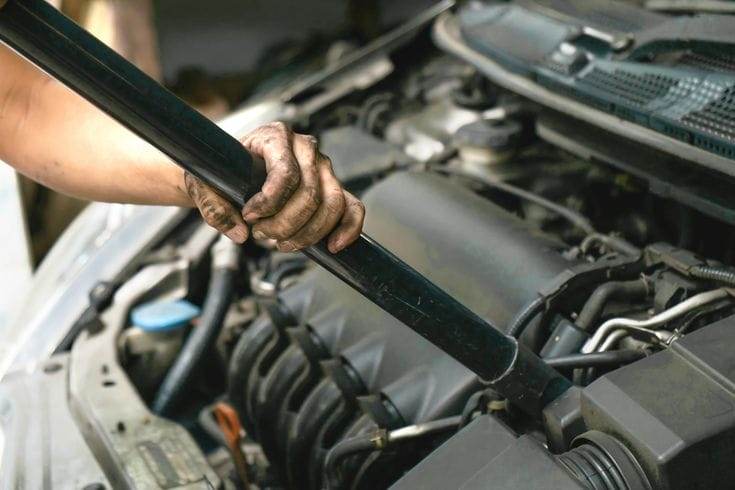
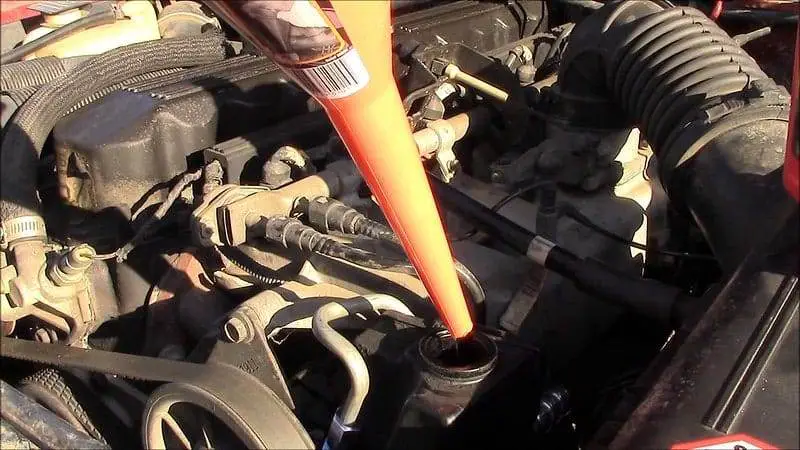
At this point, flushing the transmission fluid is a good action to take. The transmission flush is a maintenance process to remove 100% of the old transmission fluid, deposits, and dirt from a vehicle’s transmission and replace them with new fluid. The transmission fluid flush is designed to prevent transmission problems and ensure your vehicle’s proper operation. This process is as simple as cleaning the used fluid with fresh fluid to keep your transmission healthy.

what is a transmission flush
What is a transmission flush? The fluid flush will remove most contaminants from the fluid with fresh, clean fluid (Photo: pinterest.com)

When Do You Need to Flush Transmission Fluid?

According to the auto repair shop, drivers will need to flush the transmission fluid every 60,000 miles or every 3 years to keep their car in good condition. To know the exact time to flush the gearbox fluid, you can refer to the manufacturer’s instructions. In case your vehicle is equipped with a sealed transmission (no dipstick), you should still flush the fluid when the car has traveled 100,000 to 160,000 miles.

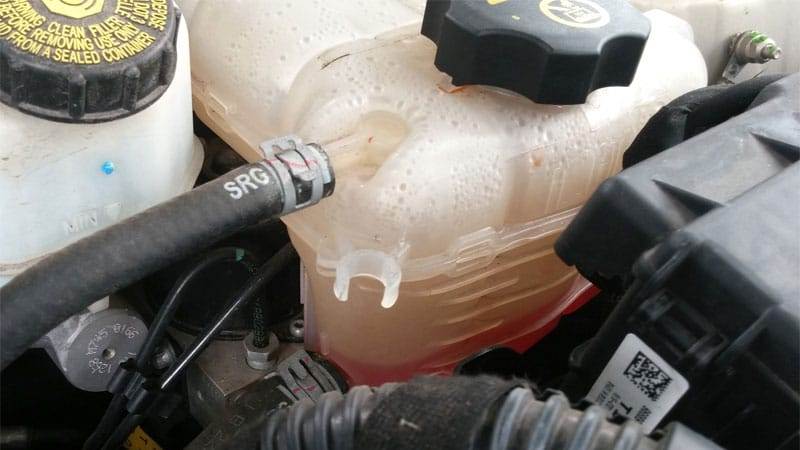
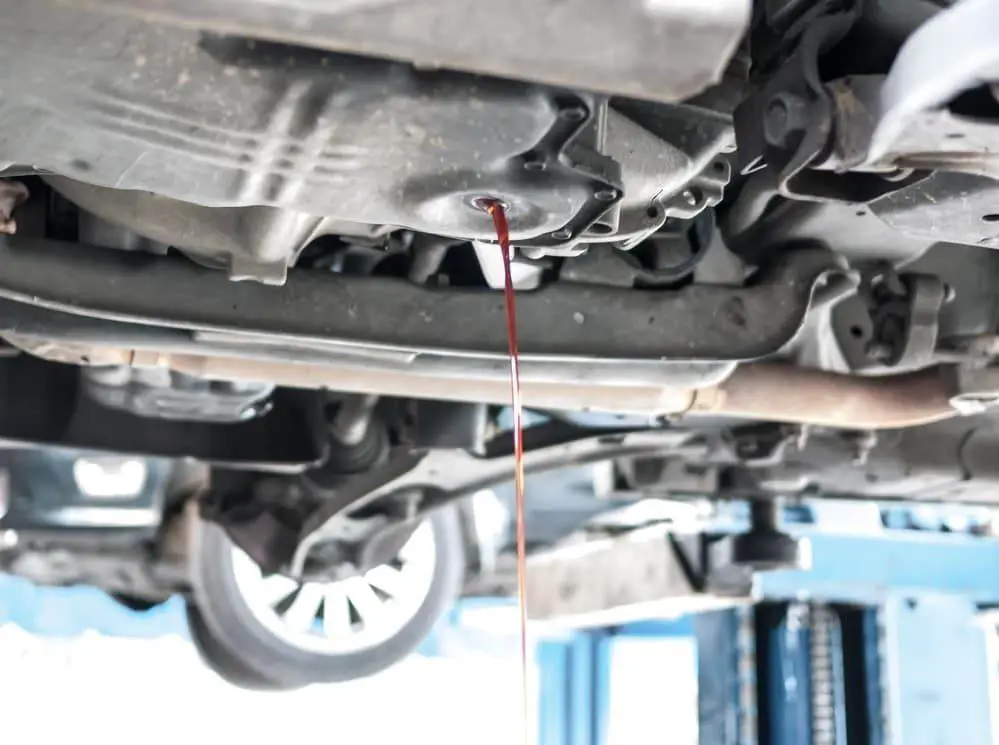
The second warning sign that tells you to flush your transmission fluid is when you notice the fluid turns brown or dark red on the dipstick because fresh transmission fluid is always red.

Gear slipping is also a wake-up call about the condition of your transmission fluid. If your transmission fluid contains excess dirt and contaminants, it can block the fluid flow, thus reducing hydraulic power. As a result, there may not be enough power to stay in gear.

Having difficulty shifting gears: Whether it’s a manual or automatic transmission. If the transmission has too much dirt or deposits in the fluid, the consequence will be a slow response when shifting gears. This may be a good time to flush the transmission fluid if the vehicle is slow to shift.

How Much Does Transmission Fluid Flush Cost?

Generally, the typical price range for a transmission flush with a pressure machine is $125 to $300. The cost depends on a number of items, including your car’s make and model, your location, the type of shop, the machine used by the machine, and any additional service.

It can take 30 minutes to flush the fluid if this job is done by an experienced mechanic. One thing that has a significant effect on the job cost is the amount of transmission flush required by your vehicle. The more fluid your vehicle needs, the higher the service price will be. Normally, transmission fluid will have a price ranging from $5 to $7 per quart, but some cars will require up to 16 quarts of fluid.

Should I Flush My Transmission Fluid?

Many debates revolve around the issue: is transmission flush good or bad? Many experts believe that flushing the transmission fluid will be a healthy activity for your transmission system. However, some people deny that the high pressure of the transmission fluid is actually bad for the vehicle because it creates a number of problems. They argue that the excessive pressure used to flush out older fluids tends to damage the internal components of the system. It removes contaminants to some extent, but whether it actually removes all contaminants is a matter of debate.

The question to ask yourself is: is transmission fluid flush good or bad? In most cases, flushing the transmission is fine! You want to replace 100% of the old contaminated fluid with new, fresh fluid. Especially when your fluid has more than 50,000 miles. If the transmission fluid set has expired, you can choose to change the fluid. Flushing a system has gone so far as to push debris into places inside the transmission where they don’t belong. And of course, this action will have a significant impact on your transmission fluid.

Transmission Fluid Change

What is a Fluid Change?

Changing transmission fluid is a simple process. All we have to do is drain a large amount of fluid from the pan, change a filter, and refill the fresh fluid into your pan at once. The big difference between a fluid change and a flush is that a fluid change will not replace all the transmission fluid in the pan with new fluid.

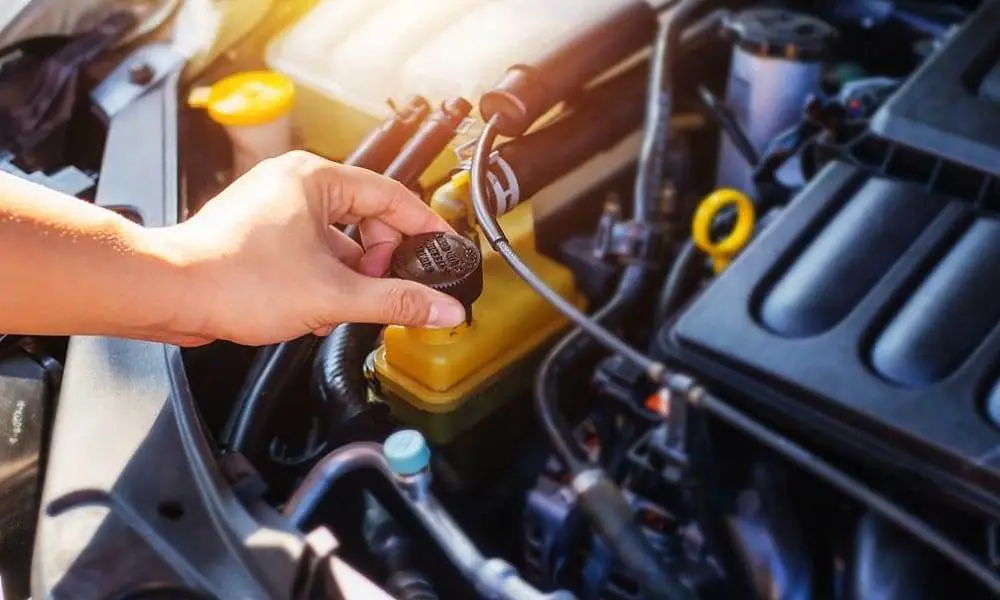
You can easily understand that you will need to change the transmission fluid if the fluid level is low or loses its viscosity. Using the dipstick, if your fluid is only darker than usual but has not burned or corroded completely, it’s a signal for you to change it. The recommended fluid change interval is about 30,000 miles and 60,000 miles. And every car will have different ways of telling you if you need to change the fluid.

transmission fluid change vs flush
Transmission fluid change vs flush. Do you think changing fluid will be better for your car (Photo: pinterest.com)

Transmission Fluid Change Cost.

How much does transmission fluid change cost? The cost you will pay for a fluid change will range from $80 to $250 for manual and automatic transmission and the price will depend on each dealer or service center. And the average price will be estimated at around $100. Additionally, when changing the transmission fluid, we recommend replacing or cleaning the filter or pan. The price for filter replacement ranges from $15 to $30 and for gaskets from $75 to $150.

Changing Transmission Fluid: Is It Good or Bad for Your Car?

We will cover the question “Can a fluid change damage your transmission fluid?”, you may have heard but still don’t have an answer. A fluid change cannot damage your transmission components. Problems will start to occur when you change the fluid if your clutch has worn out or been damaged over time.

If you still replace the fluid after these parts have the wear signal. This can cause slipping. The old fluid contains particles that actually help with engagement, making it grittier to allow for a tighter grip. New fluids do not contain this substance and may not adhere firmly, causing slipping.

Transmission Flush vs Fluid Change: Which is Best for Your Car?

After reading the above analysis, should I do a transmission flush or change it? The selection of the appropriate method depends entirely on the condition of the transmission fluid as well as the car model. However, before making a decision, we would like to confirm that transmission fluid flush and a fluid change are two completely different services.

The main difference between these services is that changing the transmission fluid removes about 20% to 40% of the total fluid volume. During flushing, the fluid will remove most contaminants from the fluid with fresh, clean fluid. However, the ultimate goal of a fluid flush and a fluid change is also to improve the performance and lifespan of your transmission. To help you make the decision more easily, we will analyze a few pros and cons of these transmission services.

The Advantages of Transmission Fluid Flush.

  • Many drivers believe that flushing the fluid can help remove dirt and materials from an engine, thus improving engine performance and lifespan. Old fluid can be left in the transmission during a fluid change, contaminating the new fluid and causing performance problems. The transmission flush will help you avoid this risk.
  • The transmission flush will be performed less frequently (every 60,000 miles) whereas a fluid change typically occurs after 30,000-mile driving intervals.
  • The flush will push all the old fluid out under pressure and run cleaner through the system to completely change the fluid. It’s an effective way to reset your transmission to its new original condition. This allows for optimal performance because the transmission only operates with fresh fluid.
transmission flush good or bad
A transmission flush good or bad: you can seek advice from manufacturers or service centers before making a decision (Photo: pinterest.com)

Disadvantages of Transmission Fluid Flush

  • The total typical cost you pay for a transmission flush can be almost double that of a fluid change.
  • If your transmission has over 100,000 miles on it, flushing the fluid can strip the varnish and cause the control valve to stick
  • Not a panacea: flushing transmission fluid is not an alternative to maintaining a good transmission. Flushing the gearbox cannot solve major problems caused by a lack of prior maintenance, such as delays and slipping.
  • The fluid will move in the opposite direction of normal flow due to eddy currents during transmission fluid flushing. Which can lead to the risk of dislodging debris and causing it to settle in a place where it shouldn’t.

The Advantages of Changing Transmission Fluid

  • You save a cost compared to flushing the transmission fluid. The average cost you pay for an oil change is typically $100, while flushing the fluid can be up to $150 or more.
  • Periodically changing the transmission fluid according to the manufacturer’s guide. Especially once it has turned black, it is a good method to improve your fuel economy. Your transmission and car engine will run more easily after a fluid change.
  • The transmission fluid change process is quicker and easier than flushing the fluid. Drivers can absolutely perform this procedure at home.

Disadvantages of a Fluid Change

  • Old transmission fluid may still exist in the transmission system during a fluid change. Which will lead to contamination of the new fluid, thus reducing transmission performance.
  • May not completely drain the buildup, which can lead to faster buildup in less time

What is Better?

A fluid change means a certain percentage of the old fluid remains in the transmission system (can be up to 50%). But a complete flush ensures that every part of the transmission gets rid of the old oil. So, what’s better for you?

Our advice for you: If you think you haven’t frequently maintained the transmission system in the past. A fluid change will be a better option for you. Because flushing the transmission fluid can cause debris or grime stuck in the fluid lines and even worsen the aging of rubber seals. Conversely, if your gearbox is regularly maintained, flushing the transmission fluid can help you remove all the old fluid from the pan.

Whichever method you choose to maintain your transmission system. Make sure the filter is changed or replaced and use the fluid recommended by the manufacturer. And the pan is dropped and check for any issues.

Bottom Line: Transmission Flush vs Fluid Change: Which is Best for Your Car?

It can be said that the gearbox plays a very important role in your car’s system. Therefore, choose the most appropriate maintenance method to improve operational efficiency. Whether you choose a transmission flush or a fluid change? We recommend referring to your own manual or seeking advice from manufacturers or service centers before making a decision. With the analysis in the article above. We believe it will help you choose an effective and cost-efficient transmission maintenance service.

Boiling coolant in the reservoir

During car operation, drivers must have encountered a situation: boiling coolant in the reservoir or bubbles in the coolant reservoir. What will happen to your car?

Our answer is: If you don’t act in time, it can damage your engine. So, if you’re looking for the reasons and how to handle the above phenomenon, this article is written for you.

Is Coolant Really Necessary for Your Car?

When the engine runs, the air-fuel mixture is burned in the engine cylinders, producing a huge amount of heat. However, only part of the heat is successfully converted and the rest is dissipated, causing the engine temperature to rise. If the engine temperature exceeds the allowed threshold, the oil won’t have a good lubricating effect, leading to increased friction and rapid wear and damage to machine parts.

That’s why your car needs coolant. Engine coolant is a liquid mixture of water and antifreeze located in a vehicle’s radiator. As its name suggests, coolant functions to “cool” your engine, thus contributing to smoother car operation. More specifically, coolant will limit engine overheating in hot climates and freezing in extreme cold. Additionally, this fluid can also prevent rust and corrosion of the parts it flows through, including the radiator, heater core, and pump.

If you’ve read this far, you probably know the importance of car coolant. When your car lacks coolant, your engine will definitely overheat and the temperature will rise during operation. This can cause an explosion, which is extremely dangerous. Stalling your car in the middle of the road in traffic. At the same time, it affects the car’s components.

What is the Boiling Point of Car Coolant?

Why Is My Coolant Reservoir Boiling
Why is my coolant reservoir boiling? It can be said that all reasons for engine overheating can also lead to coolant boiling (Photo: oards.com)

Knowing the boiling point of antifreeze or coolant is very important for drivers. So when we talk about coolant or antifreeze, what is their boiling point? As we know, 212°F is the boiling point of pure water and it freezes at 32 degrees Fahrenheit. However, the boiling point of your car’s coolant is higher than water’s, coolant boils at temperatures between 300 and 400 degrees Fahrenheit.

When choosing coolant for your car, the important factor to consider is your country’s climate. If you are in cold weather, you should take coolant with a higher boiling point as it will help your engine not to freeze. Otherwise, in a hot climate, you can choose the coolant or antifreeze that has a lower boiling point. Make sure to check your manufacturer’s recommendations before deciding to buy the coolant or antifreeze.

Why is My Coolant Boiling in the Reservoir?

It’s an abnormal situation when your coolant boils during the driving process. Your car’s coolants will start to boil or bubble when the engine temperature rises above the boiling point level. We can say that all reasons for engine overheating can also lead to coolant boiling.

Diagnosing the cause early can help you minimize damage to your car. Some faults cause the coolant to boil in the reservoir, but the most common are the following:

Damaged Head Gasket

A head gasket has an essential role in sealing your engine’s combustion chamber so your car can perform compression to maintain engine power and avoid harmful emissions from combustion. However, the most important function is to prevent coolant from leaking elsewhere.

What happens If your head gasket is blown, a head gasket failure will cause your engine to run under extreme conditions with overheating because, at that time, it allows engine coolant, gas, and oil to mix. And when the temperature in the engine reaches a boiling point, it will make your coolant boil in the reservoir. If you notice white smoke coming from under the hood or the coolant light turns on, immediately check the coolant reservoir. Furthermore, when the head gasket fails, air can seep into the coolant reservoir and cause the bubbling phenomenon in your fluid.

Bad Cooling Fan

When the car is running, the excess heat generated during air compression, fuel combustion, and mechanical part friction must be dissipated. The car radiator fan’s role is to coordinate with the coolant to increase the engine’s cooling efficiency when the above heat is released.

If your cooling fan breaks due to a blown fuse, damaged wire, faulty fan clutch, or corrosion, it will make your coolant boil in the reservoir because the fan doesn’t provide sufficient airflow when your car stops. Regardless of the cooling fan configuration, its main goal is to cool the coolant. If it fails in one way or another, you may find your coolant boiling.

Faulty Thermostat

The main symptom of a bad thermostat is related to your engine overheating. This can be easily detected as your car’s temperature gauge may be abnormally high. Valves stuck in the closed position can be the reason for this situation. As a result, the coolant won’t be able to flow and will boil.

A thermostat’s function is to open and close at the correct intervals to regulate coolant entering and leaving the radiator. When this part doesn’t work properly, it won’t open at the exact time and will cause the cooling system to overheat.

Faulty Radiator Cap

The radiator cap is often overlooked in maintenance, but it’s considered a crucial element of the cooling system. A radiator cap is essentially a relief valve; when the coolant reaches a high temperature, the relief valve opens and ensures your cooling system remains under pressure.

When this cap is stuck, it doesn’t have the ability to maintain enough pressure to lower the coolant’s boiling point, causing inadequate heat absorption from your engine. The engine can also overheat due to air pockets in the coolant caused by the malfunctioning radiator cap and the rapid expansion of air at high temperatures. This will make the coolant boil in the reservoir.

Water Pump Not Working Properly

Water pumps typically last 100,000 miles or more on average, but given the fundamental role they play in regulating engine temperature. It’s the part that continuously injects coolant into the car’s engine to prevent the engine from overheating.

What happens if your water pump fails? It will cause your engine temperature to reach a dangerous level. This is usually indicated by a high engine temperature or an engine temperature warning light on the dashboard. At that point, the coolant becomes hot, boils, and emits white smoke while increasing the heat of the entire car.

Coolant Level

Driving with low coolant will create an airlock in your cooling system and create liquid foam. The airlocks will disrupt the cooling system’s flow, leading to engine overheating. You might notice the warning that your coolant level is low due to the light on your dashboard, but if you don’t, the common consequence is that your engine will start to boil and spew steam – this will result in more steam from your engine.

Clogged Radiator

When you notice your coolant starting to boil, remember to check the radiator. Like other car parts, radiators can also be affected by the consequences of wear and tear. Eventually, debris can get into the radiator and start to clog it. Remember, the radiator is very important for ensuring the proper functioning of the cooling system. So when your radiator gets dirty, engine overheating is the popular result, and of course, it will make the coolant temperature abnormally high.

How to Deal with Coolant Boiling in the Reservoir?

As we mentioned in the part above, there will be many reasons why your coolant boils in the reservoir. So, if you don’t identify the exact cause, it can lead to serious consequences for the engine. Therefore, you need to take the car to a mechanic to determine the cause of the coolant boiling and then repair it immediately. But if you want to know how to fix it, here are some fixes you can refer to.

Coolant boiling: how to fix it? (Photo: pinterest.com)

Change the Bad Thermostat

When the thermostat is stuck, it prevents coolant from circulating in the engine to the radiator. In this case, replacing the thermostat is an unavoidable thing. Replacing or solving a bad thermostat problem can be a fairly easy task for most DIYers, while others don’t know where to start.

If you have good experience in car repair, you can replace the thermostat by yourself, otherwise you can entrust your car to a trusted mechanic. The cost of replacing a thermostat ranges between $70 and $450, depending on your car model and labor costs. A thermostat costs about $20 to $50, and factory labor costs between $50 and $400.

Fix an Air Pocket in the Reservoir

You can easily fix the problem by properly filling it with coolant. At the same time, when changing the coolant, used air is trapped inside the reservoir, causing air bubbles and making the coolant temperature rise. Therefore, to ensure there is no air in the reservoir, start the engine with the radiator cap closed. This will help remove air from your reservoir.

Replace the Faulty Radiator or Radiator Cap.

You can check the radiator cap with a pressure tester. If the pressure drops during the test, try cleaning the cap and test again. If it still gives the same results, you need to replace the radiator cap immediately. Replacing the cap can be easy to do, generally, the radiator cap is quite cheap and you can buy one at any repair center, but make sure you have the correct pressure rating.

When well maintained, the radiator can last up to 8 to 10 years. However, when you notice the bubble or coolant boiling, you need to inspect or replace your car’s radiator. A clogged radiator can make your coolant overheat and may eventually boil, which can damage the engine.

To solve this problem, you can clean the external fins annually and flush them according to the manufacturer’s maintenance schedule. When the radiator is beyond repair, you need to change this part. Unfortunately, radiators are expensive equipment and often a labor-intensive process. The cost of radiator replacement ranges from $182 to $921.

Final Thoughts

We are sure drivers had the desired answer to the question Why is my coolant reservoir boiling? So, if you encounter this situation while driving, you need to stop and turn off the car as soon as possible to avoid further damage. Hopefully, the information we share about the cause and solution of this phenomenon will help you drive safely.

How to Increase Power: Over 20 Methods

The need for speed is something countless car owners and enthusiasts are obsessed with. Even those who already own fast cars try to squeeze maximum performance out of them. From mild to wild, there are a variety of ways to add extra power to your vehicle. Learn over 20 methods to increase horsepower, including highly effective but expensive methods as well as simple and affordable solutions.

Fun Fact: The Origin of “Horsepower”

Horsepower is a measure of the rate at which work is done. Where does the term horsepower come from? Exactly what the word suggests: horses, and a man named James Watt, who used to observe mill horses walking in circles all day, powering the mills.

The origin of the term dates back to when James Watt invented a steam engine that he believed would be at least 200 times more powerful than the horse mill, but he found it difficult to explain to the millers how powerful the steam engine was compared to their horses. So he developed a formula to measure the workload, based on the estimate that a mill horse would pull/push the mill shafts in a 24-foot circle with a force of 180 pounds 144 times in an hour.

He then did further calculations to prove that such a workload meant a mill horse could push 32,572 pounds (rounded to 33,000 pounds) a horizontal distance of one foot in one minute. This equals the power of one horse.

Therefore, horsepower measures the power a horse gives when pulling, or more precisely, the power required to lift 550 pounds in one second a vertical distance of one foot, or the power required to move 33,000 pounds in one minute a horizontal distance of one foot.

Factors to Consider When Trying to Increase Horsepower

A major concern for many car owners is how aftermarket modifications affect a vehicle’s warranty. It is always best to discuss with your dealer how installing aftermarket performance parts might affect your warranty.

Indeed, car manufacturers are not thrilled about owners trying to re-engineer their vehicles, which cost a lot of time, money, and intelligence to optimize for aesthetics, performance, and safety. In some cases, some car manufacturers allow the installation of in-house performance parts when installed by an authorized dealer.

Another aspect you need to consider before tuning your car with aftermarket performance parts is emissions regulations. Many countries and states, like California in the U.S., require certain aftermarket performance parts to comply with emissions standards for the vehicle in question to be considered road-legal.

While you might choose to install non-compliant parts, it could compromise your ability to pass emissions tests. Therefore, you should spend some time checking your local emissions laws before choosing certain engine performance parts.

Finally, you need to be aware that your vehicle, as it left the factory, was already optimized as a whole, and any modification to one part can make other components less effective. While modifications like an exhaust or intake might have minimal impact on the vehicle’s overall performance and safety, more significant modifications like a supercharger can significantly alter fuel economy or the vehicle’s long-term reliability.

Therefore, consider any trade-offs you might be making when making modifications for better power. Also, be prepared that when you opt for a drastic upgrade like a supercharger, you will most likely need to spend a lot of money to get many other parts upgraded as well as a complete kit so as not to sacrifice your car’s overall efficiency, drivability, and safety.

How to Increase Horsepower: Effective but Expensive Methods

We will start our list of over 15 methods on how to increase horsepower with the most effective upgrades offering immediate and notable power gains.

If your vehicle’s engine is naturally aspirated, forced induction will provide a considerable power increase. Forced induction is one of the most effective ways to increase horsepower. Forced induction can take the form of a turbocharger or a supercharger. These upgrades are popular with performance enthusiasts and street racers, and you might have seen one in one of the Fast and Furious movies.

This is one of the most expensive engine enhancement modifications, so feel free to skip it if you are on a budget. But if you can afford it, then go for it blindly with this mod because a good supercharger will increase your horsepower by up to 625+ and your torque by up to 525+ lb-ft. Such numbers are surely staggering given you’re only getting one set of upgrades.

Before determining if this mod is worth it, you need to understand the basics of superchargers and turbochargers.

To help the engine generate more power, two things are needed: more air and more fuel drawn into the engine’s combustion chamber. It’s worth noting that a specific ratio is needed for the engine to operate: 14 parts air to one part fuel.

The air pumped into the combustion chamber is ordinary air at atmospheric pressure. Compression occurs later with the work of the piston, which rises to compress the air-fuel mixture, thus creating a “vacuum.”

The supercharger/turbocharger increases air intake simply by compressing the air to a pressure higher than atmospheric pressure before pumping it into the combustion chamber. With more air intake, more fuel can be pumped into the combustion chamber for the engine to burn to create more energy.

As mentioned above, an important reminder: since adding forced induction puts more stress on your engine and transmission, you may need to make additional modifications to handle such extra strain, like a stronger clutch or cooling system. This varies by each vehicle model, so you should consult a professional on what needs to be done.

Supercharger

A supercharger compresses the air flowing into your engine to let more air in. Photo credit: WardsAuto

Forced induction systems compress the air flowing into your engine. By “forcing” more air, the engine can burn additional fuel to produce more power. Later, you will encounter a few more aftermarket parts that also increase engine power through the same general mechanism.

A supercharger can add on average 46% to 50% more horsepower and 31% more torque, the rotational or twisting power of a car (as opposed to linear power like a push or pull).

While trying to increase horsepower, remember that this measure is mathematically related to torque. Torque is a crucial measure of an engine’s power, as it represents the load an engine can handle to generate a certain amount of power to turn the engine on its axis. Horsepower equals torque multiplied by RPM (revolutions per minute), divided by a constant. Because there is usually a limit to how fast you can spin an engine, higher torque allows for greater power at lower RPMs.

Compared to their cousin the turbocharger below, superchargers are easier to install and give you a more instant power surge when you step on the gas. This is because they are powered by a belt connecting directly to the engine at the intake. So, when the engine turns, a supercharger immediately gets to work.

This belt-drive characteristic makes them more effective on six-cylinder engines, as opposed to four-cylinder engines. They also do not require an intercooler as an indispensable supplementary modification, so you will encounter fewer overheating or breakdown issues.

Turbocharger

A turbocharger “recycles” energy from the exhaust flow to propel itself, so compared to superchargers, they are extremely efficient. However, due to the nature of this mechanism, there will be a delay or “turbo lag” before you can notice a power increase. This lag during spool-up means there is no instant response like with a supercharger.

With a turbocharger, you are typically looking at a 25% horsepower increase, although the peak power can be higher than a supercharger’s in some cases.

Nitrous

Essentially a portable supercharger/turbocharger, this upgrade is another favorite from Fast-and-Furious. It is also expensive, but it is considered by many to be more advantageous than a supercharger/turbocharger due to its portability. This might be the most appealing feature, even the deciding factor, as you can carry the kit from one car to another without losing your considerable investment.

Being another mod that deals with the air your engine “breathes,” Nitrous is like a can of “air maker.” It essentially creates more air for combustion in the engine, thus generating more power from those combustions.

Note that this engine enhancement is illegal in many countries and states, so check your local regulations carefully before making the investment, and a fairly significant investment at that. A Nitrous kit can cost you from $900 to over $3,000. On the positive side, however, they can be used to support a turbocharger or supercharger to reduce turbo lag and increase the final power boost.

Performance Chips/Aftermarket Software

For almost all factory turbo cars, a performance chip or tuner is by far the best bang for your buck when it comes to getting more power and efficiency from your vehicle. Pair one of these performance chips with other modifications on this list, and your beastly machine will be spitting fire in no time.

In addition to power, these tuners can also improve throttle response, fuel economy, towing power, gear ratio, air intake index, and more. Some chips are designed primarily to unlock the engine’s hidden power, which would require more fuel, while others are designed to increase your vehicle’s fuel consumption by optimizing other parameters.

One of the purposes of factory-installed chips, or the Engine Control Unit (ECU), is to ensure everything operates within specifications to comply with emissions regulations. From the factory, the ECU is often tuned conservatively to allow for lower-quality fuels and to minimize stress on the engine’s internal components. You can alter these specifications with the aim of optimizing power by installing a performance chip.

A performance chip is aftermarket software, also called a “flash,” and installing a performance chip is also referred to as “reflashing your car’s computer.” It is designed to take full advantage of your engine by adjusting ignition timing to smooth out the power delivery, which would often require higher-quality gasoline to do the job.

Furthermore, they also allow you to easily modify the air-fuel ratio and turbo boost, giving an instant power increase without you having to get under the hood and get your hands dirty. Just connect the chip to the OBD-II port to access the information.

These small kits allow for more power, torque, and even better gas mileage. Depending on the engine, you can see fairly significant power gains. This is a modification often done in conjunction with a turbocharger or supercharger, as the aftermarket software also allows the turbocharger to produce more boost pressure, which equals more engine power.

An important reminder is that if you choose to install a performance chip, make sure to buy from a reputable tuner, as engines are very sensitive to changes. Also note that software upgrades are often available in stages, where at each stage, you will need to select the upgrades that best suit your engine’s current setup.

How to Increase Horsepower: Air-Related Methods

You might have noticed a recurring theme by this point: an effective way to increase horsepower has a lot to do with air, and more specifically, as you will see later, with both the air your engine “inhales” and the air it “exhales” as exhaust.

Essentially, your car’s engine is a big air pump with a series of deliberate combustions that push as much air as possible in and out of it for optimal power. Ultimately, the faster, more efficiently, and cleaner your car can inhale and exhale, the more potential you have for power gains.

In other words, if you want to increase horsepower, you will essentially need to find different ways to provide air in a larger volume through your engine, and cleaner air, while helping your engine exhale more easily. More air means the engine will burn more fuel, and burning more air-fuel mixture means more power generated from the combustions.

The engine enhancement mods below will deal with air intake and exhaust to achieve this overall goal.

Velocity Stack

The name intake trumpets comes from the shape of these devices. Photo credit: Camaro6.

A velocity stack, also called intake trumpets, is a trumpet-shaped aftermarket part that is mounted on the air inlet of an engine’s intake system, the carburetor, or the fuel injector to improve airflow.

Velocity stacks improve airflow into the engine’s combustion chamber in three ways.

First, the trumpet shape smooths the airflow into the intake, allowing as much air as possible to flow through the given volume of the intake. Second, they smooth the airflow rushing into your intake, and smoother airflow means more air is flowing at any given time. Finally, these small devices purify the air and prevent carburetors without a plenum from vomiting fuel and catching fire.

Although this upgrade is simple and affordable, a properly tuned intake velocity stack would only add about a 3% power gain on average as a standalone installation, so it is usually done with other engine enhancements.

Why are these intake trumpets also installed on the carburetor or fuel injector? Quick recap. A carburetor was the most common and basic way for older car engines to get fuel, before the age of fuel injectors or fuel pumps. It mixes air and fuel before being drawn into your engine.

High-Performance Air Filter and Intake

Another quick, cheap, and easy way to increase your engine’s power, also used as a support module, is to replace your air filter with a high-performance filter. It allows your engine to breathe cleaner air, smoothes airflow, and thus gives a small amount of extra power.

Keep in mind that you need to check your state’s regulations as not all performance air filters are legal in all countries and states.

High-Performance Cold Air Intake

As mentioned above, the colder the air, the denser it is, meaning there is more air in a given volume. For this same reason, you might notice that a balloon may seem to deflate when you take it outside in cold weather, or your car’s tires seem to lose air in winter (the opposite is true, which is why it is recommended not to overinflate tires in hot weather, as they could burst due to hot, less dense air).

In other words, if you can somehow make the air entering your car’s engine denser, there will be more air molecules present to mix with the fuel to ignite for power production.

A high-performance cold air intake does exactly that. Cold air intakes draw colder air into the engine from outside the vehicle. High-performance cold air intakes are equipped with special filters that reduce resistance and unwanted turbulence that would otherwise prevent a steady airflow to the engine. In addition to smoothing airflow, these filters also increase the surface area from which air is drawn into the engine, sometimes up to three times larger than your standard factory air intakes.

Intercooler Kit

As above, an intercooler kit is often installed to complement a turbocharger. Similar to a high-performance cold air intake, installing an intercooler kit will also make your engine breathe more air. It does this with the same mechanism: cooling the air supplied to the engine to condense it.

An intercooler, or “charge air cooler,” is an air-to-air or air-to-liquid heat exchange device used on turbocharged and supercharged internal combustion engines to improve their volumetric efficiency by increasing the intake air charge density through isochoric cooling.

Simply put, a heat exchanger is a device designed to efficiently transfer or “exchange” heat from one matter to another. When a fluid is used to transfer heat, the fluid can be a liquid, such as water or oil, or can be moving air.

Basically, an intercooler uses air from the atmosphere, circulating it over and around many finned tubes to remove heat from the intake air charge, meaning it reduces the temperature of the air that has been pressurized by the supercharger/turbocharger flowing through the intake tubes.

High Idle During Acceleration: Causes and Solutions

RPM is an important parameter that determines the ideal time to shift gears on a manual transmission car. Shifting at the most ideal RPM helps optimize fuel combustion and prolongs the engine’s lifespan. High RPM during acceleration or driving is one of the abnormal signs appearing in the car; the driver must take corrective measures at that time to limit unnecessary risks.

What is RPM in a car?

Before going into the details of each cause of high RPM, we should have basic knowledge about car RPM to understand the meaning of this parameter and what it does. RPM is a parameter that affects your car’s performance, which is closely related to capacity and torque. Simply put, RPM is the number of revolutions of the car’s engine in 1 minute. RPM stands for Revolutions Per Minute, displayed on the tachometer in the digital dashboard (instrument panel) in the cabin.

RPM is inversely proportional to the car’s speed levels and proportional to the vehicle’s capacity, reaching a maximum speed of 5,000 to 10,000 RPM for race cars. For each speed level, the ideal RPM is not the same. The higher the RPM, the higher the engine displacement, the faster the vehicle moves, and the higher the fuel consumption and engine noise during driving. The more the engine revs, the louder the noise it makes. If the engine operates near the overload threshold, the roar will be very loud. RPM is an important parameter for knowing:

  • Decide when to shift gears on a manual transmission car.
  • Make the car maximize fuel by shifting gears at the right time.
  • Determine if the engine and transmission are working properly.
  • Find the right driving method to prolong the engine’s lifespan.
Car RPM high during acceleration: Let’s find the cause and treat it as soon as possible (Photo: pinterest.com)

What is a normal RPM when driving?

To save fuel, optimize engine capacity, and move smoothly on the road, drivers must be flexible in gear changes and adjusting the engine RPM to an ideal state. So, how many RPM is reasonable? For gasoline engines, in idle mode, the RPM is stable at 700 – 800 RPM. When the car starts or restarts after a long period of inactivity, the RPM fluctuates around 1000 RPM to warm up the engine and create a suitable temperature. Furthermore, some drivers wonder what is a normal RPM during acceleration? When you accelerate lightly, shift to the next highest gear when the RPM is around 3,000 RPM. During hard acceleration, shift gears when the RPM gauge reads about 4,000 to 5,000 RPM.

When the car is driving normally on the road, the RPM varies with each speed level on your car:

  • 1st, 2nd: 1,400 – 1,800 RPM
  • 3rd, 4th: 1,300 – 1,700 RPM
  • 3rd, 4th, 5th: 1,200 – 1,600 RPM

These numbers are the standard allowing the driver to drive the car smoothly on the road, shifting gears flexibly on each terrain, ensuring safety when participating in traffic. In case of emergency braking, while driving at high speed, the driver must reduce the engine RPM to less than 1,000 RPM according to the “smooth point receiving the gear change” rule to know the ideal RPM before performing the gear shifting operation. If you are driving on an open road, with few obstacles, the ideal RPM is only 1,200 RPM.

High RPM during acceleration: 7 common reasons

If you have ever experienced driving on the street and noticed that your RPM jumps during acceleration, it causes your engine to consume more fuel. It can even lead to engine overheating. You are not alone. Many drivers tell us they have encountered this problem and wonder “Why does my RPM keep jumping?”. Therefore, it is necessary to check to find the cause and fix it as soon as possible. Drivers should carefully learn some of the reasons below to apply a reasonable solution:

Vacuum leak

A vacuum leak occurs when more air is injected into the internal combustion engine; this extra air is not detected or “read” by the engine computer – this is the part that calculates the correct amount of fuel that can ideally be injected into the engine, thus creating a bad fuel-air mixture and is often called a bad fuel-air mixture. A leaking vacuum allows air to enter, increasing the amount of air in the engine cylinder’s combustion chamber.

At this point, the ECU receives the signal and adjusts the amount of fuel accordingly, which is the cause of the error that makes the RPM increase. To detect the vacuum leak, you can use a spray bottle to spray the soap and water mixture around the suspected leak areas. The leak will suck in the water, which you can see with the naked eye. Otherwise, the engine will temporarily run smoothly because the water seals the leak, improving the air-fuel ratio.

When you realize your car has high RPM. Don’t forget to check the car’s vacuum leak (Photo: pinterest.com)

Clogged fuel injector

The fuel injector is the part responsible for supplying fuel to the vehicle, specifically injecting fuel directly into the engine cylinders. This directly affects the vehicle’s acceleration. When the injectors are clogged with dirt and impurities, it will cause acceleration problems. Because the damaged injector cannot give the exact amount of fuel to your engine, it can lead to increases and stagnation and cause the RPM to go up and down, especially during acceleration.

Dirty air filters

The filter system works like a “lung” in a car engine. Air filters are your vehicle’s first line of defense by preventing airborne contaminants from being sucked into the engine compartment. Over time, the air filter is easily covered with dust and other substances and generally loses the ability to filter air entering the engine. For this reason, unstable airflow can enter your engine, which causes RPM to fluctuate and prevents you from starting or accelerating.

Timing problems

Timing is more important in your engine because the timing of fuel injection and valve opening will determine the engine’s power. If the valve is outdated, it will affect your car’s performance and fuel consumption. This can lead to RPM jumping up and down during acceleration.

Transmission problems

When you have problems with transmission fluid issues, it will cause high RPM when the automatic transmission shifts gears. Transmission fluid helps lubricate the transmission gears and some other engine parts. This fluid helps lubricate, prevent rust, prevent corrosion, and cool the engine. Your vehicle starts to rev at a higher speed when the fluid starts to leak due to transmission band or torque converter slippage. Some other signs of a transmission fluid leak are irregular or delayed gear shifts.

Malfunctioning idle control valve

Checking the idle control valve is one of the important steps recommended by mechanics when experiencing high RPM during driving. The idle valve is a component commonly installed in fuel-injected vehicles with the function of controlling the engine’s rotational speed. The ISC valve is installed to regulate and maintain the engine’s idle speed at a constant speed. If the valve fails or a malfunction occurs, the load speed will be unstable, abnormally high or low, continuously decreasing or increasing. This is the reason why the RPM jumps erratically.

Dirty/damaged oxygen sensor

There are many causes of oxygen sensor fouling, such as a coolant leak, gasoline additives… The oxygen sensor functions to measure the amount of residual oxygen in the exhaust gases. A faulty oxygen sensor affects its ability to react to excess oxygen in the exhaust gases, which leads the ECU to misalign the air ratio. A greater supply of fuel and air to the combustion chamber requires the engine to run more powerfully. This leads to an increase in RPM.

How to avoid high RPM during acceleration?

How to protect your car from high RPM while driving? Follow these tips! (Photo: pinterest.com)

Every car has a tachometer and is marked with a red line. If the red line signal appears continuously for a long time, it will seriously affect the engine parts. The driver should take the car to the nearest repair shop for inspection, or you can follow a few simple methods to overcome and avoid the situation of RPM jumping.

  • The first thing you should be concerned about is your engine. There may be problems in your engine that can cause RPM to jump. The engine light on the dashboard comes on when this happens. If you don’t have much experience in car repair. Checking and finding your engine problems should be diagnosed by a professional mechanic, so have your car checked for this fix.
  • Regularly check and clean the parts in the car’s engine compartment, such as fuel injectors, air filters, sensors, and valves… to ensure these parts are still working properly. For example: When checking the valves and found that the valves are covered with dust and dirt. This might be the reason for the car’s condition. Carefully clean the sensor and clean the plungers and the intake throat. Put the sensor back in place and start the engine, check that the engine RPM is around 1200 RPM. After a while, the RPM returned stable to 1000 RPM.
  • Perform regular car maintenance to detect problems early and take timely preventive measures.

FAQ

How to effectively increase RPM

With a gasoline engine, the engine RPM normally runs in the range of 700 to 750 RPM when the car is idling. At this time, the temperature fluctuates in the range of 80 to 90 degrees to ensure the car’s engine runs stably and smoothly. If you feel the car has jerks due to idling for a while, it’s time to automatically increase the engine RPM to 1,000 RPM at once. The driver should not worry too much because the way to increase the engine RPM will be very simple if you know the rules of adjusting the gear ratio according to the engine RPM.

During operation, if the car is running in 1st to 2nd gear, the driver should increase the RPM to reach between 1,400 and 1,800 RPM. If shifting from 2nd to 3rd gear, the driver should only let the engine rev to about 1,300 – 1,700 RPM; in the case where the car is in 3rd – 5th gear, the RPM will only increase in the range of 1,200 – 1,600 RPM.

How to use the tachometer?

Shift one gear at a time, not several gears at once: if you skip gears, you might accidentally rev the RPM up to the red line. Maintain energy efficiency usage: For better fuel economy, keep the RPM between 1,500 and 2,000 RPM when driving at a constant speed. The higher the RPM, the more fuel the car consumes.

Is it bad to drive the car at low RPM?

Low RPM is neither bad nor damaging to your engine if you stay reasonable. Low RPM (5th gear and about 50-60 km/h) is acceptable when you are cruising or slowing down, but when you start to accelerate, low RPM disadvantages the engine when shifting gears. You can imagine when you are driving at low speed and suddenly you want to accelerate. When this happens, it will put a lot of strain on the clutch, crankshaft, and bearings, but it won’t really do too much damage to the engine.

Final thoughts

RPM is a parameter that indicates the engine’s rotational speed; a fast-spinning engine will produce enough power to help the car move quickly. Normally, the car will run stably at a certain RPM. However, if your RPM is suddenly higher or abnormally slow while the car is still driving in normal mode or accelerating, the engine is likely to have a huge problem, or there are issues with your car.

In the analysis above, we mentioned some causes of high RPM during acceleration. Corresponding to each cause, we will have different solutions, but not all measures we can do or repair at home. If you cannot diagnose or find the exact reasons and solutions to this phenomenon, do not hesitate to be assisted by professional mechanics.

What happens if you overfill power steering fluid

“It’s better to have too much than too little” Do you think this saying is always correct in all situations? It may be suitable in some circumstances, but it won’t be ideal when you apply it to filling your power steering reservoir. This article will discuss the consequences and symptoms of overfilled power steering fluid. Read on for more unresolved inconveniences!

What is the purpose of power steering fluid?

Currently, all car models have an additional power steering system to make vehicle operation safer and more flexible. However, for this system to be stable, specialized lubricants are needed. So, how does power steering fluid work? Power steering fluid is a special auxiliary liquid that lubricates the hydraulic system (pump, valve) of the power steering. Power steering oil helps the driver handle the steering wheel more easily, helping them avoid needing to use too much force while driving the car accurately and smoothly.

In the hydraulic power steering system, this fluid plays a very important role in creating the rack’s thrust, to help the steering wheel turn as the driver wishes. If the vehicle lacks power steering fluid, the steering system will be affected. Specifically, when the oil pressure does not reach the required level, the force is not sufficient, leading to the phenomenon of heavy power steering, and slow steering return…

Too much power steering fluid can cause leaks that can reach the reservoir (Photo: pinterest.com)

How much power steering fluid does a car hold?

There is no fixed amount for how much power steering fluid is sufficient for your car? It will depend on each model as well as the unique requirements of each vehicle and this will make the process of identifying the fluid volume a bit more difficult than you think.

To know exactly how much power steering fluid is left? You can use the dipstick. If you use the dipstick to check the power steering fluid level, first wipe off the excess oil from the dipstick when you pull it out of the cylinder, then plug it back in and pull it out. The second way is that you can easily observe visually. If the reservoir cylinder is made of transparent plastic, you can see the oil level inside the cylinder. In some vehicles, the power steering fluid level can only be accurately checked after the engine has run for a short period, and you may sometimes need to turn the steering wheel in several directions multiple times while the vehicle is idling.

On the dipstick or on the oil reservoir, there are usually lines marking the maximum and minimum levels. If the oil level is near or below the maximum, the power steering fluid is topped up. In other vehicles, the level on the dipstick or cylinder is both “high,” after the engine runs, and a “low” level after the engine has been off for a while. Or, there may be “Min” and “Max” lines for the usable oil level. Be sure to compare the power steering fluid level with the standard level.

For the amount you need to buy, a one-liter bottle will be enough to fill, whereas you will need about two liters for a flush.

What happens if you overfill power steering fluid?

Is it bad to overfill power steering fluid? This action does not damage the power steering system. But it can give you other harmful consequences. Overfilling your car’s power steering fluid can cause leaks that can reach the reservoir. This can then cause foaming in the hydraulic fluid, which can shorten the lifespan of your system, even when the fluid becomes expensive and it can make its way out of the reservoir. Common symptoms are described below:

Fluid leak and making a mess for your engine

In the first stage, it’s easy to ignore the symptoms because there is no problem for your car. However, don’t be subjective! When you overfill your power steering reservoir, it overflows. When the engine starts to increase the temperature under the hood, the steering fluid begins to expand. Over time, the fluid will accumulate in many places where it shouldn’t be, for example in your engine belts. Before you know it, the belts can slip or break and prevent your engine from running.

However, the consequences don’t stop there, when the power steering fluid expands due to heat, this fluid will spill out of the reservoir and make a mess of your engine. And in some severe scenarios, your engine will run excessively until it catches fire and completely breaks down. Read here that many drivers may wonder “Is power steering fluid flammable?” Our answer is “No,” it only burns under certain circumstances.

More specifically, “Any fluid that catches fire and has a flash point equal to or less than 199.4 degrees F is considered a liquid” according to OSHA. Power steering fluid only burns at a sufficiently hot temperature, particularly when the ambient temperature reaches 400 degrees F. However, this temperature can be fully reached when your engine is overloaded, so if the fluid is spilled, a fire is inevitable.

Is it bad to overfill power steering fluid? It does not damage the power steering system. But it can give you other harmful consequences. (Photo: flickr.com)

Engine parts are prone to wear

You need to fill the power steering to the mark mentioned on the reservoir, or on the dipstick. If there is too much fluid, it can cause air bubbles or foam inside the pipes during your filling. And the consequences will reduce your steering performance and make turning difficult.

When the power steering leaks, it will seep into other parts of the engine compartment such as batteries, belts, etc., which will affect the performance of these parts and cause them to wear out faster.

How to drain excess power steering fluid?

We have shared with you the consequences of overfilled power steering fluid. How to remove overfilled power steering fluid? There are different methods you can use to flush your power steering fluid to achieve the ideal fluid level for the steering system.

Using a turkey baster or a syringe

An effective way to help you extract excess fluid is to use a syringe or a juice baster. This can be a tedious or time-consuming process, but it is considered one of the best methods compared to other expensive methods. If you don’t want to waste the excess fluid after suction, you can use a container to hold this fluid and prevent this fluid from splashing which will contaminate your engine compartment.

You can use this method when replacing the old fluid with the new one. Use a juice baster to suck out all the old fluid. Then add the new power steering fluid and you’re done. However, by sucking the fluid this way, it can only absorb the oil in the reservoir, not all the power steering fluid in the system. Therefore, a few additional steps are needed. Specifically, after the first suction, add a little new fluid to the reservoir, then drive for about 15-20 minutes to let the new fluid mix with the old oil. Then use the Turkey Baster to suck out all the oil. Then, continue putting in new oil, run the car, and suck out the fluid.

Flushing the power steering fluid

With the car raised and the wheels lifted off the ground, we can easily do the step. But compared to using the syringe, this method will be a bit more complicated. Because you will need to add one more step: lifting your car.

Step 1: Use the car jack to lift the chassis.

Step 2: Disconnect the oil hose from the return hose and attach the plastic tube in its place. Remember to lift the other end of the plastic tube so that the power steering fluid does not leak out.

Step 3: Set the return hose into the reservoir to catch the excess fluid.

Step 4: Start the car, steer the wheel from left to right and vice versa. This will help the steering fluid flow into the return hose.

Step 5: Turn off the car engine, reinstall the return hose as before and remember to tighten the nut firmly.

Step 6: Restart your car and turn the steering wheel fully from left to right and vice versa so that the vehicle doesn’t have air foam in the system.

When to change the power steering fluid?

When you change the power steering fluid, make sure you know exactly how much power steering fluid does a car hold? (Photo: flickr.com)

According to car manufacturers’ recommendations, the time for periodic draining of power steering oil is every 60,000 to 80,000 km. Under normal operating conditions, power steering oil is rarely lost quickly. However, if the vehicle shows the following signs, it is necessary to check the power steering oil:

The steering system makes strange noises: When the car lacks power steering fluid, the steering system often makes noise, especially when the car is moving slowly.

The steering wheel is heavy and hard to turn: Because the power steering system is malfunctioning, the steering wheel will be heavy and difficult to turn.

Slow steering return: When there is a shortage of power steering oil, the oil pressure decreases and the steering wheel moves slower than usual, which slows down the steering wheel.

The steering wheel jerks suddenly or vibrates slightly: This phenomenon occurs when the car is moving slowly.

Power steering fluid leak: If you see traces under the car, it may be because the car has a power steering oil leak. This is the cause of the car’s fluid loss.

Final thoughts: Can you overfill power steering fluid?

To ensure a smooth and precise steering system, you shouldn’t only need to check and change the power steering oil. But we recommend checking the fluid level in the reservoir. Overfilling is still not good, it can lead to catastrophic problems. We hope our shares will help you find a useful way to deal with the symptoms of overfilled power steering fluid. And you know when to check your engine.

Bubbles in Transmission Fluid: 5 Causes and Repair Guide

The last time you checked the transmission fluid, you noticed that there was a small bubble forming on the fluid and that it would be difficult to read the dipstick exactly. Although they may seem harmless, they have an impact on the fluid’s efficiency.

If more bubbles appear on the fluid, it’s a sign telling you that there is a problem with the car’s transmission. Whatever their origin, bubbles in the transmission fluid are a worrying problem that requires special attention.

What Causes Air Bubbles in Transmission Fluid?

We are sure that every driver knows how transmission fluid works in your car. This fluid is a lubricant that lubricates, reduces friction, prevents rust, etc., to help the gears inside the transmission operate smoothly.

Furthermore, transmission fluid also has the role of cooling the transmission components, keeping them at the permitted temperature. Especially for cars with automatic transmission, the transmission fluid is also involved in the operation of the hydraulic clutch. Therefore, ensuring the quality of the transmission fluid is key to maintaining your transmission and vehicle in good condition.

To do this, drivers must regularly check the transmission fluid for abnormal conditions. And air bubbles in the transmission fluid are one of the phenomena we want to mention in this article. What causes these bubbles and how does it affect the quality of the transmission fluid? Continue reading:

Overfilling the Transmission with Fluid

Everyone knows that transmission fluid has a great influence on the engine’s lifespan and the vehicle’s performance. Therefore, many drivers often pour a little extra when changing the fluid because everyone thinks that “too much is better than not enough.” However, too much of anything is not good. When overfilling, exceeding the level specified in the manual, the residual fluid has no room to circulate.

Thus, when the car’s engine runs, the gears turn, and the excess transmission fluid will be mixed with air. And foam appears. As you probably already know, foamy fluid cannot do a good job of lubricating the machine parts. This situation lasts a long time, leading to overheating. Even gradually damaging the parts of your car’s transmission and engine.

Overfilling transmission fluid can cause air bubbles in the transmission fluid (Photo: pinterest.com)

Fluid Level Too Low

The phenomenon of low transmission fluid is that the amount of oil is below the specified level or the fluid has started to deteriorate. At that moment, the parts inside the car’s transmission box are quickly worn and damaged, especially the seals and gaskets. This makes the car’s transmission almost impossible to operate at full capacity, causing damage to the vehicle, and even a risk of fire and explosion due to an oil leak.

Car seals are mainly made of rubber; they are both subjected to high impact forces and high temperature changes, so they are quickly worn, cracked, broken, torn… when your transmission doesn’t have enough fluid. This allows external factors: dust and air to infiltrate the transmission, which contaminates your fluid and creates air foam. In case of a severe seal leak, the car will lock up, slip, and be damaged. Therefore, car owners must pay attention to checking the rubber seals and should replace new seals when the vehicle has been driven for 10,000 km.

The Filter is Clogged

As its name suggests, a transmission filter is a component that helps remove impurities from the transmission fluid. The transmission fluid becomes bubbly due to a damaged transmission filter. It is possible that the filter is clogged or the filter is not installed correctly. This might be the reason you are sucking air into your transmission.

Mixing Transmission Fluid with Other Additives

During maintenance or fluid change, other additives such as chlorine, soda, or borax may be mixed with the ATF. When mixed with these compounds, they can create a new fluid totally unsuitable for your engine. And that’s what causes bubbles in the transmission fluid. Furthermore, using transmission fluid that is not according to the manufacturer’s recommendations can also lead to foam formation and more serious consequences that can damage your transmission. Using the wrong transmission fluid can affect the performance and lifespan of the transmission. Many car manufacturers already have their own fluid for their models because differences in viscosity and heat resistance can be factors that can distort the operation of the gearbox.

Transmission Pump Failure

The pump is an important part of your car’s transmission. The main responsibility of this component is to circulate the transmission fluid throughout the gearbox system and maintain the proper pressure. When the PT shows signs of damage, it will cause internal contamination of the transmission fluid by allowing air to enter the transmission system.

How Do Air Bubbles Affect the Transmission Fluid in the Car?

Many drivers think that bubbles in the transmission fluid are a simple problem and easy to ignore. However, the consequence can be very serious; it will damage your gearbox and can cost you thousands of euros to replace the entire system:

When air bubbles appear and accumulate in your transmission fluid, the gearbox cannot do the job of transferring heat easily, and the heat from its moving components is concentrated in the areas where friction occurs. When this phenomenon combines with the oxygen from the air, it can ignite the fluid. In this situation, drivers can smell a strange odor due to burnt fluid, and if you check the transmission fluid, you will see it turning a brown color. Replacing all the fluid is an unavoidable thing.

This can cause aeration of the transmission fluid, or you can call it “aeration.” Aeration is done by bubbles in your transmission lines and integrating into the fluid. Aerated fluid can cause many problems in a hydraulic fluid and lubrication system. These bubbles will move throughout the gearbox system and hinder the fluid’s efficiency, which will give the components enough air to cause damage and friction.

How to Remove and Prevent Bubbles in Transmission Fluid?

If your transmission fluid starts to form small bubbles, you can follow these methods to get rid of this problem:

Get Rid of the Old Fluid

When you are not careful and let other additives seep into the transmission fluid or use the wrong type of fluid, causing air bubbles, the best remedy is to replace all the fluid.

  • First, you need to check the color to know whether the fluid needs to be changed or not. If your car’s fluid is red or pink or light brown, it can still be used. If it is dark brown, milky brown, or has an unpleasant/burnt smell, the fluid must be changed.
  • Preheat the engine before flushing the fluid. Draining the fluid in an automatic transmission is more complicated than in a diesel, so you need to flush the fluid at the bottom of the pan and also in the torque converter.
  • Add new transmission fluid recommended by the manufacturers.

The way to change car transmission fluid in each vehicle is different, so you must pay attention to know how your car should be changed. For some vehicles, it is necessary to completely change the fluid, but in some other types, only the lost fluid needs to be added and not replaced.

If you check that there is too much transmission fluid in the car, you can fix it by extracting the excess fluid. (Photo: pinterest.com)

Check the Fluid Level

Inspect the transmission fluid to know if the fluid level is too high or too low.

  • In this case, if you check that there is too much fluid in the reservoir, you can remedy it by extracting the surplus fluid. There are two ways to help you perform this process: the first is to drain it from the bottom and the second is to suck it out from the top. You can easily drain the fluid by unscrewing the drain plug. The advantage of this method is that it doesn’t cost you too much money to do it. But it will take a lot of time to prepare, and you don’t know exactly how much fluid you are draining. To limit these disadvantages, the second method will help you. Using a fluid transfer pump makes it much easier to remove the excess fluid. You can also use a temporary pump made of a large syringe and a rubber tube. Using these 2 methods can help you reach your ideal transmission fluid level.
  • Unlike overfilling the fluid, you can easily fix the problem when the transmission fluid is low by adding more fluid until it reaches the proper level. On your car’s transmission, there are many details that are subject to friction as much as the engine. Transmission fluid is an indispensable catalyst, helping to lubricate, cool, and protect the internal components for stable operation. If there is a shortage of transmission fluid, the car will run very poorly and even suffer significant damage as well as many possible dangerous problems. You can pour more fluid by removing the dipstick, placing a funnel, and adding fluid to the reservoir. Remember to note the level to ensure the transmission fluid is full (but not too much).

Inspect the Seals, Gaskets, and Filters

Seals, gaskets, and filters are the main parts and play an important role in your car’s transmission. When you detect something happening to these components. You must replace them as soon as possible. Or you can take your car to the mechanic to have it checked and repaired. Make sure the filter and seals are securely fixed and in good condition.

In some situations, when your seal is damaged or broken, you can use the additive: head gasket sealant to quickly repair leaks on the burst head gasket. However, when using this additive, you must follow and check the usage instructions for this product. When poured into the vehicle, it can react with heat by leaving powder deposits that accumulate over time.

Final Thoughts

Maintaining the transmission fluid at the proper level and ensuring the quality of this fluid not only helps the car run better and more powerfully but also increases the lifespan of your gearbox. And bubbles in the transmission fluid are a growing concern, which we think all drivers should check while driving because it can directly affect the fluid’s efficiency.

In the article, we shared with you the cause and a few methods to help you solve this problem. With this guide, we hope you will have a deeper knowledge to know how to fix it when you encounter this situation.

Replacing Rusty Brake Lines: 5 Simple Steps to Follow

Replacing Rusted Brake Lines is a bit tricky. How to make this job easier, let’s dive into our article to learn step by step how to change your car’s brake lines when they are rusted and gain knowledge about this small part.

Car Brake Lines: Working Principle

Although car brake lines are not the most visible parts of the braking system and rarely receive much attention, they play a key role in the operation and performance of the car brake. And this can directly affect your road safety. What are brake lines on a car? Brake lines are designed with the function of connecting the braking system and running the length of your car.

Another important function is converting the impact force from the pedal into stopping power. You can simply understand that when you press the pedal, the force from your foot will be transferred to the braking system via the brake lines. This system uses brake fluid to apply pressure to the brake calipers, creating friction between the rotor and the brake pads. A car slows down and then stops when the brake calipers grip the braking system.

Most cars today often use hydraulic brakes. This means using fluid to transfer the force from your foot to the brake and make your car stop. In this case, the brake lines will have the responsibility of carrying the brake fluid stored in a master cylinder to other parts of your braking system, which means the braking system will not function without brake lines. From this, we are sure you know the importance of this part and why you need to maintain and check the brake lines like other important parts of your car.

Where are the brake lines on a car? The brake line is designed under the car, that’s where it comes into contact with dirt (Photo: carthrottle)

Why Do Brake Lines Rust?

Rust is one of the common problems for many vehicles. Corrosion (oxidation) can happen to metal or rubber and even plastic. It’s essentially oxygen and other elements from the environment attacking the car parts. As we know, brake lines are made mainly of metal (steel or stainless steel tubing) which is always coated with plastic to prevent corrosion. In terms of materials, brake lines are considered one of the most easily corroded parts on cars and they can naturally deteriorate from heat and moisture.

According to the structure, the brake line is designed under the car, that’s where it comes into contact with dirt (salt). Brake lines can be rusted by the salt spread on icy roads in cold weather. These factors mixed with moisture will accelerate the corrosion process.

Furthermore, the main cause of rust in brake lines is abrasion. Rusted brake lines are a sign that the outer protective layer has been damaged. Corrosion causes a change in the material’s surface and eventually erosion of the metal. For vehicles that have been used for a long time, the protective coating of the brake line (plastic) is easily worn away by dirt and collisions. When this layer is disabled, the brake line will be in direct contact with the air and external substances, causing significant rust.

What Happens If Your Brake Lines Are Rusted?

When brake lines are corroded, will it affect the operation of your braking system? Are rusted brake lines dangerous? We can state that rusted or damaged brake lines can be a potential risk when you are driving and it can even cause your braking system to fail completely. Corrosion on brake lines is one of the main killers due to fluid leaks. When the brake line rust is in the worst condition, it will tend to break, which will lead to a brake fluid leak.

Once you press the pedal, the pressure will transfer the brake fluid via the lines and activate the brake calipers. When the brake lines have broken, the fluid leaked out and did not have enough pressure for the calipers. Of course, in this situation, the braking action will not occur and you already know the consequence when your car suddenly loses the ability to slow down and stop.

Many drivers share with us: if my brake lines are rusted then how to repair a brake line? And our answer is: depending on the rust condition of the brake line, we will take appropriate measures, but replacing the brake line may be the best method. However, how to do this? The question will be explained in the next part.

Replacing Rusted Brake Lines: 5 Simple Steps

Before starting to replace the rusted brake lines, you need to prepare some necessary tools for this process if you have decided to fix it yourself:

  • New brake lines
  • Flare nut wrenches
  • Flaring tool kit
  • Bending pliers
  • Brake fluid
  • Tube cutter
  • A debugging tool
How to repair rusted brake lines? Scroll down to know the detailed steps (Photo: pinterest)

Step 1: Remove the Rusted Brake Lines

To facilitate the replacement process, the first step, you need to jack up your car and ensure to secure the 4 corners on the jack. The metal brake lines run from the chassis to the master cylinders. If the brake fluid is leaking near a wheel, you need to remove the wheel where you are going to replace a line.

After that, you will start inspecting each part of the brake lines to locate the line that has corroded. In this step, we recommend you wear safety glasses to prevent debris from getting into your eyes during inspection and replacement, as dirt from rust spots can affect your eyes.

Use a wrench to unscrew both ends of the brake line. If the nuts are rusted, you can spray them with oil to ease the process. You should have a cloth ready to wipe up any spilled fluid. As brake fluid is corrosive and can damage paint, clean it immediately if it leaks.

If you want to replace the entire line, you can use the wrenches to remove the brake lines. You just need to cut the section of the line and use a mini tube cutter to remove the rusted brake line section. When removing the rusted brake line, you need to be careful not to accidentally cut or loosen any other wires designed at the end of the brake line. If you want to replace the entire brake line, you can use a flat-head screwdriver to remove that brake line.

Step 2: Prepare the New Lines

First, you need to know exactly the length of the old brake lines, you can use a ruler or measuring tape to do this and the advice for this step is that you need to pay attention to the bend to ensure you get the precise result.

Use the cutting tools to cut the new brake line to the required lengths. Do not cut your line too short, you need to leave about 1/4 inch remaining to allow for flaring. Take your time and turn the tube cutter knob a quarter turn at a time until the blade just touches the metal. You may need to do this several times until the cut is complete.

Step 3: Bend the New Brake Lines

How to bend the new brake lines and can you do it by hand? You can bend the new brake line based on the old line simulation. And make some gentle bends in the new lines by hand. Depending on the material of the brake line. If the brake line is copper or some resistant materials. You can use a machine to bend it for major bends like 90 degrees. Before bending, you need to slide a new fitting onto the line. Then, use a crimping plier to make the first bend. Match the old brake line and the new line, put the bender in place, and start bending.

Step 4: Flare the New Brake Line

Remember that you must put the fitting on carefully before flaring the new brake line up to the point where it is fixed and tighten it. Continue with the frame and reattach first at the lower end, then remove your socket and reattach it there. In this step, you need to ensure the fitting meets the manufacturer’s specifications.

The fitting must be slipped onto the line before placing the line on the flare. Because you cannot install the coupling when the flare is made.

You need to choose an adapter that fits the size of the brake line. If you read the instructions, they will show that the adapter has a few bumps on it. After locating the bumps, we align the adapter and the brake line with the first bump. Then we can go ahead and close our clamps.

Note that: You must tighten the collar or the brake line will slip. Insert the pin end into the brake line and insert the tapered tool to push the die into place, forming a line, the cone will have a recess where it rests on the die. Tighten the tapered tool until it stops, remove the mold, and reinsert the tapered tool so the flare can be folded back. Press until it stops.

Step 5: Install the New Brake Line

In this step, you will connect the new brake line piece to the coupling and pair the old and new brake line with an adapter. Hold the link with an open-end wrench and tighten each joint with a flare wrench.

With the 5 steps we analyzed above, do you think repairing rusted brake lines will be easy for you? So “How long does it take to replace brake lines?” Replacing rusted brake lines is always a quick process. It just takes you about 1 or 2 hours depending on your experience.

Brake line replacement is a simple process you can do at home. (Photo: pinterest)

How to Protect Brake Lines from Corrosion?

It is easy for your brake lines to rust, so how to keep this part always in good condition? Normally, brake lines are designed with a lifespan as long as the car. However, the function of brake lines also depends on the environment when you live in a “cold climate”. To prevent the lines from rusting, we will share with you a few tips:

  • You can coat the brake line with anti-rust or spray paint just to prevent them from rusting. If your brake lines are steel and do not have a plastic or rubber coating. It would be a good idea if you used stainless steel or nickel-copper instead of steel for the brake lines. Because nickel-copper is anti-corrosion and it does not rust and can last a very long time. Before applying the paint or rust extender, you can clean the dirt on the line using alcohol.
  • Take the car to the service center to periodically check for underbody rust. The undercarriages should be washed and clean during winter for a very simple reason: to remove corrosive salts from the road. In case of severe corrosion of the brake lines. The NHTSA’s advice to drivers is to replace the entire brake hose.
  • You can limit rusted brake lines by changing the brake fluid periodically (every two years or sooner). The reason is that brake fluid accumulates deposits over time. This also causes corrosion from the inside of the brake lines.

Conclusion: Replacing Rusted Brake Lines

Brake lines are steel or copper tubes that carry brake fluid from the master cylinder to the ABS units, proportioning valves, calipers, and wheel cylinders. Brake lines wear out over time, steel lines corrode and eventually crack. And when brake lines are faulty, it may require you to replace the entire braking system. And most importantly, it can directly affect your safety and that of your passengers.

Any car can blow a brake line. However, it happens more frequently in de-icing salt or when your brakes are steel. Therefore, to ensure the brake lines are always in the best condition. You should check them regularly, especially in winter. To conclude this topic, we want to affirm that: the brake line is a very important part. If you notice signs of rusted brake lines, do not delay in repairing or replacing them.

How long does it take for a car to cool down?

Engine overheating is a serious problem, and unfortunately not too rare. When dealing with an overheated engine, you must handle it carefully, otherwise you risk causing further damage. On one hand, you need to know how long it takes for a car to cool down before you can inspect and troubleshoot or try quick fixes. Not just when dealing with an overheated engine, this is basic car maintenance knowledge to safely care for your beloved vehicle.

Signs of an Overheating Engine

Hot weather and older vehicles are the two main factors for a car overheating. Not entirely unprecedented, but modern cars rarely suffer from this problem. It can occur when climbing a hill or being stuck in traffic on an exceptionally hot day.

When dealing with an overheated engine, you need to let the car cool down to safely inspect or add coolant. Photo Credit: Automoteve Blog

There are a few common signs you need to be aware of when your car’s engine starts to overheat.

  • The engine temperature gauge on the dashboard or driver’s console points to “H” or moves into the red zone of the gauge.
  • Steam that often looks like smoke coming from the front of the vehicle under the hood.
  • Strange smells or odors emanating from the front of the car, especially near the hood. Leaking coolant can often have a sweet smell, while oil leaks usually produce a burning smell.

If you notice these signs while driving, try turning off the air conditioning system as soon as you realize the car is overheating. This will relieve the engine and lower its temperature. Open the windows to speed up the process.

If turning off the air conditioning doesn’t solve the problem, turn on the heater and the fan. This seems counterintuitive, but turning on the heater draws heat away from the engine into the passenger compartment. This will reduce the load on the engine cooling system and lower its temperature.

Another quick fix: if you notice the temperature rising in traffic, rev the engine a little after shifting into “Park” or “Neutral.” This process speeds up the water pump and fan, drawing more air and water through the radiator. The increased circulation of fluid and air helps cool the engine.

Another helpful tip is that if you are in traffic jams, try to slow down rather than alternating between braking and accelerating. Braking generates a lot of friction, which will only worsen the engine overheating situation. This forces the engine to work harder and causes further damage.

When All Else Fails: Stop and Wait for the Engine to Cool

If your car continues to overheat after a few minutes of driving with the heater on, the A/C off, and the windows open, pull over safely to turn off the engine. This is the safest and most secure way to cool down an overheated engine.

How Long Does It Take for a Car to Cool Down?

The cooling time of a car depends on the normal atmospheric temperature and the engine temperature. Cooling time also varies from engine to engine.

It usually takes at least a good 30 minutes for an engine to cool down sufficiently to be safely inspected, as there will be boiling steam when you open the hood. A car engine is said to have cooled down when you can safely handle it, such as safely opening the radiator cap or checking the coolant level.

To safely open the radiator cap, you will need to wait 1 to 2 hours. But if you want to check the coolant level, it’s safer to wait about 3 to 5 hours. Note that by this time, the engine has cooled considerably, but the coolant has already expanded, so the gauge will show a false high reading, which could be mistaken for still being hot.

An overheating engine is not a problem to be underestimated. The correct procedure is to have your car’s cooling system inspected by a professional as soon as possible to resolve the root cause of the problem.

If you are too far from the nearest mechanics, the best thing to do is to have your vehicle towed to safety. Do not drive the car for more than a quarter of a mile to avoid further engine damage. Otherwise, if circumstances allow, you can try adding coolant to let your engine cool down so you can get to the nearest auto shop.

Quick Fix: Add Coolant

Engines typically overheat because the coolant is low, so filling it will usually solve the problem. When you have waited at least 15 minutes for the hood to be cool to the touch, it’s time to add coolant.

Note that this is only a temporary solution. Adding coolant does not solve the problem causing your engine to overheat in any way, but it often allows you to drive safely to the nearest repair station.

To safely add coolant, you need to wait at least 1 to 2 hours, or 3 to 5 hours to be safe, for the car to cool down.

Put on gloves, open the hood, and locate the radiator cap. You may want to consult the owner’s manual if you are unsure where the coolant reservoir is. It is usually a translucent plastic tank near the radiator.

If the coolant reservoir is empty, you might have a leak. Take a look under the car. If you notice a drip or a puddle of water, chances are the coolant reservoir is leaking.

If the culprit is a coolant leak, you will need to fill it. Make sure the radiator cap is cool before opening it. Note that when heated, coolant expands, leading to a pressure buildup. To safely remove the radiator cap, it is important to cover the cap with a towel and slowly push it down and loosen it a quarter turn, to release the built-up pressure.

Next, fully open the radiator cap and slowly add coolant, a half-water, half-antifreeze mixture, until the fluid reaches the “full” line. You should also add coolant to the small transparent plastic overflow tank mounted on the side of the radiator.

Then, replace the cap and start the engine. Also, make sure that the upper or lower radiator hose and none of the heater hoses have been blocked, disconnected, or burst.

Important safety tip: Do not pour cold water into a still-warm radiator. This could cause the engine block to crack due to the sudden temperature change. If you absolutely must add water while the engine is still warm, pour slowly while the engine is idling in neutral or park.

Furthermore, note that most cars require a 50/50 mix of coolant with water to prevent overheating, so you won’t be able to drive indefinitely with an overheated engine by just adding water to the coolant reservoir. If you don’t have coolant on hand when your car overheats, be sure to add a comparable amount of coolant as soon as possible.

Alternatively, if the coolant reservoir is full, the problem could be electrical or mechanical in nature. A leaking hose, a worn or broken fan belt, a faulty water pump, or a defective thermostat could be the cause. In this case, your best course of action is certainly to request a tow to the nearest repair shop.

If the temperature gauge returns to normal or the red light goes out, you can continue driving, but be cautious and monitor the temperature gauge or warning light.

Why Do Engines Overheat?

Today’s cars are equipped with sophisticated cooling systems featuring multiple heat sensors and computer-controlled electric fans designed to keep your engine running in all weather conditions. These superior features make overheating less likely in modern cars than in older models. However, overheating can still occur.

There are many reasons why your car might overheat, but essentially, overheating is caused by a problem with the vehicle’s cooling system that prevents heat from leaving the engine compartment. This is often due to a leak or a blockage somewhere in the engine cooling system or other components.

Components such as rubber hoses, gaskets, and water pumps are exposed to a high degree of regular wear and tear and can therefore easily cause a leak. Furthermore, certain driving conditions, like stop-and-go traffic in hot weather, can put significant strain on the cooling system, causing it to fail.

As with most car problems, maintenance is key. To minimize the risk of engine damage, it’s best to avoid this issue with regular maintenance by checking your car’s coolant and oil levels and inspecting the hoses, fans, thermostat, and other parts of the cooling system.

But what do you do if your temperature indicator starts climbing towards “H” or the dashboard light flashes? Knowing what to do when your car overheats could mean the difference between replacing a $20 thermostat and thousands of dollars in repairs.

Here are some symptoms of a bad turbo sensor

Do you know the potential symptoms of a bad turbo vane sensor? Under your car’s hood, a car engine turbocharger, or turbo for short, is a type of forced induction device. It increases the power of an internal combustion engine by introducing more compressed air into the combustion chamber. Compared to a naturally aspirated engine, an engine equipped with a turbo can draw in more air from outside. With the mission of assisting the turbo, the turbo vane sensor will help determine the amount of air drawn into the engine.

However, every supported car component that screams necessity on its face can be in an overloaded operating state and cause unexpected malfunctions or serious accidents without the driver realizing it. When a turbo sensor fails, the most common symptom you may encounter is a rumbling sound coming from the engine exhaust. Furthermore, in the case where the vane sensor detects that there is not enough necessary air, the throttle will remain closed longer than it is supposed to be. As a result, the wastegate may not open as quickly as it should or not function at all.

To better prepare for many more complicated problems to come, we will now look at some of the most typical symptoms that might indicate a faulty turbo vane sensor and some of its common causes.

Symptoms of a Bad Turbo Vane Sensor

Overall, there are many signs indicating that your turbo vane sensor is faulty. From visual inspection to detection, you can easily notice the faulty sensor in the blink of an eye. In the guide below, we will discuss these symptoms, not in a strict order, to give you a general understanding of the problem.

Rumbling Sounds in the Car Exhaust

The first symptom indicating a problematic sensor is when you come to a sudden stop, and then suddenly the engine exhaust emits a rumbling sound. After a few seconds, it will return to its typical hissing sound. In this case, you might also witness a lot of smoke unintentionally coming from the exhaust.

Inaccurate Temperature Gauge

Showing signs of a non-compliant turbo sensor, your car’s temperature gauge can also be erroneous. The temperature gauge may display inaccurate warnings because the turbo vane sensor is not working. And the computer system may assume responsibility for this issue. Under typical circumstances, the car computer has the mission of adjusting the engine temperature to stay within a specific range. However, when the turbocharger is operating at full capacity without being monitored by the sensor, the computer will no longer be able to maintain this temperature, causing faulty and disorganized procedures in the associated components.

Sudden Loss of Engine Power

Other symptoms of a bad turbo vane sensor are decreased acceleration and the sudden stopping of the car engine power when you are on the road. This problem is usually caused by the electronic control unit blocking the turbo vane sensor to effectively protect the engine. This also leads to dangers and costly consequences shortly.

turbo-charger-on-car-engine-with-hand

Emitting Black Smoke

Working overtime while sometimes being overused, the turbo vanes can get stuck because they are all covered in dirt or particles from diesel and carbonic gases from the engine or the environment. And it’s not surprising when not only the turbo vanes but also turbo sensor failures are also usually the result of accumulated dirt and grime, which can make the sensor less accurate.

Overall, if the turbo vanes and the sensor remain stuck in one of the positions as dirty obstacles, your vehicle may experience low power at the upper or lower end of the RPM range. And for the final straw, the car will then emit a wave of black smoke from the exhaust, leading to a not-so-pleasant driving time and potentially ruining your entire cool day.

Fuel Economy Decreases Rapidly

For a car enduring a faulty turbo, particularly the vane sensor, you may notice that its fuel economy can decrease drastically compared to the usual consumption in a short time.

In a set of electronic circuits, various calculated algorithms are used to determine a car’s overall performance, daily efficiency, and fuel economy. If an algorithm proves faulty, the engine may run on low-performance or non-performing fuel instead of high-performance fuel as it should.

Notable Error Codes: P2563 and P003A

If you try to increase your engine RPM above 1500 to 2300 RPM and your turbo vane sensor is not working properly, you may encounter problems. Furthermore, when your vehicle is inoperative while the engine is still on (idling), the turbo vanes open and close every few seconds (about five seconds). In this case, you will notice the check engine light turning on and the error codes P2563 and P003A.

These codes indicate that the car’s powertrain control module assumes the standard calibration is lost or other problems occurring in the turbocharger sensor or turbo vanes, which can affect the components of the entire car system in a not-so-good way. However, if you use the Duramax diesel V8 engine, you should check the p003aDuramax fault codes and their specified fixes as soon as possible.

Senseless Vibration

Turbochargers can cause vibrations when first installed on a vehicle during acceleration or during fast driving. Over time, this can lead to the wastegate stopping functioning or not responding, and eventually, the turbocharger and related details, as the turbo vane will completely stop working. And looking back, a faulty turbo vane sensor can often lead to this problem.

Too Loud and Vibratory

If the turbocharger compresses the exhaust gases too much, it can damage the engine. In this particular situation, the turbine creates more pressure than needed to compensate for electrical losses in the compressor, resulting in a powerful engine noise like a twin-turbo engine or an ers device.

The excess exhaust pressure then overcomes the turbochargers, which in turn recycle the exhaust gases, pressurizing them further. The pressure causes the exhaust system to break, releasing the gas into the atmosphere. An excessive volume of exhaust gas leads to engine over-revving or operating at a higher RPM than usual.

Faulty Shaft Vibration

A faulty vibrating turbo shaft can also prevent the wastegate from responding. Connected to both the turbine and compressor rotors, the shaft is responsible for transferring vibrations from the engine to the car’s alternator rotor. The shaft can be faulty or malfunction under harsh and intense driving conditions such as break friction, deep potholes, and rough brakes.

Turbocharger Fails at High RPM

A noisy and robust running engine is another of the easiest symptoms to detect of a bad turbo vane sensor. With this kind of problem, you can see that the engine may run smoothly and sound light when idling for a minute before engaging. But as soon as you start steering the wheel, the bad thing, one way or another, will exert increased pressure on the car engine and push it to sound very rough.

Fortunately, you can solve the problem of a failing turbo with a highly qualified, suitable, and flexible vehicle muffler (or silencer). However, if you are still struggling to reduce your engine noise, a good tip is to buy a damper with a built-in duct purifier support.
Extreme Turbulence Flow

Turbo sensor or turbo vane problems can be caused by a lack of proper turbo insulation or a disconnected turbocharger. In both cases, all of this can lead to an engine blow-by problem. The issue is the exhaust manifold and the turbo connection band.

turbo-vane-sensor

Suppose the turbocharger starts to over-pressurize the exhaust gases. If that is the case, the rubber will cause the vibrations to move in a bell-shaped pattern inside the engine, which then transfers these vibrations to the exhaust manifold. The exhaust gases move through the intake and exhaust manifolds, picking up vibrations from there. This amplifies the beats generated by the engines or creates even more shock.

If there is too much engine vibration and loud noise, drivers may not be able to notice a frustrating problem. They may not even be aware that the turbo or turbo vane sensor is not working well if the engine is under-inflated. Oxygen sensors can also fail sometimes, leading to inaccurate problem readings and detections.

Disorderly Turbo Boost Pressure

If you experience a turbo vane sensor problem, you will know that your engine’s boost pressure is failing. Driving your car at full speed on the highway can cause the boost pressure to fluctuate between 5 and 20 PSI (pounds per square inch).

The above are some of the most visible signs of a faulty sensor regarding the vital parts of the turbocharger system. In any inspection operation or process, if you notice unusual problems and cannot immediately determine the name and causes, take your vehicle and turbo system to a professional repair shop. Being consulted and advised by qualified mechanics will prevent the worst possible damage. Because as small as they may seem, these symptoms of a bad turbo vane sensor can have an uneven impact on the surrounding components and the entire system in the long term.

Car Maintenance Tips to Avoid Symptoms of a Bad Turbo Vane Sensor

It is inevitable for you to use and operate a vehicle whose parts fail over time. Not only that, what we are talking about here is a turbocharger with the mission of putting more air into the combustion chamber. If necessary, this type of engine can consume a large amount of energy. And most likely, the components involved will have to work at high capacity even if it is configured by default to perform these tasks.

Because it is impossible to prevent the risks of damage due to time and sloppy usage cycles when you don’t have much time to pay attention, learning more about effective ways to use and maintain turbocharged engines is reasonable and necessary. That said, here are some useful tips on engine care and maintenance for the sake of your healthy turbo vane sensor.

Limit Movement Right After Starting the Engine

Modern car engines use electronic fuel injection systems, so it is not necessary to let the car start for too long before moving. However, if you use a car with a turbocharged engine, many experts suggest that the vehicle should idle for a few minutes before driving.

The reason is that the turbocharger uses the same lubrication oil as the engine. When the car starts, the engine oil is still cold (more dense), so it circulates more slowly. And the oil also needs time to warm up. Therefore, the lubrication effects on the engine and turbo are not optimal.

The ideal temperature for oil to circulate and lubricate car parts is 80 to 95 degrees Celsius. The oil warm-up waiting time will depend on the different engine warming mechanisms of each vehicle type. It is generally recommended to let the car engine start for 2 to 3 minutes before moving.

Do Not Turn Off the Engine Immediately After Stopping

With a vehicle using a naturally aspirated engine, turning off the engine immediately after stopping is not too affected. However, with those using turbocharged engines, this act should be limited. Because with this type of engine, the heat generated will be very significant.

Furthermore, under the car hood, the oil acts both as a lubricant and as a coolant to absorb heat from the engine. If the engine is stopped suddenly while it is still hot, the oil will not circulate but only be exposed locally in some high-temperature spots. This act will lead to a degradation of oil quality and a faster breakdown of the additives contained in the oil. So when driving a turbo, the driver should pay attention to slow down a few kilometers before the destination. After stopping, let the car run for 2-3 minutes, then turn off the engine.

Avoid Driving at Too Low RPM

Within a complex system, the engine exhaust will be the component that drives and monitors the turbocharger. If the engine runs at too low revolutions per minute, the turbo will not reach a certain RPM threshold. This means the vehicle’s performance power cannot reach the optimal level. Therefore, driving at too low RPM makes some drivers mistakenly perceive that it will save fuel, but it can actually consume more.

Be Careful When the Car Turns a Corner

Unlike naturally aspirated engines, turbocharged engines will have several delays during acceleration. Therefore, if they do not pay enough attention to this delay, turbo drivers are likely to understeer or oversteer in corners, leading to the car slipping, loss of grip, or even loss of control. Thus, one final noteworthy advice when driving a turbo is not to press the accelerator too deeply when exiting a corner.

When handling a turbo car engine, one should not press the accelerator too hard when exiting a corner. (Photo: car accelerator)

Use Gasoline with the Correct Octane Rating

There is always the vehicle owner’s manual, and the manufacturer often has a comprehensive recommendation on the appropriate octane-rated gasoline for that type of vehicle. Every driver should follow these tips and remember to avoid gasoline with an octane rating lower than the standard. Because this can cause the car’s fuel to explode at the wrong time, affecting the overall lifespan of the engine and the turbocharger in particular.

Take Note of the Proper Lubrication Oil

Overall, turbochargers use the same lubrication oil as the engine. In some turbocharged vehicles, there is no significant oil loss during a drain cycle. But in some other automobiles, the amount of oil loss is usually higher than usual, so you must keep an eye on the issue and refill the lubrication oil from time to time. Therefore, users should consult the car manufacturer for instructions on the proper ways to check and add oil.

Change the Fuel Filter Timely

The turbocharger rotates with the engine’s exhaust gases and is therefore very sensitive to the quality of the exhaust gases. If the fuel filter is dirty, contaminated gasoline will enter the combustion chamber, leading to a poor mixture ratio between fuel and compressed air. And in a short time, this will affect the quality of the exhaust gases and directly damage the turbo. Therefore, it is always necessary for a car owner like you to carefully inspect and periodically change the car’s fuel filter.

Maintain the Cooling System During Periodic Charging

In general, you should maintain the turbocharged intake air cooling system every 160,000 km or sooner, depending on operating conditions. Additionally, you should also check the cooling system and change the coolant regularly.

USB not working in the car

Compact, easy to use, with large capacity and containing a lot of information, the car USB is probably one of the most popular choices for many drivers for entertainment purposes on long journeys. Reviving a long-favored route from East to West, however, this device cannot last as long as that route because it is easily damaged when used continuously for a long period. That said, I will provide some information on the causes and solutions to fix the problem of the USB not working in the car.

The Basics of Car USB

Car USB is a data storage device equipped with Flash memory to quickly read, write, and store data without any power supply needed. With its capacity, fast transmission speed, compact size, and simple operation, the USB becomes an indispensable accessory in the car.

Most car models manufactured from 2010 to today are equipped with a USB connection port on the dashboard, near the infotainment system. When the USB is plugged into the charging port, users can connect and transfer the stored data inside to the infotainment screen.

Currently, car USB is divided into two types: USB without copied music and USB with available music.

  • Car USB that does not copy music: users can actively store audio, images, and videos based on their personal preferences.
  • The car USB with music allows users to choose the available data to enjoy.

USB Not Working in the Car: Causes and Quick Solutions

Here are some causes of the USB in the car not working and how to quickly resolve each type of problem. If you feel that you cannot solve the problems yourself, you can take your automobile to a specialized shop for inspection and advice with the analysis of a professional mechanic.

The Problem Lies in the USB Charging Port

This problem can occur when the metal surface inside the USB charging port and the micro USB are not in good contact or are misaligned due to a manufacturing defect. Furthermore, as it is a portable cable, the charging cable will often be plugged and unplugged, which will lead to this situation. Please check the small details inside the USB port because its cable may not be in contact with the charger, leading to this annoying situation.

If possible, you should repair the USB port yourself. It is the quickest solution that can allow you to use your USB drive again quickly without losing labor costs at the shop. What you need to do is clean all its components of the charging port, the charging cord, and the USB as well. Before doing this, remember to turn off all devices. You can use a cotton swab to gently and carefully clean them, then plug them back in as they were.

The Problem Lies in the Car USB

If your car’s USB drive has no cover or if you often leave the USB drive in dusty places, the problem may come from the USB drive. (Photo: jeanlucsialelli)

Furthermore, frequent plugging and unplugging of cables will cause scratching or deformation of the metal layer inside the charging port and the micro USB, making the connection mismatched, thus preventing the car from receiving data. Moreover, nowadays, many types of USB drives do not have a cover, so it is easy for dust to get inside or settle on the surface or slot. Therefore, drivers must clean it from time to time.

Do you often put a USB drive in your pants or shirt pocket, or not? Lint can stick to the USB and prevent it from having good contact with the car’s port. So what do you need to do? Again, carefully clean your USB drive and check if the connector is deformed or bent.

The Cable Prevents the Car from Receiving the USB Connection

Do you know the part that does not guarantee the most durability? It’s the cable. Cables can be easily damaged by physical impacts such as bending and twisting.

The simplest way to solve this problem is to try the cable with other charging devices to see if it works properly. If it does not work afterwards, you need to replace the cable with a new one.

Selective Suspend Function

The selective suspend function can also be one of the culprits that make the USB not recognized when plugged into the charging port. This function is responsible for cutting off the USB power to reduce the vehicle’s power consumption. Therefore, the USB with this feature configured will not be able to connect to the charging port because there is no power.

To overcome this situation, car owners need to disable this feature using the computer. Plug in the USB and connect to the computer, then use the following 2 methods:

  • Press the Windows + R key combination, type Regedit, and change the value of the Disable Selective Suspend key to 1.
  • Press the Windows + R key combination, type Regedit, click the Edit menu, select New, select DWORD (32-bit) Value, and change the value of the Disable Selective Suspend key to 1.

The Monitor Does Not Support USB

Currently, there are USB 2.0 and USB 3.0 corresponding to different types of cars. For the monitor to accept the USB, the driver must use the correct type recommended by the manufacturer. Furthermore, each type of monitor or screen is installed with a configuration. If your car’s monitor does not support USB, the error may be due to incorrect configuration. Drivers must revert to the standard format of the car’s USB drive, which is FAT32.

Additionally, damaged car USB hardware also prevents the monitor from recognizing the device. To fix it, users must check the electrical connection inside the drive or head to service centers for the best support. You should note to actively back up data to limit any loss if the USB drive is damaged.

Overall, the monitor does not recognize the USB because the USB hardware is damaged, the wrong format, or the wrong type of USB. Experts recommend that users do not use USB drives, chargers, and charging cords of unknown origin. Furthermore, if not in use, please disconnect the USB and store it properly, avoiding shocks to help protect and extend its lifespan.

Advice to Follow to Help Your Car USB Always Work Well

Not being able to use a USB drive to access entertainment functions is annoying and frustrating for some drivers on the road. To avoid experiencing a silent drive while enjoying promising exhaust fumes, follow a few notes below when using a car USB drive.

Say No to Car USB Drives and Related Devices of Unknown Origin

Be especially wary of cheap USB drives, car chargers, and cables of unclear origin. They can damage your associated devices. Please correctly follow the safety rules and standards when dealing with the USB port not working in the car.

Do Not Just Plug Your Car USB into Random Places

If the charging port does not have all the specifications, do not plug your USB drive into it, as it could even lead to a more serious breakdown.

Avoid Violent Shocks to the Car USB

Whatever you use, especially technological equipment, you must take great care of it to ensure its longevity. When not in use, you should put the USB drive in a closed box or store it carefully to protect it from external shocks. If you pay close attention, you will see that many drivers attach their car’s USB drive to the keychain. But this is not recommended at all, at any time or place.

plug-in-USB-in-car

Disconnect the Car USB When Not in Use

When you are not using the car’s USB drive, you should disconnect it to prevent electrical problems from damaging the data on the USB drive and possibly the entire memory card.

So, how do you disconnect the USB? Do you remove it directly from the USB socket when not in use? Be careful, avoid doing it this way because it will damage your data on the USB drive due to sudden detachment. Please safely disconnect by following the instructions below:

  • Left-click on the USB icon on the desktop and select the Eject command.
  • Then you can remove the USB drive and put it in the box.

Regularly Check and Back Up Data on the Car USB Drive

No matter how carefully you use and maintain your car’s USB drive, there may be cases where the USB drive suddenly loses data. Therefore, it is essential to occasionally check and back up the data on the USB drive.

Summarizing the Problem of USB Not Working in the Car

We hope that the information provided by our article above has helped you solve the problem of the USB not working in the car or the car not receiving the connection from the USB. You can save these handling methods to use when needed. Furthermore, remember to follow some tips to maintain and always take care of your car’s USB drive for many smooth and exceptional experiences on long journeys.