Car Frame Damage 5 Important Signs to Watch For

In a perfect world, we would spend our entire lives driving from point A to point B, without fear of being involved in a collision. Unfortunately, wrecks occur frequently and incessantly on our country’s roads. When such collisions occur, our vehicles often bear the brunt of our misfortune.

If you’re lucky, a minor fender dent will result in little more than a few cosmetic flaws, all of which can be repaired with relative ease. This can be as simple as making a dent or repainting a bumper.

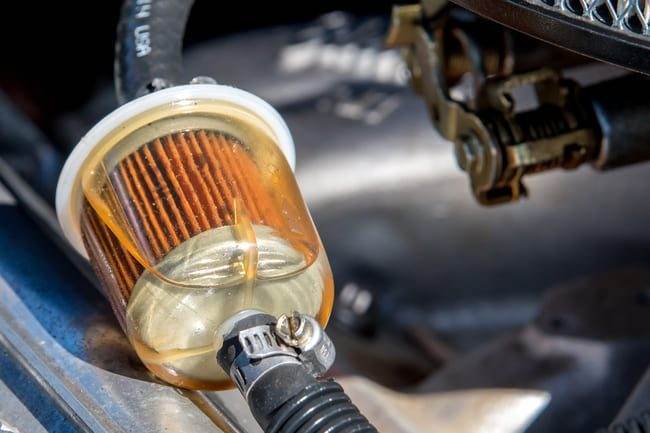
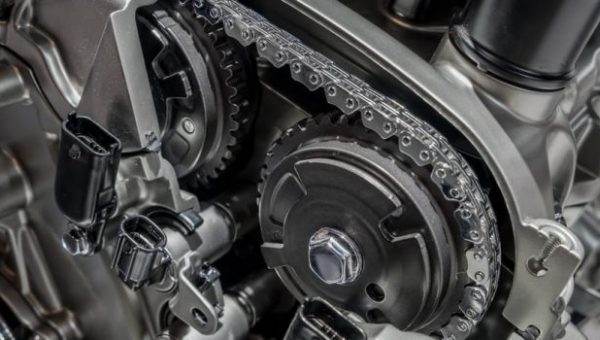
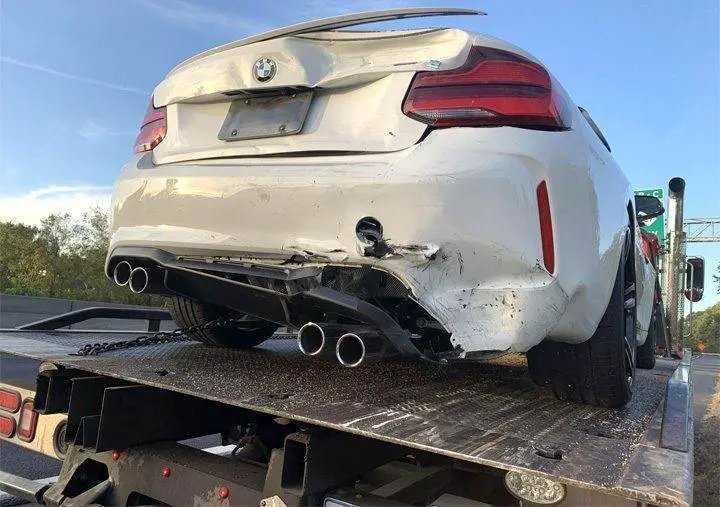
However, at the other end of the spectrum, the most violent collisions often leave behind significant mechanical damage, which is much harder to repair (or even see).

Of these damages, none is as significant as that which extends to a vehicle’s frame. When the frame is damaged, the chances of a vehicle being totaled skyrocket, as it often serves as the proverbial nail in the coffin for all but the newest vehicles. However, one must often wonder how severe such damage can truly be.

Read on to learn more about the severity of structural damage to a car, truck, or SUV’s frame, as well as the typical costs associated with repairing such damage.

What is a Car Frame?

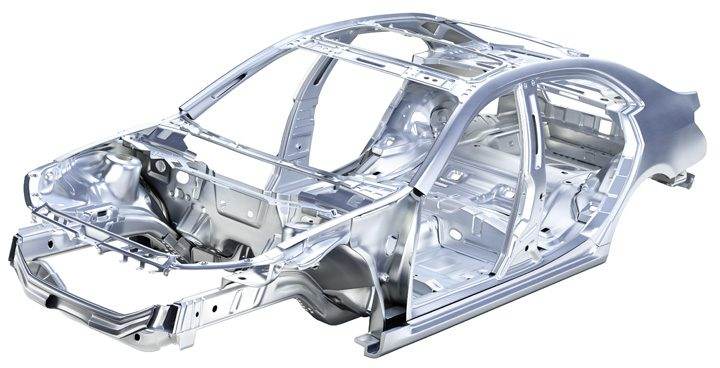
A car frame serves as the very foundation upon which the rest of a vehicle is built. A “frame” essentially consists of two main rails, which extend the entire length of a vehicle and are fixed by a number of crossmembers at varying intervals.

Although the exact design of a vehicle’s frame often varies from one particular make and model to another, all serve the same purpose. From a vehicle’s body to its drivetrain components, all are attached to this central frame at a particular point in its construction.

A vehicle’s body is mounted onto the frame below, via specialized body mounts. A vehicle’s engine and transmission are held in position by mounts supported by the frame. Essentially, without a well-designed frame, a vehicle simply would not exist.

Vehicle frames are also carefully designed to incorporate specific angles, which ultimately influences characteristics such as drivetrain inclination and front-end geometry. The slightest variation in these angles can present a multitude of handling-related issues.

what is a car frame

What is Considered Frame Damage?

Any damage that extends to a vehicle’s main support structure or compromises a vehicle’s structural integrity is classified as frame damage.

The most common example of this form of damage is that which results in a bent frame. This occurs when an impact sustained during a collision is significant enough to deform a vehicle’s main support structure.

Damage to any permanently riveted or welded mounting point on a vehicle’s frame can also be classified as frame damage. This includes damage that extends to a vehicle’s upper suspension mounts or crossmember mounting flanges.

Signs of a Car With Frame Damage

bent/twisted crossmember

When considering the purchase of a used car, there are several telltale signs of frame damage that any potential buyer should be aware of. Here are several key characteristics of frame damage to watch for.

#1 – Non-Uniform Bends In Frame

In most cases, if a bend in one frame rail does not match that of the rail on the opposite side of the vehicle, frame damage should be suspected.

Most manufactured bends in frame rails are identical from one side of a vehicle to the other, are identical and extremely uniform in appearance.

#2 – Drastically Altered Alignment

bad alignment

A vehicle’s front end can become misaligned for a number of reasons. However, a drastic misalignment, which is very visible to the naked eye, is usually a dead sign of frame damage.

Do not be fooled into believing a seller’s claims that the vehicle in question will be fine after a quick alignment.

#3 – Unnaturally Positioned Suspension Components

If a quick glance inside a vehicle’s wheel well reveals a shock absorber or strut leaning at an unnatural angle, which does not match that at the opposite end of the same axle, look elsewhere.

Mispositioned or misaligned shock absorbers/struts indicate that significant frame damage has altered the location of a vehicle’s suspension mounting points.

#4 – Ill-Fitting Components

If a number of a vehicle’s body panels and accompanying components appear to have a poor level of fit and finish, there is a high likelihood that substantial frame damage is to blame. Even a door that does not close properly can sometimes indicate that there are more serious issues at hand.

This is especially true if all of these panels and components appear to be new but bind poorly when moved. In many cases, a vehicle’s frame has been deformed to the point of altering the location of its body mounts.

#5 – Irregular Tire Wear

Tires can wear unevenly for a number of reasons. However, if several different wear patterns are present among the tires of a single vehicle, there is a high probability that frame damage is to blame.

When a frame has been damaged to the point of altering its geometry, a vehicle’s tires will often track irregularly when driving on the road. This almost always leads to extremely strange tread wear.

Can Frame Damage Be Fixed or Is the Car Totaled?

signs of car with frame damage

The viability of repairing a car’s frame is dictated by the extent of the damage sustained. In some cases, when this damage is relatively minor, a vehicle’s frame can indeed be repaired.

However, in other more severe cases, frame damage is totally irreconcilable.

When frame damage is severe enough to require a lot of time, effort, and money to perform the necessary repairs, it is not always feasible or safe.

Not only would the expenses associated with such repairs likely exceed those of most vehicles in their entirety, but a frame that has already been repaired is never as strong as it was before being damaged.

As a result, even if a frame could be repaired, doing so presents a huge liability. For this reason, many shops quickly veto the idea of repairing any frame deemed excessively twisted or deformed.

Frame Damage Repair Cost

The cost associated with repairing frame damage can vary significantly from one end of the spectrum to the other and largely reflects the severity of such damage.

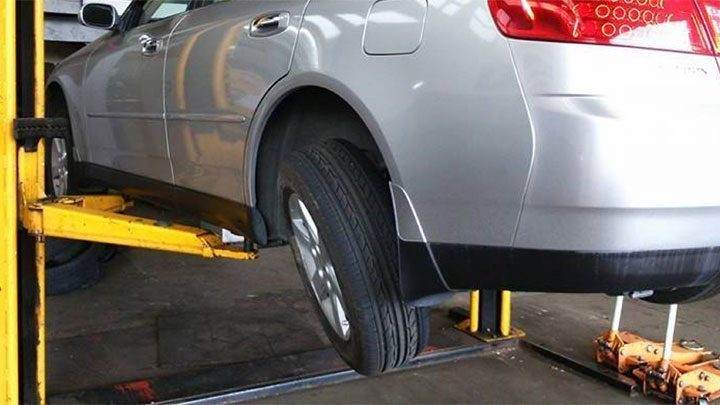
In almost all cases, a vehicle will need to be placed on a specialized piece of equipment known as a frame rack, through which precise repairs can be made. Services of this nature are never cheap and typically require a fair amount of time.

At the lowest end of the price range are damages contained within suspension mounts, which are typically riveted/welded in place at the factory. Even repairs of this type can be quite costly and often result in labor costs between $1,000 and $2,000.

Worse yet, this estimate does not include the cost associated with repairing additional cosmetic damage that will also have occurred during such a collision.

At the other extreme of this price range is the cost associated with repairing a severely damaged or twisted frame. It is not uncommon for repairs of this type to exceed $10,000 in cost, before the replacement of external cosmetic components.

Few cars undergo such extensive repairs, as it is rarely feasible.

Is It Safe to Drive a Vehicle With Frame Damage?

brakes locking up

Simply put, it is never safe to drive a vehicle with unrepaired frame damage. When such damage occurs, a vehicle’s structural integrity is compromised. As a result, a subsequent collision of any kind could have disastrous consequences.

Furthermore, since frame damage often alters a vehicle’s front-end geometry, handling usually suffers. This can result in unbalanced steering, as well as uneven weight distribution, both of which can increase the chances of you ending up in a wreck of one type or another.

If that is not convincing enough, it is also important to understand that you could be held liable if you were to injure another motorist in a wreck, while knowingly driving a vehicle with unrepaired frame damage.

Therefore, you could jeopardize the livelihoods of several people by driving a vehicle that has been damaged in this way.

Can You Sell a Car With Frame Damage?

The legality of selling a frame-damaged vehicle generally differs from one state to another. However, in almost all cases, a seller is legally required to disclose details regarding such damage prior to sale. If you fail to disclose this information, you quickly risk becoming the target of a lawsuit.

Furthermore, failing to disclose frame damage when selling a vehicle can also get you in hot water civilly, and perhaps criminally, if the vehicle’s new owner were to be injured in a collision related to such damage.

Essentially, providing potential buyers with a detailed account of any known frame damage is not only the best way to proceed, but truly the only course of action.

What transmission does my car have?

Have you ever bought cars online, then filtered your search by “manual transmission” because all the cool cars have them? If not, try it now. I’ll wait.

Isn’t it great what you find? Now try sorting by price and starting from the bottom of the barrel and tell me you didn’t just try to justify buying another project car.

While this seems like a tangent, my point is that cars have different transmissions – the link between the engine and your spinning wheels that makes your car move forward. How about digging a little deeper to understand what’s going on underneath?

Here are three different types of transmissions found in today’s vehicles as well as five ways to help identify the specific transmission model.

Types of Car Transmissions

Manual Transmission

How It Works

A manual transmission is, as the name suggests, a more hands-on approach to shifting gears. Remember when you had a bike and if you kept the same gear all the time, you would have a harder time going up hills?

Remember when you finally climbed that hill, and then when you started going down, you couldn’t spin your legs fast enough to gain more speed? That’s because you didn’t shift.

Shifting gears helps you control the power you put into your transmission, and when your engine is your legs, you need to make sure your bike is in the right gear so you don’t overwork your legs.

The same concept applies to your car. To extend the life of your engine, you need to shift gears to get the most efficient power transfer. If you didn’t, it would be like accelerating from zero miles per hour in 6th gear all the time.

How to Identify

manual transmission shift knob

A good way to identify a manual transmission is to look at it first. Does it have a picture on top of the knob that looks like a bird’s-eye view of a black and white tree trunk with numbers at the end of each line? If so, it’s probably a manual transmission.

Still can’t tell? Try grabbing the transmission and wiggling it a bit. The owner may have left it in neutral (not in gear), so you’ll have a lot of play from left to right, forward and backward. If it doesn’t move at all, it’s not a manual transmission or it’s still in gear.

Since we still might not be able to tell at this point, look to the left or right of the transmission and check if there are letters and numbers like “P, R, N, D, 1 and 2”. If there are, that’s what we call an “automatic” transmission.

Automatic Transmission

How It Works

Just as “manual” means doing something with your hands, “automatic” when applied to transmissions means the car will essentially move by itself. This is how 99% of cars evolve these days. You get in the car, turn it on, put the transmission in “D” (for “Drive”), release the brake, and you’re on your way.

When you press the accelerator, the engine speed increases, making the transmission spin a bit faster. This will increase oil pressure or trigger a sensor that will shift the transmission to a higher gear. This will lower the engine speed, allowing you to move more efficiently on the road because you won’t be using as much gas.

How to Identify

Although this transmission still has a stick that you grab to move it into “drive” gear, it won’t have as much play and it won’t give you a series of numbers (1-5 or 6 normally) to choose from. The gear lever will be either on the steering column or right next to you towards the middle of the car.

Reach and move the lever to “R” to get the car out of park and go into “Reverse”. This will allow the car to back up if you need to get out of a parking spot or make some space between you and an obstacle.

If you want to coast down a hill silently because you don’t want to wake your parents, put the transmission in “N” (neutral). That way, you can turn off the engine while you coast down that last hill to your driveway.

**Please note that we do NOT recommend turning off your car’s engine as it makes driving more difficult because you no longer have power steering!** (I only mention this in a theoretical sense)

“Drive” is pretty self-explanatory. In this position, your car will move in the most efficient way possible. There will normally be a preset shift point below 3000 rpm, and if you floor it, the car will downshift and accelerate as fast as possible.

Often, below the “D” position, there is a “2” which means second gear. You’ll shift to this gear when driving in the mountains and want to save your brakes going downhill.

This will force the engine not to exceed the speed required for second gear, and since the car’s momentum propels you down the hill, the engine will slow the car down. If you were to just press the brakes all the way down, you would cause premature wear on those pads, which could even lead to failure.

If you’re going down or up something extremely steep, you might want to just put the transmission in “L” for low, or “1” for first gear. This will allow you to use all the engine at the lowest gear option to get the best wheel spin per throttle input. If you want to do a burnout in an automatic transmission, you’ll need this feature if you’re going to have any kind of wheel spin.

Finally, many newer cars will have an automatic transmission with manual mode. This will allow you to manually select the gear you want to be in. It’s useful for the same downhill scenario where you would shift to a lower gear and allow the engine to prevent the car from gaining speed going down the slope (instead of forcing you to brake).

A manual mode also offers at least a bit more driver engagement/fun for purists who prefer shifting through the gears of a manual transmission.

CVT Transmission

How It Works

Many cars you can buy these days will be equipped with a “Continuously Variable Transmission,” or CVT. It’s a form of automatic transmission, in that you don’t have to actively shift gears with your hands, but the mechanism and feel are a bit different.

Just like an automatic transmission, just put it in “Drive” and go forward! The CVT will be smoother than a standard automatic, because you won’t feel it shift from one gear to another. You might also find that the car won’t accelerate as quickly in general, as it’s more geared towards efficiency than performance.

Under the skin, a CVT transmission uses a “rubber band” to maintain the proper gear ratio while you drive. This elastic always has the same length, but it has to go around the transmission’s input and output shafts. The way the transmission keeps engine speeds low and efficient is by moving the input and output shafts back and forth.

Each shaft has a wide part and a narrow part that adjusts the rotational speed of each shaft, but keeps them in good relation to each other because there’s an elastic that doesn’t change its length.

How to Identify

CVT transmission badge

CVTs are typically used in small cars where there doesn’t necessarily need to be a clear distinction between gears as you would need in a semi-truck, for example. With smaller cars, all forces are less severe than those you face in a big truck, so you can get away with a CVT.

Another big advantage of a CVT is that it is VERY efficient in that it never forces the engine to use more power than it needs. Many manufacturers swear by their CVTs, claiming you don’t really need to service them for the first 100,000 miles!

How to Identify the Transmission Model

#1 – Check the Driver’s Door Card

Open the driver’s side door and look down on the inner door frame closest to the rear of the car. This is where the vehicle-specific information card will be located and you can see the transmission model your car is equipped with, as well as engine specifications, the car’s model number, and other information.

#2 – Check the Owner’s Manual

This one is pretty self-explanatory, but you should dive into the glove box and pull out that owner’s manual and look in the index for “Transmission.” This will give you a page number that you can use to get information about your transmission.

Not only will this page tell you which transmission model you have, but it will also give you helpful maintenance intervals, recommended fluid types, and other useful information about functions that might help you when things get tough.

#3 – Check in the Engine Bay

Most cars will have a description of what’s going on with the transmission under the hood. It will tell you if you have a CVT, automatic, or manual transmission.

But it can also tell you the type of engine oil to use, coolant temperature recommendations, warnings, transmission fluid recommendations, and how long it’s been since you changed your timing belt or timing chain.

#4 – Oil Pan

If the simpler solutions above don’t work or if that information is missing for some reason, you might want to inquire with the company you’re buying it from or the previous owner. There could be some shady business, so if you’re buying it, walk away.

If you already own the car and can’t get the above solutions to work, crawl under the car and check the transmission oil pan. It will also have a small tag on the side that will give you the exact make and model of your good old “Gear Shifter” (I’m tired of writing “transmission,” okay?)

#5 – VIN

Finally, and the above solutions should have worked, but if for some reason they didn’t, go to the front, driver’s side of your car and look at the base of the windshield. You should find a 17-character alphanumeric string that we call a Vehicle Identification Number, or VIN.

Use this code to look up information about your vehicle, including the type of transmission you own, the make and model of your car, as well as whether your car has recalls or issues associated with it. You can contact your car manufacturer for details about your VIN or use CarVertical or a similar service to get comprehensive vehicle details and its history.

Closing Thoughts, Maintenance

Your transmission is very important to the operation of your vehicle. Maybe not as important as your tires or your engine, but certainly near the top! Shifting smoothly and reliably is the difference between reaching your destination and having your car stall and not make it over the top of that hill.

Making sure your transmission fluid is clear is what determines the lifespan of your transmission. If the transmission fluid color is very cloudy, you’ll need to replace it with new fluid because the dark particles are just metal flakes from your clutch or gears rubbing against each other. Just check it often, and you’ll be fine.

So there you have it, everything I think you should know about transmissions at a basic level, and even a bit more if you made it all the way through.

The air conditioning compressor clutch is not engaging? (8 possible causes)

During intense summer heat, few vehicle features are as appreciated by the average motorist as air conditioning. A vehicle’s air conditioning system stops the sweltering summer in its tracks, replacing it instead with comforting coolness.

Today’s modern air conditioning systems are even equipped with dual-zone climate control, allowing each occupant of a vehicle to set the cabin temperature to their liking.

However, a vehicle’s air conditioning system is only as good as its ability to function correctly, without any electrical or mechanical faults. Unfortunately, air conditioning problems of varying severity can and do occur occasionally. When this happens, cabin temperatures soar as discomfort sets in.

One of the most common faults related to the air conditioning system is one that manifests as an inoperative AC compressor clutch. When problems of this nature occur, the refrigerant in an air conditioning system does not circulate, thereby preventing cooling from taking place.

Read on to learn more about the causes of an inoperative AC compressor clutch, as well as how to remedy such issues should they arise in the future.

What is an AC Compressor Clutch?

A vehicle’s AC compressor clutch serves as the on/off point for distributing power to the internal drive components of an AC compressor. When the air conditioner is turned off, the compressor pulley’s coils are disengaged.

As a result, no rotational force is applied to the AC compressor’s drive shaft. This avoids placing an additional load on a vehicle’s engine and prevents excessive internal wear on the compressor.

When a vehicle’s air conditioning system is turned on, power is distributed to the AC compressor clutch’s magnetic coil. This energizing of the clutch coil creates a magnetic field and facilitates clutch engagement by pulling the clutch’s drive plate inward, where it meshes with the compressor’s clutch body/pulley.

In the “on” or “engaged” position, an AC compressor’s clutch transmits 100% of the rotational force applied by an engine’s serpentine belt directly to the compressor’s drive shaft.

However, when a vehicle’s air conditioning system is turned off, the accompanying clutch coil is de-energized. In turn, the AC system’s clutch disengages.

Causes of an AC Compressor Clutch That Won’t Engage

An AC compressor clutch may fail to engage for a number of reasons, many of which are electrical in nature. The exact cause of such issues also tends to vary slightly from one vehicle model to another.

Here are some of the most common causes of an inoperative AC compressor fan clutch.

#1 – Blown AC Clutch Fuse

car fuse box

In many situations, a blown AC compressor clutch fuse can be the cause of a clutch that does not turn on or engage. However, the reason for the fuse’s failure must also be determined. This could be the result of a short in the power wire or a faulty clutch.

#2 – AC Clutch Relay Failure

Most vehicles rely on the use of a relay to control the operation of the AC clutch. A failed or stuck relay can prevent power from reaching the clutch coil.

#3 – Faulty Switches

Modern automotive air conditioning systems rely on the use of several switches to function effectively. These switches directly influence the provision of power/ground to an AC clutch.

The most notable of these switches include low-pressure switches, high-pressure switches, and evaporator temperature sensors. The failure of any of these sensors can render an AC clutch inoperative.

#4 – Faulty Wiring

A compressor’s AC clutch assembly is powered and grounded via a pigtail that branches off from a vehicle’s main engine wiring harness in most cases.

If there is an open condition on any of the wires in this circuit, the compressor clutch will not operate. In some cases, the wiring itself may be good, but the connector is the problem.

#5 – Low Refrigerant Charge

An air conditioning system’s low-pressure switch is designed to cut power/ground to the compressor clutch in the event of low system pressure. Therefore, a lack of compressor clutch operation can often be attributed to a low refrigerant charge.

#6 – High Refrigerant Charge

car A/C refrigerant

Similarly, an air conditioning system’s high-pressure switch is designed to cut power/ground to a compressor’s clutch in the event of over-pressurization.

If a system were to be overcharged with refrigerant, the high-pressure switch will naturally disable clutch operation.

#7 – Faulty AC Clutch

Over time, a compressor’s clutch assembly can begin to show its age. In many cases, an AC clutch will begin to slip as the face of its clutch disc begins to wear.

In other cases, an AC clutch’s coil can fail altogether, thereby preventing clutch engagement.

#8 – Control Head/Computer Failure

An AC clutch receives its operational commands via inputs made by a driver through the system’s dash-mounted control head. A failure of any kind within this unit can prevent a clutch’s coil from being powered.

Many systems also route signals from the control head through a vehicle’s ECM/PCM. Because of this, a partial failure of a control module can also result in compressor clutch operation issues.

How to Manually Engage an AC Compressor Clutch

how to manually engage ac compressor clutch

There are several instances where manually engaging an AC compressor’s clutch can prove useful. Perhaps the best use of this practice is to attempt to determine whether or not the clutch itself has failed.

Providing the clutch coil with alternative power and ground sources can help you identify the root cause of compressor clutch-related issues.

The following steps will help you manually engage your AC compressor’s clutch assembly using the jump method.

  1. Disconnect the clutch wiring pigtail: You must first identify and disconnect the wiring pigtail that corresponds to your compressor’s clutch assembly. The wiring for this assembly typically comes from the rear of the AC, at the front of a vehicle’s compressor.
  2. Identify the power and ground wires: Next, you need to identify the power and ground pins within this connector. When in doubt, always consult a factory wiring diagram for your specific vehicle.
  3. Create jumper wires: You will now create jumper wires for the power and ground ends of your compressor’s control circuit. It is important to include an in-line fuse in the jumper intended for use on the positive side of the circuit. It is also helpful to attach alligator clips to the power end of these jumper wires, which can be easily connected to your battery’s terminals.
  4. Connect the jumper wires: It is now time to connect your new jumper wires. Ensure that the fused jumper wire is connected between your clutch coil’s positive wire and your battery’s positive terminal. Similarly, hook the remaining jumper wire between the clutch coil’s negative wire and your battery’s negative terminal.
  5. Interpret the results: Based on your observations, you will now be able to determine whether or not your AC clutch is faulty. If your compressor’s clutch does not engage when jumped, compressor replacement is advised. Engagement will be evident by the sudden inward movement of the assembly’s clutch disc, which will be accompanied by an audible “click.” If your AC compressor’s clutch does engage when jumped, further diagnosis will be necessary, as the underlying fault lies within the system’s control circuit.

Replacing the AC Compressor Clutch vs AC Compressor

In the past, replacing the AC clutch was considered a cost-effective alternative to replacing an entire AC compressor. However, this is rarely the case today. Almost all major automakers now recommend compressor replacement in the event of AC clutch failure.

In fact, many of today’s AC clutches can no longer be serviced independently. This necessitates compressor replacement, totally eliminating the possibility of clutch renewal.

Even if a particular vehicle’s compressor were equipped with a serviceable clutch, one often spends just as much upfront to replace the AC compressor clutch assembly in its entirety.

Today, aftermarket AC compressors can be purchased at a reasonable cost, thereby eliminating the monetary advantage associated with clutch replacement.

It is also important to consider the fact that replacing an AC clutch requires the use of specialized tools and is generally far more complex than replacing a system’s entire compressor.

Wheel Nut Sizes and Types (with Chart for All Car Manufacturers)

Lug nuts are an interesting beast and may well be the most important hardware pieces on your vehicle. Their job is to secure each wheel of a vehicle to its axle to allow your car to drive and protect you.

Understanding how different lug nut sizes and types can vary from one vehicle to another is essential to be able to replace one when it is lost or damaged.

Types of Lug Nuts

There is actually a variety of different lug nuts and wheel bolts. Each of the eight different types has its own distinctive characteristics. You will rarely encounter them outside of a busy commercial garage.

#1 – Conical Seat

Conical lug nuts (aka: acorn lug nuts) are by far the most common type of lug nut. The seat tapers inward at (usually) a 60-degree angle.

These cone-shaped lug nuts are designed to fit into a cone-shaped hole. They are in most cases very easy to work with and center.

ball seat lug nut

#2 – Ball Seat

Instead of being cone-shaped, the seat of a ball seat lug nut is rounded or spherical. Although not as common as conical seats, ball seat lug nuts can be found on some Honda, Audi, and Volkswagen vehicles.

The heads look almost identical to conical lug nuts, so it can be difficult to see which is which if they are installed.

#3 – Flat Seat

As the name implies, the seat is flat and resembles a washer. Of all the different types of lug nuts, flat seat ones are probably the most frustrating and difficult to use. The problem is that centering them can be very tricky because they have a small shank that fits into the stud.

If not perfectly centered, the shank can catch, giving the impression that the lug nut is tight when it is not in reality. Since the flat surface has more area than the others, they are more likely to seize and can be much harder to remove.

extended thread lug nut

#4 – Extended Thread

Similar to a standard conical lug nut, an extended thread (ET) lug nut adds the benefit of a longer thread. This is useful in cases where the length of the wheel studs and the wheel mounting surface simply do not allow sufficient thread engagement when using ordinary lug nuts.

The longer thread length allows for better engagement to keep the wheels more securely attached.

#5 – Mag Seat

This is another type of extended thread lug nut, this time with a washer seat. It is used in similar situations where a longer thread is needed, but instead of a tapered, conical bottom, they have a flat seat (sometimes with a washer, sometimes without).

They are called mag seat lug nuts because at one time, they were made from magnesium.

tuner lug nut

#6 – Tuner Style

Many types of aftermarket wheels, especially for Honda, Acura, and other Asian tuner cars, are designed with smaller diameter holes for the lug nuts. Standard acorn lug nuts will not fit, so narrower tuner style lug nuts are required.

To tighten or loosen these conical seat tuner lug nuts, a special tuner key is also needed that fits just over the lug nut. A regular socket then goes onto the tuner key like any other lug nut. This key is included when you purchase a set of tuner lug nuts, but can also be purchased separately if the key is lost or if your car does not come with one.

Since tuner style lug nuts are open in the center (to accept the tuner key), air and moisture can reach the studs and threads and cause corrosion. For this reason, tuner style lug nuts are no longer commonly used and the spline drive style (below) is a much better alternative.

#7 – Spline Drive

Like tuner style lug nuts, this unique small diameter lug nut has a conical seat and uses a special key. The difference is that instead of an opening in the middle, spline drive lug nuts have narrow grooves on the top and sides of the lug nut to accept the low-profile key. They do not have the same potential corrosion issue.

Keep in mind that the pattern on spline drive lug nuts (and tuner style) is not unique, so do not assume you can use either as a theft deterrent. The respective replacement keys can easily be purchased by anyone at a local auto parts store or online.

lug bolt

#8 – Lug Bolt

Used primarily on German vehicles such as BMW, Mercedes, Audi, and Volkswagen, these are lug nuts with an attached stud/bolt. They are threaded directly through the brake rotor hat and into the hub.

No one really knows why Germans use bolts instead of lug nuts, but it may be that it is cheaper than having to press studs into a rotor assembly during manufacturing or simply that it is easier to replace a broken lug bolt rather than a stud.

Whatever the reason, it makes installing wheels more difficult because you simply cannot hang the wheel on the studs while putting on lug nuts. Instead, you must first ensure the rotor plate holes are aligned with the hub holes, then lift the wheel assembly and hold it in place while you install the first lug bolts. There are techniques you can use to make the job easier, but regardless, the process is more frustrating than using lug nuts.

Lug Nut Size Chart

To make your life easier (in case you’ve lost your manual and don’t have a good repair manual handy), here is a comprehensive list of car manufacturers and the lug nut sizes they require.

Note: Although we have done our best to make this list as accurate as possible, we cannot guarantee that it is complete or that a manufacturer has not changed its lug nut requirements for a particular model since its publication. Do not use this chart as your only source and instead consult your owner’s manual or contact your local dealer before using this data as more than a reference to avoid potentially damaging your wheels.

ACURA
Years
Size
Type
ALL (except below) 1986-on 12 mm x 1.5 Nut
MDX 2002-2006 12 mm x 1.5 Nut
MDX 2007-on 14 mm x 1.5 Nut
RL 2005-on 14 mm x 1.5 Nut
TL 2004-2008 12 mm x 1.5 Nut
TL 2009-on 14 mm x 1.5 Nut
ALFA ROMEO
Years
Size
Type
ALL 1972-On 12 mm x 1.5 Nut
AUDI
Years
Size
Type
ALL (except below) 1988-on 14 mm x 1.5 Bolt
4000 1980-1987 12 mm x 1.5 Bolt
BENTLEY
Years
Size
Type
Continental 2004-2017 14 mm x 1.5 Bolt
Flying Spur 2014-on 14 mm x 1.5 Bolt
Mulsanne 2011-on 14 mm x 1.5 Bolt
BMW
Years
Size
Type
ALL 1962-1976 12 mm x 1.5 Nut
ALL (except below) 1977-On 12 mm x 1.5 Bolt
7 Series 2002-2008 14 mm x 1.5 Bolt
7 Series 2009-on 14 mm x 1.25 Bolt
X3 2003-on 14 mm x 1.5 Bolt
X5 2000-2006 14 mm x 1.5 Bolt
X5 2006-on 14 mm x 1.25 Bolt
X6 2008-on 14 mm x 1.25 Bolt
BUICK
Years
Size
Type
ALL (front-wheel drive) 1979-1989 12 mm x 1.5 Nut
Allure 2005-on 12 mm x 1.5 Nut

How to Remove a Stripped Oil Drain Plug (and Repair the Oil Pan Hole)

Regular oil changes are essential to prolong the life of any engine. Fortunately, changing a vehicle’s oil is generally a simple matter that usually takes no more than 30 minutes.

With a little know-how and a few basic hand tools, most motorists can change their own oil without any problems.

Occasionally, however, an oil change can present unexpected difficulties. Perhaps the most significant of these difficulties are those arising from a stripped (or rounded) drain plug. Since removing the drain plug is essential to completing any oil change, such problems can halt even the best efforts.

Furthermore, a stripped drain plug can lead to oil loss if the plug cannot be properly tightened. This leaking oil can often be seen beneath an engine’s oil pan. In such cases, proper repair will be necessary to avoid significant oil loss and potential engine damage.

Read on to learn more about how to remove a stripped drain plug, should you find yourself facing such problems in the future.

How Does an Oil Drain Plug Get Stripped?

stripped threads

The term “stripped” oil drain plug (or oil pan plug) is generally used to describe one of two conditions. These problems differ from each other in their context, as well as in the possible means of repair.

The first of these conditions involves damage to the threads of an oil pan’s drain hole. This damage prevents a drain plug (or oil pan bolt) from being properly tightened.

This condition often results in continuous oil leaks and must be repaired at the first available opportunity. Failure to correct these issues can damage the engine due to excessive oil loss.

Stripping of a drain plug’s or oil pan’s threads usually results from prior over-tightening. All drain plugs are subject to a specific torque at which they must be tightened upon reinstallation. If this torque value is ignored and over-tightening occurs, it can damage the threads of a drain plug or oil drain pan.

The second condition often described as a “stripped drain plug” actually refers to the rounding of a drain plug’s hex head. This prevents a wrench or socket from being properly applied to a drain plug during removal.

rounded drain plug
rounded head

As a result, it is impossible to drain the old oil from an engine’s pan. Ultimately, this problem must be corrected before an oil change can be performed.

The most common cause of a rounded drain plug is the use of an improperly sized wrench or socket during prior removal/installation. This often occurs when a standard socket is used in a metric application or vice versa.

Once the head of a drain plug begins to round, further rounding during successive oil changes is imminent.

How to Remove a Stripped (or Rounded) Oil Drain Plug

As mentioned earlier, the term “stripped drain plug” is often used to describe two different conditions. The procedure for remedying each of these two problems also differs. However, with patience and a steady hand, one can take control of either scenario.

Drain Plug With Stripped Threads

A drain plug with stripped threads can often be removed simply by turning it counterclockwise with a wrench or socket. However, it may be necessary to provide slight outward force on the plug itself to engage the remaining threads.

This can usually be accomplished using a flathead screwdriver, wedged between the external surface of the oil pan and the underside of the drain plug’s head.

If the head of the stripped drain plug is flush with your engine’s oil pan body, a channel lock pliers can be used to turn the plug counterclockwise while pulling outward. In most cases, this method will prove sufficient for removal, even under less-than-ideal circumstances.

Drain Plug With a Rounded Head

Removing a drain plug with a rounded head requires a totally different strategy. Removing a drain plug in this condition usually requires the use of a special socket called a bolt extractor, which features internal spiral grooves. Irwin Tools makes one of the best sets and it doesn’t cost a fortune.

A socket of this nature can be lightly tapped onto the head of such a drain plug using an impact hammer. This causes the socket’s internal grooves to bite into the head of a rounded bolt, thus simplifying the extraction process.

How to Repair a Stripped Oil Pan Drain Hole

stripped oil pan drain hole

In some cases, an oil pan’s drain hole can become stripped, making it impossible to tighten your engine’s drain plug as desired. This can be quite troubling, leaving many motorists worried about what seems to be an irreconcilable problem.

Fortunately, such problems can often be resolved using a quality oil drain plug repair kit, like those made by Lisle or Supercrazy Tools.

Scotch oil pan rethreading kit

Oil drain plug repair kits focus on removing any remaining damaged threads from an oil pan’s drain hole, before re-threading this drain hole to accept a slightly oversized plug.

When performed correctly, this procedure allows for the installation of a new drain plug in the same manner as the vehicle’s original plug. This eliminates the need to purchase and install a replacement oil pan, thus saving a lot of time and money.

How to Use an Oil Drain Plug Repair Kit

The general steps for using an oil drain plug repair kit are as follows.

#1 – Remove Damaged Threads

Many oil drain plug repair kits feature a boring drill bit, which removes the remnants of any pre-existing threading. This provides a renewed surface, which can be tapped to accept a new drain plug.

#2 – Tap New Threads

A special-sized tap will then be carefully screwed into the oil pan’s drain hole. This cuts new threads, to which an oversized drain plug will grip. In most cases, a tap of this nature will be turned several turns clockwise, before being turned 1-2 turns in the opposite direction.

This process will be repeated until the tap has passed through the entire depth of the oil pan’s drain hole.

#3 – Inspect Threads

Once a new set of threads has been cut into your oil pan’s drain hole, one must pause to carefully inspect their handiwork. Ensure that all threads are cut evenly and are free of excess metal chips.

#4 – Flush Out Oil Pan

After re-tapping your oil pan’s drain hole, it is always a good idea to flush a ½ quart of oil through your vehicle’s engine before installing a new drain plug. This will remove the vast majority of metal chips that would otherwise circulate in your engine oil.

#5 – Install Oversized Drain Plug

You will now screw a new drain plug into your oil pan’s newly threaded drain hole. Care should be taken when initially tightening this plug to identify any potential abnormalities.

The drain plug itself should be tightened to the value specified by your repair kit’s instructions. After tightening the drain plug, check that its sealing washer sits evenly around the outer perimeter of the drain hole.

#6 – Refill Oil And Check For Leaks

Check the integrity of your repair by checking for leaks after filling your engine’s crankcase to full capacity with fresh oil. If no leaks are evident, start your engine and check again for leaks.

This inspection should be repeated once more after driving your vehicle a short distance. If your oil pan and drain plug still appear dry at the end of a short road test, there will be little reason to anticipate further problems of any kind.

Preventing Stripped Drain Plug Threads

torque wrench oil drain bolt

While it is impossible to avoid the possibility of suffering drain plug damage inflicted by a vehicle’s previous owner, several precautions can be taken to avoid causing such damage yourself. By following these key procedural points, the risk of stripping a drain plug is virtually eliminated.

The first of these precautions is to use a properly sized wrench or socket during every oil change. This significantly reduces the risk of rounding a drain plug’s hex head. Information regarding the drain plug size for a particular vehicle can often be found via the internet or by consulting a manufacturer-specific service manual.

One should also adhere to proper torque specifications when tightening their vehicle’s drain plug. This significantly reduces the risk of damaging the threads of your engine’s drain plug or oil pan.

A torque wrench can be used to avoid over-tightening, while ensuring that the drain plug in question is not left loose to any degree.

Can I put water in my radiator in an emergency?

Summer has finally arrived and you are on your way to the beach for a long-awaited family vacation. Everything is fine and you are only a few hours from your destination when an unexpected event abruptly interrupts your journey. As the reading presented by your vehicle’s temperature gauge begins to soar, you realize that something is wrong.

A quick glance under your vehicle’s hood reveals a lack of coolant in the cooling system’s overflow reservoir, indicating an apparent leak. Although the nearest store within walking distance does not stock coolant, the store clerk offers several gallons of water to top up your vehicle’s cooling system.

This raises an intriguing question. Can you put water in your vehicle’s radiator or cooling system in an emergency, and does it pose a risk to your vehicle’s engine?

Read on to learn more about using water in automotive cooling systems, as well as how to properly handle such roadside emergencies if faced in the future.

What Happens If You Use Water Instead of Coolant?

In the vast majority of cases, it is perfectly safe to fill your vehicle’s cooling system with water in an emergency. However, before doing so, it is important to understand that water offers no protection against freezing and also boils at lower temperatures than antifreeze.

Therefore, water should only be used as a temporary substitute for coolant. A vehicle’s cooling system should be filled with the appropriate coolant as soon as all underlying leaks have been repaired. Failure to replace this water with the appropriate type of coolant can lead to a multitude of troubling problems over time.

Over extended periods, using water can lead to the development of corrosion in a vehicle’s cooling system. As this corrosion continues to worsen, overheating problems can manifest, as rust particles clog cooling passages and restrict radiators.

Once this corrosion cycle begins, it can be quite difficult to stop, leading to years of overheating problems.

bad radiator cap symptoms

Water must also be drained from an engine before the onset of cold weather, as water offers no freeze protection. When water freezes, it expands and occupies a significantly larger volume than when in its liquid state.

Although most engines feature freeze plugs, which are intended to relieve the pressure from this expansion, water freezing within an engine’s cooling system still poses a high risk of damage.

Engine blocks and cylinder heads are known to crack or break under the stress imposed by the expansion of frozen water. Similarly, radiators rarely stand a chance against such expansion.

Ultimately, problems of this variety will often prove to be much more problematic than those that led to your engine’s initial coolant leak.

Does the Type of Water Matter?

Although water of any type is never intended to be extended (by itself) in an engine’s cooling system, some types of water are more suitable for such uses than others. This is because certain types of water present an increased risk of corrosion and scale buildup within the cooling system.

Whenever possible, the use of ordinary tap water for such purposes should be avoided. Tap water contains many minerals that are catalysts for corrosion. Therefore, using tap water in an engine’s cooling system can lead to an accelerated buildup of problematic deposits, in turn worsening issues related to overheating.

In order to avoid the problems presented by tap water, softened or purified water should be used as an alternative, whenever possible. However, one can use distilled or bottled water for the same purpose, if such products are readily available.

Use:

  • Purified water
  • Softened water
  • Distilled water

Do not use:

  • Tap water
  • Spring water

Will a Car Overheat With Just Water in the Radiator?

overheating temperature gauge

Although water is relatively effective at keeping an engine cool, its boiling point is slightly lower than that of coolant. Water boils at a temperature of 212° F, while 50/50 coolant boils at 223° F.

Although this gap seems somewhat minor, it is significant enough to make coolant far more effective at preventing boil-over than water. Therefore, using water alone, in a vehicle’s cooling system, leaves an engine susceptible to overheating under strenuous or demanding circumstances.

Although such inefficiencies might not be evident at cruising speeds, motorists should remain mindful that an engine is not sufficiently protected against overheating when running pure water in its cooling system.

Should I Pour Water On My Engine to Cool It Down?

When an engine overheats, the vast majority of motorists are intent on providing additional cooling by any means necessary. However, one can do more harm than good by taking action, without considering the possible consequences. Pouring cold water on an overheated engine is a prime example of this.

The reason for this is quite simple. Metal, like that which makes up the engine block and cylinder heads, expands when heated. Upon cooling, this metal will contract back to its normal state.

Metal is capable of withstanding these fluctuations when heating/cooling occurs gradually. On the other hand, rapid heating or cooling can cause metal surfaces to crack in one or more locations.

Pouring cold water on an overheated engine is one of the leading causes of thermal shock-related damage. The sudden cooling provided by pouring water on an engine causes its block and cylinder heads to contract rapidly.

More often than not, this will lead to the development of one or more cracks in an engine’s vital structural components. Damage of this nature can be quite costly to repair and might even exceed the overall value of a vehicle itself.

How to Safely Top Up Coolant in Radiator With Water

Although water can be used to top up a vehicle’s cooling system in an emergency, several special measures must be taken when attempting to accomplish such a task.

The following steps, when followed, will help you safely add water to your engine’s radiator.

#1 – Let Engine Cool

Water should never be added to a hot engine. Instead, one should allow their engine to cool to room temperature, before attempting to top up the system.

#2 – Remove Cap

With the engine cooled, you will now remove your engine’s cooling system fill cap. In some applications, this cap will be located along the upper radiator tank, while other systems will be capped at a remote overflow reservoir.

In any case, this cap should be opened slowly, using a cloth or towel in hand. You do NOT want any spray of scalding coolant on your hands, arms, or even your face.

#3 – Add Water

Water should be added slowly to any cooling system, allowing as much air as possible to escape from the system itself.

Most overflow reservoirs are stamped with a “full” mark, which will provide visual confirmation of the system’s fluid level.

Alternatively, systems without an overflow reservoir should be filled until reaching a level just below the radiator’s fill neck.

#4 – Burp System

With water added, it will now be time to “burp” your engine’s cooling system of air. This is accomplished by letting the engine idle, with the system’s fill cap still removed. You should notice small bubbles being expelled upward through the water contained within the system.

Burping should continue until the engine has warmed sufficiently to allow the system’s thermostat to open. At this point, water will again be added if necessary and the system’s fill cap will be reinstalled.

#5 – Keep A Watchful Eye

When driving, one should keep an eye on their vehicle’s temperature gauge, in order to identify the early signs of overheating. Identifying the root cause of your engine’s initial coolant loss should also be prioritized.

Once all repairs have been made, the water should be drained from the system and the appropriate coolant added. Be sure to consult your vehicle’s owner’s manual to determine acceptable coolant types.

OBD Scanners – The Mechanic’s Personal Assistant


Tired of giving all your money to your mechanic instead of investing in your next road trip? That’s why OBD scanners might be the best investment for your money – but what exactly are they?

WHAT ARE THEY

Simply put, an onboard diagnostic scanner is a portable device that allows you or your mechanic to gather important information about various aspects of your car. This will enable you to take preventive measures if your vehicle encounters problems, saving you money in the long run. This device was initially developed for professional mechanics but is now available to anyone who wants clear and concise information about the status of their vehicle’s various features. It can monitor your car’s engine, report any detected issues, and record data. This gives you the advantage of being able to solve problems yourself and not having to rely on an expensive mechanic.

OBD1 OR OBD2?

OBD1 or OBD2? If you’ve heard of an OBD1 scanner, you might wonder what the difference is between it and an OBD2 scanner. OBD1 scanners are connected to the car’s console, have good diagnostic capabilities, are compatible with cars manufactured before 1996, and can help solve smaller issues. They also include built-in memory that stores codes but can be difficult to read. They are also much less popular among car owners because OBD2 provides more comprehensive information.

Onboard diagnostic scanner

OBD2 is connected to the vehicle remotely via Bluetooth or Wi-Fi, has better messaging formats and signaling protocols – making it perfect for cars manufactured after 1996. If you prefer the wired option, it is also available. If you don’t have much experience with cars, OBD2 would be the best tool for you. Most vehicles equipped with an OBD2 port have a standard CAN pinout. If your car requires a non-standard arrangement, it can be customized to meet your vehicle’s needs. In addition to the information provided by OBD1, it can also inform you about the air-fuel ratio, oil temperature, or potential issues with your airbags, and much more. OBD2 also provides live mapping and online programming.

HOW DO I KNOW WHAT IS WRONG WITH MY CAR?

How to know what is wrong with my car

OBD2 provides you with a fault code scanner. These five-digit codes inform you about any malfunction in your vehicle. For example, if the first letter is a C, it could be a brake issue in the chassis. If you encounter a problem with the network communication system, you’ll see a P. The second character of the code tells you whether the problem comes from the manufacturer or is a more generic issue. With over 5000 codes, you can be assured that no matter the problem, the scanner will find it.

If you invest in an OBD2 adapter, you benefit from Bluetooth connectivity: Bluetooth can help you track information such as how much you spend on gas, diagnose the “check engine” light – which could indicate anything from an engine misfire, a faulty spark plug, to a defective catalytic converter that may need replacement. It is also very helpful if you need emergency assistance or can’t remember where you parked your car.

Car Air Filters – Keep Your Car Oxygenated

Every vehicle needs oxygen for the combustion engine to function properly. Air filters keep the engine free from dust, debris, or other small particles, such as sand, so it can “breathe.”

You can find air filters in a variety of shapes and sizes, cylindrical, round, or panel. If you’re looking to clean or replace your filter, you’ll find it near the front of the engine compartment under the hood. Some vehicles are equipped with large, round metal air filters that are hard to miss.

HOW DO I DETECT IF MY AIR FILTER NEEDS CLEANING?

Many signs indicate that it may be time to clean or replace your air filter. The most obvious is that it looks dirty. Your vehicle will also let you know and show it in different ways:

Your car consumes more fuel than before. If you notice you’re spending more money at the gas station, and not due to higher prices, it’s time to check your air filter.

The engine misfires, hesitates, or has trouble starting. If the engine doesn’t get enough air, unburned fuel will escape from the engine and lead to soot residue. Soot then builds up on the spark plug, which consequently cannot provide enough spark to ignite the air-fuel mixture.

If, when pressing the accelerator, you notice jerking or surging. This could indicate that your car isn’t getting enough air to run properly.

Signs of a dirty air filter

The exhaust emits soot, black smoke, or even flames. If your engine doesn’t get enough air, it can prevent some fuel from burning completely. The unburned fuel then exits through the exhaust pipe. If you notice your exhaust pipe emitting black smoke, you need to clean or replace your filter. This condition is potentially dangerous and should be addressed immediately.

If your fuel injection system or carburetor doesn’t get the oxygen it needs, unburned fuel will then be emitted from the exhaust pipe. Rather than seeing flames or smoke, you’ll notice a gasoline smell – a clear sign that it’s time to replace the air filter.

The car has started making unusual noises. Normally, when your engine is on, but your car isn’t moving, it doesn’t make any noise other than the hum of your engine. If you hear your car start to “cough” and “wheeze,” or if you notice unusual vibration, it’s time to clean or replace your filter.

HOW TO MAKE YOUR AIR FILTER AS GOOD AS NEW

Before working on your car, make sure your engine has cooled down. Protective equipment, such as glasses, a face mask, and a pair of gloves, is recommended to prevent injury.

Locate the filter, and if it’s enclosed in a cover or housing, simply remove it with regular tools like a screwdriver or wrench and set it aside. Do not let debris, dirt, or dust get into the nearby intake or airbox. If debris has fallen to the bottom of the airbox, clean it with a vacuum. Do not use compressed air – you might inadvertently blow debris around your engine.

Hold the filter over a trash can or garbage bag and shake it to remove as much debris as possible. Using a vacuum, remove as much dirt as possible that still remains on the filter. The easiest and most convenient way to do this is with a handheld vacuum.

You can buy a ready-to-use filter cleaner or make one yourself. Simply combine water with a mild laundry detergent or dish soap in a 2:1 ratio. Fill a spray bottle and close it tightly to prevent liquid from leaking from the cap, and shake well before use. Now spray it on and into the filter (depending on the shape) and let it soak for a few minutes, but do not let it dry.

Next, scrub the filter with a soft-bristled brush, being careful not to press too hard, which could damage the filter. You can use a toothbrush to scrub small crevices that the regular brush can’t reach. Make sure you’ve removed all the cleaning solution and residue before moving to the next step.

Using a tap with running water or a garden hose, thoroughly rinse the filter from the clean side outward to wash away the dirt. Be sure to keep the water pressure low to avoid damaging the filter and continue until all the cleaner has been removed. Shake off excess water from the filter carefully, then let it dry completely.

If you have oil-coated filters, you need to take an extra step. Use an air filter oil and spray the top of each filter pleat, keeping the nozzle about three inches away. Ensure the filter is evenly coated with oil and let the oil soak in for about 20 minutes. With this step, it’s essential that you let the filter dry completely before reinstalling it. Not doing so could cause your mass airflow sensor to malfunction. Now reinstall the filter using the same tools you used to remove it. Take a second look to make sure everything is reinstalled correctly.

REPLACING A DIRTY FILTER

Cleaning or replacing the air filter

Locate your air filter housing and, using common tools like a screwdriver, remove the screws holding the housing together. Then, remove the cover to locate the filter, making sure not to dislodge any hoses or stretch any wires. Be sure to note the position of the filter so you can install the new one correctly. This is the time to vacuum any dirt or debris that may have fallen into the compartment. Install the new filter, ensuring the outer seal is properly in place before closing the filter cover. Close the cover and replace the screws or clips.

HOW OFTEN DO I NEED TO CLEAN OR REPLACE MY CAR’S AIR FILTER?

It is recommended to clean or replace your air filter after about 15,000 to 30,000 miles. This can vary depending on the vehicle and the environment in which you drive. If you often drive through the countryside on dusty roads, you may need to clean or replace your filter more frequently.

The ins and outs of fuel filters

Fuel filters are a necessary part of contemporary internal combustion engines. Their main function is to protect against rust particles and dirt and to regulate the flow of fuel and air into the engine. They are essential for protecting the environment by reducing fuel consumption and emissions. Replacing or cleaning the fuel filter yourself can save you a lot of money since labor is expensive. For example, in the UK, the average replacement cost is £114. Therefore, being a DIY-type car owner will have a positive effect on your wallet.

You will find the fuel filter inside the fuel tank in the opening of the fuel hose that supplies your car with gasoline or in the fuel hose typically located at the bottom of your vehicle.

HOW DO I KNOW IF MY FUEL FILTER NEEDS CHANGING OR REPLACING?

If your car starts showing the following warning signs: misfires or irregular idling, difficulty at low speed and stalling, or loud noises from the fuel pump, you likely have a blocked or clogged fuel filter, or perhaps water in the filter. Your car will tell you if there is a problem with your fuel filter. If the warning light comes on as soon as you start your car, it’s time to change or unclog your filter. You might be tempted to keep driving with the light on, but it’s important to drain the filter as soon as possible. If you wait too long, water could accumulate and eventually enter your engine, where it could cause serious damage.

FUEL FILTER MAINTENANCE FOR OPTIMUM PERFORMANCE

Fuel filter maintenance for optimum performance

Like many vehicle parts, fuel filters require regular maintenance. To maintain optimal performance, it is recommended to regularly replace your filter. In the past, the recommended interval was every 20,000 to 30,000 miles. Nowadays, thanks to improvements in vehicles and fuels, filters can be replaced every 60,000 miles. If your car uses a paper or nylon filter, you can simply install a new one. In the case where you have a metal filter and it’s not too dirty, you can simply wash it and reuse it.

REMOVING YOUR FUEL FILTER

If you decide to clean the filter, there are a few important steps to keep in mind. First, only work on your car in a well-ventilated area. Consult the owner’s manual and locate your fuel pump fuse. Remove it, then start your engine and let it run for about two minutes. Now, turn off your engine and open the hood. Locate the negative terminal of your battery and using a wrench, loosen the cable. Place the cable to the side of the battery to prevent it from accidentally touching its terminal.

Remember that if your terminals are red and black, the negative terminal is black. Not disconnecting the battery can cause sparks and ignite residue and gasoline vapors flowing from the fuel lines. Now locate the filter. As mentioned above, its location may differ depending on the make and model. Most likely, you will find it under the car just behind the fuel pump. Sometimes, it is located in the engine compartment. If it is necessary to lift your car, consult your manual to locate your vehicle’s jack points. Place a jack under one of the jack points, then repeatedly press or turn the handle to lift the vehicle. Be cautious and do not rely on the jack to support the weight of your car and do not work under a vehicle that is not supported by jack stands.

Place a container, such as a bucket, under the filter to catch any fuel that might spill. Then, detach the clips that secure the fuel line to the fuel filter. The precise design of the clips may differ by model. Look in your manual, or online, for your vehicle’s design. You can use your hands to remove them or pry them out with a flat-head screwdriver.

Detach the fuel lines using a wrench or hose clamps to remove the fuel lines from the filter. Remove the lines from the nozzles at both ends of the filter. When disconnecting the fuel lines, wear gloves and safety glasses to prevent injury. Make sure to point them towards your bucket or container to catch any fuel that might flow out. Now detach the filter from the bracket. Either loosen the bolts holding it in place, or simply slide it out of the bracket. Be sure to pay attention to its position before removing it, so you remember how to reinstall it correctly.

CLEANING THE FILTER

There might still be fuel in the filter, so carefully drain the fuel inlet and outlet nozzles into the container you used to catch the spilled gasoline. You will find them at each end of the filter.

Use a cleaner provided with an application straw. Attach the straw to the nozzle of the bottle or can and spray inside both nozzles. Gently tap the filter against the container you used to hold the spilled gasoline. Let the dirt, debris, and spray from both nozzles fall out. Repeat this procedure once more and let the filter air dry for at least one hour.

REINSTALLING THE FUEL FILTER AND FINAL STEPS

Reinstalling the fuel filter

To reinstall the filter, slide it into the bracket in the correct position. Replace the bolts you removed, if necessary. Make sure you have securely attached the lines to prevent any leaks. Now reattach the clips that secure the lines to the nozzles.

If necessary, lower your car and reconnect the fuse and battery. If you lifted your car, lift it further to remove the supports, then lower it to the ground. Use a wrench to reconnect the cable to the negative battery terminal and replace the fuel pump fuse.

Now that you have reconnected the fuse and battery, let your engine run for a few minutes. Due to the need to restore fuel system pressure, you may need to try several times before it starts. Once it has started running, look under your vehicle to see if there is a fuel leak.

If you see leaks, you will need to jack up the car again (if necessary), disconnect the battery, and tighten the fuel lines. If, after a few minutes, your engine does not start, check your fuses again. In case the interior lights and dashboard do not light up or are dim, you may need to restart your battery. If the fuses and battery are working, check that the fuel lines are not loose and that you have put the filter back in the correct position.

CORRECT PETROL DISPOSAL

Make sure to dispose of the old gasoline properly. If it is not too contaminated with dirt or debris, reusing it in gasoline-powered equipment, like a leaf blower, is the most environmentally friendly solution. If it is full of debris and not reusable, place it in a safe container for gasoline storage and bring it to a disposal center. The container must be tightly sealed when moving it – and remember that it is extremely dangerous to light a fire or smoke near flammable liquids.

Camshaft Sensors: Functions and Malfunctions

These devices are essential components for an internal combustion engine to function properly with maximum efficiency. In this article, we will detail what they are, where the camshaft sensor is located, what they do, and common problems with the device that may occur.

WHAT IS A CAMSHAFT SENSOR?

A camshaft sensor or camshaft position sensor is a device that determines the precise position and speed of the crankshaft in conjunction with the crankshaft sensor. It is typically located at the top of the engine, either on one or both cylinder heads, on top of the engine block, or, in some cases, on the intake manifold. A camshaft sensor sends this data to the vehicle’s Engine Control Module (ECM), which allows the ECM to determine the amount of fuel injected into the combustion chamber, as well as the timing of its ignition. The information from both sensors enables the engine control unit to determine the top dead center of the first cylinder.

SYMPTOMS OF CAMSHAFT SENSOR MALFUNCTIONS

A faulty device can lead to several problems. If the information relayed by the sensor is off by just a few fractions of a second, it can still cause engine knocking, reduced power, and poor acceleration. In extreme cases, the engine may even stall or shut down. Sometimes, the result is also that the transmission shift solenoids no longer function and the gears cannot shift properly. Poor timing can also cause the fuel injectors to operate for too long, wasting fuel and leading to a buildup of liquid gasoline in the combustion chamber. Ultimately, ignoring the symptoms of a failing camshaft position sensor can prevent the engine from starting at all, leaving the vehicle stranded. Fortunately, one of the most common symptoms of a malfunction is the “check engine” light illuminating on the dashboard.

HOW TO CHECK FOR A FAULTY CAMSHAFT POSITION SENSOR

After recognizing the symptoms listed in the paragraph above, it’s a good idea to check the device itself for any potential damage. What causes a camshaft position sensor to malfunction can vary, so a proper inspection is necessary. Locate the sensor at the position mentioned above or consult your vehicle’s make and model documentation to determine its location if you cannot find it. If the sensor itself shows no visible damage, check its wiring and electrical connectors. If any of the wires or cables are broken, corroded, damaged, or poorly secured, you may have found the culprit. If the vehicle has a modern onboard diagnostic system, the engine control unit may also indicate an error code that can be scanned with a DIY scan tool or at a properly equipped garage to determine the location of the sensor malfunction.

HOW TO REPLACE A FAULTY CAMSHAFT SENSOR

Once you have determined that the sensor itself is the cause of all your problems, you can either replace it yourself or take your car to a garage to have the part replaced with a functioning one by expert mechanics. Replacing it yourself should generally not be attempted unless you have some experience in car or vehicle maintenance and have access to the appropriate tools and a safe, dry place to perform the repairs. If all these conditions are met, however, you can proceed with replacing the camshaft position sensor yourself. Note that the exact location and installation method of the sensor may vary from vehicle to vehicle, so take the time to consult the relevant documentation before attempting to remove it from your car’s engine.

  1. Locate the sensor. Once you know where it is, you can move on to the next steps.
  2. Disconnect the negative battery cable. Gently remove the negative battery cable from the camshaft sensor and set it aside where it won’t be in the way.
  3. Remove the sensor’s electrical connector. This should be fairly straightforward and only involve pressing a tab. Otherwise, use a flathead screwdriver or another appropriate tool.
  4. Unscrew the sensor. The camshaft sensor will be mounted using a number of screws. Loosen them using the appropriate tool. Keep these screws in case the new sensor does not come with any.
  5. Remove the old sensor. Now that it’s no longer connected to anything, the sensor should be easily removed by pulling it out. If not, check if it’s still connected to something.
  6. Install a new sensor. Mounting the sensor should work as simply as removing the old one. Align it properly and push it into place.
  7. Screw in the sensor. Use the mounting screws and securely fasten the new sensor in place. Use the same tool as before.
  8. Reconnect the sensor’s electrical connector. Connect all the cables to the positions they were in on the old sensor.
  9. Reconnect the negative battery cable. Reconnecting it will complete the installation of the new camshaft position sensor.

WHAT TO DO AFTER REPLACING THE CAMSHAFT SENSOR

There are really only two options here, and they depend on how the installation process went. If everything works fine, continue driving your car without worry or concern and pat yourself on the back (but not while driving). You have successfully replaced the part. If your car still has issues or is in an even worse condition, well, you really should consult a garage for repairs.