
UNCHECKED CO2 AND OTHER GASES CAN HARM THE ENVIRONMENT AND YOUR WALLET


An air suspension upgrade can improve your car’s comfort.
Whether it’s speed bumps in a residential cul-de-sac, low curbs on driveways, or even potholes or unintended bumps on the road, it’s sad to say that roads in the UK don’t really favor heavy-load-bearing or high-performance sports vehicles. There have surely been times when you’ve wanted to raise your truck’s or car’s suspension to help it clear an obstacle more easily. Similarly, sometimes when there’s nothing in the back of your van, you’re sitting quite high and you can feel yourself going much slower than usual. While normal suspension systems that revolve around coils and springs are comfortable and maintain good vehicle handling, they don’t offer you the possibility to raise or lower your vehicle. Enter air suspension.
Air suspension, or air-ride, has been around for a long time, and replacement kits first appeared for sale to be fitted to cars as early as 1920. In addition to providing driver comfort, it was used from the start as self-leveling suspension for heavy loads. People even used it to help smuggle illegal moonshine! That’s why, even today, many new trucks and trailers are equipped with air suspension systems, and there is a multitude of replacement kits that can be fitted later.
Air Lift is one of the best-known companies for replacement air suspension, and it has been around since 1949. Although we tend to associate air-ride as being more focused on comfort than performance, it was extremely popular in dragster and NASCAR racing in the 50s and 60s.
So, what is this air suspension, why do people want it, and what are the advantages and disadvantages of using air suspension?
Conventional shock and spring suspension systems that feature steel components provide a vehicle with great handling and fantastic performance at all levels. Air suspension, however, replaces these components with robust rubber airbags that can be inflated using an onboard or external air compressor. This allows the vehicle to raise itself or lower itself depending on the inflation level of the airbag and can make a car much more comfortable to drive or give it a better appearance. Does air suspension affect performance? Yes – but not necessarily in a bad way. Modern kits also feature elements such as adjustable camber mounts and adjustable damping, meaning you can have the best of both worlds.
It’s important to note that there are two different types of air suspension: “semi” air suspension and “full” air suspension.
“Semi-air suspension” supports the existing suspension of a car. This is often found on heavy goods vehicles or trucks. An air spring is installed between the chassis and the rear axle, which increases the vehicle’s ride height and generates greater spring travel. In this way, semi-air suspension helps increase the level of comfort and stability when you are traveling in your vehicle.
If you have suspension issues, full air suspension could be a fully automatic and adjustable solution. The conventional suspension system is completely replaced by a full air suspension system that filters out road surface irregularities, making the ride much more comfortable.
So, ultimately, the only major difference between conventional and air suspension systems is that instead of the car sitting on a coil spring, it is sitting on a rubber bellows of compressed air. As the bags are not pre-inflated, they are powered by an air tank and an electric air compressor, with the car needing to be lifted and lowered simply by inflating and deflating the bag.
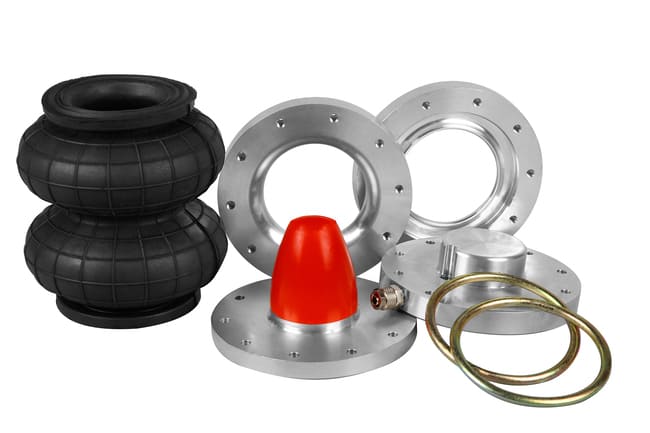
These are solid rubber bases that replace the coil spring of a conventional setup. They come in two main styles: the coilover configuration or the conventional style. In the coilover configuration, the bag has a hole in the middle allowing the shock absorber to pass through it. In the conventional style, the bag is completely independent of the shock absorber.
Modern airbags are not like a balloon filled with air that we might imagine. They are solid and durable and are designed in such a way that they only expand and contract from top to bottom. At full inflation, they can have an air pressure of 100 psi.
If you have a suspension design where the spring is mounted separately from the shock absorber, the same shock absorber that you would have used with your conventional coil spring can be used. Fortunately these days, with the rise in popularity of airbags in the tuning scene, there are now coilover-style kits for a wide range of cars, offering a matched shock and airbag combo. These kits not only simplify installation, but they improve handling and ride. Many of them feature shock absorbers with height-adjustable platforms for the bags, adjustable damping, and even adjustable camber top mounts.
Air doesn’t just magically enter the airbags. That’s what the compressor does. All air suspension kits require at least one compressor, and you’ll generally find that the one supplied is quite small and compact; they often fit neatly in the car’s trunk. They often run on a 12-volt power supply and therefore won’t drain your battery. The big issue is, however, that they are often very noisy.
That noise from the compressor is what makes the air tank necessary. You could have air-ride without it, but the pump would have to run far too often and it would take too long to lift the car unless the pump was gigantic. An air tank is used as the main supply for the airbags, and the air compressor simply serves to keep the tank above the minimum pressure. Depending on the size, air tanks allow the suspension to be lifted at an acceptable speed without the compressor needing to kick in. This also needs to be stored in the trunk of many cars. You just have to decide what matters most to you; more trunk space or a larger tank.
The higher your suspension is, the higher the wind resistance of the truck and trailer, meaning your fuel economy is going to be worse.
Advanced air suspension systems can adjust the ride height based on the load weight and the type of journey you are making. For long highway trips with light loads that don’t compress the suspension as much as heavy loads, the suspension can be set lower to maximize your fuel economy. For heavy loads, the suspension can be made as firm as needed and the vehicle remains lower to the ground due to the heavy load. In both situations, the vehicle remains low and allows you to save fuel. In a conventional suspension system, if the load was light, the vehicle’s suspension, which is designed for heavy loads, would remain stiff and your fuel economy would be much worse due to the resistance.
Due to this decrease in fuel consumption and the smooth ride, it automatically means you use less fuel, journeys are faster and shorter, and consequently, it’s much better for the environment. That’s something we can all be happy about!
Better for your cargo and better for your back on those long journeys, air-ride reduces vibrations from the truck or car. Back pain isn’t just something that comes with age; Long-distance heavy goods vehicle drivers can experience it if they are in a seated position for a long time. Vibrations also cause fatigue and discomfort, meaning a happier, fresher, and ultimately safer driver.
Similarly, the cargo carried by the truck is less likely to be damaged or shift in the back of the van or truck as well (although load packaging and restraint methods these days are very good anyway).
Alongside this, a trailer can be used for more types of loads when the suspension setup is flexible. Fragile loads such as glass are less likely to be damaged, and loads with difficult weight distribution can be leveled.
Less vibration and better load distribution through leveling improve tire wear. Some air suspensions can even lift unused axles, thereby prolonging the life of those tires.
Suspension is also a major factor in how a vehicle behaves. Better suspension could mean less likelihood of a rollover event. If the vehicle is higher off the ground, it is much more difficult to handle, and this can be a problem for vans or trucks with a rigid suspension system when they are not carrying a load.
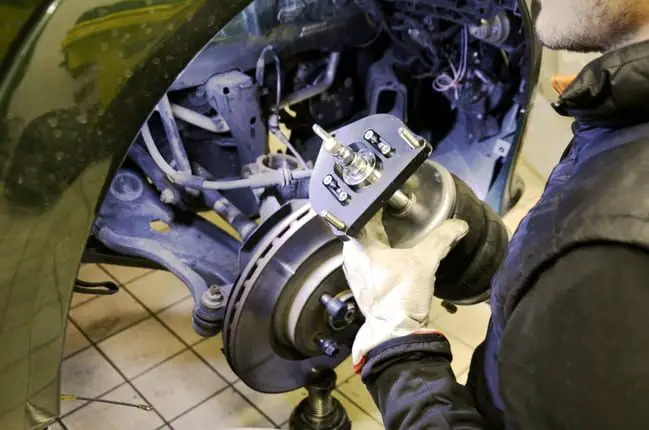
The advantage of these systems is that they are very easy to install. 5 years ago, it might have been a bit different, but nowadays, there are various direct replacement kits for a large number of popular cars. While fitting a full air suspension system to a car remains a job for professionals, for most of us, fitting a semi-air suspension is no more difficult than fitting a set of coilovers and shouldn’t take more than a day to do. These “plug-and-play” semi-air suspension kits are also relatively inexpensive. Where to install the air suspension isn’t much of a problem because these kits are designed to fit current suspension systems, provided there is trunk space for the tank and compressor.
This isn’t to say, however, that everything is perfect for air suspension systems, and there are a few disadvantages.
Some truck drivers still argue that traditional leaf springs in an articulated truck can offer a better ride, regardless of the load. This could be partly due to the fact that air suspension can be about 50 kg heavier than leaf spring suspension. This extra weight could actually counteract the “better” handling offered by the lowered vehicle and make driving more difficult.
Since it weighs so much more, it might be possible to install other aerodynamic devices such as trailer skirts and cab side fairings to achieve the same fuel economy gains instead.
Leaf spring suspension is also much more durable and typically doesn’t require much maintenance for the first 5 to 7 years, after which it will need to be tightened. On the other hand, with air suspension, cars need to be serviced more frequently – up to 3 times the cost over the first ten years. Air suspension can leak, and you will need to keep a spare air line and other parts. Air suspension also needs to be tested more frequently, which takes time.
Although leaks are rare, finding them can be a bit frustrating. You will also lose some of your boot space. You need a decent-sized tank to prevent the noisy compressor from kicking in when you lift the car. Height changes are not as fast as with hydraulics.
Common air suspension problems can also be that the air suspension is inactive due to a leak or that the control unit is broken. The compressor could also fail, or the air tank could lose pressure. These all need to be repaired or replaced, which could cost you more due to repair costs at a garage.
So, what is it really like to have air suspension and use it daily? Better than most people might expect. A good kit, properly set up, will perform much better than conventional suspension in vans or trucks. For your average passenger vehicle, it might not be worth it, as regular suspension will serve you just fine. That said, people have happily drifted and set respectable lap times on air-ride setups, so if you have a particularly low-slung car, like a Porsche Carrera or almost any Mercedes S or E, it could be an option for you.
You will of course lose a bit of trunk space to the compressor and air tank, but no more than with a subwoofer box or a nitrous bottle, and there is very little weight disadvantage to adding the air-ride kit either.
Don’t be mistaken, however: air-ride doesn’t offer the instant height jumps that hydraulic systems do (you won’t be bouncing like a lowrider), but it really only takes a few seconds and with the right-sized tank can be done silently too. If you’re wondering if air suspension is reliable, rest assured that it is, and countless people have these systems on daily-driven cars without any problems.
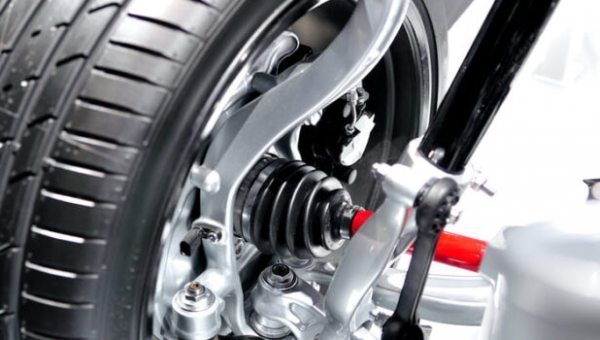

Modern automobiles often prioritize comfort and luxury alongside speed and performance. People tend to think that heated seats or cruise control systems add comfort to a journey, but the most important factor in ensuring every trip is as smooth as possible? Suspension. A car’s suspension system is undoubtedly the most important factor for having comfortable and stable performance and allowing the driver to truly control their car. But what is the purpose of the system, besides comfort, and how does it work?
The main job of a car suspension system is to ensure that there is maximum friction between the tires and the road surface, to ensure steering stability with good handling and to ensure passenger comfort. It is intended to absorb vibrations, gravity, and impact forces from the road.
If every road were completely flat, without bumps, potholes, or irregularities, suspension systems would not be necessary. But unfortunately, this is not the case anywhere in the world. Even freshly paved streets have tiny imperfections that can interfere with a car’s wheels and its operation. These imperfections exert a force on the car, pushing it upward. The magnitude of the force, of course, depends on the size of the imperfection that was hit. In any case, the car’s wheel experiences vertical acceleration when it passes over an imperfection. It is the job of the suspension system to handle these upward forces and ensure that the wheels remain on the road at all times.
If it works correctly and the wheels are constantly in contact with the road surface, then there is maximum friction and the risk of rolling or overturning the car is minimized and this helps ensure that power is transmitted to the wheels, where it is most needed. The tires absorb all shocks and vibrations, as well as other road imperfections, and in conjunction with the car’s shock absorber mechanism being part of the suspension, the effects of these shock forces can be effectively dampened. It is technically the spring mechanism of modern suspension systems that pushes the tires into the ground so that we have maximum friction and the best possible ride. Thus, when a tire hits a bump or is forced upward because of something on the road,
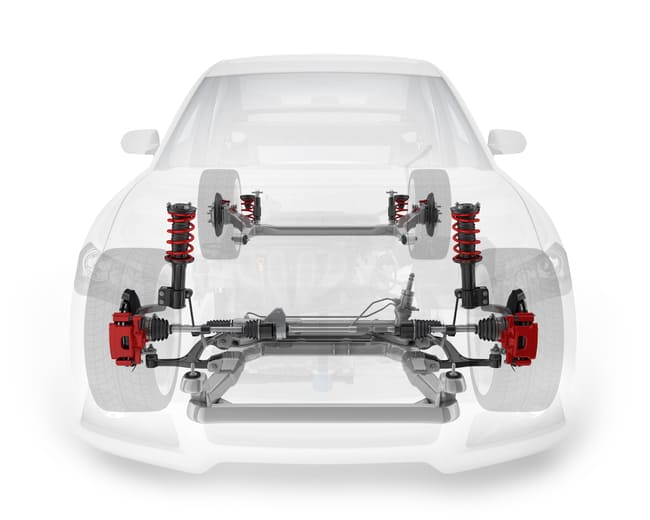
Before looking at the different types of suspension and how they work, it is important to have a basic understanding of the key elements of almost all suspension systems.
The key components of a suspension system are the springs, the shock absorbers, and the anti-roll bars. To bring it back to basics, the springs absorb the force of the impact, the shock absorbers then work to dissipate this energy, and the stabilizer or anti-roll bars are used alongside the shock absorbers to give the automobile extra stability when driving. An anti-roll bar is a metal rod that spans the entire axle and connects each side of the suspension together.
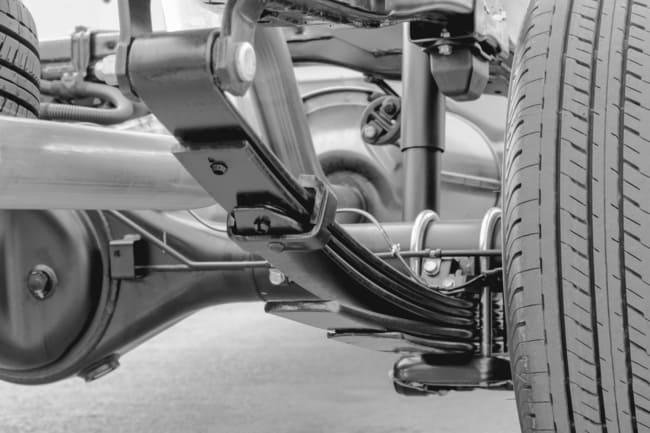
There are, of course, several types of springs, shock absorbers, or stabilizer bars. Leaf springs are one of the oldest forms of suspension springs. These springs are essentially several layers of metal bound together to act as a single thin, arc-shaped unit. They are attached to the axle and when the car hits a bump or road irregularity, the layers compress to absorb the shock. Although these are much less common for cars nowadays, they can still be found on heavy vehicles and trucks in the United States.
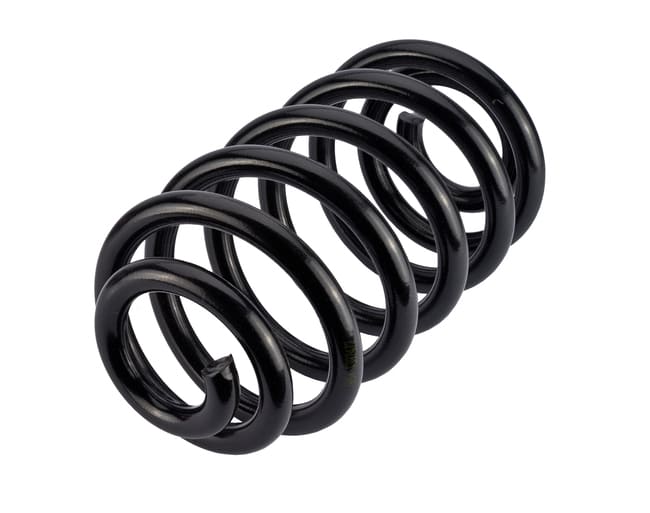
Coil springs are the most common spring component of a suspension system. A coil spring is a robust torsion bar wound around an axis. The stiffness of the spring affects the reaction of the sprung mass (everything located above the springs and thus supported by the springs) when the car is driven. If there is very little tension in the spring, it is “softly sprung,” it’s probably a very smooth ride. Luxury cars, for example, are often softly sprung. However, they can be prone to diving and squatting during braking and acceleration and have more body roll or sway in corners. Tightly sprung cars, on the other hand, give less when hitting bumps, which can be uncomfortable, but minimize body movements so they can take corners aggressively, ideal for a sports car.
A common feature of European vehicles is a system involving a suspension arm or an “A” control arm. This one consists of a torsion bar attached to a “triangular” arm (so called because it has the shape of the V-shaped “wishbone” from a turkey’s neck) and to the vehicle’s chassis. The wishbone acts as a lever that moves perpendicularly to the torsion bar; when the wheel hits a bump, the vertical movements are transferred to the wishbone or control arm, then through lever action to the torsion bar. The torsion bar then twists along its axis to provide the spring force.
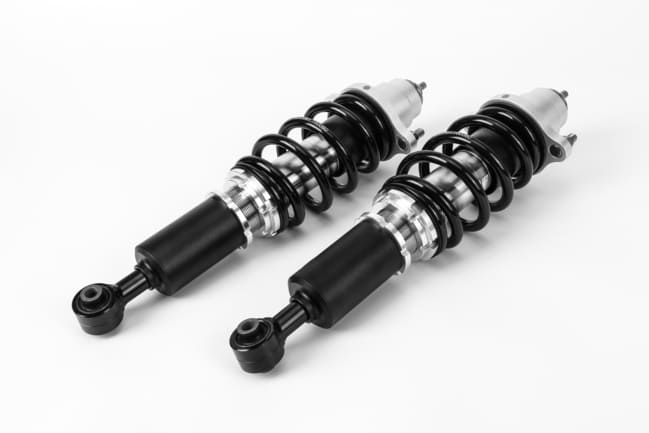
When the springs absorb the force and energy from the uneven road surfaces, this energy must dissipate in one way or another. That is the job of the shock absorbers. Shock absorbers are therefore a type of damper. They slow down and reduce the amplitude of vibratory motion by converting kinetic energy into thermal energy to be dissipated by the hydraulic fluid. Shock absorbers are speed-sensitive; the faster the suspension moves, the more resistance the shock absorber provides. They can adapt to road conditions and control all unwanted movements, including bounce, sway, brake dive, and acceleration squat.
Struts are a more advanced form of shock absorber and are essentially a shock absorber mounted inside a coil spring. It works simultaneously as a damper like a shock absorber and structurally supports the vehicle’s suspension – they do more than shock absorbers because they support the vehicle’s weight to some extent. Struts are very common in the front suspension of front-wheel-drive vehicles.
Different combinations of spring systems and shock absorbers can be found in different vehicles and the type of suspension used can even vary within vehicles – the front suspension system is likely to differ from the rear suspension system.

A suspension system can be dependent and independent. In a dependent suspension system, a rigid axle links two wheels together, while in an independent system, the wheels are allowed to move independently and are not connected to each other. Older cars tended to favor dependent suspension systems, often in conjunction with leaf springs, but more modern cars prefer independent suspension systems, especially for the front suspension. Dependent systems are robust and simple, but since there is no camber adjustment in corners, there is a risk of the wheels lifting off the road surface. As for independent suspension systems, shock loads from the road surface are isolated to the side where they are encountered, which is extremely advantageous. Of course,
Often, the front and rear suspensions of cars will be different. Front suspension systems must be integrated with the steering and can therefore be quite complex and they are also the first to come into contact with foreign objects or uneven surfaces on the road. Rear suspension systems can often be simple because steering does not need to be taken into account. This means they are often dependent systems (see below for an explanation), based on a leaf spring or a coil spring. If all our wheels have individually mounted suspension, the car can be considered to have four-wheel independent suspension.
Double wishbone suspension consists of two triangular-shaped arms (A-shaped or V-shaped) positioned one on top of the other. They are hinged at the top and bottom of the vehicle’s steering knuckle to ensure the vehicle’s steering and balance the steering wheel. Shock absorbers are often attached to each control arm and this type of suspension gives more control over the wheel’s camber angle to minimize roll and sway and provide a more consistent steering feel. These are popular on the front wheels of larger cars, which can be heavier and prone to rolling or swaying in corners. Although it is lightweight and has many advantages, it is also more expensive than solid beam (dependent) suspension systems.
Short/long arm suspension is a modification of double wishbone suspension that can be used on both the front and rear wheels of motor vehicles. In double wishbone suspension, both arms are of equal length. In a short/long arm (SLA) suspension, the two arms are of unequal length; the upper arm is shorter than the lower arm. This design allows for camber control and limits tire edge wear during cornering. The length of the upper arm is shortened so that, in corners, with centrifugal force tending to roll the vehicle and put the tires on their edges, this suspension system acts to bring the contact patch back to the center of the tire for both wheels. This effect occurs up to full jump, making it an ideal suspension for performance vehicles.
This system includes a single control arm in a strut assembly that allows the tire and wheel to move up and down. This reduces unsprung mass and increases ride comfort. It is small, relatively inexpensive, and not too complicated, meaning it is a popular strut choice. On some of the same vehicles, a strut is also used in the rear suspension system. It is similar to the front strut but does not have an anti-friction bearing at the top because it is on a non-steering wheel.
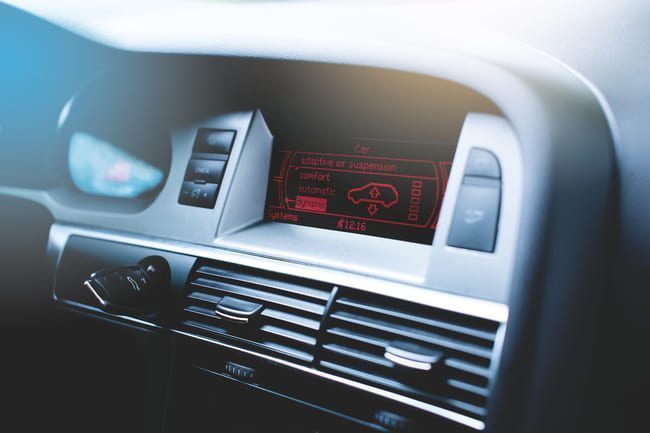
Besides all the basic types of suspension systems that manufacturers offer as standard, many drivers opt for adjustable suspension systems that they can install, adjust, and maintain themselves. These can also be provided by some manufacturers as standard in new cars. Some suspensions allow adjustment by the driver or automatically by the car itself and these can help deal with certain conditions. Indeed, a car with adjustable suspension can take on the function of two or more slightly different suspensions, depending on the situation.
Two main settings can be adjusted with adjustable suspension systems: ride height and roll stiffness. High-end cars can sometimes be equipped with the ability to raise and lower their body depending on the situation. The Tesla Model S is a good example as it automatically lifts when driven into entrances like parking lots or driveways. Some SUVs can be set to a lower suspension height on smooth roads, for more stability and economy, or higher in off-road driving, for increased ground clearance.
Ride height adjustment normally uses airbags integrated into the springs; changes in the amount of lift correspond to any change in air pressure. Other manufacturers use hydraulic systems to accomplish the same thing, with pumps providing hydraulic pressure to help lift the vehicle.
Some vehicles offer active suspensions that automatically stiffen the ride when a driver maneuvers at high speed; they do this using a pneumatic (air) or hydraulic (fluid) reservoir with variable pressure. Roll stiffness adjustment is built into aftermarket systems that feature adjustable spring rates and/or shock absorber performance. Most of the time, making adjustments like these means physically getting under the car and changing something manually, most often a dial on the shock absorber that changes the shock absorber’s tendency to dampen movement. Systems that can be adjusted from inside the car are much less common.
Dedicated race cars go even further than these two systems, allowing adjustment of almost every aspect of the suspension. A qualified race mechanic can tailor a race car to each individual track.
Nowadays, adjustable height suspension is increasingly offered by the manufacturer, as concerns about fuel economy increase. When cars are lower, they become more aerodynamic and thus more fuel-efficient. The other types of adjustable suspensions listed above are found mainly in aftermarket systems (to be added after the manufacturing process), especially in adjustable shock absorbers and “coilovers” (systems comprising a coil spring and an associated adjustable shock absorber or strut). But in all cases, the intention of a suspension adjustment is the same: to incorporate a change to help adapt to different needs or conditions.

They are mandatory on most cars and are one of the main safety features of modern driving. But what exactly does TPMS do?
With all the talk about new car features like multi-zone climate control systems, heated steering wheels, smart suspension, or evasive steering, it’s easy to forget how vital something as simple as a tire is to your car’s performance. As the only connection point between the road and the vehicle, having the right tires and ensuring they are in perfect condition is more important than the extravagant extras you might have.
Keeping your tires in order and ensuring you can drive safely and efficiently is precisely what tire pressure monitoring sensors are for. These sensors have been deemed so important that they are a mandatory feature on all new passenger cars from 2008 in the United States and from 2014 in the EU, and there is a wide variety of aftermarket systems you can install on older vehicles. Although extremely useful, what these systems do may not be immediately obvious, and if they go wrong, they can often mean an expensive trip to the dealership. This is a comprehensive guide on what tire pressure monitoring systems are, how they work, and what the benefits of having them are.

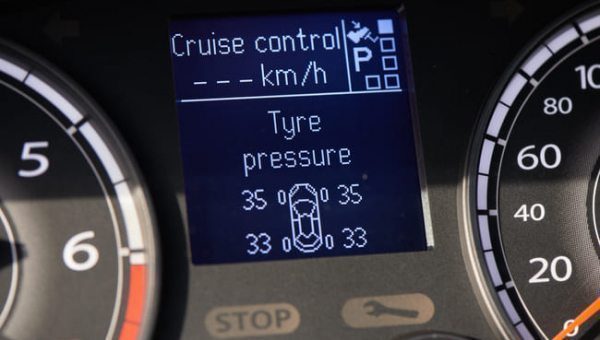
Tire pressure monitoring systems (or TPMS) are designed to primarily monitor the air pressure in a car’s tires. The system consists of sensors connected to each wheel and a display unit. If the system is integrated, the sensors will be connected to a light on your dashboard, normally a yellow symbol that is the cross-section of a tire with an exclamation point in the middle. If the system was installed after production, it will often come with a display unit that can sit on your dashboard and is connected to the sensors. In addition to pressure, it can also transmit information about the tire’s temperature, as well as give you important updates on the condition of the tires.
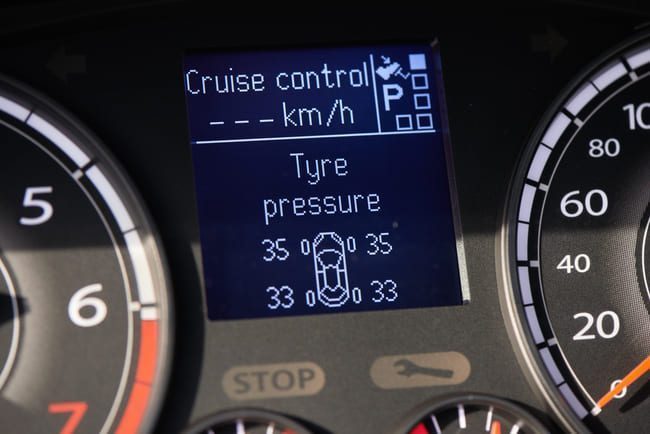
The basic principle of TPMS is that information about a vehicle’s tire pressure is collected (there are different ways to do this), then sent to the control unit on your dashboard. The system is programmed to monitor tire pressure levels and ensure they remain at an acceptable and safe pressure, often between 28 and 35 pounds per square inch (psi) of air in the tire for most passenger cars. If something is wrong, the light or alarm will let you know.
Some systems will allow you to access your tires’ temperature and pressure value at any time, allowing you to manage your tires. There are two main types of TPMS, direct and indirect, and they both collect this tire pressure data in different ways.
In direct tire pressure monitoring systems, individual sensors are located directly on the tires (and sometimes in a spare tire) and they transmit information to a central control module. These systems consist of a sensor mounted on the vehicle that communicates with the central control module. This information is most often gathered using a microelectrochemical system. At the control module level, it is analyzed, interpreted, and if the tire pressure is lower than it should be, or if the tires have been severely over-inflated, transmitted directly to your dashboard where the light comes on.
The information is most often sent wirelessly as a radio signal. Each sensor has a unique serial number, and the system can distinguish with these not only between different vehicles on the road but also between the different tires of the car. While some aftermarket systems are mounted on the outside of the tire, most manufacturers use a sensor mounted inside the tire. The battery life of one of these integrated sensors is about a decade, but for most systems, the battery is not repairable and the entire sensor must be changed.
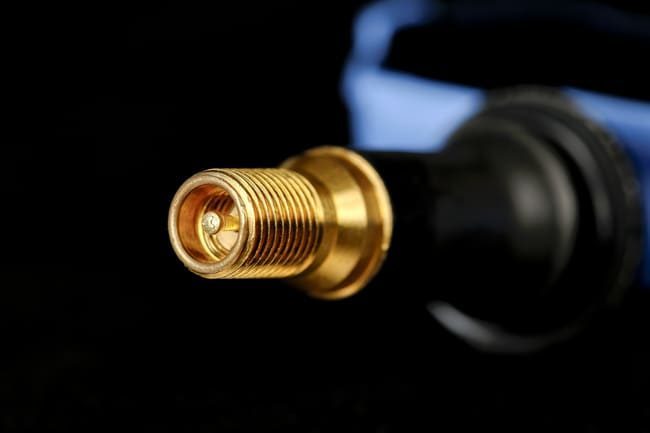
Direct systems can be mounted in different ways. They can either be mounted on the back of a tire’s valve stem or secured using an adhesive or to a strap that is then tightly wrapped around the inner rim of the tire.
Indirect tire pressure monitoring systems do not rely on tire pressure sensors to operate and make assessments about the tire. These systems gather and take into account data from wheel speed sensors (easily available through ABS or similar systems) to interpret a tire’s size and its rotation speed – a smaller tire would spin faster than a larger tire and an under-inflated tire would be smaller than one with the right amount of air. The system detects if a tire is moving faster than the others and can calculate that it is smaller and therefore possibly deflated. If this happens, it emits a warning light just like direct tire pressure monitoring systems.
One of the great advantages of this system is that it seems less fragile than direct sensors, but it needs to be reset more often. For example, if the tires are inflated before a long trip, an indirect system should be reset, as it would see the newly inflated tires as a possible danger. The system should always be at rest when the tires are inflated. In this case, if it is not reset, the system will see larger tires and may warn the driver of over-inflation. The TPMS must be recalibrated not only when the tires are restored to the correct pressure but also when the tires are swapped or completely replaced. This can often be performed from the car’s cabin via a recalibration button on the center console and takes about 30 minutes of driving to reset.
So, TPMS is a complex system, but the benefits it can offer to motorists far outweigh the potential problems. Even if it seems expensive to replace some parts, correct tire pressure should save you much more in terms of fuel and in terms of safety as well. Many of these issues mentioned above could be resolved – and are being resolved – by improved indirect TPMS systems that use sensors in the ABS hardware to perform their magic. These types of systems are becoming more common and could make the entire TPMS repair process much easier.

Causes of a Car Starting Then Immediately Stopping. What’s more frustrating than a car that starts for a few seconds and then completely shuts off, and this happens every time you try?
Not much, if you ask me! You should know that this is a fairly common problem, so you are certainly not alone, and there are easy solutions to this issue.
In this article, we will go over the 10 most common reasons why your car starts and then dies immediately.
Here is a more detailed list of the most common reasons why your car starts and then dies:
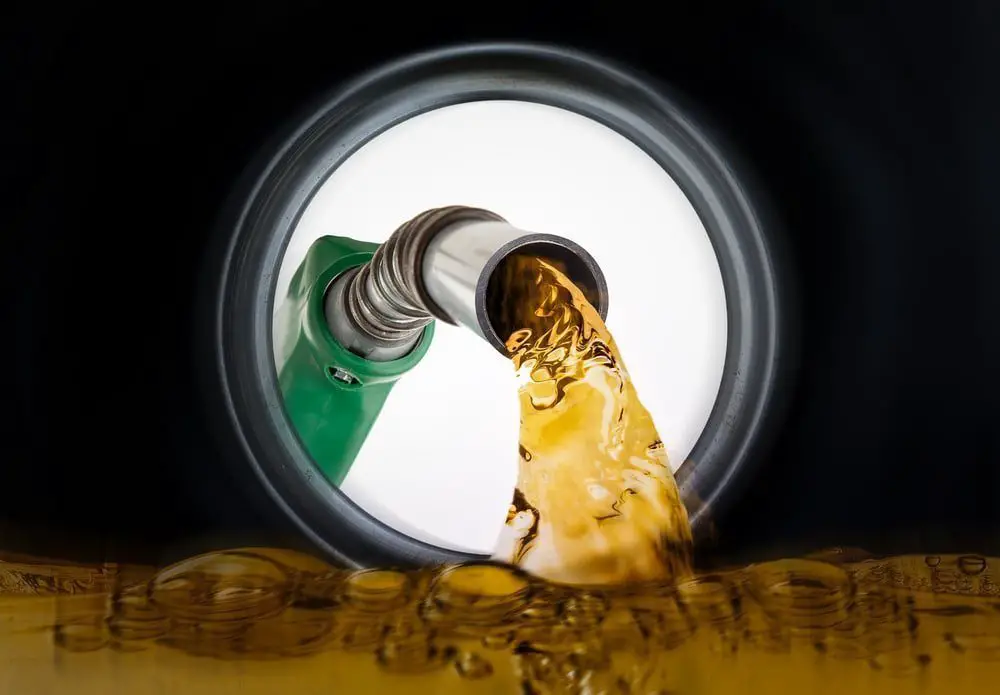
The most common reason why your car starts and then dies is due to a lack of fuel in the engine. This often happens because there is a small amount of fuel in the fuel rail, which helps the engine start, but there is no fuel pressure to keep the engine running.
Lack of fuel is, however, quite easy to diagnose. You can either connect a fuel pressure gauge to the fuel rail or carefully loosen a bolt while starting the engine to see if you have fuel pressure. Be careful so you don’t set anything on fire.
If you realize that your car has low fuel pressure,
The second most common thing is any issue with the anti-theft or anti-theft alarm system. When the anti-theft system is activated, the car does not send any power to the fuel pump, which creates fuel pressure in the fuel rail. This will cause the car to start for a few seconds, as we have already discussed.
If the anti-theft alarm system is factory-installed, you should have a key symbol on your dashboard that should turn off a few seconds after turning the ignition on. If it doesn’t, try locking and unlocking your car and try again. If it is still on, there may be a problem with your car key.
If you have an aftermarket anti-theft alarm, there may be a problem with the alarm itself or a faulty remote.
If the car stops after turning the ignition on, the problem could be a lack of fuel, as we have already discussed. A fuel filter is a common thing that causes low fuel pressure.
The fuel filter is a filter that you need to replace on a schedule, which depends on your car model. If you haven’t replaced it for a long time, it may be clogged.
Fuel filters are often quite easy to replace and inexpensive. If you have low fuel pressure, it may be worth trying to replace it.
The function of the idle control valve is to maintain your car’s idle. Newer cars control the idle with the throttle body, but if you have an older car with a throttle cable, you have an idle control valve.
Often, this idle control valve can get dirty, which will prevent the idle from functioning properly. You can try cleaning this valve to see if it improves. Otherwise, you need to replace it or repair the wiring.
The throttle body or idle control valve controls the idle by regulating the amount of air entering the intake manifold. If you have a major vacuum leak, it can actually make the car’s air-fuel mixture too lean and cause it to die after a few seconds every time you try to start your car.
Vacuum leaks are often quite easy to locate, either by using an EVAP smoke machine or simply by listening for the leak, as it will often cause a high-pitched sound.
The combustion engine works by igniting an air-fuel mixture. The spark plugs provide the spark for this ignition. The pistons move up and down, which causes movements in the crankshaft and wheel axles.
If the spark plugs are faulty, the ignition will fail and the car will stop moving. This can cause the car to start for a second but misfire too much with a weak spark, so the engine will die very soon.
Fuel is injected under high pressure into the combustion chamber using the fuel injectors. The job of the fuel injectors is to regulate so that the exact amount of fuel needed enters the combustion chamber.
If a fuel injector fails, it can cause the engine to run on fewer cylinders and also cause a drop in fuel pressure if one of them is stuck open.
You can try to feel the fuel injectors with your hand during startup to see if they click. If they don’t make any clicking sound, one of them may be faulty.

If your ignition switch is damaged, you can start the car normally, and after a few seconds, the car will stop completely. If your ignition switch is faulty, you need to check the wear on the switch contacts.
The ignition switch is located behind the car’s ignition lock. In newer cars, it is most often not possible to replace the ignition switch itself; you have to replace the entire ignition lock.
The EGR valve controls the exhaust gases that need to be recirculated into the engine. If the EGR valve is stuck open, it can allow too much air into the intake manifold.
This can make the mixture too lean, which will also cause the car to start and then die after a few seconds.
The ECU is a computer system that controls various engine functions, including the fuel injection system. Since a vehicle needs fuel to move, any malfunction of the ECU will cause the vehicle to stop after starting.
The ECU controls engine components via a series of sensors. Over time, sensors become faulty and transmit incorrect information to the ECU. In this case, you need to take your car to an auto repair shop.

Knowing the temperature is very useful. If you go outside, you look and see that it’s 28 degrees and you should wear a warm hat. Although your car doesn’t wear cozy hats, it’s essential that it constantly monitors the engine temperature when it’s running.
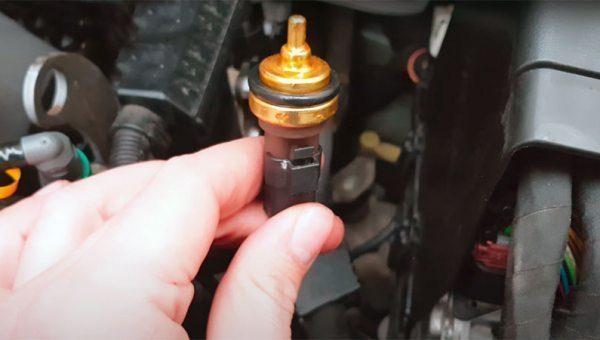
That’s the job of the engine coolant temperature sensor (CTS or ECTS). Coolant is also called antifreeze, the liquid that helps keep the engine at an optimal operating temperature.
The vehicle can do several things to change the temperature if needed, so the temperature data that the CTS sends to the ECU (the car’s main computer) is essential.
Some vehicles also have a cylinder head sensor (CHS) located at the top of the cylinder and is not affected by coolant loss because it is not submerged in coolant like the CTS. This makes the CHS more reliable than the CTS.
Table of Contents
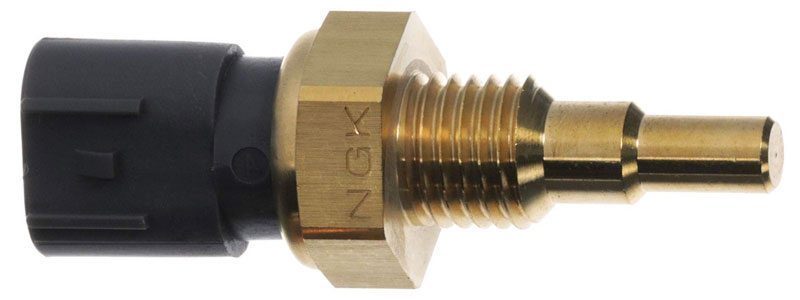
The CTS uses electrical resistance to measure temperature, meaning the CTS is a thermistor. The sensor’s resistance (opposition to electrical flow) changes proportionally with temperature – as the temperature increases, the electrical flow also increases.
The ECU sends the electrical signal through the CTS, measuring the voltage drop. This converts the electrical flow information into a temperature reading.
With this information, the ECU adjusts fuel injection, ignition timing, and the electric radiator cooling fans to maintain an optimal temperature. If the engine is cold, the ECU directs the air/fuel mixture to be richer, or a higher proportion of fuel for the amount of air entering the engine.
If the engine starts to get too hot, the ECU will kick on the radiator fans. This is normal behavior when you’re sitting at a long stoplight on a hot day, for example. Some cars shut off the engine in case of overheating to protect itself from engine damage.
The temperature information is also sent to the dashboard gauge, which is usually located next to the fuel gauge.
of a Bad Coolant Temperature Sensor
All parts eventually wear out, and this sensor is no exception. It is essential to address cooling system issues because if the vehicle ends up overheating, it could cost you an engine (which is very expensive and time-consuming to repair).
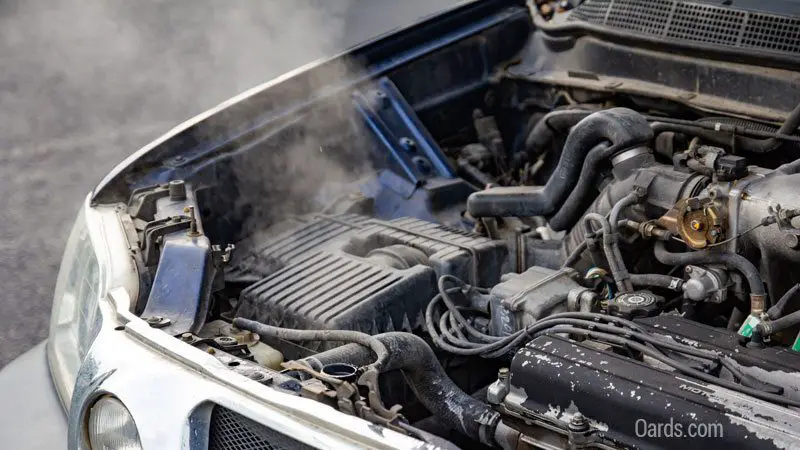
An overheating engine should give several warnings like a high temperature reading on the dashboard gauge and sometimes white “steam” coming out from under the hood (that’s boiling coolant, meaning it’s leaving the system – that’s bad!).
Not having enough coolant is one problem. A coolant leak can also cause the engine to overheat if there isn’t enough reserve to cool the engine properly.
If the sensor is faulty, it can send incorrect temperature information to the ECU, which can lead to strange engine behavior, like general “weakness” or sluggishness.
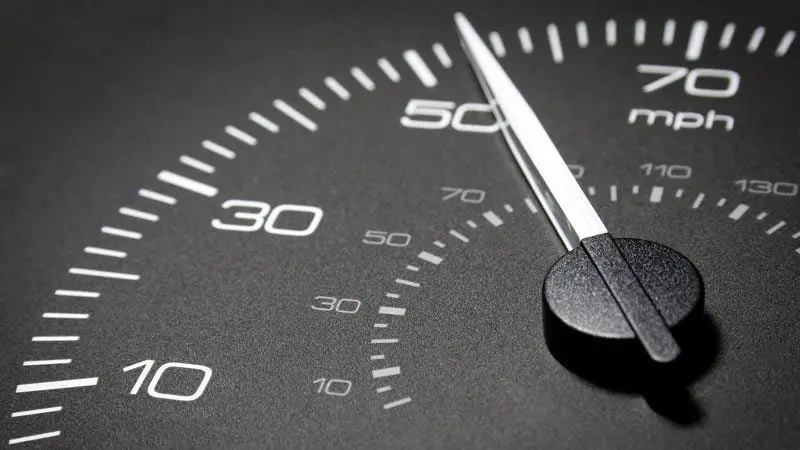
If the vehicle is lagging during acceleration, accelerates slowly, idles roughly, or is hard to start, especially when it’s already warmed up, it’s worth checking the CTS.

You might see your fuel economy deteriorate significantly if the sensor is faulty, as the computer may direct too much fuel to be injected into the cylinders.

For the same reason, the vehicle can run too rich, causing the excess fuel to burn in the exhaust and making other drivers look at you.

If too much fuel or an abnormal amount of byproducts are expelled due to inefficient combustion, it will show up during an emissions test as something that needs to be fixed.
The CTS could be the culprit, although there are several sensors and seals that need to be checked.

If the engine temperature reading on the dashboard gauge seems incorrect (for example, if the gauge reads “cold” when the car is fully warmed up), the coolant temperature sensor might be receiving faulty information.
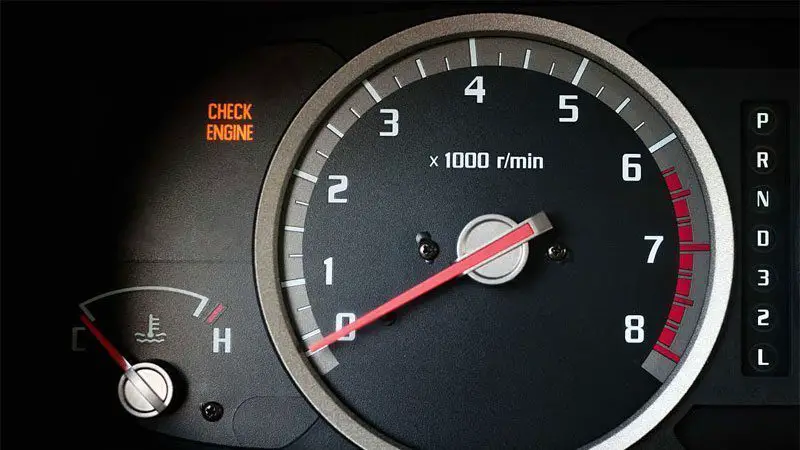
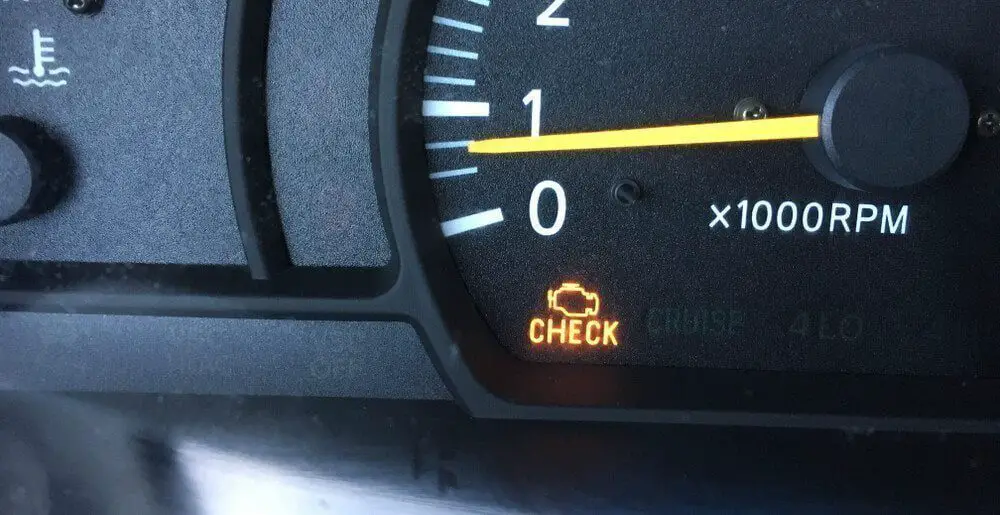
The dashboard “check engine” light comes on when the ECU detects a problem and logs a code. If you see this along with any of the other symptoms, it’s worth checking the CTS.
Many vehicles put the car into a “fail-safe” mode if overheating is detected. This can stop the engine, run the engine cooling fans continuously, and disable the interior air conditioning to allow the car to dissipate engine heat more effectively.


You can ignore many small problems when it comes to cars, but you should never ignore problems with the brakes.
If you notice that your brake pedal goes to the floor when the engine is running, you need to be very careful about this. This can lead to the complete disappearance of the braking function!
Therefore, it is certainly not recommended to continue driving your car if you experience something like this. But what causes it and how can you fix it? Let’s find out!
These causes are the most common reasons why this problem can occur. Here is a more detailed list of the common causes of the brake pedal going to the floor when the engine is running or when starting the car.
The most common reason this happens is that you have a brake fluid leak somewhere in the brake system. This is often due to a rusty brake line, but it can also be seal leak issues at the caliper pistons.
Brake fluid leaks are often very visible on the floor; however, if you have seen a puddle of fluid on the garage floor, it is definitely time to look for brake fluid leaks.
When you press the brake pedal with a fluid leak, the brake fluid flows out. When the brake pedal comes back up, it will suck in air through the leak instead, which will make your brake pedal very spongy.
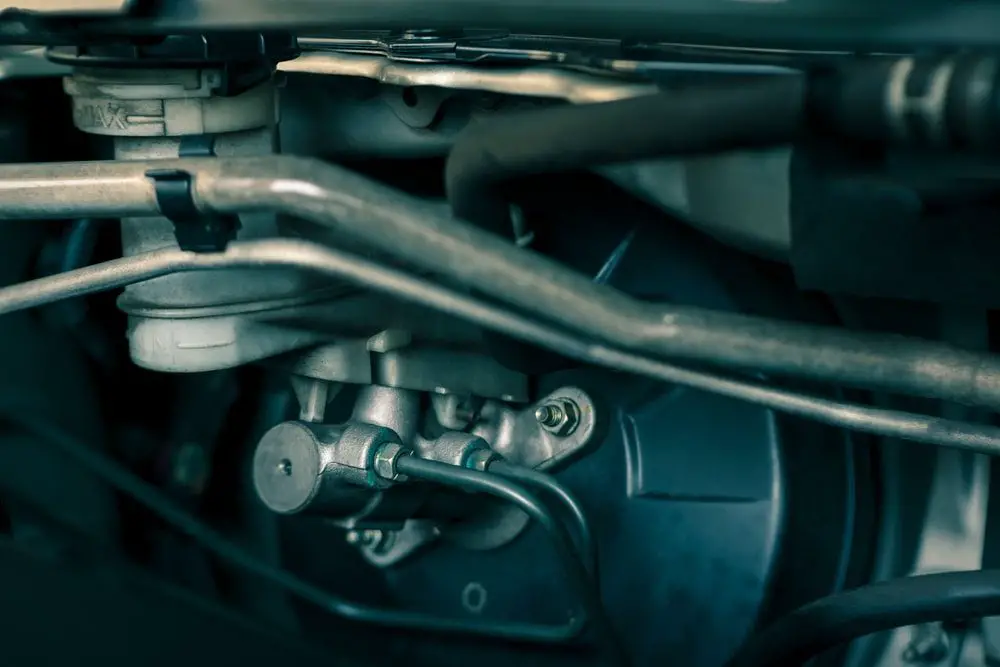
Another common reason your brake pedal goes to the floor when the engine is running is caused by a faulty brake master cylinder. The brake master cylinder is located behind the brake pedal on the other side of the engine compartment firewall.
The purpose of the brake master cylinder is to push brake fluid to the caliper pistons to reduce the vehicle’s speed.
The brake master cylinder has a seal around the push piston, and if this seal starts to leak, the brake pressure will return from the other side of the piston when you press the brake pedal.
This will cause a constant loss of pressure from your brake pedal when you press it, which will feel like a spongy or sinking brake pedal.
Between the brake master cylinder and the brake pedal, you will find the brake booster. The brake booster uses a vacuum to increase braking power when you touch the brake pedal.
If you have ever driven a car without a functional brake booster, you know how much pressure it requires without it.
If your brake pedal starts to build pressure very low, but feels very stiff once it gets near the bottom, you likely have a problem with your brake booster. It is not very common for the brake booster to fail, but it does happen on some car models.

Have you or someone else recently replaced something in the car’s hydraulic brake system without performing a proper brake bleed afterwards? Then that might be your problem!
Air is compressible, unlike brake fluid. Therefore, the brake system must be completely free of air for quick pressure build-up, and not to get a spongy brake pedal.
The only way to remove air from the brake fluid system is to bleed it properly.
If you have a brake fluid level warning light on your dashboard, it is definitely time to check the brake fluid level.
If the brake fluid level is low, air can enter the brake system when you take sharp turns, for example. What happens with your brake system when you have air inside, we discussed in the previous section.
If your brake fluid was so low that air enters the system, simply refilling it would not be enough. You need to bleed the brake system again.

Now that you know the common reasons why your brake pedal might sink to the floor, you probably want to know how to diagnose and how to fix this problem. So let’s get started.
The most common reasons your brake pedal sinks to the floor when you start your car are a brake fluid leak, a faulty brake master cylinder, or a faulty brake booster.
The easiest way to determine if the brake master cylinder is faulty is to remove the vacuum hose from the brake booster. If the pedal still sinks, it is likely due to a fluid leak, air in the system, or a faulty brake master cylinder. The only way to know for sure is to visually inspect the seal inside it.
Disconnect the vacuum hose from the brake booster. If the problem is gone when you press very hard on your brake pedal, you likely have a faulty brake booster. If the problem persists, you likely have a bad brake master cylinder.
It happens that you did not perform the procedure correctly. You must close the air bleed screws before releasing the brake pedal; otherwise, air will be sucked into the system before you close the bleed valve.


Car engines operate by combusting an air/fuel mixture. Spark plugs are used to provide the necessary spark for ignition. This will then move the pistons and crankshaft.
However, inefficiencies can lead to more fuel being supplied to the engine than necessary. When this happens, we say the engine is running rich.
Having a rich fuel car means you are spending a lot on fuel. Therefore, it is necessary to repair your rich running engine as soon as possible.
This can explain many reasons why an engine runs rich, as there are so many parts in an engine that can affect the fuel mixture.
Here is a more detailed list of the most common causes when your engine is running well.

A faulty MAF sensor is the most common cause of an engine running rich.
The MAF sensor calculates the air entering the engine, then calculates the air-fuel mixture to add. If it is dirty or malfunctioning, it will cause the engine to run too rich or too lean.
If the MAF sensor is faulty, it will calculate the wrong amount of air entering the engine and add too much or not enough fuel.
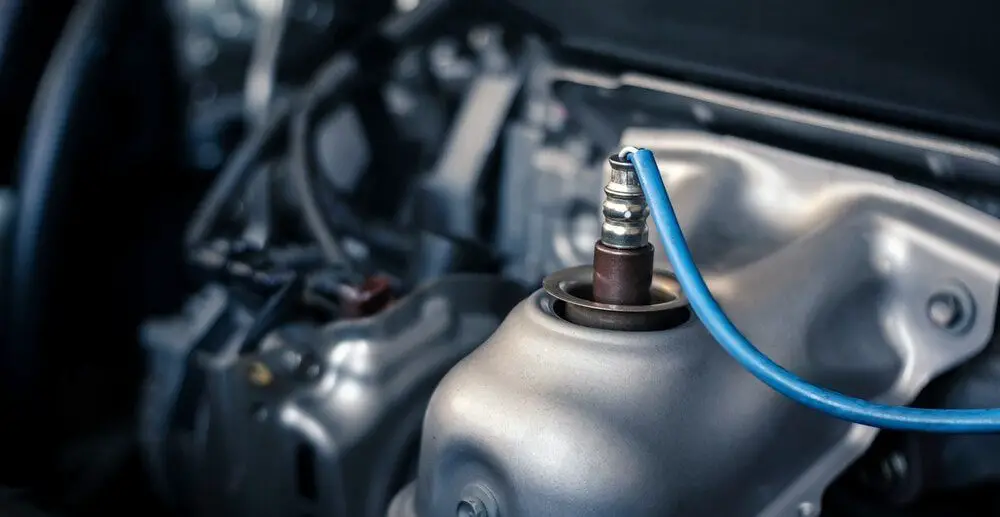
O2 sensors are located on the exhaust pipe to detect the air-fuel mixture from the previous combustion.
If the O2 sensor gets information suggesting a lean mixture, it will tell the engine control unit to add more fuel during the next combustion and vice versa.
If it is faulty and tells the engine control module to add more fuel, even if the air-fuel ratio is good, it can cause a rich fuel mixture. A faulty O2 sensor can make the engine run too rich.

In some cars, they have a MAP sensor instead of the MAF sensor. There are also cases where you can have both a MAP and MAF sensor.
The MAP sensor calculates the air-fuel mixture based on the air pressure in the intake manifold. If you have a MAP sensor, it is absolutely worth checking this part.
Diagnosing the MAP sensor is quite easy with a diagnostic tool as you can check the pressure it displays when the engine is off, which should be the same pressure as our air pressure.

When the engine is cold, the engine needs more fuel to operate properly. It is the job of the engine coolant temperature sensor to measure the coolant temperature to identify when it needs to add extra fuel to the engine.
If the engine coolant temperature sensor is faulty, you can get a mixture that is too rich.

The intake temperature sensor calculates any additional fuel that needs to be added or restricted based on the temperature of the air entering the engine.
The intake temperature sensor is often installed inside the MAF sensor and cannot be replaced separately.

A faulty fuel pressure regulator will result in fuel pressure that is too high or too low. This can cause a mixture that is too rich.
You will also want to check the fuel pressure regulator’s vacuum hose to ensure there are no leaks around it.

Injectors are the ones that manage the amount of fuel entering the engine. If an injector is not flowing as it should or is stuck open, it can cause a rich mixture in your engine.
If you think your engine is running with a rich mixture, you need to check a few things to confirm it.
Here is a more detailed list of the most common causes when your engine is running well.
When the fuel/air ratio is high, the check engine light comes on.
The engine control module monitors all sensors, and if a sensor in your car is not working properly, it will turn on the check engine light on your dashboard.

If excess fuel is heading to the combustion chambers, it means some of it will not be completely ignited.
The catalytic converter has a way to remove some of this fuel, but it will find its way into the exhaust system when in excess. Unburned fuel smells like rotten eggs.
One of the symptoms of a running engine is that you are not getting the proper fuel consumption. This is because the car does not need all the fuel supplied. However, it is normal to spend more on gas in winter or when carrying heavy loads.

For your car’s engine performance to be normal, there must be the right amount of fuel/air mixture. The assumption is that if there is an overflow of fuel, the car will move faster. This is not the case because the excess fuel does not burn.
When you experience issues with the air/fuel ratio, the car’s performance is poor. Additionally, you will notice that whenever your car is idling, the RPMs keep moving erratically.

When your engine is rich, it will cause poor emissions. A rich air-fuel mixture will create black smoke, which will then come out of your exhaust pipe.
If your exhaust pipe makes you feel like you have a diesel engine, but you don’t, it’s really time to check the air-fuel mixture.

Carbon monoxide is a dangerous exhaust gas. The catalytic converter works overtime to remove any trace of carbon monoxide in the exhaust. When your car’s engine is rich, it means you are producing more gasoline.
This can be dangerous when you are in a closed, poorly ventilated room. You also risk failing state-sanctioned emissions tests.

If your engine is running rich, the spark plugs accumulate black deposits at the bottom. This prevents them from working efficiently. The soot will find its way to other engine parts, causing further damage.
The unburned fuel eventually ends up in the catalytic converter, and due to the number of impurities, it will clog it. Over time, you will be forced to dismantle and replace it.

Diagnosing a rich engine is really not that simple. It often requires diagnostic skills if you want to waste money on simply replacing parts.
This is how a professional would do it, and you might need additional tools to do so.


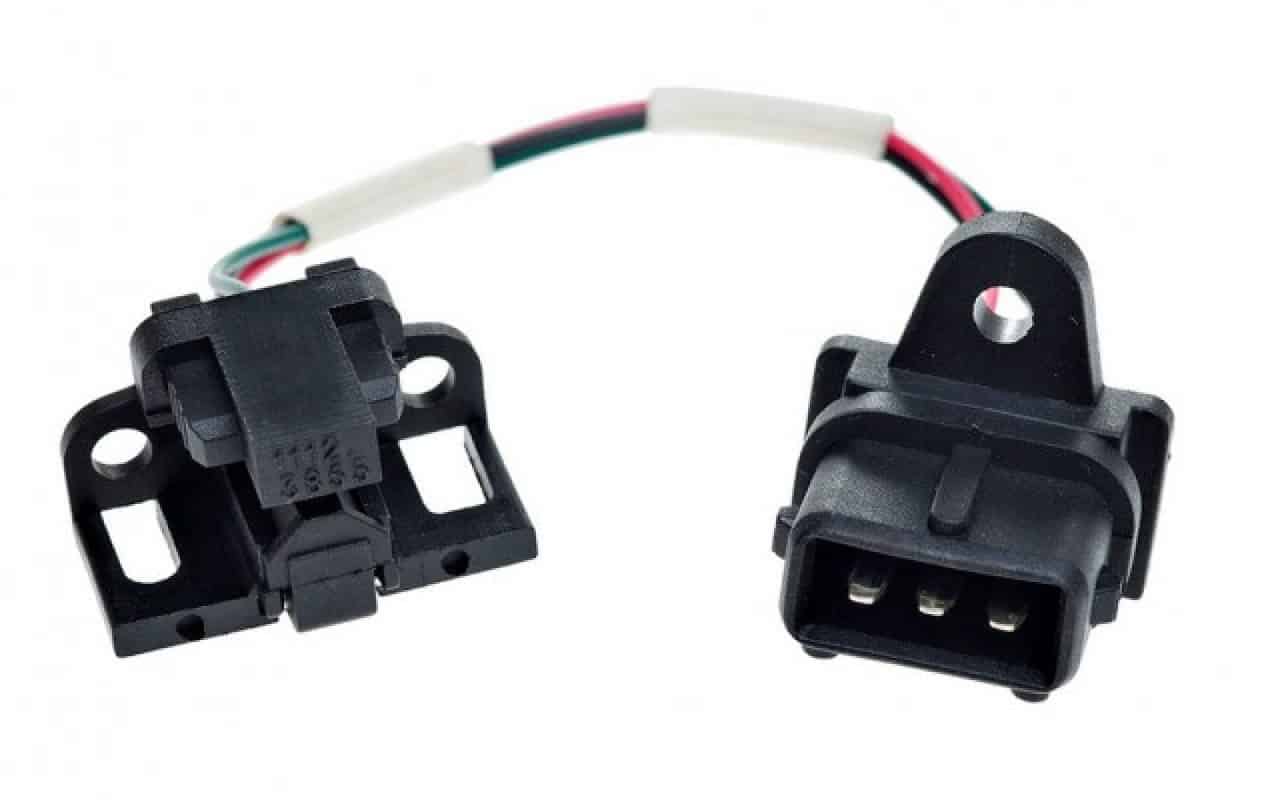
A camshaft position sensor is a component of a vehicle’s engine management system. As its name suggests, the sensor’s function is to monitor the rotational position of the camshaft relative to the crankshaft. This allows the onboard computer to know which of the cylinders is in its power stroke in the combustion sequence.
For efficient combustion to occur, the right amount of air/fuel mixture must be ignited at the right time. The camshaft is responsible for opening and closing the engine’s intake and exhaust valves. The speed at which the valves open and close depends on the engine load and speed. The valves need to be open longer at high speeds than at low speeds.
The computer combines the input from the cam position sensor and other sensors to determine the proper timings. The timings vary depending on engine load and speed, so the onboard computer adjusts the engine timings from time to time. Igniting the air/fuel mixture at precise moments in the combustion cycle ensures the engine runs smoothly and efficiently.
The camshaft sensor is part of the engine’s timing system. If the sensor is faulty, it will affect how the engine runs and behaves. Faulty sensors will cause misfiring, backfiring, or loss of power. Faulty cam sensors will also trigger the Check Engine light and the computer will put the vehicle into fail-safe mode.
The cam position sensor is one of the sensors that triggers the Check Engine warning if it fails. The camshaft position sensor works in conjunction with other sensors in the engine. If one or more of the sensors are faulty (like the cam sensor), it will send a warning in the Check Engine light.
Engine misfire is a sign associated with bad cam sensors. If the sensor is worn out, it may not provide the computer with the correct camshaft position. This causes the computer to determine the timings based on a faulty sensor input. The computer will then send non-optimized timing signals to the injectors and ignition coils, causing engine misfires.
Engine backfire is another sign of worn cam sensors. Like misfires, incorrect timings cause engine backfire. If the timing is off, the air/fuel mixture will leave the combustion chamber unburned. This unburned mixture can ignite in the exhaust system due to the heat from the exhaust manifold and exhaust pipes.
The engine stalling or stumbling is another sign that the camshaft sensor is faulty. Faulty sensor inputs will cause the computer to unnecessarily retard or advance the timings. Bad sensors will also cause the valves to open too early or too late. This deprives the engine of the right amount of air needed for efficient combustion, resulting in engine power loss.
Modern vehicles are equipped with a fail-safe safety feature called “limp mode.” The car computer activates the feature if it detects a fault (such as a bad camshaft sensor) in the engine. When the vehicle is in limp mode, you will not be able to shift beyond second gear and accelerate your vehicle.
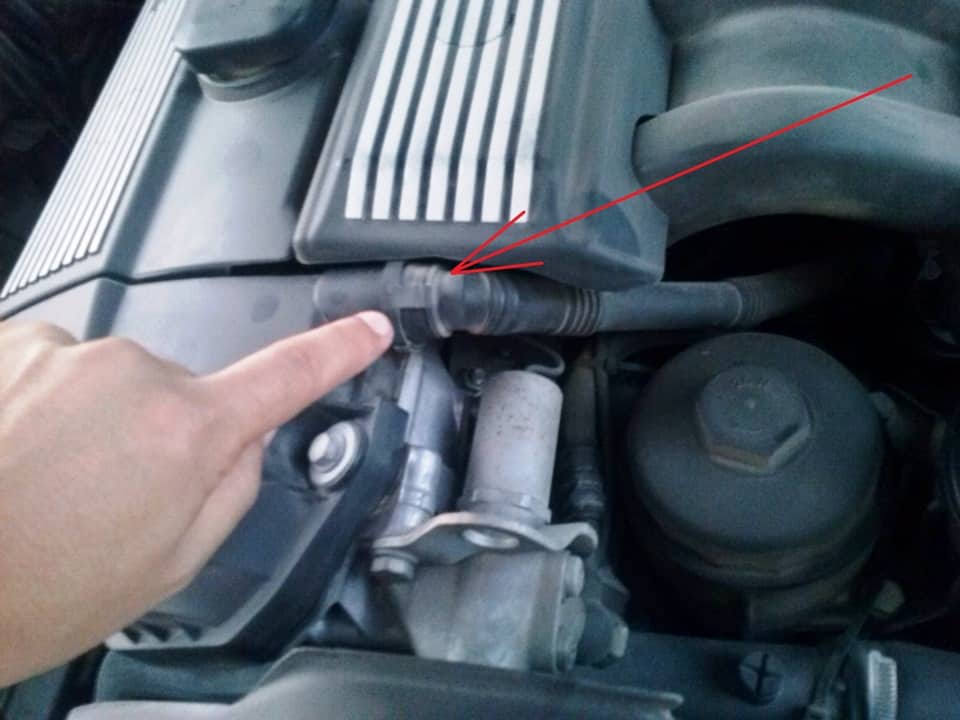
Camshaft position sensors can fail due to normal wear and tear or mechanical damage. The sensors are prone to damage from contamination, vibration, and heat in the engine compartment.
The cam position sensor is usually installed on the engine cylinder head. Broken gaskets and seals can cause oil and coolant to leak into the sensor. As with any electronic device, oil, water, and rust can short the sensor’s circuits.
The engine produces a lot of vibration during operation. The sensors are designed to withstand these oscillations. However, too much engine vibration can increase sensor wear and tear. This is further aggravated by additional vibrations generated when the engine shakes violently due to incorrect timings and improper air/fuel mixtures.
Excessive heat is another cause of camshaft sensor failure. Heat in the engine compartment can cause the metal parts of the sensor to expand. This expansion will affect the sensor’s ability to send the correct input to the computer.
Replacing the sensor is easy and you can do it yourself. You can save about $100 on labor costs alone by going this route.
Make sure the sensor is compatible with your engine when purchasing a replacement. Buying an identical sensor also reduces the risk of having compatibility issues. Replacing the sensor takes about 30 minutes. This includes removal, installation, and testing.
If you decide to change the sensor yourself, follow these simple steps:
The short answer is no. Driving with a bad camshaft sensor poses a huge safety risk and could further damage your engine. Losing engine power while driving on the highway is dangerous, especially due to the amount and speed of traffic. You risk being rear-ended by another vehicle when you suddenly lose power.
You can still drive the vehicle, albeit in limp mode, as mentioned above. Do not attempt to drive the car longer than necessary. Faulty camshaft sensors can cause serious engine damage if ignored. Engine systems are designed to work interdependently. If the cam position sensor is faulty, it will negatively affect the ignition and fuel delivery systems.
If your vehicle shows any of the signs and symptoms of worn cam sensors, take your car for repair immediately or replace the sensor yourself.
If you suspect the camshaft sensor is faulty, check the computer for trouble codes using an OBD2 scan tool. If the cam sensor is faulty, the scanner will generate codes indicating the problem.
If you don’t have an OBD2 scanner, check the sensor for damage before testing its circuits. Check the sensor for loose connections, contamination, debris, cracks, and other deformities. If there is no visible damage to the sensor, there may be a problem with the sensor circuit.
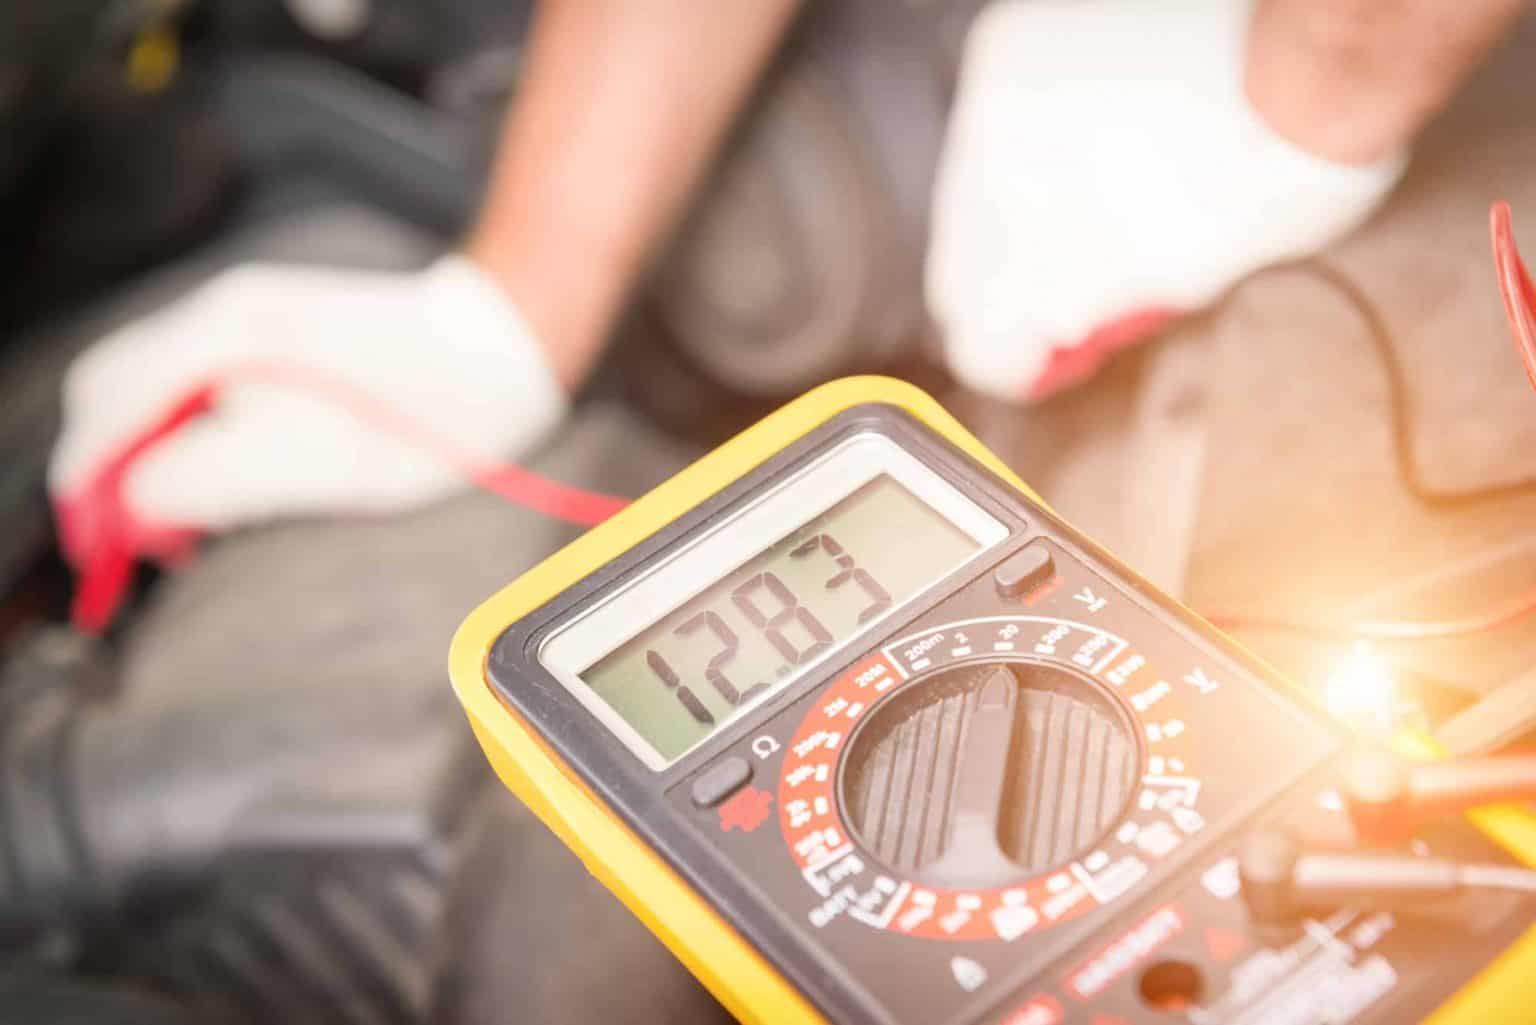
Testing bad camshaft sensors is simple and you only need a multimeter. Most modern vehicles use either the magnetic type camshaft sensor or the Hall effect camshaft sensor. The sensors are tested in situ with the ignition on, and again while the engine is running.
To test the Hall effect sensor, put the black multimeter probe in contact with the ground wire. Then connect the red probe to the sensor’s signal wire. The voltage across the device should comply with the voltages specified by the manufacturer. If the voltage reading is lower than specified or if there is no signal, the sensor is faulty.
To test magnetic sensors, first put the black probe of the multimeter in contact with any ground point (i.e., engine block, valve cover, engine bolts, etc.). Then connect the red probe to one of the sensor’s signal wires. If the voltage reading does not fall within the specified voltages, the sensor is faulty.
A functioning camshaft position sensor keeps your engine running smoothly and efficiently. Replace damaged sensors immediately to avoid damaging your engine. Since replacing the sensor is easy, the best option is to replace it yourself to save money.
If you have ever driven a car and noticed a loss of power while accelerating or even during normal driving, you know how frustrating and even dangerous it can be. Several factors can explain this problem, often related to a lack of maintenance, wear and tear, or mechanical or electronic failures. A loss of power usually results from an imbalance in the supply of air, fuel, or compression, essential elements for the proper functioning of the engine.
Identifying the exact cause may require time and effort, but to guide you, here are the 11 most common causes of power loss during acceleration. These issues can be classified into three main categories:
Each category includes critical components that can affect your engine, whether you drive a gasoline or diesel vehicle. Discover below the details for each possible cause and their solutions.
Sensors are crucial in modern vehicles with advanced electronics. They allow the engine management system to monitor and adjust performance. Here are the most common malfunctions:
The camshaft position sensor measures the rotation speed of the camshaft and sends the data to the ECM (Electronic Control Module). If this sensor is defective, the timing of ignition and fuel injection will be incorrect, leading to a loss of power.
Solution: An electronic diagnostic can confirm the problem, and replacing the sensor is relatively inexpensive.
The MAF sensor measures the amount of air entering the engine. A malfunction leads to poor management of the air/fuel mixture, which reduces performance.
Solution: Clean or replace the MAF sensor depending on its condition.
This sensor, located in the exhaust system, measures the amount of unburned gases and adjusts the air/fuel ratio accordingly. A faulty sensor leads to inefficient combustion and increases fuel consumption.
Solution: Replace the sensor and perform an emissions check.
Actuators physically control the mechanisms essential for the proper functioning of the engine.
End-of-life or dirty spark plugs prevent proper combustion, which reduces power.
Solution: Replace them regularly according to the manufacturer’s recommendations.
The ignition coil transforms the 12-volt current into high voltage to power the spark plugs. A failure leads to misfires.
Solution: Have the coil tested and replaced if necessary.
Injectors spray fuel into the engine. A clogged injector reduces the amount of fuel, leading to a loss of power and misfires.
Solution: Have the injectors cleaned or replaced.
The pump must maintain sufficient pressure to supply the engine. A faulty pump causes acceleration difficulties and intermittent breakdowns.
Solution: Check the fuel pressure and replace the pump if necessary.
Mechanical problems are often related to wear and tear or neglected maintenance.
The fuel filter prevents impurities from entering the engine. A dirty filter limits the fuel supply, leading to a drop in performance.
Solution: Change the filter every 20,000 to 40,000 km according to the manufacturer’s recommendations.
A dirty air filter prevents air from reaching the engine, affecting combustion.
Solution: Replace or clean the filter regularly.
A clogged catalytic converter or muffler limits the evacuation of gases, reducing power.
Solution: Check the components of the exhaust system and clean or replace them if necessary.
Cylinder compression is essential for combustion. Problems such as a faulty head gasket, leaking valves, or worn piston rings reduce compression.
Solution: A compression test can identify the problem. Depending on the severity, it may require costly repairs.
Many of the problems mentioned here can be avoided through regular maintenance. Here are some tips to prevent power loss:
By taking care of your car and monitoring warning signs, you can extend the life of your engine and avoid costly repairs.