Engine Flushing: Does It Work and Is It Safe

IS THIS CONTROVERSIAL PRODUCT GOING TO DAMAGE OR RESTORE YOUR ENGINE?

To successfully maintain a car, it is essential to know how to keep your engine in order and functioning properly. That’s why there is such a variety of engine oils, degreasers, sealants, cleaners, starting fluids, and antifreezes, to name just a few.

Another product that is quickly gaining popularity among motorists is engine flush. However, it is far from clear whether this product will help improve your engine’s performance and protect it, or if it risks causing serious damage to your engine. Does engine flush work and is it good or bad?

WHAT IS ENGINE FLUSH?

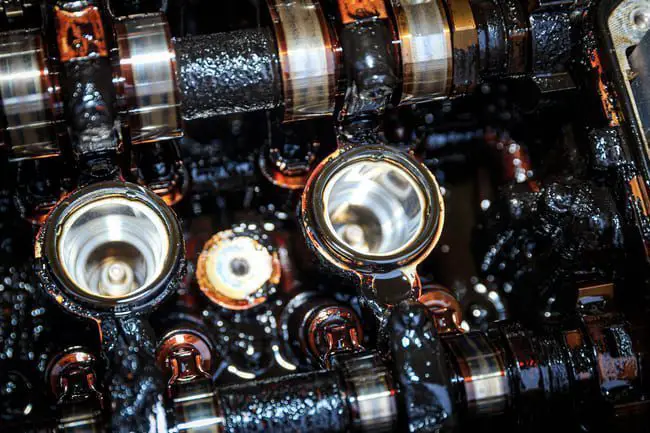
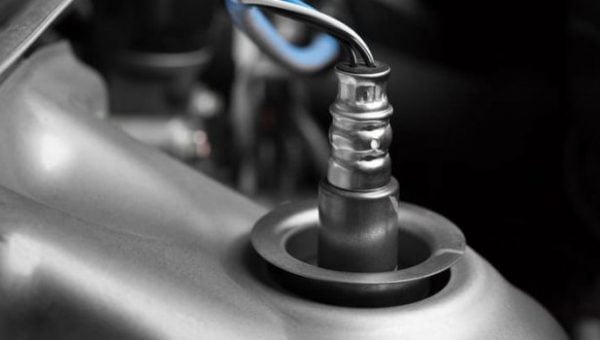
Engine flush is a chemical product intended to remove sludge, deposits, and other dirt accumulated during your engine’s combustion process. Engine flush, like synthetic or semi-synthetic engine oils, contains additives designed to clean the internal moving parts of the engine and improve performance. The basic theory is that running the flush through your engine will clean the deposits left in the engine by the combustion process and thus result in a clean and more functional engine. Engine additives are simple to use: they are added to the car’s oil fill port and the car’s engine is left to idle for 10-15 minutes (many major brands boast that it is effective after just this short period of time). Afterward, you can change the oil and replace the oil filter.

What is engine flush

Modern engine oils today already come with sets of detergents and dispersants that perfectly clean lubricated surfaces and keep sludge deposits away. But these additives only last so long. If you do not change your oil as often as you should, it can also lead to oil sludge heading to places you don’t want it. If this is the case, engine flush might be the best option for you.

WHY MIGHT ENGINE FLUSH BE IMPORTANT?

Deposits and sludge accumulate in the engine for several reasons, one of the most common for most drivers being the frequency of short trips. Making many short trips and stop-and-go driving is surprisingly hard on the lubricating oil, as the moisture that accumulates in the oil during the previous rest period will not have time to evaporate and leave the oil. This means the oil dilutes and increases in viscosity, and in the end, it also does not lubricate the engine’s moving parts well, leading to increased wear.

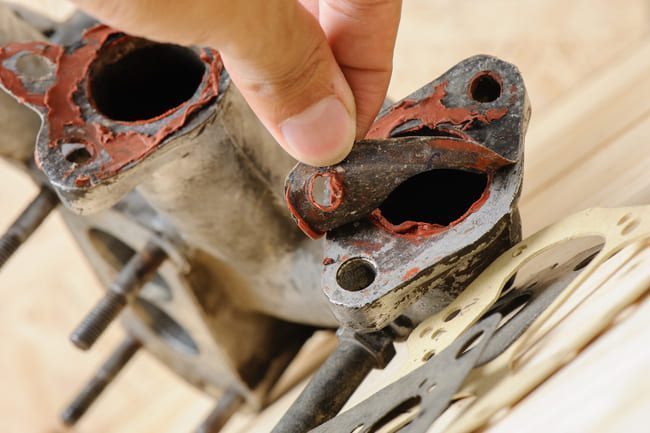
Hot and dusty environments are also harsh on engine oil because airborne dirt particles can be absorbed. Like increased moisture, high heat breaks down engine oil, and deposits of burned oil byproducts can accumulate very quickly. As they settle, all this engine sludge can clog narrow oil passages or the screen on the oil pickup tube, limiting oil flow to vital parts of the engine, especially the upper valve train.

Benefits of engine flush

All this sludge and dirt mean a very dirty engine, and that’s not good news for the engine’s thermal efficiency. Since engine oil acts as a coolant for the engine, as the oil turns to sludge, the oil gets hotter, and the engine risks overheating. Deposits on the pistons and in the combustion chambers will also increase hydrocarbon emissions. In gasoline engines, catalytic converters will have to work harder to remove waste and may break down or need to be replaced sooner. Deposits can also cause piston rings to stick, reducing engine compression and overall engine power, which directly impacts the car’s performance.

The real problems of an unclean engine are therefore a more inefficient and ineffective engine in which serious damage could be caused and which risks breaking down. It is truly vital to keep it clean, but will engine flush work in your engine?

BENEFITS OF ENGINE FLUSH

Engine flush companies claim that “engine flush is specially formulated to quickly dissolve harmful engine deposits and maintain effective oil circulation throughout the engine, thus helping to protect the engine’s vital wear surfaces throughout the flush.” In theory, this sounds ideal. A good engine flush can help loosen deposits and dissolve sludge, returning your engine to a like-new condition. So, it could be the first step in helping to restore a previously neglected vehicle to its original state.

Another benefit of engine flush is that it could improve your fuel economy. Contaminants circulating in your engine can lead to oil degradation and increased viscosity. Furthermore, sludge and deposits that build up on engine parts can increase resistance, which wastes fuel. Cleaning your engine with an engine cleaner can help parts move more efficiently, maximizing your fuel economy and saving money.

Why might engine flush be important

An advantage that will only increase in the coming years is that engine flush can help minimize emissions. The risk of piston ring sticking that we mentioned earlier means that oil can enter the combustion chamber and burn. The result is harmful deposits, and this will increase exhaust emissions when the burned oil exits the exhaust pipe. The best oil flush treatment helps free stuck rings and minimize oil consumption, thus reducing your emissions.

DANGERS OF ENGINE FLUSH

That said, there are potential dangers associated with using engine flush, and many have claimed that engine flush can damage an engine.

Ford’s view on engine flush products is that they should not be used: “Do not use oil additives or other engine treatments. Under certain conditions, they could damage the engine. If you use one and there is a subsequent engine problem, your warranty will no longer be valid.” This could be one of the most concerning things. Even if an engine is not damaged, your warranty could be voided, and if something else, completely unrelated to your engine, goes wrong with your car, you might have lost your right to have it repaired under manufacturer warranty due to the use of an engine flush.

The reason many car manufacturers do not recommend using engine flush is that they fear the chemicals could react with the engine’s rubber or plastic components at the same time as they remove dirt and sludge, causing degradation and premature engine failure.

Other car enthusiasts worry that engine flushes could dislodge critical chunks and deposits from the engine, forcing them to move to other, even more critical areas and cause greater damage. Some are also convinced that an engine flush treatment may not completely dissolve sludge and instead break it down. The sludge could then be distributed more widely around the engine, rather than being localized only in certain areas, and could lead to an even greater reduction in engine performance.

The real danger of using engine flushes might be when they are used in high-mileage cars. For cars that have already had a long life, the engine seals may be worn and leaking. In these cases, the combination of oil and sludge acts almost like a sealant, essentially keeping them viable and masking their true condition.

If this is the case for your engine, it is certainly not worth using an engine flush. It would be better to leave well enough alone and not disturb the sludge that might be the only real barrier preventing oil from leaking past the old engine’s seals. If you use it in this situation, you could end up with a leaking engine or worse.

SO IS ENGINE FLUSH WORTH IT?

The importance of having a clean engine cannot be overstated, so any product that actively tries to clean the engine’s moving parts is clearly well-intentioned. But, using a product that manufacturers do not recommend is always a risk, especially when it involves something as critical as your engine.

Many drivers report substantial gains when using engine flush products and swear by them, but others claim to have noticed no change in performance. While engine flush cannot replace a regularly well-maintained, regularly cleaned, and oil-changed engine, it might be the right product for an engine that needs some attention.

Do fuel injector cleaners really work?

FUEL RESIDUE DEPOSITS ARE A MAJOR PROBLEM FOR FUEL INJECTORS AND THESE CLEANERS COULD BE THE SOLUTION

Content
  • 1 Fuel residue deposits are a major problem for fuel injectors and these cleaners could be the solution
  • 2 What is injector cleaner
  • 3 Why do we need injector cleaner
  • 4 Does injector cleaner work
  • 5 Injector cleaner: Is it worth it

It’s almost impossible to surf the internet or walk down the street without coming across an advertisement for a new miracle cure or a new product that will change our lives like nothing else. The world of automotive products is unfortunately no different – new “must-haves” that boldly claim to increase performance or reduce fuel consumption are constantly being pushed on us.

It can be difficult to know if it’s the real deal or not. One such product that consistently has a question mark hanging over it is the fuel injector cleaner. What do these fuel additives do and do fuel injector cleaners work?

WHAT IS INJECTOR CLEANER

Fuel injector cleaners are made up of various solvents and are designed to clean the fuel lines of diesel and gasoline engines. They are incredibly simple to use and can be added directly to the fuel mixture. They do not need to be drained or removed afterwards; the solvents are combustible and will therefore be eliminated with the rest of the fuel mixture and should not leave additional deposits.

They are designed to restore your car’s fuel injection system to its original state, removing anything that might prevent it from reaching its full functionality. Producers claim that their products can disperse moisture and dissolve gum, varnish, and other fuel residues from the entire fuel system, from the fuel tank, fuel lines, fuel injectors, valves, rings, and pistons, essentially cleaning the entire fuel system.

The highest-end and potentially most effective cleaners often contain polyisobutylene (PIB), polyether amine (PEA), and polyisobutylene amine (PIBA) as active ingredients. PIB is an effective detergent for removing gum, carbon, and other deposits from the fuel system and works with PEA to break down the hardest deposits in the fuel injection system. PIBA does not remove deposits and is more effective at removing moisture in the fuel system and may not be included in all injector cleaners. Some lower-end products instead contain solvents like toluene (used in the manufacture of paint thinner) and acetone (found in ordinary cleaning products found in the home and similar to nail polish remover), which might be less effective than those containing PIB and PEA. Some of the most popular injector cleaners are: 12 Chemtool Fuel Treatment, Chevron Techron Concentrate Plus Fuel System Cleaner, and LUCAS LUC10013 10013 Fuel Treatment.

WHY DO WE NEED INJECTOR CLEANER

Fuel injectors have the essential role of spraying the optimal amount of fuel into your car’s engine. If the incorrect amount of fuel enters the cylinders, it will likely cause errors in the combustion process and your engine may start to stutter and lead to inefficient fuel consumption. Fuel consumption will increase accordingly, as will your car’s emissions.

These injectors can become blocked by deposits that have built up over time. While most of these fuel residues slowly evaporate, some of the fuel is always left in the injectors and the injectors themselves. The residue in the fuel that does not evaporate and is baked onto the sides of the fuel injectors or cylinders turns into a hard varnish which is the beginning of a deposit. These deposits eventually clog the injector nozzles as well as the injectors themselves, and cause the engine to no longer get the exact required air-to-fuel ratio. This is when it can cause serious problems.

This is often a problem for older vehicles and for drivers who frequently make short trips, as any moisture in the oil does not have time to evaporate when.

DOES INJECTOR CLEANER WORK

The solvents contained in injector cleaners are supposed to help remove all these deposits and have an extremely positive impact on the fuel in the injection system. One of the main benefits of injector cleaner is that it helps drivers achieve optimal fuel supply from the engine. When the engine receives too much or too little fuel due to clogged fuel injectors, the engine starts to run inefficiently. Using an injector cleaner prevents this from happening.

Alongside this improvement in fuel supply, the car will also produce fewer emissions when the injectors are cleaned. Carbon deposits and other impurities in the fuel injection system can impact the optimal fuel and oxygen mixture, leading to more harmful emissions. Reducing your emissions could also help older cars, which are more likely to be affected by fuel injector problems, pass their technical inspection or maintenance check.

Similarly, one of the additional benefits related to this is the reduction in fuel consumption. As the fuel injector cleaner removes deposits in the fuel system, your diesel engine’s fuel consumption level can return to its optimal state, which will make things much cheaper for you and means your car’s mileage will likely increase.

Some car owners have reported increased power after using their injector cleaner. They reported recovering up to 40% of their engine’s power by applying a high-end diesel fuel injector cleaner. Blockage of the fuel injection system reduces your car’s power and acceleration due to a sub-optimal mixture of fuel and oxygen in the fuel system. If your truck or cars are old, you should consider using a good fuel injector cleaner to remove deposits from the injection system. You might be surprised to recover lost power and acceleration in your car.

As mentioned above, higher-level injector cleaners will include PIBA and facilitate the removal of water from the fuel system. This can improve your engine’s performance and also helps prevent rust and corrosion in the engine in conjunction with other cleaning additives.

Experts have noted that incidents of engine misfires can also be avoided by using a fuel injector cleaner. The buildup of burned and cooked fuel can prevent pistons from operating at the right time and in sync with the valves and other moving components of the engine – if one cylinder misfires, the others can and will continue to operate normally, but you will notice a certain collapse in your engine’s operation. If the fuel injectors are cleaned and free of blockage, this will not take place and everything should run properly again.

However, there are potential issues with fuel injector cleaners. As always, it still depends on the quality of the product you choose. There may be a weak, or even no, effect if lower-end products, which do not include the highest-end chemical solvents, are used. Burned fuel is much more resistant than average household grease and paint, so using products mainly composed only of acetone and toluene might not be as effective.

That said, this does not mean that products containing these powerful chemicals are automatically better. Many of them are not suitable for diesel engines due to their strong nature and could cause serious and lasting damage to your engine. Overuse of certain types of diesel fuel injectors can damage your equipment’s fuel injection system. Some fuel injector cleaners can be used multiple times without adverse effect, but should only be used intermittently and according to the manufacturer’s recommendations. It is always best to check product labels and consult an expert or your vehicle’s manufacturer before using any type of injector cleaner.

Similarly, older vehicle models manufactured before the 1990s may use a carburetor instead of a fuel injection system. This means that these injector cleaners will not be suitable and might not have the desired effect or even any effect at all. These vehicles may require different, more specific cleaners or a different maintenance schedule altogether. Otherwise, it could damage the engine or even cause the buildup of larger deposits.

There are also some questions about the duration of the effect of fuel injector cleaners. Some will only protect your fuel lines for a short period, while others will keep your fuel system clean for more than 2 years. Again, this varies from product to product and is very difficult to predict.

INJECTOR CLEANER: IS IT WORTH IT

As with many aspects of car maintenance, there is no clear answer as to whether injector cleaner works or not or when to use injector cleaner. It is clear that having injectors clogged with burned fuel or leftover residue will hinder your car’s performance due to a sub-optimal air-fuel mixture and that, in theory, removing these deposits will greatly benefit your car’s overall performance and condition. However, there is a risk, albeit small, that you could damage certain engines by using injector cleaners. Overall, it seems that they are going to be better for your engine than bad for it, but it is always important to check if the product you are going to put in your fuel tank is compatible and recommended by experts or your manufacturer.

How to clean a butterfly body

Modern air intake systems can operate for a long time without maintenance. However, it is still necessary to take preventive measures every 120,000 km to ensure their proper functioning. In particular, it is worth cleaning a throttle body. You will be able to handle this task yourself after spending only 10 to 20 minutes. In this article, we will discuss the symptoms of a contaminated throttle and explain how to clean it yourself.

Content
  • 1 What is a throttle body?
  • 2 What are the symptoms of a contaminated throttle body?
    • 2.1 How to clean a throttle body without removing it from the vehicle?
    • 2.2 How to clean a throttle body when it is removed from the car?
    • 2.3 Readjusting a mechanically controlled throttle
    • 2.4 Readjusting an electronically controlled throttle
  • 3 How to prevent the throttle body from getting dirty?

WHAT IS A THROTTLE BODY?

This component is an element of the air intake system that controls the amount of air supplied to the combustion chambers. It has a direct effect on the air-fuel mixture formation process. It can have mechanical or electric actuation. It is installed in a housing connected to the hoses of the cooling, crankcase ventilation, and evaporative emission control systems, sensor connectors, etc. The throttle shaft is equipped with a position sensor that measures the opening angle and speed of the throttle. The readings from this sensor are used by the engine control unit to adjust injection and ignition.

In mechanical components, the throttle plate is connected to the accelerator pedal with a cable or lever: when the pedal is pressed, the plate opens to a corresponding angle.

Electrically actuated assemblies include an electric motor that is responsible for opening the air passage; the engine control unit gives commands to this motor based on readings from various sensors.

WHAT ARE THE SYMPTOMS OF A CONTAMINATED THROTTLE BODY?

  • Engine starting problems. Due to deposit formation, the throttle valve may let less air through than necessary at small opening angles. This leads to reduced traction, especially at low speeds. Sometimes the engine even stalls.
  • Unstable or high idle speed. This occurs when more air than necessary is supplied to the engine due to the mechanism being stuck in the open position.
  • Increased fuel consumption. In some vehicles, excessive air supply causes more fuel than necessary to enter the engine. It burns in vain.
  • Reduced engine power. If the valve does not open to the required angle, the combustion chambers receive an insufficient amount of air. The driver may notice that the vehicle’s dynamics have significantly deteriorated.

HOW TO CLEAN A THROTTLE BODY WITHOUT REMOVING IT FROM THE VEHICLE?

  1. Park your car on a flat surface to have access to the engine compartment from all sides. It is best to work outdoors or in well-ventilated rooms.
  2. Secure your vehicle with wheel chocks.
  3. Open the hood. Disconnect the negative terminal of the battery.
  4. Locate the throttle body. It should be somewhere between the air filter and the intake manifold. If you have trouble finding the component, ask your companion to press the accelerator pedal to see how the throttle opens.
  5. Identify the tools you need to detach the air filter hose. Prepare them. In addition to tools, you will need gloves and protective glasses, paper towels, a little engine oil, a small soft brush or a soft cloth, masking tape or special adhesive tape, and a can of throttle cleaner.
  6. Using masking tape or adhesive tape, mark all the hoses you will need to remove to access the throttle body and the air duct.
  7. Using a screwdriver or wrench, loosen the clamp that secures the air duct.
  8. Carefully detach the hose. Be sure not to damage the gasket if there is one. Perform the work carefully so as not to disconnect electrical connections and hoses. If the throttle body is connected to air ducts on both sides, it is sufficient to remove only one.
  9. Put on your glasses and gloves.
  10. Spray the throttle cleaner on the internal surface of the component. Let the compound penetrate for 5 to 10 minutes.
  1. Remove dirt with a soft brush or cloth. Caution: some throttle bodies have a special molybdenum coating. You must clean them with particular care.
  2. Use paper towels to remove the residue of the cleaner with dissolved deposits. If necessary, treat the surface a second time.
  3. Wipe the assembly dry.
  4. Apply a drop of oil to the throttle shaft. Spread it with a cotton swab, for example.
  5. Attach the intake manifold hose and tighten the clamp with approximately the same force as it was originally tightened. Put all removed hoses back in their place.
  6. Start the engine. Let it idle for a few minutes.
  7. Take a test drive. If the engine problems were caused by a dirty throttle body, they should disappear.

HOW TO CLEAN A THROTTLE BODY WHEN REMOVED FROM THE CAR?

Disassembling the component allows you to clean it as thoroughly as possible. However, this will take more time.

Proceed as follows:

  1. Repeat steps 1, 2, 3, 4, and 5 from the previous list. Keep in mind that you may need more tools because you will have to remove the entire assembly. Additionally, it is advisable to prepare a clean container for draining the coolant and also fresh coolant, identical to what you are currently using.
  2. Remove the air filter housing, if necessary to access the throttle body.
  3. Loosen all clamps, then detach all electrical connectors, hoses, and pipes from the throttle body. Be especially careful when removing the cooling system hose, especially if the engine was running before this: the coolant may be hot.
  4. Unscrew the throttle body fasteners and remove it from your car. In some vehicles, there is an additional fastener – a bracket. If the throttle is mechanically actuated, you will need to disconnect the throttle cable.
  5. Cover the intake manifold opening to prevent dirt from entering inside the unit.
  6. Detach the idle air control valve from the throttle body. It must also be cleaned.
  7. Apply some cleaner to the surface of your car’s throttle body and treat all hard-to-reach cavities with it. Remove contaminants with a brush and paper towels or a soft cloth.
  1. Dry the cleaned elements.
  2. Clean the throttle body mounting seat and install a new gasket.
  3. Put all components back in their place in reverse order.
  4. Check the coolant level. Refill if necessary.
  5. Readjust the component. Read on to find out how.

READJUSTING A MECHANICALLY CONTROLLED THROTTLE

  1. Remove the battery terminals for 15 minutes. Then, reconnect them. If you already removed them while cleaning the device, you can skip this step.
  2. Start the engine. Let it idle for 10 minutes. Remember not to turn on any additional consumers.
  3. Turn off the engine for about 10 seconds. Start it again.
  4. Wait for the power unit to reach operating temperature. After that, you can start using the vehicle.
  5. Note: you may need to drive 150 to 200 km until the idle stabilizes.

READJUSTING AN ELECTRONICALLY CONTROLLED THROTTLE

The readjustment process may vary by vehicle. Therefore, before starting the procedure, consult the vehicle manual for the exact sequence of steps.

The general algorithm is as follows:

  1. Study the procedure and try to remember it. You will need to act quickly so you don’t have time to check the details.
  2. Start the engine. Warm it up to operating temperature.
  3. Turn it off for 10 seconds.
  4. Turn the ignition on for 3 seconds.
  5. Quickly press the accelerator pedal 5 times. One depression should take one second.
  6. Press the accelerator pedal to the floor for 7 seconds. Hold it down until the “Check Engine” light burns steadily and hold it for 3 more seconds.
  7. Release the accelerator pedal and start the engine.

HOW TO PREVENT THE THROTTLE BODY FROM GETTING DIRTY?

  • Use only high-quality fuel. Otherwise, impurities and contaminants will enter the engine, causing rapid formation of carbon deposits on the throttle body. For the same reason, fuel filter replacement should not be neglected. It is recommended to flush the fuel tank from time to time.
  • Replace the air filter on time. Always ensure that the intake system is airtight. This simple check prevents unfiltered air from being drawn into the intake system at points where its components are not tightly connected.
  • Always ensure the crankcase ventilation system is fault-free. Its malfunctions cause rapid formation of oily deposits on throttle body elements.

Conclusion

Engine stability and performance depend on the proper functioning of associated assemblies. Therefore, cleaning the throttle body is one of the mandatory maintenance procedures of the intake system. Our tips will help you do it yourself and save on repair shop services.

What are the different types of braking systems and how do they work

The ins and outs of discs, drums, shoes, and the hydraulic system: how your brakes protect you.

Brakes are as important as the engine of any car and they are essential to ensure your safety when driving. The basic principle of brakes is simple: they take the kinetic energy of the moving vehicle and transfer it into thermal energy through friction so that the car stops. All brakes follow the same principle, but different systems achieve this friction in different ways.

Many factors will determine the type of system your car has and the components it uses, as all systems vary slightly, but here are the systems your car is likely to have, how they work, and what the key components are likely to be. Understanding a car’s braking system and vehicle braking systems can be vital, so read on!

BRAKING SYSTEM COMPONENTS

Before discussing the type of system a car may use for braking, it’s worth mentioning the key components, especially if you’re considering repairing or replacing parts of the braking system. The types of parts your braking system uses will often depend on the car’s make and model, the speeds it can reach, the car’s price, and its age. A braking system will use a drum or a disc and will contain brake pads.

DRUM BRAKES

Braking system on a car

Drum brakes are the oldest way to stop a car. A drum is attached inside the wheel, and inside are two heat-resistant pads. When the pedal is pressed, the pads push outward and press against the drum, and the drum stops the wheel. The friction caused between the pads and the drum causes the kinetic energy to transfer into thermal energy.

These types of brakes were commonly used on cars until the 1980s. As cars became more powerful, drum brakes couldn’t meet the challenge of stopping them. They get very hot under intense conditions of frequent braking, and if they get too hot, they can’t convert motion energy into heat and they stop working. After the 1980s, many cars started using disc brakes instead.

This isn’t to say, however, that drum brakes aren’t used at all. They are still adequate and they do the job. They are often used for the rear wheel brakes, as when a car stops, most of the pressure is applied to the front brakes. Since drum brakes are cheaper to manufacture and simpler to maintain, they are often used on entry-level or cheaper models.

DISC BRAKES

Braking system

Disc brakes are what “replaced” drum brakes as the most popular choice for most cars. Drum brakes push, and this doesn’t create as much pressure as squeezing the wheel. So experts designed a system where something is squeezed rather than pressed. They also discovered that a larger surface area also means more friction and is essential for improving braking at high intensities. The combination of finding something to squeeze and seeking a large surface area led to the adoption of disc brakes.

A disc brake is a mechanism to slow or stop the rotation of a wheel from its motion. A disc brake is normally made of cast iron, but in some cases, it is also made of carbon or ceramic composite. This is linked to the wheel and/or axle. To stop the wheel, a friction material in the form of brake pads is forced against both sides of the disc. The friction caused on the disc wheel will slow or stop it.

Some discs have modifications to ensure they cool faster and remain more effective. This is often achieved by letting air in, so modifications like a hole in the middle, small gaps around the outside, or fins will allow air to access the disc and ultimately mean a more efficient braking system.

BRAKE PADS

Braking system components

Whether it’s a disc or a drum used by your car, the main component contained in the disc or drum is a brake pad (sometimes called a “shoe”). These are what create the friction. Many different materials are used for brake pads, but some common pads can be organic (using glass, Kevlar, carbon, etc.), ceramic, semi-metallic, or fully metallic. All materials used are designed to absorb as much heat as possible.

Organic brake pads are very quiet and don’t wear the disc, but they need to be changed more frequently as they tend to wear out. Ceramic pads are also very quiet, last a long time, and have great braking capacity, much better than organic pads. Semi-metallic pads even exceed the capacity of ceramic pads, but due to the metal flakes in the synthetic material, they wear the disc more, so the brake disc will need to be changed more often. Finally, there are fully metallic brake pads.


This is what race cars use. They have incredible stopping power, but are noisy and will wear the disc like ice melting in the sun. Your car is likely to have synthetic or ceramic brake pads, and these are two good choices for everyday driving.

MECHANICAL BRAKING SYSTEMS

Mechanical brakes were the first of the types of braking systems installed on automobiles when they were mass-produced in the 20th century. These systems involved a series of pulleys, cables, cams, and other devices to apply friction to the brake drum and stop the car. When the pedal was pressed, it pulled on a cable, the “brake line,” which in turn forced the drum to press against the wheel and stop the car.

There were many problems with these braking systems. For one, they required a lot of maintenance because the brake lines and all other moving parts had to be kept in perfect condition for the brakes to work. When the brake cables were under too much pressure or the force required to stop the vehicle was too great, they could also break easily, and this would be very dangerous. The systems also needed maintenance due to their precision; if a lever was off or the cable tension wasn’t quite right, different wheels would receive different braking pressures, making the car very difficult to control.

Because of all these issues, by the late 1950s, mechanical brakes were rarely seen on cars, and they were replaced by hydraulic brakes.

That said, most cars still have a form of mechanical brakes: the handbrake. In addition to having main hydraulic brakes, cars often have a mechanical handbrake that uses a lever and an arm inside the brake drum to help stop the car. They are operated by a cable from the handbrake lever inside the car. A ratchet on the handbrake lever keeps the brake engaged once it is applied. A push button disengages the ratchet and releases the lever. All cars have a handbrake system (sometimes electric and not mechanical) that acts on two wheels – usually the rear wheels. This mechanical system is only meant to secure the car when parking rather than stopping it, so a mechanical system is suitable.

HYDRAULIC BRAKING SYSTEMS

Hydraulic brakes

The most common braking system for modern cars is a hydraulic braking system, and your car is almost certainly equipped with hydraulic brakes. Cars usually have this on all four wheels, and hydraulic systems can use a brake disc or a brake drum.

Unlike older mechanical braking systems, hydraulic systems use a fluid to apply pressure to the brakes. Hydraulic fluid is stored in the brake lines and is used to transmit the pressure or force from the brake pedal or brake lever to stop the car. Brake fluid, or hydraulic fluid, is a non-compressible substance that can operate at high temperatures and high pressure.

In this type of braking system, the mechanical force comes from the driver pressing the brake pedal. This force then pushes the brake fluid through the lines and, since it is not compressible, toward the braking system. In a device known as the master cylinder, this force is then converted into hydraulic pressure that is sent to the brake calipers or drum segments (depending on the type of system).

Each brake caliper contains a series of pistons (up to 6), and the hydraulic pressure forces the caliper to clamp onto the disc or drum. The brake pads attached to the brake caliper create friction when they rub against the brake disc or drum, and this is what ultimately stops the car.

Hydraulic braking systems also have distinct advantages.

First, the force generated in the hydraulic braking system is higher compared to the older mechanical braking systems used in cars. These are rather primitive and rely on levers, linkages, or cams, which don’t transfer as much force as hydraulic braking systems. Mechanical systems can also lose their efficiency over time as working parts break down.

The risk of hydraulic brake line rupture is very low, and they require very little maintenance, again in contrast to mechanical brakes. They are also incredibly fast and responsive to the pedal, and very little force needs to be applied to the brakes to exert pressure on the drums or discs.

Since a hydraulic system has far fewer moving parts than a mechanical system, the wear on these parts and any associated or resulting maintenance is also reduced. This makes the system cheaper and more reliable than a mechanical system. Since mechanical systems could also vary significantly in their design and construction from one car to another, this often made repairs tricky. Hydraulic systems have a relatively simple design and are easy to assemble, making maintenance easier.

SERVO BRAKING SYSTEM

Braking system diagram

Often also called power brakes, or servo brake or brake booster, a servo braking system is designed to provide additional power to reduce the effort needed to apply the brake and will work in conjunction with hydraulic brakes.

The brake servo works by creating a partial vacuum, which then increases the force applied to the master cylinder. With a brake servo, the brake pedal first presses on an attached rod, which then allows air to enter the servo while closing the vacuum. The pressure then increases on the rod that connects to a rod inside the master cylinder.

The brake servo became more common in cars as disc brakes replaced drum brakes as the standard setup in vehicles. Disc brakes require cars to be equipped with power brakes to eliminate the majority of the force a driver must exert to stop the car.

Inside the brake servo system, a vacuum multiplies the force exerted by the driver on the brake pedal. The outer aspect of a brake servo is a cartridge that contains a diaphragm, a valve, and is usually constructed of metal. Attached to the brake servo is also a one-way valve, which limits the direction of air to outward only to eliminate the risk of losing braking function while the car is operating.

If the vacuum fails because the engine stops, for example, the brakes still work because there is a normal mechanical linkage between the pedal and the master cylinder. But much more force must be exerted on the brake pedal to apply them.

What are anti-lock brakes and how do they work

The anti-lock braking system (ABS) is not only a crucial element of a new car’s safety system, it makes braking much more efficient and easier. Here is our guide to what it is and how it works.

    • anti-lock braking systems guarantee drivers a comfortable driving experience, almost nothing has done more than the introduction of anti-lock braking systems. It has been present on cars since the 1970s and EU legislation since 2004 states that it is now mandatory for all cars to be equipped with it.

Anti-lock brakes were first used in the 1950s, originally to prevent airplanes from skidding on the runway during landing. The hydraulic system reduced stopping distances during aircraft landing and the risk of tire blowouts. In a short time, engineers began to realize that this type of system could also make automobiles much safer.

Even for the most experienced drivers, roads can be filled with unexpected hazards that might force you to think quickly and slam on the brakes to avoid a collision or imminent danger. This type of sudden braking, as well as any type of driving on slippery roads, is exactly what your car’s ABS is designed to help with and while most people know their car is equipped with ABS and may know what that acronym means – but few know exactly what it is for and how it works.

HOW DO ANTI-LOCK BRAKES WORK

Simply put, an anti-lock braking system uses electronics to monitor the brakes and prevent the wheels from locking during braking. Wheels can lock when the brake is applied harder than the tire can handle and the wheel stops rotating, often causing the entire car to skid. A car’s anti-lock brakes will take effect when this happens and when they sense the wheel is about to lock, so anti-lock brakes reduce the risk of skidding when a driver brakes too abruptly, for example in a turn or an unexpected hazard on the road or when the brakes lose their grip on a slippery surface.

Sensors of anti-lock braking systems

Anti-lock braking systems work through detection sensors installed on a car’s wheels. Each of these sensors is mounted in the wheel hub and takes readings of the rotational speed of each wheel. It looks for decelerations in the wheel that are out of the ordinary. Just before a wheel locks, it will undergo rapid deceleration. If nothing is done, the wheel would stop much faster than any car. It can take five seconds for a car to stop at 96.6 km/h (60 mph) under ideal conditions, but a locking wheel can stop rotating in less than a second.

These sensors assess whether one is about to lock when a driver brakes. The information is transmitted to the ABS electronic control unit, which determines which wheel is skidding and may lock. If a wheel begins to lock, the sensors communicate with the open hydraulic valves to slightly reduce the brake pressure and prevent the wheel from becoming completely stationary, thereby preventing the car from skidding. The cut-off corresponding to the wheel about to lock momentarily disengages from the brake master cylinder and the wheel is then controlled by the valves, which increase wheel locking, and the pumps, to reduce it, ultimately meaning the car can still be steered effectively. The result is that the tire slows at the same rate as the car, with the brakes keeping the tires very close to the point where they will begin to lock.

It’s as if the electronics are pumping the brake as a driver might do to avoid or prevent wheel lock-up. When the ABS system is active, you will feel a pulsation in the brake pedal; this comes from the rapid opening and closing of the valves. Some ABS systems can cycle up to 15 times per second, allowing them to achieve threshold braking, thus preventing loss of traction and the onset of a skid.

ADVANTAGES AND DISADVANTAGES OF ABS

Advantages and disadvantages of ABS

ABS is particularly effective and now almost indispensable during emergency braking. It not only reduces the braking distance (assisted braking is much more effective than stopping via a completely locked wheel), it also allows the driver to maintain control of the vehicle during braking, which could help avoid serious problems.

Linked to this, ABS can help extend tire life. Tires that regularly skid on the road wear out much faster than those that do not, and as a result, anti-lock braking systems greatly help ensure that tires last as long as possible.

ABS also allows for safe driving in more challenging weather conditions like snow or during heavy rain. Although speeds should always be reduced in bad weather, ABS means there is less risk of tires losing their grip on the road and locking, making driving safer when weather conditions are not optimal, as the vehicle can still be steered effectively.

That said, however, ABS increases the braking distance on a slippery or snowy road, including on dirt paths. So, while it is good for steering in difficult weather, it is important to always consider the increased braking distance.

WHAT CAN GO WRONG: COMMON PROBLEMS WITH ANTI-LOCK BRAKE SYSTEMS

ABS warning light

Since anti-lock brakes are so important, it is essential that you have an insight into what could go wrong with them. Helpfully, there is an ABS warning light on the dashboard that illuminates whenever there is a problem with your system.

Since the system is an electronic system, any wiring issues can cause problems. In particular, when an electrical wire is torn from the ABS sensor in one of the wheels, the correct measurements will not be received and the system will not function properly. The sensors are the most essential part of the system and, over time, they can become oxidized from prolonged and repeated exposure to moisture.

How to Bleed Brakes

The efficient operation of the braking system is one of the essential conditions for safe driving. Therefore, keeping the brakes in good working order is a duty of every car owner: you must replace consumables on time, check for leaks in the lines, and remove air from the system if it has entered. Let’s explore the causes of air in the system. In this article, we tell you the correct order for bleeding brakes.

5 MAIN CAUSES OF AIR IN THE SYSTEM

  • Insufficient fluid level in the reservoir. For this reason, ambient air can be drawn into the system.
  • Worn rubber components. The wheel cylinder (or brake caliper) seals, exposed to moisture, dirt, and road chemicals, lose their elasticity and begin to leak. Over time, the hoses also start to crack.
  • Not changing the working fluid in a timely manner. The hoses it flows through have a porous structure. This means that through them, albeit in small quantities, water enters the system. It mixes with the brake fluid, resulting in a decrease of the latter’s boiling temperature. Because of this, during repeated braking, for example, when driving on a winding road, the fluid can boil. The boiling process is accompanied by the generation of steam, and consequently, air pockets are formed in certain parts of the pipes and hoses.
  • Leaking fittings and connectors. Due to vibrations caused by driving on bumpy roads, clamps and fasteners loosen over time. This leads to air leaks.
  • Repairs. If you have changed pistons, cylinders, pipes, or hoses, be sure to remove air from the braking system immediately afterward: when these components are disassembled, air freely enters the lines and, after reassembly, remains there.

HOW DO YOU KNOW WHEN YOUR BRAKES NEED BLEEDING

The presence of air is accompanied by characteristic signs. When pressing the pedal, you can feel that its resistance has significantly decreased. Sometimes, you need to press the pedal several times to get the brakes to work. With each press, the pedal becomes stiffer. Sometimes, braking starts when the pedal is pressed almost all the way down. Overall, your vehicle’s braking distance becomes considerably longer than usual.

If you notice at least one of these symptoms, bleed your brakes.

HOW TO PREPARE YOUR CAR FOR BLEEDING

The sequence of steps for bleeding air from the brake lines varies depending on the vehicle’s make and model. It is also determined by the structure of the braking system and the presence of additional units and assemblies. Therefore, before starting the procedure, be sure to carefully read the vehicle’s manual. It should contain a detailed description of the bleeding process for your exact model. In some cases, if your car is equipped with many electronic systems, you won’t be able to do it without the help of a professional.

Brake bleeding tool

Prepare the brake bleeding tools and other necessary means and accessories.

You will need:

  • A clean, stable, preferably transparent container for the drained working fluid.
  • A transparent hose with the diameter to fit the brake bleeder screw, as well as a socket or Allen key to unscrew it.
  • WD-40 spray. This will help loosen stuck fasteners and connections.
  • A lug wrench and a jack, in case you have to remove wheels to access the wheel cylinders (brake calipers).
  • Wheel chocks. It may be necessary to secure your car in place, as in some models, it is not recommended to engage the parking brake during bleeding.
  • Brake fluid of the same type as used in your car.

SPECIFICS OF THE BRAKE BLEEDING PROCEDURE ON DIFFERENT CAR MODELS

The order of steps depends on the following:

  1. Presence of a brake proportioning valve on the rear axle. It is usually installed on utility vehicles and early-generation passenger cars. Under certain road conditions, it prevents brake fluid from being supplied to the rear wheels. Therefore, to properly bleed the brakes on these vehicles, do not unload the rear axle by lifting the car on a lift or jack.
  2. Layout of the brake circuits. The procedure involves bleeding air from each brake mechanism. First, air is removed from one brake circuit, then – from the other. If the circuits are diagonal, start with the brake mechanism farthest from the master cylinder: most often, this is the right rear wheel. Then move to the front left, then the rear left, and finally, the front right.
    If the circuits are parallel and connect the rear and front wheels, the system should be bled in a circle. First, air is removed from the rear brake mechanism farthest from the master cylinder, then – from the other rear. After that, move to the front wheels.
Note: the brake bleeding diagram is individual for each model as it depends on the braking system design. Therefore, before proceeding with the procedure, always read the manual carefully.
  1. Presence of the Anti-lock Braking System (ABS). This system prevents the wheels from locking completely during braking to avoid skidding. It can be found on most modern cars. It helps avoid loss of control during emergency braking or when trying to stop on a slippery surface. Its design includes a brake pressure modulator, and air must also be removed from it.
How to bleed brakes on a vehicle without ABS
  1. Hydraulic pump instead of the vacuum brake booster. You can see it on the BMW 7 Series (E32), Nissan Cedric Y32, Toyota Land Cruiser 105, Mitsubishi Pajero III, and other vehicles. In some cars, it is used in addition to the vacuum booster. In this case, you will need to turn on the pump to remove the air.
  2. Additional features. If your car is equipped with, for example, an electronic stability control system, it is better to seek help from specialists at a garage to bleed the brake lines. You should also opt for professional service if the ABS units are located in different parts of the vehicle; because in this case, the procedure requires the use of a diagnostic scanner and is initiated using software. The Land Cruiser 200, BMW X5, and other cars are among such models.

HOW TO BLEED BRAKES ON A VEHICLE THAT HAS NO ABS

  1. Unscrew the reservoir cap.
  2. Fill the brake fluid up to the “Max” mark.
  3. Pour fluid into the drain container.
  4. Attach the hose to the brake bleeder screw and dip its other end into the drain container with fluid.
  5. Ask an assistant to press the brake pedal several times in a row, then press it all the way down.
  6. At the same time, unscrew the bleeder screw to allow the fluid to flow through the hose.
  7. Tell your assistant to press the pedal all the way down.
  8. Monitor the fluid coming out of the bleeder screw. There will be bubbles in it.
  9. Tighten the bleeder screw. After that, your assistant can release the pedal.
  10. Repeat the procedure 4 to 5 times for each brake mechanism.
  11. Don’t forget to monitor the fluid level in the reservoir and top it up to “Max”.
  12. While performing the work, ensure that the fluid does not get on the car body. It contains components that have a destructive effect on the paint. You must also prevent the substance from spilling onto the brake pads. If this happens, replace them.

HOW TO BLEED BRAKES ON CARS EQUIPPED WITH ABS

To bleed the brakes in vehicles where all ABS units are combined into a single module, proceed as follows:

  1. Remove the ABS fuse.
  2. Perform all the steps described above.
  3. Reinstall the fuse.
  4. Ensure that the dashboard warning light indicating an ABS malfunction is not lit.

HOW TO BLEED BRAKES IN CARS WITH A HYDRAULIC BRAKE BOOSTER PUMP

How to bleed brakes on a vehicle without ABS

Proceed as follows:

  1. Remove the ABS fuse from its socket.
  2. Attach the hose to the bleeder screw. Dip its other end into the drain container filled with brake fluid.
  3. Ask your assistant to press the pedal all the way down. In this case, there is no need to press it multiple times.
  4. Tell your assistant to turn the ignition key to the corresponding position. This will activate the pump.
  5. Wait for the pump to remove all the air from the system. In other words, until the fluid flowing from the bleeder screw has no bubbles.
  6. Repeat the procedure for each of the wheel cylinders (brake calipers).
  7. Monitor the fluid level in the reservoir. Top it up to the “Max” level before each cycle and also after completing the bleeding operation.
  8. Ask your assistant to turn off the ignition.
  9. Put the fuse back in place. Ensure that the dashboard warning light indicating an ABS malfunction is not lit.

HOW TO BLEED BRAKE LINES IF THERE’S NO ONE TO ASSIST

If you have no one to assist you, it is possible to perform the procedure yourself. There are several methods:

  1. Bleeding is done in the same way as with an assistant, but you need to use a gas strut to hold the pedal down. For this, you can temporarily remove one from the hood or trunk lid. For convenience, you can purchase a special brake bleeding kit. It includes fittings, adapters, hoses, and a drain container. It is very convenient that the container is equipped with a powerful magnet, allowing it to be attached to any part of the car body and preventing it from tipping over and spilling the fluid.
  2. Bleeding using a special vacuum pump. It is performed as follows: fill the reservoir with working fluid to the maximum level. Connect the pump hose to the bleeder screw of the wheel cylinder (brake caliper) you are working on. The fluid sucked out by the pump is collected in a special container, and the air is evacuated.
  3. Bleeding by increasing pressure in the reservoir. You might need various devices for this: syringes, small manual compressors, and other tools. Their operating principle lies in supplying air or brake fluid into the reservoir under pressure. This circulates the fluid in the lines and replaces the process of pressing the pedal. The rest of the process is similar to a standard bleeding procedure: the brake fluid with air bubbles is drained through the hose attached to the bleeder screw of a wheel cylinder (brake caliper).

Conclusion

All malfunctions in the braking system, if any, must be eliminated immediately after they appear. There should be no air in the system. Therefore, as soon as you suspect air in your brakes, bleed them using our tips.

What is a particulate filter and how does it work

The filter that cleans diesel exhaust is essential, but can easily go wrong if you don’t know how it works.

Content
  • 1 What is the particulate filter in a car?
    • 1.1 How does the diesel particulate filter work?
  • 2 What is diesel particulate filter regeneration?
    • 2.1 What to do if both types of regeneration do not work?
  • 3 What causes a diesel particulate filter blockage?
  • 4 Is a particulate filter a legal requirement?
    • 4.1 Do I need a diesel particulate filter to pass the MOT?
  • 5 My particulate filter is broken – how much will a new filter cost?

If you drive a diesel car in 2021, there’s a good chance it’s equipped with a diesel particulate filter. You might not know what it is, how it works, or even when it’s doing its job. Diesel particulate filters have been installed on diesel-fueled cars for nearly two decades, and knowing how they are maintained can help keep your engine running cleanly and smoothly.

Here are all the details of what a particulate filter is and how to maintain and clean it.

WHAT IS THE PARTICULATE FILTER IN A CAR?

What is the particulate filter in a car

A diesel particulate filter (DPF) is a filter fitted to cars and it is designed to capture and store exhaust soot. Soot is a natural part of the combustion process, but larger chunks can be dangerous to an engine, so the filter removes that risk. While in the past only diesel cars were equipped with particulate filters, some gasoline car manufacturers have also started installing them on their vehicles. You can always tell a car that doesn’t have a DPF by the clouds of black smoke coming from the exhaust, especially when accelerating, for which diesel vehicles were notoriously known.

However, filters only have a limited capacity, meaning they will periodically need to remove the soot, which is called “regeneration” of the DPF.

If you haven’t heard of it, you might be wondering “when were diesel particulate filters introduced”? Particulate filters have been around for a while, since the introduction of Euro 5 exhaust emission legislation in 2009 to help reduce CO2 emissions from cars, they became effectively mandatory. All post-2009 cars compliant with the Euro 5 standard must be equipped with a DPF to reduce emissions.

HOW DOES THE DIESEL PARTICULATE FILTER WORK?

Soot is one of the byproducts of the combustion process. It is harmful both to the environment and to people and animals, so it’s the filter’s job to trap and remove diesel particles from the exhaust gases before they can be released into the atmosphere.

When you drive, the exhaust products pass through the walls of a series of channels that are blocked at different ends. Here, the soot particles are captured. The filter also removes the soot and it does so by exposing it to high temperatures. This burns the soot and leaves only a very fine ash residue. However, too much ash can accumulate in your filter and eventually cause blockages, which is why there is a regeneration process to clean the filter. Now it’s the turn of the blockages to be subjected to very high temperatures and then the harmless products that are produced can be released with the exhaust gases. No harm is caused to the environment or your car!

But it’s all about diesel, are gasoline engines also equipped with particulate filters? In the past, only diesel cars were equipped with particulate filters, but gasoline particulate filters (GPF) have also been developed for gasoline cars. A gasoline particulate filter works in much the same way, although there is no soot: the combustion products are still superheated, which removes harmful substances and leaves carbon dioxide. At the same time, nitrogen oxides and unwanted hydrocarbons are converted into carbon dioxide, water, and nitrogen, making the waste much less harmful. Once the filter has done its job, the exhaust gases pass into a three-way catalytic converter which ensures that the exhaust complies with the latest level of EU emission standards and that the number of harmful pollutants coming out of the exhaust is reduced. Thus, diesel and gasoline particulate filters work in much the same way and ensure that harmful products from the combustion process do not enter the environment.

WHAT IS DIESEL PARTICULATE FILTER REGENERATION?

The diesel particulate filter regeneration process is essential to ensure its proper functioning – it is essentially a cleaning of the particulate filter. Ensuring it is able to fully regenerate when full of soot is also the best way to maintain a DPF. When it is full, you will see a warning on the dashboard. There are two types of regeneration: passive and active.

Passive regeneration takes place when the car is driven at high speed on long journeys, for example on the highway. This happens here because the engine is running at higher RPMs. These longer, high-speed journeys allow the exhaust temperature to rise to a higher level and cleanly burn off the excess soot in the filter. To ensure this happens, drivers are often advised to regularly run their diesel vehicle for 30 to 50 minutes at sustained speed on a highway or A-road to help clean the filter.

The problem with this, however, is that not all drivers do this type of driving regularly. To solve this problem, manufacturers have equipped cars with an alternative form of regeneration, which is active regeneration.

Active regeneration involves the automatic injection of additional fuel, via commands from the vehicle’s ECU, when a filter reaches a predetermined limit (normally around 45 to 50% of its total capacity). This added fuel raises the exhaust temperature and burns the stored soot, as it would have on a long highway journey. However, the trip must be long enough to complete the process and you may encounter difficulties if the trip is too short, as the regeneration process may not finish completely. If this is the case, the warning light will continue to indicate that the filter is still partially blocked. Driving for about 10 minutes at speeds above 40 mph should be enough to complete a regeneration cycle and turn off the light.

Some signs let you know if an active regeneration is in progress.

They are:

  • The engine sounds slightly different
  • The cooling fans are running
  • A slight increase in fuel consumption
  • Increased idle speed
  • Deactivation of automatic stop/start
  • A hot, pungent, and slightly acidic smell from the exhaust

WHAT IF BOTH TYPES OF REGENERATION ARE NOT WORKING?

Particulate filter warning

If your warning light does not go out, turns red, or additional DPF lights come on, do not just ignore it. In addition to releasing a lot of dangerous gases into the air, it also risks damaging your engine. This can be very expensive to repair.

Some garages offered a forced regeneration service, which essentially involves cleaning blocked DPFs. This usually costs around £100 and, although it is not a 100% guaranteed solution, it generally succeeds in removing excess soot and allowing the DPF to function and regenerate automatically, which could prevent further problems later.

It is a failure of proper regeneration that is the cause of most diesel particulate filter problems: they become blocked, which increases exhaust emissions, chokes engine performance, and sometimes even puts the car into a restricted “limp home mode.”

Therefore, modern diesel car owners must be aware of the importance of maintaining their diesel particulate filter through their driving habits and practices.

WHAT CAUSES A DIESEL PARTICULATE FILTER BLOCKAGE?

Particulate filter faults are often caused by certain driving styles. Short, low-speed trips are the main cause of diesel particulate filter blockages. This is why car manufacturers often go so far as to recommend that drivers who only want to travel short distances in urban areas choose a gasoline car instead of a diesel and why so few “city cars” are diesels.

Poor maintenance can also lead to particulate filter problems. A diesel particulate filter on a poorly maintained car may fail sooner than a well-maintained one. How long particulate filters last is a tricky question, but they should last at least 100,000 miles. This could be halved if it is not properly maintained during service. This also includes using the right type of oil. Some oils contain additives that can actually block filters, so check what oil you are using and what oil is used when your car is serviced.

IS A PARTICULATE FILTER A LEGAL REQUIREMENT?

Yes, you must have one if your car was produced after 2009. Owners face fines if caught (up to £1,000 for cars and £2,500 for vans) and removing a DPF can also invalidate your car insurance.

DO I NEED A DIESEL PARTICULATE FILTER TO PASS THE MOT?

A diesel particulate filter check has been part of the MOT test since February 2014. If a filter has been removed, the car will fail its MOT. Removing the DPF will sometimes cause the warning light to come on – and that in itself is a MOT failure point: no dashboard warning lights should remain on during the test.

MY PARTICULATE FILTER IS BROKEN – HOW MUCH WILL A NEW FILTER COST?

Diesel particulate filters are very expensive. A new one directly from the manufacturer can cost between £1000 and £3500, which could potentially wipe out the cost savings associated with driving a diesel.

As cars age, the cost of replacing the DPF could be more than the value of the car – and it’s the older, higher-mileage cars that are most likely to need a new DPF.

There are aftermarket DPFs, but you must ensure they have the correct type approval and match the manufacturer’s specifications, otherwise they may not work properly and cost you more in repairs.

What are lambda probes and how to test them

Help your engine breathe properly by checking your lambda sensor.

Content
  • 1 So, how does a lambda sensor work?
    • 1.1 How do I test my lambda sensor?
    • 1.2 What should a lambda sensor read?
  • 2 Why do lambda sensors fail?
    • 2.1

      Symptoms

      of a bad lambda sensor

    • 2.2 How long do lambda sensors last?
  • 3 What Lambda sensor do I need?
    • 3.1 How much does a lambda sensor replacement cost?

Somewhere hidden in the corners of your memory, the word lambda might ring a few bells. The symbol used to denote lambda, λ, might refresh your memory even more. Lambda is the term used to indicate the length of any wavelength in mathematics and physics and has long been part of the British school curriculum. But what does that have to do with your car?

A lambda sensor gets its name partly from its operation, measuring the output waveforms in different engine modes to see how much oxygen is coming out of your exhaust.

Essentially, this sensor measures the ratio of gasoline to air, the amount of oxygen in the exhaust gases. It does this to ensure that the amount of gasoline is accurately adjusted and that the catalytic converter can clean it.

There are many benefits to having a fully functional lambda sensor and it can cause a lot of problems if it malfunctions. So to make sure you’re on the right wavelength, here is our detailed guide on what a lambda sensor is, how it works, and how to detect if it’s faulty.

The lambda sensor is a small probe first developed by Volvo in the 1970s. The location of the lambda sensor is the same on all cars and it is located on the car’s exhaust, between the exhaust manifold and the catalytic converter. In principle, the lambda sensor is the same as an oxygen sensor. Newer cars might even have two lambda or O2 sensors and the second one will be located just behind the catalytic converter. Diesel cars have lambda sensors, just like gasoline cars.

The lambda sensor works with the catalytic converter and they “signal” the exhaust gases passing through the catalytic converter. The sensors measure the gasoline/air ratio to ensure that the amount of fuel injected exactly matches what is needed and that it can be cleaned by the catalytic converter. This air-fuel ratio is the stoichiometric ratio, or the lambda ratio (hence the sensor’s name).

SO, HOW DOES A LAMBDA SENSOR WORK?

How does a lambda sensor work

The lambda sensor takes measurements of the amount of oxygen and adjusts the amount of fuel sent to the engine cylinders by optimizing the air and fuel mixture. This optimized air-fuel mixture means the engine can run at optimal performance. Since the lambda sensor is located before the catalytic converter, it can measure the amount of air and fuel in the unburned hydrocarbons after combustion. It will therefore be able to tell if there is too much air, meaning more fuel needs to be injected, or too many carbon atoms or harmful emissions, meaning more air is needed to react with the fuel. It will also ensure that the catalytic converter, which removes harmful and toxic byproducts from the combustion process when they are expelled from the car, is working properly.

The data, once collected, is sent to the Electronic Control Unit (ECU) and it controls the amount of gas released, thereby reducing polluting emissions.

There must always be the right amount of fuel reaction with the appropriate amount of air in the combustion process. If there is not as much air in the mixture as there should be, the engine is “rich” and there is an excess of unburned fuel. Unburned fuel creates pollution, which we try to avoid. On the other hand, when there is too much air in the fuel mixture, then it is “lean.” A lean fuel mixture tends to produce more nitrogen oxide pollutants, also toxic substances we should avoid. This can also lead to poor engine performance and potential engine damage.

Similarly, the lambda sensor affects fuel consumption as well as performance. Having too much fuel injected into the engine obviously means you will refuel more often. So it is extremely important to have the correct lambda sensor readings.

HOW DO I TEST MY LAMBDA SENSOR?

Testing a lambda sensor to see if it is still working couldn’t be easier.

How do I test my lambda sensor

You can check your lambda sensor with an exhaust tester or a four-gas emission analyzer. This is done in the same way as your emissions test and can also be done in a garage. The lambda value is calculated by examining changes in the exhaust gas composition over 60 seconds.

You can also use a multimeter. Connect it in parallel to the sensor’s signal line and set it to 1V or 2V. When you start your engine, a reading between 0.4 and 0.6 V should appear. Once the engine is at temperature, the reading should alternate between 0.1 and 0.9 V.

Finally, there are devices specifically designed to test your lambda sensor. As you would with a multimeter, connect the tester to the signal line, and when you reach the correct temperature, your reading will be displayed using the LED scale.

WHAT SHOULD A LAMBDA SENSOR READ?

It’s quite simple – it should read 1. If it’s less than 1 (λ <1), it means your air-fuel mixture is rich and if it's greater than 1 (λ> 1), it means the mixture is lean.

WHY DO LAMBDA SENSORS FAIL?

There are a number of lambda sensor failure issues. The heating element is a resistive material that resists the flow of electrons, thus producing heat and this is the most common cause of early failure. The resistance burns out by opening the circuit, meaning the sensor fails. Here, the sensor must be replaced. If the circuits connecting the electrical circuits linking the sensing electrodes to the PCM fail, this will also cause the sensor to malfunction. Contaminants from outside the sensor can also accumulate, either from the road or from the engine itself, blocking the air inputs and thus preventing assessment of the oxygen level in the exhaust gases.

SYMPTOMS OF A BAD LAMBDA SENSOR

If the lambda sensor is faulty, no data will be sent to the ECU, which will then use incorrect information. This will most likely increase fuel consumption and subsequently, polluting emissions. It could also mean that the catalytic converter clogs up and then needs to be replaced.

Symptoms

of a bad lambda sensor” width=”650″ height=”433″ />

The first indicator of a lambda sensor fault will be the check engine light on your dashboard – if this light is on, your lambda sensor may be faulty.

There are also performance issues that can indicate a faulty sensor: when starting, the car may be jerky and stutter; there might be abnormally high fuel consumption; the engine does not accelerate as well as usual; the amount of emissions has increased.

When should I replace the lambda sensor?

The lifespan of a lambda sensor is about 93,000 miles driven. However, this could be shorter depending on many factors that can damage it, mainly due to abnormalities from the engine. Exhaust leaks can also damage the sensor.

Many people want to know how to clean lambda sensors when they are, for example, covered in carbon and no longer working. However, this is a difficult process and should be left to a professional.

HOW LONG DO LAMBDA SENSORS LAST?

Due to their operation and the fact that they are located in an extremely hot and dirty environment, lambda sensors wear out over time. Several things can affect the lifespan of your sensor, but generally, it should last between 50,000 and 100,000 miles.

Early sensors did not have a heating element and they needed the exhaust temperature to reach a specific heat to function. Modern sensors are equipped with a heating element, which takes a lot of the pressure off the sensor and means they have a much longer lifespan.

If you are soon taking your car for an MOT test, be aware that a faulty lambda sensor will cause your car to fail. If you think it is faulty, get it sorted first. Driving without a lambda sensor is strongly discouraged as it ensures your car does not emit more CO2 than allowed by European legislation.

WHAT LAMBDA SENSOR DO I NEED?

There are hundreds of lambda sensors available, but you should always make sure to replace your sensor with one that exactly matches the same specifications as the previous one. You should always check what your manufacturer recommends because you will need the right option for your ECU.

HOW MUCH DOES A LAMBDA SENSOR REPLACEMENT COST?

A new lambda sensor costs on average between £100 and £200 (the spare part itself) and it takes the mechanic some time to replace it – about 1 to 1.5 hours. This means a total cost of around £250. You can try to replace it yourself, although it is a tedious process.

What does the exhaust manifold do and how to know when it’s broken

What goes in must come out – what happens to exhaust gases after combustion.

Contents
  • 1 What is the exhaust manifold and why is it important?
  • 2 What are manifolds made of?
  • 3

    Symptoms

    of exhaust manifold problems

    • 3.1 An excessively noisy engine
    • 3.2 Reduced power and acceleration
    • 3.3 Reduced fuel efficiency
    • 3.4 Visible rust on the manifold
    • 3.5 Visible cracking
    • 3.6 Exhaust odor
  • 4 How to replace your exhaust manifold and gasket

The combustion process is a wonderful thing. The process of taking only air and fuel and using compression or ignition to create mechanical power is one of the most important scientific discoveries of all time. What accompanies this power, however, are the exhaust gases that must be removed through the exhaust system, and that is precisely the job of the exhaust manifold. This makes it one of the most important parts of your engine, even though it’s just sitting there with gas moving inside.

This vital engine part is partly responsible for keeping the engine cool and allowing more combustion. Without it, all that science would be wasted. But what exactly is it? What is the temperature of exhaust manifolds? Why do exhaust manifold bolts break? Read on to discover everything you need to know about this important element of your car’s engine and how to identify some of the most common problems.

WHAT IS THE EXHAUST MANIFOLD AND WHY IS IT IMPORTANT?

What is the exhaust manifold and why is it important

A car’s exhaust manifold is used to direct exhaust gases from the engine cylinders to the exhaust pipe under the body. Once they leave the exhaust manifold, the gases pass through the emissions system and the car’s mufflers and exit through the tailpipe.

The manifold is a metal piece bolted to the side of the engine block on L-head engines and to the side of the cylinder head on I-head engines. Two, three, and four-cylinder engines have one exhaust manifold because there is only one bank of cylinders to extract exhaust gases from.

However, engines with a “V” configuration (V6, V8, and V12) have two manifolds, one for each bank. In some V-8 engines, each manifold is connected to a separate exhaust pipe, muffler, and tailpipe. On others, they are connected by a crossover pipe and exhaust through a shared muffler and tailpipe.

The exhaust valve opens to remove waste from the engine’s combustion process. When the engine’s intake valve opens and the piston descends, meaning the air-fuel mixture is drawn in through the intake valve, the exhaust valve is also slightly open. Without a manifold, all the combustion gases would rush out quickly, making the exhaust valve the path of least resistance for the airflow in the cylinder. With the air and fuel from the intake, the engine would suck cold air through the exhaust valve, exponentially increasing the combustion chamber temperature and quickly melting the exhaust valve, valve seat, and top of the piston. This phenomenon is known as “reversion” and is known to ruin engines. A manifold is key to preventing this.

The gases in the exhaust manifolds are very hot, which increases the pressure. This high pressure in the exhaust manifold forces the gas to “shoot” through the manifold and into the exhaust pipe. Because exhaust gases have mass, they also have inertia, creating a vacuum as they leave the manifold, in what is called “scavenging.” This sucks the remaining gases from the engine and leaves it as well-prepared as possible for the next combustion cycle, thus more efficient. Standard cast iron and “log”-type manifolds typically exhibit little of this power scavenging; the effect is usually most pronounced in tubular headers, which are designed to enhance scavenging.

WHAT ARE MANIFOLDS MADE OF?

Typically, manifolds are made of tubular steel, stainless steel, or iron. Stainless steel is the most expensive because it does not rust and has great longevity, but tubular steel provides good gas flow and is also commonly used.

You will find that most cars, however, have cast iron manifolds. They are cheap to produce compared to others, but they are heavier than steel and become brittle with age and prone to cracking, which we will come back to later.

While most manifolds are simply bare metal, in some cases, a ceramic coating can be applied to the manifold for insulation. This is expensive, and often an “exhaust wrap” is used instead, which is relatively cheap. This “exhaust wrap,” however, shortens the manifold’s lifespan.

Since exhaust manifolds are very hot, most of them are equipped with a metal heat shield to protect other components under the hood. This prevents any unnecessary melting of the engine!

If you are looking to replace your manifold, you can choose between those from your manufacturer, aftermarket alternatives, and even used manifolds salvaged from other cars. Just be sure to check what it is made of and its age first.

SYMPTOMS OF EXHAUST MANIFOLD PROBLEMS

Problems with your exhaust manifold can have serious consequences, such as reduced engine power, slow warm-up times, higher fuel consumption, and premature failure of the catalytic converter. To avoid this, it is important that you know the signs and symptoms that might indicate that your manifold is cracked, leaking, or has another issue.

AN EXCESSIVELY NOISY ENGINE

Engine noises are a good indication that you have a leaking exhaust manifold gasket. The manifold gasket creates a seal between the manifold and the cylinder head to prevent air from escaping, and a faulty manifold gasket sounds like a hissing or tapping. When you start the car cold, the sound will be at its loudest, and it will increase when you accelerate.

REDUCED POWER AND ACCELERATION

If your manifold gasket is leaking, you will notice that your car is not performing as it was or should be. The backpressure provided by the manifold ensures that the combustion process runs as well as possible. If the vacuum is not created, the process will not run as efficiently as it should. Your car will be slower and will not accelerate as quickly from a stop. Get this leak fixed, or the problem will only get worse. It should be noted, however, that a manifold is not the only reason for reduced power and acceleration.

REDUCED FUEL EFFICIENCY

Fuel efficiency goes hand in hand with performance, and as your car loses power, it will consume more gasoline. The car has to work harder and harder to maintain the same level of performance it would have without exhaust problems. While you might consider the cost of repairing any manifold issues, the cost of extra fuel will exceed it over time.

VISIBLE RUST ON THE MANIFOLD

Rust can appear on all metal parts, especially those exposed to air (rust is caused by metal oxidation). Since the manifold is metal, it can be prone to rust, especially if it is made of iron. The fact that the system is close to the ground where it is exposed to moisture and gritty conditions means it is particularly vulnerable. If the rust is severe enough to cause holes or cracks to appear in the manifold, you will start to hear a loud roaring engine noise or a hissing as gas escapes. This will certainly require professional attention and may potentially require replacing the manifold.

VISIBLE CRACKING

Besides possible noises and a drop in performance, the most obvious sign of a cracked manifold is, well, a visible crack on the surface of the manifold. To look for a crack, carefully examine the manifold, especially where it bolts to the engine and where the most heat will be. A large crack will be relatively easy to spot, but a smaller hairline fracture may be harder to locate. You may need to remove the manifold from the engine compartment to inspect the entire surface. This type of problem will let you know when to replace an exhaust manifold.

EXHAUST ODOR

Symptoms

of exhaust manifold problems” width=”650″ height=”433″ />

Exhaust odor is one of the most obvious symptoms of an exhaust manifold leak. Manifold cracks can also cause excessive exhaust odors, as some of the exhaust gases escape from the crack instead of the tailpipe end. You may not be able to notice this exhaust smell from inside the vehicle, but if you open the hood and the engine compartment stinks, especially around the manifold, it’s a good indicator. If you can smell an exhaust odor, it means the crack or leak must be quite severe, and this can be harmful to your health.

HOW TO REPLACE YOUR EXHAUST MANIFOLD AND GASKET

How to replace your exhaust manifold and gasket

For a cracked exhaust manifold, you really have no other choice but to replace it. Trying to seal cracks is a bad idea, and using some sealant products could even damage the performance of the manifold itself if not done correctly.

Exhaust manifold gaskets can also be replaced to fix leaking issues, but they can also be repaired. A “blown” exhaust gasket can be replaced, or you can use a sealant to stop it from leaking, and a blowing exhaust manifold is something you can easily fix yourself.

The exhaust manifold can be found attached to the engine block. Consult your vehicle’s user manual to find the precise location of it in your vehicle. To replace the gasket or manifold, you will need to undo all the nuts and bolts that secure the manifold to the cylinder head. Sometimes the gasket may stick to the manifold; tap it with a hammer to loosen it. If any manifold studs are broken or damaged, remove them using locking pliers, two nuts and a wrench, or a stud extractor. Once the manifold is safely removed, carefully scrape all gasket mounting surfaces to remove dirt and pieces of the old gasket. Do not let particles fall into the manifold or cylinder head, as this will cause many problems later. This is a good opportunity to see if the manifold itself is cracked or damaged. Check that the surface is not warped.

If you are simply changing the gasket, place it in the position where the old gasket was, making sure it is facing the right way, with all holes aligned. On some engines, a gasket may be in two or three pieces, or inserts may be installed; make sure all parts are properly aligned. Finally, simply reverse these steps to reassemble your exhaust manifold. You should tighten the manifold nuts using a torque wrench and ensure you adjust them to the recommended setting in the car’s service manual. You should tighten them in order, starting from the center of the manifold and working outward toward the ends.

You might encounter problems here with the exhaust manifold bolts. It is important that you know how to remove exhaust manifold bolts without breaking them, and it can be a bit mysterious why exhaust manifold bolts break in the first place.

Since most manifolds are made of cast iron, when exposed to intense heat and then cooling, they regularly expand and contract. This expansion occurs naturally, and initially, the manifold and mounting bolts are in a state of “elastic deformation,” meaning they retain their original size and shape during these cycles and can be flexible, even when expansion/contraction puts pressure on the bolts.

Over time, however, expansion and contraction can subtly affect the manifold’s dimensions, and this means that increasingly larger tensile forces stretch the manifold beyond its “elastic deformation” point. This fractures the mounting bolts, leaving the manifold permanently deformed and dimensionally altered. This expansion and stretching of the manifold bolts over many service cycles eventually causes excessive stress on the bolt(s), stretching them beyond their capacity and causing them to fail. If this has happened, when you remove the bolts to replace the manifold, it may seem like you broke them, but this fracture occurred long before.

If you need to remove an exhaust manifold and the bolts (or even the manifold itself) are rusty and corroded, you will want to remove the bolts without breaking them. If you break them while removing them, it could risk parts falling into the engine itself and require much more work. It is best to leave this to the experts, but it can also be done using an acetylene torch to heat the studs that hold the bolts. This will allow you to remove them easily, but it certainly means you need to replace the manifold.

Exhaust Gas Recirculation: What It Does and Potential Problems

From bags to life and sorting our waste, recycling is great. So good in fact, even your engine recycles and reuses gas from the combustion process.

Contents
  • 1 What is the Exhaust Gas Recirculation System?
  • 2 How does the system work and why do you need it?
  • 3 What are the common EGR problems?
  • 4 Cleaning an EGR Valve

As climate change continues to shape the world around us, governments are taking action. For the ordinary car user, this often means problems. Car manufacturers are forced to reduce their exhaust emissions even more than they have over the past 20 years due to even stricter legislation. Diesel and gasoline manufacturers are doing everything they can to catch up with electric and hybrid cars and comply with new emission standards.

Exhaust Gas Recirculation (EGR) systems are one of the ways conventional fuel engines attempt to achieve this. The ingenious system helps reduce the amount of nitrous oxide – one of the most harmful byproducts of the combustion process – that comes out of your car’s exhaust. On gasoline engines, the system also reduces fuel consumption when the engine is running at partial load. But what is an EGR system, how does an EGR valve work, and what are common EGR problems? If you’re exhausted from searching for answers to these questions, look no further!

WHAT IS THE EXHAUST GAS RECIRCULATION SYSTEM?

Simply put, the Exhaust Gas Recirculation (EGR) system reduces NOx emissions from internal combustion engines. The system is composed of an EGR valve, a temperature sensor, and a control unit and it is connected to both the ECU and the engine’s intake/exhaust manifolds.

The main goal is to reduce these NOx (nitrous oxide) emissions and it does this by recycling exhaust gases into the combustion chamber, where they cool the combustion. The gases that have already been used in the combustion do not participate in the next combustion process, but they still help reduce NOx and also the temperature of the chamber itself.

Part of the reason for wanting to keep the chamber temperature low is that if the combustion temperature is high, it can lead to engine overheating and also more nitrogen oxide in the engine’s combustion chamber. The combustion temperature in the combustion chamber is reduced by recirculating some of the exhaust emissions into the fresh intake air and the lower combustion temperature results in less nitrogen oxide and an engine less likely to overheat.

HOW DOES THE SYSTEM WORK AND WHY DO YOU NEED IT?

How an egr valve works

As part of the combustion process, air enters the combustion chamber through the intake manifold and mixes with fuel. When it is compressed or ignited (depending on the system), the pressure forces the piston down to power the engine and the exhaust gases exit through the exhaust manifold. If an engine is running at full load, that is, it is operating at its greatest capacity, during intense acceleration for example, this process works perfectly and all the oxygen atoms in the air that are drawn into the intake manifold are used in the combustion process.

What normally happens is that an engine only runs at partial load. When you are simply driving on the road, idling, or slowly looking for a parking space, the engine is not running at full capacity, which we call a partial load. This becomes a problem regarding emissions. Because less fuel is injected (because the engine is not forced to work as hard), not all oxygen atoms are used in the combustion process. The remaining atoms combine with nitrogen (which makes up 70% of the air entering through the intake manifold) to form NOx (nitrous oxide). Unfortunately, this is a toxic air pollutant and it is exactly what the new government legislation aims to prevent. This is where the EGR comes into play.

In the final exhaust phase of the 4-stroke combustion process, when the exhaust gases leave the cylinder, the exhaust gases are partially rerouted inward and pumped back into the combustion chamber. Before getting there, there is an exhaust gas recirculation valve. The location of the egr valve depends on your car’s system, but it is always before the intake manifold so it can regulate the amount of recycled gas.

The gas already used in the combustion combines with the fresh air also entering the chamber and the gas that then enters the chamber is a combination of gas already used in the combustion process and fresh air. The valve regulates the amount of this gas allowed.

By working with the ECU, the sensors determine the load on the engine, i.e., the amount of power required from the engine, and the amount of recycled exhaust gas is calculated accordingly.

The lower the load, the more exhaust gases are recycled because there will be less fuel injected into the cylinder and thus more harmful NOx byproducts.

If the load is higher, more fresh air and oxygen are allowed and thus less exhaust gas is recycled. Since the already used gas is inert (it does not react), there is no risk of it reacting with oxygen to produce more emissions.

The gas temperature also impacts the combustion process and offers another advantage. Since the exhaust gases are hot, it decreases the time needed for the gas in the cylinder to reach the temperature required to exert pressure on the piston and thus eliminates “ignition delay.” In short, it makes the engine more efficient and faster, providing more controlled combustion.

As mentioned above, this process also decreases the temperature of the combustion process. The compression gases raise the temperature needed to apply pressure to the piston. But the inert gases absorb this temperature because they are at a lower temperature than the compressed gas. The heat is absorbed by the recycled gases and means there are fewer NOx byproducts and a lower risk of engine overheating.

WHAT ARE THE COMMON EGR PROBLEMS?

The EGR is used continuously with the engine and the system is therefore subjected to very high loads, which can cause problems, especially on high-mileage vehicles. Since the valve is the most important part of the system here, most problems are associated with it.

It is quite obvious if there is a problem with your EGR valve because your car will experience bad EGR valve symptoms like rough idling and stuttering during acceleration. Your fuel economy will also decrease due to a faulty EGR valve and you may see a check engine light on the dashboard followed by a code readable in your car’s OBD-II or newer computer.

Causes

The likely causes of these symptoms will be a stuck EGR valve. A buildup of deposits in the EGR valve over a period of time causes the valve to let less or no recycled gas through, meaning your car’s performance will start to suffer (the ECU will assume the correct amount of gas for combustion is in there, as it assumes the valve is working). This happens especially often with a diesel EGR valve. This buildup is part of the vehicle’s ordinary operation and can be fixed by either cleaning or replacing the valve.

Cleaning the EGR valve is not as tricky as you might think and you can certainly do it yourself. Once you have located and removed your EGR valve (the location varies from vehicle to vehicle, so check your user manual), shake it gently. If you hear something moving back and forth inside, it’s the diaphragm – meaning there’s a good chance your EGR valve is still in good condition and just needs to be cleaned to return to its normal operation. If you don’t hear anything, your EGR valve may be stuck. This is not a definitive test, but it’s a good starting point.

If you have a newer EGR valve, it will likely be electronic and therefore have a wiring harness connected. In this case, it is important to avoid putting corrosive cleaners on the wiring and connectors and of course, the engine must also be off. You will also need reliable eye protection and chemical-resistant gloves.

CLEANING AN EGR VALVE

Cleaning the Egr valve

First remove the vacuum line, which is the rubber line connected to your EGR valve. If it is brittle, broken, frayed, damaged in any way, or looks less than perfect, replace it. Vacuum issues are the cause of all sorts of engine problems, including a faulty EGR valve.

Then disconnect the electrical harness and unlock the EGR valve. If it doesn’t come right away when you have removed the nuts or bolts, you can loosen it by giving it a tap with wood or a small hammer.

Then remove the gasket and check that it is in good condition and not torn, frayed, or disintegrated. If it doesn’t look so fresh, you can install a new one at the same time.

Cleaning the entire valve assembly is a two-step process. First, soak the valve itself in a bowl filled with carburetor cleaner. Carburetor cleaner smells horrible and is unpleasant, so soak it outside or in a very well-ventilated area. Let it soak overnight if you can. If that’s not possible, move on to the next step.

Important! Remember not to put the electrical part of your EGR valve in the carburetor cleaner!

Once you have let your EGR valve soak in the cleaner overnight (if possible), you need to clean its passages, openings, and surfaces with a small brush. Toothbrushes and pipe cleaners soaked in the same carburetor cleaner you were using before are perfect for this. Be sure to use your eye protection and gloves at this stage to avoid injury. You want to clean as much of the valve as you can and get into as many nooks and crannies as possible – the more black sediment you remove, the better your chances of solving the problem.

Once it is clean and free of crust, you can reinstall your clean EGR valve. Remember to reattach your vacuum hose and electrical connections if necessary. If you are still experiencing problems once you have cleaned the valve, you may need to replace it.