Modern car engine control systems rely on input from several sensors to regulate engine performance, emissions, and other vital functions. When these sensors do not provide accurate information

Modern car engine control systems rely on input from several sensors to regulate engine performance, emissions, and other vital functions. When these sensors do not provide accurate information

Imagine the scene: on a hot day, you’re stopped at a traffic light, ready to merge onto the highway. When you press the accelerator to start, a strange noise is heard – as if a bunch of marbles were being shaken in a box.
Your car hesitates, stumbles, then accelerates more slowly than usual. What happened? You’ve likely just experienced a phenomenon known as engine knocking.
Here is a reorganized and improved version for better flow and clarity:
Engine pinging, pre-ignition, and pre-detonation are different terms for unwanted explosions in the combustion chamber. These phenomena occur when the ignition of the air-fuel mixture happens at the wrong time, which can lead to a loss of performance and, in some cases, engine damage.
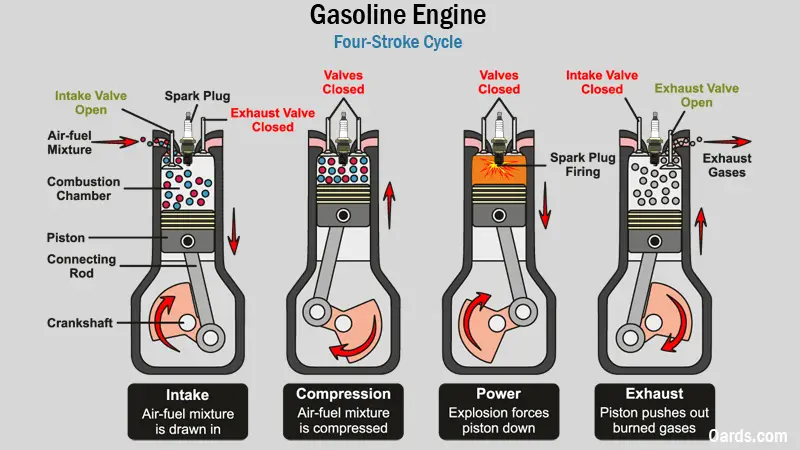
A combustion engine operates with a carefully balanced mixture of air and fuel. The ignition of this mixture must occur just before the piston reaches top dead center (TDC) of the compression stroke to maximize efficiency and power.
Virtually all engines experience some degree of knocking. Several environmental factors influence this phenomenon, including:
Engine knocking becomes a concern when it occurs under high loads, such as at full throttle. In contrast, cruise knock, which happens at constant speed, is more common and generally harmless.
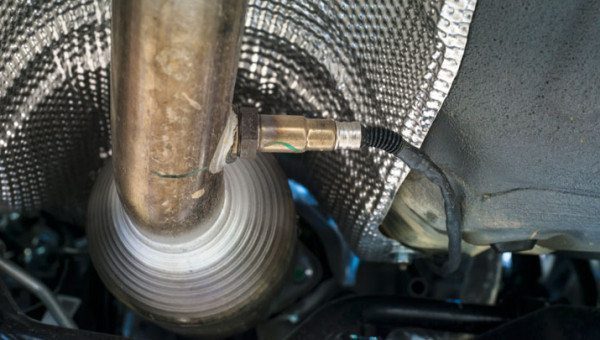
Modern engines are equipped with a knock sensor, which detects these abnormal explosions and sends a signal to the ECU (Engine Control Unit). The ECU then adjusts the ignition timing to prevent engine damage.
The ignition timing is retarded, meaning the spark plugs fire slightly later in the combustion cycle. This action reduces engine power but also lowers the pressure in the cylinders, thus protecting the engine from potential damage.
In recent engines equipped with a turbocharger and direct injection, pre-ignition can occur when the driver demands high torque at low RPM. Engineers don’t yet know exactly why this phenomenon happens, but it’s likely related to the high pressures in the cylinders of these modern engines.
Some engine oils might reduce this risk, but no solution completely eliminates it. If you drive a manual transmission car with a turbocharged direct injection engine, it’s best to downshift before accelerating sharply. Automatic transmissions, on the other hand, manage this problem automatically.
When it’s hot, the air is less dense, which reduces engine power and increases the risk of knocking. In hot weather, the combustion gas temperature is higher, which can cause premature ignition of the air-fuel mixture.
Modern engines automatically adjust the ignition timing to limit this risk, but this can lead to a slight loss of performance.
The fuel must have an octane rating suitable for the engine’s specifications. A higher octane rating means the fuel is more resistant to self-ignition.
If you use fuel with too low an octane, your engine will be more likely to knock. Some vehicles are designed to run on multiple octane ratings and automatically adjust their performance accordingly.
Over time, carbon deposits can form on the valves, cylinder walls, and pistons, creating hot spots that can ignite the mixture prematurely.
To limit this buildup, you can:
Sometimes the ECU is programmed to run with a mixture that is too lean or with ignition timing that is too advanced, which promotes fuel consumption and performance but can also cause knocking.
If this calibration is too extreme, the manufacturer may issue a recall or a Technical Service Bulletin (TSB) to reprogram the ECU and improve engine management.
A failing knock sensor prevents the engine from correctly adjusting the ignition timing, which can lead to damage. Here are the most common signs of a knock sensor problem:
If the sensor detects a problem, a check engine warning light may illuminate on the dashboard. It is crucial not to ignore this signal, as uncorrected knocking can seriously damage the engine.
An engine that is knocking often produces a metallic noise, similar to a rattling or marbles grinding. The longer the problem persists, the louder and more concerning these noises become.
A faulty knock sensor can lead to poor combustion, reducing the engine’s fuel efficiency. If you notice an increase in your fuel consumption, this could be a warning sign.
When the knock sensor malfunctions, the ECU may retard the ignition to protect the engine, resulting in slower acceleration and a lack of power.
If the problem is ignored for too long, the engine may start to vibrate, shake, or even produce a burning smell. At this stage, the risk of permanently damaging the engine is high.
Engine knocking is a normal phenomenon to some extent, but it can become problematic if it occurs under heavy loads. Fortunately, modern vehicles are equipped with knock sensors that automatically adjust the ignition timing to protect the engine.
However, a faulty sensor can lead to poor performance and, in extreme cases, costly engine damage. Therefore, it is crucial to be attentive to warning signs and perform necessary maintenance, including using good quality fuel, regularly cleaning carbon deposits, and ensuring proper ECU calibration.
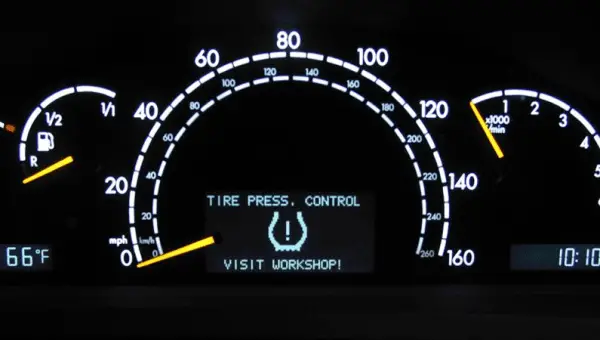
Causes of a Low Tire Pressure Warning Light
If you’ve ever been in a situation where you wondered, “Why is my tire pressure light on when my tires are fine?” you’re certainly not the first.
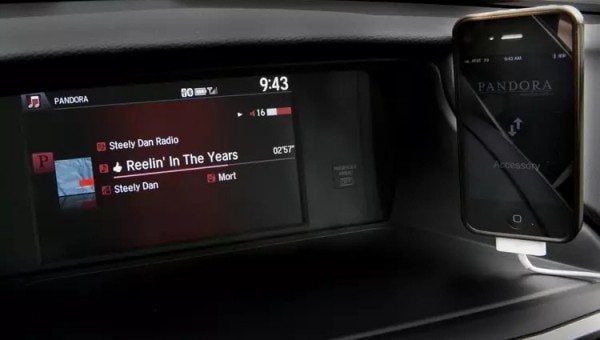

The promise that you’ll be able to connect to the Internet, listen to music from your own device, get step-by-step navigation instructions, and do it all by barking commands at your car like a drill sergeant makes today’s infotainment systems irresistible to many, even though they add thousands of dollars to the cost.


Tail lights are necessary for night driving. They are in place so that other drivers can spot you from behind and so that they can brake at a safe distance from you if you stop.

If you are like many other people, chances are you leave vehicle maintenance details to professionals and then take your car in when there’s a problem.

Nowadays, people will say just about anything to prove their point. Not only will they continue to confuse themselves, but they will also confuse your thoughts on a subject.
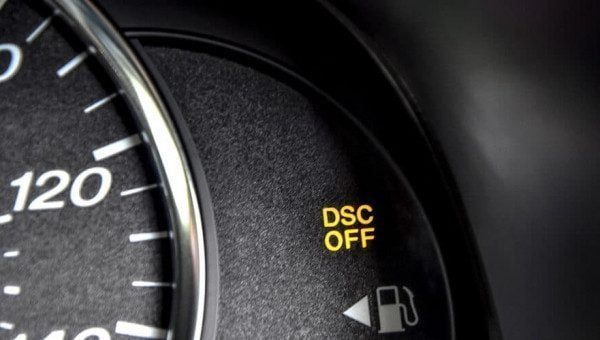

If you have owned a BMW for some time, you have probably already experienced the DSC light.
The DSC system is a very good feature to have on your car when it comes to safety.

This light automatically turns on as soon as the vehicle detects that you are driving in slippery weather conditions.
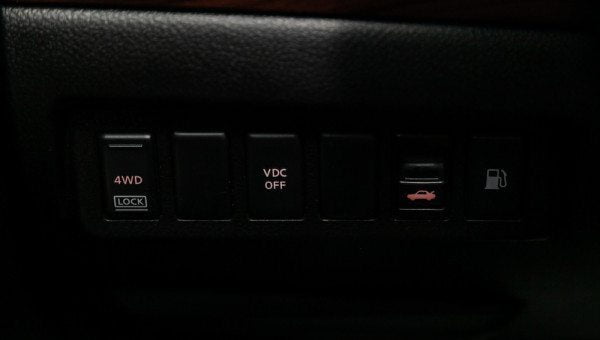
The VDC works to reduce engine power and simultaneously brake the wheels that have lost control. In most cars, the slip indicator on the dashboard lights up to indicate that you are approaching a slippery road. If the VDC indicator malfunctions, the VSC OFF light will illuminate.


There are times when you need to park your car for an extended period when you are on vacation, in winter, or when using alternative means of transportation.
Proper storage protects your car from the elements and rodents.