How to Unlock and Start a Car with a Dead Key Fob


The automotive industry is getting its fair share of modernization.

We have technologies such as parking sensors, keyless entry, automatic wipers, and much more! It truly is the era of technology. But no matter how advanced the technology is, its functionalities have limits. What’s the use of advanced technology if it’s vulnerable? What’s the use of a key fob if it doesn’t work and you’re locked outside your car?

Fortunately, there is a solution to this problem. We will explain how to bypass a dead key fob.


How to Unlock and Start a Car With a Dead Key Fob

The procedure for unlocking and starting a car with a dead key fob varies significantly depending on your car model. However, here is a general list of things that work in most car models:

Total time: 10 minutes

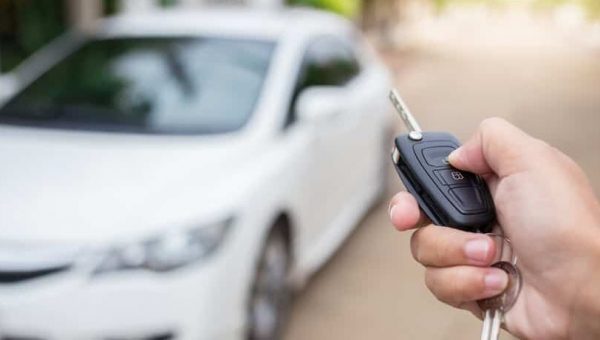
  1. Replace the batteries


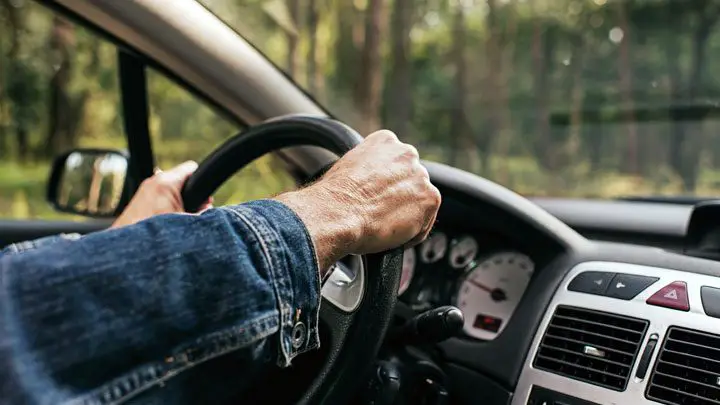
    Inside the key fob, there are batteries for it to function properly. Because it’s often quite difficult to get into a car with a dead key fob, you really want to consider replacing the batteries first. Many don’t know that it’s often not as difficult as it seems to replace them. You just need to remove a simple cover from many key fobs to replace them, and you can often buy them at any supermarket or gas station. Consult a repair manual for your car model if you don’t know how or find information online. You can also try holding your car key very close to the car door when trying to unlock it – to try to get a small signal, which might be enough to unlock the car.
    However, if you’re stranded far from home, replacing your old batteries with new ones might be problematic, and in that case, you should continue with this guide.

  2. Remove Key from the Key Fob

    Key Cover In Fob

    Even if it doesn’t look like it, most car key fobs actually have a key inside, which you can use to open the doors or even start the car. This key is often removed by pressing a small button with something small. Sometimes, this key is located inside the key fob, meaning you have to disassemble it. Try to find information about this in your repair manual or online to do it for your car model. Once you’ve found the key, you can continue with this guide.

  3. Remove Door Handle Cover


    Door Handle Cover

    A secret thing you might not have known about your car is that it actually has a door lock behind the door handle cover. This doesn’t apply to all car models, but if you don’t find a key lock on the driver’s door, there’s a good chance you have one behind the cover. It’s often located on the driver’s door, and you can often remove it using a screwdriver or the car key, but be careful not to damage the cover or the paint. If you’ve found the key inside your key fob and found a key lock behind the cover, it’s now easy to access your car. If you don’t find a lock behind the cover, it’s time to move on to the next step.

  4. Remotely Open the Vehicle

    Car Mobile App E1611603182111

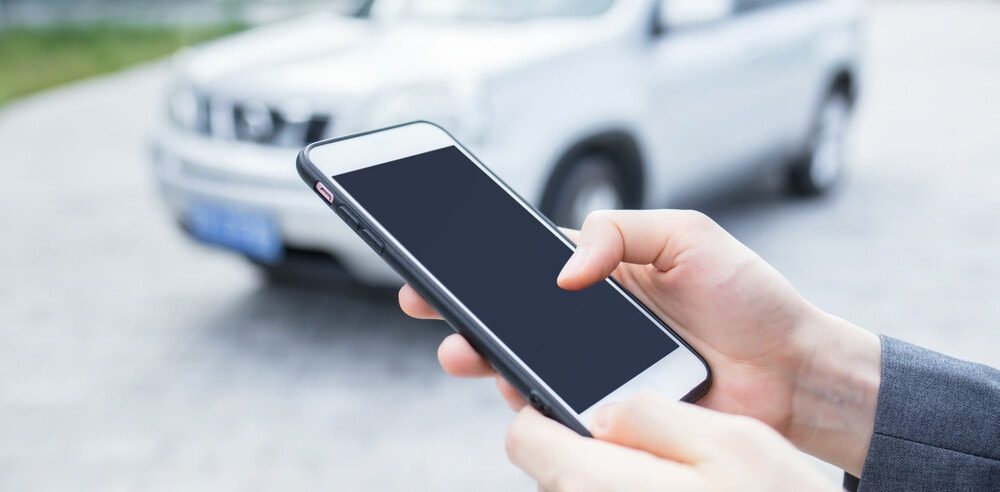
    Another secret thing is that you can access your car remotely on many modern car models. Have you installed an app for your car? Then it’s often quite simple, and you can often unlock it from that. If you haven’t, you can often call your authorized dealer, and they will send someone who can unlock it remotely. You often need your secret code for this, which is probably not something you carry around, unfortunately. Call your authorized dealer and ask what they can do in your case.

  5. Remove Ignition Lock Cover

    Ignition Lock Cover

    Once you’ve unlocked your car and gotten inside, you might wonder how you can start the car now when the key fob is dead? The same applies here as with the door handle – your car often has a hidden cover where you’ll find an ignition lock behind. Now that you have access to your car, you can easily find it in your maintenance manual. You can also try holding the key close to the ignition lock or key start button to try to get a small signal for a slight chance of starting. If you’ve managed to start your car, it’s time to head to the nearest place where you can replace the key fob batteries.

  6. Call for Help

    Call for Help

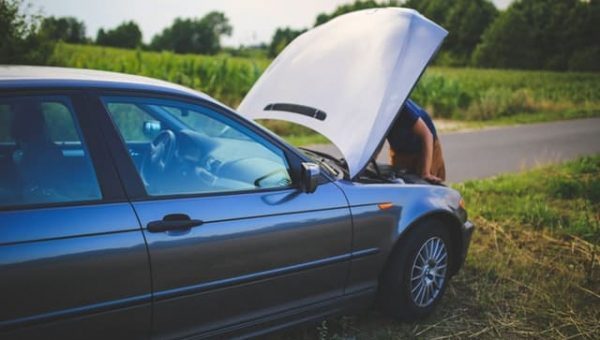
    If you’ve tried everything in this guide, but nothing has worked, it’s definitely time to call for help. Call a towing company, which can assist you, or you can try to find the emergency service number for your car model. In most cases, they will quickly send help to get you into the car or to tow your car to the nearest workshop.

Symptoms of a Faulty ECU

The Engine Control Unit (ECU), also called the Engine Control Module (ECM), is an electronic module that controls the engine’s function. This is done through a series of electronic components and sensors that calculate data to the engine.

Based on what this data indicates, the engine will perform a specific function. If your vehicle has a bad engine control unit, it can cause all sorts of problems with the engine’s operation. As a result, this will harm your ability to drive your vehicle safely and efficiently on the road.

Fortunately, there are certain symptoms you can look for early to detect if your engine control unit is deteriorating.

#1 – Check Engine Light

The easiest symptom to recognize is when the “Check Engine” warning light illuminates on the dashboard. Of course, there are many possible reasons why this light comes on.

But in cases where the engine control unit detects problems with its electronic components, circuits, and/or sensors, it will immediately cause the Check Engine light to illuminate.

Sometimes, the engine control unit will also do this by mistake. To determine if the engine control unit is truly experiencing problems, you need to look for the specific trouble codes on your vehicle’s computer.

These codes will identify the root of the problem. Consult your manufacturer, the owner’s manual, or various online resources to learn more about trouble codes.

#2 – Engine Misfires or Stalls

engine cylinder misfire causes

Another symptom that can follow a warning light coming on is an engine that misfires or perhaps even stalls. There also won’t really be any consistency with these issues. The pattern of engine misfires and stalls will be random, making it difficult to identify the specific engine problem.

Often, this is because the engine control module is failing and providing the engine with false information. If the problem worsens, the engine’s performance will deteriorate during operation.

#3 – Bad Gas Mileage

Since a good air-fuel ratio is necessary for a vehicle to run optimally, a bad ECM will not understand how much fuel to send to the combustion chamber. This means that too much fuel is often sent to burn in the combustion process.

The result is that your vehicle will then run rich and consume more fuel than necessary. Not only will you have to budget more for gasoline each month, but you won’t be doing the atmosphere any favors.

#4 – Poor Engine Performance

brake noise while driving

Alternatively, a faulty ECM can also result in insufficient fuel supply to the combustion chamber. This means that when you press the accelerator, your car simply doesn’t accelerate like it used to.

It might even shake and vibrate a bit, especially when trying to go up hills, when there is a lot of extra weight in the car, or when towing something. You may also experience rough idling due to not having enough fuel for the conditions.

#5 – Car Won’t Start

The worst symptom is when your car doesn’t start at all. It might be difficult to start initially, but then it will never start again. This happens after a complete failure of the engine control unit, and it doesn’t work at all.

Once this happens, the engine has no computer system to control and guide its own functionalities. Although you might still be able to crank the engine, it won’t start because the computer isn’t providing it with the important information it needs to do its job.

Again, there could be other reasons why your engine won’t start too. The only real way to know if this symptom is related to a failing engine control unit is to have it inspected by a certified automotive technician.

ECU Replacement Cost

ECU Replacement Cost

If it’s discovered that you truly have a bad engine control module, you will have no choice but to buy a replacement unit or possibly have it repaired. The cost of replacing the engine control unit will depend heavily on the make and model of your vehicle.

The more complex and technologically advanced a vehicle is, the more you will likely pay. ECUs for luxury vehicle brands will cost much more than those for a typical economy car. It’s similar to buying a high-end MacBook Pro from Apple compared to an economy computer from Walmart.

On average, you can expect the parts cost to be between $400 and $1,400, while labor costs are about $100 to $200 for reprogramming and installation. You might be able to save money on a refurbished ECU, but this usually carries a bit of risk.

The average owner of an economy car will end up spending close to $1,000 for a replacement job. Under certain circumstances, an existing warranty on the vehicle might cover these costs if the engine control unit fails prematurely.

Sometimes, you might have a problem with the engine control unit that can simply be repaired. This will certainly save you the huge expense of buying a completely new unit.

However, in most cases, the unit will need to be replaced. The only real time a repair job will be feasible is if there is simply a configuration issue with the computer.

ESP Light – Meaning, Function and Causes

It’s hard to find a modern car that doesn’t have electronic stability control or a variation of it.

ESP has been credited with reducing many road accidents on the roads.

However, many people are confused when they hear DSC, VSA, ESC, or VDC, but all these terms work in the same way. Each manufacturer has its own system.

For example, Volvo uses Dynamic Stability and Traction Control (DSTC) while the ESP system comes from Volkswagen, but the systems are very similar.

What does the ESP light mean?

The ESP light means there is a problem with your electronic stability program system or you are driving on a slippery surface.

ESP stands for Electronic Stability Program and is manufactured by Volkswagen. When you drive on slippery surfaces, the ESP light illuminates and flashes on your dashboard when it is active.

If the light is steady, you have a problem associated with your electronic stability program.

How does the ESP system work?

Esp Off

ESP does not work alone. It operates in conjunction with traction control and anti-lock brakes (ABS). Modern cars have an onboard computer that monitors most of the car’s functions.

If a wheel slips, ESP will control the other wheels by reducing power and applying brakes to correct your car’s stability.

ESP can also instruct the car’s engine to reduce power if your car is driving dangerously. This will then influence the power delivered to the individual wheels. This is useful when, for example, you keep spinning the car on icy ground, but there is no traction on the wheels. Power will be reduced; therefore, allowing you to have more grip on the wheel.

6 Causes of an ESP Warning Light

  1. Faulty ABS sensors
  2. Faulty ABS tone rings
  3. Faulty throttle body
  4. Faulty brake pedal switch
  5. Faulty steering angle sensor
  6. ABS wiring issues

ESP works with ABS. This makes it difficult to immediately identify the root cause of the problem.

To determine the issue causing the ESP light, it is always recommended to check the fault codes with a diagnostic scanner.

Here is a more detailed list of the most common causes of an ESP light.

Faulty Wheel ABS Sensors

The wheel sensors send information about the speed of each wheel to the ABS control unit. The ABS control unit then measures this information and applies the necessary solutions when one or more wheels slip.

If an ABS sensor fails, it may think a wheel is slipping, but it is not, which will cause the light to come on.

Faulty ABS Rings

Broken ABS ring

The same applies to ABS rings. The ABS sensor measures the wheel speed from the ABS rings, and it happens that these rings break, which will cause it to measure the wrong speed.

Faulty Throttle Body

The throttle body is used to control the power output of the ESP system when your car is skidding. If there is something wrong with the throttle body, it will cause the ESP light to come on.

Faulty Brake Pedal Switch

Brake pedal push

The ESP system needs to know when you press the brake pedal. For this function to work correctly, a brake pedal switch is installed on your brake pedal.

If this switch is faulty and sends incorrect information, the ESP light may come on.

Faulty Steering Angle Sensor

The ESP system also uses the steering angle to calculate what to do in case of skidding. If your steering angle sensor is faulty or not programmed correctly, it can cause the ESP light to come on.

ABS Wiring Issues

Broken ABS wiring

You also have wiring from the ABS control unit to each wheel sensor at each wheel. These wires move a lot due to the suspension, which can often damage the wiring as your vehicle ages.

The simplest method to see this is to measure the ABS sensors from the connector plug of the control unit. To do this, you need to consult a repair manual for the correct pinout.

Witness of the Electronic Throttle Control (ETC)

In the past, your vehicle’s throttle body had a cable that connected to the pedal. When you pressed the pedal, you opened the throttle body and increased the amount of air entering your engine. But as technology advanced, physical linkages were replaced by sensors and actuators.

While this system allows for better air/fuel ratios for improved fuel economy and better engine performance, the trade-off is that if a sensor or actuator breaks, you lose control of your throttle. That’s why car manufacturers have equipped their vehicles with numerous sensors and a comprehensive system to monitor your electronic throttle control.

But what does it mean when your throttle control light comes on and what should you do? More importantly, is it safe to drive your vehicle or should you take it directly to a repair shop? We will answer all these questions and more here.

Electronic Throttle Control Light Meaning

When your vehicle’s electronic throttle control light illuminates, it means your car has detected a fault in the electronic throttle control system.

The electronic throttle control system monitors and controls the throttle position. While older vehicles use a cable directly linked to the throttle body, most modern cars accomplish this through sensors and your vehicle’s ECM.

While this offers many benefits, if anything isn’t working as it should, you won’t accelerate as you should.

Electronic Throttle Control Light Function

Your electronic throttle control light monitors the throttle control system to ensure everything is working properly. When it’s not, the light comes on to alert you that there’s a problem.

The only other time you should see the electronic throttle control light is when you start your vehicle. At that point, your vehicle performs a system check and when everything checks out, the light should turn off. However, if the light stays on, you have an underlying issue that needs addressing.

The easiest way to pinpoint where you need to look is by plugging in an OBD-II scanner. While these tools can’t tell you with 100% certainty what the problem is, they can give you a good starting point for your investigation.

Electronic Throttle Control Light Causes

The most common causes of an electronic throttle control light are a faulty throttle control sensor or a faulty accelerator pedal position sensor. But while these are the most common causes of an electronic throttle light, they’re not the only things that could be happening.

We’ve detailed the three most common problems below.

1. Faulty Throttle Control Sensor

Throttle Body Location

Just because your vehicle’s ECM tells the throttle to open a specific amount doesn’t mean the ECM is convinced it will do so. It actually relies on the throttle control sensor to tell it how much the throttle actually opened and makes air-fuel ratio adjustments based on that.

As any good mechanic knows, you need to trust but verify. That’s exactly what your ECM does by listening to the throttle control sensor. So when things don’t come back as expected, it throws an electronic throttle control light so you can check what’s happening.

2. Faulty Accelerator Pedal Position Sensor

There are several different components in your electronic throttle control system, and an integral part is the accelerator pedal position sensor. This sensor communicates with your vehicle’s ECM to let it know how fast you want to go.

From there, the ECM tells the throttle how much to open or close. But if the ECM can’t get an accurate reading from the pedal due to a faulty sensor, you’ll never get the desired acceleration. If the computer recognizes something is wrong with the sensor, you’ll get an electronic throttle control light.

3. Stuck Throttle Body

Dirty Throttle Body

It doesn’t matter if everything on the electrical side of the house is working properly if the physical throttle body is stuck. There are many reasons why the throttle body might get stuck, but one common reason is carbon buildup.

Take a look at your throttle body and make sure it can easily open and close. If it can’t, see if you can remove any obstructions and try cleaning it with a high-quality fuel system cleaner. If that still doesn’t work, you might need to replace the throttle body.

Is It Safe To Drive With an Electronic Throttle Control Light?

It is not safe to drive with an electronic throttle control light. While you might get lucky and only experience reduced fuel efficiency or slightly decreased acceleration, the problem can quickly worsen if sensor readings continue to go wrong.

The throttle body controls the amount of air entering the engine, and if your vehicle’s ECM can’t keep an accurate eye on this, it can quickly lead to an uncontrollable engine. If you have an electronic throttle light on, you can quickly damage your engine, which can lead to even more expensive repairs when you get it to a repair shop.

This is true even if you don’t notice a significant drop in throttle response or vehicle performance. This is because the air/fuel ratio isn’t what it should be, which can lead to premature engine wear over time.

Summary

While you might think everything gets more complicated in modern vehicles, these complex features offer huge benefits. Not only do you get better fuel economy, but you get a more powerful and responsive engine.

So even though you might curse the electronic throttle control light now, when you get everything working properly again, you’ll be glad you have it. And despite what the crusty mechanic at the shop might tell you, the old linkage systems broke down from time to time too.

How long do hybrid car batteries last?

Over the past two decades, a sort of revolution has taken place in the automotive industry. Hybrid electric vehicles are now offered in abundance by almost all major car manufacturers, including Toyota, Honda, Ford, Chevy, Lexus, and many others.

While such a notion might have seemed like science fiction thirty years ago, hybrid electric power is here to stay and appears to play an increasingly important role in how we commute. However, concerns about the longevity of hybrid electric batteries persist for many current and potential hybrid owners.

In fact, many fear that the cost and frequency of hybrid battery replacement outweigh the fuel savings achieved by using hybrid vehicles. This often leaves drivers feeling conflicted and searching for answers.

If you currently have questions or concerns of this nature, read on to learn everything you need to know about hybrid electric vehicle batteries, including the important question, “how long do hybrid car batteries last?”.

Types of Hybrid Batteries

Today, manufacturers use several types of hybrid batteries in their production efforts. Each of these individual battery types varies somewhat in their construction and mode of operation.

Here are the three main types of hybrid electric car batteries.

Lithium-ion

Lithium-ion Battery

Lithium-ion batteries offer improved lifespan and are gaining popularity with car manufacturers. These batteries typically come with longer warranties, exceeding 100,000 miles, and offer short charging times.

However, lithium-ion batteries tend to be relatively expensive compared to other types of hybrid batteries.

Nickel-Metal Hydride

Nickel-metal hydride (NiMH) batteries are by far the most commonly used of all hybrid electric car batteries. Batteries of this nature are stable and exhibit predictable usage characteristics.

Nickel-metal hydride batteries are also less expensive than lithium-ion batteries, as they have been on the market for a long time now. This type of battery has been a staple of Toyota Prius production for two decades.

Lead-Acid

Lead-acid batteries are perhaps more reliable than any other form of battery on the market. However, their capabilities and storage potential are relatively limited.

The average lead-acid battery is only capable of continuously operating a vehicle for an average of 10 miles in fully electric mode and 20 miles in hybrid mode. Therefore, lead-acid batteries are much more practical in a hybrid situation.

Average Lifespan of a Hybrid Car Battery

how long does a hybrid car battery last

One of the biggest misconceptions related to hybrid electric batteries is that they have a relatively short lifespan. This leads to apprehension about dealing with the cost of expensive battery replacement multiple times throughout the applicable lifespan of a vehicle.

The truth is that the vast majority of hybrid owners will only need to replace their main battery once throughout their vehicle’s lifespan.

In fact, it is extremely rare to hear of a vehicle’s hybrid battery being replaced more than twice, even in extremely high mileage scenarios.

Most car manufacturers claim that their hybrid batteries have an average lifespan of 80,000 to 100,000 miles. However, it is relatively common to hear of a well-maintained hybrid battery lasting 150,000 to 200,000 miles.

This means that even in the worst-case scenario, a vehicle would need to average 240,000 miles before perceptibly reaching the point of requiring a third battery replacement. As with any battery, good maintenance is key to hybrid battery longevity.

Hybrid Battery Replacement Cost

The best places to order parts?

The relative cost of hybrid battery replacement can vary significantly from one scenario to another. However, services of this nature are decreasing day by day, as manufacturers use cost-saving measures and battery technology improves.

On average, drivers can expect to pay between $2,000 and $8,000 for hybrid battery replacement. While this may seem like a wide range of potential prices, there are a significant number of variables that go into calculating these costs.

Over time, a greater number of good used hybrid batteries are available from recovered wrecks. These batteries can usually be purchased at a significantly reduced cost and can then be installed by a qualified service professional.

In this scenario, the lower end of the aforementioned price range applies.

However, if a new hybrid battery needs to be purchased and the installation proves to be rather lengthy, leaving room for increasing labor costs, one can expect to pay higher fees.

In any case, any qualified service center should be able to provide you with an accurate quote before installation begins.

What Affects a Hybrid Battery Lifespan?

hybrid oil change

Many factors affect the lifespan of a hybrid electric battery. The most important of these factors are as follows.

#1 – Charging Routine

To maximize the longevity of a hybrid battery, it is imperative to follow all charging guidelines provided by the manufacturer.

Never plug in your hybrid for a quick 5-minute charge before leaving with an almost depleted battery. It is always best to fully charge a hybrid whenever necessary.

#2 – Temperature Fluctuations

Hybrid electric batteries are designed to operate within a specified temperature range. If a battery of this nature is forced to operate outside this range for extended periods, damage can result.

Regularly driving a hybrid vehicle in regions like Arizona or parts of Canada will reduce its battery’s lifespan, much like a normal car’s battery life is affected.

Most hybrid batteries use a dedicated cooling fan to prevent overheating. It is advisable to have a qualified maintenance technician regularly check the proper operation of this cooling fan.

#3 – Frequency of Maintenance

Most manufacturers specify that a hybrid battery should be tested at predetermined maintenance intervals. Skipping such checks can certainly harm your battery’s lifespan.

If one or more weak battery cells are detected, while all other cells appear to be functioning as expected, reconditioning efforts can be made to extend the unit’s lifespan.

When Should You Replace a Hybrid Battery?

Due to the cost associated with purchasing and installing a hybrid battery, preventive replacement is generally not advised.

A hybrid battery should be replaced when a questionable health test is recorded during routine maintenance, or when the first signs of an imminent failure become obvious.

Most car dealerships that sell hybrid electric vehicles will check your vehicle’s battery as a free service. These regular tests will provide you with some level of information about when replacement is justified.

Similarly, a number of symptoms often occur when a hybrid battery is on its last leg, informing you when the need for replacement is imminent.

These symptoms include shortened charge life, irregular state of charge fluctuations, reduced fuel consumption, and increased engine dependency.

Does Your Car Warranty Cover Battery Replacement?

All manufacturers provide some level of coverage regarding the hybrid electric batteries present in their vehicles. The duration and extent of this warranty often vary significantly from one manufacturer to another.

In all cases, if a battery dies during its coverage period, replacement should be provided free of charge or on a pro-rata basis.

Here are some examples of hybrid electric battery warranties currently offered by various manufacturers.

Manufacturer Warranty Duration
Toyota / Lexus (2020+) 10 years or 150,000 miles
Toyota / Lexus (2019 and older) 8 years or 100,000 miles
Honda 8 years or 100,000 miles
Ford 8 years or 100,000 miles
Hyundai 10 years or 100,000 miles
Kia 10 years or 100,000 miles
Chevrolet 8 years or 100,000 miles

Top 5 Driving Tips for Hybrid Cars

Hybrid cars seem to be the standard of the future. There are already many people driving hybrid cars on the road, and there will certainly be even more over time. If you believe in global warming, then you can appreciate the fascination people have with hybrid cars and how they can reduce air pollution that is destroying the environment.

Hybrid cars are powered using a combination of electric motors and gasoline engines. The idea is that this combination will reduce the vehicle’s carbon emissions during use. These vehicles cost a bit more than economy cars, but this could change in the future if traditional gasoline vehicles become obsolete.

Top 5 Driving Tips for Hybrid Cars

Before buying a hybrid car, you should follow some driving tips. These tips will help you save on gasoline and get the most out of your hybrid vehicle. Below are the top 5 driving tips for this purpose.

  1. Drive Efficiently – Hybrid vehicles were not designed for their performance. They were designed to be efficient vehicles by consuming less gasoline and using more electrical energy to make up the difference. That being said, this does not mean you should race on the highway or try to exhaust as many resources from your vehicle as possible. What you should do is use the gasoline engine just to get the car to the desired speed, then let the electric motor keep you cruising. This is the best way to save on gasoline.
  2. Lower Speed – Even if you set your vehicle on cruise control with the electric motor powering it, you will still have less fuel consumption if you drive over 55 mph. When driving on the highway, try to drive at 60 mph instead of 70 mph. This will be the best way to reduce gas consumption while maintaining a sufficiently fast speed on the highway.
  3. Manage Battery Charge – You might think that fully charging your hybrid car’s battery would be a wise choice before hitting the road. The truth is that a fully charged battery will consume energy faster than a half-charged battery. Many hybrid car manufacturers recommend keeping the battery charged between 20% and 80%. If it drops below 20% and you are still driving your vehicle, it could end up ruining your battery by not being able to recharge it as much in the future.
  4. Braking Helps the Battery – When you use the battery’s electrical power while driving your vehicle, you can actually return energy to the battery every time you apply the brakes. This does not mean you can drive very fast and then brake quickly to bring all that power back into the battery. It means you drive slowly, brake gradually, and try to brake as often as possible. If you do this, you will find that you won’t have to recharge your battery as often.
  5. Use Fewer Accessories – Remember that your car has many accessories that also draw power from its battery, such as the air conditioner, radio, heater, etc. If your vehicle has an eco mode, you should use it, as this will result in less consumption of your vehicle’s battery when powering these accessories. Other tips to follow are not using your headlights during the day and using your mobile phone for music and radio instead of your car’s radio.

How to know if you have a faulty coil pack

In newer vehicles, a coil pack replaces the distributor. It is an electronically controlled ignition coil pack regulated by the car’s computer and used to create the spark for each engine cylinder’s spark plug. Generally speaking, coils are much more reliable than distributors because there are no moving parts and because they fire much less frequently than a distributor. Coils typically create a better spark, which in turn produces better combustion and more power in a car’s engine.

How a Coil Pack Works

When creating a spark at the spark plug, the ignition must come from a high-voltage power source so that as much fuel as possible burns in the cylinder. Each time the combustion process is initiated, the coil pack accumulates energy, up to 50,000 to 75,000 volts. When the electronic control module (the car’s computer) sends the signal to the ignition control, the voltage is released from the coil pack through the spark plug wires to the spark plug.

When the spark travels to the spark plug, it jumps across the spark plug gap to ground, causing an explosion of the air-fuel mixture inside the cylinder chamber.

Coil Pack Problems

Usually, if a coil pack is faulty, there will be a loss of ignition or spark in one or more cylinders. This causes what is commonly known as misfires. Misfires can lead to crankshaft drag and typically result in a very rough-running engine.

Common Symptoms of a Faulty Coil Pack

A faulty coil pack will usually exhibit symptoms similar to those of a faulty spark plug. Some of the most common telltale signs that a coil may be faulty include:

  • A rough idle
  • An engine that is inexplicably louder than usual
  • A noticeable lack of power
  • A significant drop in RPM when accelerating for no apparent reason
  • A check engine light flashing or coming on intermittently
  • An active gas warning light when the vehicle has plenty of gasoline
  • Exhaust smoke emitting intermittently, instead of a steady flow

How to Test a Coil Pack

Fortunately, there is a simple way to test your vehicle’s coils and ensure they are working as they should. You need to use an ohmmeter to test the coil pack’s continuity. Make sure you have the approximate ohm values for the coil pack. To find this information, search for your car’s engine online or purchase a Chilton or Haynes manual to find out what the mega ohm reading on the coil pack should be.

Coil Packs vs Distributors

While in the past, vehicles used a distributor to transmit the thousands of volts needed to create a spark from the ignition coil to the spark plugs, modern ignition systems now use one coil per spark plug or, in some cases, one coil for two spark plugs. Often, these multiple coils are mounted in a single assembly with multiple terminals, hence the term coil pack.

Coil packs began to be implemented in many vehicles in the late 1990s. The main reason most manufacturers switched to coil packs is that they are more reliable. Many coil packs require no maintenance over a distance of 120,000 to 150,000 miles. Additionally, distributors are very prone to failure if they get wet or if the engine is submerged underwater for a few seconds. Coil packs tend to work even when they have been completely splashed with water.

Besides being more reliable, coil packs are generally credited with providing more power and torque than a common distributor. Because a coil pack typically creates a much more efficient spark, it is also known to provide a slight improvement in fuel efficiency compared to vehicles that use standard distributor caps. Although some modern vehicles still use a distributor system, there are aftermarket upgrades that many car enthusiasts add to improve performance, reduce maintenance, and lower fuel consumption.

Which Coil Pack Works with a Rotary Engine?

Most rotary engines require a different type of ignition coil. Below are two options, one for a standard replacement and another for a high-performance voltage-type coil pack.

Original Equipment Replacement
Beck Arnley is a well-known name in the automotive ignition parts industry. They are favored by many mechanics, especially those who primarily work on import cars. The Beck Arnley 178-8025 Rotary Engine Coil Pack is a direct replacement for original equipment parts on older Mazda cars with a rotary engine. You can expect to pay around $55 for one.

Performance Replacement
M&W Ignition Systems is a fairly well-known name in the import performance market. Their part number PAK005 is a high-performance ignition coil pack for performance enthusiasts who are not afraid to spend a bit more for a high-quality performance part. With prices around $245 for a dual coil pack for direct-fire ignitions, these coil packs will provide years of excellent performance.

When ordering a coil pack for your rotary engine car, you need to know the year and model as well as the engine displacement to ensure you have the correct parts.

Symptoms of a Loose Alternator Belt

Whether you have owned a car for a few years or decades, you have probably heard of a loose alternator belt.

But how do you know when it’s time to tighten or replace it? Is it even possible on all car models?

In this article, we will talk about the symptoms of a loose or faulty alternator belt, its location, and the replacement cost.

Symptoms of a Loose or Bad Alternator Belt

The alternator belt powers not only the alternator but also many other parts in the engine compartment. Therefore, many things can also fail when it becomes loose. Here are the 6 most common symptoms of a bad alternator belt:

1. Battery/Alternator Warning Light

Since the alternator or serpentine belt powers the alternator, it will, of course, cause the alternator to struggle when the belt is loose. There is a battery warning light on your dashboard in most car models, which lights up if there is a problem with the charging system.

When the alternator belt is loose, the alternator does not spin at its optimal speed, which can cause the charging voltage to drop and, consequently, the warning light appears.

2. Squealing Noise When Cold

Noise in the car

You have probably heard that many older car models emit a very high-pitched noise during a cold start, which will slowly disappear as the engine warms up.

This is mainly due to a loose alternator belt, which becomes more slippery and wet when it’s cold and creates a high-pitched noise when it slips on the alternator.

If you hear a high-pitched noise when you start the car for a few seconds, it is definitely time to check the alternator belt. You may also experience a constant high-pitched noise if the belt is still loose.

3. Heavy or Jiggery Steering

As I mentioned earlier, the alternator or serpentine belt powers the alternator and other things like the power steering pump. Some car models have a separate belt for the alternator and the power steering pump, but they usually use the same one.

This means that when the alternator belt can also prevent the power steering pump from working properly, you will recognize this as jiggery or constant heavy steering.

4. Flickering or Dimming Lights

Dim car headlights

When the alternator charges the car battery, it charges it with about 14.5 volts. When the car battery is inactive, it usually has about 12-12.5 volts. When the alternator is not working properly due to a slipping or loose alternator belt, the voltage will also cause spikes and drops.

You will recognize these voltage changes mainly by looking at the headlights or other electronic components. You may see the light become dimmer or brighter, and you may also see a pulsing light in some cases.

5. Sudden Stall

If you have driven very far with a loose or slipping alternator belt, it can become so bad that the electronic components will consume more power than the alternator can produce.

This will cause the car to stall completely, and you will find yourself stuck on the side of the road because there is no chance you can restart it when the car battery is completely drained.

6. Dead Battery

Dead car battery

If the alternator belt is a bit loose, it can

If it becomes bad enough, the car battery may even be completely dead the next time you try to start your car.

Just Tighten It or Replace It?

To determine whether you need to replace or tighten the alternator belt, you need to look at the belt. If it has cracks or looks very dry, it is definitely time to replace the alternator belt.

When buying a new belt, you must make sure and compare it with the old belt to ensure you have the same length, as many car models can have many different belt lengths depending on utilities such as power steering, air conditioning, etc.

When tightening the new alternator belt, you must ensure not to tighten it too much. This will result in a much shorter lifespan, and it can even damage the bearings in parts like the alternator or power steering pump.

Most newer car models also use an automatic belt tensioner, so it is quite rare for the belt to come loose. However, it can happen, and if you have a loose belt on a car with an automatic belt tensioner, you must make sure to replace the tensioner while you are replacing the alternator belt.

Alternator Belt Location

Serpentine belt

The alternator belt is located at the front of the engine. This is not the same as the front of the car because the engine can be installed on the side in many car models.

However, finding the alternator belt is quite easy in most car models; look for a belt around different wheels, and you will probably find it.

In some car models, the belt may be located quite low in the engine compartment and close to the car body, making it difficult to see from above. In this case, you may need to lift the car and check from underneath.

Alternator Belt Replacement Cost

An alternator belt costs $20-100, and labor costs $30-200 to replace it. You can expect a total cost of $50 to $300 for replacing an alternator belt.

The alternator belt is often quite cheap, so if you know how to replace and tighten it yourself, you can certainly save money.

As I mentioned earlier, most modern car models use an automatic belt tensioner, and if you have a loose belt on any of these car models, you need to replace the tensioner. These tensioners are often a bit more expensive, and you can expect to pay $30 – $150 for a new one.

The alternator can be installed very close to the car body, making it very difficult to access. In some car models, you even have to lift or lower the engine to reach it properly.

The car won’t start – Here’s how to fix it

Is your car not starting and making clicking sounds? Then this article is for you. I just had this problem with my car too and I finally created a routine on how to troubleshoot the car if this happens. Follow us and we will show you step by step what you need to do if this occurs.

When you hear clicking sounds while trying to start your car, there is no clear answer to the problem. There can be several different components that may be damaged or improperly configured.

To start the engine, you need a push from the flywheel, which is controlled by the starter. All these components are powered by the battery, which is why it’s the first part we will check, but again, when the car won’t start and begins clicking, there could be different outcomes or ways to solve the issue.

Car Won’t Start and Makes a Clicking Sound: How to Fix

It is most likely the battery or the starter when you hear clicking when trying to start the engine. There is a series of components involved when you start the engine, and if just one of these components fails, you won’t be able to start the engine.

Step 1. Check the Battery

The most common problem when the clicking issue occurs is the battery. As I mentioned earlier, the battery is the most important component when trying to start a car because it powers the starter and the flywheel.

Battery acid or corrosion can cause clicking when trying to start the car

Check for corrosion or acid buildup around the battery poles and clean if present.

If you don’t know what this looks like, look at the image above; the corrosion is the blue texture you can see on the left pole. If you have something similar on your battery, it could be a reason why your car won’t start; the only thing you need to do here is clean it, which is quite simple.

Use baking soda mixed with 32 ounces of hot water, mix it, and pour it over the connectors. I also like to use a toothbrush afterward to remove all the corrosion. Make sure to wear gloves and glasses when doing this. You don’t want baking soda in your eyes or on your hands, nor do you want battery acid. When you’re done cleaning, use WD-40 to prevent rust or corrosion in the future.

Check the Connectors – You should also check if the battery terminals are loose/the wires going to the poles. If these are loose, you need to tighten them. This is a very common solution, so don’t skip this step. Here is a picture of the two bolts to tighten.

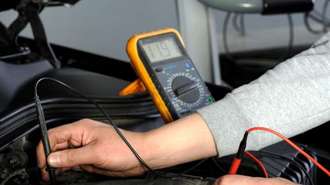
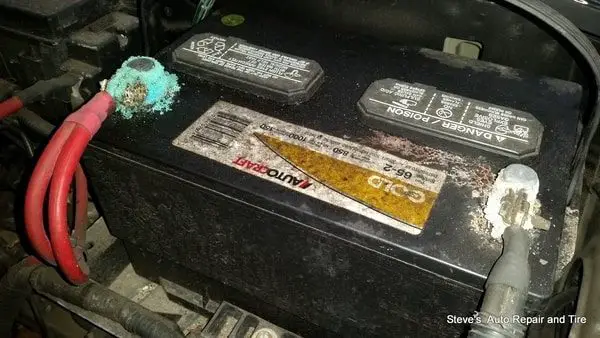
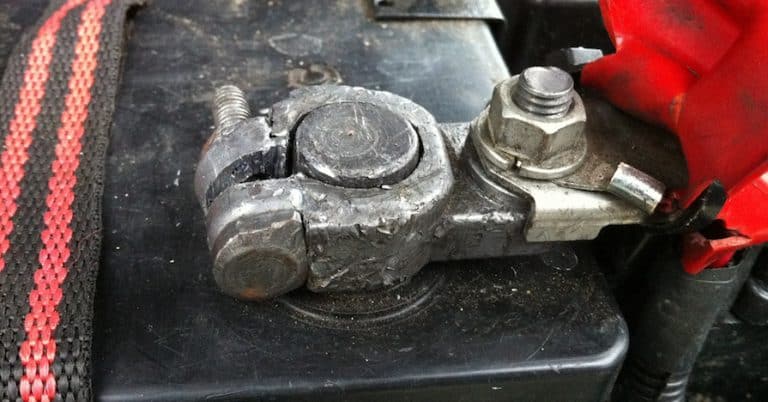
Battery connectors, tighten them. Common problem when your car makes clicking sounds.

If none of these previous steps solved your problem, don’t panic, there is always a solution. Here are a few more points to check.

Check if the Battery is Dead or Damaged

If corrosion or tightening the bolts didn’t work, your battery might be dead or not functioning properly.

What you need to do to check if this is the case is use a multimeter to check the battery levels. If you don’t have one, you can simply buy one here or go to your local store.

Multimeter for testing a car battery

When you have your multimeter ready, turn the dial to 20 volts or at least something above 15 volts. Then simply place the red reading cable on the positive pole of your battery and the black cable on the negative pole of your battery. When you do this, a number should appear on your multimeter; this number should be around 12.6 volts.

If the number is far from 12.6, your battery is faulty and needs to be replaced; if it’s around 12.6, we can proceed with further testing. Just because the battery has the correct voltage doesn’t mean it’s working as it should. That’s why we need to do a few more tests to solve the problem you’re experiencing.

Another issue could be that there aren’t enough cold cranking amps (CCA) in the battery. This is a measure that shows the voltage the battery can provide, and you need voltage to start the car.

So, what we do to test this is keep the cables you just placed in the same position, but this time, you want to start the car while you or someone else watches the multimeter. When starting the car, the multimeter reading should not drop below 10 volts. If it does, it indicates your battery is faulty; if it drops below 5 volts, it means your battery is completely dead and needs to be replaced.

Testing voltage on car battery with multimeter. Car troubleshooting

2. Check the Starter

If your battery still isn’t working, we need to check the starter. For most people, the battery will be the problem, and the previous steps should solve your issue. So make sure to check those points first. Additionally, you can check if the clutch is working and if your car is in park. Try the simplest solutions first.

The starter is positioned under the car and is difficult to access as an everyday driver, which is why I have a trick for you that you can use to check the starter without even touching it. Just follow along and don’t overcomplicate things, and you should be done in no time! This will be the last step we take; if it doesn’t give us an answer, you’ll need to go to a mechanic to have it checked.

Okay, the first thing to do before testing the starter is to put your car in neutral; this is very important.

Power distribution center on a car

Now go to this box; inside you will find fuses and relays. Open the top cover, and you should see a diagram showing all the relays and fuses on the inside of the top cover.

Try to find where it says starter relay on the cover and locate it in the power distribution center.

Under the cover of the power distribution center on the car
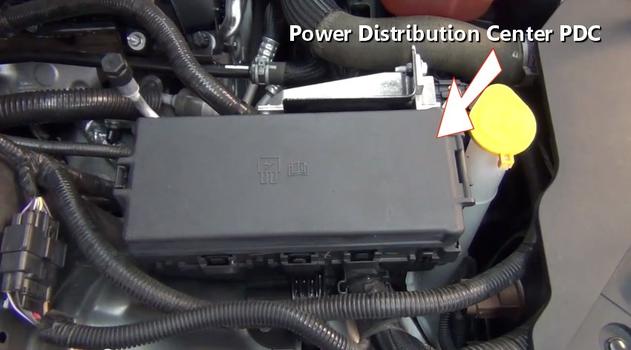
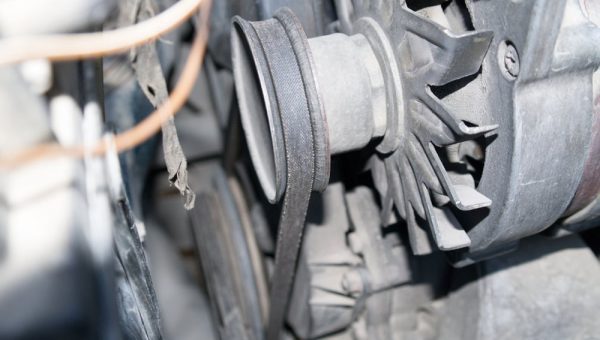
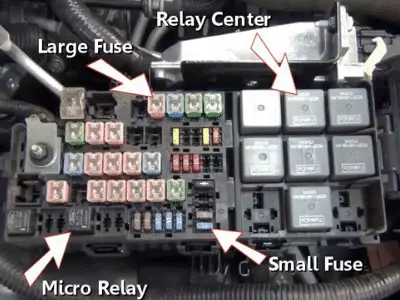
Locate the relay center.

Don’t be confused by everything you see here; the only thing you need to find is the starter relay. I’ll put an image below so you can see what you need to look for.

Image of the starter relay you need to locate in the power distribution center.

So this is the starter relay.

Now, when you have removed the starter relay, you should get yourself a jumper wire, like this one. You’ll only need one. In the previous image, you can see a diagram showing the number of each pin on the starter relay.

Locate pins 30 and 87; they are usually diagonal from each other. Now look at the power distribution center and find the holes where pins 30 and 87 were, and plug the jumper wire into these two holes; your car should now start. If it doesn’t, you know your starter isn’t working, so what you can do is use a hammer and tap on the starter; don’t ruin it, but just give it a few taps; this can solve the problem in some cases. If that doesn’t work and you’re not an experienced mechanic, I would advise seeking help.

Conclusion

I hope this article helped you solve your problem; if so, please leave a comment about your issue so others can see it. If it didn’t, let me know as well. I’m always looking to improve my content to help more people; sharing your experience will help others in your situation. Thank you for reading.

CA Pressure Chart | Low Side Pressure Chart R134a

Being confident with your A/C compressor means it is operating at its optimal capacity.

But, being a component of refrigeration, it can also develop malfunctions.

If such a situation arises, you will need the interpretation of your A/C compressor unit.

A qualified technician can do this job for you. The technician must have the right tools and information about the A/C compressor.

One of the necessary tools is an information tool called a pressure chart. The pressure chart plays an essential role in identifying the problem in an A/C compressor unit.

In this article, let’s examine a type of pressure chart called the R134a low-side pressure chart.

Continue reading as you seek to find out what the R134a low-pressure chart is.

Before defining the R134a low-side pressure chart, let’s understand what r134a means.

So,

Ambient Temperature (°F) Low Side High Side
110° 50 to 55 psi 335 to 345 psi
105° 50 to 55 psi 325 to 335 psi
100° 50 to 55 psi 300 to 325 psi
95° 50 to 55 psi 275 to 300 psi
90° 50 to 55 psi 250 to 275 psi
85° 50 to 55 psi 220 to 250 psi
80° 45 to 50 psi 175 to 220 psi
75° 40 to 45 psi 150 to 175 psi
70° 35 to 40 psi 140 to 165 psi
65° 25 to 35 psi 135 to 155 psi

What does R134a mean?

r134a

R134a is a refrigerant used in a wide range of household or industrial appliances. These household appliances are equipped with a refrigeration unit called a compressor.

Inside this compressor is an R134a refrigerant. The refrigerant allows the compressor to perform its function well.

Installing a gauge/meter helps in understanding the regular operation of this component.

The meter displays pressure readings relative to the temperature readings of the refrigerant. In this case, R134a is the refrigerant.

Recording these readings is done on a three-column table. We have the temperature column, the low side, and the high-pressure column.

Usually, we call the table the pressure chart. In this case, since the refrigerant is R134a, our chart will be the R134a pressure chart.

The R134a pressure chart indicates the pressure-temperature relationship with the R134a refrigerant.

The r134a chart comes in two forms,

  • R134a low-side pressure chart.
  • R134a high-side pressure chart.

The gauge/meter installed on the refrigeration component contains two meters/gauges. We have a low-pressure gauge and a high-pressure gauge.

For the low-side pressure chart, the readings come from the low-side meter. Similarly, the high-side pressure chart records come from the high-side gauge or meter.

So,

What is an R134a low-side pressure chart?

This is a chart detailing the relationship between pressure and temperature on the low side of the A/C compressor.

Is the R134a low-side pressure chart important? Yes.

How?

The technician uses this chart to determine if the A/C compressor needs a refrigerant recharge.

Similarly, it tells you if the compressor requires replacement. Therefore, it determines the condition of the A/C compressor system.

To identify that the A/C compressor unit is operating at its optimal, the technician uses the R134a low-side pressure chart.

Knowing what the R134a low-side pressure chart is can be a challenging task. Similarly, interpreting the reading on the charts is never easy. Remember, the measurement is against pressure.

Therefore, you need to understand what each reading means.

When interpreting this reading, you compare both the low side and the high side of the chart. But this article is about the R131a low-side pressure chart.

So, let’s focus on the low-side readings. Remember, we are comparing the pressure reading to temperatures.

How to read an R134a low-side pressure chart

Well, let me guide you through the process.

Remember this; a performing compressor should have low readings on the low-side pressure chart.

This will indicate that the compressor is clean and there is maximum airflow.

This process will allow you to understand and interpret the readings on the r134a low-pressure chart.

  1. On the low side, the pressure is low relative to a high temperature. This should show you two things
  • The A/C compressor system is not engaged. Therefore, there is a changing displacement in its operation.
  • The compressor operation may be failing. So, you need to replace it with another one.
  1. When the pressure on the low side of the chart is high, check the following points.
  • Check the condenser fan. It may not be working. Dirt is clogging, and thus there is an obstruction in the airflow.
  • There could also be an obstruction of the refrigerant flow in the compressor.
  1. On the low side of the chart, the pressure is low while the temperature is high. This should mean the system is not operating at its optimal capacity.
  2. When you look at the R134a pressure chart, you realize the pressure is almost equal on both sides. Consider the following.
  • The displacement function of the A/C compressor is not working and therefore needs to be checked.
  • The A/C expansion valve may not be working.

In other words, the A/C compressor could be failing internally.

Wait a minute, I know you are now wondering and asking,

What are the normal operating pressures for R134a?

The pressure for a normally operating R134a is between 22 and 57 pounds per square inch (PSI).

Remember, there are two sides to the chart; we have the low and the high.

Therefore, in a normal R134a, the low-pressure side is 90 degrees or less and the PSI should be close to 30.

After going through all the details above, you are still wondering,

Why is my AC low-side pressure high?

As I mentioned in the reading interpretation part above, point number two to be precise.

High pressure on the low side of the pressure chart is not a good indicator. In other words, the A/C compressor unit of your appliance might be failing; therefore, it needs servicing.

Looking at it more closely, the technician should be able to note the following,

  • The condenser fan may not be working due to clogged dirt. Thus, there is an obstruction in the airflow.
  • The refrigerant could not flow properly.

A qualified person with the right tools can identify all the above issues.

Conclusion

The r134a low-pressure chart is essential for every technician. Whether for home inspection and interpretation or commercial interpretation.

The chart helps inspect, identify, and resolve issues resulting from the readings. If you are a technician, consider having it at all times.