How to Fix a Car Air Conditioner Leak

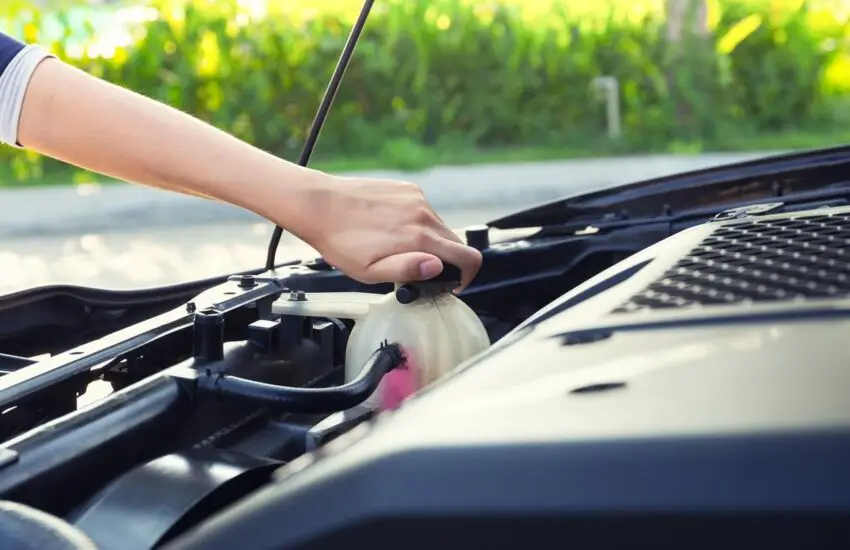
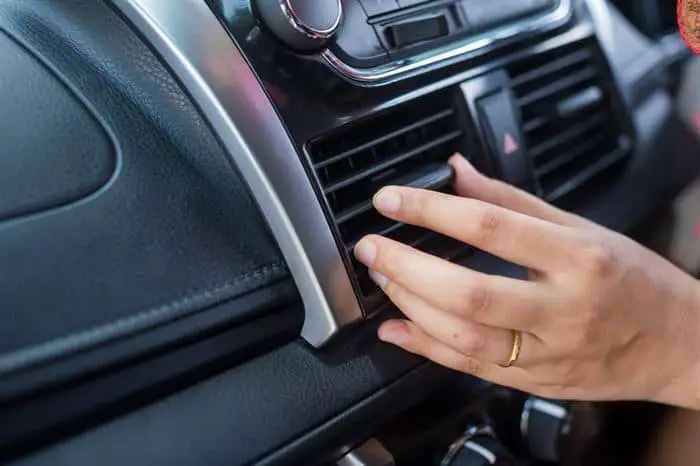
The car’s air conditioner isn’t blowing cold air – this seems like the most terrifying thing to discover during a long trip in the middle of the sweltering summer heat. The truth is, an air conditioning problem is quite common due to the frequency of damaged components and leaks. If the refrigerant level drops despite repeated refills, there must be a puncture somewhere. You need to know how to check the car’s air conditioning for leaks and how to repair car air conditioning leaks.

How to Find a Leak in a Car’s Air Conditioner

Before knowing how to repair air conditioning leaks in a car, you need to learn how to find them. The car’s air conditioner leak can occur in several components. Here are the most common air conditioning leaks in cars and how to find them.

A Visual Inspection

Check the refrigerant lines, condenser, and compressor for any residue of PAG oil or refrigerant. This is an effective method for a slow leak.

Soap Solution

Fill a spray bottle with water and a thick soapy solution. Fully charge the AC system and spray the liquid on all components. Bubbles will form if there is a break. This technique works well except for detecting a crack on the front seal of the evaporator or compressor.

Finding the leak is difficult. (Photo source: pexels)

Black Light

Some refrigerants are pre-mixed with a UV dye that appears under black light. However, this will not work if there is a leak at the front seal or the evaporator.

Use a Sniffer

A sniffer is a device used to detect a car air conditioning leak. It detects the chemical components of the refrigerant.

However, the air conditioning system must be clean, and tests must be performed in an enclosed space. The device is sensitive to dirt and air, and these elements can alter the readings.

How to Repair Air Conditioning Leaks in a Car?

Repairing car air conditioning leaks is a complex and costly process. However, you can still do it provided you have adequate mechanical knowledge, the right tools, and patience. If you are curious to know how to repair air conditioning leaks in a car, these two methods will be useful to you:
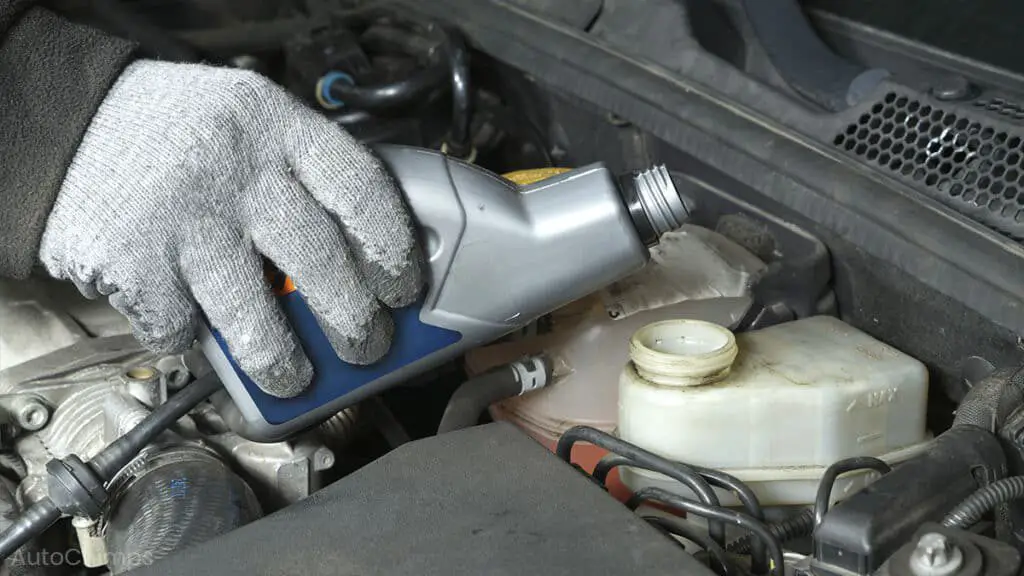
Apply a Super Seal

Sealant is an inexpensive and quick way to patch small leaks in the air conditioning system. You can find R-134a Super Seal in almost any auto parts store.

How to use it?

Super Seal will seal small punctures. (Photo source: acprocold)

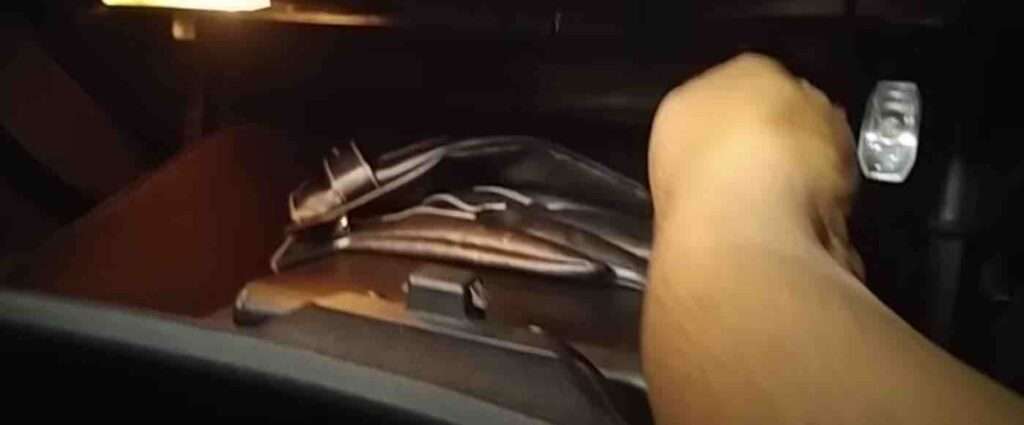
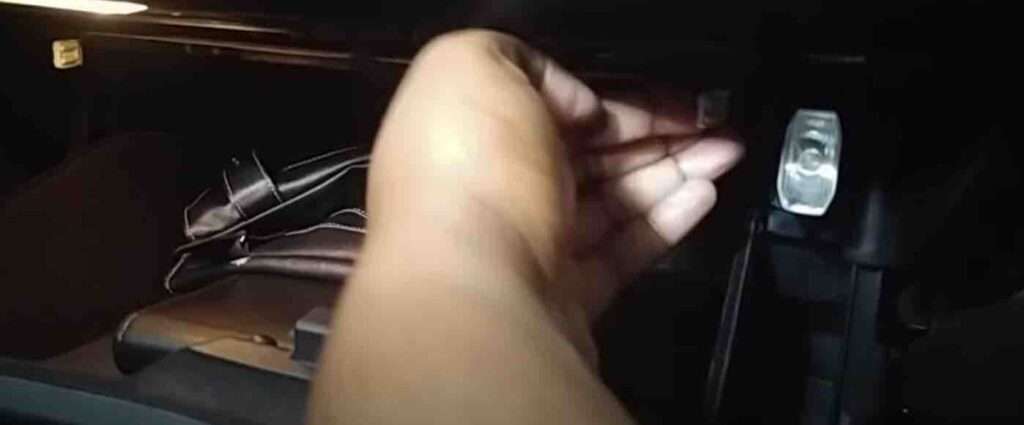
Start the engine and turn the air conditioning and fan knobs to maximum. Attach a hose to the Super Seal can and connect the hose coupler to the low-pressure port.

After transferring the liquid, fill the system with R-134a refrigerant. Run the air conditioner for at least 15 minutes to allow the Super Seal to spread throughout the system.

Work on the Evaporator

No Super Seal can repair an evaporator leak. You must either repair it or replace it completely. You can cut and crimp the tube to repair pinhole-sized breaks. A bit of soldering can help in this regard.

When the puncture or punctures are larger, replacing the evaporator with a new one is the only solution. You must remove the dashboard to access the evaporator. You must also vacuum the system before recharging it.

FAQ on How to Repair Air Conditioning Leaks in a Car

  1. What are the common signs of air conditioning leaks in a car?

Common signs of an AC leak include a noticeable decrease in cooling efficiency, warm air blowing from the vents, hissing or unusual bubbling noises, or a distinct refrigerant smell inside the car.

  1. How much does it cost to repair air conditioning leaks in a car?

The cost of repairing an AC leak varies depending on the extent of the damage, the type of repair needed, and the specific vehicle. It can range from a few hundred to over a thousand dollars, including parts and labor.

  1. Is it safe to use DIY AC leak repair kits?

DIY AC leak repair kits are available, but their effectiveness can vary. It is essential to follow the instructions carefully. However, professional repairs are generally more reliable for long-term results and safety.

  1. Can I recharge my AC refrigerant after repairing a leak?

If you have repaired the air conditioning leak, it is essential to recharge the refrigerant to the correct levels. It is best to entrust this operation to a professional to ensure proper handling of the refrigerant and optimal cooling performance.

  1. Can AC leaks be prevented?

Regular maintenance of the air conditioning system can help prevent leaks. This includes checking for worn seals or damaged components during routine maintenance and ensuring the system is well-maintained to avoid unnecessary stress on its parts.

  1. What should I do if I suspect air conditioning leaks in a car?

If you suspect air conditioning leaks in a car, it is advisable to have it inspected and repaired by a qualified technician. Ignoring the problem can lead to greater damage and reduced cooling performance.

Conclusion

Knowing how to repair an air conditioning leak in a car and addressing an air conditioning leak as soon as possible is essential to maintaining a comfortable and functional air conditioning system.

Although diagnosing and repairing the leak can sometimes be a complex task, it is important to follow a systematic approach. Identifying the source of the leak, whether it comes from the pipes, connectors, or the air conditioning compressor, is the first crucial step.

Always use the appropriate tools and materials recommended for AC system repairs to ensure good sealing and safety!

Changing Automatic Transmission Fluid: Essential Information

Automatic transmission fluid serves two essential roles: lubrication and cleaning. The fluid circulates through various components to reduce friction between them and collect sediments that can circulate in the system and cause damage.

Role of Automatic Transmission Fluid (ATF):

  • Lubrication of the transmission’s moving parts.
  • Cleaning and removal of sediments and contaminants.

Why Change ATF?

  • Ensure proper operation and longevity of the transmission.
  • Avoid costly transmission problems.

Signs Indicating the Need to Change ATF:

  • Unusual gear shifts (jerking, slipping).
  • Dark or burnt color of the fluid.
  • Burnt smell of the fluid.
  • Low fluid level.

Steps for Changing ATF:

  1. Check the type of ATF recommended by the manufacturer.
  2. Drain the old ATF.
  3. Replace the ATF filter (if applicable).
  4. Flush the transmission system (optional).
  5. Fill the system with new ATF.
  6. Check the fluid level and adjust if necessary.

Important Points to Remember:

  • Use the type of ATF specified by the manufacturer.
  • Carefully follow the instructions in the vehicle’s manual.
  • Clean the torque converter during flushing.
  • Properly seal the transmission pan.

Benefits of Changing ATF:

  • Improved transmission performance.
  • Reduced wear and tear.
  • Extended transmission lifespan.
  • Improved fuel economy.

Frequently Asked Questions (FAQ):

What type of ATF should I use?

Consult your vehicle’s manual for the recommended type of ATF.

How to check the ATF level?

Refer to your vehicle’s manual for specific instructions.

Can changing ATF improve fuel economy?

Yes, changing ATF can improve fuel economy by optimizing transmission operation.

Should I do a complete flush or a simple ATF change?

A complete flush replaces more fluid than a simple change. The choice depends on your vehicle and its condition.

Should the ATF filter be changed at the same time as the ATF?

It is generally recommended to change the ATF filter when changing the ATF.

Is it necessary to change ATF if it is synthetic ATF?

Yes, even synthetic ATF degrades over time. Change intervals may be longer, but a change is still necessary.

How to dispose of old ATF?

Take the old ATF to a recycling center or hazardous waste disposal facility.

What to do if I accidentally use the wrong type of ATF?

Have the ATF drained and replaced with the correct type by a professional.

Can changing ATF solve transmission problems like slipping or harsh shifting?

Changing ATF can improve transmission performance, but it may not solve all problems. Consult a professional for diagnosis and repair.

Can I tow a trailer immediately after changing ATF?

It is advisable to drive your vehicle for a short period after changing ATF to check for leaks and issues before towing a trailer.

Can I use a generic ATF or should I use the manufacturer’s brand?

It is generally better to use the ATF brand recommended by the manufacturer. However, some generic brands may be compatible; check approvals and compatibility before using them.

Conclusion:

Changing ATF is an important part of your vehicle’s maintenance and can contribute to the longevity and performance of the transmission. It is important to follow the manufacturer’s recommendations and use the appropriate type of ATF for your vehicle.

Coolant shortage in your car

If you want to keep your car running smoothly on the road, maintaining proper antifreeze levels is essential. Without antifreeze, having a vehicle would be pointless. As the saying goes, “Small things come in big packages.” The same applies to coolant, which may seem insignificant but can prevent your car from functioning. Keep reading to learn what happens when your car lacks coolant.

What Happens When Your Car Lacks Coolant? The 3 Common Effects

Coolant, or what you might call antifreeze, is a fluid that regulates the engine’s temperature. The role of antifreeze is crucial, and its absence could lead to disasters. Sometimes, you might tend to ignore the low coolant warning light and overlook the consequences. What are they? Let’s explore this in detail for your better understanding.

1. Engine Shutdown

Coolant is present to cool down the very hot components of the engine. Without coolant, the engine parts would heat up but never cool down. This, in turn, would cause the engine to fail and deteriorate the corresponding parts. When the engine fails, the heart of the car breaks down; thus, your car loses its essence of existence.

Today, with the advent of new technologies and modern cars, things have changed for the better. As soon as the coolant level drops, the engine automatically stops. This is a sign indicating the need to top up the coolant. Simply put, you won’t be able to drive further until you provide the right dose of coolant to the system. This is the worst thing that happens when your car lacks coolant.

Learn all about what happens when your car lacks coolant. (Photo source: istockphoto)

2. Car Heater Malfunction

The car heater uses the residual heat that the coolant absorbs from the engine. It’s clear that without coolant, the heater won’t receive the dose of heat it needs to function. Under such circumstances, the heater wouldn’t blow hot air at all, or it might blow hot air continuously.

This would be an extreme situation that you wouldn’t be able to handle. Driving in winter would be a task you couldn’t fully enjoy. Even if you’re wondering what’s wrong, checking the coolant levels would prove useful here. You can also refer to maintenance tips to detect symptoms of low coolant levels.

3. Poor Fuel Economy

The benefit of an engine running at the right temperature is reflected in its fuel economy. This is a crucial factor every car owner must consider as fuel prices rise. If you witness a drop in the MPG reading, it would be appropriate to check the coolant levels.

The truth about what happens when your car lacks coolant. (Photo source: feelgoodcars)

When the coolant level is low, the engine doesn’t lose its “overheating” state, leading to inefficient fuel combustion. Once this happens, the emissions from the exhaust would also increase exponentially. This would further deteriorate your carbon footprint, a key parameter for meeting environmental needs.

According to automotive technical experts, coolant operates in a closed circulation system, making its loss difficult. Normally, during the first 2 to 3 years of use, a small amount of coolant may be lost. If the car owner notices rapid coolant loss, it’s advisable to have the vehicle inspected and repaired.

Coolant leaks and losses can occur due to damaged hoses and perforations. However, detecting coolant leaks can be challenging for car owners, as these areas are often located deep within the engine compartment.

Expert Tip

To ensure the coolant always functions properly, you should follow these tips below:

Regularly Check the Coolant Level

Before each trip, the driver should open the hood and check the coolant level in the auxiliary tank. Make sure the coolant is always maintained at a safe level (between the Max and Min lines). If the coolant level is below the Min line, add some immediately.

Monitor the Temperature Gauge

While driving, occasionally pay attention to the coolant temperature gauge. If the temperature needle points to the Hot level, immediately stop the car, open the hood to let the car cool down, and check for any issues.

Do not open the coolant tank cap when the engine is running. If you need to stop the vehicle because the temperature gauge is too high or the vehicle has a problem, do not open the coolant tank to check the water level immediately due to the coolant. During boiling, the high pressure in the tank can cause strong splashes of water onto the face and limbs, causing burns.

You Should Use Specialized Coolant

To keep the engine durable, you should use specialized coolant. This type of coolant allows heat to be conducted quickly and doesn’t accumulate residue. At the same time, specialized water has an easily recognizable color, making it easier to visually check for coolant leaks.

Wrap Up

By looking at what happens when your car lacks coolant, you’ll understand the importance of maintaining it. Never overlook small symptoms, as they can lead to irreparable disasters that could cost you a fortune.

Understanding the Operation of Automatic Transmission Solenoids

Modern automatic transmissions are complex systems that use a variety of components to function properly. Among these components, solenoids play a crucial role in controlling the flow of hydraulic fluid and activating the different gears.

What is an automatic transmission solenoid?

A solenoid is an electromagnetic device that converts an electrical signal into a mechanical force. In an automatic transmission, solenoids are used to:

  • Control the flow of hydraulic fluid: Solenoids operate the hydraulic valves that direct the fluid to the various passages and pistons in the transmission.
  • Activate the different gears: By controlling the fluid flow, solenoids allow the different gears to be engaged and disengaged.
  • Regulate the fluid pressure: Some solenoids are used to regulate the fluid pressure in the transmission’s hydraulic circuit.

Types of automatic transmission solenoids

There are different types of automatic transmission solenoids, each with a specific function:

  • Shift solenoids: They control gear shifting by activating the different gears.
  • Torque converter clutch solenoid: It controls the locking of the torque converter, which helps improve the vehicle’s fuel efficiency and performance.
  • Pressure regulator solenoid: It regulates the fluid pressure in the transmission’s hydraulic circuit.
  • Transmission brake solenoid: It allows the vehicle to slow down using engine braking.

Symptoms of a faulty automatic transmission solenoid

When an automatic transmission solenoid is faulty, it can cause various symptoms, such as:

  • Delayed or no gear shifting
  • Harsh or jerky gear shifting
  • Jerking or vibrations while driving
  • Transmission fluid leak
  • Check engine light illuminated

Diagnosis and repair of an automatic transmission solenoid

If you suspect an issue with an automatic transmission solenoid, it is important to have your vehicle diagnosed by a qualified mechanic. The mechanic can use a diagnostic tool to identify the faulty solenoid and replace it.

Tips to prevent automatic transmission solenoid problems

To prevent automatic transmission solenoid problems, it is important to:

  • Perform regular transmission fluid changes
  • Use the correct type of transmission fluid
  • Avoid aggressive driving
  • Have your vehicle regularly maintained by a qualified mechanic

Conclusion

Automatic transmission solenoids are essential components that enable the proper functioning of the transmission. If there is a solenoid problem, it is important to have your vehicle diagnosed and repaired by a qualified mechanic.

Comparison of DOT 3 and DOT 4 Brake Fluid

If you’re looking for the right brake fluid for your car, a comparison of DOT 3 and DOT 4 brake fluid will help you make a better decision.

What is the difference between DOT 3 and DOT 4 brake fluid?

Brake fluid is the lifeblood of the braking system. It keeps the braking components lubricated so they respond quickly when you press the brake pedal.

With the help of the fluid, the piston can comfortably compress the rotors to slow down the vehicle. DOT 3 and DOT 4 are the two most commonly used types in automobiles.

DOT 3 is the most common and popular type of brake fluid for trucks and cars. DOT 4 is also gaining momentum due to its compatibility with anti-lock braking systems and traction control.

The first is the standard, low-cost option for average cars where drivers are unlikely to brake aggressively.

But automobiles like race cars and police vehicles that require frequent and vigorous braking use DOT 4 fluid. Let’s discover a few more points of difference between DOT3 and DOT4:

A comparison will help you make a better decision. Source: DailyDriven

1. Boiling Point

The main difference between DOT 3 and DOT 4 is the boiling point – their tenacity to absorb water. DOT 3 is more likely to absorb water because its boiling point is lower.

For this reason, it boils easily during sudden and abrupt braking, which could damage the braking components and lead to poor braking performance.

DOT 4 fluid can easily replace DOT 3, but the latter should not be used as an alternative to the DOT 4 type unless absolutely necessary.

2. Chemical Structure

Another slight difference between DOT 3 and DOT 4 brake fluid lies in their chemical components. DOT 3 contains a mixture of ether and polyalkylene glycol, while a mixture of glycol and borate creates DOT 4 fluid.

The glycol-ether mixture holds up very well in hot and humid conditions, which is perfect for ordinary vehicles where brakes heat up easily.

On the other hand, the chemical ingredients of DOT 4 exhibit a high level of water tolerance and stability at high temperatures.

3. Boiling Capacity

DOT 3 is the winner in this section of the comparison between DOT 3 and DOT 4 brake fluid. It performs well in water and in open air because it has a wet and dry boiling capacity. DOT 4 has an excellent dry boiling capacity but it does not perform well in water.

Which one should you choose? DOT 3 or DOT 4 brake fluid? Well, the first is the best option if you drive a standard vehicle.

However, if it’s a race car or you enjoy aggressive driving, DOT 4 will take better care of the braking components.

DOT 4 will take better care of the brake parts. (Photo: Poutoline)

Are there any precautions to take?

Yes, there are a few points to consider. Both types of fluid eat paint, so do not spill them on the car body. Furthermore, they may react poorly if mixed with other fluids used in a vehicle.

You must store the fluids in tightly sealed containers. Moisture from the air degrades their chemical components. Therefore, it is not safe to use brake fluid from an open bottle.

FAQ on DOT 3 and DOT 4 Brake Fluids

  1. Can I use DOT 4 brake fluid in a system designed for DOT 3?

You can generally use DOT 4 in a system designed for DOT 3. However, it is essential to flush and carefully replace all the old fluid to avoid compatibility issues.

  1. Can I mix DOT 3 and DOT 4 brake fluids?

Mixing brake fluids is generally not recommended. It is best to use a single type consistently to ensure proper performance and avoid potential compatibility issues.

  1. How often should I change my brake fluid?

Brake fluid should be changed according to the maintenance schedule recommended by your vehicle manufacturer, typically every 2 to 3 years. However, if you notice a decrease in braking performance or signs of contamination, it should be changed sooner.

  1. Can I use DOT 5 brake fluid instead of DOT 3 or DOT 4?

DOT 5 brake fluid is silicone-based and is not compatible with DOT 3 or DOT 4, which are glycol-based. Using DOT 5 requires a complete system flush and should only be done if your vehicle is specifically designed for it.

  1. Which brake fluid should I choose for my everyday vehicle?

For normal driving conditions, DOT 3 brake fluid is sufficient. Reserve DOT 4 for high-performance vehicles or those subjected to heavy braking demands.

  1. Can using the wrong brake fluid damage the braking system?

Using inappropriate brake fluid can potentially damage the braking system and compromise safety. Always use the type of brake fluid recommended for your vehicle to ensure proper performance and safety.

  1. Should I take special precautions when handling brake fluid?

Yes, brake fluid is corrosive and can damage paint and other materials. When handling it, wear safety glasses and avoid spilling it on your vehicle’s paint or any other surface. Additionally, store brake fluid in a tightly sealed container.

  1. Are there performance benefits to using higher-grade brake fluids, such as DOT 5.1 or racing brake fluids?

Higher-grade brake fluids, such as DOT 5.1 or racing fluids, offer even higher boiling points and improved resistance to brake fade.

These are typically used in high-performance and racing applications where extreme braking conditions are common. However, for regular daily driving, DOT 3 or DOT 4 brake fluids are generally sufficient.

Watch the video below to see the difference between Dot 3, 4, 5, and 5.1 brake fluids!

https://youtube.com/watch?v=M6UrH_mDBrU%3Ffeature%3Doembed

In conclusion, the choice between DOT 3 and DOT 4 brake fluid depends on your specific vehicle and driving needs.

DOT 3 is suitable for most everyday driving situations and is widely available and cheaper.

On the other hand, DOT 4 offers higher boiling points, making it more suitable for high-performance or heavy-duty applications, such as racing or towing.

What is the function of a crankshaft position sensor

The crankshaft position sensor, in case you didn’t know, is an essential electronic device for the operation of a car. It is located in the car’s engine. It records the rotational speed of the crankshaft.

This sensor then transmits the information to the ECU and decides on fuel injection and optimal ignition regulation.

The location of the crankshaft determines the effectiveness of the collected data. This is why the sensor is located either next to the camshaft or the crankshaft itself.

If we try to explain it in simpler words, the crankshaft position sensor monitors the location of the camshaft in the engine.

The information it collects in this way is used to optimize the timing of fuel injection into the engine.

If this sensor malfunctions, the computer will be unable to make precise fuel injection adjustments and engine performance will decrease.

How does the crankshaft position sensor work?

Here are some ways this sensor works. Let’s take a look.

Detection

If you look at the crankshaft, you will find a powerful magnet next to it. You will also notice that there are steel pins or dowels arranged at regular intervals around the crankshaft.

Learn more about the crankshaft position sensor (Photo: BMW Owners Blog)

This magnet constantly radiates a stable magnetic field. When the engine starts and the crankshaft rotates, the steel pins around the shaft rotate through this field. This causes a fluctuation in the field, thus producing an AC (alternating current) signal.

This signal further informs the Engine Management Unit (engine computer) to decipher the rotational speed. In turn, the EMU is able to calculate the position and rhythm of the camshaft to further optimize fuel injection and ignition.

Adjustments

Like modern cars, we need to learn one thing. Engines will give us efficient performance only if the internal parts move at a specific recommended speed.

It is only once the crankshaft position sensor detects the rotation of the crankshaft inside the engine that the onboard system can use the information the sensor sends to it.

This is when the computer will make small, precise adjustments/tunings to the engine to increase its efficiency.

Consider cases where you are moving at full throttle. With constant acceleration in modes like cruise control or sport mode, the computer must make these fine adjustments to the engine to change the speed.

The computer will ensure it continuously checks the crankshaft’s rotational speed, compares it to the ideal range, and adjusts the speed accordingly. This adjustment may involve increasing or decreasing the speed.

What happens if the crankshaft position sensor malfunctions?

How to maintain the crankshaft position sensor (Photo source: thxsiempre.blogspot.com)

If you need to maintain the proper functioning of your engine, it is imperative that this sensor remains in perfect condition. Any fault in the sensor will result in incorrect data being communicated to the engine computer.

The engine, when operating based on this data, will not perform optimally. It can even go as far as causing the car to stall.

The reason is that the ECM will start based on its own memory to ensure fueling and ignition, which, by the way, cannot be optimal.

Thus, a decrease in engine performance could actually be one of the symptoms of a crankshaft sensor failure.

FAQ on the function of the crankshaft position sensor

  1. Can a faulty CKP sensor damage the engine?

While a faulty CKP sensor can lead to poor engine performance and drivability issues, it does not typically cause direct engine damage.

However, continued operation with a faulty CKP sensor can lead to other issues, so it is crucial to address the problem promptly.

  1. How to diagnose and repair a faulty crankshaft position sensor?

Diagnosing a faulty CKP sensor involves using a scan tool to read Diagnostic Trouble Codes (DTCs) from the ECM.

Additionally, technicians may perform electrical tests and inspect the sensor and its wiring.

If a fault is confirmed, the sensor should be replaced with a new one, then clear all DTCs.

  1. Can I replace the crankshaft position sensor myself?

Replacing a CKP sensor can be a DIY task for those who possess mechanical skills and the necessary tools.

However, it is essential to consult the vehicle’s service manual for specific instructions and ensure proper installation and torque specifications.

  1. How often should a crankshaft position sensor be replaced?

There is no specific maintenance interval for replacing the CKP sensor. It is typically replaced when it fails or shows failure symptoms.

Regular vehicle maintenance and prompt replacement of sensors when issues arise can help ensure optimal engine performance.

  1. Are there different types of crankshaft position sensors?

Yes, there are different types of CKP sensors, including Hall effect sensors and magnetic reluctance sensors. The type used depends on the vehicle’s make and model.

  1. Can a damaged CKP sensor affect vehicle emissions?

Yes, a faulty CKP sensor can impact emissions by causing incomplete combustion and increased pollutant emissions. Addressing CKP sensor issues can help maintain compliance with emission standards.

  1. Can a faulty crankshaft position sensor cause sudden vehicle stalling while driving?

Yes, a faulty CKP sensor can lead to sudden stalling while driving. If the sensor fails to provide accurate data to the ECM, it can disrupt the engine’s ignition timing and fuel injection, causing the engine to shut down unexpectedly.

  1. Is the crankshaft position sensor the same as the camshaft position sensor?

No, the Crankshaft Position Sensor (CKP sensor) and the Camshaft Position Sensor (CMP sensor) are not the same. Although both sensors provide critical data to the ECM for engine control, they monitor different components.

The CKP sensor monitors the position and rotational speed of the crankshaft, while the CMP sensor monitors the position and timing of the camshaft.

In general, the crankshaft position sensor plays a very important role in ensuring engine performance and increasing its efficiency. Follow the maintenance advice recommended by your car manufacturer to keep it in good condition.

Can you use brake fluid for power steering fluid

For some reason, you accidentally add brake fluid to the power steering pump. What happens if you put brake fluid in the power steering? Let’s revisit the topic Can you use brake fluid as power steering fluid to get an answer:

Brake Fluid and Power Steering Fluid: Are They Similar?

Our answer is “No.” These are two types of oil with completely different properties and functions, used for two separate systems in the car: the braking system and the power steering system. Let’s look at the differences between these fluids:

Two types of oil with completely different properties and functions (Photo: autovfix.com)

What is Power Steering Fluid?

Power steering fluid is a special auxiliary solution used to lubricate the hydraulic system (pump, valve) of the power steering. Power steering fluid helps the driver handle the steering wheel more easily, allowing them not to exert too much effort while still driving the vehicle accurately and smoothly. It is a petroleum-based fluid that acts as a pressure transfer fluid for the power steering and is primarily used for dynamic steering.

Power steering fluid must meet requirements such as not being compressible, not changing viscosity much when temperature changes, and not creating residue. During each maintenance session, the power steering oil should be checked and topped up if lacking.

What is Brake Fluid?

The main function of brake fluid is to absorb moisture present in the braking system. Brake fluids from lubricant manufacturers are all glycol or silicone-based and have appropriate viscosity, preventing corrosion of metals and materials in the braking system (rubber, plastic, cast iron, steel…), ensuring lubrication and a high load-bearing surface… Some important effects of your car’s brake fluid:

  • Improve the safety of the braking system.
  • Resists corrosion and oxidation and protects the vehicle’s braking system.
  • Offering good force transmission and good flexibility even at high temperatures and high humidity.
  • Ensure proper lubrication of the vehicle’s braking system, thereby enhancing the lifespan of the vehicle and the braking system.
  • Improve driver safety during emergency braking.

Unlike power steering fluid, brake fluid is not a good lubricant; this fluid is used for static brakes. It is a petroleum-based fluid that acts as a pressure transfer fluid for the power steering and is primarily used for dynamic steering.

So now you had the answer to the question: Are power steering fluid and brake fluid the same thing?

Can You Use Brake Fluid for Power Steering Fluid?

Can brake fluid be used as power steering fluid? Certainly not, these fluids are not meant to be mixed or used interchangeably. They are hydraulic fluids but they have different chemical compositions. The oils themselves also have their own parameters and viscosity grades; mixing them is very dangerous or will at least damage or reduce the vehicle’s lifespan. So are there consequences related to this mistake?

Brake fluid is much more abrasive and it is alcohol-based because a petroleum-based fluid would erode the rubber seals and hoses; which would cause a system failure. Using brake fluid in the power steering system can damage the seals and other components of the power steering system. This can lead to leaks, reduced steering performance, and potential safety risks.

What happens if you put brake fluid in the power steering (Photo: autochimps.com)

Whereas power steering fluid is petroleum-based and a power steering system (of the rack and pinion type) has many metal-on-metal contacts. In addition to being a pressure transfer fluid, it also functions as a lubricant. Brake fluid is not a good lubricant.

Therefore, it is appropriate to use only power steering fluid for the power steering system and brake oil for the braking system, as all automobiles offer the best performance. Although in some undesirable cases, where there are no other alternatives, brake fluid can be used as power steering fluid, it should only be a once-in-a-lifetime occurrence.

You should never use brake fluid as power steering fluid because this system requires a fluid with a high boiling point. However, you can replace power steering oil with brake fluid in some extreme situations, as both are hydraulic fluid.

What to Do If You Add Brake Fluid to the Power Steering System?

If you accidentally use brake fluid instead of power steering fluid, what should you do? It is important to know that using brake fluid in the power steering system is very dangerous. The first thing to remember is not to start your engine because as soon as you start the engine, the brake fluid flows into all the lines. What we recommend is to immediately flush all the fluid from the reservoir as soon as you notice you are using the wrong fluid.

This step would be easy if you still haven’t started your car; however, extracting or removing the fluid will be more difficult if your car’s engine has been started because by that time these fluids are already mixed. You need to open the cap and drain the entire reservoir as it is very likely the brake fluid is still there. Use a syringe or a turkey baster to drain the brake fluid from the container. Furthermore, you can disconnect the power steering return line from the pump on the primary side. Remember to disconnect the power steering pump return port that brings back all the fluid you put into another container. When the pump system is empty, you can reconnect the entire system and fill the reservoir with the correct fluid.

After that, turn your car’s steering wheel lock-to-lock two times or more; this will help remove all the air from the system.

In case you cannot flush the power steering fluid yourself, you should immediately contact a trusted mechanic. With their knowledge and the necessary tools, they can help you safely flush and drain your power steering system, change damaged parts if necessary, and add the appropriate fluid.

Can We Use Transmission Fluid for Power Steering?

This is also a common question we want to clarify on this topic. If you ask the manufacturer, they will tell you NO because these two types of oils have completely different functions and should be used for different purposes. But in reality, you can use transmission fluid to replace power steering fluid if necessary. If your car is made by Honda, you absolutely must not use transmission oil to replace power steering oil. The reason is that Honda power steering oil is thicker than ordinary power steering oil and is produced specifically for Honda vehicles.

You should note that using the wrong power steering fluid can lead to leaks, corrosion, damage to internal components, and even complete system failure. It is always best to be cautious and use the exact type of fluid specified for your car.

We hope all this information will be helpful to you in one way or another. The lesson we want to share in this article is that according to each system present in the car, you must choose a suitable fluid recommended by the manufacturer and it should not be used indiscriminately or mixed as they can lead to extremely serious consequences.

If you are unsure or cannot find the above information, a qualified mechanic or dealership representative can look up the exact fluid recommended for your specific car model and year. If you have any concerns, remember to leave your comments in our comment section below.

How to bypass the anti-theft system without a key and reprogram for new keys

Without keys, let’s bypass the immobilizer with the Hacking relay and reprogram it for new keys. Today’s article explains how to bypass an immobilizer system. This guide details a method for hacking and bypassing the ECU (Engine Control Unit) to program the immobilizer for new keys. This may be necessary if all your original keys have been lost or during an exchange of your ECUs; either scenario would require bypassing the immobilizer with a relay or programming new ones on each ECU, and that’s why I explain exactly how to bypass the immobilizer without a key and I’ve even covered how to bypass the immobilizer with a relay.

Generally, taking your car to a dealership would cost much more; in this tutorial, we are going to hack our ECU to clear its codes and put it into an automatic programming mode that automatically accepts new key configurations.

So, before we begin, let’s look at what bypassing the immobilizer means.

What is Immobilizer Bypass?

You know, a car immobilizer is a security agent for your vehicle. It is a chip in the ECU that prevents the car engine from starting unless you have the correct key program with the car. So, if someone breaks into your car, they cannot just hotwire it and drive away with the immobilizer functioning correctly.

Now, an immobilizer bypass is any method, technique, or procedure used to disable the functionality of the ECU’s immobilizer chips. Generally, this can be done by removing the immobilizer chips or by using an electronic component, a hardware or software element to bypass or disable the immobilizer in a vehicle and allow the car engine to start without using its key. These bypass modules are typically installed when installing remote starters, as these also need to start the car without the presence of physical keys.

But note that immobilizer bypass can also be used maliciously to start cars without authorization, thereby stealing them, and so I hope this article does not enable you to become a thief. Therefore, bypassing an immobilizer system without proper authorization or for illegal reasons can have serious legal consequences.

How to Bypass the Immobilizer and Program New Keys for Your Car?

how to bypass immobilizer without key,

To demonstrate, I will install a new ECU in my car and render my existing keys unusable.

So, before any attempt to modify your ECU, always disconnect its battery first; The ECU of most cars is usually located behind their glove compartment under the steering wheel; once located, open it and unplug the five electrical connectors at the back that connect to the ECU.

When you insert an unknown or any new key into the ignition, its security light does not go off because it does not match the ECU’s requirements for immobilizer with relay programming, and any attempt to start the car will result in the engine cranking but not starting.

Before going further, let’s briefly review how your car’s immobilizer system works.

How the Immobilizer System Works.

When you place the key in its ignition ring, an integrated coil captures an RFID signal and transmits it to a transponder key amplifier, which decodes it to pass it on to the ECU; The ECU has an EPROM chip that stores the key values; after matching, the car can start.

The setup involves an ignition ring equipped with a coil and a chipped key. Signals from this setup are transmitted to a transponder key amplifier, which in turn sends signals directly to the ECU for processing. Each key contains its own RFID chip containing RFID chips, which interact with each other when an electric current passes through them.

Newer vehicles are equipped with amplifiers that first direct signals to a transponder ECU which stores the keys before passing them to the main ECU for processing. This system was implemented because replacing ECUs can be expensive if keys are lost; therefore, using cheaper transponder ECUs allows for key replacement without breaking the bank. However, for these vehicles, key replacement involves performing a costly procedure. Most steps remain unchanged, with minor variations being that a key insertion must occur between each to properly program the keys.

How to Bypass Immobilizer Without Key, Bypass Immobilizer with Relay Hacking and Programming New Keys.

How to bypass immobilizer without key, bypass immobilizer with relay hacking and programming new keys.

How to bypass immobilizer,
  • After unscrewing and extracting the ECU from its mount in your car, the next step should be to open the ECU by unscrewing the screws used to hold things in place. Before that, you want to disconnect your battery.
  • Unscrewing will expose its printed circuit board, which we need to extract from its casing; an eight-pin chip (IC 900) must then be located so we can connect to our computer via this connection cable.
  • The wires to solder to connect our computers to the chips are a method used to connect directly to the chips. A chip clip could simplify programming; however, establishing direct contact was too difficult, which led me to use soldering wires instead.
  • After setting up my EPROM chip programming circuit, which involved plugging it directly into my computer’s serial port while being connected by 4.7 K ohm resistors and five-volt Zener diodes to its chip, I programmed it successfully.
  • Using an EEPROM reader, I retrieved the entire contents of a chip. Each key in its dump is represented by an 8-digit hexadecimal value repeated three times;
  • To prepare our ECU to accept new keys, it is necessary to erase all existing values from the key settings and assign zeros where applicable before writing this new configuration directly onto its chip and reinstalling it into its casing.
  • Now we can install our new ECU in the car with the accompanying dashboard to view the security light necessary for programming new keys. Programming involves inserting and removing each new key while monitoring its status; once completed successfully, the automatic programming light should come on to indicate when programming is finished.
how to bypass immobilizer without key,

Finally! Your immobilizer has been successfully modified to recognize the new keys if they were lost or if the ECU was changed.

And there you have it, folks! We’ve just covered the basics of how to bypass the immobilizer and have gone through the steps explaining exactly how to bypass the immobilizer without a key and have even covered bypassing the immobilizer with a relay.

Now, with the know-how on how to bypass the immobilizer without a key under your belt, you are ready for a smooth journey.

Common Power Steering Issue in Audi Q5 and How to Fix It Yourself

You are experiencing a malfunction with your Audi’s steering system and wondering if you can continue driving your 2016 Audi Q5s model to the 2009 Audi Q5s model? This article covers common power steering issues in the 2016 Audi Q5s, 2014 Audi Q5s, 2013 Audi Q5s, 2012 Audi Q5s, 2011 Audi Q5s to the 2009 Audi Q5s.

Can you continue driving an Audi Q5 with faulty power steering?

Although it is possible to still drive an “Audi Q5s with a faulty power steering system,” you really should not drive your Audi Q5 under such conditions. The reason is simple: your power steering is extremely important for steering and turning your car in the right direction safely. So, if it is not working properly, you might have difficulty steering and could completely lose control in case of an unexpected incident on the road while driving under such conditions. Moreover, imagine the accompanying whining or leaks. And believe me, you don’t want a power steering fluid leak to occur near your engine. Flames are the last thing you need in a car!

If you feel something is wrong while driving or hear unusual noises, pull over and call your mechanic. Driving with shaky power steering could not only be risky for you but could also lead to more expensive repair bills.

Here are some of the risks associated with driving an Audi Q5 with failing power steering:

  • Difficulty steering your vehicle, which makes it harder to avoid unexpected collisions and other dangerous situations on the road in time.
  • You could completely lose control of your car if the power steering system fails entirely, which can result in a serious accident or even death.
  • It could lead to a fire risk if the power steering fluid leaks onto the engine.
  • Continuing to drive an Audi Q5 with a faulty power steering system could damage other parts of your car and result in more costly repair expenses than you would wish.

Bottom line? If you have any doubt about your Audi Q5’s power steering, it’s always a good idea to go to a professional mechanic. Better safe than sorry!

Identifying an Audi Power Steering Issue or Problem for Audi Q5, A4, and S4

Loss of power steering feel is a commonly encountered issue by most drivers, especially when it comes to Audi Q5, A4, and S4 models. This can also apply to the 2016 Audi Q5s, 2014 Audi Q5s, 2013 Audi Q5s, 2012 Audi Q5s, 2011 Audi Q5s to the 2009 Audi Q5s.

So here it is: when you’re driving straight, problems usually appear when the steering wheel is in its original center position and everything is fine; then when you turn at a particular angle, the resistance increases significantly, then decreases to become difficult again later, resulting in binding sensations.

Common Power Steering Problem in Audi Q5s

An Audi Q5 power steering issue or problem is often the result of an intermediate or lower steering shaft connecting to the rack, with its U-joint at the base being exposed to the elements and eventually becoming compromised, leading to corrosion or wear over time.

But here are also other power steering issues I’ve observed with Audi Q5 models over the year:

  1. Power steering leak: When power steering fluid leaks due to cracks or loose connections in its lines, signs can include difficulty steering your car and an audible whine or squeal when turning the steering wheel.
  • Faulty power steering pump: If the power steering pump fails, it could lead to stiff steering that is often accompanied by an audible whine or hum.
  • Blown steering rack: Damage to the steering rack can have more severe consequences, leading to limited steering wheel response or even erratic turning of the car in one or both directions.
  • Electric power steering failure: Some Audi Q5 models are equipped with electric power steering systems. When there are electrical issues within these systems, a sudden loss of power steering assistance can occur, and a warning message will display on your driver information system if this happens.

Replacement can be a rather costly undertaking due to high labor costs; so it might be wise to do it yourself as the process should not be complex.

Power Steering Problem in Audi Q5s 2017 to Audi Q5s 2009

Power steering problem in Audi Q5s 2017, Audi Q5s 2016, Audi Q5s 2015, Audi Q5s 2014, Audi Q5s 2013, Audi Q5s 2012, Audi Q5s 2011, and for Power Steering Problem in Audi Q5s 2009

The common causes of power steering problems among Audi Q5 2017 to Audi Q5 2009 are as follows:

  • A leak in the power steering fluid line,
  • malfunction of the pump, rack, or control module
  • An electrical issue with the power steering system.


DIY Fixes for the Audi Q5s 2016 Power Steering Problem


1. Fixing a Leak in the Power Steering Fluid Line:

If you can identify where the leak is occurring, using a power steering fluid line repair kit, you might be able to perform the repairs yourself. However, if the issue is more significant or you don’t feel experienced enough to handle it yourself, it would probably be better to have your car repaired.

2. Power Steering Pump Failure:

To replace a faulty power steering pump, you will need to uninstall and reinstall both pumps – a complex task that may involve carefully following the instructions in your car’s repair manual.

3. Power Steering Rack Failure:

In order to replace a power steering rack, it will be necessary to disassemble the front wheels and suspension components from your car’s frame – this process must closely follow the guidelines in your vehicle’s repair manual to be successful.

4. Power Steering Control Module Failure:

In order to replace a power steering control module, you will first need to locate it and then extract it. Although this should be relatively straightforward, make sure to carefully follow all applicable instructions from your vehicle’s repair manual when performing this job.

5. Electrical Issues with the Power Steering System:

If you suspect there may be electrical issues with your car’s power steering system, you may want to reset the power steering control module by disconnecting the battery, and if the problem persists, take your car to a mechanic for proper diagnosis and repair to be the best course of action.

Power Steering Problem in the Audi Q5s 2014

The most common failure or issue with the 2014 Audi Q5s is the power steering pump problem, which can lead to power steering failure and render the steering wheel completely unusable.

To rectify or solve this power steering pump issue, you will need to replace the pump by purchasing another unit.

Audi Q5 Power Steering Recall

Audi issued a recall in 2012 due to frequently reported power steering issues affecting Audi Q5 models from 2009 to 2012. This recall included the replacement of defective power steering hoses that could leak and lead to a loss of steering ability. Therefore, if you own such an Audi model between 2009 and 2012, you should ensure that yours meets these criteria and have its power steering hose replaced if necessary.

Resetting Audi Dynamic Steering System Faults

If the “Audi Dynamic Steering System Fault” message appears on your dashboard, try following these steps to reset the dynamic steering system failure issue:

  • Start by turning off your car and removing the car key from the ignition.
  • Then wait about 30 seconds.
  • Now reinsert the key into the ignition switch, but do not start the car yet; Turn the steering wheel all the way to the left and then turn it to the right.
  • Now start your car’s engine, and the error message should disappear.

If the warning message persists, entrust your car to an experienced Audi mechanic who can assess and repair its systems.

Audi Steering Malfunction, Please Stop Vehicle on Dashboard

When an “Audi Steering Malfunction, Please Stop Vehicle” message appears on your dashboard, you should immediately park in a safe location and stop your car right away. This message signals a serious malfunction in the power steering system that makes driving dangerous; have your car towed immediately to a certified Audi mechanic so it can be properly diagnosed and repaired before continuing your journey.

How to Troubleshoot Power Steering Problems Yourself

https://youtube.com/watch?v=zY13vcVz6Ng%3Ffeature%3Doembed

Here are some DIY solutions for fixing power steering problems yourself:

  • Regularly check your power steering fluid level; if needed, add more fluid. Inspect for leaks; any detected should be repaired immediately or replaced entirely as soon as possible.
  • Regularly check your power steering belt – any slack or damage should be tightened or replaced as soon as possible. Also, inspect the pump; any noise from it or any leaks suggest that replacement may be necessary.
  • Check the power steering rack. If the rack is leaking or damaged, it may need to be replaced.

For your own safety and if you feel inexperienced in working on cars yourself, it would probably be better to entrust your Audi to an experienced technician.

For Your Own Safety

Additionally, the specific elements for each of the models are: for example, the power steering problem in the 2016 Audi Q5s mainly involves stiff steering due to cold weather that thickened the steering fluid and also reduced the fluid level, making driving in the early morning a bit difficult.

Power steering issues in the 2014 Audi Q5s often appeared as sudden losses of power steering, a nightmare for the driver. Meanwhile, those driving the 2011 model were sometimes greeted by an annoying whine, due to the 2011 Audi Q5s power steering problem. For those who owned the older 2009 model, complete steering failures were not uncommon, highlighting the power steering problem in the 2009 Audi Q5s.

But it wasn’t just about individual models; the brand had its share of setbacks. A broader Audi Q5 power steering recall was launched, signaling issues in several cars. A few drivers had to handle resetting the Audi dynamic steering system faults to clear electronic issues. And if you ever spot the “Audi Steering Malfunction Please Stop Vehicle” message, take it seriously. It’s not just a warning; it’s a plea for safety. Finally, the general Audi power steering failure reminds all Q5 owners: regular checks are not just good practice; they are essential both for the car’s health and for safety on the road.

BMW Airbag Light Reset With and Without Tools

Let’s be realistic, seeing an airbag light illuminate on your BMW dashboard can be unsettling, and realizing there’s an issue with its airbag system that requires resetting the BMW airbag light can make you feel anxious moments. Yet, when this problem or minor error manifests and doesn’t disappear on its own after being resolved, you can do certain things when we think about how to bypass the airbag light.

So, in this article, we’ll go through a simple, hassle-free guide on how to reset a BMW’s airbag light with a scanner and “how to reset the BMW airbag light without a tool.” No expensive equipment, complicated jargon, or unnecessary mechanic visits are needed here as we’ll cover different types of BMW model airbag reset approaches, such as How to reset the airbag light on a BMW with a scanner, resetting the BMW e36 airbag light without a tool, BMW e46 airbag light reset, BMW x3 e83 airbag light reset, and BWM airbag light and seatbelt light on.

So, whichever BMW vehicle graces your garage, this article will address it.

Understanding the BMW Airbag Light and Reset

You’re cruising on the highway, your favorite song is playing on the radio, and everything seems perfect. Then suddenly, your BMW’s airbag light flashes on the dashboard. A moment of panic follows. Is it serious? Do you need to pull over? This light isn’t like the others. It’s a sign that the faithful airbag system, your lifeline in an accident, might have a problem.

“BMW Airbag Light Reset”

This is where the “BMW airbag light reset” steps might be necessary, and it’s not just about turning off an annoying light that spoils your dashboard’s mood, far from it. Resetting the airbag light is your first step in determining if your airbag system simply has a hiccup or if there’s a serious issue that requires your attention.

It might be a small bug, like a loose wire triggering the light, or perhaps a bigger beast, like a faulty airbag. The initial “BMW airbag light reset” should only concern the diagnostic steps that allow you to clear the warning and check if it returns. If the light stays off, you can breathe easy knowing it’s just a minor issue, nothing serious, but if the airbag light comes back on, it’s a sign: your BMW airbag sensor, wires, computer, or even the airbag itself may have been damaged or defective. So, in this situation, you’ll need to troubleshoot by identifying the cause of the problem. And the good news? You don’t need to be a mechanic to handle this. With our guide, you’ll learn to handle all of this by yourself; no sophisticated tools required.

How to Reset the Airbag Light on a BMW with a Scanner

So we first look at a simple yet quick solution using a Bluetooth scanner (see scanner here) before proceeding with this operation without any tools. These steps will be paired with your Android or iPhone and will reset your airbag sensor light in no time.

  • Step 1: First, ensure your Bluetooth scanner is ready. It’s an essential tool for this job.
  • Step 2: Connect the Bluetooth scanner to your car’s OBD2 port. This port is usually located under the dashboard, near the driver’s seat. With the scanner connected, go ahead and start your car’s engine.
  • Step 3: Now, turn your attention to the smartphone app connected to the Bluetooth scanner. Open the app and navigate to the “Diagnostics” section. And now, in the diagnostic interface, I want you to select “BMW”. You’d be surprised how straightforward this process is with the scanner.
  • Step 4: You might need to wait a bit while the scanner communicates with your vehicle’s systems. This can vary slightly depending on the Bluetooth device you’re using. Then, select “Diagnose System” located at the bottom, followed by “All Systems”.
  • Step 5: From there, go to the “Body Module” category located at the bottom left.
  • Step 6: Select “SRS Airbag” and move to “Read Fault Codes”. You should see an option for “Clear Code”. Hit it without hesitation.
  • Step 7: Confirm your selection by clicking “Yes” when asked if you want to clear all fault codes. Rest assured, it’s a definitive step towards eliminating that darn light.
  • Step 9: Press “OK” to continue. You should notice your airbag light blinking while you do this. Hold steady for about 10 seconds.
  • Step 10: At this point, turn off your engine. This action will reset your airbag light once and for all.

And there you go! Your airbag light should now disappear, leaving only other unrelated lights, like the brake light, seatbelt light, or perhaps the washer fluid light (if your reservoir is leaking like mine). That’s how you reset the airbag light on a BMW with a scanner. Let’s see how to reset without a scanner or tool or how to bypass the airbag light.

How to Reset BMW Airbag Light Without Tool

Don’t panic when your BMW’s airbag light starts flashing. It might seem intimidating, but you can reset it without any sophisticated tools with our BMW airbag light reset guide. Just follow these simple steps, and everything will be sorted out in no time. Remember, you’re in control.

Step 1: Safety First, Always!

Before we even begin, let’s make sure you’re safe. If you’re in an automatic, put your BMW in Park. If using a manual, put it in neutral. Engage the parking brake and cut the engine. And remove the key from the ignition for safety.

Step 2: Ignition Animations

Now that we’re all safe, take your key and insert it into the ignition now and this time, turn it to the “On” position, but hold it mid-way before the car’s engines start, and do not start the engine. You should look for all the dashboard lights to animate without the engine running, including the one we’re focusing on in this article, I mean, the airbag light.

Step 3: Keep an Eye on the Airbag Light

Basically, here, you want to pay attention to what the BMW airbag light does. Normally, if it’s just a minor issue in the airbag system, the airbag light will stay on for a few seconds, about 7 seconds, and then turn off while the car is in this mode; otherwise, it will remain on.

Step 4: Turn Off Ignition if the Light Goes Off

So if the airbag light turns off in this mode, you need to quickly turn the ignition off completely, and I’d like you to wait a few seconds before moving to the next step.

Step 5: Repeat the Process

Now, to reset the BMW airbag light, we’re going to repeat steps 2 to 4 three times in total. It sounds weird, but this repetition works magic on your airbag’s electronic control unit and will help reset your BWM’s ECU.

Step 6: Turn It On

It’s time to bring your BMW to life. Start the car as you normally would.

Step 7: The Moment of Truth

Alright, you’ve made it this far. Now, take a look at that dashboard. If the airbag light stays off, it’s done! You’ve cracked the code on “How to reset the BMW airbag light without a tool”. So give yourself a pat on the back!

But what if that light comes back on and decides to stay? Well, that’s your BMW telling you it’s not a minor issue. In that case, it’s best to call in a professional. Sure, resetting the airbag light at home is a good thing, but if the problem is serious, it’s better to let a mechanic handle it.

Dive into Specific BMW Models and Their Airbag Lights

Now that we have the basics, let’s get into the specifics. Because let’s face it, every BMW has its own personality. Each model can bring its own twist to the reset process. So let’s take a quick tour of a few fan favorites, shall we?

How to Reset BMW E90 Airbag Light Without Tool”

Alright, E90 owners, this one’s for you. Got an airbag light more stubborn than a mule? No stress. You can follow the same reset steps we talked about. But here’s the catch: keep an eye on the “Seat Belt” light. If it lights up like a Christmas tree along with your airbag light, then we’re looking at a seat belt sensor that might seem a bit off. And that, my friend, requires a mechanic’s touch.

Dealing with BMW E36 Airbag Light Reset Without Tool.

BMW E36 owners, we’re back. You’ve got that déjà vu “BMW E36 Airbag Light Reset Without Tool”? I get you. Sometimes the airbag light can be like that, always on. If you’ve encountered a minor issue and it’s making a comeback, it might be a sign of a bigger problem. Give the reset another shot, but if that light still shines, it’s time to call a mechanic.

“BMW E46 Airbag Light Reset Without Tool

bmw e46 airbag light on

Next up is the BMW E46. To reset this airbag light for this model, you can follow our general steps to see if it works. But here’s a little heads-up, the E46 is known for occasional seat sensor issues, and so, if your BMW E46 airbag and seatbelt lights are both on at the same time, the problem might require more than just a reset; in that case, you need to consult a mechanic.

And if the step above didn’t work, try this BMW e46 airbag light reset without tool

how to turn off bmw e46 airbag light without tool

  • Step 1: Let’s start from the beginning. You notice that stubborn airbag light on my dashboard staying on? That’s our target for today. Just a warning, don’t worry about the brake wear sensor; we’ll get to that another time.
BMW E46 Airbag Light Reset
  • Step 2: This is where the magic begins. Open your glove box, which is on the passenger side of your BWM dashboard, and in the glove box, look above the right side for the fuse box. You need to lower the fuse box to reveal the card inside.
BMW E46 Airbag Light Reset Fuse
  • Step 3: After a careful inspection of the card, you’ll notice number 11 which is marked “airbag”. Please do not remove number 11.
BMW E46 Airbag Light Reset
  • Step 4: Instead, you need to locate fuse number 10, which is the one associated with the instrument cluster. If you can’t see it clearly, try lowering the fuse box a bit more, and you’ll find the numbers just at the top.
BMW E46 Airbag Light Reset
  • Step 5: Once you’ve identified fuse number 10, remove it gently. And there you go! The airbag light should now turn off. It works wonders and, from my experience, the airbag itself would still deploy in case of an accident if you used this method despite this slight trick.

“BMW X3 E83 Airbag Light Reset” – Step by Step

And finally, let’s look at the BMW X3 E83 reset step, I’ll just say it’s the same airbag light reset steps above but, a different car. And don’t forget, if this light refuses to go off even after a reset, the root cause isn’t solved. And just a quick note: if your airbag light and the “Brake” light decide to come on at the same time, your braking system might be the culprit. If that happens, get professional help as soon as possible.

These guides on “how to reset BMW airbag light without a tool” are only useful for minor issues and not for serious problems. So, if your BMW’s airbag light keeps triggering the alarm, listen to it and get a mechanical check.

On or BMW Airbag Light On After Battery Change

Wondering why my BMW airbag light comes on after replacing the battery?” Well, if you ever found yourself replacing your BMW’s battery only to encounter an airbag light after changing the battery?