How to grease CV joints without removing them

Is it possible to grease your car’s CV joint without removing the boots? And if it is possible, what are the steps to follow to grease CV joints without removing the boots? In this article, I will address all the following questions:

How to add grease to a CV joint? Can you over-grease a CV joint?

What kills CV joints? Can you use white lithium grease on CV joints? Why do CV joints need special greases? What is lithium complex grease for CV joints? Is white lithium grease better than silicone grease? And finally, where should you not use lithium grease?

Overview of the CV Joint.

The CV joint of your vehicle serves as a crucial interaction center between its transmission and the drive wheels of your vehicle, which is an indispensable link. Each drive wheel has its own pair of CV joints: the outer CV joints provide strong connections between the wheel and the axle, while the inner joints establish reliable communications between the transmission and the axle, ensuring that your speed remains unchanged even in response to unexpected potholes!

An elegant rubber boot is normally used to cover the CV joints, thus helping to provide additional protection to these critical joints.

Note that CV joints involve metal-on-metal contact, and it will be useful to keep things smooth by greasing them regularly, which is essential for maintaining their groove smoothly and reducing friction and wear.

What is a CV joint and its function?

By definition, a CV joint, which is the abbreviated form of constant velocity joint, is what ensures a constant speed for your vehicle. They connect the drive wheels to the transmissions, with two such joints on each axle: an inner joint connecting the transmission to the axle, while another connects the axle and the wheel.

CV joints play an essential role in maintaining constant wheel speeds when you encounter uneven terrain or obstacles such as potholes, by ensuring the linkage between two rotating shafts so that they work together rather than against each other due to poor lubrication.

How to grease a CV joint without removing them

So, steps to grease the CV joints without detaching or removing the bolt.

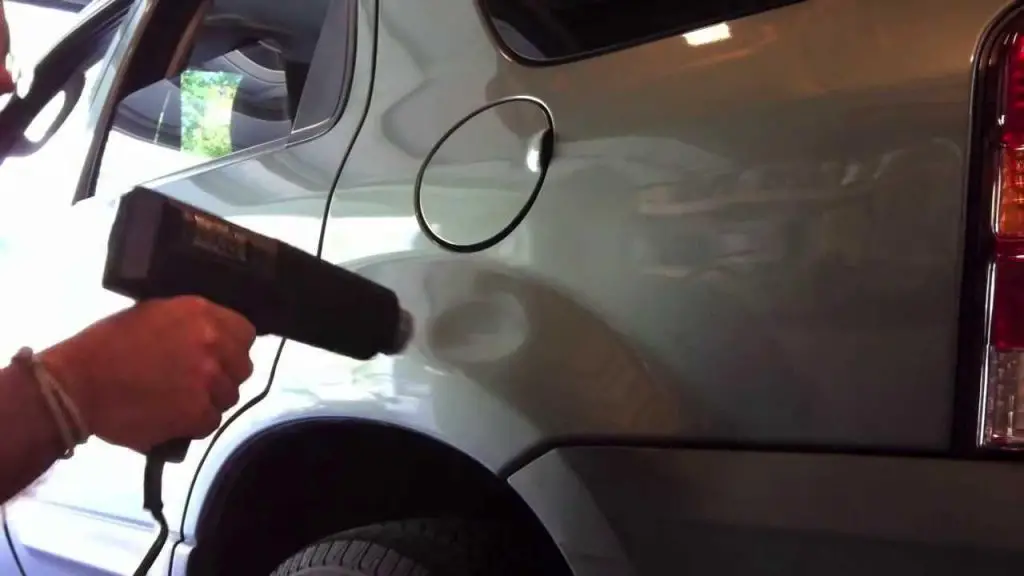
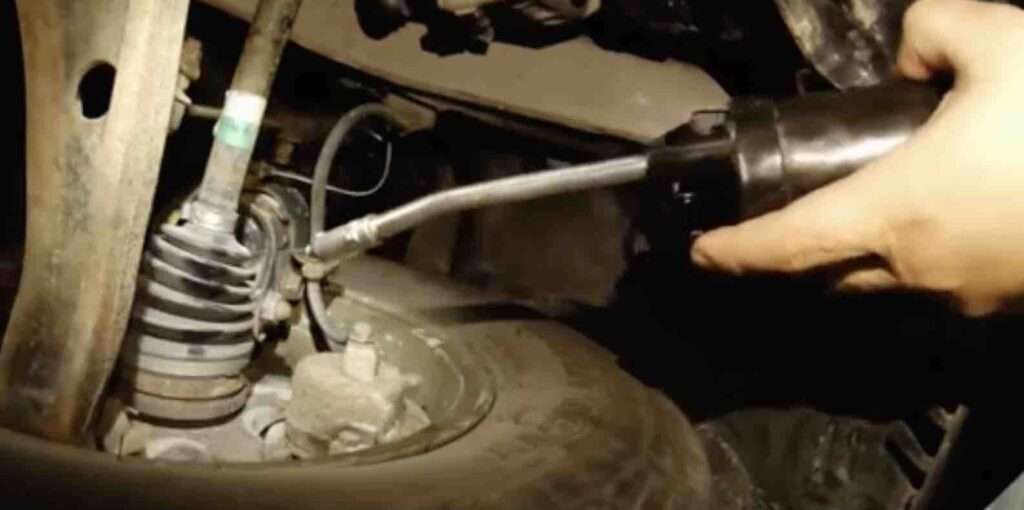
To add grease to a CV joint without disassembling its boot, you generally need to use a grease needle or a needle adapter that pierces and drills a hole in its housing.

First and foremost, you need to buy a grease needle, and you can buy a grease needle at almost any auto parts store at relatively affordable prices, designed to attach directly to standard grease guns. or you can get it here

Steps to grease a CV joint without removing the boot

How to Grease CV Joints without Removing Them

Your safety must always come first, which means lifting the vehicle sufficiently on two jacks to leave enough space underneath for you to pass without any obstruction.

Now here are the steps to grease a CV joint

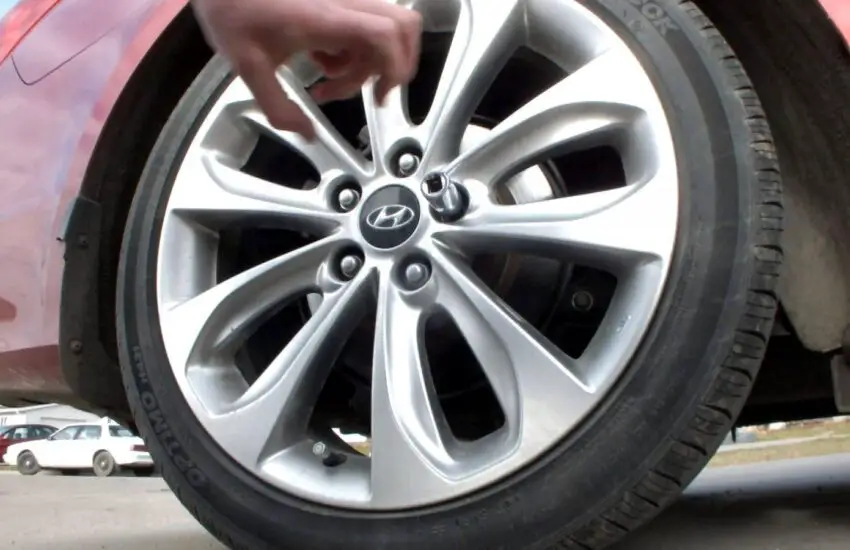
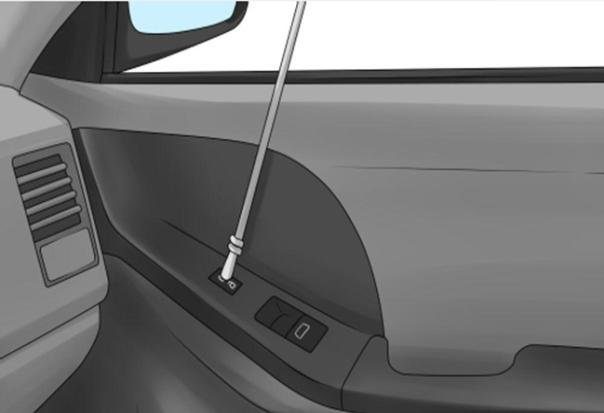
  1. Start by unbolting and removing the tire, leaving only its hub intact.
  • Next, you need to move the steering wheel away from the steering system, which is outward, to reveal your car’s CV joint.
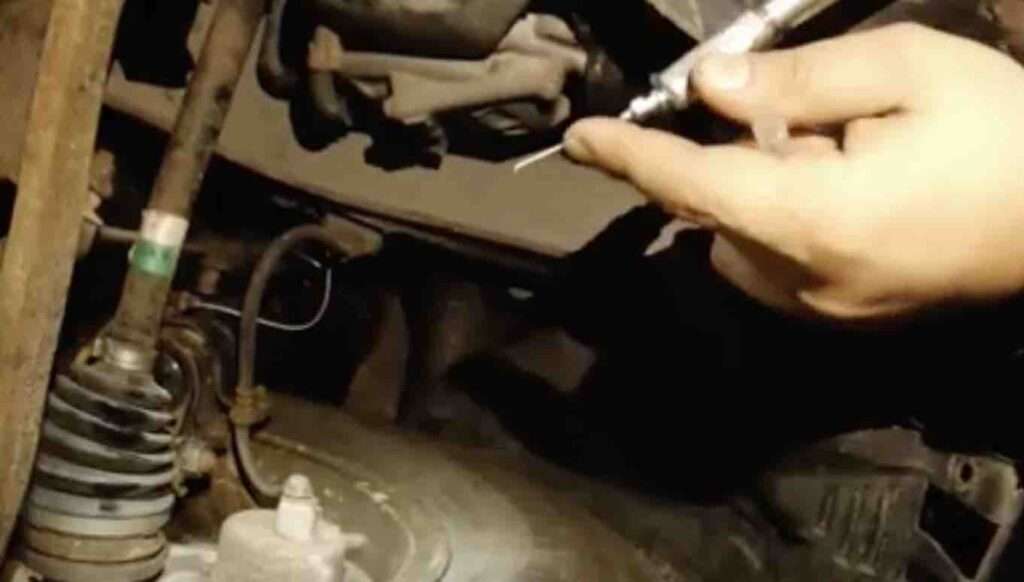
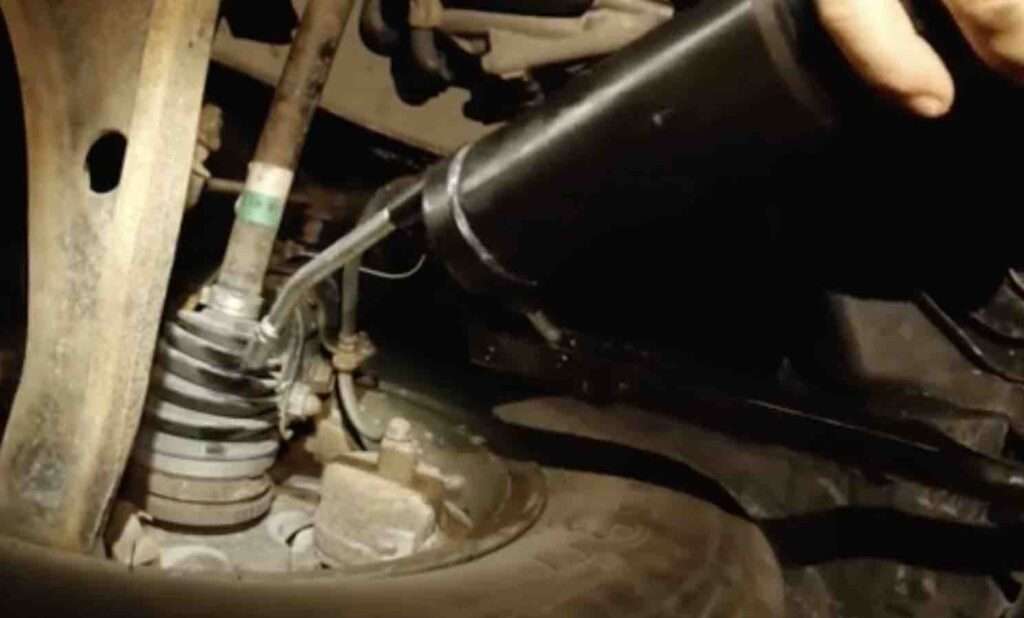
  • Now, you need to get a grease gun with a pointed or narrow tip. Drill a starting hole in the CV joint using the grease gun before injecting grease into the joint.
How to Grease CV Joints without Removing Them2
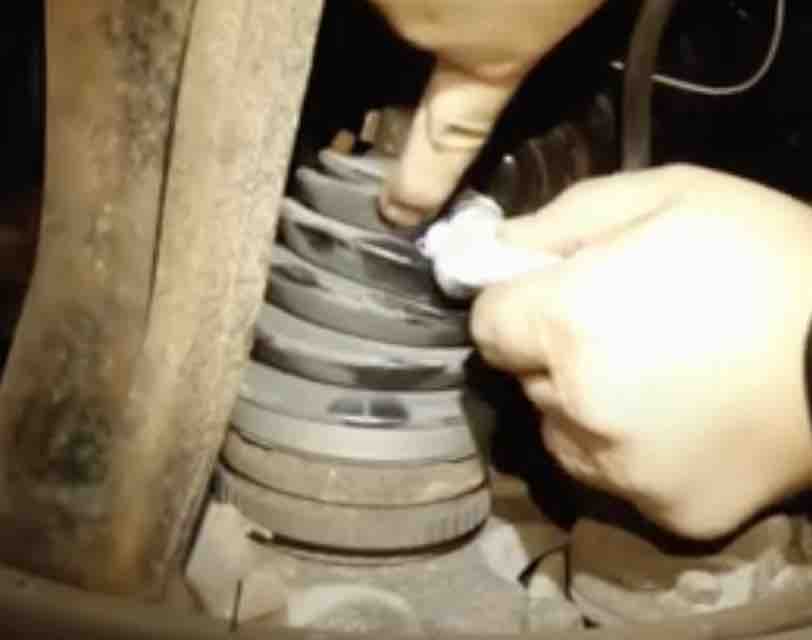
  • Locate and seal all holes caused by the grease gun with super glue after applying the appropriate amount of grease to the CV joint.
  • Reassemble all remaining parts of the vehicle’s wheel and clean them thoroughly with soapy water.
How to Grease CV Joints without Removing Them2
  • Repeat steps 2 to 6 with all remaining drive wheels.
  • Reattach the tires and lower the jacks.

So, basically, that’s how you grease a CV joint without removing the boot.

And now, what about CV joints depleted of grease? What happens if CV joints lack grease?

What happens if CV joints lack grease?

Without enough grease in their CV joints, the rotating shafts start rubbing against each other while accelerating wear of all kinds and noise levels. You may notice increasing wear on tires and brake pads, leading to the dislodging of moving wheels, making the car unusable and requiring either towing services or immediate on-site repair.

However, before the CV joints reach this critical phase, CV joints usually emit warning signals, such as an audible click every time you turn your steering wheel.

How to Grease CV Joints without Removing Them2

Cover your battery terminals with dielectric grease:

Applying dielectric grease is an ideal way to combat corrosion on battery terminals. Dielectric grease does not conduct electricity and remains pliable over an extended period, and its incredibly high melting point ensures that even small amounts applied will last over time.

Placing dielectric grease on battery terminals: Before covering the battery terminals with dielectric grease, make sure their wires are connected. Dielectric grease acts as a vapor barrier between the dielectric grease and your terminals and corrosion. Petroleum jelly can be an acceptable substitute. But most types of grease also protect against corrosion.

Replacing silicone grease with dielectric grease: Yes, silicone grease is an excellent alternative for battery terminals due to its extremely high melting point. It remains stable under high temperatures or summer heat without running – its temperature range extends from -40°F to 400°F!

Ordinary grease as an alternative to dielectric? Even though conventional grease like petroleum jelly can work very well as an alternative dielectric material, its low melting point requires frequent applications as a preventive measure.

Dielectric grease and silicone grease, what is the difference?

Dielectric and silicone greases vary considerably in several aspects. Formally speaking, their forms differ considerably; dielectric grease is translucent to seal electrical conductors while protecting them from dirt, sand, dust, debris, etc. In contrast, silicone grease, produced by mixing thickeners with silicone oils, offers ideal water resistance for protecting rubber parts from dirt.

Dielectric grease tends to be more expensive than silicone grease due to its wide range of applications. Although both are non-conductive, dielectric remains flexible while silicone eventually hardens.

Silicone grease is significantly thicker than dielectric grease; both varieties have high melting points.


FAQ

Can you over-grease a CV joint?

Yes, over-greasing CV joints can increase pressure, thus causing the CV joint boot to rupture and release grease into the joint from external sources; allowing contaminants and dirt particles to enter and damage it further.

What grease is best for CV joints?

Greases enriched with molybdenum disulfide (moly) tend to be the preferred choice when selecting the best grease for CV joints due to their superior resistance to high temperatures and extreme pressure, making them essential components in CV joint environments.

What kills CV joints?

What causes damage to CV joints? CV joints can be compromised by a lack of lubrication due to torn starting parts, by contamination from dirt and debris, or by a lack of regular maintenance, ultimately leading to wear and possible joint failure.

Can you use white lithium grease on CV joints?

White lithium grease is generally not recommended as an ideal lubricant for CV joints due to its inefficient performance in high-pressure environments; Moly-enriched grease specifically designed to withstand CV joint environments is usually best.

Why do CV joints need special greases?

CV joints require special grease because they operate under high pressure and high temperature. The special grease, such as moly-enriched grease, is designed to withstand these extreme conditions, ensuring proper lubrication and extending the life of the CV joints.


What is lithium complex grease for CV joints?

Lithium complex grease is a high-quality, versatile grease known for its tolerance to high temperatures and excellent water resistance. Although it can be used for various applications, it is generally not the first choice for CV joints.

Is white lithium grease better than silicone grease?

White lithium grease and silicone grease serve different purposes. Lithium grease is excellent for metal-on-metal applications due to its high performance. In contrast, silicone grease is ideal for plastic and rubber components as it does not cause swelling or deformation.

Where should you not use lithium grease?

Avoid using lithium grease on components that come into contact with rubber and certain plastics, as it could cause them to swell or deform. Always refer to the manufacturer’s instructions for specific applications.

To lubricate a CV joint, first lift your vehicle using a jack, remove its tire, turn outward and easily access its joint, make a hole using the pointed tool in the rubber boot, then inject grease through it directly into the joint, then seal the hole with super glue.

Understanding the Functions and Importance of Bidirectional Analysis Tools

What are bi-directional scan tools? And how do they apply vehicle system control code reading and board diagnosis? Modern vehicles are equipped with many electronic systems that allow diagnosing your vehicle’s issues or problems well beyond simply listening to engine noises and inspecting visible damage with an ordinary scanner. However, with bi-directional scan tools, an advanced device that will help learn and communicate directly with the vehicle’s systems in order to quickly diagnose issues. In this article, we will introduce these scanners and explain their functions and importance in automotive diagnostics.

What is a Bi-directional System?

What is a bi-directional system, you might ask? Well, a bi-directional system is about communication in two directions. A bi-directional scanner system is somewhat like a walkie-talkie, meaning you can send data one way, then receive data the other way. The difference with a walkie-talkie is that you cannot do both at the same time. Now let’s see what a bi-directional scanner is.

What are Bi-directional Scan Tools?

Bi-directional scan tools are automotive diagnostic devices capable of both receiving data from an automotive system and sending control commands back to a vehicle’s onboard systems, thus aiding in more accurate problem reading or diagnosis than traditional code readers. Bi-directional scanner tools offer technicians more interaction for testing/diagnostic purposes.

Functions of Bi-directional Scan Tools

Bi-directional scan tools offer multiple functions beyond simply reading and clearing codes, including performing active tests, operating actuators, resetting modules and initializing new ones, adjusting vehicle parameters as needed, as well as reprogramming certain aspects of the vehicle’s software.

For example, automotive repair technicians can use bi-directional scanner tools to turn a car’s fuel pump on or off, adjust the throttle position, or perform real-time diagnostic tests on specific parts. The real-time interaction between the systems used on vehicles and the technicians’ use of these tools allows technicians to easily identify problems, verify repairs, and perform thorough diagnostic procedures.

Here are the main features and the breakdown of the roles and importance of bi-directional scanner tools in the automotive industry.

· Reading and Clearing Codes

In vehicle diagnostics, these bi-directional tools make an invaluable difference because they listen and respond in both directions between the ECUs. Their bi-directional dialogue makes this device truly unique in its kind!

Imagine you are trying to decipher what is wrong with your vehicle when the car’s “check engine” light comes on: any scanner can read the error codes generated by its ECU; and end of story, but with a bi-directional scan tool, however, not only can you read these error codes, but you can also clear them once a solution has been identified – pretty smart indeed?

· Live Data Reading

One of the unique features offered by a bi-directional scan tool is its ability to monitor live data on your vehicle’s systems. Imagine driving and your car behaves erratically from time to time, but your bi-directional scanner tool comes to the rescue by monitoring live data from various sensors in real time – helping to detect those tricky and intermittent problems by observing how it behaves under various circumstances.

· Active Tests

One of the biggest features of these tools is their ability to perform active tests. This means they can ask an ECU to control specific systems or parts for testing purposes, such as turning fuel pumps on and off or checking oxygen sensors! Yes, they really can!

· Module Reset/Programming

Advanced bi-directional devices offer much more than just repair capabilities; they also have the power to reset or initialize systems once repairs are done and to program or code new parts, making replacing sensors or control units simpler than ever.

Vehicle Parameter Adjustments

Bi-directional scan tools also allow you to easily customize certain settings of your car if you know how to use them. Changing when doors automatically lock, increasing or decreasing alarm sensitivity, or adjusting idle settings are among the many features offered by these tools. These are features that a classic scanner will not offer you.

Another Additional Function Offered by Bi-directional Scan Tools is:

Directional scanners or code readers are equipped with special features designed for specific car brands or models, ranging from resetting oil lights to assisting with brake bleeding to registering new batteries.

Simply put, with a bi-directional device, you get an in-depth view of the diagnostic view or health status of your vehicle. This type of tool acts as access to any automotive system, making it indispensable in today’s automotive repair and maintenance toolboxes.

Importance of Bi-directional Scan Tools in Vehicle Diagnostics

Bi-directional scan tools have become essential tools in today’s electronic vehicles, offering technicians a deeper understanding of the vehicle’s condition. Moreover, these scan tools also give technicians direct control to test various vehicle systems directly.

Bi-directional scan tools offer advanced features that not only enhance diagnostics or board diagnostics but also the accuracy of repairs, thereby reducing repeated issues and making it an essential tool for modern auto repair shops, and even DIY car owners can better understand and diagnose their problems well.

Types of Bi-directional Scan Tools

Bi-directional devices come in different shapes and sizes, from handheld units to larger, more robust systems. Your choice will depend on factors such as the scope of use, the types of vehicles regularly serviced, and budget considerations.

Popular types include comprehensive diagnostic systems, Bluetooth or Wi-Fi compatible devices, and manufacturer-specific tools. Each of them has its own advantages and disadvantages.

Different Types of Bi-directional Scan Tools:

· Professional Grade Scan Tools:

Imagine a supercharged tool capable of chatting with all your car’s systems, not just the brain. Professional grade scan tools are the ultimate toolbox for automotive technicians. They can do everything from looking up error codes to programming new parts, pressing the reset button. Plus, they can speak the language of many cars, makes and models, whether from your local fleet or from foreign countries. The Autel Maxisys Elite diagnostic is in this category you might consider. And for more options, check out this article featuring the 11 Best Professional Bi-directional Scanner Tools here.

· DIY Grade Scan Tools:

So, you love tinkering with your car in your garage as a DIYer? The BlueDriver Bluetooth Pro OBDII Scan Tool is for iPhone and Android and is a very popular choice among enthusiasts and DIY car owners. DIY grade scan tools like this are just what you need, as they have the right balance of being economical and having enough features to satisfy your inner mechanical desire. They may not connect to as many systems as professional systems, but they still have enough bi-directional control for a range of functions.

· Brand-Specific Scan Tools:

These types of bi-directional scanner tools are specifically designed to work with one brand or a small group of brands. It’s not my favorite, because what happens when you switch brands or if you own cars from different unsupported brands? However, I must say they often offer deeper and more precise control over the vehicle’s systems, and they give you in-depth and precise control over those specific systems, but remember their conversation lines won’t work on all cars.

· Compact Scan Tools:

If you are looking for a pocket-sized, simple-to-use, and straightforward bi-directional directional tool, then the Ancel BD310 2-in-1 OBD2 Diagnostic Scanner is a compact scanner but a versatile compact scan tool that covers you. They may not have all the features, but they remain simple and nonetheless allow you to have a bi-directional conversation with your car.

· Wireless Scan Tools:

The FIXD Professional OBD2 Bluetooth Scan Tool is made for you if you want a low-end portable tool that connects your car and your phone or tablet so you can perform your scanning on your mobile. The main advantage of these wireless code readers is that they are affordable and user-friendly. So, basically, they use Bluetooth or WiFi for a flexible and portable connection. Some even allow you to control things bi-directionally.

· Heavy-Duty Scan Tools:

If trucks and buses are your thing, then the Launch X431 V+ Diagnostic Tool should be your best bet. These types of heavy-duty tools are designed to take on rugged big trucks and are built for the hard knocks of larger vehicle environments, and they come with unique special features specific to those heavy systems.

And there you have it, all these tools can communicate with your car in two ways, but each has its own vibe, catering to your needs, your technical know-how, your budget, and the type of vehicles you work on. It’s about choosing the right tool for your job.

Conclusion

As vehicles continue to evolve and become more technologically advanced, their diagnostic tools or code readers must also evolve. And that’s where bi-directional scan tools represent a groundbreaking advancement in automotive board diagnostics that allow auto mechanics, technicians, and even DIYers to interact directly with their car’s systems to perform active tests that provide unprecedented insight into general vehicle problems and its overall health status. Understanding the purpose and benefits of the bi-directional scanner tool is imperative for anyone involved in the auto repair industry.

Sudden and unintended acceleration: causes and solutions

Acceleration works like fire – a cruel master and a good servant. Acceleration can be joyful, but when unwanted, it can turn into a nightmare. Sudden unintended acceleration is the deadliest flaw in the history of automation.

This occurs when the car’s electronics cause the throttle to open fully. It is difficult for the driver to return the car to idle if it remains in gear.

Furthermore, it significantly limits the brakes’ ability to regain control of the vehicle, leaving the driver at the mercy of a fast and uncontrollable car.

In today’s world, millions of people are injured or die due to a vehicle problem involving sudden acceleration.

What causes unintended acceleration?

The main reason for sudden unintended acceleration during braking is a malfunction in the electronic system controlling the vehicle’s powertrain.

Cases involving throttle control mechanisms have reached a higher level since the introduction of throttle-by-wire systems in modern vehicles.

There is no doubt that advancements in the automotive field have made cars safer, but modern electronics increase their complexity. However, the risks of malfunction remain high, and sudden accelerations remain a major problem to manage.

When does sudden unintended acceleration occur?

Sudden unintended acceleration can cause a car breakdown (Photo source: Depositphotos)

Nothing is fixed: sudden acceleration can occur at any time. Due to certain design changes in vehicle electronics, most accidents occur when the vehicle is in motion.

Shifting gears, disengaging cruise control, braking, etc., can cause sudden accelerations. These common conditions cause a disruption in the electrical current, leading to a dangerous malfunction.

Solutions for sudden unintended acceleration

Controlling the car during sudden unintended acceleration requires certain knowledge – it may not be possible for a novice. Here are some ways to deal with it:

1. Use the brakes

Although it’s a natural reaction, it is imperative to use the emergency brake to brake as hard as possible. Do not continue to pump the pedal, but keep it stable.

The brakes will need more force than usual, so gather more strength than you think you can. The car will not slow down at a normal rate, but brakes are more powerful than the car’s engine, so eventually, the brakes will win.

2. Shift to neutral

This is the best option in an emergency. If the throttle is wide open, the engine may trigger a high alarm. Do not worry about the engine revving, as most electronic limiters are equipped with automatic protection that controls disturbances from sudden changes.

3. Turn off the engine

Ways to stop sudden unintended acceleration (Photo: web.sonoma.edu)

By now, your car should be under control. But for added safety, turn off the engine. Some modern cars are equipped with push-button starters, which you may need to hold for 2 to 3 seconds to stop the engine.

When doing this, be cautious as the pressure on the brake pedal may increase slightly. To maintain safety, pull the car off the road and call for help.

FAQ on Sudden Unintended Acceleration (SUA)

  1. How can I prevent sudden unintended acceleration?

To reduce the risk of SUA, ensure regular vehicle maintenance, promptly address any warning lights or unusual behavior in your vehicle, and stay informed about recalls or safety notices issued by the manufacturer.

  1. What should I do if my vehicle experiences SUA?

If your vehicle suddenly accelerates uncontrollably, prioritize safety. Shift to neutral, brake firmly, and steer to a safe location.

Turn off the engine only if you can do so safely. Immediately seek a professional inspection and report the incident to the manufacturer and relevant authorities.

  1. Are there recalls related to SUA?

Manufacturers occasionally issue recalls related to sudden unintended acceleration issues. Stay informed about recalls by regularly checking the National Highway Traffic Safety Administration (NHTSA) website or contacting your vehicle’s manufacturer.

  1. Can sudden unintended acceleration be caused by driver error?

Yes, in some cases, these incidents can be attributed to driver error, such as pedal misapplication, where the driver mistakenly presses the accelerator instead of the brake pedal. Proper driver training and attentiveness are essential to avoid such errors.

  1. Are there lawsuits or legal actions related to SUA?

There have been lawsuits and legal actions involving SUA incidents against automobile manufacturers.

These cases often seek compensation for damages related to accidents allegedly caused by SUA. Consult legal professionals for specific information on ongoing cases.

  1. How do manufacturers respond to sudden unintended acceleration issues?

Manufacturers continuously work to improve vehicle safety and address these concerns through enhanced technology, design, and rigorous testing. They may also issue recalls and implement software updates or modifications if necessary.

  1. Is there technology to prevent SUA?

Modern vehicles are equipped with safety features such as brake override systems and electronic throttle control that can help mitigate SUA incidents.

However, no technology can guarantee absolute prevention, so driver awareness and maintenance remain crucial.

  1. Where can I report a suspected sudden unintended acceleration incident?

If you experience or suspect a sudden unintended acceleration incident, report it to the vehicle manufacturer, the National Highway Traffic Safety Administration (NHTSA), and your local authorities. This helps ensure proper investigation and potential resolution of the issue.

Overall, to handle a sudden unintended acceleration situation, do not panic and stay calm. To deal with the dangerous situation, gather professional knowledge and learn some additional tips. After all, safety comes first!

How to Remove Rounded Wheel Nuts Like a Pro

So, how many of you car owners believe in DIY? We certainly do. And that’s why our maintenance section offers you such great DIY blogs. And this time, we’re going to explain how to remove rounded wheel nuts like a pro.

Often, when you try to remove these wheel nuts, the wrench slips and rounds off the edges of the bolts. So it becomes extremely difficult to remove that wheel nut when you want to change it. And since you might want to prepare your car for the upcoming winter months, you can learn more about wheel nuts.

Here, we explain how to remove a rounded wheel nut.

The Practical Tutorial on How to Remove Rounded Wheel Nuts

You need to pay attention to wheel nuts because they keep the wheel attached to the threaded wheel studs. The wheel studs, in turn, connect it to the car’s axle.

Before we start explaining how to proceed, let’s see what we need.

Required Tools

  • 1/2″ drive breaker bar $15-20
  • 1″ diameter iron pipe, 36″ length $10-15
  • Twist socket set for nut/bolt extractor $20-100
  • 3 lb hammer $5-10
  • WD-40 or alternative penetrating oil $5
  • Replacement wheel nut $3
  • Total cost: $58-153 if you have nothing and need to buy everything

With your other emergency supplies stored in your car, I highly recommend keeping these items in the car as well, in case you need to repair your tires when you’re away from home.

Here’s how to remove rounded wheel nuts in 4 simple steps.

Step 1. Breaking the Rust

First, you apply targeted and generous amounts of WD-40 to the base of the lug nut to allow this penetrating oil to be drawn into the bolt threads by capillary action. If it’s very rusty, hit it a few times with the hammer to break up some of the rust before applying the WD-40 oil. Give the penetrating oils time to work, up to a day if you have enough time.

Step 2. Installing the Socket

Simply because the wheel nut is rounded, it can be difficult to install the socket onto the nut. So, take a socket, place its mouth over the wheel nut, and tap it on the back with the hammer. Make sure not to hit too hard. This could cause a bad socket lock. Keep tapping until it fits snugly.

Step 3. Working with the Breaker Bar

How to properly remove rounded wheel nuts (Photo: BMAC VAGS @ Youtube)

Now take the breaker bar and install it on the back of the socket. Start hitting the handle of the breaker bar with the hammer towards the left (counterclockwise).

When you do this several times, you’ll feel like you’re about to break the wheel nut.

Step 4. Breaking the Lug Nut

With persistent pressure to the right, the wheel nut will come loose with a snap. Now turn the socket a bit clockwise and counterclockwise and remove it. It will come off easily. But that’s not where the tutorial on how to remove a rounded wheel nut ends.

Step 5. Removing the Nut from the Socket

How to remove rounded wheel nuts for safe driving (Photo: How to do it on Youtube)

Once the nut is removed, you still have a problem: the wheel nut will still be stuck in the socket.

Screw the nut back on loosely with the socket. Then, gently tap the socket from top to bottom with the hammer. The socket will come out while the nut will be right there, slightly screwed on. You can twist it with your hand and remove it.

Alternative Strategies

Although our professional method usually works, some problems with removing rounded wheel nuts can arise and will require different strategies.

1. Stripped Stud

The lug nut spins freely but it doesn’t come off the stud. You drill the lug nut or the stud. Select a carbide drill bit that matches the size of your stud. You apply strong pressure while drilling at low speed to drill the center of the lug nut until it’s no longer attached to the stud. However, to drill the stud, you’ll need to replace it, which can be quite tricky for some vehicles.

2. Preventing the Problem

Those careless mechanics can easily overtighten wheel nuts with their impact wrenches. You should consider talking with your mechanic to ensure they apply the correct torque before starting work on your car. Remember that different cars have different lug nut tightening requirements. Cars require 60 to 100 foot-pounds of torque. Larger vehicles may require up to 300 foot-pounds of torque. You should consult your owner’s manual for the correct torque requirements.

Conclusion

Removing rounded wheel nuts can be a challenging task, but with the right approach and tools, it’s possible to overcome this common problem. It’s important to be patient and avoid applying excessive force, as this could further damage the wheel nuts or the wheel. There are several methods you can try to apply. Each method has its advantages and limitations, and the appropriate approach may vary depending on the specific situation.

I hope all this information is helpful to you. This is by far the simplest DIY tutorial on how to remove rounded wheel nuts like a pro. Let us know if you like it in the comment area below:

How to Increase Power in a 4-Cylinder Car

Most vehicles you see today are 4-cylinder engines. They are small, compact, and easily fit into almost any engine compartment. Interestingly, they are lighter, with one cylinder head, fewer moving parts, and one exhaust manifold compared to multiple cylinder banks.

4-cylinder engines are among the most versatile vehicles in this modern era. However, you might be unsatisfied with the power level produced by your car. Since modern technology has come with advancements in automotive engineering, car manufacturers have established ways to improve your vehicle.

There are several ways to extract more power from your vehicle’s 4-cylinder engine. Performing this activity would void your warranty. Its success depends on your skills, budget, and the number of options.

So far, writing this guide will provide answers to these specific questions ranging from: how to make a 4-cylinder faster than a V8, how to supercharge a 4-cylinder engine, turbocharger for a 4-cylinder engine, how much horsepower a turbo adds to a 4-cylinder, can you swap a 4-cylinder for a V8, and more.

Be patient; let’s get started right away!

How to Make a 4-Cylinder Faster Than a V8?

To make your 4-cylinder faster than a V8 engine, you need to turbocharge or supercharge it. You would do this through forced induction since V8 engines are larger than inline 4-cylinders. To produce greater power, it’s necessary to move the vehicle at a significant speed.

It would be vital to increase the power of 4-cylinder engines to make them faster and give the V8 engine a run for its money. That said, by removing vast chunks from inside its engine and replacing them with turbocharging or supercharging kits.

How to Increase Power in a 4-Cylinder Car?

The procedures to increase power in a 4-cylinder car are as follows:

1. Maintain Your Vehicle Properly

Most of the time, vehicle owners must pay attention to proper maintenance procedures. However, the best way to increase power is to follow the instructions recommended by your manufacturer. Such as oil changes, wheel alignment, brake checks, and a few others.

2. Install a Cold Air Intake

Remove the intake tube and airbox surrounding the 4-cylinder’s filter. Then, install a new intake designed to increase the air passing into your engine. Increasing the airflow into your engine would improve its mileage. However, most aftermarket intakes produce more noise than stock ones.

3. Improve Your Vehicle’s Exhaust Flow

Replace parts of your exhaust flow with larger diameter pipes. These larger pipes will reduce backpressure that would limit the speed at which exhaust gases could be expelled from the engine. You can replace the piping directly behind the catalytic converter (cat-back). You can also remove all the piping that leads to your exhaust manifold.

4. Reprogram Your Vehicle’s Computer

The computer controls important functions of most modern vehicles and their operation. Computer programs help balance efficiency, fuel consumption, output power, emissions, and reliability. Reprogramming would be vital to increase power. Get the right programming company for your vehicle online, or you can visit your dealer.

5. Replace Ignition Components

For your engine to function correctly, it needs fuel, air, and a spark to ignite the mixture. It would be helpful to replace worn spark plug wires and old spark plugs to increase the ignition of the air-fuel mixture.

6. Install a New Throttle Body

This is where your intake meets the engine when air enters the intake manifold. Thus, installing a larger diameter throttle body would allow more air to flow over the engine. As a result, this leads to an increase in engine power. For example, replacing a 65 mm throttle body with a 75 mm throttle body would increase airflow. Although replacing your throttle bodies would also require a new gasket between the body and the intake manifold.

7. Upgrade to More Aggressive Camshafts

Camshafts or cams help open and close the intake and exhaust valves. This also allows air and fuel to enter the engine and exhaust gases out at the right time. Remember that your engine’s stock camshafts are concerned with fuel economy, emissions, power, and efficiency. It would be appropriate to replace them with more specialized ones to increase engine power.

Note: Ensure all components to be installed are specific to your vehicle.

The Most Powerful Non-Turbo 4-Cylinder?

The highest power for a non-turbocharged engine is 340 hp. The 4-cylinder engine with this figure is the BAC Mono R 2.4 L inline 4-cylinder with 243 lb-ft. It achieves 0 to 100 km/h in 2.5 seconds, a top speed of 170 km/h, and the engine is mid-rear engine.

How Much Horsepower Does a Cold Air Intake Add to a 4-Cylinder?

The power level of a 4-cylinder depends on the potential power. The exact amount varies, but a car would have up to a 5% power increase with an excellent cold intake. However, a 4-cylinder engine would have marginal power due to its potential power. For example, a 200 hp 4-cylinder engine would gain about 10 hp when installing a cold air intake.

According to reports, the modding community had agreed that the cold air intake would be insignificant for naturally smaller engines (4-cylinders).

Maximum Power for a 4-Cylinder

The maximum power of a 4-cylinder engine is about 415 hp. The maximum power value comes from the German luxury brand, Mercedes-AMG CLA45 S, M139 2.0 L inline 4-cylinder. This vehicle is the most powerful 4-cylinder engine in the world with 369 lb-ft of torque. It also accelerated to 60 mph in 4 seconds when manufacturing the CLAS45 S.

How to Supercharge a 4-Cylinder Engine?

Supercharging a 4-cylinder engine is possible and can be achieved with forced induction. Even though car manufacturers prefer to supercharge larger engines, the result of a 4-cylinder would also be worth it. Supercharging forces compressed air into your engine, which is belt-driven. Supercharging is more efficient than turbocharging for vehicle owners who appreciate power at lower RPMs.

Here are the steps to supercharge your 4-cylinder:

  • Maintain your vehicle using your manufacturer’s guide.
  • Upgrade your exhaust system using larger diameter exhaust pipes.
  • Replace your ignition components.
  • Replace associated fuel modifications.
  • Use a supercharger kit such as a bracket and a larger serpentine belt to improve the supercharger pulley support.
  • Use a dry/wet nitrous oxide kit. This kit contains more oxygen than air; injecting nitrous into your 4-cylinder engine would be possible. On the other hand, the wet nitrous kit injects a mixture of fuel and nitrous into your cylinder. The essence of the wet type is to create more power, more safely than the dry kit.
  • Tune your vehicle professionally because you have installed the nitrous oxide kit and force-induced it. Doing this would support the power increase.

Turbocharger for 4-Cylinder Engine

A 4-cylinder engine consists of lines of each cylinder accordingly, forming a straight line. This gives it the reason why the 4-cylinder is also called an inline 4.

Introducing a turbocharger for a 4-cylinder engine would give it a displacement of less than 3 liters. Thus, the 4-cylinder becomes different since it is turbocharged.

Therefore, returning the exhaust gases into the cylinder would create a giant explosion when the pistons pump inside the cylinders. After turbocharging your 4-cylinder, the result will be more power and significant horsepower than some larger engines, like V8s.

Getting the right turbocharger for your 4-cylinder would be essential.

How Much Horsepower Does a Turbo Add to a 4-Cylinder?

Significantly, a turbocharger can add about 30 to 40% or 70 to 150 hp to a 4-cylinder engine. This power range is generally the same as what would be added to the diesel engine. So far, the turbocharger improves more power on a 4-cylinder than what the cold air intake adds.

Can You Swap a 4-Cylinder for a V8?

Yes, you can swap a 4-cylinder for a V8. To do this, you will need to weld new engine mounts while notching the metal and reinforcing areas. It depends if the 4-cylinder engine compartment would fit a V8 engine, which is only possible for vehicles produced in the last 25 years.

However, Caroll Shelby swapped a Ford V8 into an Alpine Sunbeam. As a result, he produced an incredibly controlled and very fast Sunbeam Tiger skate.

How to Increase Power in a Naturally Aspirated Engine?

A naturally aspirated engine is an atmospheric engine. It is not a turbocharged or supercharged engine.

Here are the steps to increase power in a naturally aspirated engine:

· Remove Restrictions in the Cylinder Head

Remove the primary restriction found in the cylinder head. The process must be performed by a professional.

· Add a Larger Diameter Throttle Body

Since air is an essential component that affects the overall combustion process, allowing more air would not only increase power but affect multiple elements of the naturally aspirated engine’s performance. Adding a larger throttle body will provide more air at a higher flow rate to increase power.

· Make Your Vehicle More Aerodynamic

Improving the aerodynamics, shape, and design of your vehicle would make a huge difference. You can make your vehicle aerodynamic and reduce weight to avoid feeling sluggish.

· Install a High-Performance Exhaust

Installing a cat-back exhaust will allow exhaust gases to leave the engine and exit the muffler much faster. It’s best to leave it to a professional if you get a kit for your exhaust.

· Switch to a High-Performance Camshaft

Choosing the appropriate camshaft will help you achieve better results at the manifold or exhaust. So, install a new camshaft to increase your vehicle’s power. Remember that your car may idle roughly.

· Install a New Water Injection Kit

Suppose you notice that your vehicle’s power has dropped for a while. Installing a water injection kit will help restore the previous level and maintain the naturally aspirated engine. This will also ensure that you get your vehicle back on track.

· Reprogramming

Changing the vehicle’s programs in terms of timing would be helpful. This will also modify the air-fuel mixture and necessary settings. When it comes to a naturally aspirated engine, you might get a minor difference in reprogramming.

Note: Please try to perform other vital services such as oil changes, fuel system cleaning, and using appropriate fuel.

Conclusion

Finally, there is no doubt that everything is possible today in the automotive world. Increasing the power of your naturally aspirated engine is more complex than it seems. The most significant improvement is to supercharge or turbocharge your vehicle with vital kits. Apart from that, any added component is marginal in its performance.

However, I have detailed the steps for you to increase your 4-cylinder’s power to a higher horsepower. Be sure to use the services of a professional during such a conversion. Feel free to share this guide with others!

Diagnosis, symptoms, and preventive measures of a blown head gasket

Do you have a blown head gasket? Discover the causes of blown head gaskets, how to repair a blown head gasket, and whether you can drive with a blown head gasket. We will also look at why a blown head gasket ruins an engine and how long can you drive your car with a blown head gasket?

A car’s head gasket plays an essential role in the proper functioning of a car’s engine, and if your car’s head gasket is blown, it can cause very serious damage to the car and even lead to major repairs.

What does blowing a head gasket mean?

A head gasket is a mechanical seal sandwiched between the surfaces of the engine block and the cylinder heads. The main purpose of the head gasket is to help contain the combustion process so you can have a functioning engine since it is part of the combustion chamber. Secondly, the head gasket provides a physical extension of the fluid passages from the head to the block.

Being so close to the combustion process, the head gasket must be strong. Most contemporary gaskets are made from steel, composite materials with copper used in high-performance applications. Head gasket sets are quite affordable despite the importance of this part. Removing the cylinder head can be very labor-intensive, hence the high cost of replacing a head gasket.

What causes head gaskets to blow?

Usually, the head gasket forms a kind of seal between the engine block and the cylinder head. The head gasket must seal both the high-pressure and exceptionally hot combustion gases and the engine coolant whose temperature can vary significantly. It is normal for head gaskets to develop leaks over time due to the wide temperature range and a relatively large surface area. Head gaskets can blow regardless of your vehicle model or the type of head gasket used.

The head gasket seals the coolant passage from the atmosphere and the combustion chamber, meaning you cannot see much of the head gasket on a vehicle with an installed engine. Symptoms of blown head gaskets can be difficult to diagnose because much of the gasket cannot be seen without disassembling the engine. A simple visual inspection will not prove a leak at the head gasket, so it is essential to know the other symptoms so you can perfectly identify a head gasket problem.

Symptoms of a blown head gasket

  • External coolant leak from under the exhaust manifold
  • Emission of white smoke from the exhaust pipe
  • Engine overheating
  • Bubbles in the radiator or bubbles in the coolant overflow tank
  • Weak cooling system
  • Milky white oil
  • Fouled spark plugs

Let’s now look at the symptoms one by one.

External head gasket leak

An external head gasket leak could cause coolant to leak from under the intake or exhaust manifold. This can only occur when the engine is fully warmed up. You might be able to identify the leak as a head gasket leak if there are no other cooling passages or pipes near the head gasket. But this may require you to add UV dye to the coolant and then observe if there are other cooling passages nearby. You can carefully locate the head gaskets with a UV light to spot the leak.

White smoke from the exhaust

In most cases, head gasket leaks are internal to the engine, allowing coolant to flow into the combustion chamber on each intake stroke. When this happens, the coolant burns with the combustion process and appears as white smoke emitted from the exhaust. White smoke may excessively come out of the exhaust when this occurs.

Engine overheating

It is normal for your engine to overheat after longer drives if your head gasket is blown. This is due to the lack of coolant because your engine is consuming it. Engine overheating can cause many problems, the major issue being the expansion of metal components beyond what they were designed for, which can cause cracks and distortions. This can cause irreversible damage to seals and gaskets.

Bubbles in the radiator

A leak from an internal head gasket allows exhaust gases to enter the coolant, in addition to allowing coolant to enter the combustion chamber. This can result in bubbles forming in the radiator or coolant reservoir. The coolant may appear to be boiling even when it is cold. Bubbles form when exhaust gases are forced into the cooling system during the combustion process.

Weak cooling system integrity

A leak in your head gasket, pressurizing your cooling system, and inspecting for pressure loss can prove that your head gasket is blown. Yet, this is not a completely convincing test because there could be other leaks you are unaware of.

White or milky oil

The leaking coolant seeps into your combustion chamber, causing it to flow past your piston rings into your oil. Oil and water can mix over time, giving the oil a milky white appearance. You can check this on your dipstick and around your engine’s oil cap. The mixture of water in your oil will reduce the oil’s effectiveness in lubricating your car. A lack of adequate lubrication will lead to wear on your cylinder walls and crankshaft and camshaft bearings.

Fouled spark plug

Burning coolant in your combustion chamber will leave tiny white deposits on your spark plug, usually around the ground strap and electrode. A fouled spark plug may not be a conclusive symptom of a blown head gasket, as other issues can cause these white deposits.

How to prevent head gasket failure

Head gasket failure can be avoided in several ways:

  • Keep combustion chamber pressures as low as possible. For turbocharged or supercharged vehicles, ensure your boost level is set to the factory setting.
  • Make sure your engine has no pre-ignition due to carbon buildup.
  • Maintain a low engine RPM to reduce stress and heat on your head gasket and avoid revving your engine at high RPM.
  • For cars with a manual transmission, avoid downshifting to slow the car and match the RPM to reduce head gasket pressure.
  • If you are rebuilding an engine, reduce the risk of a blown head gasket in the future by using properly lubricated head studs and tightening them according to the proper sequence to the correct torque setting.

What is the cost to repair a blown head gasket

The cost to repair a blown head gasket can vary significantly from one vehicle to another. Cost factors include:

  • Damage to the head or block
  • Number of cylinder banks
  • Overhead cam engines VS pushrod engines
  • Other replaced components

It is mainly the labor cost that makes head gasket repair expensive. The cost can therefore vary depending on the complexity of the job. A “V” style engine has 2 cylinder heads, so the repair cost will be high because the gasket of both heads will need to be replaced. Furthermore, an engine with overhead camshafts adds the complexity of removing the timing belt or chain, thus making the job more complicated. For a pushrod engine, the repair may not be too expensive since it only requires removing the rocker arms and pushrods. Machine work can add a lot of expense to a head gasket job, so it is essential to know the extent of the damage to the cylinder head or block to calculate the cost of repairing your head gasket.

Additionally, you should note that other parts may need to be replaced when repairing a head gasket, such as other gaskets, seals, parts, or water pump.

Avoid driving with a blown head gasket as it could damage the engine.

Does a blown head gasket ruin an engine?

Yes. A blown head gasket can damage an engine. Ignoring the symptoms of a blown head gasket can lead to problems such as a coolant leak. This could damage the catalytic converter. It can cause leaks in the engine oil, erosion of lubrication, which can damage the engine.

So, can a car still run with a blown head gasket? That’s the next area we look at?

Can you drive with a blown head gasket?

No. It is not advisable to drive with a blown head gasket, as it can foul the spark plugs and make your engine inefficient due to the deposits left by burning coolant. Coolant and combustion gas leaks can lead to high temperature gradients causing erosion of the leak area and possible cracks. The hot gases and cold coolant passing through the gasket hole can erode the metal cylinder head or even the engine block. This can make the cost of repair quite high.

How long can you drive your car with a blown head gasket?

It depends if there is coolant in the oil or if the oil looks milky. Gray smoke coming out of the exhaust pipe at startup may mean that coolant is leaking into the cylinders. Coolant burning in the cylinder can lead to long-term destruction of the rings and other parts. However, if the damage hasn’t lasted too long, you can get a Bar’s leak head gasket repair and pour it into the coolant tank. Be sure to follow the instructions. This should allow you to use it for a year or more depending on the condition of the gasket. You can also get a gasket kit, which is usually not expensive. It’s difficult to remove, but not impossible, or you may need to take the head to a machine shop if it is damaged.

How to start a car with a blown head gasket?

Watch this video to see some actions to take if you are trying to start your car with a blown head gasket.

Conclusion

Head gasket failure can be prevented by avoiding overheating your engine. Check the radiator and coolant overflow tanks whenever you check your oil level. Add coolant if necessary and immediately check for any mysterious fluid loss. Check radiator hoses for cracks or fraying and replace them at the first sign of damage.

Also check for any fluid leaks under your vehicle and any strange smoke. Note that the symptoms of a blown head gasket vary from vehicle to vehicle depending on the engine and the specific way the gasket is failing. Note that the gasket may still fail despite all your efforts; you should not expect it to last forever due to its construction and the environment.

Can Worn Tires Cause the Traction Control Light to Illuminate

Worn tires are one of the most common causes of the anti-skid warning light coming on. Indeed, when tires are worn, they have less grip on the road, which can cause the wheels to skid.

When this happens, the anti-skid system kicks in and attempts to correct the problem. However, if the tires are too worn, they may not be able to do so effectively and the warning light will illuminate.

Anti-skid is an important safety feature in modern cars. It helps prevent wheels from skidding on wet or icy roads and can also help improve traction when driving on loose surfaces such as sand or gravel.

There are two main types of traction control systems: electronic and mechanical. Electronic systems use sensors to monitor the speed of each wheel and apply the brakes automatically if one starts spinning too fast. Mechanical systems use a limited-slip differential device, which allows some wheels to skid while others remain locked.

Both types of systems have their advantages and disadvantages. Electronic systems are generally more effective at preventing wheel skid, but they can be less reliable in off-road conditions where there may be a lot of dust or mud around the sensors. Mechanical systems are more likely to perform well in these conditions, but they can sometimes cause problems when cornering on dry roads, as they may cause excessive braking of the inner wheel.

Can Worn Tires Cause the Anti-Skid Warning Light to Come On?

Yes. There are several reasons why your anti-skid warning light may come on, but one of the most common is tire wear. When your tires become too bald, they cannot grip the road properly, which can trigger your anti-skid system.

This is because the system is designed to prevent you from skidding on slippery roads, so it activates when it detects that your tires do not have sufficient tread.

Does Low Brake Fluid Level Affect Anti-Skid?

One thing you don’t want to skimp on is brake fluid. A low brake fluid level can affect many systems in your car, including the anti-skid system. The anti-skid system prevents your car from skidding on wet or icy roads. If the brake fluid level is low, it can cause the system to malfunction and put you in danger.

You can take some steps to prevent this from happening. First, make sure to regularly check your brake fluid level and top it up if necessary.

If you notice changes in how your car handles slippery roads, take it to a mechanic immediately so they can check the anti-skid system. Following these simple tips can help ensure your safety on the road this winter.

What Are Two Things That Affect Traction and That You Can Control?

Traction is the force between two surfaces that allows one surface to move relative to the other. Traction can be affected by many factors, but there are two main ones you can control: tire pressure and tread depth.

Tire pressure impacts traction because it determines how much your tires contact the ground. The more contact your tires have, the more grip they will have on the road and the better your traction will be.

However, too high pressure can cause your tires to slide on wet or icy roads, so it’s important to find a balance.

Tread depth also affects traction, as it determines your tires’ ability to grip slippery surfaces. Deeper treads provide better grip than shallow treads, but they also wear out faster. This means you need to find a balance between having enough tread for good traction and not wearing out your tires too quickly.

How Do I Know If My Anti-Skid Is Broken?

There are a few things you can look for if you think your anti-skid might be broken.

Check if there is a warning light illuminated on your dashboard. If so, there is likely a problem with the system.

Another thing to check is unusual tire wear. If your tires are wearing unevenly or faster than usual, it could be a sign of a problem with the anti-skid system.

You might also notice that your car feels like it’s sliding or skidding more than usual when driving in slippery conditions; this could indicate that the anti-skid is not working properly.

Finally, listen for strange noises coming from under the hood; this could be a sign of a problem with one of the system’s components. If you notice any of these things, it’s best to take your car to a mechanic.

If your anti-skid is broken, it’s important to get it fixed as soon as possible. Otherwise, you could end up in a serious accident. Driving without anti-skid can be extremely dangerous, especially in slippery conditions.

How Long Does It Take to Repair Anti-Skid?

There is no definitive answer to this question, as the time needed to repair anti-skid can vary depending on the severity of the problem, the make and model of the vehicle. However, it generally takes a mechanic no more than a few hours to diagnose and repair anti-skid issues.

Tips

If you are experiencing problems with your anti-skid system, you should consult your owner’s manual for troubleshooting advice. If that doesn’t resolve the issue, you will need to take your car to a mechanic or dealership for more in-depth diagnosis and repairs. Be prepared to spend time and money on repairing your anti-skid system, but it will be worth it in the end!

Conclusion

There are several potential reasons why worn tires can cause the anti-skid warning light to come on in a vehicle. One possibility is that the tire tread is too low and doesn’t provide enough grip, which would trigger the warning light as an alert!

Another possibility is that there is a problem with the tire pressure sensor or another part of the system that monitors the condition of the tires. In any case, it’s important to have the issue checked by a mechanic so they can determine the exact cause and fix it accordingly.

How to Quickly Remove Dents from a Car at Home

Accidents are an unavoidable part of driving a vehicle. Even the most careful driver can have a bad day. However, minor damages can represent a financial burden if you have to take the car to a body shop every time. There are many ways to fix a dent on a car yourself at home, which will save a lot of money.

Dented Cars: How Did It Happen?

When they encounter dents on a car, most car owners immediately think of taking the car to a repair center. However, this condition can be completely corrected at home with small, shallow dents.

Car dents are likely to occur for many reasons such as collisions and falling foreign objects. For small, shallow dents, from 1 to 3 cm deep, with a not too large dented surface, drivers can fix them at home with simple solutions, but must be careful.

Whether it’s an objective or subjective factor, the car body will have a few slight dents which will lead to a loss of aesthetics.

You can completely fix it yourself at home with simple items or take it to a garage with professional methods. However, depending on each specific vehicle, body type, curvature, bumper or tire material… different treatments will need to be applied.

6 DIY Car Dent Repairs You Could Apply

With basic knowledge of solving and repairing minor car problems and a few tools, you can apply these five ways to fix a dent in a car:

1. Repair with a Plunger

This method will work for large, shallow dents on a flat surface such as the hood or door. Use a dent removal plunger for best results. Moisten its suction surface with a little water then press it onto the dent. Pull backward and repeat the process from different angles if the dent is large.

2. Use Dry Ice

This is an effective method if the dent is medium-sized. Dry ice (also known as smoke ice) is solid carbon dioxide used in food preservation and in medical pharmaceuticals. Few people know that this type of compound can effectively help repair car dents. First, the car owner should circle the dented area for more precise operation. After that, place a piece of dry ice with tongs on the area and do not keep it for more than a minute. Remove it and the dent is likely to pop out and be level with the surface. You may need to try several times. Remember to wear thick gloves and safety glasses, as touching them with bare skin would cause injuries similar to a burn.

3. Repair Dents from Behind

It is particularly useful for small depressions that would otherwise be difficult to repair with other methods. It is necessary to apply pressure to the back of the damaged area from inside the vehicle. Use your hands for larger dents, but those with a smaller diameter may need a hammer. Wrap a thick cloth around the head of a wooden mallet and tap the tapped spot with it.

4. Pull with Glue Dent Pullers

This is another way to easily remove dents. Choose a pull tab that matches or is larger than the size of the dent. Apply glue to the tab and quickly place it in the middle of the damaged area. Wait a moment for the glue to set. Now, attach a puller tool to the tab and turn the knob until the dent pops out. You will need to wax the vehicle after applying this system as the glue may create a small mess on the car body.

5. Repair Dents with a Hair Dryer

This will work if you want to fix a bulging spot. Use the hair dryer to apply heat to the raised area from five to seven inches away. Do this for two minutes and then check the flexibility of the metal. If it is malleable, take a can of compressed air and spray it on this area. Continue until the bulge returns to its original shape. Wipe the spot with a piece of soft cloth. Using safety glasses and gloves is necessary during this process to ensure your safety.

6. Repair Dents with Boiling Water

This method seems quite strange but is an effective way to repair car dents in the following positions: front bumper, rear bumper, and underbody, especially plastic parts… The car owner poured boiling water to expand the dent, then put their hand inside and gently pushed the dent so that it returns to its original shape. For dents in places that cannot be touched, after pouring boiling water, the driver immediately pours ice water to create a sudden temperature change to help restore the dent.

All the tools and ingredients needed for these easy dent removal processes will be available in your local retail stores. Any DIY dent repair requires caution and a bit of skill, as it will cost a lot of money if you damage the paint during the process.

Reasons why shifting from 1st to 2nd gear is difficult

The mechanism of an automatic transmission is complicated and it takes time, money, and expertise to fix it when there is a problem with this component. One of these complex problems is the difficult shift of the automatic transmission from 1st to 2nd. Even experienced mechanics struggle to find the exact reasons for this issue.

Difficult Gear Shift from 1st to 2nd: The Reasons

The gear shifting problem can persist even after replacing the fuel filter and pressure control solenoids. Sometimes it occurs when the engine is cold and you try to start it immediately without warming it up first.

Why does the automatic transmission behave this way? Here are some reasons and solutions for a difficult gear shift from 1st to 2nd:

Dirty Transmission Fluid

The fluid gets dirty over time, and when this happens, it causes many problems. Difficult gear shifts are among them. If the color is dark brown or burnt, changing it will likely solve this issue.

Dirty transmission fluid. (Photo source: procare review)

There is a recommended schedule in the owner’s manual for changing the fluid.

However, if the fluid changes color too often, the transmission is wearing out faster than normal. It could be a faulty bearing or clutch, so check these components if you need to change the fluid frequently.

Low Fluid Level

The fluid can drop below the normal level due to a leak somewhere in the pan gasket or in the input and output shaft seals.

Replacing these seals can be expensive because of their location inside the transmission. Instead, use a transmission sealant to repair the bent or shrunken seal(s).

This is a simple and less expensive solution that remains in the system until the next fluid change.

Faulty Components

Another reason why the transmission shifts from 1st to 2nd is that some components are faulty. It could be a cracked O-ring or a broken spring on the piston. Replacing them is the simplest way to get the gearbox back in order.

To replace these components, you need to remove the pan and the gasket. There is a cap on the right side of the transmission.

Detach the cap by removing the bolts attached to it. Then, remove the valve body. If the black transmission seal is already damaged or broken, you need to replace it.

Automatic transmission O-ring. (Photo source: YouTube)

The cap has a piston and a spring. Check their condition and the piston seal for any damage. If yes, replace them. If they are fine, proceed and inspect the valve’s second spring.

Clean or change this spring and reassemble all the components to put the transmission back together.

If you haven’t already changed the fluid and replaced the filter, do so while changing these parts. Otherwise, just keep the filter in a bag while you change the O-ring or spring, then reinstall it.

FAQ on Difficult Gear Shifting

  1. What role does transmission fluid play in smooth shifting?

Transmission fluid lubricates and cools the moving parts inside the transmission while also providing hydraulic pressure to engage the gears. Low or degraded transmission fluid can lead to difficult gear shifts and other transmission problems.

  1. Can a clogged transmission filter cause difficult gear shifts?

A clogged transmission filter can hinder the flow of transmission fluid, leading to a drop in hydraulic pressure. This can result in difficult gear shifts as the transmission struggles to engage gears smoothly.

  1. Is a difficult gear shift always a sign of a serious transmission problem?

Not necessarily. While a harsh shift can indicate transmission issues, it doesn’t always mean a major problem. It can sometimes be resolved with routine maintenance, such as changing the transmission fluid and filter.

  1. Can driving habits affect gear shifting?

Yes, aggressive driving habits, such as rapid acceleration or sudden deceleration, can put extra strain on the transmission and potentially lead to difficult gear shifts over time. Gentle driving can help prolong the transmission’s lifespan.

  1. How can I handle difficult shifts from 1st to 2nd gear?

If you experience difficulty shifting gears, start by checking the transmission fluid level and condition. Ensure it is at the proper level and not discolored or burnt.

If the fluid is good, it is advisable to have the vehicle inspected by a qualified mechanic who can diagnose and fix the underlying issue.

  1. Are difficult gear shifts covered by my vehicle’s warranty?

Whether difficult gear shifts are covered by your warranty depends on the specific terms and conditions of your warranty coverage.

Typically, powertrain warranties may cover transmission-related issues, but it’s important to consult your warranty documentation or contact the manufacturer or dealer for clarification.

  1. Can a transmission flush help with difficult shifting?

In some cases, a transmission flush can help improve shifting performance by replacing old fluid with new fluid.

However, it’s essential to consult a professional technician to determine if a flush is appropriate for your vehicle’s specific situation.

  1. Are there DIY solutions for difficult gear shifts?

While routine maintenance tasks such as checking and topping up transmission fluid can be DIY, diagnosing and repairing difficult shifting issues often requires specialized knowledge and equipment.

It is generally best to consult a qualified mechanic for proper diagnosis and repair.

Final Words

These are the most common reasons for the difficult gear shifting problem. However, if changing the fluid and replacing these parts do not solve the issue, you should take the car to a repair shop for a professional check-up.

How to unlock the door of a Toyota Camry without a key

I understand why you’re here, it’s probably because you’ve lost the keys to your Toyota Camry car or trunk, and now you’re looking for how to unlock the Toyota Camry door without a key. Well, that’s pretty much what we’re going to discuss in this article. We’re also looking at different methods to unlock your trunk and your Camry vehicles, usually without using the internet.

How to unlock a Toyota Camry door without a key

Yes, you and I know how annoying and stressful it is to lose your vehicle keys. However, it’s reassuring to know that you can still unlock or open your car door or Toyota trunk using a small object, a metal wire, or a coat hanger. So we’ll start first with how to unlock a Toyota Camry door without a key.

Although you must keep in mind that you risk damaging your vehicle’s door by doing this, I would recommend calling a locksmith to unlock the vehicle for you. And if you still want to unlock or open your car yourself, here are the steps to unlock a Toyota Camry without a key:

  1. First, wrap a flat-head screwdriver or a screwdriver in a towel and insert it between the slightly cracked spot or right next to the door and the frame on the driver’s side of the vehicle.
  2. Or insert a small wedge between the door frame and the front driver’s side panel of your Camry.
  3. The screwdriver can be used to open the door by gently pressing on the door lock, but be careful not to damage the locking mechanism or the frame.
  4. You can use another screwdriver or a wedge to open the door.
  5. Insert a steel coat hanger or another long, rigid cable between the door frame and the door.
  6. Use the coat hanger or the small metal wire to unlock your car’s keypad
  7. Before opening the door, carefully remove the metal wire or coat hanger and also remove the wedges. You can now open the door.

How to unlock a Toyota Camry trunk without a key

I understand that you don’t necessarily want to spend a lot of money to unlock your trunk without losing the keys. So the techniques I’ve presented here will be very useful to you, and they won’t allow you to damage your trunk or your car door.

First technique:

  • Remove the left screw from the Toyota Camry’s license plate.
  • The screwdriver will be visible in the hole. You can either insert the screwdriver or push it through the hole.
  • The tip of the tool can be used to locate the hook in the trunk. Using your tool, remove it.
  • Once the trunk is open, the next step is to access the passenger compartment. This is done by releasing the seatback latch. You will find the latch in the section of each folded seat that is near the top edge of the trunk cavity.
  • Use a screwdriver to release a latch. Place it from the trunk on the left side and lift it into the open position.

When the latch opens, you’re done. This will allow you to access the passenger compartment and unlock the trunk.

Second technique:

  1. You must first use adhesive tape to cover the edges of your trunk door. This will ensure your car’s paint doesn’t get scratched.
  2. The plastic cap located at the top of the driver’s door must be removed. You just need to remove it.
  3. Use the screwdriver to loosen the screw.
  4. Pull the door handle to reach the key cylinder.
  5. Remove the key cylinder and the wafers.
  6. Use the screwdriver to push the +-shaped wafers into the pocket. Turn the screwdriver.

Once you have retrieved your keys, please put all the items back in their place. Once you’re done putting everything back, securely screw the handle back on.

Third technique:

If the rear seats of your Toyota Camry are foldable, this technique only applies to you.

  1. You should check if your seats are foldable.
  2. The hooks are located on the rear side of the back seat.
  3. These hooks will allow you to remove the seat lock.
  4. Fold down the rear seats.
  5. Take your trunk.
  6. The hook is located near the trunk lock.

Now, the trunk can be opened.

This article will solve your problem. You can now open your trunk easily if you have forgotten or lost your keys. It is common for people to forget their keys, which can lead them to have to deal with different problems. You can unlock your trunk using one of these methods. You need to familiarize yourself with how to use screwdrivers properly before delving into this and ensure they are gentle. These techniques must be used with patience. We all know that rushing is a waste. If you need professional help,

Here are some tips that can help you remember your keys wherever you go.

Tips to avoid losing your keys

Before you leave:

Before leaving your home, office, or public space, always check your wallet. This will remind you not to forget your keys.

Use keychains:

Keychains are a great way to organize your keys. You don’t need a keychain to keep your keys safe. You very often risk losing your keys. Keychains are a great way to have your keys at hand.

Keep spare keys handy:

You can buy spare keys for your car if you have often lost your keys. These spare keys can be used to open your car doors and trunk in case of loss. You won’t need to resort to these methods to open your trunk. These methods are tedious and time-consuming.

Bluetooth Trackers

It’s the age of technology. Make the most of this technological advancement. A Bluetooth tracker can be used to help you locate your keys and also serve as a reminder. You can also use a Bluetooth tracker to locate your keys and remind you where they are.

Many gadgets emit a loud sound that alerts you if you leave the keys behind. These gadgets can be used to help you.

Key holders:

You can find many holders available to hang your keychains and decorate your walls. These holders will be your only spot for the keys. This will reduce the risk of misplacing or losing your keys.

Use drawers:

Most people use drawers to store their important items. To keep your rings safe, you can use the drawer. You can always use your drawer to store your rings, but make sure you have removed all the extra material.

It’s harder to find the keys if there are a lot of things in your drawer.