Complete VCDS Tutorial: VW/Audi Diagnostic Software User Guide

How to use VCDS, the essential diagnostic tool for Volkswagen and Audi. This comprehensive guide walks you step by step through getting started with VCDS software, formerly known as VAG-COM. Whether you’re a professional technician or a DIY mechanic enthusiast, this video is for you.

Main Features of VCDS

Our tutorial covers all the essential basics to master your VCDS interface. You’ll learn how to navigate through the different menus and harness the power of this software.

Reading and Clearing Fault Codes

Discover how to interpret the error codes (DTCs) stored in your vehicle’s control units. Learn how to clear them after a repair and verify they don’t reappear.

Measuring Block Values (MVB)

Access real-time data from all sensors in your VW or Audi. View engine RPM, temperatures, pressures, and much more for accurate diagnostics.

Coding and Adaptation

Master the advanced functions of control unit coding to enable or disable options. Use the adaptation module to customize the behavior of various electronic systems in your vehicle.

Basic Settings and Graphs

Perform basic adjustments on components like the EGR valve or throttle body. Use the graphing tool to record and analyze parameter trends over time, a major asset for diagnosing intermittent faults.

Who Is This VCDS Tutorial For?

This guide is designed for all Volkswagen, Audi, Seat, or Skoda owners who want to perform their own vehicle diagnostics. It’s also perfectly suited for beginner technicians looking to train in using this professional tool.

Husky 46″ Mobile Workbench: The Best Mechanic’s Toolbox?

I constantly receive questions about choosing a toolbox. What is the best toolbox? What budget should you plan for your first mechanic’s toolbox? Should you opt for a used toolbox? Here are some of the most frequent questions. Disclaimer ~ This article is created in a paid partnership with The Home Depot.

Buying Guide: How to Choose Your First Toolbox?

Acquiring your first toolbox is an important investment. It is crucial to find a balance between quality, functionality, and price. The Husky 46″ mobile workbench often presents itself as an ideal solution for those who are starting out or looking to improve their workspace without breaking the bank.

The Advantages of a Mobile Toolbox

Mobility is a major asset in a workshop. Being able to move all your tools around a vehicle or project is an invaluable gain in time and efficiency. The sturdy wheels and locking system of the Husky 46″ make it a reliable and practical work companion for daily use.

Why the Husky Brand?

Husky is a brand known for offering durable and well-designed products, often with a solid warranty. Their range of toolboxes and mobile workbenches is designed to withstand the rigorous demands of professional use while remaining accessible to passionate DIYers.

How to Change a Wheel with a VW Jack (The WIDOWMAKER): Complete and Safe Guide

Changing a wheel and correctly using the VW jack is an essential skill for every driver. Alarmingly nicknamed “The Widowmaker”, the VW jack has a reputation that precedes its use. Yet, replacing a flat tire is a roadside repair task within everyone’s reach, provided safety steps are strictly followed. This guide explains the procedure for using this tool confidently and changing your wheel quickly.

Why is the VW jack nicknamed the “Widowmaker”?

The original jack supplied with Volkswagens is a scissor jack model. Its dramatic nickname, “Widowmaker”, was given due to its potential instability if improperly positioned or used on soft ground. Its relatively small base and limited lifting height require particular attention to avoid any accidents. Understanding this risk is the first step towards safe use.

Equipment needed to change your wheel

Before starting, gather all the equipment: the VW jack, the wheel wrench, the spare wheel (space-saver or full-size), and wheel chocks (or a large, solid rock). Ensure your vehicle is on perfectly hard, flat, and stable ground. Absolutely avoid surfaces made of dirt, grass, or on a slope.

Step-by-step procedure for safely changing a wheel

1. Vehicle preparation and securing

Firmly apply the handbrake and engage a gear (or “P” for automatic transmissions). Turn on your hazard warning lights. Place a chock in front of and behind a wheel opposite the one you are going to change to block the vehicle.

2. Correct positioning of the VW jack

Locate the specific lifting point on your VW’s sill. This is a notch or reinforced area located behind the front wheels or in front of the rear wheels. Position the jack’s hook precisely on this notch. This is THE most important rule to avoid dangerous slipping.

3. Loosening the nuts and lifting the car

Loosen the nuts on the wheel to be changed slightly before lifting the car. Use the wrench and apply leverage if necessary. Then, operate the jack handle to lift the vehicle slowly and steadily. Lift just high enough for the wheel to clear the ground by a few centimeters.

4. Removing the wheel and fitting the space-saver

Unscrew the nuts completely, remove the flat tire, and replace it with the spare wheel. Hand-tighten the nuts in a criss-cross pattern to ensure correct initial placement.

5. Lowering the vehicle and final tightening

Carefully lower the car with the jack until the tires rest on the ground. Remove the jack. Tighten the nuts firmly with the wrench, still following a star pattern. Stow your flat tire and equipment.

Mistakes to absolutely avoid

Never crawl under a vehicle supported only by the jack. Do not use the jack on unstable ground. Do not position the jack anywhere under the body: use only the designated lifting points. Avoid raising the vehicle more than necessary.

Conclusion: a simple operation with the right precautions

Although its nickname is alarming, the VW jack is an effective tool when used cautiously and according to instructions. By following this guide, you will turn a stressful situation into a simple formality. The key to success lies in strictly adhering to safety rules, particularly the choice of ground and the exact positioning of the jack.

MAKITA 18V LXT Cordless LED Flashlight: Complete Test and Review

The MAKITA 18V LXT LED flashlight is a high-performance lighting tool designed for professionals and demanding DIY enthusiasts. Operating on the well-known 18V LXT battery platform in the power tool world, this cordless flashlight offers remarkable autonomy and power. It is often sold in a kit with a 2.0Ah battery and a charger, making it a complete and immediately operational solution for those not yet equipped with the Makita ecosystem.

Features and Benefits of the Makita Flashlight

This flashlight stands out with its strip of 12 high-brightness LEDs, delivering powerful, uniform, and shadow-free lighting, ideal for working in the dark or in poorly lit spaces. Its cordless design, thanks to the lithium-ion battery, frees you from any power cord constraints and offers total mobility. Makita’s robust, shock-resistant construction ensures its durability even on demanding job sites.

Autonomy and Usage

Thanks to the 18V lithium-ion battery technology, this flashlight benefits from long battery life and low self-discharge, ensuring your tool is charged and ready to use when you need it. Its compact size and ergonomic grip make it an ideal companion for a multitude of tasks, from automotive repairs to camping and home troubleshooting. It is an essential addition to any respectable toolkit.

Dewalt 20V MAX 115mm Angle Grinder: Test & Review of an Essential Tool

Dewalt 20-VOLT MAX 4-1/2 in. Angle Grinder. We often buy a new tool thinking “this tool is nice, but I don’t really NEED it.” That’s exactly what I thought before acquiring the Dewalt 20V MAX cordless angle grinder. Ultimately, this cordless grinder quickly became a tool I wish I had owned for years.

Why Choose the Dewalt Cordless Angle Grinder?

The freedom offered by the absence of a cord changes everything. No more dragging an extension cord, worrying about a power outlet, or getting tangled in a cable. The power of the Dewalt brushless motor is impressive and easily rivals many corded models, whether for grinding, stripping, or cutting.

Technical Features and Benefits

With a 115 mm disc, it is perfect for precision work and hard-to-reach areas. Its compact size and anti-vibration handle make it easy to handle and comfortable, even during prolonged use. The 20V MAX battery offers excellent battery life and integrates perfectly into the Dewalt tool ecosystem you may already own.

Final Verdict on the Dewalt Angle Grinder

What I thought was a superfluous purchase turned out to be an extremely cost-effective investment. Time savings, efficiency, and mobility: the Dewalt 20V MAX angle grinder definitely has its place in the toolbox of any demanding craftsman or DIY enthusiast.

The Best Car Modification to Make: Improve Your Driving

The best car modification you can make isn’t what you think. You might be looking for the best mod for your car, but the answer is much simpler than you imagine. It’s neither an engine tune (ECU), a sport exhaust system, upgraded suspensions, performance brakes, or even good tinted windows.

The ultimate modification: the DRIVER MOD

The real improvement, the one that will make the biggest difference on both the track and the road, is you. The best performance upgrade for a vehicle is and will always be the DRIVER MOD. This means becoming a better driver, refining your feel, anticipating trajectories, and understanding the mechanics of your car.

Why bet on the driver?

A high-performance car in the hands of a novice driver will never deliver its full potential. Conversely, an experienced driver will know how to get the most out of a much less modified car. Therefore, investing in your driving training is the most cost-effective and safest mod. It’s the key to fully utilizing all the other modifications you might add later.

Ford P1443 Code: EVAP System Issue & Expert Solutions

Understanding the Ford P1443 Diagnostic Trouble Code

The P1443 diagnostic trouble code is a manufacturer-specific code that primarily affects Ford, Lincoln, and Mercury vehicles. This code indicates a problem within the Evaporative Emission Control (EVAP) system, specifically related to the purge flow sensor circuit. When this code appears, your vehicle’s Powertrain Control Module (PCM) has detected an irregularity in the monitoring of fuel vapor flow during the EVAP system purge operation.

What Does P1443 Mean Exactly?

P1443 specifically points to an issue with the “Purge Flow Sensor Circuit Low Input” or “EVAP System – Vacuum System” depending on the specific Ford model and year. The EVAP system is designed to prevent fuel vapors from escaping into the atmosphere by capturing them in a charcoal canister and then purging them into the engine for combustion during normal operation. The purge flow sensor monitors this process, and when it detects readings outside the expected parameters, it triggers the P1443 code.

How the EVAP System Works in Ford Vehicles

The EVAP system in modern Ford vehicles consists of several key components working together:

  • Fuel tank and filler neck
  • Charcoal canister for vapor storage
  • Purge valve/solenoid
  • Vent valve/solenoid
  • Purge flow sensor
  • Various hoses and connections
  • Fuel tank pressure sensor

During normal operation, the PCM monitors these components through a series of tests, including the key-off natural vacuum test and the running purge flow test, which is where P1443 typically originates.

Common Symptoms and Immediate Effects of P1443

When the P1443 code activates, drivers may notice several symptoms that indicate an issue with their vehicle’s EVAP system. Understanding these signs can help in early detection and prevention of more serious problems.

Primary Symptoms of P1443

  • Illuminated Check Engine Light (CEL) or Malfunction Indicator Lamp (MIL)
  • Possible slight decrease in fuel economy
  • Failed emissions testing in regions requiring it
  • Rough idle in some cases
  • Fuel odor around the vehicle (in severe cases)

Secondary Effects and Potential Risks

While P1443 itself doesn’t typically cause immediate drivability issues or safety concerns, ignoring it can lead to:

  • Increased hydrocarbon emissions
  • Potential damage to other EVAP components
  • Permanent catalyst damage if left unresolved for extended periods
  • Additional diagnostic trouble codes as the problem progresses

Diagnosing and Troubleshooting P1443 Step by Step

Proper diagnosis of P1443 requires a systematic approach using appropriate tools and following manufacturer-recommended procedures. This process helps identify the root cause accurately before proceeding with repairs.

Required Tools for Diagnosis

  • OBD2 scanner capable of reading manufacturer-specific codes
  • Digital multimeter (DMM)
  • Smoke machine for EVAP system testing
  • Hand vacuum pump
  • Vehicle service manual or professional diagnostic information
  • Basic hand tools

Step-by-Step Diagnostic Procedure

Begin by confirming the code with your OBD2 scanner and checking for any additional codes that might provide context. Clear the code and perform a test drive to see if it returns immediately or after specific driving conditions.

Next, perform a visual inspection of the entire EVAP system, paying close attention to:

  • All vacuum hoses for cracks, brittleness, or disconnections
  • Electrical connectors at the purge flow sensor and related components
  • Signs of physical damage to components
  • Evidence of previous repairs or modifications

Electrical and Functional Testing

Using your digital multimeter, test the purge flow sensor circuit for proper voltage, ground, and signal integrity. Refer to your vehicle’s service manual for specific pinout diagrams and expected values. Test the purge valve operation using a hand vacuum pump and verify it opens and closes properly when commanded.

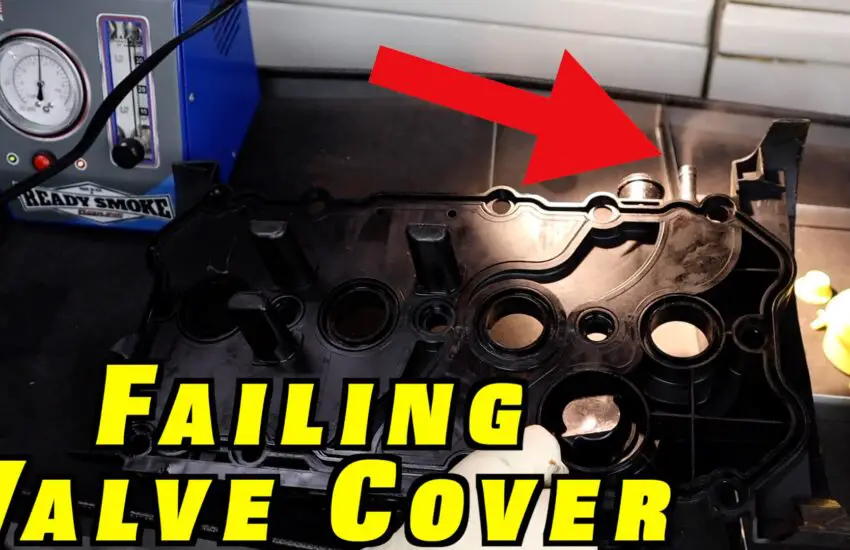
Perform a smoke test on the EVAP system to identify any vacuum leaks that might be affecting purge flow sensor readings. This is particularly important since many P1443 codes are triggered by vacuum system issues rather than sensor failures.

Common Causes and Repair Solutions for P1443

After thorough diagnosis, you’ll typically find one of several common causes for the P1443 code. Understanding these causes helps in implementing the correct repair strategy.

Most Frequent Causes of P1443

  • Faulty purge flow sensor
  • Damaged or clogged purge valve/solenoid
  • Cracked, disconnected, or restricted vacuum hoses
  • Wiring issues in the sensor circuit (broken wires, corrosion, poor connections)
  • Problems with the EVAP canister
  • Faulty PCM (rare, but possible after ruling out all other causes)

Repair Procedures and Replacement Guidelines

When replacing the purge flow sensor, ensure you use OEM or high-quality aftermarket parts specifically designed for your Ford model. After replacement, clear all codes and perform a complete drive cycle to verify the repair was successful.

For vacuum hose issues, replace damaged sections with OEM-specification hoses to ensure proper fit and function. When dealing with electrical issues, repair damaged wiring using proper automotive-grade connectors and ensure all connections are secure and protected from moisture.

Preventive Maintenance and Long-Term Solutions

To prevent recurrence of P1443 and similar EVAP system codes:

  • Follow manufacturer-recommended maintenance schedules
  • Address any fuel system issues promptly
  • Avoid overfilling the fuel tank
  • Regularly inspect EVAP components during routine service
  • Use quality fuel from reputable stations

Remember that proper diagnosis is crucial before replacing components, as misdiagnosis can lead to unnecessary repairs and continued operation with the P1443 code active. When in doubt, consult with a qualified automotive technician who has experience with Ford EVAP systems and access to current technical service bulletins that might apply to your specific vehicle.

Smoke Testing a Plastic Valve Cover with Integrated PCV: Diagnosis and Analysis

This plastic valve cover directly integrates part of the PCV valve. In this article, we will disassemble it to examine the gas flow passages and the oil separator. We will also perform a smoke test to diagnose a potential failure. A great opportunity to practice using a smoke machine!

Disassembly and Analysis of PCV Passages

The Positive Crankcase Ventilation (PCV) system is crucial for engine health. It allows for the evacuation of blow-by gases and maintains stable internal pressure. On this model, the circuit is partially integrated into the valve cover itself, a complex design that can be prone to defects. By disassembling it, we can clearly see the internal passages and the oil separator, whose role is to trap oil vapors before they enter the intake system.

Smoke Testing: An Essential Diagnostic Tool

To check the system’s sealing and identify potential leaks, we use a smoke machine. This non-invasive test involves injecting smoke under low pressure into the PCV circuit. Any leak becomes immediately visible, allowing for a quick and precise diagnosis. It is an extremely effective method for locating cracks in the plastic, a faulty gasket, or a failing PCV valve without having to completely disassemble the engine.

Conclusion on Leak Diagnosis

Smoke testing proves to be an essential technique for any mechanic or enthusiast. Testing the sealing of a plastic valve cover with an integrated PCV helps prevent issues like unstable idle, excessive oil consumption, or premature clogging of the passages. Early diagnosis using smoke can save you time and money by precisely targeting the necessary repair.

Husky 268-Piece Mechanics Tool Set with Case: Complete Review

The Husky Mechanics Tool Set (268-Piece) with Tool Box is the ideal starting point for any mechanical enthusiast or DIYer looking to build their first tool kit. Acquiring over 200 tools at once is the perfect solution to start with a complete and professional setup. After two decades of perfecting my own collection, I offer a detailed experience review of this iconic set.

Why choose a complete tool set?

Purchasing an all-in-one kit saves considerable time and money. Avoid buying piece by piece and unnecessary duplicates. This Husky 268-piece set offers a carefully selected range to cover most common mechanical tasks, from automotive repairs to ambitious DIY projects.

What’s included in the Husky 268-piece tool set?

The strength of this set lies in its diversity and quality. It includes a wide range of wrenches, sockets, bits, and accessories neatly stored in a sturdy storage box.

A comprehensive tool selection

The contents are impressive: you’ll find standard and deep sockets, ratchets of various sizes, combination wrenches, screwdrivers, Allen keys, and numerous specialized pieces. Each tool is made from corrosion-resistant chrome vanadium steel, offering exceptional durability.

A functional and robust tool box

Storage is crucial. The tools are organized in a high-strength plastic case equipped with carrying handles and a secure locking system. Molded compartments and a removable tray facilitate access and organization, ensuring you can always find the tool you need in an instant.

Advantages and strengths of the Husky set

This set stands out for its excellent value for money. The lifetime warranty offered by the Husky brand provides confidence and peace of mind, guaranteeing free replacement of any defective tool. It’s a long-term investment for all your projects.

Signs not to miss when choosing a good mechanic | Expert Guide

Choosing a trustworthy mechanic begins with carefully examining their certifications. While ASE (National Institute for Automotive Service Excellence) certification is the gold standard, other serious accreditations also exist. Official certifications are a reliable way to verify your mechanic’s expertise and technical skills on the various systems of your vehicle.

The Importance of Certifications and Quality Labels

Beyond ASE, look for garages affiliated with recognized networks or holding specific quality labels. These commitments often indicate increased professionalism and a focus on customer satisfaction.

The Garage’s Experience and Specialization

Another sign not to overlook is the garage’s experience, particularly its specialization in certain brands or types of repairs. A mechanic who invests in ongoing training is generally a mark of quality and technical proficiency.