Volkswagen Jetta TDI Diesel Fuel Filter Replacement ~ Common Rail Diesel | Complete Guide

Replacing the fuel filter on a Volkswagen Jetta TDI or an Audi TDI model is a crucial maintenance operation to preserve the health and performance of your Common Rail diesel engine. This detailed guide explains the step-by-step procedure, the necessary tools, and answers a frequent question: is a diagnostic tool absolutely necessary?

Tools needed for replacement

Before starting, gather the appropriate materials. You will need the new fuel filter specific to your model, a ratchet, sockets (usually 10mm and 24mm), a screwdriver, a clean cloth, and a container to collect the diesel fuel. A VCDS diagnostic tool or similar is highly recommended, although some alternative methods exist for the latest models equipped with an electric fuel pump.

Step-by-step procedure

1. Preparation and location

Locate the fuel filter housing, usually found in the engine compartment. Thoroughly clean the area around the housing to avoid introducing dirt into the system.

2. Removing the old filter

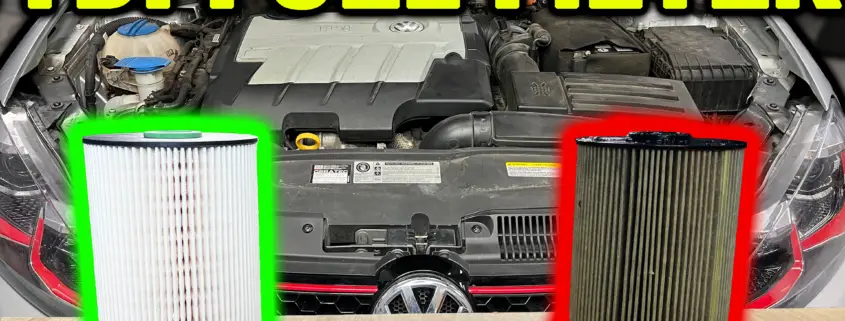
Unscrew the purge plug and the temperature/level sensor if present. Use the appropriate wrench to loosen the drain plug located at the bottom of the housing and let the fuel flow into your container. Then unscrew the housing cover and remove the old filter.

3. Installing the new filter

Place the new seal on the housing and insert the new filter. Replace and tighten the cover. Screw the drain plug back in.

Fuel system bleeding

This step is essential. On older models with a mechanical pump, operate the manual priming pump. On newer Common Rail models, using a diagnostic tool to activate the fuel pump via the control unit is the most reliable method to effectively bleed the system and avoid starting problems.

Conclusion

Replacing the diesel filter on your Jetta TDI yourself is an accessible operation that allows for savings. The key to success lies in meticulousness, cleanliness, and proper system bleeding to ensure flawless starting and protect your high-pressure injection system.

JDM vs Euro: Is the Nitrous VW Faster than the Turbo Honda?

The great JDM vs. Euro rematch is finally here! In this adrenaline-packed video, the team repairs the engine mounts and the turbo’s axle. They also apply a stunning F+F tribute livery. Then, it’s off to the drag strip to settle the question once and for all: which is faster between a JETTA equipped with a NITROUS system and a turbocharged CIVIC? The duel is fierce, and the answer lies on the asphalt. After the race, the Jetta returns to the workshop for an in-depth analysis of its performance. A mechanical face-off that promises explosive revelations.

The Preparation: Mechanics and Style Before the Race

Before they can compete, both cars require some final preparations. The Japanese car (JDM) has its turbocharger and engine mounts overhauled and reinforced to handle the power and lightning-fast accelerations of drag racing. Meanwhile, the European car (Euro) is adorned with an “F+F tribute” graphic design, a stylistic homage that adds a dose of aesthetics to pure performance. These modifications are crucial to ensure the reliability and effectiveness of the cars during the speed trial.

The Heart of the Race: On the Drag Strip

The moment of truth finally arrives. The two cars, the Volkswagen Jetta powered by a nitrous oxide injection system and the Honda Civic equipped with a turbo, line up at the starting line. The tension is palpable. At the green light, they launch with incredible force, unleashing all their power onto the track. The burning question on everyone’s lips: will the instant thrust of the Jetta’s nitrous oxide overpower the exponential power of the Civic’s turbo? The race is tight, every millisecond counts.

Post-Race: Analyzing the Results

Once the finish line is crossed and the winner is declared, the investigation is just beginning. The Jetta is brought back to the workshop for a comprehensive technical debrief. Experts examine the data, scrutinize the mechanics, and analyze every aspect of its performance to understand the winning technical choices and areas for improvement. This post-race analysis is essential for fine-tuning the settings and preparing for the next duel. This rematch may only be the first chapter in a legendary rivalry.

Jetta Tuning with Nitrous Oxide: New Mods and Explosion Risk?

Back on the dyno! After the complete rebuild of our Jetta’s BPY engine, we’re taking it to the next level with Paul. This time, we’re installing a series of upgrades dedicated to the nitrous oxide (NOS) system to push the limits and, hopefully, avoid an explosion.

The New NOS Modifications for the Jetta

Our preparation for the drag strip is intensifying with the addition of three key components. The goal is to gain power, but above all, control and safety.

A Progressive Nitrous Controller

First major upgrade: installing a progressive controller. This electronic unit allows precise dosing of nitrous oxide injection, preventing a too abrupt supply that could damage the engine. It’s the key to a controlled power increase.

An Upgrade to the Fuel Supply System

To accompany the NOS flow, an additional amount of fuel is essential. Therefore, we’re reinforcing the low-pressure system with a new pump and more efficient injectors to maintain the perfect mixture and avoid a lean mix, which is a source of detonation.

A Purge Valve for the Spectacular Effect

And for the final touch! We’re installing a purge valve. Beyond its spectacular visual effect with its white cloud, it ensures that the gas arrives pure and immediately in the engine upon engagement, for optimal responsiveness.

Final Goal: Back on the Drag Strip

All these modifications serve only one purpose: to return to the drag strip and break records. Is the rebuilt engine strong enough to handle this additional power? That’s the big test. Stay tuned to find out if the Jetta will explode this time… or if it will steal the show.

Engine Rebuild 2007 Jetta: Express Repair after Nitro Explosion

We blew up our engine. In a previous adventure, Paul and I literally blew the engine of our 2007 Jetta, pushed to its limits by nitrous injection. A painful failure, but not discouraging! Our goal is now clear: rebuild this block in record time to get back on the track and challenge @Gears and Gasoline again.

The Challenge: An Emergency Engine Rebuild

The countdown has begun. This video is the first episode of an intense series where we tackle the complete engine rebuild. The mission is simple but ambitious: get everything back in working order, and even better than before, to handle the power of nitrous once again.

Technical Upgrades and Modifications

This time, we’re taking no risks. We’re not settling for a simple repair. The heart of the project involves installing new reinforced connecting rods and a meticulous recalibration of the piston ring gap. These upgrades are crucial to ensure the engine’s reliability and power during future nitrous injections. Every part is inspected, every adjustment is optimized for racing.

Final Goal: Back to Racing

Every hour of work counts. Every move has one goal: to return to competition. This rebuild isn’t just a mechanical repair; it’s a race against the clock to prepare the Jetta to face its competitors again. Nitrous doesn’t wait, and neither do we.

R32 Clutch Kit: Performance Upgrade for 500HP | Complete Guide

R32 Clutch Upgrade to Hold 500HP. In this video, we perform an essential clutch upgrade on a Nissan Skyline R32. This procedure, although demonstrated on an R32, is actually a VR6-type clutch replacement, meaning it is applicable to other models sharing this mechanical setup, and not just the famous Skyline.

Why a Clutch Upgrade is Necessary

The main reason for this change is preparing the vehicle for turbocharging. The original clutch is simply not designed to handle the additional torque and power generated by such preparation, aiming here for 500 horsepower. A standard clutch would slip and not effectively transmit power to the wheels.

The Components of the Performance Kit

The upgrade is not limited to just a disc. It is a complete kit including three key elements: a new reinforced clutch disc, a high-performance pressure plate, and a major change, a flywheel. We are abandoning the original dual mass flywheel in favor of a single mass flywheel. The latter offers more direct response and better reliability under high stress.

The Advantages of the Single Mass Flywheel

Replacing the dual mass flywheel with a single mass model is a strategic choice for performance. It allows for sharper acceleration, reduced rotating mass, and increased durability, essential for supporting the target power of 500 horsepower. This upgrade is crucial to ensure the transmission of all the power from the tuned engine.

How to Replace Wired CarPlay with Wireless CarPlay on VW Golf MK7 | Complete Guide

How to make a wired CarPlay wireless. I added wireless CarPlay to my 2019 Golf. Installing a wireless CarPlay adapter is as simple as plugging it into the existing wired CarPlay port. You can finally ditch your worn-out Apple cable and go WIRELESS. This setup works exclusively with Apple CarPlay. Unfortunately, I don’t have information regarding Android Auto for this specific model.

The simple installation process

The beauty of this upgrade lies in its simplicity. Just locate the USB port dedicated to CarPlay in your cabin, usually in the glove box or under the radio. Simply plug the wireless adapter module into it. Once powered on, your Golf MK7’s screen should recognize the new device after a brief initial setup moment.

Main advantages of wireless

Going wireless offers unmatched freedom of movement. No need to take your phone out of your pocket for every trip. Your iPhone connects automatically as soon as you get in, enabling a smoother driving experience and much more convenience in daily use.

Complete R32 engine overhaul for turbo: VR6 preparation for forced induction

In this video, we are finalizing the complete overhaul of the R32 engine. This is a VR6 engine rebuild that includes installing a head gasket spacer specifically designed to handle forced induction. This R32 is being prepared to receive an HPA turbo kit, with a power goal set at 500 wheel horsepower (500WHP). I will guide you step by step through the crucial stages of installing the camshafts, cam adjusters, cylinder head, head gaskets, and the head gasket spacer.

Key Steps in Engine Preparation

Rebuilding an engine for forced induction is a meticulous process that requires careful attention to detail. Each component must be thoroughly inspected, cleaned, and installed according to precise specifications to ensure the targeted reliability and performance under boost.

The Importance of the Head Gasket Spacer

Adding a head gasket spacer is a fundamental modification for an engine intended for turbocharging. This component helps reduce the compression ratio, making the engine block much more resistant to the thermal and mechanical stresses induced by forced induction, thereby securing the pursuit of higher power.

Final Goal: Reliability Under Boost

The ultimate aim of this complete rebuild is not only to achieve an impressive 500WHP but also to build a strong and reliable engine capable of delivering this power consistently, whether on the track or on the road.

Volkswagen Golf R 2022: Complete Test of the Best Golf R to Date?

The MK8 Golf R is set to be the most high-performance version in the history of the Golf R. A bold prediction, indeed, but one that proves true on the road. We had the chance to drive it at the “Wookies in the Woods” event, and Megan from Volkswagen of America answered our most pressing questions about power, price, and features.

Performance and Technical Features

Under the hood, the 2022 Golf R hides a formidable engine. The 2.0 TSI EVO4 unit is more powerful than ever, promising thrilling sensations and exemplary agility on all roads. The 4MOTION all-wheel drive and 7-speed DSG transmission ensure optimal traction and responsiveness.

A New Driving Experience

Behind the wheel, the difference from previous generations is immediately noticeable. The new Golf R offers surgical precision, impressive cornering stability, and lightning-fast acceleration. It clearly positions itself as a benchmark in the sport compact segment.

MK8 Design and Features

Volkswagen has also taken care of the packaging. The exterior design of the MK8 is more aggressive and aerodynamic, while the interior welcomes the latest in digital technology, with the multifunction steering wheel and central touchscreen, for a connected and immersive driving experience.

Engine and Gearbox R32 Disassembly: Complete Guide for Engine Overhaul

Engine and transmission removal on the Nissan Skyline R32. With over 320,000 kilometers on the odometer, the time has come to pull out the engine, perform a thorough cleaning of the engine bay, and prepare for a complete teardown. These steps are crucial to ensure the vehicle’s reliability before the future installation of a turbocharger.

Why Remove the Engine from Your R32?

High mileage is often synonymous with internal wear. Removing the engine block and gearbox is the only method to perform a comprehensive overhaul. This allows for the inspection of every component, cleaning years of dirt and grease, and solidly preparing the mechanics for engine tuning and performance upgrades.

Key Steps in the Process

The disassembly requires a precise methodology. It begins with draining the fluids and disconnecting all electrical connectors, hoses, and lines. Supporting the engine with a hoist is essential before removing the engine mounts and separating the transmission to safely extract the assembly.

Preparing Your Turbo Project

Before any power increase, the integrity of the original engine is paramount. This disassembly operation is therefore an indispensable preparation phase. It allows for the identification and replacement of worn parts, ensuring a healthy and robust foundation to handle the additional stresses generated by forced induction.

R32 Suspension Diagnosis: The Strange Noise and Low Price Explained

One of the main reasons I acquired this Nissan Skyline R32 at such an attractive price was the recurring issues with its front suspension. Squeaks, creaks, and grinding noises from the chassis were common. Before proceeding with the complete disassembly of the vehicle to rebuild the engine, it was crucial to diagnose and resolve these noise issues. Today, we are dismantling the suspension to identify the exact source of the problem.

The Mechanical Exploration Begins

The first step involved lifting the car and dismantling the front suspension components. Every bolt and nut was carefully inspected. Initial suspicion fell on the bushings, steering knuckles, or suspension arms, typical wear items on a vehicle of this generation.

The Surprising Discovery

After a thorough examination, the source of the noise was not what was initially suspected. The culprit turned out to be an often-overlooked component: a seized and severely damaged front wheel bearing, whose abnormal play was generating the squeaks and vibrations. This failure perfectly explained all the symptoms described by the previous owner.

Conclusion: A Common Problem, an Accessible Solution

This diagnosis shows that behind a concerning suspension noise can lie a common and relatively simple issue to fix. It is often this type of mechanical problem, frightening for the uninitiated, that allows one to find iconic models like the R32 at very attractive prices. The next steps of the operation can now proceed smoothly.