What are brake discs made of

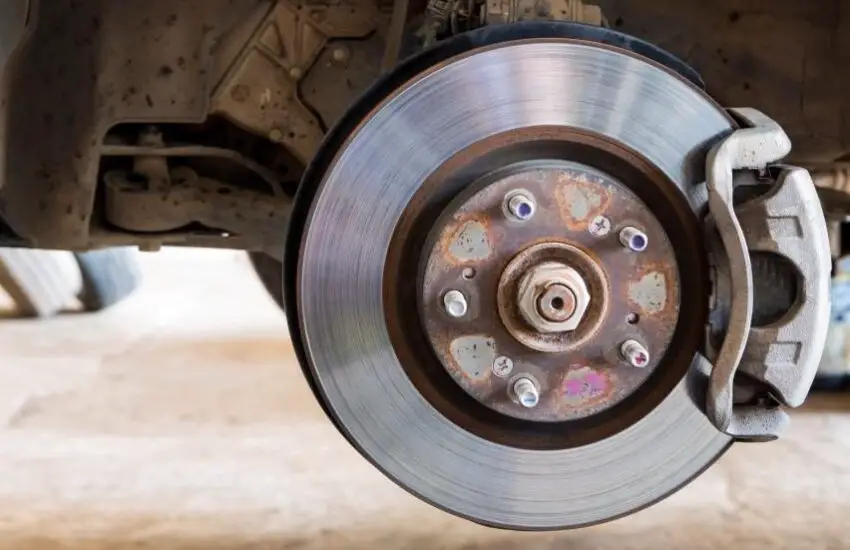
What Are Brake Rotors Made Of? Choosing the right type of rotor is important for the proper functioning of the braking system. You might encounter problems stopping the car if a component is underperforming.

Rotors can be made from several materials, and not all offer the same performance. Learn about the brake rotor material to know if it’s the right choice for your car.

What Are Brake Rotors Made Of?

Believe it or not, brake rotors can be made from six different materials. Let’s discover their advantages and disadvantages.

Cast Iron Brake Rotors

Cast iron is the most commonly used material in brake rotor manufacturing. Manufacturing with the right design can make it work even for performance vehicles.

However, it is a heavy material that adds to the total vehicle weight. This extra weight goes directly into the front wheels, making it somewhat difficult to handle.

Most practical choice for suburban vehicles. (Photo: Mechanic)

Steel Brake Rotors

Due to their thinner dimensions and lighter weight, steel rotors have been the choice of racers for many years.

If you compare cast iron and steel brake rotors, the latter handle overheating conditions better. They offer a good balance of “grip” for drag cars and are also easier to handle due to their lighter weight.

However, steel rotors are not very durable. Moreover, warped rotors create annoying sounds and cause pulsating pedals during braking.

Layered Steel Brake Rotors

These rotors are made by placing steel sheets on top of each other and then laminating them together.

It’s a new favorite among racers due to its durability and resistance to warping. Unlike steel rotors, you don’t need to repair or replace them frequently.

However, these rotors are not popular with the general public, except among professional racers. Production is limited for this reason.

Aluminum Brake Rotors

Aluminum is lightweight and can release heat fairly quickly. But the melting point is lower than that of any other material.

For this reason, it is used in motorcycle rotors as they have to withstand less pressure than truck or SUV rotors.

High-Carbon Brake Rotors

Don’t be fooled by the name. This material is actually iron but with a good volume of carbon mixed in. These rotors can absorb and dissipate heat quickly and do not break under significant pressure.

Using them instead of steel rotors means losing at least 10 pounds of rotating weight, which significantly improves braking performance.

They also create less noise and vibration compared to other options. The only downside is the high price.

Iron material mixed with carbon. (Photo: carcarbaba)

Originally developed for Formula 1 vehicles, carbon brake rotors are probably the best choice for the fastest drag cars.

Ceramic Brake Rotors

What are brake rotors made of? Well, if you drive a high-performance sports car, the rotors are definitely ceramic.

It has an incredibly superior heat absorption and release capacity as well as the ability to provide consistent performance under high pressure.

It is arguably the best material for brake rotors, but cast iron is more cost-effective if you use the car only for commuting.

How to Choose the Right Rotor for Your Vehicle

To help you get a rotor suitable for your vehicle, here is a summary table of the advantages and disadvantages of each brake rotor material.

Brake Rotor Material Advantages Disadvantages Common Applications
Cast Iron Common and affordable Adds weight to the vehicle Suburban vehicles
Steel Lightweight, good for racers Not very durable Racing and performance cars
Layered Steel Durable, less warping Limited production Professional racing
Aluminum Lightweight and fast heat dissipation Lower melting point Motorcycles
High Carbon Efficient heat absorption Higher price Performance vehicles
Carbon-Mixed Iron Exceptional for dragsters N/A Fastest drag cars
Ceramic Excellent heat absorption Expensive High-performance sports cars

According to the table above, when it comes to choosing the type of rotor to buy for your vehicle, it all depends on what you drive and how you drive it.

If you are a commuter, you are probably doing just fine with cast iron rotors. However, if you own a high-performance car and enjoy driving it on different types of terrain, you might want to consider high-carbon or ceramic rotors.

If you have a motorcycle, aluminum rotors are probably your best choice. If you enjoy racing, consider getting steel or ceramic rotors.

FAQ on Brake Rotor Materials

  1. Why Are Most Brake Rotors Made of Cast Iron?

Cast iron is a popular choice for brake rotors because it offers excellent heat dissipation and great durability. It can withstand the high temperatures generated during braking without warping.

  1. Can Brake Rotors Be Resurfaced or Machined?

Cast iron rotors can often be resurfaced or machined to remove minor wear and grooves. However, composite or carbon-ceramic rotors are typically replaced when worn, as they are more difficult to resurface.

  1. What Causes Brake Rotor Wear or Damage?

Brake rotors can wear out over time due to repeated braking, leading to reduced thickness. They can also be damaged by excessive heat, abrupt braking, or corrosion.

  1. How Can I Extend the Lifespan of My Brake Rotors?

Regular maintenance, including replacing brake pads at recommended intervals, can help extend the lifespan of your brake rotors. Avoiding excessive or prolonged abrupt braking can also reduce wear.

  1. Are There Eco-Friendly Materials for Brake Rotors?

Some manufacturers are exploring alternative materials for brake rotors, such as carbon fiber-reinforced composites, to reduce weight and improve energy efficiency.

However, these materials are still in the experimental phase and are not yet widely used in production vehicles.

Conclusion

After learning what brake rotors are made of, you can see that brake rotors are essential components of a vehicle’s braking system. They are typically made from materials like cast iron, carbon-ceramic composites, or stainless steel.

The choice depends on factors such as performance, budget, and vehicle use. Regardless of the material, brake rotors are crucial for safe and reliable braking, requiring regular maintenance and inspection.

The car accelerates by itself at idle

The car accelerates on its own at idle. Idling is the process of keeping a car stationary while the engine is running, but the vehicle is not moving. This occurs when no gear is engaged, the accelerator pedal is not pressed, and the brakes are applied. Idling is necessary in many situations, for example, when waiting for a traffic light to turn green or when you don’t feel the need to turn off the engine. Sometimes, idling increases the RPM until the engine is fully warmed up. But the problem arises when the RPM remains set at a high level even after the engine is warmed up. If you experience a car that idles and accelerates on its own, here is your solution.

The Car Idles and Accelerates on Its Own – Why Does the Engine Idle?

What does it mean when your car idles? When a car idles, it means the engine is running at a faster speed than it should when the vehicle is in a stationary position and the accelerator is released. Normally, a car’s engine should maintain a constant and relatively low idle RPM when it is not moving.

Several potential causes can lead to high engine idle:

Faulty or Stuck Idle Air Control (IAC) Valve

The IAC valve is responsible for regulating the amount of air that bypasses the throttle plate when the accelerator pedal is released. If the valve sticks or malfunctions, it can allow too much air into the engine, causing the engine to idle at a higher RPM.

Vacuum Leak

A vacuum leak occurs when there is an unintended entry of additional air into the engine. This can be due to a cracked or disconnected vacuum hose, a leaking intake manifold gasket, or a faulty brake booster, among other things. The extra air disrupts the proper air-fuel mixture, leading to high idle.

It’s easy to fix the problem by referring to the codes (Photo source: Bloomberg)

Throttle Body Issues

A dirty or faulty throttle body can affect the proper operation of the throttle plate, which controls the amount of air entering the engine. If the throttle plate does not close completely when you release the accelerator pedal, the engine may idle at a higher RPM.

How can you handle this issue? Sometimes, it’s easy to fix the problem by referring to the codes. If you encounter a flashing error code, you can either use a code reader or entrust your car to professionals.

If there don’t seem to be any error codes, you can check the idle air control valve / bypass air control or have it checked. There may be debris that can be cleaned, and the idle problem is resolved.

Possible Causes of High Idle RPM

If the car idles and accelerates on its own, there may be reasons. Consider these reasons to identify the true root of the problem.

  • Sometimes, the fuel supply circuit malfunctions and is responsible for high idle.
  • There may be a fault in the cooling system causing the engine to overheat.
  • The fuel pressure regulator may be a reason that requires repair or replacement.
  • You may need to work with the ignition timing.
  • A leaking hose could be the cause.
  • There may be issues with the engine control system.

You see, there can be many reasons behind the idle problem. If you can’t find the actual root cause, it’s always advisable to entrust the vehicle to professionals.

You see that there can be many reasons behind the idle problem (Photo source: ctmirror)

Why Does the Engine Accelerate on Its Own?

Sometimes, with high idle, you also notice that the engine accelerates automatically, even if you give no command. A faulty throttle body could be the cause; if it sticks, it can cause acceleration. Refer to the car’s maintenance tips and resolve any issues.

The most common reason could be the floor mat that may jam the pedal. As a result, the pedal does not return to its precise position, causing acceleration. You can have the accelerator checked and ask the repairer to replace it if there’s a problem.

You can check the floor mat yourself and ensure it doesn’t interfere with the accelerator pedal in any way. Nothing should be stuck in the accelerator pedal; clean the area to check.

The most common reason could be the floor mat that may jam the pedal (Photo source: hotcars)

Conclusion

Ultimately, you should always have the error codes diagnosed. You can either fix the problems yourself or entrust the car to professionals and resolve the issue.

The 6 Common Problems to Watch for After Cylinder Head Gasket Replacement

Replacing a head gasket is a critical repair often necessitated by engine overheating, coolant leaks, or compression loss.

While this repair aims to restore engine integrity and performance, it’s important to be vigilant about a series of issues that can arise after the replacement.

Awareness and prompt action can mitigate further damage and ensure the longevity of your engine repair. Here are the common problems to watch for after replacing the head gasket.

Common Problems After Head Gasket Replacement

Engine Overheating

After head gasket replacement, engine overheating indicates unresolved issues. A clogged radiator, which fails to effectively remove heat from the engine coolant, can cause the engine to overheat.

A faulty thermostat that doesn’t open as it should prevents coolant from circulating through the engine and radiator, leading to overheating.

Similarly, a defective water pump may fail to circulate coolant through the engine and cooling system, thus worsening the problem. These components must be checked and, if necessary, repaired or replaced to prevent engine overheating.

Coolant Leaks

A new, properly installed head gasket should create a tight seal between the engine block and cylinder head, thereby preventing coolant leaks.

Persistent leaks can indicate installation issues or unnoticed damage such as warping or cracks in the engine block or cylinder head during the gasket replacement.

It is essential to ensure the surfaces were adequately prepared and inspected before installation to prevent such leaks.

Persistent leaks can indicate installation issues or unnoticed damage. (Photo: Kinek00)

Poor Engine Performance

Suboptimal engine performance following a head gasket replacement can result from several factors. If the head bolts are not torqued to the manufacturer’s specifications, it can lead to an uneven seal, affecting engine compression and, consequently, performance.

Unresolved damage to cylinders or pistons can also impair engine operation. A thorough inspection and proper reassembly of engine components are crucial for maintaining optimal engine performance.

Oil Contamination

The head gasket serves as a barrier preventing oil and coolant from mixing. Continued oil contamination in the coolant after replacement suggests the new gasket may not be sealing properly, or there could be additional undetected cracks in the engine allowing cross-contamination.

Comprehensive diagnostics are needed to identify and rectify the source of contamination.

Excessive Exhaust Smoke

Persistent white smoke from the exhaust after replacement could indicate that coolant is still entering the combustion chamber, suggesting the new gasket may not be providing a proper seal.

Alternatively, undetected cracks in the cylinder head or engine block could allow coolant to leak into the combustion chamber.

Further investigation is necessary to identify the cause and ensure the integrity of the new head gasket installation.

Compression Loss

The head gasket is crucial for maintaining cylinder compression. Compression loss following gasket replacement can indicate that the new gasket is not properly sealing the cylinder head to the engine block.

This situation requires a thorough inspection of the gasket installation and the mating surfaces of the engine block and cylinder head for any irregularities that could compromise the seal.

The head gasket is crucial for maintaining cylinder compression. (Photo: dubizzle)

FAQ on Common Problems After Head Gasket Replacement

1. Can a recently replaced head gasket affect engine timing?

Improper installation of a head gasket or incorrect reassembly of engine components afterward can inadvertently affect engine timing.

This misalignment can lead to inefficient engine operation, reduced performance, and in severe cases, engine damage.

2. Why might my engine oil appear milky after a head gasket replacement?

Milky engine oil after a head gasket replacement could indicate that coolant is still entering the oil system, suggesting the new head gasket may not be sealing properly.

This could result from incorrect installation, or there could be additional cracks or warping in the engine that were not resolved during the gasket replacement.

3. Is it normal for the engine to run rough immediately after head gasket replacement?

While some initial roughness may occur as the engine settles, persistent rough running is not normal and suggests issues such as trapped air in the cooling system, misaligned engine components, or other underlying problems not corrected by the head gasket replacement.

4. How does head gasket replacement influence exhaust system performance?

If the head gasket problem had allowed coolant to enter the combustion chamber, it could have led to a buildup of coolant residue in the exhaust system.

After replacing the head gasket, this residue may take some time to clear out, which could temporarily affect exhaust performance. However, persistent exhaust issues warrant further investigation.

5. Can head gasket replacement reveal other engine problems?

Yes, the process of replacing a head gasket can reveal other engine problems, such as cylinder wear or damage to engine valves, which may not have been visible before the repair.

This is because the intensive inspection and disassembly required for head gasket replacement provide an opportunity to assess the engine’s overall condition.

6. How important is it to use the exact head gasket specified for my vehicle model?

It is crucial to use the head gasket specified by your vehicle manufacturer. Using an incorrect or inferior quality gasket can lead to premature failure, poor sealing, and persistent engine problems.

The material composition and gasket thickness are specifically designed for your engine’s thermal expansion rates and pressure requirements.

Conclusion

While replacing a head gasket is a significant solution intended to resolve major engine issues, it is crucial to closely monitor the engine afterward for any signs of the aforementioned problems.

Early detection and intervention of common problems after head gasket replacement can save time, money, and prevent further engine damage!

How to choose the right coolant for your car

How to choose the right coolant for your car. Besides fuels such as engine oil and gasoline, coolant is an essential fluid for every vehicle. How to choose the right coolant for a car is a question many drivers must ask themselves because there are many types of coolant on the market today. Don’t worry, take note of the 6 tips below to choose the best car coolant:

Basic types of car coolant you should know

Normally, car engines are placed in sealed compartments and generate a large amount of heat during operation. This challenged engineers to invent new ways to cool the engine, and car coolant was developed with the main function of maintaining an optimal engine temperature.

Coolant is a compound made of distilled water, ethylene glycol, and several substances that have anti-evaporation, anti-corrosion, reduced electrolysis effects… and especially antifreeze. Antifreeze helps lower the freezing point and increase the boiling point so that the coolant can perform well under difficult conditions.

What coolant do I need for my car (Photo: pinterest.com)

Coolant plays an important role in the cooling system, so choosing a coolant suitable for your car is also a crucial task. However, as mentioned above, because there are many types of coolant, many customers feel confused when purchasing this fluid. Generally, coolant is divided into 3 types with different scale, antifreeze, and boiling temperature indices, including:

  • IAT (Inorganic Additive Technology)
  • OAT (Organic Acid Technology)
  • HOAT (Hybrid Organic Acid Technology).

Alternatively, they are also distinguished by their colors: green, red, blue, and pink or yellow.

  • Orange, red, and blue coolants often use OAT technology. This type of coolant contains neither Silicate nor Phosphate but still has corrosion inhibitors but is organic. This type is considered environmentally friendly and is the most commonly used today.
  • Green coolant often uses IAT technology. This coolant often contains silicates and phosphated corrosion inhibitors…

Besides color, coolant is also classified as Long Life Cooler (LLC) and Super Long Life Cooler (SLLC). The difference between LLC and SLLC mainly lies in the proportion of ethylene glycol ingredients, and LLC has added diethylene glycol, unlike SLLC. LLC coolant is typically green and red, while SLLC is blue and pink.

How to choose the right coolant for a car?

It would be very convenient if all car manufacturers used the same coolant, but that’s not the case. When you change the coolant, what coolant do I need for my car?

Coolant Color

Different coolant colors will have different functions and characteristics. For example, blue SLLC coolant has the longest usage duration, followed by pink SLLC. The LLC type has a shorter lifespan. LLC is often recommended for use on older cars, while SLLC is used on new cars.

Normally, dark blue or green coolant will be used directly without having to add pure water. This fluid often applies Inorganic Additive Technology (IAT) to create the two colors above. This is an older technology that needs to be replaced every 2 years or every 60,000 miles.

Red coolant is usually mixed with pure water in a 50:50 ratio before it can be used. Red coolant uses Organic Acid Technology (OAT), which has better durability than IAT.

The Owner’s Manual

This is the best resource you can refer to. Each car manufacturer also has its regulations regarding coolant change. Furthermore, car manufacturers also recommend suitable types of coolant in the manual. For the convenience of car owners, many manufacturers indicate in the vehicle’s owner’s manual whether LLC or SLLC coolant should be used. Make sure to consult the guide before buying coolant for your car; it will specify the exact coolant formulation and sometimes even the brand.

Car Age

There is a general guideline for coolant usage based on your car’s manufacturing year:

  • Before 1998: These vehicles typically use Inorganic Additive Technology (IAT) coolant, often green, which usually contains a 50/50 mixture for protection down to about -35°C (-31°F).
  • After 1998: These cars often need Organic Acid Technology (OAT) coolant, which does not contain silicate for better corrosion protection. It can be of different colors.

Furthermore, if you are unsure after consulting the owner’s manual, let’s consult a trusted mechanic. They can advise you on the appropriate coolant for your car based on its make, model, and year.

What are the best car coolants you can buy?

Nowadays, on the market, there are many types of coolant from many different brands, some of which are highly rated and commonly used, including:

1. Prestone

This is a type of car coolant from an American brand, recommended by car manufacturers such as GM, Ford, and Chrysler. Prestone coolant can resist boiling up to 129°C and freezing down to -36°C. In particular, Prestone car coolant can be used continuously for 5 years or 150,000 miles (approximately 241,401 km).

Most Prestone coolants can be used directly without adding water, which brings comfort to users. Furthermore, the products meet the strict standards of most major global automobiles such as Toyota, Ford, BMW,…

2. Valvoline Zerex G05

Valvoline has a long history, founded in 1866, and its products are available in 140 different countries. Zerex Red coolant is one of the company’s top 10 high-end cooling product lines. Zerex G05 is fully formulated from a silicate-free HOAT formula that protects the cooling system from rust and corrosion. It combines the most advanced phosphated organic acid additive technology in an ethylene glycol base to completely protect modern cooling systems and engine components. Zerex coolant has a lifespan of 5 years or 150,000 miles. Zerex G05 has been proven to enhance the engine life of the latest Ford, Chrysler, and Mercedes-Benz cars, light trucks, and heavy vehicles.

3. Liqui Moly

The Liqui Moly brand was developed in 1957 and has produced over 4,000 additive, lubricant, and car maintenance and care solution products.

Liqui Moly offers many different ranges of engine coolant, most of which use OAT technology. Liqui Moly coolant is also an advanced product that effectively helps cool and prevent corrosion and rust. Furthermore, this coolant is also free of nitrites, amines, phosphates, and silicates and is formulated to be ready-to-use without needing additional water.

Notes when changing car coolant

  • Do not use water, mineral water, tap water, bottled water… to mix with car coolant. The above types of water have higher hardness, not to mention higher sedimentation in the water, easily causing rust and seriously affecting the structure of the cooling system.
  • Do not add additional antifreeze other than those recommended by the manufacturer. You replace the car coolant only according to the car manufacturer’s requirements, and you should also consider other types of car coolant before applying it.
  • If you add or change coolant, use the same color as the one in the vehicle’s reservoir. Never mix coolants of different colors. Mixing coolants of different colors can damage the radiator and the cooling system.

Why are catalytic converters so expensive

Why are catalytic converters so expensive? Theft of catalytic converters has become so dramatic recently that many drivers wonder what was in the catalytic converter that attracted such thieves. Besides the important tasks of converting harmful emissions into other forms of waste with less impact on the environment, the catalytic converter is also one of the most valuable parts of your car, so why are catalytic converters so expensive? Let’s find out in our topic:

What is the purpose of a catalytic converter?

What makes catalytic converters so expensive (Photo: thecoldwire.com)

The catalytic converter is an effective emissions control device. This part is responsible for converting harmful gases and environmental pollutants in exhaust fumes into less toxic waste. Catalytic converters are often used on internal combustion engines using gasoline or diesel fuel.

When your vehicle is running, the engine’s fuel combustion process will emit harmful emissions such as CO2, H2O, and N2 (78%), these substances are almost harmless to the environment if the process is done correctly.

During operation, regardless of the engine’s quality, the combustion process can still create small amounts of other toxic compounds such as carbon oxides (CO), nitrogen oxides (NO, NO2), and hydrocarbons (HC).

The car converter’s task is to transform toxic substances into less toxic compounds (CO2) or eventually into substances that are not harmful to the environment like N2 and H2O before leaving the exhaust system.

Catalytic converters can convert about 90% of environmentally harmful emissions into less toxic compounds. Some high-end car manufacturers now add special filters, which can significantly increase the efficiency of car converters up to 99%, thus helping to better protect the environment.

There are several reasons why you might need to replace the converter:

  • It can get clogged due to burned oil/coolant.
  • Your catalytic converter could be damaged by going from a hot state to a cold state, which would crack the metals inside it.
  • When someone steals it, which is much more common than you think.

Why are catalytic converters so expensive?

Why is the catalytic converter so expensive (Photo: pinterest.com)

A crucial question is why people want to steal this part and why replacing them can cost $2,000. Well! Stay tuned and find out:

The catalytic converter is a metal box containing a ceramic or metal honeycomb filter element. This filter core will be coated with a layer of catalyst that creates a chemical reaction with toxic emissions. For the converter to do its job properly, it is made of expensive metals like gold, platinum, rhodium, and palladium, called “catalytics.” A catalyst is a substance that causes a chemical reaction to happen faster without being used up. To convert harmful emissions, the converter must consume a layer of precious metal to catalyze the reactions so they occur easily.

The point of the question

The point of the question “why is the catalytic converter so expensive” lies in these precious metals. The cost of rhodium per ounce rose from $1,800 to $6,000 by the end of 2019 and now, the price has slightly decreased but still stands at about $4,675 per ounce. Additionally, as we know, platinum group metals are always used in jewelry, electronics, and some industrial parts, so they are very valuable. Generally, there are about 1 to 2 grams of rhodium, 3 to 7 grams of platinum, and 2 to 7 grams of palladium in catalytic converters. The exact amount of these substances will be mixed in different ratios according to different catalytic converter manufacturers.

Although the metals are the main reason that makes catalytic converters expensive, there is much more. When it comes to the cost of the converter, we must also talk about production. It is a complex production, requiring specialized materials and manufacturing processes to ensure their efficiency and durability. This complexity adds to the overall cost.

Beyond these components, we cannot help but mention supply and demand factors. As emission laws become stricter, the demand for effective catalytic converters has increased. The supply of precious metals often struggles to keep pace, leading to price pressure and rising costs for consumers.

How much does it cost to replace a catalytic converter?

On average, changing catalytic converters can cost between $700 and $4,108. However, labor does not cost too much. Instead, the cost of a catalytic converter will account for the majority of the cost. The cost of replacing the converter will depend on many factors, for example:

If you drive an older car, replacing your catalytic converter may cost you less. Older vehicles are equipped with cheaper catalytic converters, which can cost only a few hundred dollars. However, modern vehicles contain more complex catalytic converters, which significantly increases the price. Furthermore, if your vehicle is equipped with a dual exhaust system, there may be two catalytic converters to deal with. However, the cheaper catalytic converter will not contain the same level of precious metals, making it less efficient and less durable than others.

Replacing a catalytic converter can be one of the most expensive car repairs. Depending on the value of your vehicle, it may not be worth replacing the catalytic converter. However, you can avoid needing a new catalytic converter by periodically maintaining your vehicle.

Thus, I have provided you with information to answer the question “What makes catalytic converters so expensive” as well as the overall cost of replacing this part. To limit the repair cost of this expensive catalytic converter, you should observe and check it regularly to quickly detect and repair damage to ensure smooth operation.

The 7 tips on how to break in a new engine

How to Break In a New Engine (7 Tips to Extend Your Vehicle’s Lifespan)

Buying a new car is exciting. Nothing beats the smell of a new car and the ease of maintenance offered by a new engine.

If you’ve just bought a new car, chances are you want your new engine to last a good 20 years, or at least until you decide to upgrade it. The way you break in a new engine can impact its lifespan and health over time.

What Does “Breaking In” a New Engine Mean?

“Breaking in a new engine” refers to a process performed with a new or rebuilt engine to ensure all its components fit together properly and operate smoothly. During the break-in period, the engine’s moving parts, especially piston rings, cylinder walls, camshaft, bearings, and other components, wear in a controlled manner to create an effective, tight seal.

The break-in process typically involves running the engine under various loads and speeds for a certain mileage or period. Manufacturers often provide specific guidelines for this process.

The goal is to allow the engine components to mate and wear in a way that promotes longevity and performance. Proper break-in can help ensure the engine delivers its intended power, maintains good fuel efficiency, and reduces oil consumption and emissions throughout its life.

Tips for Breaking In a New Engine

Breaking in a new engine is quite simple. Here are some general tips to help your engine last longer than the vehicle itself.

1) Follow the Manufacturer’s Recommendations

No one knows your vehicle better than the engineers who designed it. When a manufacturer includes a break-in procedure in the owner’s manual, you should follow that procedure (even if it differs from this guide).

Many manufacturers include engine break-in guidelines that look like this: for the first 1,000 miles, vary the engine speed, avoid full throttle, and stay below 4,000 RPM.

Modern vehicles record telemetry data in the ECU. If you ever need to bring your vehicle in for warranty work, the technician may check the vehicle’s computer to see how fast you were going, what the maximum throttle percentage was, and what your maximum RPM was.

If you drove the vehicle hard before reaching the target break-in mileage, it could potentially cause issues with engine warranty work.

Example from the 2020 Dodge Charger owner’s manual (with 6.2L Hemi engine):

Click to enlarge

2) Avoid Redlining

When breaking in an engine, bearing surfaces and rotating components are mating. Small bits of metal wear off during the first few thousand miles on an engine. Once the engine is settled, wear will be minimal as long as you take care of it.

If you rev an engine very high before it’s broken in, you risk damaging it. This could damage bearing surfaces, cylinder walls, or piston rings. This is especially true if you rev the engine while it’s hot.

3) Avoid Full Throttle (At Least Initially)

For the same reasons you want to avoid redlining, you should also avoid full throttle if possible. Full throttle puts extra load on the engine, stressing components that may not be fully broken in.

An engine that hasn’t been broken in properly may experience increased blow-by and oil consumption as it ages. In extreme cases, you could even spin a bearing. A spun bearing will require a bottom-end engine rebuild.

4) Be Gentle with the Clutch

If your engine is new, chances are the rest of your car is too. This means other components need to be broken in up to 1,000 miles, like the clutch.

If your new vehicle has a manual transmission, it’s completely normal to smell a slight burnt clutch odor, even if you’re gentle with the clutch when driving. This smell should largely dissipate within the first few thousand miles.

5) Vary Engine Speed (Avoid Cruise Control)

When you vary engine speed during break-in, you help the piston rings seat evenly. While cruise control isn’t hard on the engine, using it for long distances during break-in could interfere with this process.

6) Avoid Idling

For the same reasons you want to avoid cruise control, you also want to avoid idling. Idling runs the engine at a single low RPM. You also want some load on the engine.

The engine will perform best at operating temperature while running under various loads. As you put miles on your new engine, you can gradually increase the maximum load you apply to the engine.

7) Drive in the City

Driving in the city is a simple way to naturally vary engine load. When you’re in stop-and-go traffic or driving from one traffic light to another, gentle intervals of acceleration and coasting are good for a new engine.

Engine Wear and Break-In

Engines will naturally see more contaminants in the oil early in their life due to the break-in process. If you perform used oil analysis, you’ll notice these extra contaminants start to thin out and disappear within the first 10,000 miles or so.

Some common elements you’ll notice on your oil report that are higher than average are copper, aluminum, and silicon. As you put miles on the vehicle, these values will likely drop to single-digit parts per million (PPM).

The 13 Causes of Gasoline Consumption

13 Causes of Poor Fuel Consumption (Increase Your MPG)

If your car suddenly starts consuming a terrible amount of fuel and leaves you wondering “why is my car using so much gas all of a sudden?”. You are not alone, and current gas prices make this a more serious problem than it used to be.

There are a number of common causes behind the drop in fuel efficiency. Fortunately, many of them can be easily fixed so you can recover the missing miles per gallon.

Causes of High Fuel Consumption

1) Excessive Idling

An often overlooked MPG killer (especially in summer and winter) is excessive idling. Although it may seem harmless to sit in your parked car for long periods waiting for someone or letting the engine warm up, you are literally getting 0 miles per gallon during this idling time.

These minutes of inactivity here and there really add up. It is said that idling consumes between 0.17 and 0.50 gallons of fuel per hour, depending on the vehicle.

Contrary to myths, idling for more than 10 seconds uses more fuel to keep the engine running than it would take to restart it. Unless you are stopped in traffic, it is best to turn off the engine if you are sitting for more than 10 seconds.

2) Carrying Excess Weight

A simple cause of high fuel consumption is when a vehicle carries too much weight, whether it has many items in the trunk, is full of people, is carrying a roof rack, or is towing a trailer.

The more weight the vehicle carries, the harder the engine has to work to generate enough power to move everything. In the case of a roof rack, you will also have to deal with additional wind resistance, which also affects your MPG.

Whenever more power is needed, whether cruising or accelerating, the engine must burn more fuel to achieve it. Consequently, you will need to fill up your fuel tank more often.

Keep in mind that excess weight leading to lower fuel consumption is often proportional to the amount of power a car produces. For example, an extra 100 pounds in a full-size truck won’t be a big deal, but that extra weight will have a significant impact on your Smart car’s MPG.

3) Dragging Brakes

If the brake pads, calipers, or any other component do not fully disengage from the rotor after releasing the brake pedal, you will experience constant friction and drag as the component lightly rubs against the spinning rotor. This constant friction forces your engine to work harder to maintain speeds and leads to a noticeable reduction in fuel consumption.

Often, you will notice a burning smell while driving or excessive brake dust covering your wheels. Causes can include stuck calipers, warped rotors, incorrect brake pads, or air in the brake lines.

4) Low Tire Pressure

Your vehicle’s tires must be inflated to the proper air pressure, usually between 32 PSI and 36 PSI on the majority of vehicles. A good tire pressure gauge is something everyone should own.

If you drive a vehicle with low tire pressure on one or all tires, it creates more wear and resistance for those tires. This forces the engine to work harder to compensate for the extra resistance, meaning more fuel will need to be used to power the engine.

5) Worn Tires (Low Tread Depth)

This may be surprising, but tires with insufficient tread can lead to increased fuel consumption. Because they have less grip and traction on the road, the engine works harder during acceleration, as some of the wheel movement is wasted.

Furthermore, unevenly worn tires (inner or outer tire wear) add extra drag and reduce mileage. This is because uneven tire wear changes the contact patch with the road, creating an imbalance.

6) Dirty Air Filter

There are many reasons to have a clean air filter, but one of the main reasons is to have good fuel economy. If your air filter is clogged or dirty, less air enters the combustion chamber, causing the engine to work much harder to meet the driver’s power demands.

This can even cause a rich running condition where the air/fuel mixture is not optimal. So consider changing your air filter at the recommended frequency set by the vehicle manufacturer. Your vehicle’s manual will contain this information.

7) Driving Too Fast

Believe it or not, the difference between a speed of 80 MPH and a speed of 70 MPH could mean fuel consumption that is 25% higher. The two main contributing factors are wind resistance and gear ratio. That’s why it’s always best to just stick to the speed limit or get as close to it as possible. Otherwise, you will consume more fuel than necessary.

8) Aggressive Driving

Even more important than driving above the speed limit, aggressive acceleration and braking have a drastic effect on your MPG.

This impatient, impulse-based driving style can reduce MPG by 33% compared to gradual, steady acceleration and braking practices. By stomping on the pedal for bursts of speed, you are dipping much deeper into the least efficient ranges of your engine’s RPM and fuel consumption.

Hard acceleration also often requires hard braking to slow down for turns or when closing in on traffic. This triggers a vicious cycle reminiscent of frustrating stop-and-go driving, a constant seesaw between flooring it and hard braking.

Smooth acceleration will save you a lot of fuel, especially when there is another red light a few blocks away.

9) Improper Gear Shifting

This is especially true with manual transmissions, but also applies to automatic transmissions with sport modes. Don’t shift too early or too late. If you try to shift to a higher gear at too low an RPM, the engine has to work harder to accelerate.

Alternatively, if you constantly let your engine rev in the upper RPM range of your power band since you are enjoying the extra power, keep in mind that you are also burning much more fuel.

10) Old Engine Oil

Not only do your spark plugs need to be in good condition, but you must also ensure you change the oil regularly and replace the oil filter as well. Over time, engine oil becomes thicker and has different flow properties.

For this reason, there is increased resistance within your engine’s components. This leads to requiring more fuel to move a vehicle.

11) Air Conditioning

When you use the air conditioner, the engine is under more load. As a result, it must consume more fuel to meet this demand. Use the standard fan ventilation if possible, or simply roll down your windows when driving at slower speeds, like on typical city streets.

Keep in mind that driving with the windows down also consumes more fuel because the openings create a drag effect that slows the vehicle. This is especially true at higher speeds, like on the highway. In that case, using the AC is the better option.

12) Bad Oxygen Sensor

Your engine is equipped with oxygen sensors that track the air and fuel mixture in the internal combustion chamber. Based on what it detects, it tells the Powertrain Control Module to add the correct amount of fuel.

But if the oxygen sensor is faulty, the system may automatically add more fuel even if the engine doesn’t need it.

13) Bad Spark Plugs

When the spark plugs are worn, you will have more engine misfires with your vehicle, which will consume more fuel. You will want to use good quality spark plugs if possible (OEM plugs are often the best), so you can get the most out of them. Iridium spark plugs and platinum spark plugs are the two most popular types.

How Weather and Environmental Factors Influence Fuel Consumption

Cold Temperatures

  • Icy winter air makes engine oil viscous like molasses. This creates more internal friction to overcome.
  • More gas is burned to bring the engine up to operating temperature.
  • Winter gasoline blends have a higher ethanol content, which reduces the energy density of the fuel per gallon.

Hot Temperatures

  • Summer heat helps engines avoid cold-start issues, but the constant operation of the air conditioning places a heavy accessory load on the engine, reducing highway mileage by up to 25%.

Strong Winds

  • Intense headwinds or storm gusts produce significant aerodynamic drag on the outside of the vehicle, making it much harder to maintain speed.
  • The engine must consume more fuel to fight against the wind resistance forces trying to push it back.

Rain and Snow

  • Wet roads cause tires to hydroplane more easily, increasing rolling resistance.
  • Hard throttle jabs or wheel spin accelerate wear and significantly reduce mpg.

Altitude Changes

  • Traveling to mountainous altitudes changes air density and oxygen content.
  • Thinner air causes engines to lose power and efficiency at altitude.
  • More throttle is needed simply to maintain speed, harming fuel economy.

Monitoring fuel consumption across different seasons and weather conditions illustrates how much external conditions can significantly impact MPG. What seems at first glance to be a random drop in fuel consumption is often due to environmental factors.

Check Transmission Fluid When Hot or Cold?

Should you check transmission fluid when it’s hot or cold?

Checking your transmission fluid is essential to prevent serious and costly damage on the road. But is it important that you check it hot or cold?

It’s important to do it right, as incorrect fluid levels can lead to transmission problems. Read on to learn the ideal time and technique for inspecting your transmission fluid.

When to Check Transmission Fluid

Check When Hot or Cold?

As a general rule, you’ll want to check the transmission fluid only when the engine is fully warmed up and idling.

When the vehicle first starts and the engine is cold, the transmission fluid is condensed and hasn’t yet begun to circulate fully through the system. Once warmed to operating temperature and idling, the fluid circulates through all components requiring lubrication and expands to a normal state that the dipstick can accurately measure.

Turning off the engine allows the fluid to drain into the pan, giving you an incomplete picture of the actual operating levels.

Why is there a Hot and Cold mark on the dipstick?

The “cold” mark on the transmission dipstick primarily serves as a factory fill line to ensure there is enough fluid from the start to prevent any damage at initial startup. It does not necessarily indicate a recommended minimum fluid level for continued operation after leaving the production line.

The dipstick’s “hot” mark instead reflects the target operating level for which the transmission was designed. So, while the cold mark provides the factory with a safety net for newly built transmissions, the hot mark is the one to pay attention to when checking your fluid.

Follow the Vehicle Manufacturer’s Guidelines

With so many different combinations of vehicles and transmissions, be sure to follow your vehicle manufacturer’s instructions exactly. Testing procedures may differ slightly between makes and models. Some specify having the vehicle running and idling in park, while others want it in neutral or perhaps after a few minutes of spirited driving.

Consult your owner’s manual for the proper gear selector setting, engine state, required temperature conditions, and any other special conditions to check before pulling that dipstick. Precise steps lead to accurate readings.

Correctly Checking Transmission Fluid Level

Follow these steps for the most accurate results when checking fluid levels in your transmission:

1) Warm Up the Vehicle

Run your vehicle until the engine reaches its operating temperature and the transmission is warm. Cold fluid will provide unreliable readings on the dipstick. Operating temperature ensures the fluid has expanded to the appropriate level for measurement.

It’s a good idea to cycle through all gears (from 1st to reverse) several times. This allows the fluid to flow into all internal valves and passages, thus filling the entire system. Cycling the transmission through all gears ensures everything has first reached its maximum capacity.

Some car manufacturers may even specify that you drive your vehicle as usual for a few minutes, so consult that owner’s manual.

2) Shift to Park

When parked on a level surface with the engine idling, put your automatic transmission in the park position and engage the parking brake. Keep your engine idling at all times during the process.

3) Locate the Dipstick

The location of the transmission dipstick handle can vary by vehicle make and model. Some are found near the engine oil dipstick, but others may be elsewhere under the hood. Consult your owner’s manual or perform an online search to find the transmission dipstick equipped in your vehicle.

4) Remove the Dipstick

Similar to checking your engine oil, fully remove the transmission dipstick and wipe any fluid residue from the end using a clean cloth. This prepares the marked end for an accurate fluid level reading without any leftover fluid or dirt.

5) Reinsert and Remove

Fully reinsert the dipstick into place, then remove it again. This allows you to get a true snapshot of the current operating fluid level, rather than the residual fluid left on the dipstick from your initial removal.

6) Assess Fluid Color and Level

First, check that the transmission fluid itself appears healthy – clear, red, or pink, without dark coloring or strong, strange odors. Then note where the fluid level sits.

Most transmission fluid dipsticks will have a hot (or warm) range, a shaded area, notches, or dots indicating the proper fluid level. That’s where you want to be. Again, check with your owner’s manual to ensure you are correctly interpreting the fluid level marks.

7) Adding Fluid

If your transmission fluid level falls below the correct level, you will need to add transmission fluid to bring it to the appropriate levels.

FAQ

Where can I find the transmission dipstick in my vehicle?

Finding the transmission dipstick in your vehicle is usually a fairly simple process, although the exact location may vary slightly by make and model. Here are some tips to locate it:

  • Consult your owner’s manual. The manual will clearly state where to find the transmission dipstick. It might be labeled and placed near the engine oil dipstick, or stowed elsewhere.
  • Look near the engine. In most front-wheel-drive vehicles, the transmission dipstick handle will be located towards the front of the engine compartment, near the radiator or battery. Rear-wheel-drive dipsticks are usually found closer to the firewall.
  • Identify by shape or label. Most transmission dipsticks have a ring or loop on the top of the handle, whereas the engine oil dipstick is straight. Some have “TRANS” printed directly on the handle. Be sure to remove the correct one.
  • Feel the texture. Some transmission dipsticks (but not all) often have grooved metal or plastic handles, as opposed to the smooth engine oil dipstick. This helps differentiate by touch.
  • Follow the transmission lines. If you’re still unsure, trace the metal lines going to and from the transmission. This usually leads directly to the dipstick location. The tube will be firmly mounted nearby.

What is the difference between the transmission fluid level when checked hot versus cold?

Checking the fluid level when the engine is hot provides the most accurate measurement of how much fluid is actually reaching all internal components under normal operating conditions.

When the transmission is hot, the fluid expands and circulates more freely, essentially giving you a “full” reading that reflects the amount present once everything has reached temperature. Cold fluid tends to measure lower, being denser and contracted, and will not reveal if there is sufficient volume present to properly fill the transmission once the entire system reaches operating heat and pressure.

Ultimately, you want to mimic the actual operating state rather than just a static cold measurement.

What should I do if my car doesn’t have a transmission dipstick?

Some newer vehicles no longer have a physical dipstick for owners to check the transmission fluid level at home. Often, they use a sensor to measure fluid levels and display a warning message for low fluid. If your car doesn’t have a transmission dipstick, try these instead:

  • Consult your owner’s manual. A few models without a dipstick may have another way to check the transmission fluid, such as a plug on the transmission itself. Your manual will tell you if and how this can be done.
  • Look for a fill tube. Cars without a dipstick often have a fill tube with markings instead. The car must be running and warmed up to read this tube correctly.
  • Rely on an auto technician. If there is no owner-accessible check method, then the fluid requires periodic inspection by a mechanic or service technician. They have the necessary tools to check the levels.
  • Inspect based on intervals. With no way to personally check the fluid, rely on drain intervals based on age and mileage instead. Today, most transmissions don’t need changes more often than 60,000 to 100,000 miles.

How to Diagnose a Bad Wheel Bearing Noise

How to Diagnose a Bad Wheel Bearing Noise: While driving, do you hear growling, howling, or sometimes squealing that increases with the vehicle’s speed? If yes, then know that most of the time, it’s the damaged wheel bearing making noise. “Wheel Bearing – What is it?” – If you have the same question in mind, let’s learn about it first. Then, you can understand and put into practice the ways to diagnose the bad wheel bearing noise.

Introduction to Wheel Bearing

Wheel bearings are steel balls held together by a metal ring called a race. The job of these balls is to reduce friction while the wheel is turning. Used in all vehicles, from bicycles to airplanes, these car components are equipped with a metal axle shaft inside the hub. This hub is located at the center of the wheel, which facilitates bolting the tire onto the wheel. And the bearings are mounted in the hub from the back of the wheel.

What Causes a Bad Wheel Bearing Noise?

In every vehicle, wheel bearings accompany the wheel and also constantly move. While driving, the wheels touch the road, so there can be a wide range of reasons why wheel bearings produce a bad sound. Here are 5 common reasons for bad wheel bearing noises.

1. Driving on Rough Roads

Driving on rough roads causes bad wheel bearing noise.

While you are driving your car, the wheel bearing of your car will receive all the pressure from the wheel and tire. Therefore, if you drive over a pothole or a bumpy curb, there will be more pressure on your wheel bearing, which will damage it very easily.

While driving, hitting something is a risk you cannot avoid, leading to increased force on the wheel bearing balls. This will cause small imperfections in the wheel bearings. Driving a car with these faulty bearings for a long time will lead to more heat and wear. Debris will be created due to the wear and will then contaminate the wheel bearing lubricant, causing the wheel bearing to fail more quickly.

2. Poorly Installed

Even if you have replaced your wheel bearings with new ones, you still hear a bad wheel bearing noise. The only conclusion is that the wheel bearings are making bad noises because they were poorly installed (without following the manufacturer’s recommendations).

3. Driving on Flooded Streets

If you drive on water-covered roads, your wheel bearings will be exposed to moisture.
If you drive on water-covered roads, your wheel bearings will be exposed to moisture. (Photo: Insurance Times)

Another reason that causes bad wheel bearing noise is driving on a flooded street. If you drive your vehicle on a street flooded with water, your wheel bearings will be exposed to moisture. The moisture mixes with the lubricant, making the lubricant ineffective, damaging the wheel bearings. In this case, you cannot maintain or repair a modern-style wheel bearing. According to automotive experts, the only solution to water damage is to replace the wheel bearing.

4. Wheel Area Accident

Wheel bearings are connected to the wheel, so if the wheel area is damaged, the wheel bearing will be damaged and then cause bad wheel bearing noise.

5. Bad Shock and Unbalanced Tires

The wheel system can operate stably depending on its wheel bearing, lower joint, lower arm, tire, and shock absorber. If you drive your car with unbalanced tires, some of these other parts will break and cause bad wheel bearing symptoms.

How to Diagnose a Bad Wheel Bearing Noise

Before taking the car to the nearest mechanic shop, let’s learn the three different methods to check the wheel bearing and see if it is faulty.

1. Check the Wheel Bearing by Listening to It

To hear the wheel bearing noise, you need to drive your car at a speed above 30 mph. And, at that time, you will notice that the faster you drive, the noise from the faulty or damaged wheel bearing increases.

Here, it is essential to note that this noise may seem to come from the tires or the window, but in reality, the source of the problem lies in the wheel bearing. The biggest difference one can notice is that the car with good wheel bearings does not produce a howling or squealing noise like the one with bad bearings.

Checking bad wheel bearing noise
Ways to diagnose a bad wheel bearing noise. Source: Mitsubishi

Furthermore, to find out which side of the wheel bearing is damaged, gently turn the vehicle. For example, if the car after turning left produces a bit less noise, it means the problem is with the bearings on the right side, and vice versa.

2. Physically Diagnose the Wheel Bearing by Shaking the Tires

For this step, you need to lift the front of the car by safely supporting it on a jack stand; with the rear tires blocked. This last action is necessary to prevent the vehicle from rolling back. Let’s now start by diagnosing the front wheel bearing and make sure it is the source of the problem.

First, grab the tire at both ends in the three o’clock and nine o’clock positions and shake it back and forth. If, while shaking the wheel, you hear some noise, it indicates a bad wheel bearing. Then, to ensure it is the bad wheel bearing noise and not a malfunction of the wheel itself, repeat the same process by holding the tire in the twelve o’clock and six o’clock positions. During this diagnostic procedure, also check the components behind the steering wheel. As this would ensure that the problem is not from any other part but only from the wheel bearing.

Tip: Before grabbing the tire in the six o’clock and twelve o’clock positions, make sure the vehicle is stable.

3. Use a Scanner to Diagnose the Problem

Before proceeding, it is important to note that not all vehicles are equipped with scanners. Therefore, cars equipped with ABS sensors can actually use this technology. Usually, newer cars have this technology.

For this, you need a device such as an OBD2 scanner (a kind of Bluetooth device), providing all information related to the vehicle’s configuration and the current status of its components. To check the condition of the wheel bearing, connect the device to the tablet/computer. Then enter the specific code for the wheel bearing on the tablet screen and confirm its status.

Bad wheel bearing noise via scanner
Using a scanner to check bad wheel bearing noise. (Photo: YouTube)

Therefore, here are the three simple methods that can help check the bad wheel bearing noise. And later, it can help you follow the corresponding maintenance tips.

Wrap Up

Bad wheel bearing noise is a common problem that can significantly impact a vehicle’s safety and performance. It is crucial to promptly identify and address wheel bearing issues to ensure the vehicle’s continued operation and avoid potential accidents or further damage. We hope the article will be helpful to you.

The 5 Symptoms of Power Steering Failure

Symptoms of Power Steering Failure Every innovation in the automotive science field makes driving safe and easy for us. Power steering is one such innovation that has revolutionized driving. It is a feature in all modern cars that allows us to steer the vehicle without applying much force. Without it, it would take Herculean strength to turn the steering wheel from one direction to the other, as in older cars.

In the event of power steering failure, driving can become a very difficult task. You will still be able to turn the wheels but with immense force. And if the power steering fails suddenly while the car is in motion, the result can be a serious accident since you won’t be able to steer the wheels as they should be.

When we buy a new car, we (humanly) cannot see how prepared we should be in case a car component gives up. With this blog article here, we are preparing you to face an imminent power steering failure by telling you the symptoms.

5 Obvious Symptoms of a Power Steering Failure

Here are 5 of the most obvious symptoms that tell you your car’s power steering is about to fail. Recognizing them in time can help you drive safely and avoid accidents.

1. Squealing and Whining Noises

Any kind of squealing in any part of the car is never a good sign. When you hear a whine or squeal when turning the steering wheel, or when moving the car at a slow pace, it means an imminent power steering failure. It’s probably because the power steering pump is about to fail.

Also, if you hear chuckling sounds under the hood when you start the ignition, your power steering pump is in bad condition. If there is a brake squealing noise, that’s something else. In any case, have it checked immediately.

2. Vibration in the Steering Wheel

Power Steering Failure Symptoms
Some power steering failures (photo source: Shutterstock)

This symptom is likely to manifest when the car is idling. And it can often come as a surprise, like an unexpected thunderclap. This vibration can often be turbulent and indicate that the drive belt is loose or damaged. In both cases, replacement becomes necessary. The drive belt needs the correct tension for the power steering pump to continue functioning properly. If not, the pump can fail.

You should, as usual, check the belt tension and cracks once a month.

3. Difficulty Turning the Wheels

This is one of the most obvious symptoms of a power steering failure, but you need to keep something in mind here. It could be due to an insufficient level of power steering fluid, which is most likely the case. It could also be due to insufficient tire pressure or an alignment issue. So, before jumping to a hasty conclusion, have it checked by a qualified mechanic.

4. Insufficient Power Steering Fluid Level

It’s a good thing that you follow the best maintenance tips and regularly check all car fluids. If the power steering fluid level is below the required level, it could mean a leak in the power steering system. A low level can cause noise and pump malfunction over time.

Check for leaks on the ground where your car is parked. Red puddles or a particular smell can indicate that there has been an oil leak and therefore the pump needs to be repaired.

5. Appearance of the Power Steering Fluid

New power steering fluid is red and has a particular smell. Old, oxidized fluid will appear dark gray. If air or water has infiltrated the fluid, it will appear foamy or bubbly. It can also happen that you find chrome particles in the fluid. When you notice this, it’s probably the power steering pump deteriorating.

So, make sure the fluid is red and has a distinctive smell.

What to Do If the Power Steering Fails While Driving ?

Experiencing a power steering failure while driving can be alarming, as it requires more effort to steer the vehicle. However, it is important to stay calm and take appropriate measures to ensure your safety. Here are some steps you can take when encountering this issue:

Hold the steering wheel firmly: With power steering assistance unavailable, you will need to apply more force to steer the vehicle. Use both hands and hold the steering wheel firmly.

Step 1 : Gradually Slow Down

Gradually reduce your speed and avoid sudden braking or acceleration, as the lack of power steering can affect your ability to maneuver quickly. Apply light pressure to the brakes and decelerate gradually to a safe speed.

Step 2: Turn On Your Hazard Lights

hazard lights
Activate hazard lights (Photo: carandbike.com)

Inform other drivers on the road that there is a problem with your vehicle by turning on your hazard lights. This will increase your visibility and prompt others to be cautious.

Step 3 : Safely Pull Over

Look for a safe place to stop, such as the roadside shoulder or a nearby parking lot. Use your turn signals to indicate your intention to stop and proceed with caution.

Step 4: Turn Off the Engine

Once safely stopped, turn off the engine. This will prevent further damage to the power steering system and allow you to assess the situation calmly.

Step 5: Inspect the Power Steering System

After stopping, visually inspect the power steering components, such as the drive belt, fluid level, and hoses, if you have the necessary knowledge and experience. If you notice obvious problems, like a broken belt or a fluid leak, it can help you understand the cause of the failure. However, keep in mind that it may not be advisable to attempt to fix the issue yourself unless you possess the required expertise.

After performing all these steps, you should seek professional advice to diagnose and repair the power steering system in a timely manner.

You must recognize the symptoms of a power steering failure before it’s too late. Remember; a stitch in time saves nine. So, beware of these 5 symptoms.