Carburetor or fuel injection: which is the best option

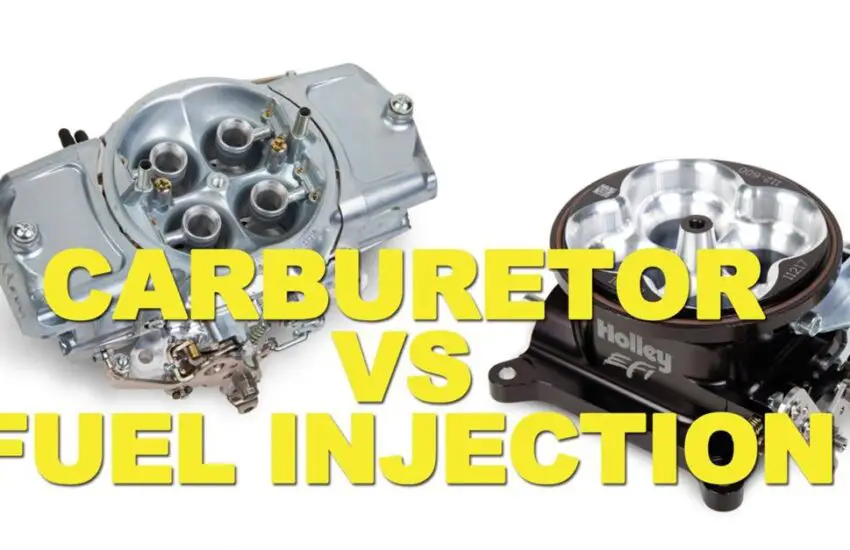
Carburetor vs Fuel Injection Car enthusiasts always have differing opinions in the carburetor vs fuel injection debate. Some believe only a carburetor does justice to engine performance while others are convinced of fuel injection’s usefulness.

So, which is the better option for you? Let’s follow Car From Japan!

Carburetor vs Fuel Injection: What Are They?

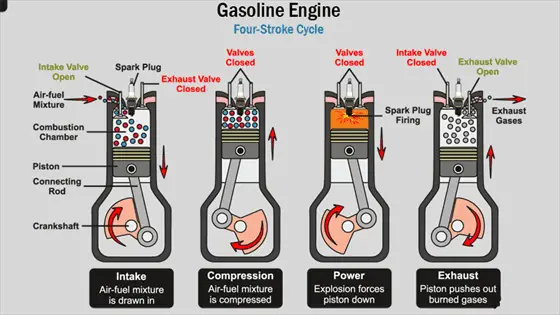
The carburetor and fuel injection are the systems that supply fuel and air to the engine cylinders. Gas combustion releases energy into the pistons and combustion chambers.

The earliest carburetors used airflow or fuel vapors for ignition. Later versions used a different principle and supplied the same amount of air and fuel into the intake.

This system cannot monitor the air/fuel ratio for individual cylinders. But carburetors last a long time and are widely used in race cars.

The carburetor system lost popularity in the early 1990s and fuel injection made its appearance.

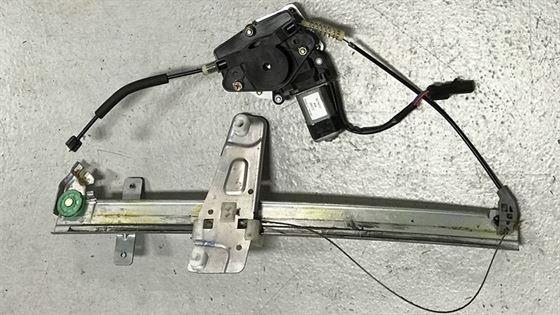
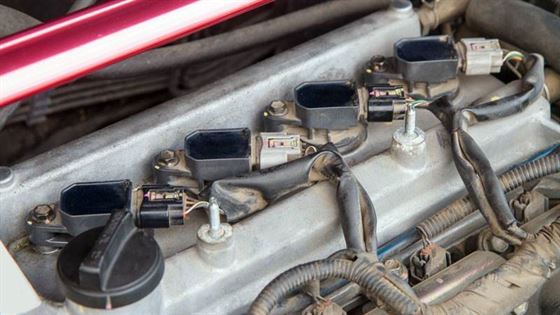
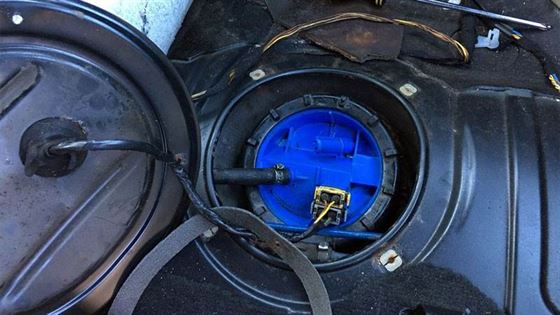
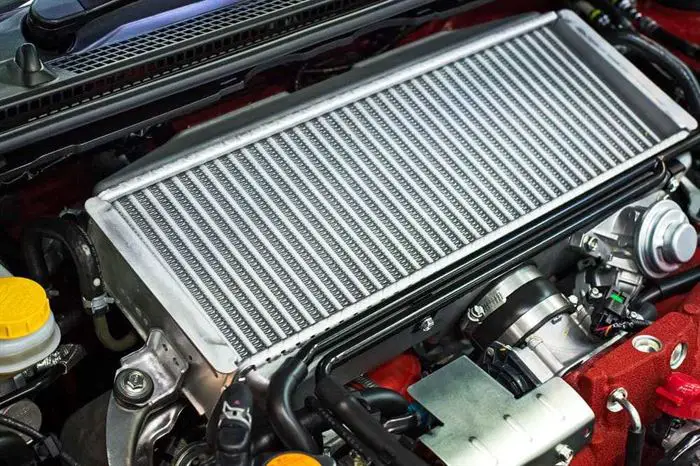
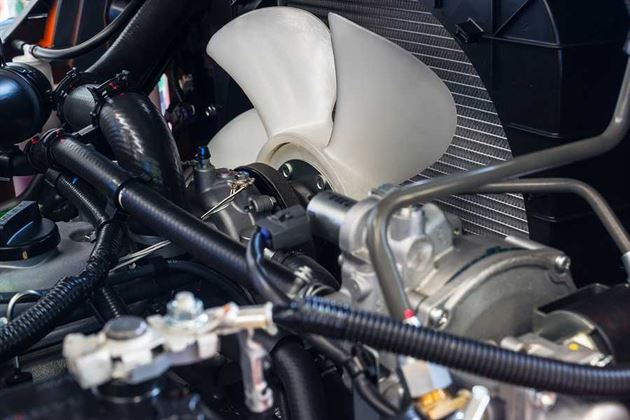
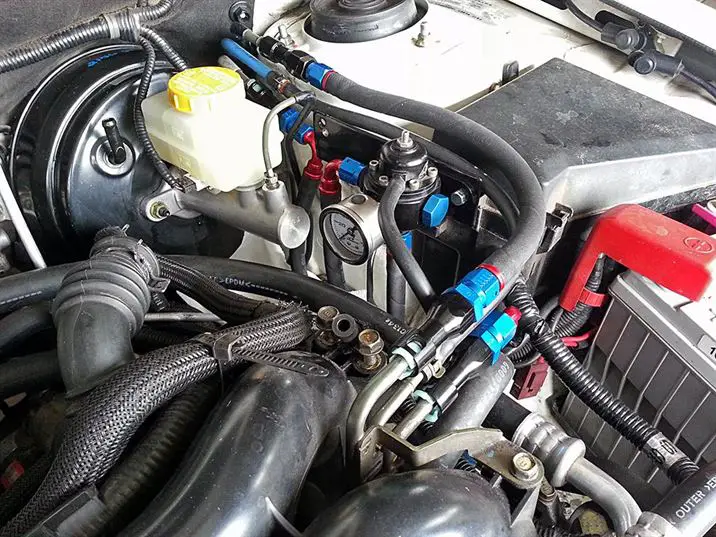
The fuel injection system is available in mechanical and electronic versions and for both diesel and gasoline engines.

The earliest carburetors used airflow or fuel vapors for ignition. Source: Holley

There are two different types: port fuel injection systems and direct injection systems. The latter is the advanced version that can handle two-stroke or four-stroke engines and supply fuel directly into the cylinders.

Depending on engine load conditions, this system will allow you to perfectly calculate the required amount of fuel and air and then distribute it into the cylinders. It will constantly adjust the amount based on the latest engine report.

Carburetor vs Fuel Injection: The Pros and Cons

The systems have their advantages and disadvantages. You can discover the best option by comparing their features across several parameters.

Power and Performance

A fuel injection system with electronic controls provides more precise results in terms of air and fuel supply to the cylinders. Since it can deliver the required amount, the engine runs at its optimal power and offers the best performance.

Conversely, carburetors cannot calculate the precise amount. They cannot adjust for changes in atmospheric pressure or fuel temperature.

Emissions and Fuel Economy

Again, the injection system wins in this area. It can accurately calculate the required amount of fuel and air and adjust it based on changes in several parameters, resulting in lower fuel consumption, higher energy efficiency, and fewer carbon emissions.

Carburetors cannot deliver the same results because they supply the fuel/air ratio on average, without being subject to engine conditions.

Port fuel injection. Source: DriveSpark

Maintenance Costs

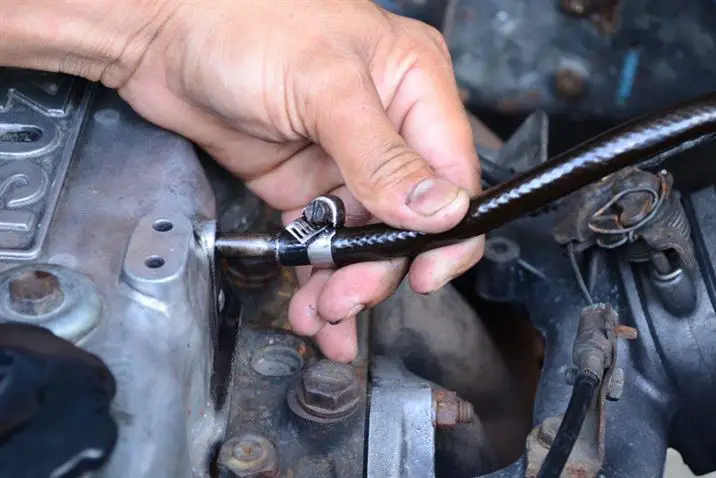
The carburetor system comes out on top in this section. You can even rebuild the entire carburetor system in your garage! All you need are a few simple hand tools, a can of carburetor cleaner, and some spare parts.

On the other hand, fuel injection is a complex system. If the system fails, you will need outside help to tow the car to a repair shop. Furthermore, repairing a fuel injection system requires professional skills.

Carburetor vs Fuel Injection: Which is Best?

It seems that fuel injection is the better option. Although most small engines use the carburetor system for its simplicity, cheap prices, and reduced maintenance costs, fuel injection is the ideal choice for modern vehicles for better performance, reduced emissions, and fuel economy.

FAQ on Carburetor and Fuel Injection

  1. Which system is more fuel-efficient: carburetor or fuel injection?

Fuel injection is generally more fuel-efficient than carburetors. It delivers fuel more precisely, optimizing the air-fuel mixture for improved combustion, which results in better fuel economy.

  1. Which system produces fewer emissions: carburetor or fuel injection?

Fuel injection tends to produce fewer emissions than carburetors. It allows for precise control of the air-fuel mixture, leading to cleaner and more efficient combustion, which reduces harmful emissions.

  1. Are there situations where carburetors are still preferred over fuel injection?

Carburetors are still preferred in certain niche applications, such as restoring vintage or classic cars, small engines like lawnmowers, and some off-road vehicles where simplicity and ease of maintenance are prioritized.

  1. Can you retrofit a carbureted engine with fuel injection?

It is possible to equip a carbureted engine with a fuel injection system. This conversion can improve fuel efficiency, emissions, and overall performance. However, it can be a complex and costly process.

  1. Is fuel injection more reliable than carburetors?

Fuel injection systems are generally considered more reliable than carburetors because they are less prone to issues such as fuel flooding, vapor lock, and cold-start problems. They also offer better adaptability to changing conditions.

  1. Which system is more common in modern vehicles: carburetor or fuel injection?

Modern vehicles almost exclusively use fuel injection systems due to their advantages in fuel efficiency, emission control, and performance. Carburetors have become obsolete in new car production.

Watch this video from Summit Racing to discover the difference between a carburetor and fuel injection!

  1. Can carbureted engines be as environmentally friendly as injected engines?

It is difficult for carbureted engines to match the environmental friendliness of injected engines. Fuel injection’s ability to precisely control fuel delivery and combustion helps reduce emissions, making it more environmentally friendly.

  1. Can you switch between carburetors and fuel injection on the same vehicle?

Converting a vehicle from carburetion to fuel injection or vice versa is possible but involves significant modifications to the engine and its control systems. This is typically done as part of customizations or engine swaps by experienced mechanics.

  1. Which system is more adaptable to performance upgrades and modifications?

Fuel injection systems are generally more adaptable to performance upgrades and modifications, as they offer precise control over fuel delivery and can adapt to changes in engine parameters.

  1. Do carburetors or fuel injection systems require more tuning for optimal performance?

Carburetors generally require more tuning to achieve optimal performance compared to fuel injection systems. Fuel injection systems can automatically adapt to different driving conditions, reducing the need for constant tuning.

Final Words

In the carburetor vs fuel injection debate, fuel injection emerges as the superior choice for modern vehicles. It offers precise fuel delivery, improved efficiency, reduced emissions, and better performance compared to carburetors.

Even though carburetors hold historical significance, advanced fuel injection technology aligns with contemporary demands for cleaner, more fuel-efficient, and environmentally friendly vehicles.

As automotive technology continues to evolve, fuel injection remains at the forefront, making it the preferred option for optimizing both engine performance and environmental impact.

Electric windows not working

Power windows not working. Nothing is more annoying than getting into your car on a scorching hot day, pressing the button, and realizing that your power windows won’t go down. Or worse, it’s raining and you can’t get the windows back up!

Before resorting to further smashing of the unresponsive buttons or manually forcing the window and potentially damaging the gears, read this first. We review the 10 most common reasons why your power windows fail and whether there’s a quick DIY fix or if it’s time to see a mechanic.

Common Causes of Power Window Malfunction

There are several reasons why your car’s windows may stop working. If you don’t hear or see any movement when you press the button, the problem is likely electrical rather than mechanical.

Here are some of the possible issues to check should this happen to you.

1) The Window Lock Button is Engaged

One of the simplest reasons your power windows aren’t working is that the window lock button is activated. This safety feature disables all passenger windows, preventing children from playing with them.

Check if the lock switch is pressed on the driver’s door. This button may have been accidentally placed in the locked position without you realizing it.

How to Fix:   Fixing this issue only takes a few seconds: simply press the window lock button on the driver’s door to unlock the setting. Try your power windows again and they should now work properly again. Performing regular checks of the lock buttons can prevent future power window problems.

2) Bad Window Regulator

The mechanism that raises and lowers a power window is called a window regulator. Each car door equipped with a power window has a window regulator to move it. It is connected via cables to a power window motor.

If the regulator fails , pressing the up or down button will not move the window. Excessive wear can cause slow cracking and breaking of regulator components, such as plastic gears, over time, or a misaligned regulator.

How to Fix:  Replacing worn window regulators. Although regulators can be repaired by a mechanic, the cost of professional repair may be equal to or greater than replacing them.

3) Bad Fuse

If all four windows are stuck and won’t move, the window regulator fuse is likely the cause. In this case, when you press any of the window switches, nothing happens – you won’t hear any motor and the window won’t shudder as if trying to move.

How to Fix:   Consult the owner’s manual to see which fuse powers the windows, then replace it.

4) Bad Window Motor

Power windows require a motor to provide electrical power to move the window up and down. At the end of the window motor is a gear that connects to the window regulator mechanism.

When you press the up/down buttons on your door, it activates the motor. This powers the regulator so it can move the window. If the motor is faulty, the regulator will not have the power to move.

You may be warned that the motor is starting to fail if the window occasionally moves slower than normal when going up. This gradual change in performance can precede a complete motor failure.

How to Fix:   The solution for a faulty power window motor is either to repair it or install a complete replacement unit. Repair involves disassembling the motor to service the internal components, which requires some expertise. Completely replacing the motor is a simpler solution and a fairly straightforward DIY task. 

5) Snow and Ice

If you live in an area where the weather is often snowy and icy, this can impact the operation of power windows. Windows can freeze when ice forms between the glass and the window frame.

Regulators may not have enough strength to force the window open if it is frozen. Even if it’s possible to force it initially, over time, the regulator will wear out faster due to the strain. Repeated cycles of the glass freezing and the need to force it open put more pressure on the power window components.

How to Fix:   Avoid forcing frozen power windows open or closed. Instead, use a hairdryer or other heating device to gently melt the ice on the edges.

Check if any clumps of snow or ice remain stuck in the window seals that could still hinder movement. Clean them by hand, using a plastic tool if possible to avoid scratches. Apply lubricant to restore proper operation. Keeping window seals clean and lubricated will help prevent snow and ice buildup.

6) Torn, Loose, or Dirty Window Seal

The window seal protects from wind and rain while helping to properly align the window. If the seal becomes sticky from debris buildup or moves out of its position, it can create extra friction against the window. The regulator motor may struggle to overcome this and move the glass.

It’s important to clean, lubricate, and replace window seals if necessary. If seal issues are ignored, water can leak inside the car . Maintaining the seals will allow power windows to operate optimally and avoid water damage inside the doors.

How to Fix:   Carefully inspect the window seals for any cracks, missing pieces, loose areas, or signs of leakage. Immediately replace any visibly deteriorated sections so the damage doesn’t spread. Ensure the seals are properly aligned in their frames.

Clean dirty window and door seals using a mild cleaner and a microfiber cloth to prevent buildup. Periodically lubricate the seals and tracks to prevent sticking issues.

7) Bad Power Window Switch

The power window switch on the door can fail over time. Every time you use the switch to raise or lower the window, it wears out a little more. Frequent use or aggressive pressing of the switch accelerates wear.

Eventually, the switch may stop working properly. This is the best-case scenario for power window problems, as replacing a window switch is fairly inexpensive compared to fixing other potential issues.

Troubleshooting is also simple. Compare the window’s response when using the switch on each door versus the master switch on the driver’s door (making sure the child safety lock is not activated).

If only one switch doesn’t work, either that switch is faulty, or there may be a wiring fault between the switches.

How to Fix:   Remove the panel covering the switch and inspect the connections for loose plugs or damage. Clean any dirt, corrosion, or foreign objects present. If the power window switch terminals seem functional, replace the entire switch. Install a new identical OEM factory switch to restore window control functionality from that location.

8) Wiring Problems

A set of wires connects the window switch to the motor. Although rare, wiring problems in the door can occur.

For example, if power window components were recently repaired, a mechanic may have inadvertently damaged the wires. In this case, make another trip for the mechanic to fix it.

You can also open the door panel and follow the wires from the fuse box to the switch, checking for any loose or corroded wires.

Before touching any wiring, always disconnect the battery first to avoid shock. It’s wise to inspect the condition of the wires and connections along the path to the switch to check for potential wiring faults affecting the power windows.

How to Fix:   It’s generally best to leave this task to the pros. But if you’re confident in your abilities:

Use a wiring diagram to methodically check every inch of wiring between the switches, fuses, regulators, and motors. Look for rubbing, bare wires, corrosion, breaks, melted areas indicating short circuits, or other physical damage likely to cause disruption.

Check connectors and terminals for any play or resistance using a multimeter. Any suspect wires will need to be spliced or replaced completely. Reconnect wires properly and replace damaged insulation like electrical tape. Test window operation before sealing everything up.

9) Damaged Door

For the power window to function correctly, the alignment of the window rails must be proper. Damage to the door from a collision or a loose bolt can disrupt the alignment, causing issues such as the window jamming or the door’s inability to close completely .

Maintaining good rail alignment allows the window regulator to smoothly lift and lower the window. But if the rail’s position changes due to door damage or loose mounting hardware, the regulator will struggle to move the window, leading to jamming or an inability to completely seal the door.

How to Fix:  Carefully inspect the affected doors and surrounding areas for any visible damage interfering with the smooth movement of the windows. Check the window for smooth up and down operation without any catching on the edges.

For minor alignment issues, adjust the regulator and motor mounts to avoid binding and friction. Lubricate restricted areas. If deformation prevents electrical or mechanical operation, door or frame replacement may be necessary. A body shop can better assess and remedy this type of significant damage for functional windows.

10) Dirty Window Tracks

The power window slides along metal tracks inside the door. These tracks can get dirty over time from road mud and debris, or the lubricant that keeps the window moving smoothly can dry out.

How to Fix:   Thoroughly clean all window tracks, seals, and glass with mild soap and a microfiber cloth. Use a flat vacuum nozzle to extract debris packed into the hard-to-reach back parts of the window track.

Compressed air can also help dislodge accumulated sediment. Lubricate the now-clean track surfaces using silicone lubricant, graphite powder, or other designated lubricants to prevent recurrence. Be careful not to get silicone on the car’s painted surfaces. Wipe it off immediately to avoid damage.

The car overheats when the air conditioning is on

The car overheats when the air conditioning is on. Your car should never overheat under normal operating conditions. If you are experiencing intermittent overheating issues, your vehicle may have one of the problems on this list.

Reasons Why Air Conditioning Causes a Car to Overheat

When a car overheats, it usually indicates a mechanical problem with the cooling system. Sometimes, a car can also overheat because the cooling system is overloaded. Here are some reasons why your air conditioning might cause your vehicle to overheat.

1) Low Coolant Level

If you are experiencing car overheating issues, one of the first things you want to check is that your coolant level is full. A low coolant level will introduce air pockets into the cooling system. Air does not cool as effectively as a liquid, so your engine will heat up more.

Wait for the engine to cool down completely before removing the radiator cap. If you need to add coolant, make sure to bleed the air from the cooling system to ensure no air pockets remain.

2) Overloaded Cooling System

If you are climbing a steep hill on a very hot day, your cooling system may not be able to dissipate heat quickly enough. This is especially true if you are towing or carrying a heavy load.

The air conditioning moves heat from one place to another. This heat must be dissipated through the AC system’s condenser. Your car may have just enough cooling capacity to cool the engine by itself, but not when the air conditioner is running.

Sometimes, your radiator or condenser can be upgraded to increase your vehicle’s cooling capacity. This is a common modification on sports cars that are heavily used on tracks and on towing vehicles.

3) Restricted Airflow

If debris is blocking the radiator or a significant number of fins are bent, your radiator and condenser may not be able to get enough airflow to cool the engine. Since the radiator and condenser are usually stacked next to each other, an airflow issue is likely to affect both units.

A few bent fins will have a negligible impact on cooling capacity. However, if your radiator has a large number of bent fins, it could cause problems under heavier loads.

Although it is quite tedious, fins can sometimes be straightened to improve airflow. Be careful if you try to do this yourself; you don’t want to puncture the radiator.

4) Bad Radiator Fan

If your radiator fans fail, there will not be enough airflow through the radiator and condenser when idling or moving slowly. If your car only overheats when stationary, the problem may be due to a bad radiator fan.

Why Do Cars Overheat?

An internal combustion engine is powered by small explosions. Air and fuel are injected into the combustion chamber, and then the combustion chamber is sealed. When the piston rises, the air-fuel mixture is compressed.

At a precise moment in the piston’s stroke, the spark plug ignites to ignite the fuel. This ignition forces the piston back down, turning the crankshaft.

Engines are designed to operate within a specific temperature range. If the engine is too cold, it will not operate efficiently. If the engine is too hot, parts can melt, cylinder heads can warp, the engine block can crack, and head gaskets can leak.

Coolant circulates through an engine to prevent the engine from running too hot. Once the engine starts to get a bit too hot, the thermostat opens to allow coolant to flow from the radiator to the engine block. Once the engine has cooled down to the target temperature, the thermostat closes, and the process repeats.

Loss of power in a car during acceleration cause

Causes of Car Power Loss During Acceleration

Few things are as frustrating as suddenly losing engine power when trying to accelerate. Whether you’re attempting to merge onto the highway or need to make a crucial pass, a sudden loss of acceleration can be completely shocking, not to mention dangerous.

Even though it might seem like your engine is giving up at the worst possible moment, in most cases, your car’s power issues have a mechanical or electrical culprit. Here are the most common causes of a car losing power during acceleration.

Common Reasons Why Your Car Loses Power While Driving

Unfortunately, determining the cause of your vehicle’s power loss isn’t as straightforward as other problems. For this reason, it’s always a good idea to start with the cheapest and/or simplest solutions when it comes to making a correct diagnosis.

1) Bad Spark Plugs

Your vehicle’s internal combustion engine relies on spark plugs to transmit the electrical signal from the ignition coils to the internal combustion chamber. Once this happens, an electrical spark ignites the fuel and air mixture.

Consequently, if you have faulty spark plugs that cannot transmit this electrical signal, then your engine’s performance weakens and you won’t be able to accelerate as quickly. This will eventually reach the point where it won’t accelerate at all.

2) Bad MAF Sensor

Your Mass Air Flow (MAF) sensor directly influences how your car’s Engine Control Unit (ECU) balances the air and fuel mixture. If you have a faulty MAF sensor, you will notice a drop in engine power because it results in an improper mixture. Keep an eye out for rough idling or difficulty starting the car, signs of a malfunctioning MAF sensor.

3) Faulty Ignition Coil

The ignition system is equipped with ignition coils that convert the 12-volt power from your battery into the 20,000 volts needed to start the engine. If you had a faulty ignition coil, the fuel and air mixture inside the engine would not ignite properly. This means you would lose power when you press the accelerator pedal.

4) Clogged Fuel Filter

Imagine your car trying to suck gasoline through a clogged straw: that’s what a clogged fuel filter will do. A dirty or clogged fuel filter will restrict the flow of fuel to the engine, leading to a drop in performance, particularly noticeable during acceleration attempts.

This is due to the simple fact that the engine needs more fuel as speed increases, and a clogged filter can prevent the necessary volume of fuel from reaching the engine.

5) Bad Fuel Injectors

A car engine depends on its fuel injectors inside the fuel system. A fuel injector is responsible for spraying the fuel brought by the fuel pump into each cylinder.

Obviously, if the fuel injector fails or is clogged, it will not be able to spray fuel into the engine properly. This would prevent the engine from producing enough power to accelerate.

Often, running a fuel injector cleaner through your system can clear a clogged injector, but other times, a replacement may be necessary.

6) Bad Fuel Pump

The fuel pump is how the fuel inside the gas tank is brought to the engine to be burned. The fuel pump also regulates the fuel pressure during transfer to meet the engine’s demands.

A faulty fuel pump would result in the transfer of an inconsistent fuel supply. This will lead to poor engine performance and acceleration.

7) Low Compression

The internal combustion process relies on strong cylinder compression for the vehicle to generate enough power to accelerate. If there is a low level of compression due to bad seals or another issue, the engine will generate a low level of power.

8) Clogged Exhaust Pipe

The exhaust system consists of two filters called the catalytic converter and the muffler. The catalytic converter reduces the pollution produced by the exhaust gases. The muffler reduces the noise produced.

If either of these filters or the exhaust pipe were clogged by something, it would deteriorate the engine and lead to a reduction in the power it generates. Before replacing a clogged or dirty catalytic converter, it’s worth using a good catalytic converter cleaner first.

9) Bad Throttle Body

The throttle body controls the amount of air entering the engine, and if it’s not working correctly, it can lead to various problems, including uneven acceleration, rough idling, engine stalling, and lack of power.

A faulty throttle body may not open fully or not respond properly to the accelerator pedal, which will result in poor engine performance and reduced acceleration.

10) Dirty Air Filter

When the internal combustion chamber mixes air and gasoline to produce power, the air first passes through an air filter before entering the chamber. This filter helps prevent any external debris and insects from entering the chamber.

If you had a clogged or dirty air filter, then not enough air would enter the engine for optimal combustion. Thus, you will experience a lack of power when you attempt to accelerate.

11) Turbocharger and Supercharging Problems

Do you have a turbo? Problems with the turbocharger or associated components in a turbocharged engine can lead to a lack of expected power during acceleration.

For example, damage to the turbo’s blades or bearings can prevent the turbo from properly generating increased engine boost pressure during acceleration. Air leaks in the pipes between the turbo and the engine will also decrease usable boost.

Furthermore, any sensors or controls related to the turbocharger and supercharging system could malfunction and not signal the engine to produce adequate power during acceleration.

12) Transmission Problem

Sometimes, what feels like engine power loss is actually caused by a transmission issue.

Worn clutch discs can slip when torque is applied, failing to properly transfer engine power to the wheels. Low transmission fluid levels can deprive internal components of necessary lubrication, causing delayed engagement or slipping.

Faulty solenoids that control gear engagement may not activate at the right time, causing bands to slip instead of locking firmly. Internal leaks can also reduce pressure in the lines, thereby compromising the transmission’s ability to shift gears firmly.

In all cases, the result is increased engine RPM without proportional vehicle acceleration due to inefficient power transfer within the transmission.

13) Engine Knocking

Engine knocking, also known as pre-ignition or “ping,” is the uncontrolled ignition of fuel inside the combustion chamber.

Combustion engines are precisely timed to maximize their power and efficiency. If the fuel burns before it’s supposed to, the piston may not be in the correct position in the cylinder. This could lead to power loss and even catastrophic engine damage.

14) Clogged Catalytic Converter

The catalytic converter is responsible for cleaning the exhaust gases, converting toxic gases such as NOx and carbon monoxide into less toxic molecules.

A restriction in the catalytic converter would prevent exhaust gases from exiting properly. In extreme cases, this can even cause a fire. Therefore, this problem must be resolved as quickly as possible.

The cooling circuit fan is not working: troubleshooting

The cooling circuit fan is not working. To ensure optimal performance and longevity, your engine must not overheat. As part of the engine cooling system alongside the coolant, a radiator fan blows fresh air through the radiator as a heat transfer method to prevent the engine from overheating. The issue of radiator fan malfunction will cause significant damage to the engine and therefore requires immediate attention when it occurs.

Learn how a radiator and radiator fan work, how to diagnose radiator fan malfunction issues, and common causes.

What is the purpose of a radiator fan?

Everything related to the proper functioning of your engine is a priority, after the engine itself. Another component that can lead to engine malfunction and failure is the radiator.

Quite different from the radiator in your home, a radiator in a car is a crucial element of its engine cooling system. The engine powers your car by generating combustion inside the combustion chamber, along with a great deal of friction. This results in a lot of heat inside the engine.

The radiator is the heart of the cooling system. Creator: Shutterstock

If this heat is not diverted elsewhere to cool the engine while it’s running, the engine will become too hot and, like all other parts of your car, this will eventually cause significant damage.

The radiator is one of the multi-part cooling systems of the engine, along with the lubricating oil that reduces friction and the exhaust system through which heat exits the combustion chamber. When the thermostat located in front of the engine detects that the engine is reaching a dangerous temperature, the radiator then comes into action by releasing a mixture of water and coolant to quickly cool the engine.

There is a sensor on the lower passenger side of the radiator. Its job is to take note of the coolant temperature. It sends signals to the radiator fan to turn on when the temperature exceeds 172°F. The fan should also turn on after activating the air conditioner.

Placed between the radiator and the engine, cooling fans blow cooling air through the car’s radiator to cool the heated water and coolant mixture circulating through the radiator.

Radiator fans blow cooling air through the car’s radiator. Source: Adobe Stock

Radiator fan not working: Symptoms

If you need to confirm whether it is working or not, you should start your engine and let your vehicle idle. The safest way to check is to actually listen for the sound of the fan.

Turn the air conditioning to the maximum setting; this should trigger the cooling fan to turn on immediately. In older cars, it usually takes about 15 to 20 minutes for the engine to reach the proper temperature.

All you have to do is lift the engine hood and listen carefully for the fan noise. The best modern cars have very quiet engines, so it might not be easy to hear the noise when you are inside the car.

If the fan starts immediately when the air conditioning is on maximum, but does not operate correctly when the engine heats up later, the radiator fan may not be working properly.

Can I drive my car if the fan is not working?

Yes, your car can still run without a radiator fan, but you should never do so. Your vehicle’s cooling system is crucial for engine performance and longevity. Whenever your engine overheats, you cause significant damage to the precious engine.

As soon as you feel that your radiator fan is no longer working or that your car is not cooling, you should take a few troubleshooting steps to determine what the problem is. If you can’t figure it out, take your car to a mechanic immediately so they can identify the issue.

Radiator fan not working: Common causes

What prevents cooling fans from working? Here are 5 common problems that can affect your car’s radiator fan, making it obsolete or ineffective:

1. A faulty fuse

This is a very common issue that leads to radiator fan failure: the fuse can blow or simply fall out. However, you will need to consult the owner’s manual to find out exactly where you can locate the fuse, but once you do, it’s an easy task. You will need to replace the radiator fan fuse if it is not working or missing.

Remember, if anything electrical in your car isn’t working, your first check point is the fuse. Here’s how to test radiator fan fuses with a multimeter.

Check the fuses one by one. Source: AudiWorld

You need to check the voltage of a few fuses in the fuse box under the dashboard (numbers 3, 15, and 20) and in the fuse box under the hood (numbers 47 and 50). Turn off the engine or turn the ignition key to IG2. Set the multimeter dial to “20” in the DCV section because you will be testing 12V circuits.

The black probe of the multimeter will go to the negative terminal of the battery (for fuses under the hood) or to a metal ground point on the car (for fuses under the dashboard). Each fuse has two contacts where you need to touch the multimeter test probes to get the readings.

Touch the red probe to one of the two contacts and take the reading. The value should be around 12 volts. No need to worry about recording the precise voltage value as it varies due to several factors, including alternator output and battery load. Touch the probe to the other contact and take the reading.

What do the readings mean?

  • 12V on both contacts. This means the fuse is working correctly, and you can simply check the next one.
  • 12V on one contact and 0V on the other. This is a sign of a blown fuse. You need to replace it.
  • 0V on both contacts. This means the fuse has no power, which is only possible if the black probe is not properly connected to the battery’s negative terminal or grounded to a metal part. Detach the probe, then reconnect it to take measurements.

2. Dead wires

If you see the engine heating up but not the radiator fan, the fan wires could be the cause. Simply disconnect both wires, negative and positive. The standard direct current they should provide is 12V (approximately). Take a voltmeter and check for current. If there is none in one or both, you will need to replace them.

You will be able to locate the fan relay under the hood. Check the current from the relay to the fan. That’s where the current should pass. If there is voltage there, a fault in the fan is the reason why the radiator fan is not working. Then it is the fan that you will need to replace.

3. Broken fan clutch

The fan clutch is responsible for attaching the radiator fan to the engine and making it operate. If this clutch fails, the fan will not work. It’s the usual wear over the years that can cause the clutch springs to corrode or even burn out. If you don’t find any other radiator fan problems, the clutch is likely the cause.

4. Insufficient coolant level

An insufficient coolant level in the engine can also lead to fan failure. Just look at the coolant reservoir and check if the level reaches the required maximum mark. If not, simply fill it to the line and you’ll be good to go.

This is actually one of the most practical maintenance tips that helps you keep the engine as well as the cooling/heating system in good condition.

5. Defective temperature sensor

The temperature sensor is the mechanism that decides when the radiator fan should come into action. It does this by reading the temperature of the cooling system. If this sensor is faulty, the fan will not be able to start its operation. You will likely find this sensor in the thermostat housing. You can try disconnecting the wires and reconnecting them to the sensor; there’s a good chance it will work. Otherwise, you will need to have it replaced.

6. Faulty radiator fan motor

If the problem of the radiator fan not working persists, you can check the fan by connecting it to a different power source, i.e., direct battery power.

First, disconnect the wiring connector. Check for any damage and clean the connector. Make sure the wires are securely attached and not damaged. Then, look at the wires and identify which are power wires and which are ground wires to avoid confusion.

Next, connect the battery negative to the ground side of the fan connector, then connect the battery positive to the other wire. You may need to consult your vehicle’s repair manual to see if your vehicle has a 4-terminal connector or three terminals, with two for power and one for ground wires.

After being connected to the battery, your radiator fan should start operating. However, if your radiator fan does not start operating with direct power or operates at a very low speed, you should then ensure that the terminal is not damaged and test the incoming voltage.

If there is indeed incoming power, the problem is a failing fan motor, and you will also need to replace the fan motor.

Radiator fan replacement cost

The cost of replacing a radiator fan ranges between $300 and $700. Source: Ebay

A radiator fan costs between $200 and $400. Additionally, your mechanic will charge between $120 and $200 for labor depending on the make and model of your car. Since the radiator is located right at the front, your mechanic does not need to open other components to remove the radiator fan.

If you also need to replace the fan motor, labor costs are estimated between $170 and $220, while parts cost between $530 and $680.

How long does it take to replace a radiator fan?

Replacing a radiator is a laborious process, and the duration varies depending on the service attendant’s skills. A professional mechanic is unlikely to take more than 2 to 3 hours. It may take an additional 30 minutes to an hour because the process involves additional services like coolant disposal, broken belts, and a few other things, if necessary.

You might need more time depending on the condition of some other parts. If the car is old, it’s possible that the electrical connectors and terminals are damaged and the fasteners are broken. You will need to repair and replace these parts for the radiator to resume operation. Some mechanics might also want to change the antifreeze and replace the radiator hoses.

Motor Overvoltage: How to Troubleshoot and Repair

Engine Surging: How to Troubleshoot and Repair, Every dedicated car owner, even if not a true enthusiast, must understand and pay attention at all times to the well-being of their engine, as many problems can affect this delicate and complicated component.

A common malfunction you will likely encounter is engine surging, and knowing how to resolve this issue in under 45 minutes is a maintenance tip you must master early on.

The internal combustion engine relies on the precise cyclic operations of numerous parts, including the precise air/fuel mixture, spark timing, and exhaust gas management.

The slightest malfunction in a part will cause the engine cycles to deviate from what is optimal, which will hinder engine performance.

This issue is often referred to as engine soaring or rapid acceleration or deceleration cycles. You might encounter either engine surging at idle or car surging while driving.

The good news is that in many cases, engine surges can be repaired inexpensively. Discover the causes and how to troubleshoot and resolve this common engine problem in just under 45 minutes for smooth driving.

Engine Surging: Symptoms

Surging or Misfiring

Engine surging is different from hard starting or a no-start problem. “Surging” does not refer to an engine that knocks, idles roughly, or stalls. It is when an engine starts easily and accelerates smoothly, but after a few minutes at constant speed, it either accelerates or misfires.

Misfiring occurs when one of the cylinders in an engine’s combustion cycle fails. Since an engine has four cylinders, the car would still run if one cylinder failed.

However, power surges in speed and misfiring usually cause rough operation, jerking, or engine strain. If you experience either, the first thing to do is perform an inspection before going to a mechanic.

In some cases, you can resolve the root of the problem in your garage with the available tools. Meanwhile, if the cause requires complicated repairs, it is best to leave this task to a professional.

Check Engine Light On

Engine surging will cause the Check Engine light to come on. (Photo: rd)

Whatever the cause, if your car’s engine is misfiring or surging, your OBD-II diagnostic system will display error codes and the Check Engine light will illuminate on your dashboard.

Engine Surging: Causes and Troubleshooting

Below are the most common causes of engine surging. While some are relatively simple and inexpensive to maintain, others require professional inspection and repair.

Electronic Control Module Adjustment

When one of an engine’s carefully controlled parameters deviates from what the electronic control module expects, it automatically adjusts the air intake, fuel injection, and spark plug timing to bring everything back to its normal state.

Each time, this electronic control module will almost invariably overcompensate, causing engine surging issues.

Vacuum Leaks

Radiator fan For trucksfan, radiator, car, engine, cooling

Vacuum leaks most often occur in hoses, which are the most prone to wear due to engine heat under the hood.

Vacuum leaks can cause car surging during acceleration on engines equipped with a Mass Air Flow (MAF) system or a Manifold Air Pressure (MAP) system. Regarding engine surging while cruising, it depends on the type of fuel injection system.

An internal combustion engine needs a mixture of air and fuel to create combustion. MAF systems measure the amount of air flowing through the engine’s throttle body and use this information to determine how much fuel to inject.

Vacuum leaks in a MAF system usually cause rough idling but often do not result in engine surging while cruising.

Meanwhile, a MAP system extrapolates airflow from the intake manifold’s internal air pressure. A vacuum leak in a MAP system can cause engine surging while cruising.

The Solution: check and replace vacuum lines if necessary by following this definitive guide on “What is and How to Find a Vacuum Leak”

Bad Gasoline

The oxidation of gasoline after a certain storage time is a natural process. Gasoline will react with oxygen to produce carbon dioxide, water, and contaminants like nitric oxide and free carbon molecules, thus losing its potency.

In other words, oxidized gasoline also contains air or is contaminated by air. Once the engine is injected with this bad gasoline, its electronic control module will read this as a “lean burn” or excess air conditioning.

A lean burn is not optimal for the engine, as a combustion engine strictly requires a fixed ratio of fuel and air to operate.

In attempting to adjust, the electronic control module injects even more bad gasoline to rebalance the air-fuel ratio. This essentially causes a lack of flame in the engine’s combustion chambers.

Once a lack of flame is detected, it slows down during fuel injection, runs lean again, then overcompensates and must repeat this cycle over and over to keep running. This repeated lean combustion and overcompensation will cause engine surging and stalling.

The Solution: remove the tank and siphon the bad gas using a garden hose. Then fill the tank with dry cleaning fluid.

EGR Valve Stuck Open

The Exhaust Gas Recirculation (EGR) valve is an important part of your car’s emission system. It recirculates exhaust gases from the engine’s combustion chamber to burn them again instead of sending them to the emission system, thus reducing emissions.

The EGR valve opens and closes during engine cycles. If the EGR valve remains open, exhaust gases return to the chamber when they are not supposed to.

The engine cannot burn too much carbon dioxide present in the exhaust gases, meaning there is not enough oxygen for combustion to take place.

The Exhaust Gas Recirculation (EGR) valve is an important part of your car’s emission system. (Photo: next truck online)

The electronic control module will overcompensate by allowing more air to enter through the intake manifold, which will result in the engine running lean. As explained above, lean combustion will cause engine surging cycles.

The Solution: replace the EGR valve.

Faulty Electronic Control Module

As explained above, the electronic control module regulates the operation of many components to ensure the engine gets what is optimal to run efficiently and compensates when there is a deviation.

The electronic control module, or the “computer” of a car. (Photo source: YouTube)

When the electronic control module malfunctions for any reason, it will not do its job correctly. For example, it may suddenly inject more fuel into the combustion engine, resulting in engine surging.

The Solution: this is usually not a DIY job. Have a mechanic test the electronic control module and repair or replace components if necessary.

Clogged Fuel Filter

An engine’s fuel injectors contain very fine mesh filters, which can just as easily become clogged. A clogged fuel filter will reduce fuel pressure, prompting the electronic control module to open the fuel injectors wider to maintain the same flow.

Once the fuel filters are forced open this way, the fuel pressure increases rapidly, which injects more fuel into the engine than it needs, causing what you would feel as engine surging.

A clogged fuel filter will reduce fuel pressure. (Photo: autoexpert)

The electronic control module then compensates by closing the injectors, which causes the fuel pressure to drop again. The above cycle would therefore repeat, causing repeated engine surges.

Engine Running Too Hot

An engine can overheat, often due to low coolant levels or air bubbles in the cooling system.

When an engine overheats, the cylinder head gaskets can typically blow, which can cause coolant leakage and air intake.

Similar to what happens when you use poor quality gasoline, as explained above, a greater amount of air entering the engine will cause an engine surging cycle.

The coolant reservoir in the cooling system. (Photo: hot cars)

The Solution: check and fill the coolant or remove air from the cooling system by referring to How to Flush a Car’s Cooling System.

Fuel Pressure Regulators Operating at Low Pressure

If a fuel pump fails or the fuel pressure regulator operates at low pressure, it can result in incorrect fuel volume or fuel pressure in the fuel system.

As explained above in previous sections, if the fuel pressure is reduced or when the engine runs with a lean mixture, these deviations will lead to engine surging cycles.

A faulty fuel pressure regulator can lead to low fuel pressure, resulting in engine surging. (Photo: tokopedia)

The Solution: these are usually not easy DIY jobs. Check the fuel pressure with a fuel pressure gauge. If it is low, take it to a mechanic to repair or replace a fuel pressure regulator.

To learn more about how to check and replace faulty fuel pumps, refer to the guides below.

Bad Ignition Timing

Without a spark, the air-fuel mixture could not ignite in the engine chamber, thus causing combustion. Spark plugs will transmit an electrical signal from the ignition coil at a predetermined time to create a spark that will ignite the air-fuel mixture.

The timing of this ignition must be precise. If the ignition timing is incorrect, the air/fuel ratio will not burn efficiently, the combustion process will not be optimal, and engine performance will surely be affected.

For example, if the timing is too advanced, or much earlier than it should be, the air-fuel mixture will ignite too early in the combustion cycle.

This can lead to engine overheating. As explained above, an overheating engine can cause engine surging.

The Solution: have a professional adjust the ignition timing.

Ignition System Causing Weak Spark

A weak ignition spark can be caused by many possible problems in the ignition system, including faulty distributor caps, rotors, wires, spark plugs, and coils.

How to Flush a Car’s Cooling System

How to flush a car’s cooling system, The engine cooling system plays a crucial role in preventing your car from overheating. Additionally, it helps maintain optimal temperature under all conditions. However, the effectiveness of the coolant mixture wears out over time due to scale and rust. A contaminated cooling system can put your car at risk of sudden breakdown. To avoid a cooling system failure, it’s important to know how to flush the cooling system. You simply need the right tools and follow a few steps to do this.

Some precautions for a cooling system flush

All the necessary items for draining a cooling system and adding the new coolant mixture must be ready before proceeding with the cooling system flush.

You will need a pan or disposable container to collect the used coolant as it drains. Ensure the fluid is disposed of safely, out of reach of children or pets. Inquire, especially at your local auto parts store, to find used fluid recycling options.

For the fresh engine coolant mixture, you will need distilled water and the coolant or antifreeze suitable for your car (check your owner’s manual to find out). You can also add an anti-rust sealant and a protector to the mixture.

A chemical flush product can be used in the mixture if you wish to do it more effectively.

Keep a screwdriver or a wrench handy (depending on the drain plug). Always use a pair of gloves to prevent skin irritation from contact with chemicals.

Never remove the coolant reservoir cap from a running or hot engine, as the pressurized area poses a risk of hot fluid spray. Let the system cool down before loosening any plugs or caps.

How to drain the coolant system

Place the disposable container for collection under the car and use a screwdriver/wrench to loosen the coolant drain plug. Then remove it and drain the coolant.

After safely disposing of the used coolant, securely reinstall the drain plug.

How to flush the cooling system

Fill the empty reservoir with water until it’s full. Start the engine and add more as the water is pumped, allowing you to completely fill the system so there’s no air left inside. Then, add the entire bottle of chemical product while the engine is still running, or simply use distilled water only.

Flushing a cooling system. (Photo source: nearby)

Next, follow these steps to learn how to flush the engine coolant:

  1. Put the reservoir cap back on and take the car for a short 10 to 15-minute drive. If the engine seems to be overheating, stop the car immediately.
  2. After the drive, allow time for the engine to cool before draining the cooling system by disconnecting the drain.
  3. As the water drains, also remove the reservoir cap so that no water is trapped by suction in the upper part. Start the engine for a few seconds after the water has drained to expel any remaining water from the cooling system.
  4. Stop the engine and securely reinstall the drain plug.
  5. Fill the cooling system with the appropriate type and volume of coolant, as indicated in your owner’s manual. Pour the coolant into the system. If it starts to spill, start the engine and continue adding more as the fluid is drawn in.
  6. Add the anti-rust solution (if you wish to add one) before pouring your last gallon of coolant mixture.

Finally, securely close the reservoir cap. Take the car for a final drive to circulate the brand-new engine coolant throughout the system. And that’s how to perform a coolant flush.

How to align the flywheels? The right way to do it

How to align steering wheels? The proper way to do it. It’s nice to have good control over your car, but sometimes it becomes difficult to keep the wheels aligned. If even after turning the steering wheel in the correct direction, your car drives in the wrong direction, consider straightening the steering wheel.

And, if the question “How to straighten the steering wheel” bothers you; the following procedure would certainly help you a lot.

How to Straighten the Steering Wheel

The stability of the steering wheel is an essential element in vehicles when it comes to improving driving comfort. Shaky steering wheels ruin the driving experience for any car enthusiast. But don’t worry, it’s not a problem you can’t solve.

This misalignment of the steering wheel can be easily corrected by following some guidelines and instructions.

Initialization Process and Loosening the Nuts

The first step towards straightening the steering wheel is to drive your car in a straight line without any deviation. Then, park it in a spacious place and lift it on ground jacks to easily reach the tie rods.

Next is loosening the tie rod nuts. A large wrench should be your tool when it comes to loosening the tie rod nuts. Let the wrench hook onto the nut and turn it halfway so it loosens a bit.

One thing to remember here is that you don’t need to completely remove the nut; it’s just the loosening that needs to be done.

Be careful when aligning and adjusting the steering wheel. Source: Carsworld

Working on the Steering Wheel

Once the inner nuts of the tie rod are loosened, get into your car. Grab the steering wheel and try to straighten it by turning it several times.

Make sure the alignment is perfect, and if you are naive and have no idea about alignment, it is advisable to seek the help of a professional.

This will ensure the safety and efficiency of the work to be done. You can also look for maintenance tips that can help you understand the steering wheel alignment mechanism.

Aligning and Adjusting a String in Parallel

This step answers “How to straighten the steering wheel.” First, find an unbreakable string as long as your car.

Start from one end of the string and wrap it around any sturdy object. Make sure the object is high enough to match the height of the wheel center.

Repeat the process with the other end, ensuring the string passes through the center of the wheels. To adjust the string, use a measuring tape by placing it on the wheel rim at the rear of the car.

Check the distance between the wheel rim and the string. Repeat the process at the other end of the same wheel. If the measurements turn out equal, the alignment is done.

But if not, adjust the distance between the strings to ensure an equal measurement or readjust the tie rods. Repeat the process on the other wheel.

Follow a few steps to straighten the steering wheel. Source: YouTube

Tighten the Nuts and You’re Ready to Go

The final step is to tighten the loosened tie rod nuts. You can do this using the wrench and ensuring the wheels do not move.

Repeat the process on the other wheel. Now, you are ready to go. To ensure everything has been perfectly achieved, take a test drive.

If the driving experience improves, you have done a good job. And if the problem continues to affect the driving experience, you must repeat the mentioned steps.

Whenever “How to straighten the steering wheel” goes around your head, following this simple procedure will improve your driving experience.

However, keep in mind that it is never too late to consult the right professional if you are stuck in between.

FAQ on Straightening Steering Wheels

  1. Can I drive with a crooked steering wheel?

Although it is possible to drive with a crooked steering wheel, it is not advisable as it may indicate alignment or suspension issues.

Continuing to drive this way can lead to uneven tire wear and affect the vehicle’s handling. It is best to address the issue promptly.

  1. Can I fix a crooked steering wheel myself?

Minor steering wheel adjustments can be made by carefully centering it when the vehicle is stationary.

However, for more complex issues or if the problem persists, it is recommended to consult a professional mechanic for proper diagnosis and adjustment.

  1. What causes steering wheel misalignment after hitting a pothole or curb?

Hitting a pothole or curb with force can disrupt the vehicle’s alignment, causing steering wheel misalignment. This impact can affect wheel alignment angles and steering components.

  1. How can I tell if my steering wheel alignment is bad?

Signs of steering wheel misalignment include a crooked steering wheel when driving straight, the vehicle pulling to one side, uneven tire wear, or the car feeling like it’s pulling in one direction. If you notice these issues, it’s time to check and adjust the alignment.

  1. Can wheel alignment be done at home?

Although minor adjustments can be made to center the steering wheel, it is better to perform professional wheel alignment at a specialized automotive service center.

This requires precision equipment and expertise to ensure correct adjustments of camber, caster, and toe.

  1. How often should I have my wheel alignment checked?

It is recommended to have wheel alignment checked annually or whenever you replace tires, hit a significant obstacle, or experience handling issues. Regular checks can help prevent uneven tire wear and maintain vehicle stability.

  1. What does a professional wheel alignment service involve?

A professional wheel alignment service involves measuring and adjusting the wheel angles, including camber, caster, and toe, according to the manufacturer’s specifications.

It ensures that all four wheels are properly aligned for optimal handling and tire wear.

  1. Can a DIY wheel alignment kit be effective?

DIY wheel alignment kits are available, but they may not offer the same level of precision as professional equipment. For accurate alignment and to avoid potential safety issues, it is advisable to have alignments performed by professionals.

Conclusion

Straightening a steering wheel is a simple but important task to maintain safe and comfortable driving.

Whether your steering wheel is misaligned due to a recent repair, tire rotation, or general wear, taking the time to correct it ensures your vehicle drives straight and you have full control at the wheel.

Symptoms of a Faulty Diesel Pressure Regulator: How to Recognize and Treat Them Effectively?

Symptoms of a Faulty Diesel Pressure Regulator, When your diesel pressure regulator starts to show problems, it can significantly impact your engine’s performance. But how can you recognize the symptoms of a faulty pressure regulator and address them effectively? In this article, we will review the most common signs of a faulty diesel pressure regulator and provide you with practical tips for remedies.

One of the most obvious signs of a faulty pressure regulator is a loss of engine power. If your vehicle struggles to accelerate or frequently stalls, it may be due to a malfunctioning pressure regulator. Additionally, you might notice excessive fuel consumption and difficulties starting the engine. These issues can also indicate a faulty pressure regulator.

It is important to quickly diagnose diesel pressure regulator problems to avoid further damage to your engine. In this article, we will guide you on how to recognize the signs of a faulty pressure regulator and provide effective solutions to resolve these issues.

Importance of a Properly Functioning Diesel Pressure Regulator

A diesel pressure regulator plays a crucial role in the proper functioning of your engine. It is responsible for maintaining constant fuel pressure in the injection system, which allows for efficient combustion. When the pressure regulator is faulty, the amount of fuel injected may be incorrect, leading to a loss of engine power and other performance issues.

Common Symptoms of a Faulty Diesel Pressure Regulator

Identifying Irregular Idling and Stalling

Another common symptom of a faulty diesel pressure regulator is irregular idling or frequent stalling. If your engine runs unevenly or shuts off abruptly when you are stopped, it may be a sign of a faulty pressure regulator. These issues can be particularly troublesome, as they can make driving difficult and unpredictable.

Understanding Black Smoke Emissions

Black smoke emissions are another common indicator of a faulty diesel pressure regulator. When the pressure regulator is not working properly, an excessive amount of fuel may be injected into the engine, resulting in incomplete combustion. This leads to black smoke emissions from your vehicle’s exhaust. Not only can this be harmful to the environment, but it can also indicate a serious problem with your pressure regulator.

Addressing Engine Misfires

Engine misfires are another common symptom of a faulty diesel pressure regulator. If you experience unusual shaking or vibrations while driving, it may be due to a malfunctioning pressure regulator. These misfires can be intermittent or constant, but they all require immediate attention to avoid further damage to your engine.

Dealing with a Faulty Diesel Pressure Regulator

When you experience symptoms of a faulty diesel pressure regulator, it is essential to take steps to address the problem. Here are some steps you can follow to effectively deal with a faulty pressure regulator:

1. Seek professional help for diagnosis and repair: Diesel pressure regulators are complex components, and it can be difficult to accurately diagnose problems. Therefore, it is recommended to consult a qualified professional for diagnosis and repair.

2. Replace the faulty pressure regulator: If your pressure regulator is faulty, it will need to be replaced. Make sure to purchase a quality pressure regulator from a reliable supplier to ensure optimal performance.

3. Perform regular maintenance on the fuel system: To prevent pressure regulator issues in the future, it is essential to perform regular maintenance on the fuel system. This includes regularly replacing fuel filters and using quality fuel.

Seeking Professional Help for Diagnosis and Repair

It is essential to quickly diagnose diesel pressure regulator problems to avoid further damage to your engine. If you experience any of the following symptoms, it is recommended to consult a professional for accurate diagnosis and appropriate repairs.

Conclusion

In conclusion, it is essential to recognize the symptoms of a faulty diesel pressure regulator so that you can take corrective measures quickly. If you experience a loss of engine power, excessive fuel consumption, or difficulties starting the engine, it is recommended to consult a professional for accurate diagnosis and appropriate repairs. Do not let a faulty pressure regulator cause further damage to your engine. Take action now to maintain your vehicle’s optimal performance.

Common Transmission Problems You Cannot Ignore

Common transmission problems you cannot ignore. In every vehicle, the car transmission is one of those components that directly affects performance. By following proper maintenance procedures, you can keep the transmission running smoothly. This way, you won’t have to worry about costly maintenance and replacements. However, having some knowledge of common transmission problem signs will help you detect any issues with your transmission in time. In this article, we will take a closer look at the most common transmission problems. But before that, it is suggested to understand what a transmission is.

What is a transmission in cars?

A transmission, or as some car owners prefer to call it, a gearbox. The car transmission is the part of the car that transfers the vehicle’s power so the car can use it. There are two types of transmissions usually seen in vehicles:

Manual Transmission

In short, a manual transmission, or a manual gearbox, is like a bicycle’s gear lever, but much more powerful and of course doesn’t have a chain inside. Car owners disconnect the transmission and the engine by pressing the clutch. To shift the vehicle to a new gear, drivers adjust the gear lever to the new gear, then release the clutch to continue driving.

Automobiles need gears to prevent the engine from destroying itself. The transmission and engine are temporarily separated during gear changes. Instead of using your own hands, drivers can use the clutch pedal to control the spring plates. There are two plates that play an important role in the manual transmission for shifting gears:

One plate is the pressure plate. This automotive part is connected to the flywheel. The other is the driven plate located on the input shaft connected to the gearbox. By pressing the clutch pedal, the driver releases the pressure on the spring clamp and separates the engine from the gearbox.

Automatic Transmission

An automatic transmission, also known as an automatic gear lever, is the improved version of the manual gearbox. Drivers do not need to shift gears manually using a clutch since the automatic transmission will do everything. Normally, a low-speed car will mostly start to struggle as it is pushed to higher speeds. However, with an automatic transmission and a torque converter, the car can detect speed changes. More precisely, when the driver accelerates or slows down, the car automatically shifts to an appropriate gear.

Signs of Transmission Problems

Recognizing that your vehicle has transmission failures, car owners must repair it as soon as possible before it becomes much worse and much more expensive. So, how can we know when our car has automatic transmission problems? Here are our symptoms for drivers to spot transmission problems:

  1. Delays in shifting gears
  2. The car shakes while driving
  3. Transmission grinding
  4. Fluid leak
  5. Burning smell under the hood
  6. Transmission fluid is thick or foul-smelling
  7. Dull and whining noise from the vehicle
  8. Unable to engage a gear on the manual transmission gear lever

Remember: the car transmission is crucial and any type of transmission problem can make your car unable to drive. The typical function of your car’s transmission is to direct engine power to the driveshaft that effectively turns the wheels.

Now that we recognize the symptoms of automatic transmission problems, the list below presents some of the most common transmission problems.

Automatic Transmission Problems

1. Grinding or Whining Noises

Whenever you hear noises, don’t panic

If everything is working normally, the automatic transmission operates smoothly when shifting gears. More precisely, there will be no sensation of slipping, shaking, or grinding when moving from one gear to another. When you hear a strange brushing noise, even with a gear in good condition, the problem will surely lie in the torque converter.

Damaged or worn needle bearings are one of the most common automatic transmission problems. It is usually just a minor issue, but since it is connected to a torque converter, you will know immediately.

Even if it seems like a minor problem, it can cause huge damage to the transmission if drivers do not take care of their dear vehicle.

2. Lack of Response

If there are faulty responses or no response from your car when you engage the gear, this problem surely comes from the transmission. Of course, one of the most important problems regarding car transmission must be the transmission itself. However, this problem could be complicated. It could be as simple as low transmission fluid level, or perhaps something more serious.

The cause of transmission failure is mostly the lack of proper care. Especially if you usually drive cars on difficult terrain like towing and in hilly areas, it is recommended to take care of the transmission and engine, as well as change the filters and fluid at the recommended time and mileage.

For this reason, if your car is unresponsive, entrust it to a professional service to avoid losing even more pennies from your wallet!

3. Burning Smell

Another symptom in the list of common transmission problems is a burning smell. The smell of something burning is a bad warning sign that you don’t want to happen in your car. Many factors can cause this burning smell, but the main factor is often the transmission fluid overheating. If you have to face this bad situation, you must calm down and have your car checked by a professional as soon as possible.

With a non-professional person, diagnosing some car transmission problems is not the best thing to do. Keep in mind that whenever you feel or hear strange things, don’t wait to see if the problem goes away. The most urgent thing to do is to take your car to a repair shop to avoid any further terrible damage. Solving your car’s transmission problems as quickly as possible not only saves you trouble, time, and money but also prevents you and others from accidents on the road.

4. Torque Converter Problems

Torque problems happen very often

In the list of common transmission problems, torque cannot be ignored.

Speaking of definition, a torque converter is a connection that transfers engine torque to the transmission and the vehicle’s drive wheels. Undoubtedly, it plays a crucial role in transmitting the fluid pump drive to operate the transmission.

However, torque transmission and the converter can cause different types of problems responsible for failures or damage in the transmission. Drivers often face problems related to damaged or worn needle bearings. Hot needle bearings often create easily audible noises while driving. At neutral, it is unlikely to make noise. But, as soon as you shift into drive gears, you can hear brushing or grinding noises.

Although most transmission problems include overlapping symptoms, car owners must carefully check all other parts of the car before blaming the torque converter.

5. Low Fluid Levels or Leaks

Oil leaks are one of the most common transmission problems

The most common car transmission problem is probably transmission fluid leaks or low fluid levels. Such a problem can occur if there is a leak in the transmission system. There are many reasons for this problem: a leak at the pan gasket, driveshaft or axle seal, or even a transmission cooling line. This will lead to burning or lack of fluid, overheating, and significant damage. In situations where the driveshaft or transmission is faulty, leaks can occur. You can fix the problem by replacing the transmission seals. In other cases, coolant also contaminates the transmission fluid. The common term for such a fault is cross-contamination.

Fluid leaks or low fluid levels usually result in slow shifting or gear slipping. Immediately change the fluid or completely flush and fill the transmission whenever you notice fluid contamination.

6. Flashing Check Engine Light

One of the most common transmission failures that we can easily notice is the flashing check engine light. Experienced drivers all recognize that the check engine light can say a lot about their car’s problems.

More precisely, the air conditioning, braking systems,… and many other car components can cause this light, including the transmission. So, if the check engine light is flashing, the transmission is the place to check.

7. Solenoid Problems

The solenoid is the cause of many common transmission problems

The solenoid is a major component of the vehicle that manages the up and down movements and gear changes while the car is running. Throughout the car transmission and the fluid flow is controlled by this car part.

However, electronic malfunctions or inadequate fluid levels can severely damage the solenoid. Drivers can spot the faulty solenoid through these symptoms:

  1. Your car does not shift gears
  2. Strange and changing patterns
  3. Delay in shifting gears
  4. Flared or slipping shifts
  5. Unable to upshift or downshift.

When the solenoid is faulty, the result can be the same as in the case of a fluid leak or shortage: transmission problems, pressure issues, and faulty shifting. As long as there is no leak, but your transmission continues to slip, there is a problem with the solenoid. Furthermore, your engine power drops sharply. The good side of things, car owners can simply fix this problem by just replacing the solenoid.

8. Shudders

Shudders are one of the most common car transmission problems. More precisely, when the bands or clutches are faulty, the transmission starts to shudder. Many factors cause this problem: incorrect computer signals, faulty engine operation, dirty or low fluid, damaged or worn clutches…

With this problem, we recommend finding an automotive technician to help you solve this one.

9. No Shifting

In the list of common transmission problems, no gear shifting is included. For the car to be able to shift up and down normally, the transmission bands are designed to wrap around the internal parts of the transmission. Along with that, it also has solenoids, pistons, and fluid pumps that control and provide pressure. The combination of these components contributes to the proper functioning of the car.

However, if any of these components is faulty, car owners cannot shift gears at all. So, if your car fails to shift gears properly, the transmission may be the main factor.

10. Delays

This is a rather difficult way to detect common transmission problems, as drivers detect delays in gear shifts quite often.

However, if car owners notice a significant delay when shifting gears or between gear changes, they may know there is a problem with the car’s transmission.

Manual Transmission Problems

1. Clutch Pedal

A clutch that cannot disengage is a common transmission problem. When this happens, drivers will hear a grinding noise when shifting gears. In some cases, they cannot even move, which is dangerous while driving.

Most drivers are unaware of the underlying problem: there may be a leak or air inside the system. This reduces the force needed to release the pressure, which creates a dragging clutch.

Car owners can adjust the clutch if possible or turn to an auto mechanic if you want to ensure your car’s components are treated properly.

2. Grinding

Last but not least, you can observe that this symptom presents differently in automatic and manual transmission. If your car is a manual transmission vehicle when shifting gears, you feel or hear a grinding sensation, it may mean that your car’s clutch has just worn out and it’s time for you to replace it. However, it also means that one of your car’s transmission synchronizers is damaged and worn.

If you own an automatic transmission car, a harsh gear shift instead of a seamless shift could be caused by several factors. In the case of automatic transmissions, you should take your car to an auto shop for diagnosis.

These symptoms sometimes occur before or after your transmission starts slipping. These problems can occur when you haven’t replaced your fluid levels at the correct intervals, your engine is running poorly, or the clutches are worn.

How to Prevent Transmission Problems

Let’s be honest, when was the last time you checked your transmission? Most car owners do not maintain or regularly check their vehicle, especially their automobile’s transmission. That’s normal, but you will lose a huge amount of money for an auto maintenance workshop. Usually, as soon as car owners start noticing a problem with their vehicle, it’s time to find the problem and fix it immediately.

However, the best way to