Insulation faults in electric vehicles can pose a significant risk to user safety and the reliability of electrical systems. This article explores the different types of insulation faults, their impact, and the methods for checking them using a megohmmeter.
Types of Insulation Faults
1. Insulation Faults to Ground
This type of fault occurs when one of the conductors comes into contact with the ground, which can lead to current leakage.
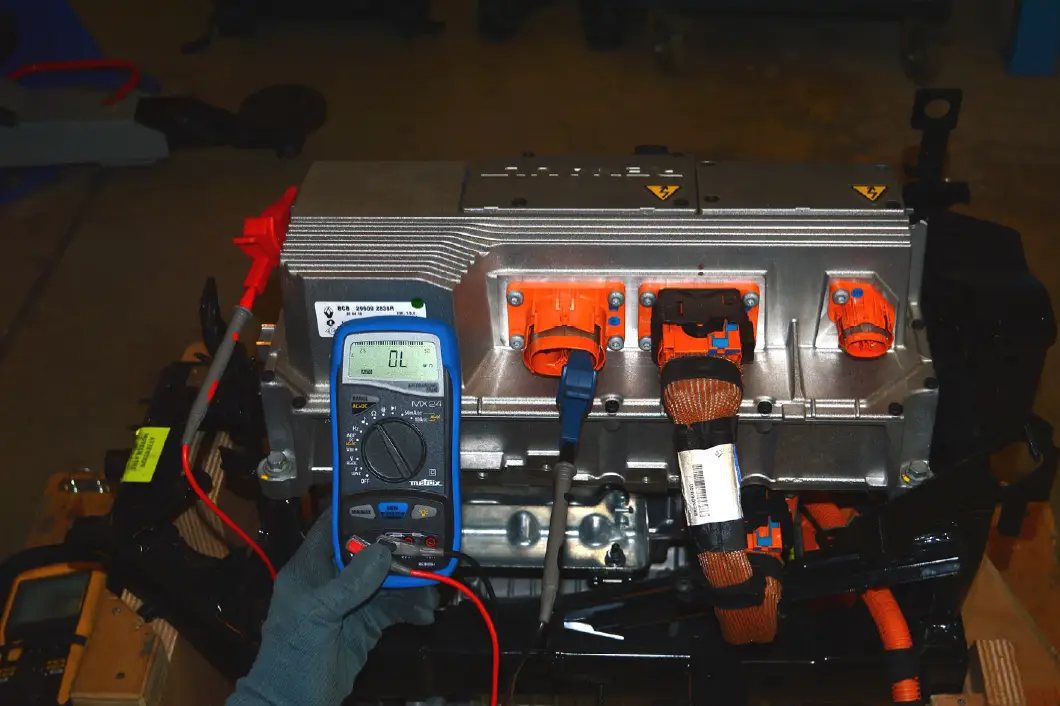
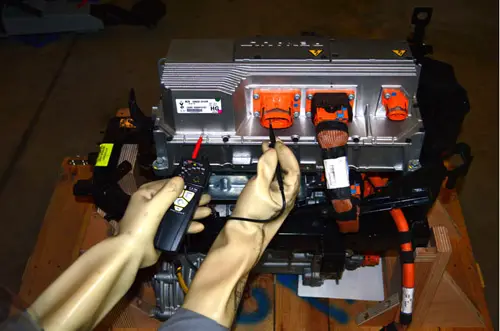
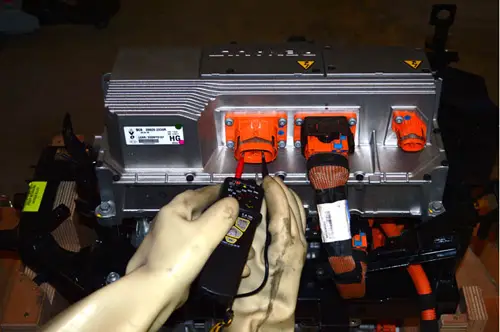
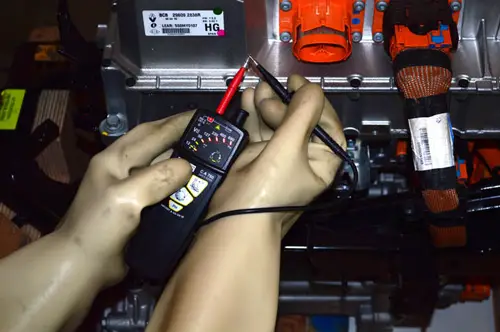
Below is an example showing a case where the ohmmeter is no longer able to perform the measurement. We
want to check for insulation above 80 MΩ. After verifying the complete absence of voltage, we measure the resistance between a 400 V DC phase and the ground. The ohmmeter we are using displays out of range ‘OL’. It has reached its maximum measurement range. We will then use an insulation tester.
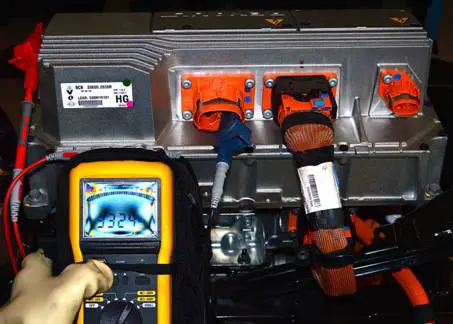
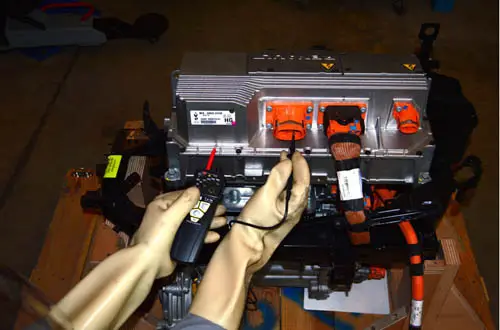
The insulation tester displays a resistance value of 3,324 M when we measure the resistance between a phase and the ground on a component. For a part to be declared compliant, the measured resistance must be greater than the minimum value specified by the manufacturer in the diagnostic manuals.
2. Faults Between Conductors
These faults involve a reduction in the insulation resistance between two conductors, increasing the risk of a short circuit.
3. Aging or Degradation of Insulating Materials
Over time, insulating materials can lose their effectiveness due to environmental factors such as heat, moisture, or vibrations.
Impact of Insulation Faults
Insulation faults can cause:
- Risk of electrocution for users.
- Degradation of the vehicle’s electrical performance.
- Increased risk of fire.
- Systemic failure of electrical equipment.
Checking Methods with a Megohmmeter
Principle of the Megohmmeter

The megohmmeter is a device used to measure insulation resistance by applying a high voltage between the conductors and/or the ground. It provides a value in megaohms (MΩ), indicating the state of the insulation.
Checking Steps
- Preparation:
- Disconnect the equipment to be tested from the circuit.
- Ensure the system is de-energized.
- Connecting the Megohmmeter:
- Applying the Voltage:
- Set the voltage recommended by the manufacturer (usually between 500V and 1,000V).
- Start the measurement.
- Reading the Results:
- A resistance below the minimum limit indicates an insulation fault.
Illustration of the Steps
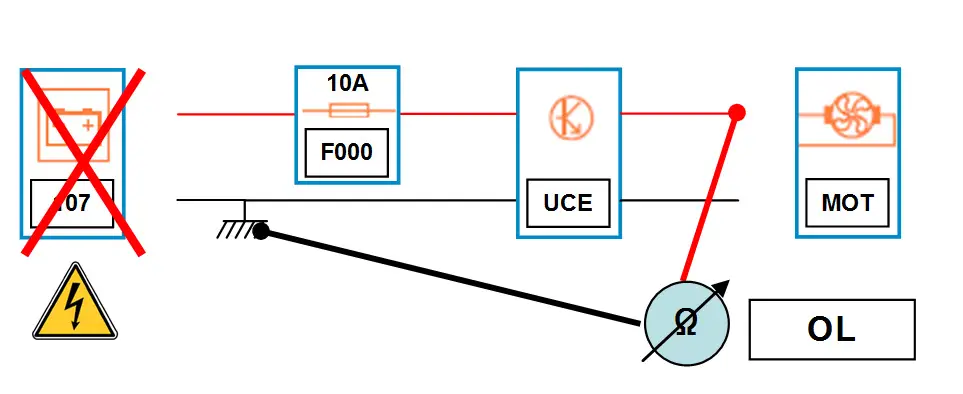
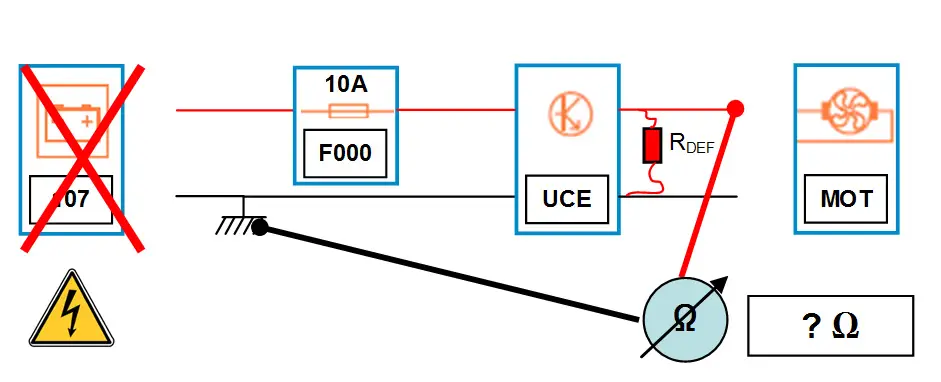
A ground insulation check involves verifying that an element, receiver, or conductor is not touching the ground.
With an ohmmeter, we measure with the power off:
- If R = “OL” (Out of Limit: infinite), between the controlled line and the ground, the ground insulation check may be
correct.
Caution: an out-of-limit resistance is indicated by “OL”, meaning the resistance is higher than what
the device can measure. For circuits powered by the traction battery of an electric vehicle, it will be necessary to
refer to the minimum reference resistance required in the diagnostic manuals. - 107: 12V battery
- F000: fuse
- UCE: control unit – Electronic Control Unit
- MOT: Electric motor
- If, for example, R = ? Ω (Ohm), there is a short circuit to “ground”.
A mutual insulation check involves verifying that two or more wires are not touching each other.
This operation must be repeated as many times as there are wires in the implicated harness.
With an ohmmeter, we measure with the power off:
- If R = OL (infinite) between these two wires, the circuit is compliant.
- If R = ? Ω (Ohm), there is a mutual short circuit.
Search with an insulation testerAn insulation check involves verifying that an element, receiver, conductor, or ground is not touching.
With an insulation tester, we measure the insulation between a power cable and the ground, or between two power cables, with the power off, to check for short circuits and insulation faults.
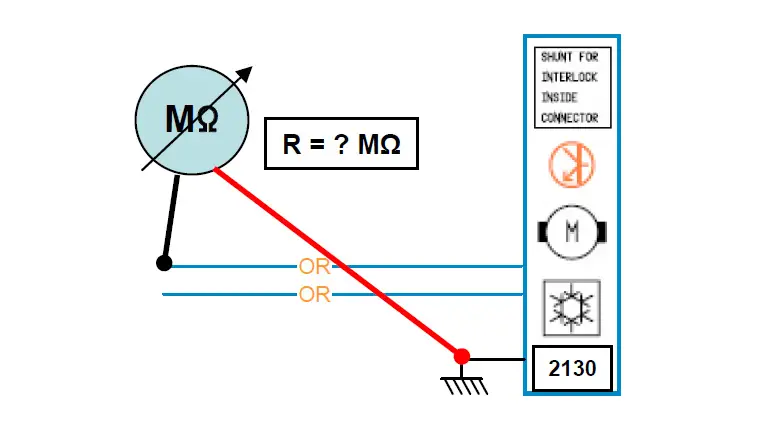
2130: air conditioning compressor
To interpret the measurement, it will be necessary to refer to the minimum reference value required in the diagnostic manuals.
- If R > “reference value” MΩ, the circuit is compliant.
- If R ≤ “reference value” MΩ, the circuit is non-compliant.
Check for the absence of voltage between the phases and the ground and between the phases (3 measurements).
Check the proper functioning of your voltage absence verification device.
- Do not test a vehicle or equipment when it is located in a flammable or
explosive environment. Sparks may occur during the discharge of the insulation before and after the test or during the test in case of faulty insulation. - Restrict personnel access as much as possible by marking the area and wearing personal
protective equipment for electricians. During measurement, there may be high measurement voltages,
exceeding safe voltages for persons. - Use only connection cables suitable for the test to be performed and ensure they are in perfect condition. Unsuitable cables will lead to measurement errors and can be dangerous.
The measurement
- Turn on the device by setting the switch to the M position and selecting the desired voltage
(50 V, 100 V, 250 V, or 500 V). - Check that all displays are functioning and that the battery charge level is correct.
- The determination of test voltages is based on the operating voltage of the devices. The table below
gives the recommended test voltages based on the operating voltages of installations and
equipment.
| Operating voltage cable / equipment |
DC test voltage |
| 24 to 50 V | 50 to 100 V |
| 50 to 100 V | 100 to 250 V |
| 100 to 240 V | 250 to 500 V |
| 240 to 550 V | 500 V |
It is required to use the electrical and electronic diagnostic manuals to know the recommendations for the test voltages to be applied.
Check between a conductor and the ground or earth. To do this, connect the cable from the “+” (plus) terminal of the insulation tester to the cold point and the one from the “–” (minus) terminal of the insulation tester, or the remote control probe, to the hot point. Alligator clips are preferable to handheld probe tips.
By this we mean:
- Cold point: neutral, earth, ground.
- Hot point: a phase. The insulation tester measures and displays the presence of voltage between its terminals as soon as it is turned on. Before starting the insulation measurement, verify that there is no voltage present on the terminals to be checked.
- If the voltage on the vehicles is greater than 25 V, a warning display is indicated and/or a continuous signal
is given, the measurement is not possible. Do not perform an insulation or resistance measurement when
the presence of a voltage is indicated. - If the voltage present on the vehicles to be checked is less than 25 V, the insulation measurement is possible,
but it is affected by an error that is more significant the lower the test voltage. It is required to have a voltage close to 0 V. - If there is no dangerous voltage, the user can then perform an insulation measurement.
- Press the “TEST” button,