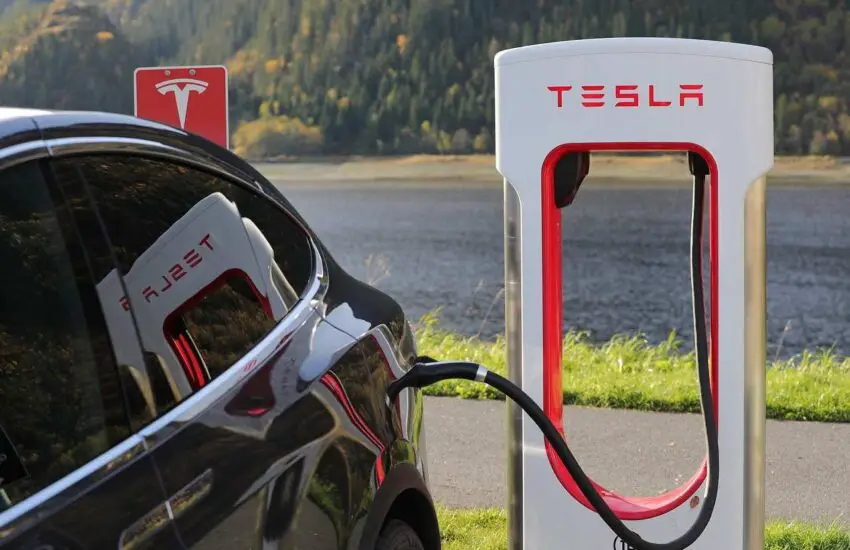
You just bought a Tesla car. Congratulations! You are now the happy owner of one of the most efficient and reliable electric cars on the market today. But you have also entered the exclusive club of car owners who need to recharge their vehicle. How much does it cost to charge a Tesla?
The answer is not as simple as one might think! Many factors contribute to the cost of charging an electric car, and they vary depending on the type of charger you use, the car you drive, how often you drive your car, and other factors.
Key Factors for Charging a Tesla
You want to charge your Tesla, but you don’t know how much it will cost you? Well, worry no more! Here is a breakdown of the factors that contribute to the total charging price.
Types of Chargers
First, what type of charger are you using? There are three different types: Level 1 AC charging (the universal charging option), Level 2 AC charging (found in homes), and a Tesla Supercharger.
A Level 1 charging station with a standard outlet uses a 110 to 120 V power supply and provides between 7.5 amps and 15 amps of electrical juice to your car. This type of charging is the slowest way to recharge your Tesla. The average time for a full charge with this method can take even a few days if you are charging a long-range car like the Tesla Model 3. Charging time can vary depending on the distance driven each day.
A Level 2 AC charge involves plugging into an outlet at your home or office that uses 220-240 V of electrical charge and offers about 40 to 50 amps of power. This is the most common type of charging and can take from 7 to 12 hours, depending on how much you drive/recharge each day.
Finally, there are Tesla Superchargers, which use a huge electrical power of 480 V or more. However, they also provide electrical power about ten times that of the Level 1 charger. With an output of over 100 amps, it is possible to refill 200 miles (about 322 km) in 15 minutes.
Tesla Superchargers (Credit: Jakob Härter / Wikimedia Commons)
For daily charging, the Level 2 charging option is the most suitable as you can perform a full charge by leaving the car plugged in overnight. Superchargers are recommended only for a quick boost when you are taking a long car trip.
Some Other Factors
How much does it cost to charge a Tesla? Well, it will also depend on whether you are going to recharge the battery from 0 to 100%. It will take much more energy to recharge a completely discharged battery. Additionally, the battery tends to consume more energy as it approaches its full capacity.
AC chargers are less efficient than DC chargers. For this reason, Superchargers cost less than Level 1 and 2 charging stations.
How Much Does It Cost to Charge a Tesla Car?
Let’s find out the estimated charging cost of your Tesla car for different types of chargers. We will discuss charging costs with an AC and DC charger.
Home or Residential Chargers
The cost of residential energy in the United States is $0.1399/kWh, but we will round it to $0.14 for easier calculation.
The Model S has a 100 kWh battery, so it will cost $14 to fully charge the battery from 0 to 100%, right? Well, the calculation is not that simple. No AC charging station, whether Level 1 or Level 2, offers 100% efficiency. So, if the average efficiency of these chargers is 85%, you need to add 15% additional energy cost to this price.
The total cost for a full battery charge will be about $16.47. However, the original cost will be a bit lower because it is unlikely that you will charge the battery from 0 to 100%.
The Model S has two versions: Plaid and Long Range, which have an estimated range of 396 miles and 405 miles, respectively. So, you need to pay $0.042 per mile for the Plaid and $0.041 per mile for the Long Range.
Tesla Superchargers
How much does it cost to charge a Tesla with a Supercharger? In the United States, the price of commercial energy is cheaper than household prices. But Tesla charges more than this rate for its Supercharger network.
By adding an extra $0.10/kWh to the country’s average energy price (based on EIA data), the estimated unit price in the network becomes $0.216. For easier calculation, we will round it to $0.22 per kWh.
Superchargers do not lose much energy during the process of transferring from the source to the battery. Their estimated efficiency is about 95%, so there will not be much additional energy cost.
For a Model S car, you need to spend $22 for a full charge. However, it will be $23.10 by adding the 5% energy loss cost. For the Plaid version, $0.058 and $0.057 for the Long Range version per mile.
Conclusion
How much does it cost to charge a Tesla? It is not difficult to know if you are aware of the energy rate, battery capacity, state of charge, and a few other factors.
Is a car dashboard camera sufficient as a backup camera
Having a rear dashboard camera is quite common nowadays. Its main purpose is to provide video footage in case of an accident. If you have one, you must have thought about using it as a backup camera. Are you considering installing a dashboard camera at the back of the car? Have a clear idea of its performance.
What is a Rear Dashboard Camera and a Backup Camera?
The increasing rate of car accidents and the lack of evidence to prove fault for the cause of the accident have led many manufacturers to equip cars with a rear dashboard camera. This camera captures what happens behind the car, providing a close-up view of the traffic and other vehicles around you. They can help you identify the cause of your accident and protect you from potential lawsuits from your insurance company.
On the other hand, a backup or car reverse camera is a device that allows the driver to see what is behind the vehicle. You will typically find them on or behind the license plate or above the car’s bumper. The live feed will be displayed on a screen in the dashboard or the main unit. You can adjust the video feed in terms of angle and distance to allow for optimal visibility.
A car backup camera. (Credit: sonicelectronix)
Can I Use the Dash Cam as a Backup Camera?
The clear and simple answer is “yes.” You can use the dashboard camera to see what is behind the vehicle. However, some drawbacks make this option impractical.
Small Camera Focus
Using dashboard cameras for rear navigation is not practical. Dashboard cameras are generally small and do not provide enough detail to be used for rearview visibility. Backup cameras are much larger and more effective at offering a clear view behind your car.
Reversed Footage
A dashboard camera cannot horizontally reverse the rear video feed. Without this feature, the left and right views will be reversed for all footage. So, when looking behind your vehicle, everything is reversed. For example, if you were to turn right, the dashboard camera would display a left turn. If you were to turn left, the dashboard camera would show a right turn.
Limited Camera Angles
The backup camera is an important accessory when driving. It helps prevent accidents by letting you know when someone is in your blind spot. The backup camera is a device mounted at the rear of the car that provides a clear view of what is behind the vehicle. The idea is to help drivers avoid hitting other cars, pedestrians, and animals on the road.
However, a dashboard camera cannot provide such functionality due to its limited visibility from certain angles. It does not capture the full view of what is behind you. So, using it in place of a backup camera means compromising road safety.
Conclusion
Dashboard cameras are not designed to be used as backup cameras, even if they can function as such in some cases. They cannot provide drivers with the necessary information to get out of tight parking spots or reverse in confined spaces in general.
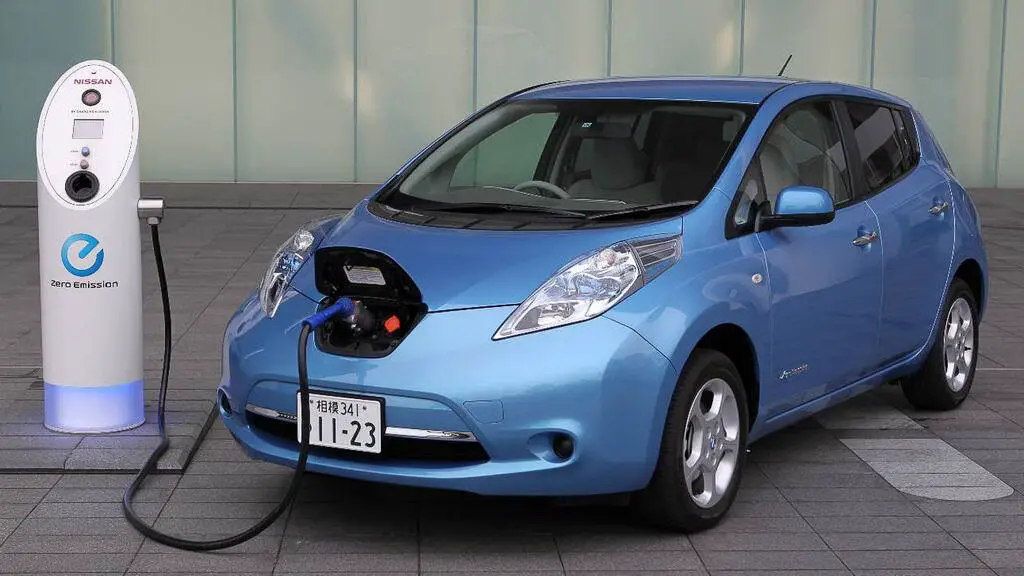
The cost of replacing the Nissan Leaf battery
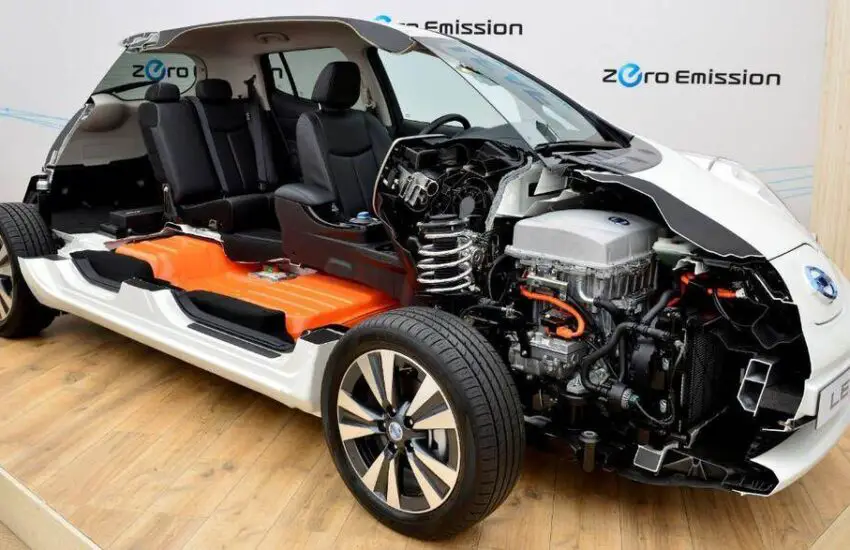
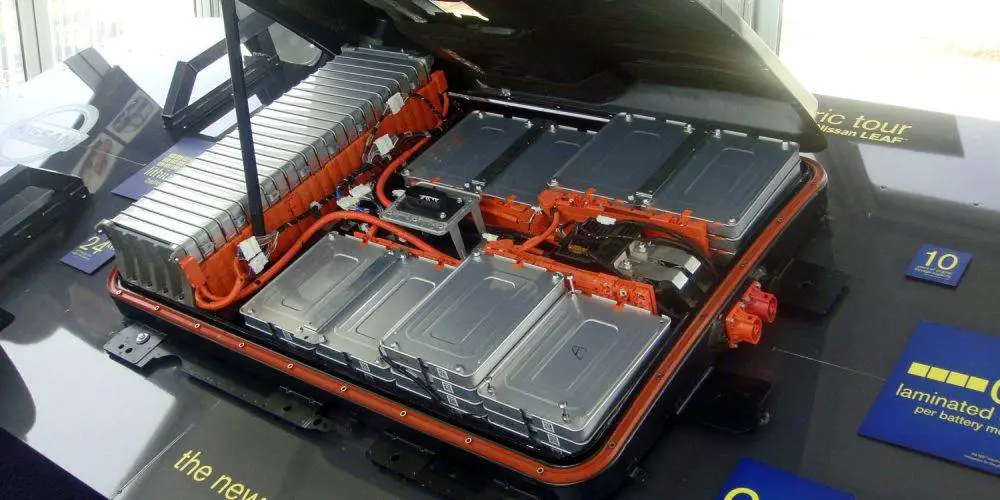
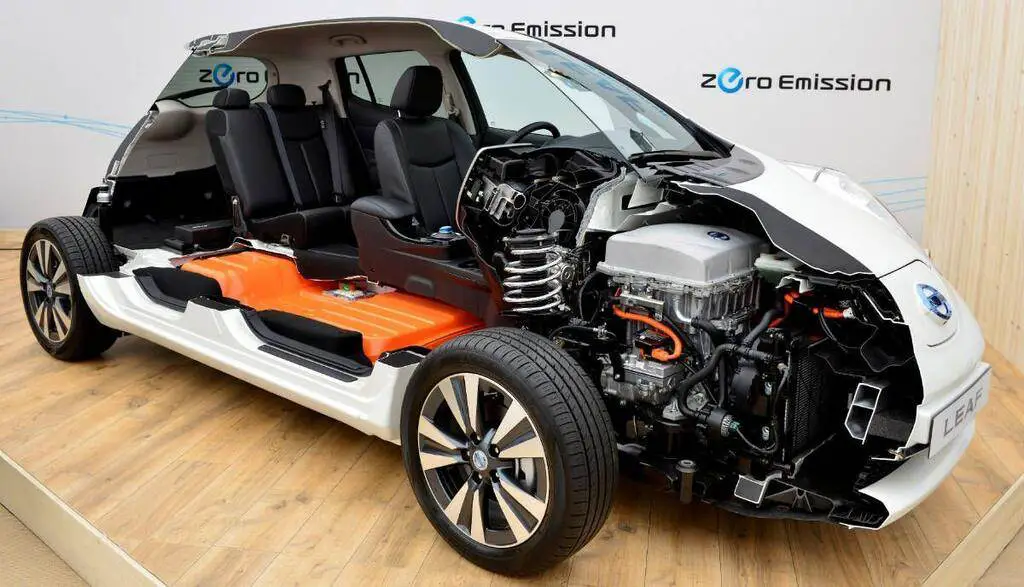
The Nissan Leaf is a compact five-door hatchback battery electric vehicle (BEV) manufactured by Nissan. It was introduced in Japan and the United States in December 2010. The Nissan Leaf uses a 24 kWh lithium-ion battery based on polymer cells from the Automotive Energy Storage Corporation. The Leaf is classified as a BEV because there is no combustion engine: the vehicle is powered solely by the energy stored in its Li-ion battery.
The Nissan Leaf is one of the most popular electric SUVs you can buy on the market and has received many positive reviews. But while the Nissan Leaf saves you money on fuel for now, the battery could be incredibly expensive to replace later.
Battery Problem
Source: Electrek
It is normal for a car battery to deteriorate; this is not a new problem. All batteries begin to degrade after a while, just like your cell phone battery holds less and less charge. EV battery degradation is the natural process that permanently reduces the amount of energy the battery can store and/or deliver. Factors affecting battery health include time, high temperatures, operating at a high or low state of charge, high electrical current, and usage. Although it is difficult to find answers about the lifespan of an EV battery, some car manufacturers have warranties that cover the battery for eight years or 100,000 miles.
At a very basic level, lithium-ion batteries work this way: lithium ions move back and forth in a liquid, entering and exiting the positive and negative ends of a battery. Lithium ions moving in one direction means charging the battery and storing energy; moving in the other direction means discharging the battery and using the energy to power something, like a car.
However, occasionally, a manufacturing defect can cause a more or less spontaneous thermal runaway in a lithium-ion cell. Simply put, thermal runaway is a chain reaction that causes lithium-ion batteries to overheat very quickly and significantly reduces their lifespan.
How Long Do Nissan LEAF Batteries Last?
The Nissan LEAF has been available in North America since 2010, but in this article, we focus only on models from 2015 onwards, as the battery underwent a significant upgrade that year. Like most electric cars, the LEAF is equipped with a lithium-ion battery that can be recharged by plugging it into an electrical outlet or a charging station. It also recharges while you drive using a technology called regenerative braking.
The 2015 LEAF has a battery capacity of 24 kilowatt-hours (relatively low by current standards) and a range of 84 miles. The 2018 model’s capacity increased to 40 kWh and 151 miles of range, while the 2019-2021 models offer two options: a 40 kWh battery or a 62 kWh battery with up to 226 miles of range.
The battery is one of the most important components of any electric car. Therefore, Nissan LEAF owners, like all EV owners, need to be concerned about battery lifespan. Smaller batteries tend to have a shorter lifespan because they go through more charge cycles.
According to a report from the Union of Concerned Scientists, the first-generation LEAF could lose about a quarter of its capacity after five years of use or 50,000 miles. This means that after 10 years of driving, it might no longer hold a sufficient charge.
Fortunately, the new LEAF models have improved battery technology with greater capacity.
Today, Nissan executives believe that the Nissan LEAF’s battery could last for decades and even outlive the car itself. They could be recycled or reused for another purpose, such as a solar energy storage system to power a home.
Nissan LEAF Battery Replacement Costs
Source: Greentecauto
According to a post on the MyNissanLeaf.com forum, as of January 30, 2020, the labor and replacement cost for a 24 kWh battery in a Nissan Leaf was $5,500. It appears the battery itself would cost $4,500, placing the $/kWh at $187/kWh, which is 36% above the stated price of $137/kWh in 2020.
According to a 2020 Greencars report, the Nissan Leaf 40 kWh battery costs $5,500 or about $137/kWh, which is quite in line with the 2020 average price.
A 2013 Nissan Leaf owner in Canada reported being quoted CA$15,000 for a replacement battery by a dealership.
Car buyers reported in September 2020:
The price of the 30 kWh pack ranges from $3,500 to $4,500, at most $150/kWh.
The price of the 40 kWh pack ranged from $6,500 to $7,500, at most $187.5/kWh.
The 62 kWh battery was expected to cost between $8,500 and $9,500, at most $153/kWh.
Replacement costs range from $0 to $20,000 depending on dozens of factors. If a battery is covered by the manufacturer’s warranty, typically 8 years and 100,000 miles, you should get a replacement battery at no extra cost. But what if it’s no longer under warranty?
If you experience problems with your battery after your warranty expires, you may have no choice but to pay for a replacement out of pocket. Unfortunately, there is no MSRP for new batteries, so the replacement cost will vary depending on where you are and which mechanic you hire to fix it.
Estimates range from a few thousand dollars to $8,000 for a replacement battery, which may be more than the current market value of your LEAF.
Not all electric vehicle owners will have to replace their battery, but keep this possibility in mind before buying a LEAF. You may decide that the overall lifetime savings from driving an electric vehicle are worth it.
If you are considering a used LEAF, be sure to test the battery capacity before buying to reduce the risk of battery failure or degradation.
How to Take Care of Your Nissan LEAF Battery
Source: Autobuzz
To avoid having to change the battery too early, you can take a few steps to extend the battery’s life by charging your electric vehicle’s battery wisely.
Avoid DC fast charging and use a 240-volt home charging station when possible. By charging your battery more slowly overnight, you can extend your battery’s life. Also try to avoid draining your battery or overcharging it. While it may be tempting to keep your battery at 100%, it is healthiest between 20% and 80% capacity.
Keep your car cool. The biggest drawback of the Nissan LEAF’s battery is its lack of active thermal management, which helps keep the battery cool. The newer LEAFs have a “passive” thermal management system, which slightly cools the battery by allowing air to flow over it while the car is moving, but they do not have the liquid system that more advanced electric vehicles like Tesla offer. So, if you want to get the longest battery life, you can make an extra effort and store your LEAF in a garage or covered parking to better protect your battery from outside temperatures. While cold temperatures can impact your car’s ability to hold a charge in the short term, it’s hot weather that will cause the most damage to your battery.
Try to drive smoothly. The LEAF’s regenerative braking system is designed to capture kinetic energy from the brakes that would otherwise be wasted. To make the most of this system, avoid sudden braking and sharp acceleration. Driving steadily and smoothly will result in less wear on your battery and brake pads and reduce your driving costs by saving more energy. According to the U.S. Department of Energy, the 2021 LEAF’s annual fuel costs are $600, and it costs $1.02 to drive 25 miles.
The world’s largest car collection, valued at $2.3 trillion
We will take you to the small country of Brunei, located in Southeast Asia and bordering Malaysia. The country has a low population proportion and strict immigration laws, which have allowed people to live in peace with a per capita GDP of $60,000. However, what is most interesting is the world’s largest car collection of the ruler of Brunei, none other than Sultan Hassanal Bolkiah. The man is the most significant car collector with over 5,000 cars, with a total value of 2.3 trillion.
Discover the World’s Largest Car Collection Here
There are the rich, and then there are the incredibly rich. However, not everyone knows how to spend their fortune the right way. The Sultan of Brunei certainly knows where to spend his money and is famous for spending his wealth. To put it briefly, he doesn’t think twice before getting a $21,000 haircut. The secret to his wealth lies in the revenue from oil and natural gas reserves. The country under his rule is financially rich and communally safe. Citizens do not need to pay taxes.
With a collection of over 5,000 cars from different manufacturers, models, and eras, there is no doubt that the Sultan wants to have a wide range, making other car enthusiasts jealous. However, every head of state has a selection of certain types of cars, but none can match that of the Sultan of Brunei.
Car Collection of the Sultan of Brunei (Photo: pinterest.com)
His Car Collection
The Sultan is known for his world’s largest car collection, which numbers up to 7,000 cars. His younger brother, Prince Jefri, is also a car enthusiast and loves collecting brands such as Rolls Royce, Mercedes Benz, and Ferrari.
With thousands of cars in his collection, the Sultan of Brunei not only owns luxury cars and supercars but also special limited-edition versions of these models. Not only that, but he also owns many “ubiquitous” models created for himself or just for display. We will now provide you with detailed information about the cars that have joined the Sultan’s collection.
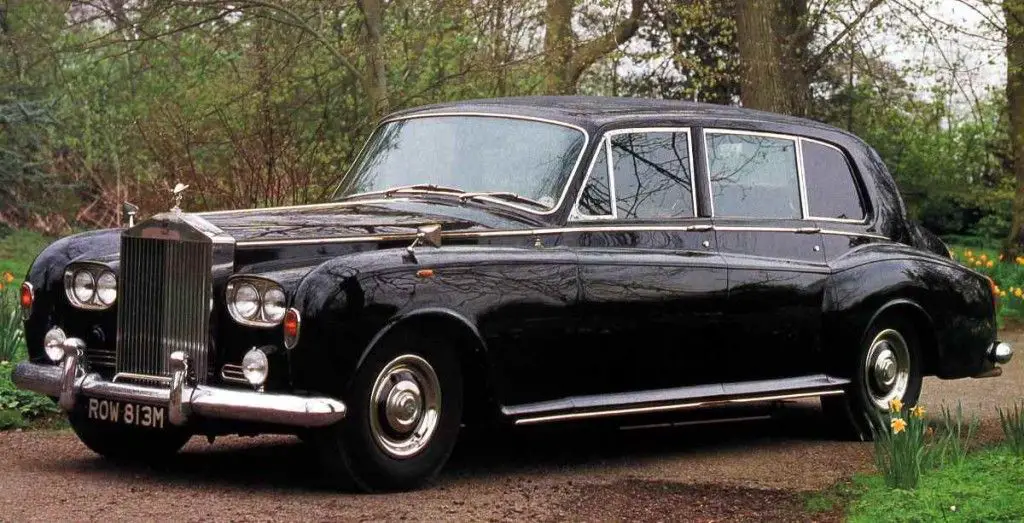
1. Rolls-Royce Phantom VI
Nearly 100 years after the Phantom name was given to the Rolls-Royce brand, this model is still a monument in the super-luxury car community.
The Rolls Royce Phantom was only available on special order until the early 1990s. It took about 800 hours to build the body of this beast. The British Monarch was one of its customers. However, the Sultan of Brunei took the lead and had two custom-built, which included redesigning the trunk to resemble the Rolls Royce Silver Seraph. It is now part of the Sultan’s largest car collection in his private garage.
Some of the features and specifics of the Rolls-Royce Phantom VI include:
Launched in 1968 with a 6,230 cc V8 engine and a four-speed automatic transmission. In 1978, the model was offered with a 6,750 cc V8 engine and a three-speed automatic transmission.
Based on the Phantom V, the Phantom VI features a redesigned exterior and interior but is powered by an engine from the Rolls-Royce Silver Shadow. Most of the body was built by Mulliner Park Ward, usually as a limousine, although a few landaulets (semi-roofs) were made. At least two convertibles were built, one two-door and one four-door, both made by Frua in Italy.
Phantom VI is the last car with a separate chassis.
The Rolls Royce Phantom was only available on special order until the early 1990s (Photo: pinterest.com)
2. 24-Carat Gold-Plated Rolls Royce
The penchant for customized cars reaches a whole new level with this one. On his wedding day, the Sultan drove an extended limousine Rolls Royce Silver Spur II. However, that wasn’t enough for the man living in a palace up to 2 million square feet. He had the entire car plated with 24-carat gold for the price of $14 million to make it worthy of royalty. We recommend doing an online search to gather the best industry knowledge about other expensive cars owned by the Sultan.
He had the entire car plated with 24-carat gold for the price of $14 million to make it worthy of royalty (Photo: pinterest.com)
3. The Ferrari Mythos
Mythos was initially launched by Ferrari as a show concept car, and only three were produced. The first unit produced still belongs to the Pininfarina design unit. Meanwhile, the other two were sold to the Sultan of Brunei. Like many other models, he never used the Ferrari Mythos. The car is equipped with a mid-engine rear-wheel drive to show drivers the company’s ability to produce a variety of models. The Ferrari Mythos was every racing car enthusiast’s dream, but it was not available to the public. The car could reach speeds of up to 290 km/h, and the Sultan had two custom-made.
So, these were some of the classic and royal rides from the world’s largest car collection of the Sultan of Brunei.
Unlocking the Tiptronic Transmission Mechanism
If you are passionate about cars, you must have watched the Fast and Furious series. You may not have liked the movies, but your heart was racing like the race cars every time the camera panned to an actor jumping on the clutch and shifting gears. Many people want to enjoy the adrenaline rush of shifting gears, but not everyone is willing to do so at the expense of the benefits of an automatic transmission. The Tiptronic transmission can solve this dilemma by offering the benefits of both worlds!
Car enthusiasts will literally split into two groups when it comes to choosing between automatic and manual transmissions. Both types have their zealous supporters, but it is undeniable that each has unique advantages that the other type cannot offer. The Tiptronic transmission can be the bridge between the two types. Let’s find out what Tiptronic is, how it works, and its advantage over the automatic transmission.
What is the Tiptronic transmission?
Packard and Chrysler were the first car manufacturers to experiment with the concept of Tiptronic transmission in the late 1930s. They developed a semi-automatic mechanism capable of automatically operating the clutch during gear changes.
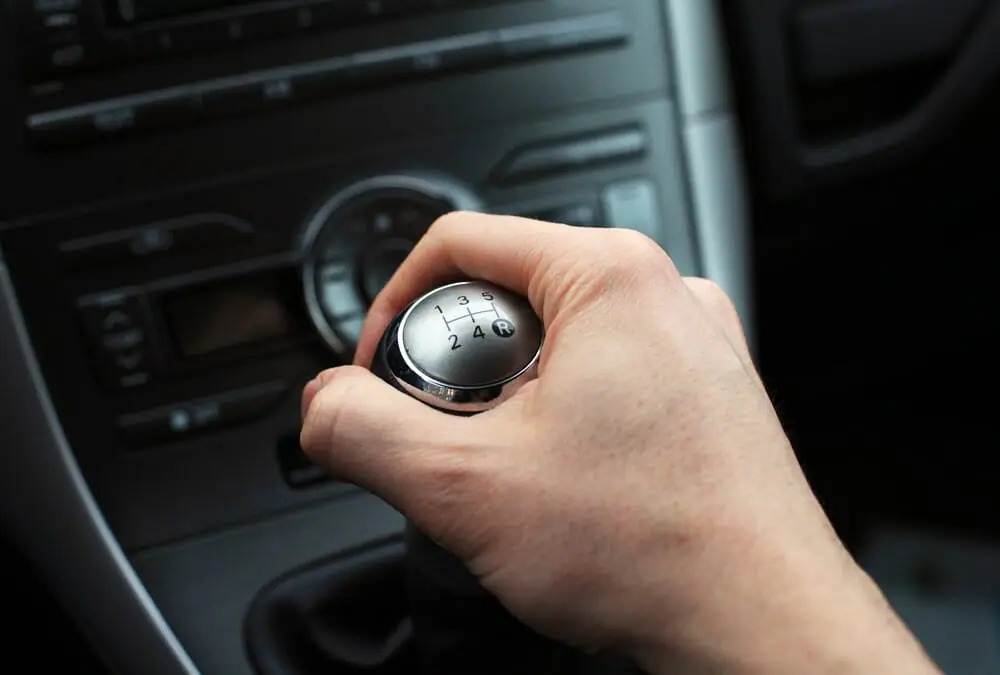
A car interior with a Tiptronic system. (Photo: Edmonds)
In the modern world, the Volkswagen-Audi group takes the Tiptronic turn as a brand-specific automatic transmission. You will see this variation in some first-class luxury brands such as BMW, Mercedes-Benz, Audi, Porsche, as well as in some standard vehicles like Citroën Sensodrive, Honda iShift, Chrysler AutoStick, and more.
Definition of Tiptronic transmission
This particular type is similar to an automatic transmission but offers the driver the ability to shift gears manually. It allows you to shift up and down in this mode using the gear lever or the paddles behind the steering wheel. It was developed with the idea of extracting the best performance from a vehicle.
Unlike semi-automatics, the Tiptronic transmission technology uses a torque converter instead of a clutch. It also integrates some manual functions into an automatic mechanism.
Advantages of a Tiptronic gear shift
A Tiptronic gearbox allows the driver to manually manage the nuances of two options: upshifting and downshifting. After switching from automatic mode to the manual option, the driver can make the gear-shifting decisions. Thus, it is entirely possible to enhance braking power with deliberate downshifting or increase acceleration by using upshifting while enjoying the traditional features of automatic transmission. The unique advantages of Tiptronic technology are:
Gear controls can be performed by both the driver and the car’s computer system (ECU), making it suitable for both novice and experienced drivers.
Manual navigation for upshifting and downshifting allows the driver to have more control over the gear-shifting action. To ensure safety, there is built-in protection to revert to automatic control if the driver neglects the redline of the engine speed.
Just like navigating an automatic transmission, it does not require much skill to operate a Tiptronic transmission. Thus, even beginner drivers can drive a car with this mechanism.
What is the working principle of a Tiptronic transmission?
The operating mechanism of this system may seem complex because it uses techniques from both types of transmission. It goes without saying that it has two modes: automatic transmission and manual gear shifting.
The automatic mode – The car’s ECU controls the entire transmission system, requiring the driver to do nothing other than operate the brake and accelerator. This mode is suitable for amateur drivers and when you are driving in the city. It will provide hassle-free navigation through all traffic.
The manual mode – It allows the driver to take control of the transmission, specifically the gear shifting. There are paddles mounted on the steering wheel or a gear lever knob to perform the mode change. When you use it, the internal actuators of the transmission change the gear to an upshift or downshift position.
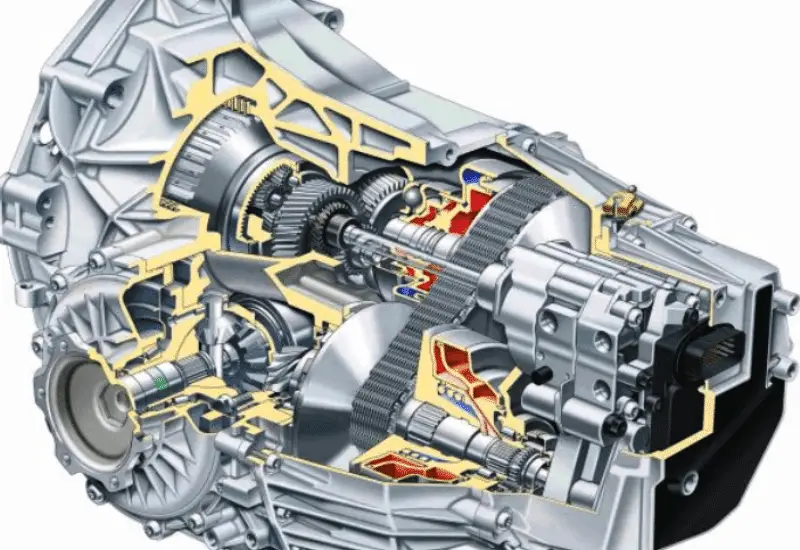
Internal mechanism of a Tiptronic gear shift. (Photo: Motor1.com)
The ECU always retains much of the control (for safety reasons, of course) when you switch to manual mode. For example, the Tiptronic transmission of Audi continues to automatically shift from first to second gear during manual operation. This also highlights the safety measures taken by the vehicle’s central computer system. Most models equipped with this transmission have built-in protections for high and low engine speeds.
If the engine speed exceeds the maximum limit, the ECU intervenes to correct the gear shift. Similarly, it performs a downshift when the engine speed exceeds the lowest limit. Many modern cars are equipped with the Tiptronic S version of this transmission, which automatically switches to automatic mode if the driver gives no input for 8 seconds. All these features are standard safety measures that prevent engine failure.
Watch the video to learn more about the mechanism of a Tiptronic transmission:
The difference between Tiptronic and automatic transmission
Tiptronic is a kind of automatic transmission but it has some differences compared to a standard automatic system.
A Tiptronic system gives drivers the freedom to choose how they want to drive. They can enjoy the simple, hassle-free driving of automatic navigation and the fun of gear shifting in manual transmission. Although it allows for acceleration or deceleration, the ECU always monitors if the engine speed exceeds danger limits. It takes control if something goes wrong or if the driver does not use the gear shift for a set period. In contrast, the automatic transmission always controls the gear shifts and engine speed.
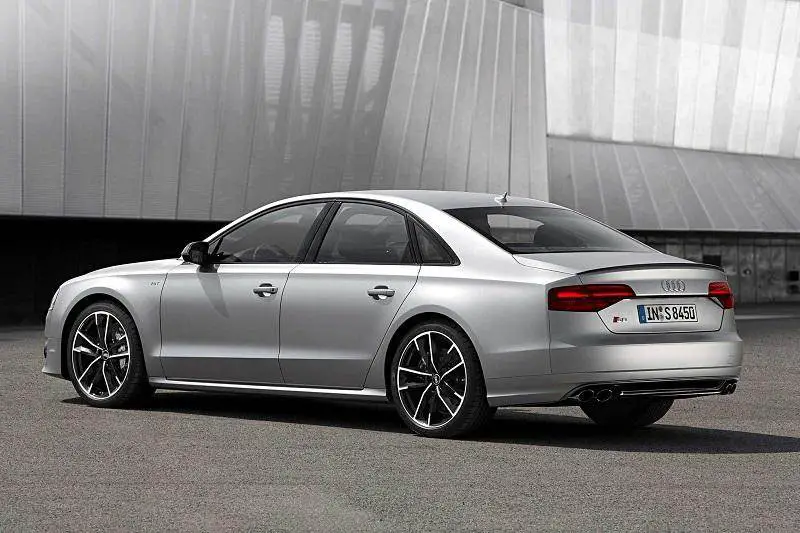
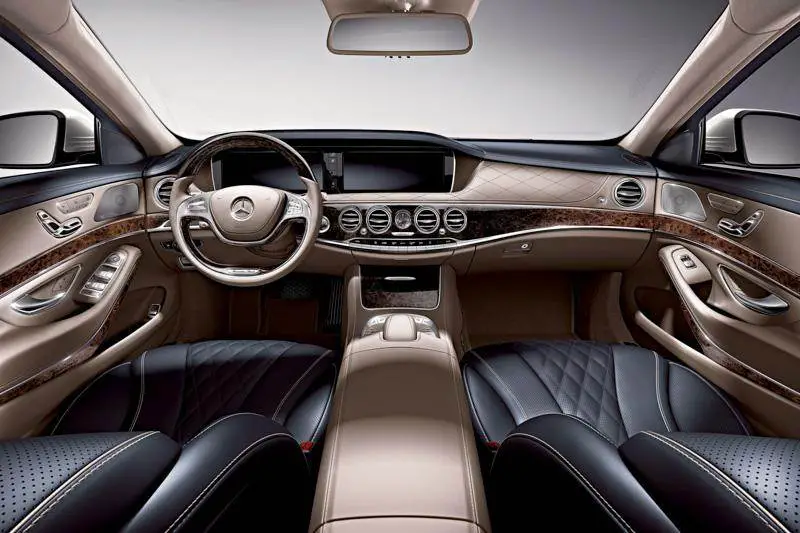
Honda Jazz with a Tiptronic system. (Photo: CAR Magazine)
There are different advanced versions of the Tiptronic transmission. For example, the Porsche Cayenne has an 8-speed Tiptronic S version that learns the driver’s behavior and acts accordingly, according to the manufacturer. Many modern cars are equipped with advanced versions of automatic transmission, but none of them have this feature.
The two transmissions are similar in that they are easy to use. Even a new driver can drive and perform routine trips through urban areas.
Conclusion
A Tiptronic transmission offers the driver the best of both automatic and manual gear shifting. You can change gears without pressing a clutch and remain worry-free thanks to the built-in safety functions. There is almost no possibility of making a driving mistake when you drive a car equipped with a Tiptronic system.
Suggestions for the best colored rims for a white car
Wheels are one of the areas you can improve without spending a lot. A low-cost solution is to paint the rims. However, choosing the best wheel color for a white car can be a bit confusing.
A significant percentage of vehicles sold worldwide are white. It’s a standard color that looks decent and suits all occasions. But there’s no harm in trying to enhance the look from time to time.
You can choose to paint them any color you like, but not all shades will suit a white vehicle.
Best Wheel Colors for a White Car
Adding a custom wheel color can look stunning if you choose the right one. You might seriously consider these options as the best wheel color for a white car.
Common Choices: Chrome and Black
These two colors are widely found in a broad range of vehicles and also work well with white cars.
Chrome is a classic color. It’s the safest bet for a custom wheel color, as it works on any car and any paint job.
Black or chrome, or a combination of both, will have a classic and stunning look. Source: Mobile01
Black is also a good choice even though it exudes a flamboyant style. It blends with the black tires but stands out against the white car body.
If you drive a sedan or coupe, black wheels will give it a race car look. If it’s an SUV, they’ll make it appear as if it’s “floating” on the road when you drive.
Opt for Neat and Clean White
White is one of the best wheel colors for white cars because it’s a clean, simple, and presentable color. White cars with white wheels are very elegant and perfectly streamlined without looking tacky.
However, you need to choose the right shade of white to create a coordinated look. There are beige, off-white, bright white, and a few other shades.
Choose one that matches the car’s hue. Consult a professional if you don’t know the exact shade of white your car is.
Choose a Bright Shade
Many car owners don’t have the courage to paint their white car’s wheels with a bright, vibrant color, thinking it will only look good on a race car or in a video game.
But you might be surprised to learn that dazzling colors like red, orange, green, and similar shades can breathe new life into your white car’s monochromatic look.
When done well, bright wheels can be breathtaking. Source: KBB
If you manage to do it correctly, the paint will look magnificent on the wheels. The only downside is that you might not get the best price for the car when selling if the buyer doesn’t like your original taste in colors.
However, if you don’t plan to sell, you should embrace this color customization.
Can You Paint Car Wheels Yourself?
If the wheels you currently have are in perfect condition and you don’t want to replace them, you might consider painting them.
You can hire someone to do this task for you if you lack the expertise. Compared to buying new wheels, painting your car’s wheels can cost between $100 and $350.
Here are the steps you can follow to undertake this wheel painting project yourself:
Lift the car and place it on stands.
Remove the wheels.
The surface must be polished and the wheels cleaned. Use a wire brush to remove contaminants, dirt, or rust. Use steel wool and sandpaper for hard-to-remove spots.
Protect the tire rubber once the surface is clean. Cover the tire with painter’s tape and a protective cloth.
Put on safety gear before painting. Wear old clothes, a mask, and safety glasses to protect yourself from hazards.
Priming the wheels with paint is a priority.
Once the primer is completely set, evenly spray the selected color onto the wheels.
Apply a clear coat finish to the wheels when the color is completely dry.
Make sure the spray paint you choose for your wheels is suitable for the material. Not all spray paints are suitable for use on steel, alloy, or aluminum wheels.
Watch the video below to learn how to paint wheels to achieve the best wheel color for a white car!
Any car can look attractive and stunning with black wheels. Black wheels give sports vehicles a more sporty appearance than they actually are, as it’s true that sports cars have a distinct fan base!
Sports vehicles are designed to be powerful and robust. They also require wheels that can be used for that purpose.
Does a white car with gold wheels look good?
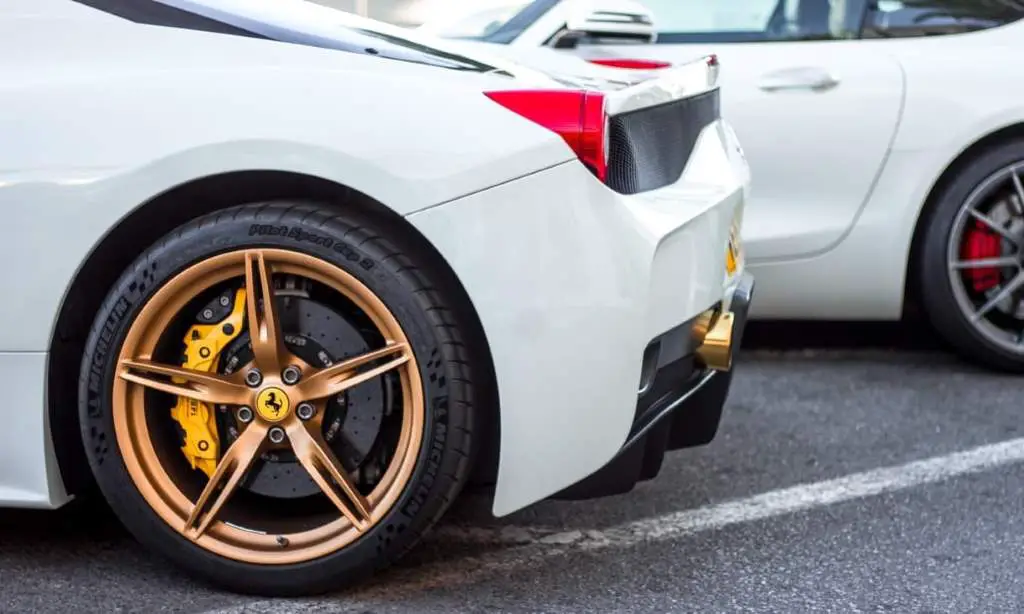
The rare cars that look great with gold wheels are those that are white and plain in color. In fact, among vehicle enthusiasts, this combination has long been one of the most coveted.
The only issue would be that these two colors might clash if your car has a lot of chrome trim. But there are two simple solutions to this. One is to use Plasti-Dip or a similar product to paint the chrome white. The alternative is to select gold wheels with silver rims.
Which color best complements white car wheel colors?
Generally, black wheels with a glossy or matte finish look better on a white automobile. Installing a set of black-painted alloy wheels can give your vehicle a subtle yet striking look.
As an alternative, you can choose bright white wheels with vibrant colors if you’re going for a more athletic appearance. To further emphasize the idea, use the same color for body decals like stripes or racing banners.
You can choose bright white wheels with vibrant colors if you’re going for a more athletic appearance. (Photo: Replicarclub)
There are also bronze or copper wheels, which have a more distinctive look. Finally, those who want to stand out can choose wheels in bright colors like red or blue.
So here are our recommendations on the best wheel colors for a white car that might be helpful to you.
What is power braking: a detailed guide for drivers
Are you wondering what brake boosting is? Brake boosting is a captivating concept highly valued within the automotive enthusiast community, especially among street racers.
If you share our curiosity and wish to delve deeper into this topic, read on to discover a comprehensive guide on brake boosting, covering everything from A to Z.
What is brake boosting?
Brake boosting, a term that resonates particularly with car enthusiasts and racers, summarizes its essence in its name.
It is essentially a driving technique where the brakes are intelligently used to significantly increase a vehicle’s speed. But how exactly does this maneuver work?
The mechanics of brake boosting
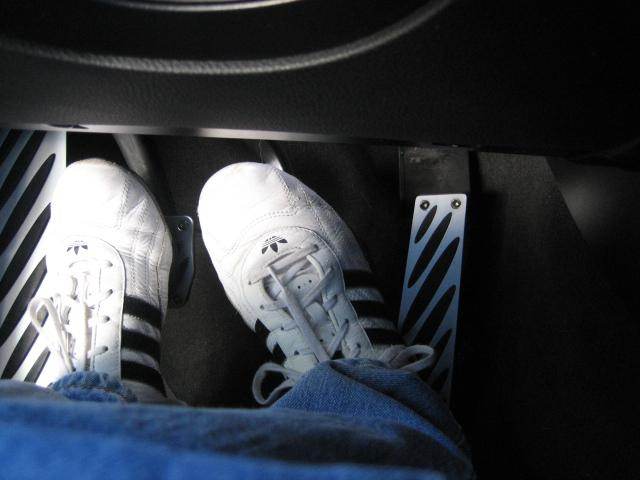
To activate brake boosting, the driver simultaneously applies pressure to the brake pedal and the accelerator pedal. This combination of actions may seem counterintuitive at first glance, but its purpose becomes clear once you look into its mechanisms.
When the accelerator pedal is pressed while the brake pedal is lightly engaged, the vehicle remains in a state of controlled motion.
This balance is akin to holding a sprinter at the starting line. The driver shows restraint while being ready to unleash a burst of power at the right moment.
Essentially, brake boosting represents a delicate balance between restraint and rapid acceleration.
To activate brake boosting, the driver simultaneously applies pressure to the brake pedal and the accelerator pedal. (Photo: Bryan’s Garage)
The purpose of brake boosting
Now that we understand the technical subtleties of brake boosting, it is equally important to explore the motivations behind using such a technique. Below, we outline the multifaceted goals underlying the practice of brake boosting:
Speed enhancement
The primary goal of brake boosting is to increase a vehicle’s speed. As explained earlier, the driver skillfully manipulates both pedals to maintain a steady speed before triggering a sudden acceleration.
This dramatic increase in speed is a central aspect of brake boosting.
Racing dynamics
Brake boosting finds its most significant application in the realm of racing, particularly in the context of street racing and roll racing. It is a strategic weapon in a racer’s arsenal, allowing them to gain a competitive edge.
In a scenario involving multiple racers, the judicious use of brake boosting can give the driver a significant head start, leaving competitors in the dust.
Tactical advantage
Brake boosting embodies the very essence of tactical driving. By engaging in this braking technique, a driver can outmaneuver opponents and take control of the race.
It is a calculated move that often surprises adversaries, as they may not even realize it is being executed until it is too late.
A driver can take control of the race through brake boosting. (Photo: ITS Tactics)
Strategic maneuver
Beyond racing, brake boosting can be used as a strategic maneuver in various driving scenarios where rapid acceleration is required.
Whether merging onto a highway or overtaking slow traffic, the judicious deployment of brake boosting can offer a definite advantage.
In summary, brake boosting is a nuanced driving technique that combines the principles of restraint and acceleration.
Can brake boosting damage your vehicle?
Once we have discussed what brake boosting is, its purposes, and its potential dangers, the remaining topic to address is the possible damage it can inflict on your car. We outline below the potential adverse effects of this activity on your vehicle’s well-being.
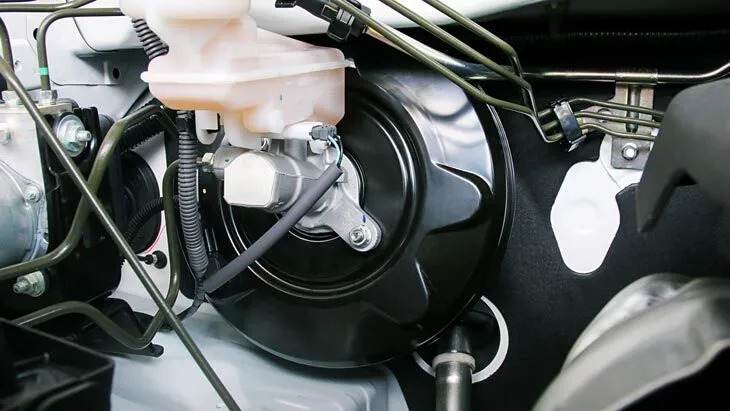
Increased wear on the braking system:
It is evident that brake boosting can damage the braking system. Specifically, it can accelerate the wear of these components.
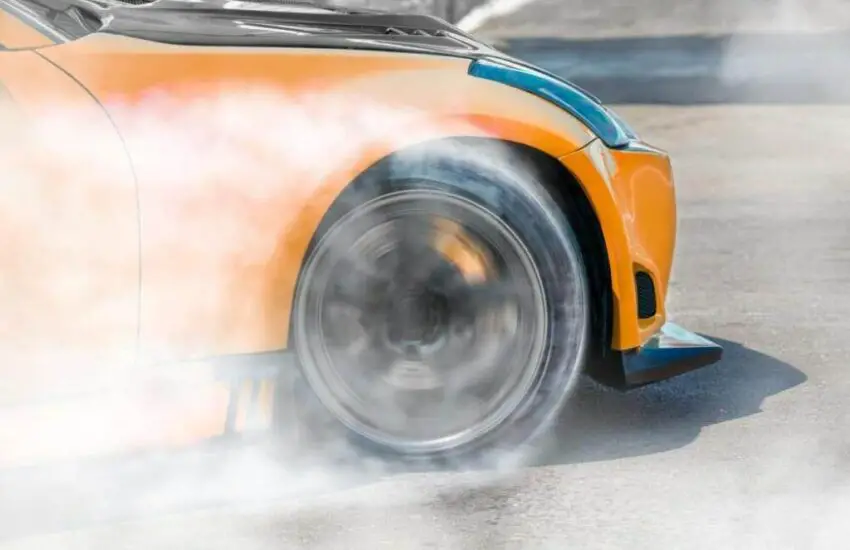
Risk of smoke and fire
Brake boosting involves intensive use of the brakes, which can lead to smoke formation in the braking system. In extreme cases, if not approached with caution, it can even lead to a fire risk.
Overall, brake boosting is not without risks, and it is crucial to be aware of the potential damage it can cause to your vehicle, particularly its braking system.
It is essential to be aware of the potential damage this method can cause to your vehicle. (Photo: Vehicle Freak)
Distinguishing between brake boosting and left-foot braking
In previous sections, we discussed brake boosting and its occasional confusion with another racing technique called left-foot braking.
Although these techniques share some similarities, they are fundamentally distinct. This section will provide a comparison between brake boosting and left-foot braking, highlighting their key similarities and differences.
Brake boosting
Involves the simultaneous use of the accelerator and brake pedals.
Maintains a constant speed.
Aims to prepare for a subsequent increase in speed and power.
Left-foot braking
Also involves the simultaneous use of the accelerator and brake pedals.
Primarily intended to decelerate or slow down the vehicle.
Ultimately results in a stop.
Both techniques incorporate the simultaneous use of the accelerator and brake pedals. However, the outcomes and intentions behind these actions are very different.
Specifically, brake boosting involves using both pedals simultaneously to prepare for a significant increase in speed and power.
While the initial steps involve maintaining a gentle, constant speed, the ultimate goal is to achieve notable acceleration.
Conversely, left-foot braking is a technique used to slow down or decelerate the vehicle, ultimately leading to a complete stop. When a driver brakes with the left foot, the intention is to reduce speed or halt the vehicle’s movement.
In summary, brake boosting and left-foot braking share similar processes and theories. However, the crucial distinction lies in their outcomes.
Brake boosting enhances engine power and speed, while left-foot braking aims to slow down or stop the vehicle.
Brake boosting and left-foot braking share similar processes and theories. (Photo: Race Junky)
How to perform brake boosting in automatic cars
Brake boosting in automatic vehicles is relatively straightforward compared to manual cars, as there is no issue of clutch wear. Here are two methods to achieve brake boosting, with some slight variations in the steps but the same final result:
Method 1: Brake first
Reach a constant speed of about 20 mph. Even though a speed of 20 mph may seem modest for racing maneuvers, it is generally sufficient. Gradually apply pressure to the brakes during this process.
Once the brakes are fully engaged, press the accelerator pedal while paying attention to the sound of the turbochargers spooling up.
When the turbochargers start to accelerate, release your foot from the brakes to feel an exhilarating surge of power! Be prepared for intense exhaust noises, but it’s all part of the experience.
Method 2: Brake and accelerate simultaneously
Increase your vehicle’s speed to at least 20 mph. For this method, 30 mph is even better.
Place your left foot on the parking brake and your right foot on the accelerator pedal, applying pressure to both pedals simultaneously.
Using your left foot, gently engage the parking brake while simultaneously pressing the accelerator pedal with your right foot.
Hold this position for about 2 to 3 seconds. Then, release your foot and let the vehicle accelerate on its own. You will be amazed by its performance!
How to brake boost a manual car
Brake boosting in a manual car follows steps similar to those in automatic cars, with the main difference being that you need to be in lower gears to achieve the desired result.
It is important to note that excessive wear on your clutches and transmission can impact the car’s long-term durability.
Method 1: Using the handbrake
Handbrakes are handy tools for manual cars and are particularly useful for those who prioritize safety.
Press the clutch pedal and rev the engine to about 3,000 RPM.
Engage the handbrake and hold it engaged while gradually releasing the clutch pedal.
When the vehicle starts to move, slowly release the handbrake until the engine produces a roar.
Now, apply maximum acceleration and enjoy your high-performance ride!
Brake boosting in a manual car follows steps similar to those in automatic cars. (Photo: Vehicle Freak)
Method 2: Using the foot brake
For drivers who are not comfortable with handbrakes, the foot brake is another option, even though it may pose more safety risks than the handbrake method.
Press the clutch pedal and rev the engine to about 3,000 RPM.
Press the brake pedal while gradually releasing the clutch pedal.
Gradually release your foot from the brake pedal until the engine roars as the vehicle begins to move.
Maximize the accelerator and enjoy the exhilarating experience!
Please exercise caution and ensure safety when attempting to brake boost, as it can affect your vehicle’s performance and safety.
Is brake boosting viable for supercharged vehicles?
No, it is not possible, despite some theories suggesting otherwise. Most supercharged vehicles have a complex design that prevents drivers from obtaining a significant boost.
Turbochargers are known to increase speed by activating to overcome lag, thus releasing power when you release the brake pedal.
Superchargers, on the other hand, cannot achieve the same results without additional components (often at high costs). Even with additional support, the outcome remains uncertain and inconsistent.
Can you launch your car with brake boosting?
Yes, you can use brake boosting to launch your car into action from a complete stop, similar to BMW’s Launch Control function.
However, such practices put considerable strain on the car’s engine, which is why some drivers prefer a conventional rolling start.
Alternatively, some opt for BMW models equipped with the aforementioned Launch Control mode, offering similar results without stressing the powertrain.
Final words
You now know what brake boosting is and some of its associated issues! Overall, brake boosting is a driving technique that combines braking and acceleration.
But it is generally not common due to safety risks, increased vehicle wear, fuel inefficiency, potential strain on the transmission, and legal issues.
Off-center steering wheel: causes and repair methods
Have you ever encountered a problem with a misaligned steering wheel? It’s annoying because when the steering wheel isn’t centered, you have to adjust your driving and seating position. This could lead to safety issues and physical discomfort like shoulder and back pain if it lasts for a long time.
Why is my steering wheel misaligned?
There are several reasons why the steering wheel becomes misaligned. It could happen due to poor engineering and design. Although this is rare, it’s not unheard of. Most people never notice it. But a car can leave the factory with a misaligned steering wheel or tilted.
This can occur when you hit the suspension after hitting a pothole. Such sudden shocks move components from their factory-set original positions. The same problem will happen if you spend too much time off-road. When you drive a lot on rocks, the many bumps and impacts will slightly misalign the steering wheel.
Moreover, the steering wheel position depends on a vehicle’s thrust angle. Misalignment of the wheel or rear axle affects the angle between the thrust line and the centerline. The result is a crooked wheel.
Off-road driving can disrupt wheel alignment. (Photo source: rac)
Misaligned steering wheel: how to fix it?
When repairing a bent wheel, you need to work on three angles: caster, camber, and toe.
Caster – refers to the forward or backward tilt of the top of the steering axis. It regulates the directional control of the steering. According to the measurement, backward tilt is considered positive (+) while forward tilt is negative (-).
Camber – controls directional operation and tire wear. The angle refers to the bending of the wheels from the vertical position. It becomes a positive angle (+) when the wheel’s top tilt is outward. It will be negative (-) when it tilts inward.
Toe – refers to the extent of the angle at which the front or rear wheels are turned inward or outward. The toe angle is positive (+) when the wheels are turned inward and negative (-) when they are turned outward.
The simple ways to fix the steering wheel misalignment problem are as follows:
Method 1
This is the simplest method, but you need to have some technical knowledge about a vehicle’s mechanism. Also, you need the right tools because it involves removing the steering wheel from its housing.
Simply remove it and put it back in the correct position. It’s also possible to correct the alignment without disassembling the wheel. But the process involves more time and money.
The wheel needs to be removed to repair it. (Photo source: autohome)
Method 2
When the misalignment is too significant, you need to take the vehicle to a service workshop. Mechanics use an alignment machine that handles all four wheels and the thrust angle. They will also check the caster, camber, and toe angles to ensure the steering wheel isn’t misaligned.
How to Fix Apple CarPlay That Isn’t Working in a Few Simple Steps
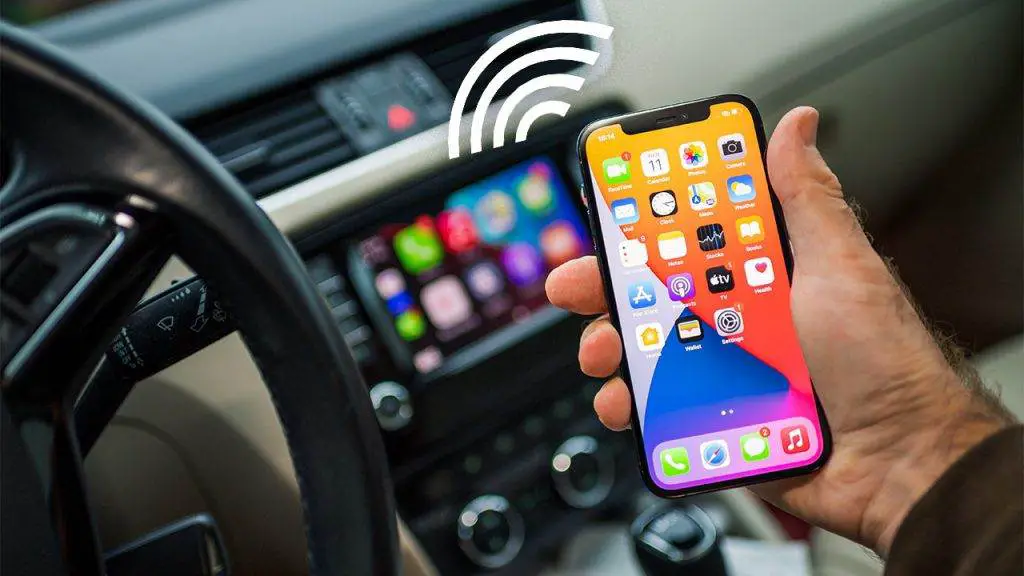
Apple CarPlay is a convenient platform that allows you to access your iOS apps hands-free while driving, by establishing a connection between your iPhone and your car’s infotainment screen. And your experiences will only be truly great when everything works properly. But what if your Apple CarPlay doesn’t connect? Don’t worry! In today’s topic, we will explain how to fix Apple CarPlay when it’s not working effectively:
How does Apple CarPlay work?
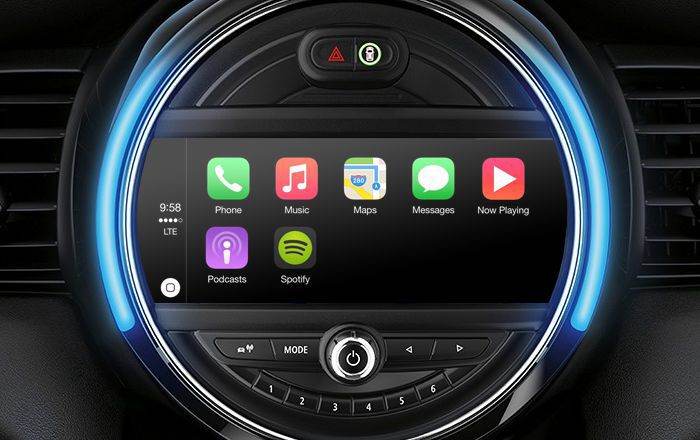
With the Apple CarPlay screen, you can send texts, view maps, listen to music, and more. (Photo: pinterest.com)
Nowadays, besides basic driving needs and comfort, we also need cars equipped with high-tech and entertainment equipment for long, boring trips.
Understanding this, Apple launched a smart application called Apple CarPlay, which allows connecting the iPhone to the car. Car manufacturers are increasingly offering this application by default on new version vehicles.
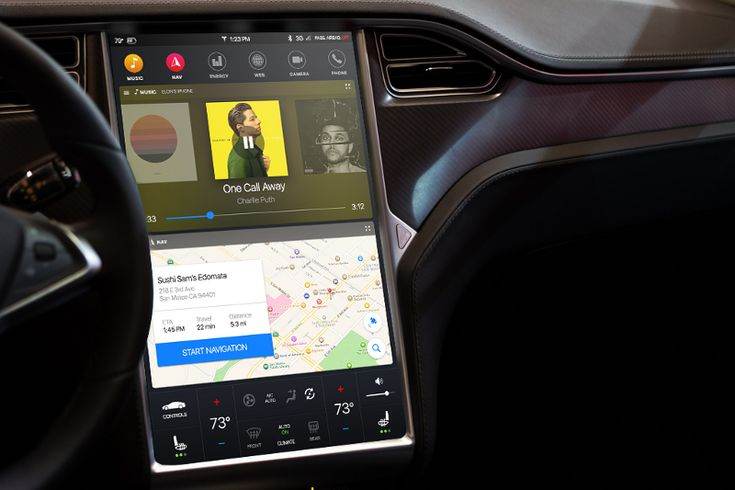
Simply put, when cars connect to Apple CarPlay, the infotainment screens can perform many operations and functions similar to those of iPhones. The driver can receive calls, texts, check maps, listen to music, etc. Conversely, you can also control the car’s screen from the phone you are connected to.
Besides the iPhone’s default functions, Apple CarPlay allows the use of a number of compatible third-party applications such as iHeartRadio, Spotify, WhatsApp, Amazon Music, etc. Apple CarPlay also supports access to a number of applications developed by its rival Google: Google Play Music and Google Maps are both accessible through the software.
Notably, Apple CarPlay also supports the virtual assistant Siri, making it easier than ever to automatically control your car’s screen. This feature will be extremely convenient for you when your hands and feet are busy driving on the road.
Depending on your car, you can connect your iPhone to CarPlay using a USB port or pair your iPhone with your car’s Bluetooth if your car supports wireless connectivity.
Why is my Apple CarPlay not working?
There can be several reasons why Apple CarPlay fails to connect, stops working, or doesn’t work properly. Typical causes include:
iOS Updates
If your iOS software is outdated, it can lead to compatibility issues. Make sure to check and update your infotainment system software and the iPhone’s software promptly to ensure stable operation.
Compatibility Issue
Make sure your iPhone is compatible with CarPlay and that the infotainment system supports Apple CarPlay. Nowadays, more and more car models worldwide are compatible with Apple CarPlay. Volvo, Honda, Chevrolet, BMW, Ford, and Porsche are among the dozens of brands offering CarPlay compatibility. You can ask a technician for advice or check the car purchase website to see if your car supports Apple CarPlay!
Other Reasons
The USB cable is faulty
Bluetooth connection problem
Integration issues between applications
How to fix Apple CarPlay when it’s not working?
You can follow a few methods below to get your Apple CarPlay working again:
Note: Before starting the process, make sure CarPlay is compatible with your vehicle and available in your region. Otherwise, you will not be able to establish a connection or access any features.
How to enable CarPlay on iPhone (Photo: pinterest.com)
Preliminary Inspection
Before trying any of the methods, here are a few points to check:
Make sure your iPhone has the latest iOS version and supports CarPlay (iPhone 5 or later).
Check if the latest version is installed on your vehicle. Look for software updates on the manufacturer’s website to receive instructions on how to update.
Unpair the iPhone from your car and try connecting again. This is often helpful if the Bluetooth connection between your phone and your car’s infotainment system is malfunctioning.
Disconnect any other Bluetooth devices connected to your iPhone that might cause interference or conflicts with the device and the car when using CarPlay.
If you have performed all these checks and Apple CarPlay still isn’t working, try the fixes below to see if CarPlay recovers:
1. Check Connections
If you are using a USB cable, check that the cable is not damaged or loose, or try another cable with a different USB port if you have one. If you choose to use a wireless connection, enable Bluetooth and WiFi in your iPhone’s settings.
2. Restart Your iPhone and Your Car’s Infotainment System
If CarPlay doesn’t work after trying different connections, check if the CarPlay logo appears on your car’s screen. If not, restart your iPhone and your car’s infotainment system.
To restart your car’s infotainment system, consult your vehicle’s owner’s manual. After restarting the device, try using CarPlay with your iPhone again to see if the issue is resolved.
3. Make Sure Siri is Enabled
If your car supports Siri Eyes Free, you can press and hold the voice command on the steering wheel to make your request. However, if Siri is disabled, you won’t be able to use it with CarPlay.
Step 1: To enable Siri, you choose: Settings -> Siri & Search
Step 2: Enable the following options: Allow Siri When Locked, Listen for “Hey Siri”, and Press Side Button for Siri or Press Home for Siri.
4. Disable USB Restricted Mode
USB Restricted Mode is an iOS feature that protects iOS user data from hackers using USB accessories to hack your passwords via the Lightning port. This feature will disable the internal USB data connection after a certain period of time.
Step 1: To disable this feature, open Settings on your iPhone and tap on Face ID & Passcode or Touch ID & Passcode.
Step 2: Enter your password if prompted and go to the Allow Access When Locked section.
Step 3: Then, tap on USB Accessories and turn on the switch to disable USB Restricted Mode.
Note: Once this feature is disabled, Lightning-based phone accessories can work even when your iPhone is locked. However, disabling USB Restricted Mode exposes your iPhone to certain threats. But if that’s acceptable to you, you can disable it when using CarPlay and enable it when you don’t need it.
5. Reset All Settings
Sometimes, issues with apps on your iPhone can change some system settings, which may prevent CarPlay from working correctly. In this case, resetting all system settings to default will put everything back in order.
To reset all settings on your iPhone, open Settings > General > Reset
Tap Reset All Settings, follow the prompt to complete the process, and check if CarPlay works correctly again.
You can also reset your phone’s network settings, as network-related errors may have interrupted or broken the connection between your iPhone and CarPlay. To erase and reset network settings on your iPhone, open Settings > General > Reset > Reset Network Settings.
We hope these tips and methods help you fix CarPlay when it’s not working. If you encounter other issues, you can contact Apple Support or your vehicle manufacturer for advice on problems related to car infotainment systems.
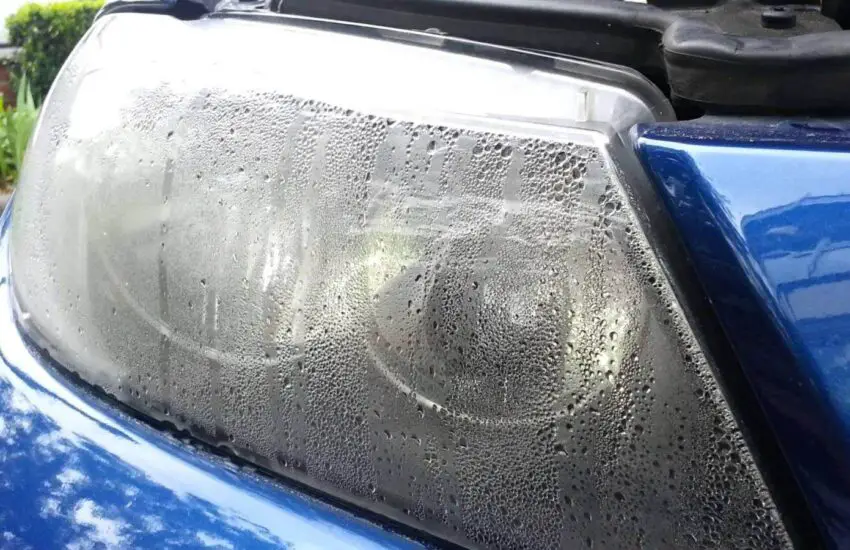
How to Remove Moisture from Headlights
Let’s explore how to remove moisture from headlights. Read below to find useful tips and tricks.
Is there moisture buildup in your headlights? Well, this is a very common problem faced by many car owners. Moisture prevents headlights from functioning properly, making night driving difficult.
Therefore, it’s important to fix it immediately. But don’t worry. There are many effective ways to remove condensation from headlights quickly and easily.
How to Remove Moisture from Headlights? – An Easy DIY Method!
Moisture inside your car’s headlights can potentially dim your car’s headlights, which can make your car less visible in ongoing traffic.
Thus, it can increase the risk of accidents. To avoid such situations, here are some helpful guidelines that will guide you on how to remove water inside headlights!
Required Materials
Let’s look at the materials needed for repairing moisture in headlights:
1. A Socket and Ratchet
To unscrew the three screws around your vehicle’s headlight, you just need a socket and ratchet. Remember to consult the owner’s manual to identify the exact size. If you own an older car, a screwdriver is enough to loosen the screws.
2. Silica Gel Packs
Using silica gels to learn how to remove moisture from headlights. (Photo: YouTube)
These packs are the best for retaining moisture. Inserting these gel packs into your vehicle’s headlights is a better and inexpensive option for removing headlight moisture.
3. A Lint-Free Cloth
This cloth is used to remove current moisture from inside your car’s headlights. If there is currently no moisture, you can skip this part.
Follow the Tutorial on How to Remove Moisture from Headlights.
Now, you need to follow the steps below to remove the moisture.
1. Remove the Headlight Assembly
First, you need to remove the three screws from your headlight assembly using a socket and ratchet. Simply turn the screws clockwise to remove them completely.
2. Wipe the Accumulated Moisture
After removing the headlight assembly, it’s time to clean the moisture present in the headlights with a lint-free cloth. Wipe the entire area around the lights as well as near the lights that appear damp.
3. Insert the Silica Pack
Once the inside of the headlights is completely dry, it’s time to place the silica gel packs inside the headlights. These packs will fully absorb the moisture present there.
Ensure these gel packets are not exposed to the headlight bulbs; otherwise, they will block the light coming from the headlights.
4. Reinstall the Headlight Assembly
Reinstall the headlight assembly to remove headlight moisture. (Photo: YouTube)
After completing the insertion of the silica gel, you need to reinstall your headlights. Simply place the headlight where you detached it and firmly insert the screws.
FAQ on How to Remove Moisture from Headlights
Why are my headlights foggy or filled with moisture?
Headlights can become foggy or accumulate moisture due to temperature changes, condensation, worn seals, or cracks in the lens. This can affect visibility and the overall appearance of your car.
Can I still drive with moisture in my headlights?
It is not recommended to drive with moisture in your headlights as it can reduce the effectiveness of the lights and compromise your visibility, especially in bad weather or at night.
How can I tell if there is moisture in my headlights?
Headlights may appear as foggy or cloudy lenses, water droplets inside the housing, or visible condensation when the lights are on.
What can I do to prevent moisture buildup in my headlights?
To prevent moisture buildup, regularly inspect your headlights for cracks or damaged seals. Additionally, avoid exposing your car to extreme temperature changes and high-pressure car washes.
Can I remove headlight moisture myself?
Yes, you can try to remove headlight moisture yourself, but it depends on the severity of the problem. Simple methods like using a hairdryer or silica gel packs may work for minor condensation.
How to use silica gel packs to remove headlight moisture?
Place silica gel packs or desiccant bags in a plastic bag and place them in the headlight housing. Leave them overnight to absorb the moisture. Make sure the headlight is completely dry before sealing it back up.
Are there commercial products to remove headlight moisture?
Yes, there are commercial headlight restoration kits and moisture removal products. Follow the manufacturer’s instructions for safe and effective use.
There are many highly skilled headlight restoration kits and moisture removal products you can choose from. (Photo: Indian Auto)
Can I use a heat gun to remove headlight moisture?
While a heat gun can help evaporate moisture, be cautious to avoid damaging the plastic lens or causing cracks. Keep the heat gun at a safe distance and use it sparingly.
Should I drill holes in my headlights to let moisture out?
It is not recommended to drill holes in your headlights as it can lead to further moisture penetration and compromise the integrity of the headlight housing.
What to do if the moisture in my headlights doesn’t go away?
If DIY methods fail to remove the moisture, or if the moisture returns, it is best to seek professional help from an auto repair shop or a trusted dealership.
Can I prevent moisture buildup by sealing my headlights?
Sealing headlights is not recommended as they are designed to allow proper ventilation to prevent condensation. Attempting to seal them can do more harm than good.
Is it better to replace or repair foggy headlights?
In case of severe moisture issues or damage, it may be better to replace the entire headlight assembly. In other cases, repairing and cleaning the headlight lens may suffice.
Remember, the presence of moisture in your headlights can affect visibility and safety while driving. It is essential to address the issue promptly and follow safe methods to remove the moisture or seek professional help if necessary.
Watch the CarLubeTv video for more details on removing headlight condensation!
You are now learning more about how to remove moisture from headlights and some related advice on removing headlight condensation. You can say goodbye to foggy headlights by following these simple and quick tips.