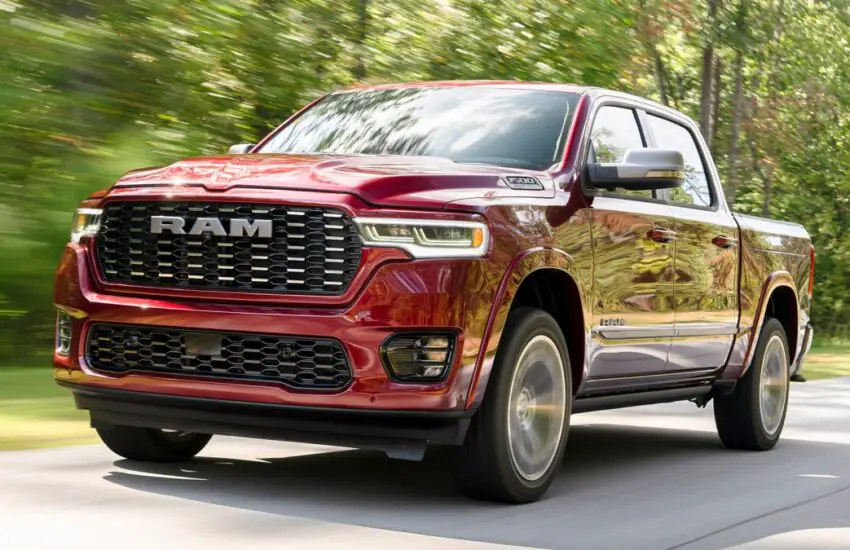
P1437 Honda Code: Complete Diagnosis and Detailed Solutions

Understanding Honda P1437 Trouble Code

What Exactly is Code P1437?

The OBD2 trouble code P1437 is a manufacturer-specific code, particularly common on Honda and Acura vehicles. This code indicates a problem with the catalyst heater system circuit. The catalyst heater system is designed to accelerate catalyst warm-up during cold starts, thereby reducing pollutant emissions during the engine’s first minutes of operation.

Catalyst Heater System Operation

The system includes several essential components that work in synergy:

  • A heating element integrated into the catalyst
  • A dedicated heater system control relay
  • Circuit protection fuses
  • The Engine Control Module (ECM) that manages activation
  • Temperature sensors for monitoring

Symptoms and Consequences of Code P1437

Visible Manifestations of the Fault

When code P1437 appears, several symptoms may alert the driver:

  • Illumination of the check engine light on the dashboard
  • Potential increase in pollutant emissions
  • Slight decrease in performance during cold starts
  • No direct mechanical symptoms in some cases
  • Possible failure during emissions testing

Impact on Performance and Environment

Although code P1437 typically doesn’t directly affect engine power, it compromises the anti-pollution system’s efficiency. The catalyst takes longer to reach its optimal operating temperature, leading to:

  • Increased emissions of unburned hydrocarbons
  • Higher carbon monoxide release
  • Reduced overall exhaust system efficiency
  • Slightly increased fuel consumption when cold

Technical Diagnosis of Code P1437

Preliminary Verification Steps

Before proceeding with in-depth diagnosis, start with these basic checks:

  • Visual inspection of system connectors and wiring
  • Verification of relevant fuses (typically fuse 18 or 22 depending on model)
  • Check of the catalyst heater relay condition
  • Examination for corrosion or oxidation traces on connectors

Detailed Electrical Diagnostic Procedure

For complete heater circuit diagnosis, follow this methodology:

  • Measurement of heating element resistance (normal value: 1-5 ohms)
  • Circuit continuity test between ECM and heating element
  • Verification of supply voltage at the relay
  • Check of ECM command signal to the relay
  • Relay operation test under load

Using Specialized Diagnostic Tools

Using an advanced OBD2 diagnostic tool is essential for:

  • Reading real-time system parameters
  • Performing actuator operation tests
  • Viewing temperature sensor data
  • Checking fault code history
  • Performing resistance tests via diagnostic interface

Solutions and Repair Procedures

Repairing Common Electrical Problems

Most P1437 faults originate from simple electrical issues:

  • Replacement of blown fuse (15-20 amps depending on model)
  • Cleaning oxidized or corroded connectors
  • Repair of damaged or cut wires
  • Replacement of defective relay
  • Restoration of faulty ground connections

Replacing Defective Components

If electrical checks indicate a faulty component:

  • Replace heating element if resistance is out of specifications
  • Change complete catalyst if heating element is integrated and not separately replaceable
  • Replace ECM only after eliminating all other possible causes
  • Use original or equivalent quality parts to ensure compatibility

Repair Costs and Economic Considerations

Cost Estimates for Main Repairs

P1437 code repair cost varies significantly depending on root cause:

  • Fuse replacement: €5-15
  • Relay replacement: €30-80
  • Wiring repair: €50-150
  • Heating element replacement: €200-500
  • Complete catalyst with integrated element: €600-1200

Recommended Economic Approach

To minimize repair costs, adopt this methodical approach:

  • Always start with the least expensive checks
  • Prioritize thorough diagnosis before any major part replacement
  • Consult Honda technical bulletins for recurring problems
  • Consider recycled parts for expensive electronic components
  • Evaluate cost-benefit ratio based on vehicle age and value

System Prevention and Maintenance

Best Practices to Avoid Code P1437

Adopt these maintenance habits to prevent fault occurrence:

  • Avoid engine washes that could damage electrical components
  • Regularly inspect connector condition in engine compartment
  • Protect electrical elements from water and salt splashes
  • Perform periodic battery charging system checks
  • Follow manufacturer-recommended maintenance intervals

Importance of Professional Diagnosis

Although some aspects of P1437 diagnosis are accessible to amateur mechanics, professional intervention is recommended for:

  • Correct interpretation of diagnostic scanner data
  • Use of specialized test equipment
  • Ensuring repairs comply with manufacturer specifications
  • Potential ECM programming after component replacement
  • Complete validation of proper system operation after repair

The Honda P1437 code, although specific and technical, can be effectively resolved through a methodical diagnostic approach. Thorough understanding of the catalyst heater system and its components is essential to identify the root cause and apply the appropriate solution. Remember that accurate diagnosis is key to economical and lasting repair.

P1437 Lexus Code: Technical Diagnosis and Solutions

Understanding the P1437 Code on Lexus

What is the OBD2 P1437 Code?

The P1437 trouble code is a manufacturer-specific code related to the auxiliary heating system on Lexus vehicles. This code indicates a problem in the auxiliary heater circuit, specifically a failure detected by the Powertrain Control Module (PCM). When this code appears, it means the system has identified an anomaly in the operation of the auxiliary heating system, which can affect the cabin’s thermal comfort and, in some cases, engine performance.

Operation of the Auxiliary Heating System

The auxiliary heating system on Lexus is designed to provide additional heating to the cabin, particularly useful in cold weather. This system operates independently of the main heating system and typically uses an electric heating element to generate heat. The PCM continuously monitors this system through various sensors and circuits to ensure its proper functioning.

Main Causes of the P1437 Code

Common Electrical Problems

  • Faulty or burned-out auxiliary heating element
  • Open or short circuit in the electrical circuit
  • Corroded or loose connectors
  • Blown fuse in the heating circuit
  • Electrical grounding issues

Component Failures

  • Faulty auxiliary heating relay
  • Defective temperature sensor
  • Damaged heating control module
  • Damaged or worn electrical wires
  • Issues with the engine control unit

Environmental Factors

Exposure to moisture, road chemicals, and extreme temperature variations can accelerate the degradation of auxiliary heating system components. Vehicles operating in regions with harsh climates are particularly susceptible to developing this type of problem.

Symptoms and Consequences of the P1437 Fault

Visible Signs for the Driver

  • Illumination of the check engine light on the dashboard
  • Reduced operation or absence of auxiliary heating
  • Failure to heat the cabin in cold weather
  • Possibility of additional related trouble codes
  • In some cases, no apparent symptoms

Impact on the Vehicle

Although the P1437 code typically doesn’t directly affect vehicle safety or drivability, it can compromise occupant comfort in cold weather. In some Lexus models, this fault may also affect the air conditioning system and windshield defrosting, thereby reducing visibility and safety.

Technical Diagnostic Procedure

Required Equipment

  • Professional OBD2 scanner compatible with Lexus
  • Quality digital multimeter
  • Model-specific repair manual
  • Electrical diagnostic tools
  • Vehicle wiring diagrams

Detailed Diagnostic Steps

Start by checking stored trouble codes with an OBD2 scanner. Clear the codes and perform a driving test to see if P1437 reappears. Visually inspect all connectors, wires, and components of the auxiliary heating system for any signs of damage, corrosion, or disconnection.

Use a multimeter to test the auxiliary heater resistance according to manufacturer specifications. Check the circuit’s power supply voltage and ground. Test the auxiliary heating relay and inspect the relevant fuse. Consult wiring diagrams specific to your Lexus model to identify all circuit components.

Specific Electrical Tests

  • Heating element resistance measurement
  • Circuit continuity testing
  • Power supply voltage verification
  • Ground integrity check
  • Relay operation test

Repair Solutions and Prevention

Common Repairs

Depending on the identified cause, repairs may include replacing the auxiliary heating element, repairing damaged wiring, cleaning corroded connectors, or replacing the faulty relay. It’s essential to use OEM quality or equivalent replacement parts to ensure repair durability.

Replacement Procedures

Replacing the auxiliary heating element varies by Lexus model. Typically, this involves locating the component (often behind the dashboard), disconnecting the battery, removing electrical connectors, and replacing the faulty unit. Always follow model-specific procedures to avoid damaging other components.

Preventive Measures

  • Regular electrical system inspections
  • Periodic connector cleaning
  • Protection against excessive moisture
  • Regular use of the heating system
  • Preventive maintenance of the cooling system

Important Considerations and Precautions

Safety Aspects

Before any intervention, always disconnect the battery and wait for electronic modules to fully discharge. Use personal protective equipment and follow electrical safety procedures. Auxiliary heating systems can reach high temperatures – allow the system to cool completely before handling.

Advanced Technical Considerations

On some recent Lexus models, the auxiliary heating system may be integrated into more complex systems. An adaptive reset may be necessary after repair using appropriate diagnostic tools. Always consult the latest technical information for your specific model.

The Lexus P1437 code, although specific, follows diagnostic principles similar to other heating system-related codes. A methodical approach and use of appropriate tools are essential to effectively identify and resolve this technical issue.

P1437 Lincoln Code: Technical Diagnosis and Solutions

Understanding Lincoln Fault Code P1437

The OBD2 fault code P1437 is a specific code for Lincoln vehicles indicating a problem with the nitrogen oxide (NOx) sensor heater circuit. This crucial system is an integral part of the selective catalytic reduction (SCR) system equipped in modern Lincoln models to meet strict anti-pollution standards.

Role of the NOx Sensor in Lincoln Vehicles

The NOx sensor precisely measures the amount of nitrogen oxides present in the exhaust gases. This data is essential for the engine control unit to:

  • Optimize urea injection (AdBlue) in the SCR system
  • Monitor the efficiency of the anti-pollution system
  • Adjust engine combustion parameters
  • Ensure compliance with emission standards

Importance of the Integrated Heater Circuit

The heater circuit integrated into the NOx sensor serves a vital function:

  • Maintaining the sensor at its optimal operating temperature (typically between 600°C and 800°C)
  • Enabling accurate measurements right from engine start-up
  • Preventing condensation of exhaust gases on the measuring element
  • Ensuring measurement reliability in all weather conditions

Symptoms and Consequences of Code P1437

When code P1437 appears, several characteristic symptoms may alert the driver. Prompt intervention is recommended to prevent more serious damage to the anti-pollution system.

Visible Manifestations of the Fault

  • Illuminated check engine light on the dashboard
  • Possible limp mode limiting engine power
  • Noticeable increase in fuel consumption
  • Possible reduction in vehicle performance
  • Abnormal ammonia odor due to improper urea injection

Impacts on the Anti-Pollution System

An unresolved P1437 fault can lead to:

  • Exceeding legal emission limits
  • Risk of SCR system clogging
  • Potential damage to the catalytic converter
  • Cascade failures in the urea injection system
  • Possible failure in technical inspection

In-Depth Technical Diagnosis of P1437

Diagnosing code P1437 requires a methodical approach and specialized tools. This procedure allows precise identification of the fault origin before any intervention.

Equipment Required for Diagnosis

  • Professional OBD2 scanner compatible with Lincoln
  • Precision digital multimeter
  • Automotive oscilloscope (optional but recommended)
  • Vehicle technical documentation (electrical diagrams)
  • Model-specific removal/installation tools

Step-by-Step Diagnostic Procedure

Follow this rigorous methodology to identify the root cause:

  • Step 1: Reading and recording fault codes with OBD2 scanner
  • Step 2: Visual inspection of NOx sensor wiring and connectors
  • Step 3: Measuring heater circuit resistance (normal value: 2-10 Ω)
  • Step 4: Checking heater circuit supply voltage
  • Step 5: Verifying circuit ground
  • Step 6: Testing cable insulation and checking for short circuits
  • Step 7: Analyzing real-time NOx sensor data

Repair Solutions and Corrective Procedures

Depending on diagnostic results, several solutions are available to the technician. The choice of repair depends on the cause identified during the diagnostic phase.

Common Repairs for Code P1437

  • Replacement of defective NOx sensor (most common cause)
  • Repair of damaged wiring or oxidized connectors
  • Cleaning connection terminals and applying dielectric grease
  • Replacement of defective relay or fuse
  • Updating engine control unit software if necessary

NOx Sensor Replacement Procedure

Replacing the NOx sensor follows a precise protocol:

  • Disconnect battery for safety reasons
  • Locate and access the NOx sensor (typically located after the catalytic converter)
  • Disconnect sensor electrical connector
  • Unscrew sensor using appropriate wrench
  • Clean housing threads
  • Install new sensor with proper torque specification
  • Perform adaptation procedure with diagnostic tool
  • Clear fault codes and perform validation road test

Preventive Measures and Maintenance Recommendations

Prevention remains the best strategy to avoid recurrence of code P1437. Several best practices help extend system lifespan.

Usage Best Practices

  • Use only automotive-grade urea (AdBlue)
  • Avoid repeated short-trip driving
  • Follow Lincoln’s recommended maintenance intervals
  • Regularly check urea level and quality
  • Immediately consult a professional if warning light appears

Recommended Preventive Checks

  • Semi-annual visual inspection of wiring and connectors
  • Annual heater circuit resistance check
  • Regular verification of exhaust system condition
  • Systematic software updates during maintenance
  • Periodic sensor cleaning according to manufacturer recommendations

The Lincoln P1437 code, although specific, can be effectively resolved through rigorous diagnostic approach. Thorough understanding of the SCR system and NOx sensor role is essential for lasting repair. Don’t hesitate to consult a Lincoln specialist equipped with necessary tools and skills to guarantee quality intervention.

OBD2 Code P1437 Mercury: Diagnosis and Technical Solutions

Understanding the Mercury P1437 Fault Code

What exactly is the P1437 code?

The OBD2 fault code P1437 is a specific code for Mercury vehicles that indicates a problem with the Evaporative Emission Control (EVAP) system. More precisely, this code signals a malfunction in the fuel vapor emission valve circuit. This system is crucial for controlling hydrocarbon vapor emissions from the fuel tank, thereby contributing to environmental protection and the proper functioning of the vehicle.

Operation of the Mercury EVAP System

The EVAP (Evaporative Emission Control System) on Mercury vehicles primarily aims to capture and store fuel vapors from the tank rather than letting them escape into the atmosphere. The system includes several essential components:

  • The fuel tank with its airtight cap
  • The EVAP purge valve that regulates vapor flow
  • The charcoal canister that stores vapors
  • Pressure sensors and vent hoses
  • The specific fuel vapor emission valve related to code P1437

Symptoms and Causes of Code P1437

Visible manifestations of the problem

When code P1437 activates on your Mercury, several symptoms may appear, varying in intensity depending on the severity of the fault:

  • Illumination of the check engine light on the dashboard
  • Persistent smell of gasoline around the vehicle
  • Noticeable increase in fuel consumption
  • Irregular idle or difficulty starting
  • Possible failure in emissions testing
  • Slight loss of engine power in some cases

Main causes of the P1437 fault

The P1437 code can be triggered by several distinct technical issues:

  • Faulty or stuck fuel vapor emission valve
  • Electrical circuit problem (damaged wiring, corroded connectors)
  • Blown fuse in the valve control circuit
  • Engine Control Unit (ECU) failure
  • Clogged or punctured vent hoses
  • Pressure problem in the fuel system

Technical Diagnostic Procedure

Equipment needed for diagnosis

To properly diagnose a P1437 code on your Mercury, you will need specific tools:

  • Professional OBD2 scanner compatible with Mercury
  • Digital multimeter for electrical tests
  • Manual vacuum pump for leak tests
  • Electrical contact cleaner
  • Set of wrenches and sockets suitable for the vehicle
  • Model-specific repair manual

Step-by-step diagnostic procedure

The diagnostic procedure must follow a rigorous methodology:

  • Start by checking fault codes with the OBD2 scanner
  • Visually inspect the valve wiring and connectors
  • Test the valve’s electrical resistance with a multimeter
  • Check the control circuit supply voltage
  • Check system tightness with a vacuum pump
  • Test valve operation by applying 12V directly
  • Inspect vent hoses for possible obstructions

In-depth electrical tests

Electrical tests are crucial to identify the exact origin of the problem:

  • Measure the resistance at the valve terminals (usually between 20-30 ohms)
  • Check circuit continuity between the ECU and the valve
  • Test supply voltage with ignition on
  • Check for absence of short circuit to ground
  • Check the condition of relevant fuses in the box

Repair Solutions and Prevention

Common repairs for code P1437

Depending on the cause identified during diagnosis, several repair solutions are possible:

  • Replacement of the faulty fuel vapor emission valve
  • Repair or replacement of damaged wiring
  • Cleaning or replacement of corroded connectors
  • Replacement of the charcoal canister if clogged
  • Repair of punctured or clogged vent hoses
  • Update or replacement of the ECU as a last resort

Valve replacement procedure

Replacing the fuel vapor emission valve follows a precise sequence:

  • Locate the valve (usually near the tank or engine)
  • Disconnect the battery for safety reasons
  • Disconnect electrical connectors and hoses
  • Unscrew the faulty valve’s fasteners
  • Install the new valve respecting the mounting direction
  • Reconnect all connectors and hoses
  • Reset the fault code with the OBD2 scanner
  • Perform a road test to verify the repair

Preventive measures to avoid recurrence

To prevent the P1437 code from reappearing, adopt these good practices:

  • Perform regular inspections of the EVAP system
  • Always use an original fuel tank cap
  • Avoid filling the tank to the brim
  • Periodically clean electrical connectors
  • Follow the maintenance intervals recommended by Mercury
  • Have the system checked during scheduled services

The Mercury P1437 code, although specific, generally responds well to methodical diagnosis. By rigorously following the described procedures and using the appropriate tools, resolving this technical problem becomes accessible to both skilled mechanics and experienced car enthusiasts.

P1437 Toyota Code: Complete EGR Valve Failure Diagnosis

Understanding Toyota Fault Code P1437

The OBD2 code P1437 is a manufacturer-specific code for Toyota that indicates a malfunction in the Exhaust Gas Recirculation (EGR) system. This crucial system reduces nitrogen oxide (NOx) emissions by reinjecting a portion of the exhaust gases into the cylinders. When the engine control unit detects an anomaly in the EGR valve’s operation, it records code P1437 and illuminates the check engine light.

Toyota EGR System Operation

The EGR system in Toyota vehicles operates on a specific principle:

  • Recovery of a portion of the exhaust gases
  • Cooling via a heat exchanger
  • Controlled reinjection into the intake
  • Reduction of combustion temperature
  • Significant decrease in NOx emissions

Specifics of Code P1437

Unlike other generic codes, P1437 is a manufacturer-specific code for Toyota. It typically signals a circuit or performance issue in the EGR valve control system. Detection is performed using position and flow sensors that continuously monitor the system’s efficiency.

Symptoms and Consequences of P1437 Fault

When code P1437 appears, several characteristic symptoms can alert the driver. Quick identification of these signs allows for intervention before more significant damage occurs.

Immediate and Recognizable Symptoms

  • Illumination of the check engine light on the dashboard
  • Noticeable decrease in vehicle performance
  • Jerking and unstable idle, particularly at idle speed
  • Significant increase in fuel consumption
  • Black smoke from the exhaust in some cases

Long-Term Consequences

Ignoring a P1437 code can lead to serious mechanical complications:

  • Accelerated clogging of the intake system
  • Deterioration of turbocharger performance
  • Increase in pollutant emissions beyond legal standards
  • Risk of catalyst damage
  • Premature wear of engine components

Step-by-Step Technical Diagnosis

Diagnosing code P1437 requires a methodical approach and the use of specialized tools. Here is the procedure recommended by automotive experts.

Step 1: Preparation and Initial Checks

Begin with a complete visual inspection:

  • Checking electrical connectors of the EGR system
  • Inspecting hoses and intake ducts
  • Checking general condition of wiring
  • Searching for air leaks in the circuit
  • Preliminary cleaning of connectors

Step 2: Electrical and Functional Tests

Use a digital multimeter to perform the following measurements:

  • Continuity test of EGR valve circuits
  • Measurement of actuator resistance
  • Verification of supply voltage
  • Ground circuit test
  • Control of position sensor signals

Step 3: Real-Time Data Analysis

With an advanced OBD2 diagnostic tool, monitor the following parameters:

  • Actual EGR valve position in percentage
  • Position requested by the control unit
  • Measured EGR gas flow
  • Recirculation gas temperature
  • Differential pressure in the system

Repair Solutions and Estimated Costs

Depending on the cause identified during diagnosis, several solutions are available to the technician. The choice of repair depends on the condition of components and available budget.

EGR Valve Cleaning

In 40% of cases, simple cleaning resolves the problem:

  • Careful removal of the valve
  • Thorough cleaning with specialized products
  • Verification of rod movement
  • Reassembly with new gaskets
  • Fault code reset

Replacement of Defective Components

If cleaning is insufficient, replacement is necessary:

  • Complete EGR valve (average cost: €200-500)
  • EGR position sensor (average cost: €80-150)
  • Engine control unit (rare cases, high cost)
  • Defective hoses and connections
  • Differential pressure sensor

EGR System Prevention and Maintenance

Regular maintenance helps prevent the reappearance of code P1437 and extends the EGR system’s lifespan.

Good Usage Practices

  • Perform regular trips at high engine RPM
  • Use quality fuels
  • Follow recommended maintenance intervals
  • Preventively clean the EGR system every 80,000 km
  • Monitor early signs of malfunction

Scheduled Maintenance

Integrate these operations into your regular maintenance:

  • Semi-annual visual inspection of the system
  • Sensor cleaning every 2 years
  • Hose check at each oil change
  • EGR data monitoring with diagnostic tool
  • Replacement of sealing gaskets if necessary

The Toyota P1437 code, although specific, responds well to methodical diagnosis. Quick and professional intervention restores optimal vehicle performance while preserving the environment through maintained anti-pollution standards.

P1437 Volkswagen Code: Complete Diagnosis of the Nox Sensor Heating Circuit

Understanding Volkswagen Code P1437

What is Fault Code P1437?

The OBD2 code P1437 is a Volkswagen group-specific code that indicates a malfunction in the nitrogen oxide (Nox) sensor heater circuit. This code is particularly common on Volkswagen, Audi, Seat, and Skoda vehicles equipped with diesel engines and the Selective Catalytic Reduction (SCR) system. The heating system integrated into the Nox sensor is essential for its proper operation, especially during cold starts and in harsh weather conditions.

Operation of the Nox Sensor and Its Importance

The Nox sensor measures the concentration of nitrogen oxides in the exhaust gases after treatment by the SCR system. This data is crucial for the engine control unit, which continuously adjusts the injection of AdBlue® additive. The integrated heater circuit allows the sensor to quickly reach its optimal operating temperature (typically between 700°C and 800°C), ensuring accurate measurements from the moment the engine starts.

Immediate Consequences of Fault P1437

When code P1437 appears, the emissions control system no longer operates optimally. The immediate consequences include:

  • Illumination of the check engine light on the dashboard
  • Possible engine power limitation (limp mode)
  • Potential increase in pollutant emissions
  • Risk of non-compliance during technical inspections
  • Possible slight increase in fuel consumption

Technical Diagnosis of Code P1437

Required Diagnostic Tools

To properly diagnose a P1437 code, you will need specific equipment:

  • OBD2 diagnostic tool compatible with Volkswagen (VCDS, ODIS, or professional tool)
  • Quality digital multimeter
  • Automotive oscilloscope (optional but recommended for in-depth analysis)
  • Technical documentation of the vehicle’s electrical diagrams
  • Disassembly tools suitable for the specific model

Step-by-Step Diagnostic Procedure

The diagnostic approach must follow a precise logic to identify the root cause of the problem:

  • Reading fault codes and real-time data with the diagnostic tool
  • Visual inspection of the Nox sensor wiring and connectors
  • Checking the heater circuit supply voltage
  • Measuring the resistance of the Nox sensor heater
  • Testing circuit continuity between the sensor and control unit
  • Checking system grounds
  • Analyzing Nox sensor parameters during operation

Reference Electrical Measurements

The nominal values for a properly functioning Volkswagen Nox sensor heater circuit are:

  • Supply voltage: 12V with ignition on
  • Heater resistance: typically between 2 and 10 ohms (refer to manufacturer data)
  • No short circuit to ground or between wires
  • Acceptable voltage drop less than 0.5V across the entire circuit

Main Causes and Solutions for P1437

Most Common Electrical Causes

Electrical problems represent the majority of P1437 code cases:

  • Faulty Nox sensor (internal heater open)
  • Damaged electrical wires or oxidized connectors
  • Problem with heater circuit relay or fuse
  • Faulty engine control unit (rarer cases)
  • Corrosion of connections due to exhaust conditions
  • Chafed or severed wiring in the engine compartment

Proven Repair Solutions

Depending on the identified cause, repair solutions may vary:

  • Replacement of the Nox sensor (most common solution)
  • Repair of damaged wiring with proper soldering
  • Cleaning connectors and applying dielectric grease
  • Replacement of faulty fuse or relay
  • Engine control unit software update
  • In rare cases, replacement of the engine control unit

Nox Sensor Replacement Procedure

Replacing the Nox sensor requires a specific procedure:

  • Locate the Nox sensor (usually after the SCR catalyst)
  • Disconnect the battery for safety reasons
  • Disconnect the sensor’s electrical connector
  • Unscrew the sensor with appropriate tools (beware of corrosion)
  • Clean the housing threads
  • Install the new sensor with appropriate torque
  • Reset adaptations with the diagnostic tool
  • Perform a drive cycle to complete the learning procedure

Advanced Technical Aspects and Prevention

Interaction with Other Systems

The Nox sensor does not operate in isolation. Its heater circuit interacts with several systems:

  • Engine management system that controls the heater
  • SCR system that uses sensor data
  • On-board diagnostic system that monitors operation
  • Cooling system that influences exhaust temperature
  • Electrical system that provides necessary power

Preventive Measures to Avoid Recurrence

To minimize the risk of P1437 code reappearance:

  • Use only OEM quality parts or equivalents
  • Protect connectors with appropriate greases
  • Regularly check wiring condition in the engine compartment
  • Avoid aggressive engine washes that could damage electronics
  • Follow manufacturer-recommended maintenance intervals
  • Use quality fuel and AdBlue®

Economic and Environmental Considerations

Repairing P1437 code presents important issues:

  • Average repair cost: between €300 and €800 depending on the model
  • Environmental impact if not repaired: increased Nox emissions
  • Consequences on fuel consumption
  • Risk of damage to other SCR system components
  • Importance of recycling old Nox sensors

The Volkswagen P1437 code, although specific, follows clear diagnostic logic. A methodical approach allows effective identification and resolution of this fault, thus restoring optimal performance of the emissions control system and ensuring your vehicle’s environmental compliance.

P1438 OBD2 Code: Diagnosis and Solutions for the NOx Sensor Heater Circuit

Understanding Fault Code P1438: An Emission Control System Problem

The OBD2 fault code P1438 is a manufacturer-specific code, often encountered on diesel vehicles equipped with a Selective Catalytic Reduction (SCR) system and a Nitrogen Oxides (NOx) sensor. This code indicates a circuit problem in the NOx sensor heating system. When the Powertrain Control Module (PCM) detects an electrical anomaly (voltage, resistance, or open circuit) in the circuit of the heater integrated into the NOx sensor, it stores the code P1438 and illuminates the check engine light.

The Crucial Role of the NOx Sensor and its Heater

The NOx sensor is an essential sensor located in the exhaust line, downstream of the SCR catalyst. Its mission is to accurately measure the concentration of nitrogen oxides (NOx) in the exhaust gases. This data is vital for the engine control unit to precisely regulate the injection of AdBlue (reductant) into the SCR system, thus ensuring the optimal breakdown of NOx into harmless nitrogen and water vapor. The integrated heater in the sensor is essential to allow it to function correctly from a cold start and to maintain its optimal operating temperature under all conditions, guaranteeing accurate measurements.

Operation of the Heater Circuit and Generation of Code P1438

The NOx sensor heater circuit is a simple but critical electrical loop. The PCM sends a control signal (usually in Pulse Width Modulation, or PWM) to activate the heater. It continuously monitors the circuit’s response, including voltage drop and current consumption. If the measured values deviate significantly from the reference ranges stored in its memory (for example, infinite resistance indicating an open circuit, or zero resistance indicating a short circuit), the PCM interprets this as a fault and triggers the P1438 code after meeting the specific conditions of its diagnostic cycle.

Symptoms, Causes, and Diagnosis of Code P1438

The appearance of code P1438 is usually accompanied by symptoms noticeable to the driver. A methodical diagnostic procedure is essential to identify the root cause and perform the appropriate repair, thus avoiding costly and unnecessary part replacements.

Common Symptoms Associated with Code P1438

  • Check Engine Light Illuminated: This is the most immediate and common symptom.
  • Decreased Engine Performance: The control unit may adopt a degraded mode (“limp mode”) to protect the engine and the emission control system.
  • Increased Fuel Consumption: Due to engine management no longer being optimal.
  • Failed Emissions Test: Due to excessive pollutant emissions.
  • Unstable Engine Idle or Difficulty Accelerating: Especially under load.

Possible Causes of Fault P1438

  • A Faulty NOx Sensor: This is the most frequent cause. The internal heater is open or short-circuited.
  • Damaged Wiring: Cut, chafed, burned wires, or oxidized/corroded connectors between the sensor and the control unit.
  • A Blown Fuse: The heater power circuit is often protected by a fuse in the fuse box.
  • A Problem with the Heater Control Relay: (If the vehicle is equipped with one).
  • A Fault in the Powertrain Control Module (PCM): More rare, but possible in case of internal failure.

Step-by-Step Diagnostic Procedure

To effectively diagnose a P1438 code, follow this logical procedure with a digital multimeter and possibly an oscilloscope.

  • Step 1: Consultation of Freeze Frame Data: Use an OBD2 scan tool to examine the data recorded at the time of the fault (engine RPM, temperature, load). This helps to reproduce the problem conditions.
  • Step 2: Visual Inspection: Thoroughly inspect the NOx sensor wiring and connectors along their entire length. Look for obvious signs of damage, burning, corrosion, or poor contact.
  • Step 3: Fuse Check: Locate and test the fuse dedicated to the NOx sensor heater circuit in the engine fuse block.
  • Step 4: Heater Resistance Measurement: Disconnect the NOx sensor connector. Measure the resistance between the heater pins (refer to the repair manual to identify the pins). Compare the measured value to the manufacturer’s specification (usually between 1 and 10 Ohms for a healthy circuit). Infinite resistance (OL) indicates an open circuit, zero or very low resistance indicates a short circuit.
  • Step 5: Power and Ground Test: Reconnect the connector and use backprobing pins to check, with the ignition on, for the presence of +12V (or the PWM control signal) and a good ground at the sensor connector.

Repair, Cost, and Prevention of Code P1438

Once the cause is identified, the repair can be planned. It is also important to understand the cost implications and best practices to avoid recurrence.

Repair Solutions and Order of Probability

  • Replace the NOx Sensor: If the heater resistance is out of specification, this is the most likely solution. Ensure you use a quality part.
  • Repair or Replace the Wiring Harness: If damage to the wiring is detected. Use quality solder and heat-shrink tubing for repairs.

  • Replace the Fuse: If the fuse is blown. Investigate the cause of the blown fuse (short circuit) before replacement.
  • Replace the PCM: This is the rarest and most costly action, only after all other causes have been eliminated and often requires programming.

Repair Cost Estimate

The cost to resolve a P1438 varies considerably.

  • Part (NOx Sensor): Between €200 and €800 depending on the vehicle model and part quality (OE or aftermarket).
  • Labor: Allow between 1 and 3 hours of labor depending on the accessibility of the sensor, approximately €80 to €300.
  • Total Cost: A realistic range is between €300 and €1100. Accurate diagnosis is crucial to avoid unnecessary expenses.

Tips to Prevent Fault Recurrence

  • Always use high-quality replacement parts, preferably Original Equipment (OE) or from reputable brands.
  • When replacing, handle the new sensor with care and adhere to the specified tightening torque.
  • Ensure all electrical connectors are clean, dry, and properly locked.
  • Avoid aggressive engine bay washes that could damage electronic components or allow moisture into the connectors.

In conclusion, code P1438, although specific and related to an advanced emission control system, can be diagnosed and resolved systematically. A methodical approach, starting with the simplest checks (fuse, visual inspection) before moving on to more advanced electrical tests, will allow you to accurately identify the root cause and perform a lasting repair, thus restoring your vehicle’s performance and environmental compliance.

Audi P1438 Code: Complete Diagnosis and Technical Solutions

Understanding Code P1438 on Audi Vehicles

Fault code P1438 is a generic OBD-II code specifically related to cooling and exhaust gas treatment systems on Audi vehicles. This code indicates a malfunction in the exhaust gas cooling system heater circuit, a crucial component for the proper operation of the EGR (Exhaust Gas Recirculation) system and the reduction of pollutant emissions.

Technical Meaning of Code P1438

Code P1438 translates to “EGR Cooler Heater Circuit – Performance Problem”. This system is designed to heat the coolant circulating through the EGR heat exchanger, allowing for better efficiency of the exhaust gas recirculation system, particularly during cold starts.

Common Symptoms of P1438

  • Illumination of the check engine light on the dashboard
  • Noticeable decrease in engine performance
  • Significant increase in fuel consumption
  • Irregular engine idle speed
  • Excessive pollutant emissions during technical inspection
  • Possible activation of limp mode

Technical Diagnosis of Audi Code P1438

Diagnosing code P1438 requires a methodical approach and the use of specialized tools to accurately identify the source of the problem.

Required Equipment for Diagnosis

  • Professional OBD2 scanner compatible with Audi/VW
  • Digital multimeter for electrical tests
  • Specific diagnostic tools VAG-COM/VCDS
  • Pressure gauge for cooling circuit pressure testing
  • Oscilloscope for electrical signal analysis

Step-by-Step Diagnostic Procedure

Start by checking real-time data via the OBD2 scanner: coolant temperature, EGR valve operation, and heater circuit parameters. Then test the resistance of the EGR cooler heater, which should generally be between 0.5 and 5 ohms depending on the Audi model.

Specific Electrical Tests

Use a multimeter to check the power supply voltage of the heater circuit (typically 12V). Test cable continuity and visually inspect the wiring harness for possible damage, short circuits, or corroded connections.

Repair Solutions for Code P1438

Once the complete diagnosis is performed, several repair solutions can be considered depending on the identified cause.

Most Common Repairs

  • Replacement of the faulty EGR cooler
  • Repair of damaged wiring harness
  • Thorough cleaning of the EGR valve and circuit
  • Replacement of the coolant temperature sensor
  • Repair of corroded electrical connections

EGR Cooler Replacement Procedure

The replacement procedure requires partial draining of the cooling circuit, removal of pipes, replacement of the EGR cooler, and careful refilling of the system while avoiding air bubbles that could compromise system efficiency.

Important Technical Considerations

After any repair, it is imperative to reset the engine control unit adaptations and perform a road test to allow the system to recalculate optimal parameters. ECU reprogramming may sometimes be necessary in case of recurring problems.

Prevention and Maintenance of the Audi EGR System

Regular preventive maintenance can prevent the occurrence of code P1438 and extend the life of the EGR system.

Recommended Maintenance Schedule

  • Annual inspection of the EGR system and its components
  • Preventive cleaning of the EGR valve every 80,000 km
  • Regular check of coolant level and quality
  • Visual inspection of associated wiring harness
  • Complete system diagnosis every 2 years

Tips to Avoid Recurrences

Use only Audi-approved coolants, avoid repeated short trips that prevent the system from reaching its optimal operating temperature, and perform regular maintenance at an Audi specialist equipped with appropriate diagnostic tools.

Code P1438 on Audi, although technical, can be effectively resolved with a rigorous diagnostic approach. Understanding the operation of the EGR cooling system and following appropriate procedures ensures a lasting repair and maintains the optimal performance of your German vehicle.

P1438 BMW Code: Complete Diagnosis of the AdBlue Heating Circuit

Understanding BMW Code P1438: Definition and Context

The OBD2 fault code P1438 on BMW vehicles specifically corresponds to a malfunction in the AdBlue system’s heater circuit. This code falls under the category of faults related to the Selective Catalytic Reduction (SCR) system, a crucial technology for meeting Euro 6 anti-pollution standards on BMW diesel engines.

What is the AdBlue System and its Heater Circuit?

The AdBlue system is an exhaust gas treatment fluid composed of urea and demineralized water. Its integrated heater circuit in the tank prevents the liquid from freezing in winter conditions and ensures optimal fluidity for injection into the SCR system.

Operation of the AdBlue Heater Circuit

  • Electric heating element integrated into the AdBlue tank
  • Thermal control by the SCR module via temperature sensor
  • Protection against freezing down to -11°C
  • Automatic activation based on weather conditions

Symptoms and Consequences of Fault P1438

The appearance of code P1438 is typically accompanied by characteristic symptoms that alert the driver to a malfunction in the pollution control system.

Visible Indicators for the Driver

  • Illumination of the pollution control fault indicator on the dashboard
  • “AdBlue System Fault” warning message on the iDrive screen
  • Possible reduced performance mode with engine power limitation
  • Noticeable increase in fuel consumption

Impacts on Performance and Environment

  • Partial or complete deactivation of the SCR system
  • Nitrogen oxide (NOx) emissions exceeding standards
  • Risk of technical inspection non-compliance
  • Potential degradation of the particulate filter

In-depth Technical Diagnosis of Code P1438

Diagnosing the P1438 fault requires a methodical approach and the use of specialized tools to precisely identify the source of the problem.

Required Equipment for Diagnosis

  • BMW-compatible OBD2 scanner with access to specific modules
  • Precision digital multimeter
  • Oscilloscope for electrical signal analysis
  • Technical documentation with AdBlue system wiring diagram

Step-by-Step Diagnostic Procedure

Step 1: Real-time Parameter Verification
Access the SCR module via your diagnostic tool and check the following values: AdBlue temperature, heater status, supply voltage, and heating element resistance.

Step 2: Electrical Test of the Heater Circuit
Measure the resistance of the heating element when cold. A normal value is typically between 1 and 5 ohms. Infinite resistance indicates an open circuit, while zero resistance indicates a short circuit.

Step 3: Power Supply Verification
Check for the presence of supply voltage (typically 12V) at the AdBlue heater connector with ignition on. Absence of voltage = wiring harness or relay problem.

Main Causes and Repair Solutions

Analyzing the possible causes of P1438 enables the establishment of an effective and lasting repair plan.

Most Common Electrical Causes

  • Defective AdBlue heating element (most common cause)
  • Damaged electrical harness or oxidized connector
  • Faulty heater control relay
  • Problem with the SCR control module

Detailed Corrective Actions

Replacement of the AdBlue Heating Element
This operation typically requires replacing the entire level sensor assembly with integrated heating element. Specific procedure depending on the BMW model, often requires prior draining of the AdBlue tank.

Electrical Harness Repair
Thorough inspection of wiring from the SCR module to the AdBlue tank. Repair damaged wires and clean connectors with specific contact cleaner.

Reset Procedures and Post-Repair Tests

After repair, specific steps are necessary to validate the diagnosis and reset the system.

Clearing Fault Codes and Adaptations

  • Clearing P1438 code via diagnostic tool
  • Resetting SCR system adaptations
  • Testing heater operation under real conditions
  • Verifying that the fault does not reappear

Final Validation and Prevention

Perform a road test of at least 20 km to allow the system to complete self-test cycles. Monitor real-time parameters during the test. Use only certified quality AdBlue to prevent recurrence.

The BMW P1438 code, although specific to the pollution control system, generally responds well to methodical diagnosis. Intervention by a professional equipped with appropriate tools guarantees lasting repair and maintenance of your vehicle’s environmental performance.

Ford Code P1438: Diagnosis and Repair of the Valve Lift System

Understanding Ford P1438 Code

The OBD2 P1438 code is a manufacturer-specific code primarily encountered in Ford, Lincoln, and Mercury vehicles. This code indicates a malfunction in the variable valve lift system, specifically in the camshaft actuator control circuit. When this fault appears, the engine control module detects an anomaly in the VCT (Variable Camshaft Timing) system operation and stores the P1438 code in its memory.

Ford VCT System Operation

The variable valve lift system on Ford engines is an advanced technology that optimizes engine performance according to driving conditions. This system continuously adjusts the camshaft position relative to the crankshaft through a hydraulic actuator controlled by the engine control module. This technology improves both performance, fuel efficiency, and reduces pollutant emissions.

Consequences of P1438 Code on the Engine

When the P1438 code is active, the VCT system no longer functions properly, leading to several negative consequences:

  • Significant reduction in engine performance
  • Increased fuel consumption
  • Higher pollutant emissions
  • Risk of premature catalyst damage
  • Poor idle operation

P1438 Code Diagnosis: Comprehensive Methodology

Diagnosing the P1438 code requires a methodical approach and specialized tools. It’s crucial to follow a logical procedure to identify the root cause of the problem and avoid unnecessary repairs.

Required Diagnostic Tools

To properly diagnose a P1438 code, you’ll need the following equipment:

  • Ford-compatible professional OBD2 scanner
  • Quality digital multimeter
  • Oscilloscope for analyzing electrical signals
  • Pressure gauge for testing oil pressure
  • Model-specific technical documentation

Step-by-Step Diagnostic Procedure

Here is the recommended procedure for diagnosing a P1438 code:

  • Step 1: Check engine oil level and quality
  • Step 2: Visual inspection of wiring and connectors
  • Step 3: Electrical test of VCT solenoid with multimeter
  • Step 4: Measure oil pressure at the actuator
  • Step 5: Real-time data analysis with OBD2 scanner
  • Step 6: VCT actuator operation test

Real-Time Data Analysis

Analyzing real-time parameters via an OBD2 scanner is essential for diagnosing the P1438 code. Critical data to monitor includes:

  • Actual camshaft position
  • Desired camshaft position
  • VCT solenoid supply voltage
  • Solenoid control duty cycle
  • Engine oil pressure

Main Causes and Solutions for P1438 Code

The P1438 code can have several origins, ranging from simple problems to more complex failures. Identifying the exact cause is crucial for performing the appropriate repair.

Common Causes of P1438 Fault

The most common causes of P1438 code on Ford vehicles include:

  • Defective or stuck VCT solenoid
  • Low engine oil pressure
  • Insufficient quality or low engine oil level
  • Clogged or poor quality oil filter
  • Wiring problems or damaged connectors
  • Mechanically defective VCT actuator
  • Engine control module issue

Detailed Repair Solutions

Depending on the identified cause, here are the recommended repair solutions:

  • Replace defective VCT solenoid
  • Perform complete oil change with quality product
  • Replace oil filter and check pressure
  • Repair or replace damaged wiring
  • Clean or replace VCT actuator
  • Reset engine control module adaptations

Repair Costs and Prevention

The repair cost for a P1438 code varies considerably depending on the cause of the problem and the specific Ford vehicle model.

Repair Cost Estimation

Average costs to resolve a P1438 code can vary as follows:

  • VCT solenoid replacement: €150 to €400
  • Complete VCT actuator replacement: €400 to €800
  • Wiring repair: €100 to €300
  • Oil change and filter replacement: €80 to €150
  • Professional diagnosis: €50 to €120

Preventive Measures to Avoid P1438 Code

To prevent the appearance of P1438 code, follow these recommendations:

  • Strictly adhere to oil change intervals
  • Use only Ford-recommended engine oil
  • Replace oil filter with every oil change
  • Perform regular oil level checks
  • Use quality parts for repairs
  • Quickly consult a professional if symptoms appear

The Ford P1438 code represents a technical challenge that requires specific expertise. Although some diagnostics can be performed by experienced mechanics, complex repairs should be entrusted to professionals trained in Ford technologies. Prompt and appropriate intervention will restore your vehicle’s optimal performance and prevent more serious engine damage.