P0418 Secondary Air Injection System Relay A Malfunction

What does it mean?

This diagnostic trouble code (DTC) is a generic powertrain code, meaning it applies to OBD-II equipped vehicles (Dodge, Ram, Ford, GMC, Chevrolet, VW, Toyota, etc.). Although generic, specific repair steps may vary by make/model.

When I encounter a stored P0418 code, I know the powertrain control module (PCM) has detected a malfunction in a secondary air injection (SAI) system relay circuit. The A designation indicates either the sole relay or a specific relay if multiple exist in a system.

Modern automobiles use SAI systems as a method of reducing harmful exhaust emissions by introducing ambient air into the engine’s exhaust system. SAI designs include either a belt-driven pump or an electric pump to draw ambient air, slightly compress it, and inject the pressurized air into the engine’s exhaust manifolds. The PCM electronically controls one-way valves, switching valves, anti-backfire valves, and bypass valves to regulate air pressure distribution and protect the SAI pump.

SAI system pressure fluctuations are monitored by the PCM using voltage input signals from one or more pressure sensors. When SAI pressure falls below a certain threshold, the PCM electronically opens necessary valves and allows secondary air to be pumped into the exhaust system. Engine temperature, engine RPM, and vehicle speed are also factored into SAI pump activation.

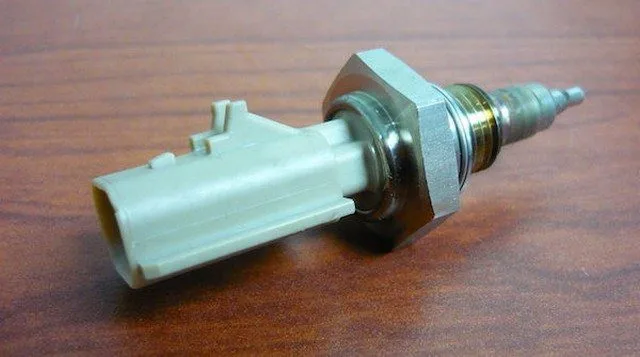
In vehicles equipped with electric pumps, the PCM monitors SAI pressure sensors and activates the pump when needed. The system relay serves to transfer battery voltage from the fuse panel or fuse link to the SAI pump.

If the PCM detects a voltage input signal from the SAI relay circuit (designated A) indicating a malfunction has occurred, a P0418 code will be stored and a malfunction indicator lamp may illuminate.

Other secondary air injection system trouble codes include P0410, P0411, P0412, P0413, P0414, P0415, P0416, P0417, P0419, P041F, P044F, P0491 and P0492.

Code Severity and Symptoms

A stored P0418 code doesn’t require immediate urgent attention. The SAI system is only associated with reducing exhaust emissions and isn’t essential to engine operation.

Symptoms of this code may include:

• Frequently no symptoms appear with a stored P0418 code
• No SAI pump activation

Causes

Possible causes for this code being set include:

• Faulty SAI pump relay
• Shorted wiring, components and/or connectors in the SAI system
• Defective SAI pump
• Blown SAI system fuses

Diagnostic and Repair Procedures

To accurately diagnose a P0418 code, a diagnostic scanner, digital volt/ohmmeter (DVOM), and reliable vehicle information source (such as All Data DIY) will be necessary.

Begin diagnosis by inspecting system wiring, connectors, and the serpentine belt driving the pump (if applicable). Repair or replace burned, corroded, or damaged circuits as needed and retest the system. Check system fuses and relays at this time if the SAI pump is electrically driven.

If your visual inspection reveals no obvious malfunction, continue by connecting the scanner to the vehicle’s diagnostic port and retrieving all stored codes and freeze frame data. Note this information as it may prove helpful later. Then clear the codes and test drive the vehicle to see if P0418 resets.

Using your vehicle information source, search for technical service bulletin (TSB) entries matching the code(s) and symptom(s) presented by the vehicle in question. Data from hundreds of thousands of repairs are used to compile TSBs, and the information they contain can be very helpful in making an accurate diagnosis.

In extremely cold weather conditions, belt-driven SAI pumps are prone to seizure from frozen condensation. To prevent condensation from reaching the SAI pump, a one-way check valve is typically incorporated in the air supply hose. These valves are known to fail and allow exhaust condensation to enter the SAI pump. Ice (frozen condensation) causes the SAI pump (belt-driven) to seize or causes a fuse to blow (electric pump).

You can use the scanner to activate the electric SAI pump. Once the pump is activated, use the DVOM to test for voltage and ground. Suspect a blown fuse or faulty power relay if no voltage is detected. Use the DVOM to check for an open circuit between the power source and the pump if all fuses and relays are in good condition. Before using the DVOM to check circuit resistance, disconnect all associated controllers.

Using the DVOM, check resistance and continuity of individual circuits. Repair or replace circuits that appear open or shorted.

Additional diagnostic notes:

• Blown fuses are typically a reaction to a short circuit rather than the source of the malfunction
• Frozen pumps may thaw before operation to prevent catastrophic pump damage

P0419 Secondary Air Injection System Relay B Malfunction

What does it mean?

This diagnostic code (DTC) is a generic powertrain code, meaning it applies to vehicles equipped with OBD-II (Dodge, Ram, Ford, GMC, Chevrolet, VW, Toyota, etc.). Although generic, specific repair steps may vary by make/model.

When I come across a stored P0419 code, I know that the Powertrain Control Module (PCM) has detected a malfunction in a relay circuit of the Secondary Air Injection (SAI) system. The designation B refers to a specific relay in a system that uses multiple relays.

Modern automobiles use SAI systems as a method to reduce harmful exhaust emissions by introducing ambient air into the engine’s exhaust system. SAI designs include a belt-driven pump or an electric pump to draw in ambient air, slightly compress it, and inject the pressurized air into the engine’s exhaust manifolds. The PCM electronically controls one-way valves, switching valves, anti-flame backflow valves, and bypass valves to regulate and distribute air pressure and protect the SAI pump.

Fluctuations in the SAI system pressure are monitored by the PCM using voltage input signals from one or more pressure sensors. When the SAI pressure falls below a certain level, the PCM electronically opens the necessary valves and allows secondary air to be pumped into the exhaust system. Engine temperature, engine speed, and vehicle speed are also considered in activating the SAI pump.

In vehicles equipped with electric pumps, the PCM monitors the SAI pressure sensors and activates the pump if needed. The system relay is used to transfer battery voltage from the fuse panel or fuse link to the SAI pump.

If the PCM detects a voltage input signal from the SAI relay circuit (designated by B) indicating that a malfunction has occurred, a P0419 code will be stored, and a malfunction indicator light may be illuminated.

Other secondary air injection system fault codes include P0410, P0411, P0412, P0413, P0414, P0415, P0416, P0417, P0418, P041F, P044F, P0491, and P0492.

Code Severity and Symptoms

It is not necessary to address a stored P0419 code with great urgency. The SAI system is only associated with reducing exhaust emissions and is not essential to engine operation.

Symptoms of this code may include:

Frequently, no symptoms are displayed with a stored P0419 code
No activation of the SAI pump

Causes

Possible causes for setting this code are as follows:

Faulty SAI pump relay
Short-circuited wiring, components, and/or connectors in the SAI system
Faulty SAI pump
Blown SAI system fuses

Diagnostic and Repair Procedures

To accurately diagnose a P0419 code, a diagnostic scanner, a digital volt/ohmmeter (DVOM), and a reliable vehicle information source (such as All Data DIY) will be necessary.

Inspect the system wiring, connectors, and the serpentine belt that drives the pump (if applicable) to begin your diagnosis. Repair or replace burnt, corroded, or damaged circuits as needed and retest the system. Check the system fuses and relays at this point if the SAI pump is driven by an electric motor.

Continue by connecting the scanner to the vehicle’s diagnostic port and retrieving all stored codes and freeze frame data, if your visual inspection indicates no obvious malfunction. You’ll want to note this information as it may be helpful later. Then, clear the codes and test the vehicle to see if the P0419 resets.

Look for Technical Service Bulletin (TSB) entries that match the code(s) and symptom(s) presented by the vehicle in question using your vehicle information source. Data from hundreds of thousands of repairs are used to compile TSBs, and the information they contain can be very helpful in making an accurate diagnosis. In extremely cold weather conditions, belt-driven SAI pumps are prone to seizing due to frozen condensation. To prevent condensation from reaching the SAI pump, a one-way check valve is typically integrated into the air intake hose. These valves are known to fail and allow exhaust condensation to enter the SAI pump. Ice (frozen condensation) causes the SAI pump (belt-driven) to seize or a fuse to blow and melt (electric pump).

You can use the scanner to activate the electric SAI pump. Once the pump is activated, use the DVOM to test for voltage and ground. Suspect a blown fuse or a faulty power relay if no voltage is detected. Use the DVOM to check for an open circuit between the power source and the pump if all fuses and relays are in good condition. Before using the DVOM to check circuit resistance, disconnect all associated controllers.

Using the DVOM, check the resistance and continuity of individual circuits. Repair or replace circuits that appear open or short-circuited.

Additional diagnostic notes:

Blown fuses are usually a reaction to a short circuit and not the source of the malfunction
Frozen pumps can be thawed before use to avoid catastrophic damage to the pump

P041A EGR Temperature Sensor B Circuit

What does it mean?

This is a generic diagnostic trouble code (DTC) that generally applies to OBD-II vehicles. This may include, but is not limited to, vehicles from Mazda, VW, Audi, Mercedes Benz, Ford, Dodge, Ram, etc.

Although generic, the exact repair steps may vary depending on the year, make, model, and powertrain configuration.

Before EGR (Exhaust Gas Recirculation) systems were effectively introduced into vehicles in the 1970s, engines were actively wasting unburned fuel and expelling it into the atmosphere. Nowadays, however, a vehicle must meet a certain emission rate to proceed with production.

The use of EGR systems has significantly improved emissions by recycling fresh exhaust gases from the exhaust manifold and/or other parts of the exhaust system and reusing or burning them again to ensure we efficiently burn the fuel we pay for with our hard-earned money!

The function of the EGR temperature sensor is essentially to provide a means for the ECM (Engine Control Module) to monitor the temperature in the EGR system and/or adjust the flow accordingly using the EGR valve. It does this easily by using a common temperature-sensitive resistance-type sensor.

Your OBD (On-Board Diagnostic) scan tool may display P041A and related active codes when the ECM detects a fault in the EGR temperature sensor or its circuits. As I mentioned earlier, the system involves the exhaust, which is hot—not only that, but you’re dealing with one of the hottest areas of the vehicle, so be aware of where your hands/fingers are even with the engine off for a short period of time.

The P041A code for the Exhaust Gas Recirculation Temperature Sensor B Circuit is set by the ECM when a general malfunction is detected in the EGR temperature sensor “B” circuit. Refer to a vehicle-specific repair manual to determine which part is the “B” circuit for your particular application.

How severe is this DTC?

The severity here varies considerably depending on your specific issue, but I would not classify it as severe since the entire system was introduced to vehicles simply as an emission reduction strategy. That being said, exhaust leaks are not “good” for your vehicle, nor are leaking or faulty EGR temperature sensors, so maintenance is key here, sooner or later!

An example of an EGR temperature sensor:


PGR E041A Temperature Sensor
What are some of the symptoms of the code?

Symptoms of a P041A trouble code may include:

Failure of state/provincial smog or emissions test
Engine noise (knocking, rattling, ticking, etc.)
Louder exhaust
Excessive exhaust odors

What are some common causes of the code?

Causes

of this P041A engine code may include:

Faulty or damaged EGR (Exhaust Gas Recirculation) temperature sensor
Leak from the EGR temperature sensor gasket
Cracked or leaking exhaust pipe where the sensor is mounted
Burned wiring harness and/or sensor
Damaged wire(s) (open, short to power, short to ground, etc.)
Damaged connector
ECM (Engine Control Module) issue
Poor connections

What are the troubleshooting steps for P041A?
Basic Step #1

The first thing I would do here is check everything we can see by simply inspecting the sensor and the surrounding EGR system, looking for exhaust leaks in particular. Also check the sensor and its harness while you’re at it. Remember what I said about those high temperatures? They can wreak havoc on plastic and rubber insulated wires, so inspect them carefully.

TIP: Black soot may indicate an exhaust leak around the area.
Basic Step #2

Many EGR issues I’ve seen in the past have been caused by soot buildup in the exhaust, potentially due to a number of things (poor maintenance, low-quality fuel, etc.). In this case, it’s no exception, so it may be wise to clean your EGR system or at the very least the temperature sensor. Be aware that sensors mounted in exhaust systems may feel seized when you attempt to remove them.

Remember that these sensors are subjected to significant temperature fluctuations, so a bit of heat using an oxyacetylene torch (not for the layperson) can help loosen the sensor. Once the sensor is removed, use carburetor cleaner or a similar product to effectively soak the soot. Use a wire brush to dislodge soot in heavily built-up areas. When reinstalling the cleaned sensor, be sure to apply some anti-seize compound to the threads to help prevent seizing.

NOTE: The last thing you want to do here is break the sensor inside the manifold/exhaust. This could be a costly mistake, so be careful when loosening the sensor.
Basic Step #3

Check the sensor’s integrity by measuring the actual electrical values against the manufacturer-specific desired values. To do this, use your multimeter and follow the manufacturer-specific pin testing procedures.

P041B EGR Temperature Sensor B Circuit Range

What does it mean?

This is a generic diagnostic trouble code (DTC) that generally applies to OBD-II vehicles. This may include, but is not limited to, vehicles from Mazda, VW, Audi, Mercedes Benz, Ford, Dodge, Ram, etc.

Although generic, the exact repair steps may vary depending on the year, make, model, and powertrain configuration.

Before EGR (Exhaust Gas Recirculation) systems were actually introduced in vehicles in the 1970s, engines actively wasted unburned fuel and expelled it into the atmosphere. Nowadays, however, a vehicle must meet a certain emission rate to proceed with production.

The use of EGR systems has significantly improved emissions by recycling fresh exhaust gases from the exhaust manifold and/or other parts of the exhaust system and reusing or burning them again to ensure we efficiently burn the fuel we pay for with our hard-earned money!

The function of the EGR temperature sensor is essentially to provide a way for the ECM (Engine Control Module) to monitor the temperature in the EGR system and/or adjust the flow accordingly using the EGR valve. It does this easily by using a common temperature-sensitive resistance-type sensor.

Your OBD (On-Board Diagnostic) scan tool may display P041B and related active codes when the ECM detects a fault in the EGR temperature sensor or its circuits. As I mentioned earlier, the system involves the exhaust, which is hot—not only that, but you’re dealing with one of the hottest areas of the vehicle, so be aware of where your hands/fingers are even with the engine off for a short period of time.

The code P041B Exhaust Gas Recirculation Temperature Sensor Circuit B Range/Performance is set by the ECM when a functionality or out-of-range issue is detected in the EGR temperature sensor “B” circuit. Refer to a vehicle-specific repair manual to determine which part is the “B” circuit for your particular application.

How severe is this DTC?

The severity here varies significantly depending on your specific issue, but I would not classify this as severe given that the entire system was introduced to vehicles simply as an emission reduction strategy. That being said, exhaust leaks are not “good” for your vehicle, nor are leaking or faulty EGR temperature sensors, so maintenance is key here, sooner or later!

An example of an EGR temperature sensor:


P041B EGR Temperature Sensor

What are some of the symptoms of the code?

Symptoms of a P041B trouble code may include:

  • Failure of state/provincial smog or emissions test
  • Engine noise (knocking, ticking, rattling, etc.)
  • Louder exhaust
  • Excessive exhaust odors

What are some common causes of the code?

Causes of this P041B engine code may include:

  • Faulty or damaged EGR (Exhaust Gas Recirculation) temperature sensor
  • Leaking EGR temperature sensor gasket
  • Cracked or leaking exhaust pipe where the sensor is mounted
  • Burned wiring harness and/or sensor
  • Damaged wire(s) (open, short to power, short to ground, etc.)
  • Damaged connector
  • ECM (Engine Control Module) issue
  • Poor connections

What are the troubleshooting steps for P041B?

Basic Step #1

The first thing I would do here is check everything we can see by simply inspecting the sensor and the surrounding EGR system, looking for exhaust leaks in particular. Also check the sensor and its harness while you’re at it. Remember what I said about those high temperatures? They can wreak havoc on plastic and rubber insulated wires, so inspect them carefully.

TIP: Black soot may indicate an exhaust leak around the area.

Basic Step #2

Many EGR issues I’ve seen in the past have been caused by soot buildup in the exhaust, potentially due to a number of things (poor maintenance, low-quality fuel, etc.). In this case, it’s no exception, so it may be wise to clean your EGR system or at least the temperature sensor. Be aware that sensors mounted in exhaust systems may feel seized when you try to remove them.

Remember that these sensors are subjected to significant temperature fluctuations, so a bit of heat using an oxy-acetylene torch (not for the layperson) can help loosen the sensor. Once the sensor is removed, use carburetor cleaner or a similar product to effectively soak the soot. Use a wire brush to dislodge soot in heavily built-up areas. When reinstalling the cleaned sensor, be sure to apply some anti-seize compound to the threads to help prevent seizing.

NOTE: The last thing you want to do here is break the sensor inside the manifold/exhaust. This could be a costly mistake, so be careful when loosening the sensor.

Basic Step #3

Check the sensor’s integrity by measuring the actual electrical values against the manufacturer-specific desired values. To do this, use your multimeter and follow the manufacturer-specific pin testing procedures.

P041C EGR Circuit Low Temperature Sensor B

What does it mean?

This is a generic diagnostic trouble code (DTC) that generally applies to OBD-II vehicles. This can include, but is not limited to, vehicles from Mazda, VW, Audi, Mercedes Benz, Ford, Dodge, Ram, etc.

Although generic, the exact repair steps may vary depending on the year, make, model, and powertrain configuration.

Before EGR (Exhaust Gas Recirculation) systems were effectively introduced into vehicles in the 1970s, engines were actively wasting unburned fuel and expelling it into the atmosphere. Nowadays, however, a vehicle must meet a certain emission rate to proceed with production.

The use of EGR systems has significantly improved emissions by recycling fresh exhaust gases from the exhaust manifold and/or other parts of the exhaust system and recycling or burning them again to ensure we efficiently burn the fuel we pay for with our hard-earned money!

The function of the EGR temperature sensor is essentially to provide a way for the ECM (Engine Control Module) to monitor the temperature in the EGR system and/or adjust the flow accordingly using the EGR valve. It does this easily by using a common temperature-sensitive resistance type sensor.

Your OBD (On-Board Diagnostic) scan tool may display P041C and related active codes when the ECM detects a fault in the EGR temperature sensor or its circuits. As I mentioned earlier, the system involves the exhaust, which is hot—not only that, but you’re dealing with one of the hottest areas of the vehicle, so be aware of where your hands/fingers are even with the engine off for a short period of time.

The P041C code for the Exhaust Gas Recirculation Temperature Sensor “B” Circuit “B” is set by the ECM when a low electrical value is detected in the EGR temperature sensor “B” circuit. Refer to a vehicle-specific repair manual to determine what the “B” part of the circuit is for your particular application.

How severe is this DTC?

The severity here varies significantly depending on your particular issue, but I would not classify it as severe given that the entire system was introduced to vehicles simply as an emission reduction strategy. That being said, exhaust leaks are not “good” for your vehicle, nor are leaking or faulty EGR temperature sensors, so maintenance is key here, sooner or later!

An example of an EGR temperature sensor:


P041C EGR Temperature Sensor

What are some of the symptoms of the code?

Symptoms of a P041C trouble code may include:

Failure of state/provincial smog or emissions test
Engine noise (knocking, rattling, ticking, etc.)
Louder exhaust
Excessive exhaust odors

What are some of the common causes of the code?

Causes

of this P041C engine code may include:

Faulty or damaged EGR (Exhaust Gas Recirculation) temperature sensor
Leak from the EGR temperature sensor gasket
Cracked or leaking exhaust pipe where the sensor is mounted
Burned wiring harness and/or sensor
Damaged wire(s) (open, short to power, short to ground, etc.)
Damaged connector
ECM (Engine Control Module) issue
Poor connections

What are the troubleshooting steps for P041C?
Basic Step #1

The first thing I would do here is check everything we can see by simply inspecting the sensor and the surrounding EGR system, looking for exhaust leaks in particular. Also check the sensor and its harness while you’re at it. Remember what I said about those high temperatures? They can wreak havoc on plastic and rubber insulated wires, so inspect them carefully.

TIP: Black soot may indicate an exhaust leak around the area.
Basic Step #2

Many EGR issues I’ve seen in the past have been caused by soot buildup in the exhaust, potentially caused by a number of things (poor maintenance, low-quality fuel, etc.). In this case, it’s no exception, so it may be wise to clean your EGR system or at the very least the temperature sensor. Be aware that sensors mounted in exhaust systems can feel seized when you attempt to loosen them.

Remember that these sensors are subjected to significant temperature fluctuations, so a bit of heat using an oxyacetylene torch (not for the layperson) can help loosen the sensor. Once the sensor is removed, use carburetor cleaner or a similar product to effectively soak the soot. Use a wire brush to dislodge soot in heavily built-up areas. When reinstalling the cleaned sensor, be sure to apply some anti-seize compound to the threads to help prevent seizing.

NOTE: The last thing you want to do here is break the sensor inside the manifold/exhaust. This could be a costly mistake, so be patient when loosening the sensor.
Basic Step #3

Check the sensor’s integrity by measuring the actual electrical values against the manufacturer-specific desired values. To do this, use your multimeter and follow the manufacturer-specific pin testing procedures.

P041D EGR Sensor B Temperature Circuit High

What does it mean?

This is a generic diagnostic trouble code (DTC) that generally applies to OBD-II vehicles. This may include, but is not limited to, vehicles from Mazda, VW, Audi, Mercedes Benz, Ford, Dodge, Ram, etc.

Although generic, the exact repair steps may vary depending on the year, make, model, and powertrain configuration.

Before EGR (Exhaust Gas Recirculation) systems were effectively introduced into vehicles in the 1970s, engines were actively wasting unburned fuel and expelling it into the atmosphere. Nowadays, however, a vehicle must meet a certain emission rate to proceed with production.

The use of EGR systems has significantly improved emissions by recirculating fresh exhaust gases from the exhaust manifold and/or other parts of the exhaust system and recycling or burning them again to ensure we efficiently burn the fuel we pay for with our hard-earned money!

The function of the EGR temperature sensor is essentially to provide a way for the ECM (Engine Control Module) to monitor the temperature in the EGR system and/or adjust the flow accordingly using the EGR valve. It does this easily by using a common temperature-sensitive resistance-type sensor.

Your OBD (On-Board Diagnostic) scanner tool may display P041D and related active codes when the ECM detects a fault in the EGR temperature sensor or its circuits. As I mentioned earlier, the system involves the exhaust, which is hot—not only that, but you’re dealing with one of the hottest areas of the vehicle, so be aware of where your hands/fingers are even with the engine turned off for a short period of time.

The P041D code for the Exhaust Gas Recirculation Temperature Sensor “B” Circuit “B” is set by the ECM when a high electrical value is detected in the EGR temperature sensor “B” circuit. Refer to a vehicle-specific repair manual to determine what the “B” part of the circuit is for your particular application.

How severe is this DTC?

The severity here varies considerably depending on your particular issue, but I wouldn’t classify it as severe given that the entire system was introduced to vehicles simply as an emission reduction strategy. That being said, exhaust leaks are not “good” for your vehicle, nor are leaking or faulty EGR temperature sensors, so maintenance is key here, sooner or later!

An example of an EGR temperature sensor:


P041D EGR Temperature Sensor

What are some of the symptoms of the code?

Symptoms of a P041D trouble code may include:

    Failure of state/province smog or emissions test
    Engine noise (knocking, rattling, ticking, etc.)
    Louder exhaust
    Excessive exhaust odors

What are some common causes of the code?

Causes

of this P041D engine code may include:

    Faulty or damaged EGR (Exhaust Gas Recirculation) temperature sensor
    Leak from the EGR temperature sensor gasket
    Cracked or leaking exhaust pipe where the sensor is mounted
    Burned wiring harness and/or sensor
    Damaged wire(s) (open, short to power, short to ground, etc.)
    Damaged connector
    ECM (Engine Control Module) issue
    Poor connections

What are the troubleshooting steps for P041D?

Basic Step #1

The first thing I would do here is check everything we can see by simply inspecting the sensor and the surrounding EGR system, looking for exhaust leaks in particular. Also check the sensor and its harness while you’re at it. Remember what I said about those high temperatures? They can wreak havoc on plastic and rubber insulated wires, so inspect them carefully.

TIP: Black soot may indicate an exhaust leak around the area.
Basic Step #2

Many EGR issues I’ve seen in the past have been caused by soot buildup in the exhaust, potentially caused by a number of things (poor maintenance, low-quality fuel, etc.). In this case, it’s no exception, so it may be wise to clean your EGR system or at the very least the temperature sensor. Be aware that sensors mounted in exhaust systems can feel seized when you attempt to remove them.

Remember that these sensors are subjected to significant temperature fluctuations, so a bit of heat using an oxy-acetylene torch (not for the layperson) can help loosen the sensor. Once the sensor is removed, use carburetor cleaner or a similar product to effectively soak the soot. Use a wire brush to dislodge soot in heavily built-up areas. When reinstalling the cleaned sensor, be sure to apply some anti-seize compound to the threads to help prevent seizing.

NOTE: The last thing you want to do here is break the sensor inside the manifold/exhaust. This could be a costly mistake, so be careful when loosening the sensor.

Basic Step #3

Check the sensor’s integrity by measuring the actual electrical values against the manufacturer-specific desired values. To do this, use your multimeter and follow the manufacturer-specific pin testing procedures.

P041E EGR Temperature Sensor B Circuit Intermittent

What does it mean?

This is a generic diagnostic trouble code (DTC) that generally applies to OBD-II vehicles. This may include, but is not limited to, vehicles from Mazda, VW, Audi, Mercedes Benz, Ford, Dodge, Ram, etc.

Although generic, the exact repair steps may vary depending on the year, make, model, and powertrain configuration.

Before EGR (Exhaust Gas Recirculation) systems were effectively introduced in vehicles in the 1970s, engines actively wasted unburned fuel and expelled it into the atmosphere. Nowadays, however, a vehicle must meet certain emission standards to proceed with production.

The use of EGR systems has significantly improved emissions by recycling fresh exhaust gases from the exhaust manifold and/or other parts of the exhaust system and reusing or burning them again to ensure we efficiently burn the fuel we pay for with our hard-earned money!

The function of the EGR temperature sensor is essentially to provide a way for the ECM (Engine Control Module) to monitor the temperature in the EGR system and/or adjust the flow accordingly using the EGR valve. It does this easily by using a common temperature-sensitive resistance-type sensor.

Your OBD (On-Board Diagnostic) scan tool may display P041E and related active codes when the ECM detects a fault in the EGR temperature sensor or its circuits. As I mentioned earlier, the system involves the exhaust, which is hot—not only that, but you’re dealing with one of the hottest areas of the vehicle, so be aware of where your hands/fingers are even with the engine off for a short period of time.

The P041E code for the intermittent/erratic Exhaust Gas Recirculation Temperature Sensor B Circuit is set by the ECM when it detects an intermittent or erratic reading from the sensor in the EGR temperature sensor B circuit. Refer to a vehicle-specific repair manual to determine what the “B” part of the circuit is for your particular application.
How severe is this DTC?

The severity here varies significantly depending on your specific issue, but I wouldn’t classify it as severe given that the entire system was introduced in vehicles simply as an emission reduction strategy. That said, exhaust leaks are not “good” for your vehicle, nor are leaking or faulty EGR temperature sensors, so maintenance is key here, sooner or later!

An example of an EGR temperature sensor:

What are some of the symptoms of the code?

Symptoms of a P041E trouble code may include:

  • Failure of state/provincial smog or emissions test
  • Engine noise (knocking, ticking, rattling, etc.)
  • Louder exhaust
  • Excessive exhaust odors

What are some common causes of the code?

Causes of this P041E engine code may include:

  1. Faulty or damaged EGR (Exhaust Gas Recirculation) temperature sensor
  2. Leak from the EGR temperature sensor gasket
  3. Cracked or leaking exhaust pipe where the sensor is mounted
  4. Burned wiring harness and/or sensor
  5. Damaged wire(s) (open, short to power, short to ground, etc.)
  6. Damaged connector
  7. ECM (Engine Control Module) issue
  8. Poor connections

What are the troubleshooting steps for P041E?

Basic Step #1

The first thing I would do here is check everything we can see by simply inspecting the sensor and the surrounding EGR system, looking especially for exhaust leaks. Also, check the sensor and its harness while you’re at it. Remember what I said about those high temperatures? They can wreak havoc on plastic and rubber-insulated wires, so inspect them carefully.

TIP: Black soot can indicate an exhaust leak around the area.
Basic Step #2

Many EGR issues I’ve seen in the past have been caused by soot buildup in the exhaust, potentially caused by a number of things (poor maintenance, low-quality fuel, etc.). In this case, it’s no exception, so it may be wise to clean your EGR system or at the very least the temperature sensor. Be aware that sensors mounted in exhaust systems can feel seized when you try to loosen them.

Remember, these sensors are subjected to significant temperature fluctuations, so a bit of heat using an oxyacetylene torch (not for the layperson) can help loosen the sensor. Once the sensor is removed, use carburetor cleaner or a similar product to effectively soak the soot. Use a wire brush to dislodge soot in heavily built-up areas. When reinstalling the cleaned sensor, be sure to apply some anti-seize compound to the threads to help prevent seizing.

NOTE: The last thing you want to do here is break the sensor inside the manifold/exhaust. This could be a costly mistake, so be careful when loosening the sensor.
Basic Step #3

Check the sensor’s integrity by measuring the actual electrical values against the manufacturer-specific desired values. To do this, use your multimeter and follow the manufacturer-specific pin testing procedures.

P041F Low Circuit Value of Secondary Air Injection System Switching Valve A

What does it mean?

This diagnostic trouble code (DTC) is a generic powertrain code, meaning it applies to vehicles equipped with OBD-II. Although generic, specific repair steps may vary by make/model.

The secondary air injection (AIR) system switching valve is the computer-controlled valve that controls air injection into the engine’s exhaust system (this valve may be integrated with the AIR pump). This code deals with an issue in the SOLENOID circuit, not the operation of the AIR pump itself.

The AIR injection system reduces hydrocarbon (HC), carbon monoxide (CO), and nitrogen oxide (NOx) emissions by injecting fresh air into the exhaust ports of a cold engine or the catalytic converter of a hot engine. This helps convert hydrocarbons into water vapor (H2O) and carbon monoxide into carbon dioxide (CO2).

Generally, the electric air pump is the most common type, although there may be belt-driven air pumps with an electric clutch. The electric air pump is controlled by the PCM (powertrain control module), which grounds the AIR pump relay control circuit and provides voltage to the AIR pump and solenoid valve (which may control a vacuum-operated shut-off valve or directly control airflow). There is a check valve in the fresh air supply tube that prevents exhaust gases from flowing back into the AIR pump. The PCM monitors the driver that activates the AIR pump for faults. When the PCM commands the AIR pump relay on, the control circuit voltage is naturally pulled near zero. When the relay is commanded off, the control circuit would have battery voltage present. If the PCM detects a voltage lower than expected, P041F will be set.

Other secondary air injection system fault codes include P0410, P0411, P0413, P0414, P0415, P0416, P0417, P0418, P0419, P041F, P044F, P0491, P0492.

Symptoms

Symptoms of a P041F DTC may include:

    MIL (Malfunction Indicator Lamp) illumination
    Increased exhaust emissions
    Rich running engine

Causes

Potential causes of a P041F code include:

    Short to ground in the control circuit
    Short to voltage in the control circuit
    Open control circuit due to damage, etc.
    Open or short circuit in the battery supply circuit to the solenoid
    Open or short circuit in the battery supply to relay control circuit

Possible Solutions

If you have access to a scan tool, with KOEO (Key On Engine Off), activate and deactivate the AIR pump solenoid. If the solenoid does not operate, disconnect the solenoid and using a voltmeter, check that voltage is supplied to the solenoid when commanded and also for a good ground. If there is voltage supplied and a good ground, check for a good connection at the solenoid wiring harness connector. If the connection is good, replace the solenoid. If there is no voltage supplied to the connector when commanding the solenoid, locate the AIR pump relay and check that there is fused battery voltage on the switched side of the circuit that powers the AIR pump; if not, check for a blown fuse or open in the wiring. Repair and retest.

If battery voltage is present on the voltage supply side of the relay, a quick way to check proper solenoid and AIR pump operation is to use a fused jumper and manually activate it. To do this, connect battery voltage to the switched AIR pump voltage supply. This is typically terminals 30 and 87 on the relay diagram (not always). If the solenoid (and possibly the AIR pump) operates, then you know your wiring and solenoid are correct. If it does not activate, open the wiring harness and find the open or short circuit in the AIR pump solenoid supply and fix it. If connecting the solenoid to battery voltage activates the solenoid, it’s time to check for voltage present with KOEO on the PCM-controlled side of the relay. If there is none, again repair open or shorted in the circuit and retest.

To check the AIR pump solenoid PCM wiring, grounding the control circuit that is normally operated by the PCM will tell you if the wiring is intact. Grounding the circuit at the PCM connector with KOEO should activate the AIR pump relay, which in turn should activate the AIR pump and solenoid. If this does not work, there is an open or short in the PCM control circuit. If grounding the control circuit makes the AIR pump and solenoid operate, check that the PCM has good ground paths and no connector damage or water intrusion. If this checks out, suspect an open driver in the PCM.

P0420 Catalyst System Efficiency Below Threshold

What does it mean?

This diagnostic code (DTC) is a generic powertrain code. It is considered generic because it applies to all makes and models of vehicles (1996 and newer), although specific repair steps may vary slightly by model. Therefore, this engine code article applies to Nissan, Toyota, Chevrolet, Ford, Honda, GMC, Subaru, VW, etc.

P0420 is one of the most common trouble codes we see. Other popular codes include P0171, P0300, P0455, P0442, etc. So be sure to bookmark this site for future reference!

The catalytic converter is part of the exhaust system that looks somewhat like a muffler, although its job is very different from a muffler’s. The job of a catalytic converter is to reduce exhaust gas emissions.

The catalytic converter has an oxygen sensor at the front and rear. When the vehicle is hot and running in closed-loop mode, the upstream oxygen sensor waveform reading should fluctuate. The downstream O2 sensor reading should be fairly stable. Typically, the P0420 code triggers the Check Engine light if the readings from both sensors are similar. Oxygen sensors are also called O2 sensors.

This indicates (among other things) a converter that is not operating as efficiently as it should (according to specifications). Catalytic converters are normally not a “wear” item, meaning they are not designed to wear out and need replacement. If they have failed, it is likely due to something else that caused their failure. This is what a P0420 means in simplified terms.

Symptoms

The main symptom for the driver is the illumination of the MIL (Malfunction Indicator Light). You will probably not notice any driving issues, although there may be symptoms. For example, if the substance inside the catalytic converter is broken or failing, it can restrict the exhaust, which will result in a feeling of reduced vehicle power.

P0420 DTC Code

Causes

A P0420 code can mean that one or more of the following events have occurred:

  • Lead fuel was used where unleaded was required (unlikely)
  • A damaged or faulty oxygen/O2 sensor
  • Damaged or poorly connected downstream oxygen sensor (HO2S) wiring
  • The engine coolant temperature sensor is not working properly
  • Damaged or leaking exhaust manifold/catalytic converter/muffler/exhaust pipe
  • Faulty or underperforming catalytic converter (likely)
  • Retarded ignition timing
  • The oxygen sensors in front of and behind the converter report values that are too similar
  • Leaking fuel injector or high fuel pressure
  • Cylinder misfire
  • Oil contamination

Possible Solutions

Some suggested steps for troubleshooting and fixing a P0420 error code include:

  • Check for exhaust leaks at the manifold, pipes, and catalytic converter. Repair as needed.
  • Use an oscilloscope to diagnose the oxygen sensor operation (Tip: the oxygen sensor located in front of the catalytic converter normally has a fluctuating waveform. The waveform of the sensor behind the converter should be more stable).
  • Inspect the heated downstream oxygen sensor, replace if necessary
  • Replace the catalytic converter

Diagnostic Tip

Generally, you can look at the exhaust temperature just before and just after the converter using an infrared gun. The output should be about 100 degrees Fahrenheit hotter when the engine is fully warmed up.

Overall, the biggest mistake vehicle owners make when they have a P0420 code is simply replacing an oxygen sensor (O2 sensor). It is important to perform proper diagnostics so as not to waste money unnecessarily replacing parts.

If you need to replace the catalytic converter, we highly recommend replacing it with an original manufacturer brand unit (i.e., get it from a dealer). The second choice would be a high-quality replacement part like a 50-state legal cat. There are many stories in our forums where people replaced the cat with a cheaper aftermarket one only for the code to return shortly after.

One thing to note is that many automakers offer a longer warranty on emissions-related parts. So, if you have a newer car but it’s out of its bumper-to-bumper warranty, there may still be a warranty on this type of issue. Many manufacturers offer a five-year, unlimited mileage warranty on these items. It’s worth checking.

P0421 Catalyst Heater Efficiency Below Threshold

Diagnostic Code P0421: What Does It Mean?

Diagnostic code P0421 is a generic powertrain code, meaning it applies to all OBD-II compatible vehicles, regardless of brand. However, specific repair steps may vary depending on the vehicle manufacturer and model.

This code indicates that the oxygen sensor located after the catalytic converter (bank 1) detects that it is not functioning as efficiently as it should, according to the manufacturer’s standards. This malfunction is part of the vehicle’s emission control system.


Possible Symptoms

In many cases, no visible symptoms will be noticeable while driving. However, certain conditions may trigger the code, including:

  • Repeated cold starts in recent days.
  • A slight drop in performance may sometimes be observed (rarely).

Common Causes

The P0421 code can be triggered by one of the following issues:

  • Catalytic converter failure: the catalytic converter is no longer performing its function correctly.
  • Oxygen sensor defect: the downstream O2 sensor is not reading the exhaust gases accurately.
  • Fouled or worn spark plugs: poor combustion can disrupt gas analysis.

Possible Solutions and Repairs

Here are some avenues to explore to resolve this code:

  1. Check the oxygen sensor voltage (bank 1, sensor after the catalytic converter).
  2. Test all the vehicle’s O2 sensors, even those that do not seem directly involved.
  3. Inspect the condition of the spark plugs, replace them if necessary.
  4. Check the proper functioning of the catalytic converter, especially if the vehicle is older or has high mileage.

Tip: Consider the Warranty!

Good to know: some manufacturers offer an extended warranty on emission-related components, often up to 5 years with unlimited mileage. Even if the vehicle’s general warranty has expired, this type of coverage may still be in effect. Check with your dealership or consult your car’s maintenance manual.