Symptoms of a Bent Push Rod: Diagnosis, Causes, and Replacement

The symptoms of a bent pushrod are often a sign of a serious engine problem. Although a complete break is rare, a deformed rod significantly reduces the total lift provided to the valve. This malfunction can lead to a cascade of internal damage, including damaging the camshaft lobe if it encounters abnormal resistance. Additionally, the bent rod can rub against the lifter or rocker arm, worsening the problem. Therefore, it is crucial to know how to identify the warning signs to intervene quickly.

Main Causes of a Bent Pushrod

Several incidents can be the cause of this deformation. The most common cause is contact between a valve and the piston, often following a timing belt break or incorrect timing. A broken or weakened valve spring can also allow the valve to float and hit the piston. Finally, over-tightening the rocker arms or an excessively high engine RPM can cause enough stress to bend the rod.

How to Diagnose a Bent Pushrod?

Abnormal Noise and Loss of Power

The most immediate symptom is an abnormal metallic clattering sound coming from the engine, synchronized with its RPM. You will also notice a significant loss of power, misfires, and poor acceleration, as the engine is no longer breathing properly.

Visual Inspection

To confirm the diagnosis, a visual inspection is necessary. Remove the rocker arm cover and turn the engine over by hand. Observe the movement of each pushrod. A bent rod will have irregular movement or will not rotate on its own like the others.

Pushrod Replacement Procedure

Replacement requires disassembling the rocker arm cover and removing the defective rod. It is imperative to always replace the pushrods as a complete set and to take advantage of the operation to thoroughly inspect the related lifters, rocker arms, and valves. Do not forget to adjust the rocker arm clearance after replacement according to the manufacturer’s specifications.

Car Lights That Stay On: 4 Main Causes and Solutions

Are your interior lights or dome light refusing to turn off? This issue, although common, can be frustrating and mainly lead to battery drain. Designed to illuminate when doors open and turn off automatically, these lights can sometimes malfunction. Discover the 4 main reasons why your car lights stay on and how to fix the problem.

1. A Faulty Door Switch

One of the most common causes is a faulty door switch. Each door of your vehicle is equipped with a small switch, often called a “door contact switch,” which tells the onboard computer whether the door is open or closed. If this switch is broken, dirty, or misadjusted, it can send an incorrect signal, making the system believe a door is still open and thus keeping the lighting on.

How to Check It?

Open and close each door one by one while observing the indicator light on your dashboard. If the door-open light does not turn off for a specific door, its switch is likely the cause.

2. The Dome Light Switch is in the “ON” Position

Before getting alarmed, check the position of your dome light switch. It usually offers three modes: OFF (turned off), ON (constantly lit), and DOOR (lit only when doors are open). It is very easy to accidentally switch the control to the “ON” position, which keeps the light on continuously, regardless of the door status.

3. A Faulty Timer

Modern vehicles are equipped with an electronic module, a delay timer or timer, programmed to keep the lights on for a short while after the doors are closed (to light your way to your house door, for example) before turning them off automatically. If this module fails, it may no longer send the shut-off command, leaving your lights on indefinitely and draining your battery.

4. A Wiring Problem or a Short Circuit

Finally, faulty or damaged wiring could be the source of the problem. Frayed wires, melted insulation, or a short circuit in the lighting circuit can create an unintended electrical path, powering the lights permanently. This type of fault is more complex to diagnose and often requires the intervention of a professional equipped with a wiring diagram and a multimeter.

What to Do While Waiting for Repair?

To avoid a dead battery, the immediate solution is to manually remove the fuse corresponding to the interior lighting (consult the owner’s manual to locate the correct fuse) or simply unscrew the dome light bulb. This will allow you to continue using your vehicle without risk until the issue is permanently resolved.

Volkswagen P1442 Code: Secondary Air Injection System Explained

Understanding the Volkswagen P1442 OBD2 Trouble Code

The P1442 diagnostic trouble code is a manufacturer-specific code primarily associated with Volkswagen, Audi, and other Volkswagen Group vehicles. This code indicates a malfunction within the secondary air injection system, specifically related to the pump or its control circuit. When this code appears, your vehicle’s powertrain control module (PCM) has detected an irregularity in the secondary air injection system’s operation during the critical cold-start phase.

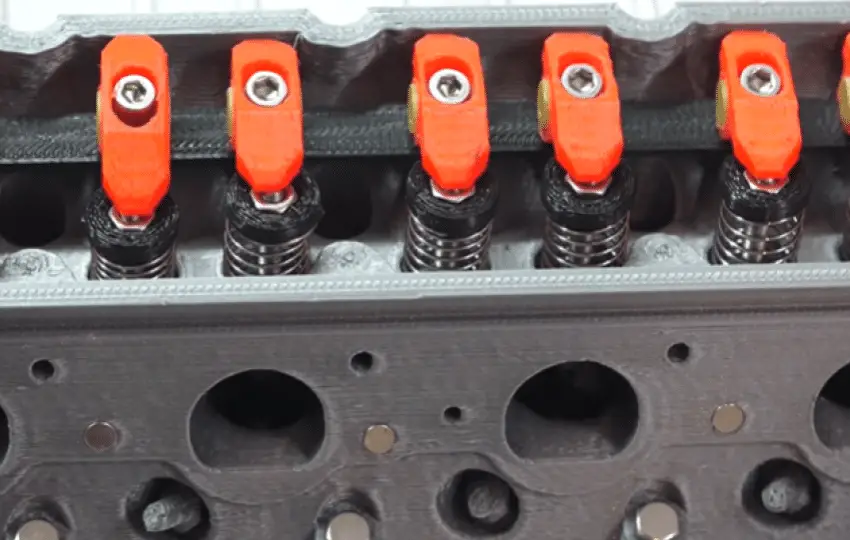
What is the Secondary Air Injection System?

The secondary air injection system is an emissions control component designed to reduce hydrocarbon and carbon monoxide emissions during cold engine starts. When your engine is cold, combustion is less efficient, leading to higher levels of unburned hydrocarbons. The secondary air injection system addresses this by injecting fresh air into the exhaust stream upstream of the catalytic converter, promoting further combustion of these unburned gases and helping the catalytic converter reach optimal operating temperature more quickly.

How the P1442 Code is Triggered

The PCM monitors the secondary air injection system through various sensors, including pressure sensors, temperature sensors, and electrical current monitors. The P1442 code is specifically triggered when the PCM detects that the secondary air injection pump is not drawing the expected amount of current or when the pump’s performance falls outside predetermined parameters. This typically occurs during the first few minutes after a cold engine start when the system is programmed to activate.

Common Symptoms and Immediate Effects of P1442

Recognizing the symptoms associated with the P1442 code is crucial for timely diagnosis and repair. While some symptoms may be subtle initially, they typically become more pronounced if the underlying issue is not addressed.

Primary Warning Signs

  • Illuminated check engine light on your dashboard
  • Possible reduced engine performance during cold starts
  • Increased hydrocarbon emissions during vehicle inspection
  • Rough idle immediately after starting
  • Unusual noises from the secondary air pump area

Secondary Effects on Vehicle Operation

While the P1442 code itself doesn’t typically cause immediate drivability concerns, the compromised secondary air injection system can lead to several secondary issues. The most significant impact is on your vehicle’s emission control system, which may fail to meet regulatory standards. Additionally, the increased workload on the catalytic converter could potentially shorten its lifespan over time.

Long-Term Consequences of Ignoring P1442

If left unaddressed, a persistent P1442 code can lead to more serious complications. The most immediate concern is potential failure during emissions testing. Beyond regulatory compliance, prolonged operation with a faulty secondary air injection system can lead to carbon buildup in the exhaust system and may trigger additional fault codes related to catalytic converter efficiency.

Comprehensive Diagnostic Procedure for P1442

Proper diagnosis of the P1442 code requires a systematic approach to identify the root cause. This process involves electrical testing, mechanical inspection, and component verification to pinpoint the exact failure point.

Initial Visual Inspection Steps

  • Check all vacuum lines connected to the secondary air system for cracks or disconnections
  • Inspect electrical connectors to the air pump for corrosion or damage
  • Examine the secondary air pump for physical damage or signs of overheating
  • Verify the condition of the combination valve and associated piping
  • Check for any obstructions in the air intake filter for the pump

Electrical System Testing

Begin electrical diagnosis by verifying power and ground to the secondary air injection pump. Using a digital multimeter, check for battery voltage at the pump connector when the system is commanded on during a cold start. If voltage is present but the pump doesn’t operate, the pump motor is likely faulty. If no voltage is present, trace the circuit back through the relay and fuse to identify where the voltage is interrupted.

Component-Specific Testing Methods

  • Test pump motor resistance: Typically should be 0.5-3.0 ohms
  • Check relay operation using a relay tester or multimeter
  • Verify combination valve operation using a vacuum pump
  • Monitor system pressure during activation with a pressure gauge
  • Use a scan tool to command the system on and observe parameters

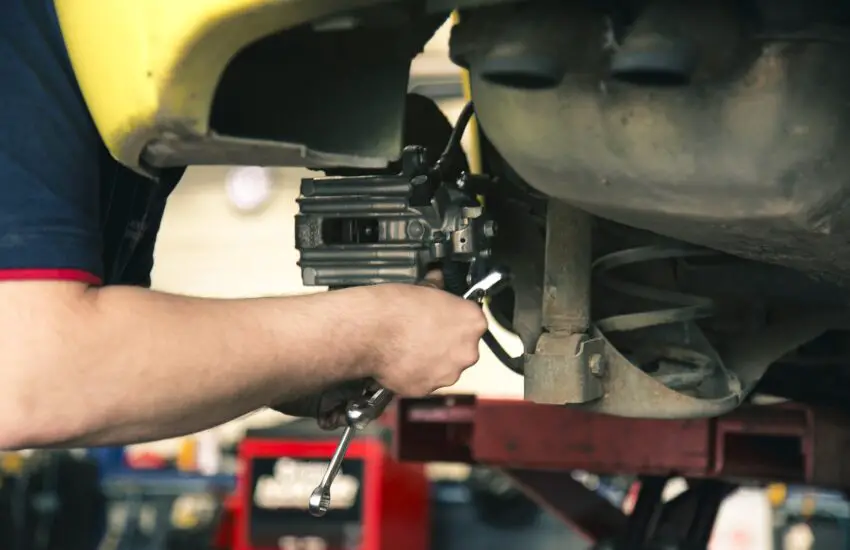
Professional Repair Solutions and Replacement Procedures

Once the faulty component has been identified through proper diagnosis, repair can commence. The complexity of these repairs varies depending on which component has failed and its accessibility within the engine bay.

Secondary Air Pump Replacement

Replacing the secondary air pump is typically the most common repair for P1442. The procedure generally involves disconnecting the electrical connector and air hoses, removing mounting bolts, and installing the new pump. It’s crucial to use OEM or high-quality aftermarket parts to ensure proper fitment and longevity. After replacement, the system should be tested to verify proper operation before clearing the fault code.

Combination Valve Service and Replacement

The combination valve, which prevents exhaust gases from flowing backward into the air injection system, can also cause P1442 if it becomes stuck or fails. Replacement involves disconnecting the air hoses and exhaust connection, then unbolting the valve from its mounting. Care should be taken not to damage the exhaust manifold during this process, and new gaskets should always be used during reassembly.

Electrical Circuit Repairs

If the issue lies in the wiring rather than the components themselves, repairs to the electrical circuit may be necessary. This can include repairing damaged wiring, replacing corroded connectors, or addressing issues with the pump relay or fuse. Proper wire splicing techniques and weatherproof connectors should be used to ensure a durable repair that will withstand engine compartment conditions.

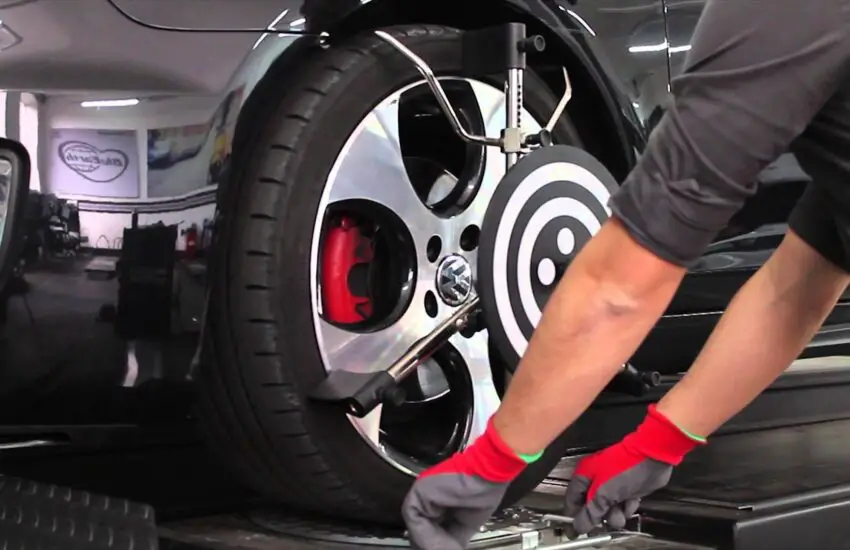
Preventive Maintenance and System Longevity

While the secondary air injection system doesn’t require routine maintenance in the traditional sense, certain practices can help prevent P1442 and related issues from occurring.

Regular System Checks

  • Periodically inspect electrical connections for corrosion
  • Check vacuum lines during routine service intervals
  • Listen for unusual pump noises during cold starts
  • Address any exhaust leaks promptly as they can affect system operation
  • Have emission system scanned regularly as part of preventative maintenance

Optimizing System Performance

Ensuring your vehicle receives regular maintenance according to manufacturer specifications can indirectly benefit the secondary air injection system. Proper engine operation reduces the strain on emission control components, while timely oil changes prevent sludge buildup that could potentially affect system operation. Using quality fuel can also minimize carbon deposits that might interfere with system components.

The P1442 code, while not typically an emergency, should be addressed promptly to maintain your Volkswagen’s emission compliance and overall system health. With proper diagnosis and repair, this issue can be resolved effectively, restoring your vehicle’s emission system to proper operation.

Car Wheel Alignment: Complete Guide for Perfect Adjustment

Your car’s alignment can be affected by poor roads and potholes. Driving a poorly maintained vehicle can have serious consequences. It is imperative to have your wheel alignment checked every 8,000 to 9,000 km. The first symptom of poor alignment is uneven tire wear. Proper alignment ensures excellent handling, extends tire life, and ensures the vehicle steers correctly. Additionally, it allows for significant fuel savings, as the car requires less energy to move forward.

Why is wheel alignment so important?

Precise alignment is crucial to keeping your vehicle in perfect condition. It directly influences your safety, driving comfort, and your wallet by avoiding premature and costly wear.

Signs that indicate a need for alignment

Premature and uneven tire wear

This is the most obvious sign. A tire that wears out faster on one side than the other indicates a problem with the camber or toe angle. It is recommended to have the alignment checked every 1,600 km (1,000 miles), especially if you frequently drive on rough terrain.

Steering wheel vibrations

If your steering wheel shakes or vibrates abnormally while driving, it often means the tires are not rolling straight and are pulling in opposite directions. Poor alignment can also cause the vehicle to pull to one side, making it difficult and dangerous to drive in a straight line.

Drifting off course

When you briefly release the steering wheel, the car tends to “pull” strongly to the left or right instead of staying straight. This drift is caused by improper adjustment of the camber and caster angles.

What is a full 4-wheel alignment?

A full adjustment involves precisely checking and correcting three main angles on all four wheels: camber, caster, and toe. This service also includes checking tire pressure and overall condition, as well as inspecting the suspension. Proper 4-wheel alignment improves tire durability, safety, and steering precision. A well-aligned vehicle is easier to drive and stop, thus protecting you and other road users.

Annual Car Safety Inspection: Why It’s a Good Idea?

In Canada, driving a vehicle is not as simple as it seems. To drive legally, insurance is mandatory. And to obtain this insurance, you must have a vehicle safety inspection done in Brampton. Many accidents are caused by poorly maintained vehicles. Moreover, the inspection ensures that your car or truck is safe for you and other road users. Although each province has its own guidelines, there are common similarities across Canada. Let’s discover the ultimate benefits of a vehicle inspection that can save you a lot of money!

Detecting Problems

The best way to know if your vehicle has a problem is to perform an annual inspection. Many people think their car runs perfectly and shows no signs of damage. However, some issues are undetectable through simple driving. A thorough inspection helps identify them, such as wheel realignment or changing tires for the upcoming season. This early detection prevents the problem from worsening.

Complete Peace of Mind

Having your car inspected is a proactive step that significantly reduces the risk of accidents. Additionally, it gives you complete peace of mind: you drive without fearing a sudden breakdown.

Saving Money

The bigger a problem is, the more expensive its repair. An annual inspection performed by certified mechanics allows for the detection and correction of minor issues at an early stage, thus saving you money in the long run. For example, you might have forgotten to change lubricants or oil after a certain mileage. Without an annual inspection, you risk an unexpected and costly breakdown.

What is the Checklist for a Vehicle Inspection?

The content of a safety inspection can vary from one workshop to another. A complete checklist to establish an accurate health assessment of your vehicle:

  • Inspection of the fuel tank and oil pan
  • Tire check (adaptation to weather)
  • Brake pedal test
  • Brake check (cracks, wear)
  • Coolant control and engine condition
  • Hydraulic system inspection
  • Thorough brake check
  • Inspection of CV boots (CV joints)
  • Condition of wipers, struts, and shock absorbers
  • Check of heater hoses and radiator
  • Check of all lights (headlights, taillights, brake lights)
  • Inspection of brake pedals and coolant leaks

The 10 Major Tips for Cleaning Your Car in Winter | Complete Guide

Many believe it’s pointless, even counterproductive, to wash their car in winter, arguing that it will get dirty again immediately. However, this idea is a serious mistake. Leaving salt residue and de-icing products on the bodywork is one of the worst things to do, as they accelerate paint corrosion and damage the vehicle’s very structure. Cleaning your car during the cold season is therefore an absolute necessity.

Beyond protection, a clean vehicle improves your image and your safety by offering better visibility.

Essential tips to protect your car in winter

Prefer lukewarm water over hot water

One of the biggest mistakes is using boiling water to remove snow and ice. Thermal shock can cause micro-cracks on the glass and severely damage the paint. Lukewarm water is much safer. Furthermore, water that is too hot removes protective wax layers, leaving the paint vulnerable.

Forget soap, use car shampoo

The main goal of winter washing is to neutralize corrosive salt. Household soaps or detergents are too aggressive; they clean so intensely that they strip away wax and leave the paint unprotected. Always opt for a specific car shampoo, which is much gentler and more respectful of the finish.

Apply a layer of protective wax

For optimal protection, apply a high-quality wax or a polymer sealant to the bodywork before winter arrives. This barrier will prevent salt from bonding directly to the paint and causing rust, also making cleaning easier.

Maintain your tires and rims

Winter puts a lot of strain on tires and running gear. Regular balancing and wheel alignment are crucial for your safety and to prevent premature wear. Also consider installing winter tires in Toronto for maximum grip.

Replace fabric mats with rubber mats

Melted snow, mud, and salt invade the interior. Fabric mats retain this moisture, becoming a breeding ground for bacteria and mold. Rubber mats are much easier to clean, rinse, and dry, preserving the inside of your vehicle.

Use the pressure washer with caution

High-pressure cleaning is effective for a quick deep clean, but it must be used with caution. Too much pressure or a nozzle too close to the surface can tear seals, damage paint, and mark plastics. Always maintain a safe distance.

The 10 Essential Tips to Prepare Your Car for Winter 2025

It is undeniable that vehicles require special attention throughout the year, and this is even more true during the winter season. Harsh weather conditions put more strain on your car and increase the risk of breakdowns. Therefore, it is crucial to adopt the right habits to face winter with peace of mind. Here is a comprehensive guide to essential checks.

1. Check tire pressure

Tires are particularly vulnerable when temperatures drop. Cold naturally reduces air pressure, which can accelerate their wear and impair grip. Regularly check and adjust your tire pressure, including the spare tire, to ensure optimal handling on cold and wet roads.

2. Check the battery condition

Low temperatures significantly impact battery performance. Its capacity decreases while the engine requires more current to start. Regular checks of its voltage and terminals are essential to avoid a breakdown at the most inconvenient time.

3. Opt for winter tires

Standard tires are not designed to provide performance-safety suitability on snow or ice. Winter tires, made with softer rubber and specific tread patterns, offer much better traction and a shorter braking distance once the temperature drops below 7°C.

4. Perform a pre-winter check-up

A complete check-up before the cold season is the best prevention. It ensures the overall good condition of the vehicle and helps anticipate potential issues affecting sensitive parts like the battery, tires, brakes, or cooling system.

5. Replace windshield wiper blades

Perfect visibility is crucial. Worn or cold-hardened wiper blades will clean your windshield poorly, especially when it is covered in mud or frost. Remember to replace them before winter and fill the washer fluid with an antifreeze product.

6. Keep the fuel tank full

Driving with a full tank limits condensation that can form in the tank and potentially freeze. Moreover, in case of unexpected events or traffic jams due to bad weather, you will have enough range to safely run the heater.

7. Check the lights (headlights and brake lights)

Days are shorter, and weather often reduces visibility. Ensure all your lights (headlights, front and rear fog lights, brake lights) are working perfectly. Regularly clean their lenses to guarantee optimal lighting.

8. Repair a cracked windshield

Why is it crucial?

A small chip can quickly turn into a long crack due to temperature variations and vibrations. A weakened windshield offers less resistance in case of impact and impairs vision clarity, already compromised by bad weather.

9. Use antifreeze coolant

This fluid is vital to protect the engine. It prevents the water in the circuit from freezing (which could severely damage the engine block) and ensures efficient heat distribution. Check its level and condition (using a tester) so it can withstand extreme cold.

10. Do not neglect the general inspection

A thorough inspection of all key elements (oil levels, brake fluid, steering, electrical system) ensures a car ready for winter. This will help you avoid costly repairs and ensure your safety and that of your passengers on the road.

What to do if you break down on Sheikh Zayed Road? Dubai emergency guide

Sheikh Zayed Road is the busiest and most iconic highway in Dubai. With six to eight fast-moving lanes on each side, a car breakdown at this location can be stressful, dangerous, and very disruptive if you are not prepared. Knowing how to react when your vehicle suddenly breaks down is essential to ensure your safety and that of others, while minimizing inconvenience.

1. Keep calm and act quickly

The first rule in case of a breakdown: stay calm. Panic can lead to hasty and dangerous decisions. If you hear a suspicious noise, feel a loss of power, or see a warning light come on, immediately signal your intention and move to the emergency lane.

2. Safely pull over to the emergency lane

If your car is still moving: turn on your hazard lights, slow down gradually, and guide the vehicle to the emergency lane. Avoid stopping in a traffic lane at all costs. Once stopped, apply the handbrake and turn the wheels slightly away from the road to prevent the car from rolling into traffic in case of an impact.

3. Make yourself and your vehicle visible

After safely stopping: keep your hazard lights on. If the situation allows, place a warning triangle at least 50-100 meters behind your car to alert other drivers. Stay inside the vehicle with your seatbelt fastened. Only get out if absolutely necessary (fire, smoke) and position yourself behind the safety barriers.

4. Call emergency and assistance services

Dubai authorities are well-equipped to respond. For urgent assistance, dial: Dubai Police: 999 | RTA Road Assistance: 800 9090. If you are a Carcility customer, you can also book a 24/7 breakdown service, a tow truck, or be connected with nearby partner garages for mobile repair.

5. Know the common causes of highway breakdowns

Prevention is better than cure. The most common breakdowns include: engine overheating (especially in summer), a flat or burst tire, battery failure, lack of fuel, or brake failure. Regular maintenance by certified professionals is the best prevention.

6. Equip yourself with a car emergency kit

Don’t be caught off guard. Every driver in Dubai should have an emergency kit in their vehicle, containing: a reflective triangle, a flashlight, jumper cables, basic tools, a power bank, a first aid kit, and water bottles.

7. Avoid DIY repairs on the highway

Never attempt to repair your car yourself on Sheikh Zayed Road. The risk of being hit by traffic is far too high. Leave diagnostics and repairs to professionals, such as the mobile mechanics available through Carcility.

8. Prevent breakdowns with regular maintenance

Prevention is key. In Dubai’s climate, your car is put to the test. Do not neglect periodic checks: battery and electrical inspection, tire pressure and alignment check, fluid levels (coolant, oil, brake), air conditioning maintenance, and engine diagnostics.

Conclusion: Be prepared, stay safe

A breakdown on Sheikh Zayed Road is an unpleasant experience, but it doesn’t have to be dangerous. By staying calm, knowing who to call, and preparing in advance, you can handle any emergency situation like a professional. Save Carcility’s number or bookmark the app for quick and secure assistance.

Electric Car Maintenance in Dubai: Complete Guide for Tesla, BYD and Geely

As Dubai intensifies its transition towards sustainable mobility, electric vehicles (EVs) have become commonplace. From sleek Teslas to efficient BYD sedans and emerging Geely models, EV ownership in the United Arab Emirates is accelerating. With government incentives, reserved parking zones, and extensive charging infrastructure, owning an electric car in Dubai has never been more convenient.

But this transition raises a new question: how do you service and maintain an electric car in Dubai’s unique climatic and urban conditions?

This guide details everything Tesla, BYD, and Geely owners need to know to keep their car in perfect working order in Dubai.

How is Electric Car Maintenance Different?

Unlike petrol or diesel vehicles, EVs have far fewer moving parts. No engine oil to change, no spark plugs to replace, no complex transmission to service. However, this does not mean they are maintenance-free.

Key components requiring specific attention include:

  • Battery system health
  • Brake pads and fluid
  • Tires and alignment
  • Suspension systems
  • Software updates and diagnostics
  • Air conditioning performance (critical in Dubai)

Routine inspections are vital, even if the intervals are longer.

Battery Maintenance: Crucial in Dubai

The heart of an EV is its lithium-ion battery. In a desert climate like Dubai’s, heat management is essential. Extreme temperatures can degrade performance and affect charging cycles.

Tips for extending lifespan:

  • Avoid charging to 100% daily; aim for 80-90%.
  • Prefer charging stations in the shade or indoors.
  • Schedule a battery health check every 6 to 12 months.
  • Keep software updated for better thermal management.

Some centers in Dubai offer cooling system diagnostics.

Where to Service Your Tesla, BYD, or Geely in Dubai?

Not all garages are equipped for EVs. Specialized tools, certified technicians, and approved diagnostics are essential.

Tesla Owners:

Tesla has a dedicated service center, often overbooked. Partner garages from Carcility now offer:

  • Tesla-compatible diagnostics
  • Brake and suspension service
  • Battery coolant refill
  • Appointments with mobile service

BYD and Geely Owners:

As these brands gain popularity, more and more independent centers are supporting them. Look for garages offering:

  • Compatible OBD-II diagnostics
  • Access to certified OEM parts
  • Multilingual support

With Carcility, filter for EV-suitable garages, compare reviews, and book online.

Don’t Neglect Brakes, Air Conditioning, and Tires

Even though the electric motor requires little attention, other components wear out:

  • Brakes: Regenerative braking wears pads less, but the fluid should be flushed every 2-3 years.
  • Air Conditioning: Essential for cooling the cabin and the battery in Dubai. Its proper functioning is non-negotiable.
  • Tires: EVs are heavier, putting more strain on tires. Rotate them every 10,000 km and maintain correct pressure.

Carcility offers competitively priced AC diagnostics and tire rotation packages.

Software Updates: More Than Just New Features

For Tesla, BYD, or Geely, updates improve range and safety. Some garages in Dubai offer:

  • Assistance with over-the-air (OTA) updates
  • Firmware version rollback for diagnostics
  • Calibration of driver assistance systems (Autopilot, DiPilot)

Stay updated to ensure optimal performance and safety.

Why Choose Carcility for Your EV Maintenance in Dubai?

Finding the right garage for your electric car can be time-consuming. Carcility simplifies the process by allowing you to:

  • Search and filter for certified EV garages
  • Book an appointment instantly
  • Benefit from transparent pricing
  • Read reviews from other EV owners
  • Opt for mobile home service

Whether it’s for a brake check, AC service, or battery diagnostic, Carcility connects you to the growing network of expert EV mechanics in Dubai.

Conclusion: Master Your Electric Vehicle Maintenance

Owning an electric car in Dubai is a rewarding experience. But keeping up with its maintenance needs is just as important as with a traditional car.

By understanding the specific demands of Tesla, BYD, and Geely models, and choosing qualified partners via Carcility, you will protect your investment, maximize range, and stay safe on the road.

Book your next electric vehicle service in just a few clicks on Carcility.com and drive towards the future with confidence.

Toyota P1442 Code: EVAP System Vent Control Valve Circuit

Understanding the Toyota P1442 Diagnostic Trouble Code

The P1442 code is a manufacturer-specific diagnostic trouble code (DTC) that pertains to the Evaporative Emission Control (EVAP) system in Toyota vehicles. This code specifically indicates a malfunction in the vent control valve circuit, which is a critical component for managing fuel vapor emissions and maintaining proper fuel system pressure.

What Does P1442 Mean in Toyota Vehicles?

P1442 signifies a detected fault in the electrical circuit controlling the EVAP system’s vent control valve. This valve, typically located near the charcoal canister, is responsible for allowing fresh air into the EVAP system during purging cycles and sealing the system during pressure testing. When the vehicle’s Engine Control Module (ECM) detects an abnormal voltage, resistance, or operational pattern in this circuit, it stores the P1442 code and illuminates the check engine light.

Technical Specifications and System Operation

The EVAP system is designed to prevent fuel vapors from escaping into the atmosphere by storing them in a charcoal canister and later purging them into the engine for combustion. The vent control valve operates as a normally open solenoid valve that closes when energized by the ECM. The P1442 code triggers when the ECM detects:

  • Circuit voltage outside expected parameters
  • Abnormal resistance in the valve solenoid
  • Open or short circuit conditions
  • Inconsistent valve operation during self-tests

Common Symptoms of P1442 Code in Toyota Models

Recognizing the symptoms associated with P1442 is crucial for timely diagnosis and repair. While some vehicles may show multiple symptoms, others might only display the check engine light without noticeable driveability issues.

Primary Warning Signs and Indicators

The most immediate indication of a P1442 code is the illumination of the check engine light on your dashboard. However, several other symptoms may accompany this warning:

  • Check engine light illumination (constant or flashing)
  • Failed emissions testing due to EVAP system faults
  • Possible fuel odor around the vehicle
  • Decreased fuel efficiency in some cases
  • Rough idling or occasional stalling
  • Difficulty refueling (slow fuel fill) due to improper venting

Secondary Effects on Vehicle Performance

While the P1442 code primarily affects emissions control, prolonged neglect can lead to secondary issues:

  • Increased hydrocarbon emissions
  • Potential damage to other EVAP system components
  • Reduced engine performance under specific conditions
  • Activation of limp mode in some modern Toyota models

Diagnosing and Repairing P1442 Code

Proper diagnosis of P1442 requires a systematic approach using appropriate tools and following manufacturer-recommended procedures. Attempting repairs without proper diagnosis can lead to unnecessary part replacement and continued issues.

Required Tools and Safety Precautions

Before beginning diagnosis, ensure you have the necessary equipment and follow safety protocols:

  • OBD2 scanner capable of reading manufacturer-specific codes
  • Digital multimeter for electrical testing
  • Vehicle service manual for specific wiring diagrams
  • Safety glasses and gloves
  • Well-ventilated work area
  • Fire extinguisher nearby when working with fuel system components

Step-by-Step Diagnostic Procedure

Follow this systematic approach to accurately diagnose the P1442 code:

  • Step 1: Confirm the code with an OBD2 scanner and check for additional codes
  • Step 2: Perform visual inspection of EVAP system components and wiring
  • Step 3: Locate the vent control valve (typically near charcoal canister)
  • Step 4: Test valve resistance with multimeter (typically 20-30 ohms at 20°C)
  • Step 5: Check wiring harness for damage, corrosion, or loose connections
  • Step 6: Verify power and ground signals to the valve during operation
  • Step 7: Test valve operation using bidirectional scanner controls

Common Repair Solutions and Replacement Procedures

Based on diagnostic findings, common repairs for P1442 include:

  • Replacing faulty vent control valve assembly
  • Repairing damaged wiring or connectors
  • Cleaning or replacing clogged vent filters
  • Addressing corrosion in electrical connections
  • Replacing the charcoal canister if contaminated
  • Updating ECM software in rare cases

Technical Insights and Preventive Maintenance

Understanding the broader context of the EVAP system and implementing preventive measures can help avoid recurrence of P1442 and related codes.

Component Location and System Integration

The vent control valve is typically located underneath the vehicle, near the fuel tank and charcoal canister. In most Toyota models, it’s integrated with or mounted directly to the charcoal canister assembly. Proper understanding of its location is essential for efficient diagnosis and repair.

Preventive Maintenance Strategies

To minimize the risk of P1442 and other EVAP system codes:

  • Avoid overfilling the fuel tank during refueling
  • Keep the area around the fuel tank and EVAP components clean
  • Address check engine lights promptly to prevent secondary damage
  • Follow manufacturer-recommended service intervals
  • Protect undercarriage components from road debris and corrosion
  • Use quality fuel from reputable stations

Cost Considerations and Professional vs DIY Repair

Repair costs for P1442 vary significantly based on the root cause and whether you choose professional service or DIY repair. The vent control valve itself typically costs between $80-$200 for parts, with professional labor adding $100-$300 depending on location and vehicle accessibility. DIY repairs can significantly reduce costs but require technical competence and proper tools.

Successfully addressing a P1442 code requires methodical diagnosis, quality replacement parts when necessary, and proper system testing after repairs. Always clear codes after repair and perform a drive cycle to verify the fix. For complex cases or when multiple codes are present, consulting a professional Toyota technician with specialized diagnostic equipment is recommended.