Oil Light On After an Oil Change: Causes, Solutions, and Prevention

An oil light coming on after an oil change indicates a problem with oil pressure, not the level. Insufficient pressure deprives the engine of lubrication, risking premature wear, overheating, or even engine failure. Act quickly to avoid costly repairs.


7 Main Causes

  1. Incorrect oil level
  • Underfilling: A level that is too low reduces pressure.
  • Overfilling: An excess of oil creates foam, disrupting pressure.
    Solution: Check the dipstick and adjust the level according to the markers. Use the recommended oil (viscosity indicated in the manual).
  1. Oil filter improperly installed or not lubricated
  • A dry or poorly secured filter causes an initial loss of pressure.
    Solution: Lubricate the filter gasket before installation and tighten it correctly.
  1. Contaminated oil or presence of sludge
  • A dirty engine can clog oil passages, even after an oil change.
    Solution: Perform an engine flush or a complete oil change with a flush.
  1. Faulty pressure sensor
  • A dirty or damaged sensor sends false signals.
    Solution: Test the sensor with a pressure gauge. Replace it if necessary (moderate cost).
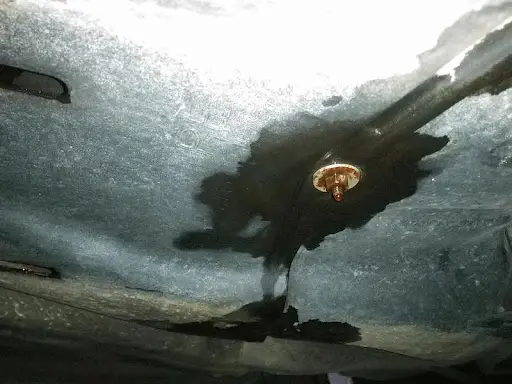
  1. Oil leak
  • A loose drain plug, a worn gasket, or a cracked filter cause a leak.
    Solution: Inspect the engine and the ground for oil traces. Tighten or replace the faulty parts.
  1. Failing oil pump
  • A worn pump does not generate enough pressure.
    Solution: Diagnose with a professional (pressure test). Replacement necessary in case of failure.
  1. Electrical problem
  • Damaged wiring, corroded connectors, or a short circuit disrupt the signal.
    Solution: Visually inspect the cables. Use a multimeter to check continuity.

What to do if the light stays on?

  1. Stop the engine immediately to avoid irreversible damage.
  2. Check the oil level when cold, on a flat surface. Adjust if necessary.
  3. Inspect for leaks:
  • Check the filter, drain plug, and gaskets.
  • Look for oil traces under the vehicle.
  1. Restart cautiously:
  • If the light goes off, monitor the level.
  • If it persists, have the vehicle towed to a professional.
  1. Consult your mechanic:
  • Request a check of the oil change (quantity, oil type, tightness of parts).

How to Prevent the Problem

  • Use the recommended oil: Adhere to the manufacturer’s viscosity and specifications.
  • Choose a trusted garage: Check reviews and ensure they use suitable parts.
  • Regular oil changes: Follow the manual’s intervals (every 5,000 to 10,000 km depending on the oil).
  • Monthly checks: Check the oil level and condition, even between oil changes.

FAQ

1. Can I drive with the light on?
No. Stop the engine immediately to avoid engine failure.

2. Why does the light flash at idle?
The pressure might be too low (<5 PSI) or the sensor is faulty.

3. The light is on but the level is good. Why?
Target the pressure sensor, oil pump, or clogged passages.

4. How long before the problem worsens?
A few minutes of driving are enough to seriously damage the engine.


Conclusion

An oil light coming on after an oil change requires quick action. First, check the level and for leaks, then consult a professional if the problem persists. Ignoring this warning can lead to costly engine failure. Always prioritize regular oil changes and quality parts to prevent risks.

My car won’t move forward but reverses: what to do?

When a car refuses to move forward but operates normally in reverse, it typically indicates a serious issue with the transmission or related components. It is crucial not to ignore this symptom, as it can lead to more significant and costly damage.

Here are the possible reasons and solutions to consider:

I. Understanding the Transmission System

To understand why a car might experience this problem, it’s important to know how the transmission works:

  • Manual Transmission: The clutch temporarily disconnects the engine from the gearbox, allowing gear changes. The gears inside the transmission mesh to transfer motion to the wheels.
  • Automatic Transmission: The gear shifting process is automated via a torque converter, multi-disc clutches, and a hydraulic and electronic system that manages gear changes.

Reverse gear often uses a different set of gears than those used for forward gears, which explains why a problem can affect one without affecting the other.

II. Possible Causes of the Failure

Several causes can explain why a car won’t move forward but reverses:

  1. Transmission Fluid Level or Quality (Automatic Transmission)
    • Reason: Low fluid level or worn, contaminated, or burnt transmission fluid can prevent the internal clutches from engaging properly for forward gears, while still allowing reverse gear engagement. Transmission fluid is essential for lubrication, cooling, and power transfer.
    • Symptoms: Difficulty shifting gears, transmission slipping, burning smell, dark fluid.
    • Solution: Check the transmission fluid level and condition. If the fluid is low, add the manufacturer-recommended type. If the fluid is old or burnt, a transmission fluid change may be necessary, although this doesn’t always fix internal damage.
  2. Clutch Failure (Manual Transmission)
    • Reason: A worn clutch or a faulty clutch mechanism (broken cable, failed master/slave cylinder) can prevent power from being transmitted from the engine to the wheels in forward gears. The reverse gear clutch may be less stressed or function differently, allowing it to engage.
    • Symptoms: Soft or hard clutch pedal, clutch slipping (engine revs increase but the car doesn’t accelerate), difficulty shifting gears.
    • Solution: Check the condition of the clutch and its control system. Clutch replacement may be necessary.
  3. Internal Gearbox Problem
    • Reason: This is one of the most common and often the most expensive causes. Worn or broken gears, synchronizers, clutch discs (for automatics), or bearings inside the transmission can prevent certain gears (especially forward gears) from engaging or transmitting power. Reverse gear, being generally less used, may remain functional.
    • Symptoms: Unusual noises (grinding, clunking) when attempting to shift gears, difficulty engaging gears, transmission warning light illuminated.
    • Solution: A transmission overhaul or replacement is often necessary. This involves disassembly to identify faulty components.
  4. Faulty Torque Converter (Automatic Transmission)
    • Reason: The torque converter transfers engine power to the transmission. If faulty, it may not transmit power to the forward gears, while still allowing some drive in reverse.
    • Symptoms: Transmission slipping, transmission overheating, unusual noises, difficulty starting after stopping.
    • Solution: Torque converter replacement is often required.
  5. Shift Linkage or Gear Selector Problems
    • Reason: A torn, misaligned, or worn shift cable, or a problem with the gear linkage (manual or automatic) can prevent the gear lever from correctly positioning the gears for forward movement, while reverse may still be accessible.
    • Symptoms: Loose gear lever, difficulty moving the lever, or it doesn’t seem to engage gears properly.
    • Solution: Inspect and adjust or replace the shift linkage or cables.
  6. Electronic/Sensor Problems (Automatic Transmission)
    • Reason: Automatic transmissions are managed by an electronic control module (ECM or TCM) and numerous sensors (speed, pressure, temperature, etc.) as well as solenoids. A malfunction in these components can disrupt the gear shift logic, allowing only reverse or certain gears.
    • Symptoms: Engine or transmission warning light on, harsh or erratic gear changes, gears stuck.
    • Solution: Electronic diagnostics are needed to read error codes. Replacing faulty sensors or solenoids, or reprogramming the control unit may solve the problem.
  7. Seized Rear Brakes or Wheel Problem
    • Reason: In rare cases, if the rear brakes are partially seized (shoes stuck in the drum, seized caliper) or if there’s a mechanical issue with a rear wheel (broken bearing), it could prevent the car from moving forward, but the greater power in reverse might temporarily overcome the blockage. This is less common as a primary cause of the described problem, but it’s worth checking.
    • Symptoms: Burning smell (brakes), excessive heat at the wheels, resistance to movement.
    • Solution: Inspect and repair/replace faulty brake or wheel components.

III. Diagnostic Steps and Solutions

  1. Check Transmission Fluid Level and Condition (Automatic Transmission): This is the first thing to do. Low or burnt fluid is a sign of trouble.
  2. Listen for Noises: Abnormal noises (clunking, grinding) from the gearbox indicate internal problems.
  3. Test the Clutch (Manual Transmission): If the clutch pedal feels abnormal or if the engine revs without the car moving forward, the clutch is likely the cause.
  4. Check the Linkage: Inspect the cables and levers to ensure they are properly connected and not damaged.
  5. Look for Leaks: Fluid spots under the vehicle may indicate a transmission leak.
  6. Electronic Diagnostics: For modern vehicles, an OBD-II scanner can reveal error codes related to the transmission, sensors, or control unit.

The most recommended action is to have your vehicle towed to a transmission specialist mechanic. Transmission problems are complex and often require specific tools and expertise for accurate diagnosis and proper repair. Attempting to drive in this condition can worsen the damage and make repairs more expensive.

Reasons and solutions for smoke coming from the oil cap

Smoke coming from the oil cap can be a worrying sign and potentially indicative of an underlying engine problem. Here is a comprehensive overview of the possible reasons and associated solutions.


Causes of Smoke Coming from the Oil Cap

Several factors can lead to smoke being emitted from the oil cap:

1. Excessive Crankcase Pressure (Blow-by)

This is the most common reason. “Blow-by” occurs when combustion gases escape from the combustion chamber and pass by worn or damaged piston rings into the crankcase.

  • Worn or Broken Piston Rings: Over time and with wear, piston rings lose their effectiveness, allowing gases to seep through.
  • Scored or Worn Cylinders: Damaged cylinder walls can prevent piston rings from sealing properly.
  • Worn Valves and/or Valve Guides: Less common, but valves that do not close tightly can also contribute to blow-by.

2. Problems with the Positive Crankcase Ventilation (PCV) System

The PCV system is designed to remove gases from the crankcase and send them back to the intake to be burned. If it is faulty, these gases can build up and seek an exit, often through the oil cap.

  • Clogged or Defective PCV Valve: A stuck or blocked PCV valve prevents the evacuation of gases.
  • Obstructed PCV Hoses: The hoses or passages of the PCV system can become clogged with oil and carbon deposits.

3. Faulty Cylinder Head Gasket

A damaged cylinder head gasket can allow combustion gases or even coolant to enter the engine oil circuit.

  • Blown or Cracked Cylinder Head Gasket: This creates an unwanted connection between the combustion chambers and the crankcase.

4. Overly Diluted or Contaminated Engine Oil

Oil contaminated with fuel or coolant can create excessive vapors when it heats up.

  • Leaking Fuel Injectors: Unburned fuel can end up in the oil.
  • Cylinder Head Gasket or Oil Cooler Problem: Allowing coolant to mix with the oil.

5. Faulty Turbocharger (on turbo engines)

A failing turbocharger can allow oil to pass into the intake or exhaust system, which can create vapors and potentially smoke through the crankcase ventilation system.


Solutions and Actions to Take

The solution will depend on the underlying cause of the smoke. It is crucial to have the problem diagnosed by a qualified mechanic.

1. Professional Diagnosis

  • Cylinder Compression/Leak-down Test: To assess the condition of the piston rings and cylinders.
  • PCV System Inspection: Checking the PCV valve, hoses, and manifold.
  • Engine Oil Analysis: To detect the presence of fuel or coolant.
  • Visual Inspection: Looking for leaks or signs of damage.

2. Specific Repairs

  • Piston Ring Replacement or Engine Overhaul: If blow-by is severe due to worn rings or cylinders, a complete engine overhaul (or at least ring replacement) may be necessary.
  • PCV System Repair or Replacement: Cleaning or replacing the PCV valve and hoses if necessary.
  • Cylinder Head Gasket Replacement: If the cylinder head gasket is the cause, it must be replaced. This can be an expensive repair.
  • Injector or Turbocharger Repair: Depending on the cause, faulty components will need to be repaired or replaced.
  • Engine Oil Drain and Replacement: If the oil is contaminated, a complete drain with new oil that meets the manufacturer’s specifications is essential.

Prevention

  • Regular Maintenance: Adhere to the oil change intervals and filter replacement schedules recommended by the manufacturer.
  • Use of Quality Oil: Only use the engine oil specified for your vehicle.
  • Monitoring Warning Lights and Performance: Be attentive to any changes in your engine’s behavior (excessive oil consumption, loss of power, unusual noises).

Seeing smoke coming from the oil cap is a sign that should not be ignored. A quick and accurate diagnosis can help you avoid more significant damage and higher repair costs in the future. Have you noticed any other symptoms accompanying this smoke?

Engine Block Cleaning: Complete Technical Guide

Why Clean Your Engine Block?
Like the foundation of a house, a clean engine block is essential for vehicle performance. The buildup of sludge, grease, oil residue, and coolant leads to corrosion and malfunctions. Regular cleaning extends its lifespan and prevents rust.


1. Choosing the Right Products

  • Essential Criteria:
    • Ability to remove grease, scale, rust, and carbon deposits
    • Compatibility with metals (aluminum/cast iron)
    • Non-corrosive formulation
  • To Avoid:
    • All-purpose cleaners (too abrasive)
    • Intensive manual methods (excessive scrubbing)
  • Recommended Solutions:
    • High-penetration engine degreasers
    • Professional steam cleaners
    • Soft blasting kits for disassembled parts

Warning: Using the wrong product accelerates surface wear. Consult a specialist for vintage or specific engines.


2. Preparation: Safety First

  1. Disconnect the Battery:
    • Start with the negative terminal (black)
    • Then remove the positive terminal (red)
  2. Protect Sensitive Components:
    • Wrap in plastic bags:
      • Ignition coils
      • Electronic control units
      • Electrical connectors
      • Air filter
    • Seal with waterproof tape

3. Step-by-Step Cleaning Procedure

Step Tools Instructions
Pretreatment Brass brush, plastic scraper Manually remove thick deposits
Degreaser Application High-pressure sprayer Cover evenly. Let sit 10-15 min
Targeted Brushing Stiff-bristle brush (tooth type) Focus on crevices without scratching surfaces
Rinsing Steam cleaner (max 100 bar) or garden hose Keep 30 cm away from electronic components
Drying Microfiber cloths + compressed air Avoid residual moisture in cavities

Regulation: Collect contaminated wastewater (legal requirement). Use retention tanks.


4. Post-Cleaning Checks

  1. Visual Inspection:
    • Check for no residue in openings
    • Inspect condition of seals and hoses
  2. Leak Test:
    • Reconnect the battery (start with the positive terminal)
    • Run the engine at idle for 15 minutes
    • Look for:
      • Oil leaks under pressure
      • Coolant leaks
      • Abnormal behavior (smoke, noises)

5. Mistakes to Absolutely Avoid

  • ❌ Using a high-pressure washer (damages sensors and seals)
  • ❌ Neglecting to protect electronic components
  • ❌ Applying products to a hot engine (risk of cracking)
  • ❌ Discharging polluted water into drains (fine up to €1,500)

Conclusion

A methodical engine block cleaning:

  • ✅ Improves cooling
  • ✅ Reduces corrosion risks
  • ✅ Facilitates mechanical diagnostics
    Perform this every 50,000 km or before selling. For stubborn deposits (scale, rust), prefer disassembly and professional ultrasonic tank cleaning.

⚠️ Reminder: 80% of electronic failures on cleaned engines are due to improper rinsing.


Acceleration Problems: 6 Common Causes When Your Car Loses Its Punch

A sluggish acceleration, worrying jerks, or a sudden lack of power? These symptoms aren’t just frustrating – they can be dangerous. Discover the most common culprits that deprive your car of its liveliness.

Why Does Your Car Respond Poorly to the Accelerator?

Press the pedal and… nothing? A delayed or jerky response? Behind these symptoms often lie problems in these 4 vital systems:

  • ⛽ Fuel supply
  • 💨 Air intake
  • ⚡ Ignition system
  • 📡 Electronic sensors

1. Fuel Supply Problems: The Engine’s Hunger

An underfed engine = weak acceleration. Watch out for these components:

🔧 Failing Fuel Pump

Typical symptom: Progressive loss of power, abnormal humming from the tank.
Did you know? A tired pump struggles to maintain the necessary pressure.

🧪 Clogged Fuel Filter

Typical symptom: Stalling during acceleration, hiccups under load.
Simple solution: Replace every 20,000 to 30,000 km (check your service manual).

💉 Clogged Injectors

Typical symptom: Jerking, black smoke (too much fuel), or increased consumption.
Tip: A cleaning additive can prevent clogging.

2. Air Intake Problems: The Choked Engine

Without air, no efficient combustion! Two main enemies:

🌫️ Saturated Air Filter

The most common AND the cheapest to fix!
Quick test: take out the filter. If it’s black and dusty, change it without delay.

📶 Faulty Mass Air Flow Sensor (MAF)

Typical symptom: Engine light on + erratic acceleration.
Warning: Clean it with a special product (never direct contact!).

3. Failing Ignition: The Missing Spark

When combustion fails, power flies away:

🔥 Worn or Fouled Spark Plugs

Typical symptom: Hard starting, abnormal vibrations.
Lifespan: From 30,000 km (copper plugs) to 100,000 km (iridium).

⚡ Tired Ignition Coils

Typical symptom: Clear misfires, sudden loss of power.
Test: An electronic diagnostic identifies the faulty coil.

4. Failing Sensors: The Lost Computer

Your ECU needs reliable data:

  • Throttle Position Sensor (TPS): Misinterprets your accelerator pedal input
  • Crankshaft Sensor: Desynchronizes injection/ignition
  • Lambda Sensor (O2 Sensor): Falsifies the air/fuel mixture

Good to know: These faults usually trigger the engine light (🟠).

5. Choking: The Clogged Exhaust System

Dreaded culprit: Clogged catalytic converter
Alarming symptoms:

  • EXTREME power loss at high RPM
  • Overheating under the floor
  • Rotten egg smell

⚠️ Absolute emergency: Fire risk! Consult a professional.

6. Insidious Mechanical Causes

  • Slipping Clutch (manual transmission): The engine revs up but speed doesn’t increase
  • Brakes Binding: A seized caliper creates constant resistance (touch the rims after a drive: if burning hot, that’s the problem!)

🔍 What to Do in Practice? The 3-Step Method

  1. Check the basics: Air filter, fuel level, dashboard warning lights
  2. Read the error codes: With an OBD2 scanner (less than €30 at auto centers)
  3. Consult a professional: For complex diagnostics (fuel pump, sensors, catalytic converter)

⚠️ Don’t Take Risks!

A failing acceleration isn’t just an inconvenience – it’s a potential danger during overtaking or merging onto the motorway. An untreated problem can also damage other components (like the catalytic converter, which is very expensive).

Final word: Start with simple maintenance (filters, spark plugs). If the problem persists, act quickly – your safety and your wallet will thank you!

Thumping noises or vibrations under your car? Watch out for the transmission mount!

Abnormal shaking or dull noises coming from underneath your vehicle, especially during acceleration, are warning signs. They may indicate a faulty transmission mount. Do not ignore them!

What is a transmission mount?

  • It is a crucial part that securely fastens the transmission to the vehicle’s chassis.
  • Its roles:
    1. Keep the transmission in position to transfer power to the wheels.
    2. Absorb the natural vibrations from the transmission.
  • Without it, the transmission would vibrate excessively and damage surrounding parts.
  • Often made of rubber (sometimes hydraulic in high-end vehicles), it is located at the transmission end of the gearbox (different from engine mounts).
  • Typical lifespan: 60,000 to 120,000 miles, reduced by aggressive driving, extreme heat, or oil leaks.

Symptoms of a faulty transmission mount:

  1. Excessive vibrations: Shaking in the cabin (steering wheel, seat, gear lever), very noticeable at idle (red light) or during acceleration. Not to be confused with tire vibrations.
  2. Clunking or knocking sounds: Dull metallic noises coming from underneath, especially during acceleration, braking, or over bumps. They intensify over time.
  3. Harsh gear changes: Jerky gear shifts or delayed engagement (especially from P to D/R), even with a well-functioning automatic transmission.
  4. Visible transmission movement: (Often visible on front-wheel drive) The transmission moves abnormally at idle or when shifting from P to D/R (careful inspection required).
  5. Increased road/cabin noise: The mount no longer absorbs vibrations and sounds, making driving noisier, particularly at steady speeds or during acceleration.
  6. Dashboard/interior vibrations: Cockpit elements (dashboard, center console, gear lever) shaking at idle or low speeds.

Replacement cost:

  • Range: $250 to $550 (part + labor at an independent mechanic).
  • Details:
    • Labor: $200 – $400 (varies depending on the mount’s accessibility).
    • Part: $50 – $150 (depending on the vehicle and type of mount).
  • More expensive at a dealership: $400 – $700 (original parts, warranty).
  • The price depends on the car model (front-wheel drive often more accessible) and the complexity of access.

Causes of failure:

  1. Normal wear: Natural degradation of the rubber (hardening or softening).
  2. Heat: Proximity to the transmission and exhaust accelerates deterioration.
  3. Oil contamination: Leaks (transmission, engine, steering) that cause the rubber to swell and rot.
  4. Aggressive driving: Sudden acceleration/braking, high engine RPMs.
  5. Age: Increased risk after 10 years, even with moderate mileage.

Can you keep driving?

  • Strongly discouraged long-term!
  • Immediate risks:
    • Collateral damage: Premature wear of seals, cooling lines, electrical components, or nearby exhaust parts (much more expensive repairs: $200 to $4000+).
    • Safety issues: Unstable transmission potentially interfering with other parts or affecting handling (sudden acceleration/braking).
  • If absolutely necessary:
    • Drive extremely gently (no sudden acceleration/braking, moderate speed).
    • Schedule an appointment with a mechanic as soon as possible.

Conclusion: A failing transmission mount does not fix itself. Its symptoms (vibrations, noises) are clear warnings. Prompt replacement (average cost $250-550) avoids much more expensive and potentially dangerous repairs. Have it checked without delay!

Essential Components of the Fuel Supply System & Their Functions

The fuel supply system is a vital network for any internal combustion engine vehicle (gasoline or diesel). Its role is simple but crucial: to store, filter, pressurize, and precisely meter fuel to the combustion chambers, where it will be mixed with air and ignited. Optimal operation of this system is essential for the engine’s performance, efficiency, and longevity.

The fuel system must be maintained regularly to prevent unexpected breakdowns. Clean filters ensure proper engine operation by preventing impurities from harming the system. Fuel pressure must be properly regulated to ensure efficient combustion. Any fuel leak can have serious consequences for the vehicle’s safety and performance. Technologies are evolving to make fuel systems more efficient and environmentally friendly.

The Fuel Supply System is essential for the proper functioning of a vehicle, enabling efficient and optimized fuel combustion.

Furthermore, the Fuel Supply System plays a central role in reducing fuel consumption.

Here are the essential components of this system, detailed with their functions:

Fuel Supply System and its Importance

  1. The Fuel Tank:
    • Function: To safely store fuel (gasoline or diesel) in sufficient quantity for the vehicle’s range.
    • Details: Typically made of high-density plastic resistant to shock and corrosion, or metal. It is equipped with a ventilation system to maintain internal pressure and prevent the formation of excessive vapors. It also contains the fuel level gauge (float sensor).
  2. The Fuel Pump:
    • Function: To draw fuel from the tank and deliver it under pressure to the engine.
    • Details:
      • Location: Often submerged in the tank (an “in-tank” pump) for better cooling and to avoid priming issues. Sometimes mounted in-line on the chassis (less common today).
      • Type: Mostly electric with a rotor or vane wheel in modern vehicles. Mechanical pumps (driven by the engine) are now rare, especially on fuel injection engines.
      • Control: Its speed (and thus its flow rate) can be electronically controlled by the engine control unit (ECU) to adapt the pressure to requirements.
  3. The Fuel Filter:
    • Function: To trap impurities (dust, rust, water particles to some extent, deposits) present in the fuel before they reach sensitive downstream components (injectors, diesel high-pressure pump).
    • Details: This is a consumable item, essential for protecting the injectors and ensuring clean flow. It is generally replaced periodically according to the manufacturer’s recommendations. Diesel filters are often more complex and include water separation systems.
  4. The Fuel Pressure Regulator:
    • Function: To maintain a constant and optimal fuel pressure in the fuel rail, regardless of engine demand (RPM, load) or pressure in the intake manifold.
    • Details:
      • Principle: It acts as a relief valve. It allows excess fuel to return to the tank via the return line (“fuel return”) when the pressure exceeds the set value.
      • Variation: In some returnless systems, regulation is achieved by modulating the speed of the fuel pump itself, controlled by the ECU, thus eliminating the need for a mechanical regulator and the return line.
  5. The Fuel Rail (or Injector Rail):
    • Function: To distribute pressurized fuel to each of the injectors equally and to serve as a buffer volume to dampen pump pulsations.
    • Details: Rigid piping (usually made of steel or aluminum) connected to the pump/regulator outlet and to which the injectors are attached. It often includes a fuel pressure sensor.
  6. The Injectors:
    • Function: To spray the fuel as fine droplets (atomization) into the intake manifold (indirect injection) or directly into the combustion chamber (direct injection), according to precise metering and timing controlled by the engine control unit (ECU).
    • Details:
      • Control: Electrical. The ECU sends an electrical signal that opens the injector valve for a very precise duration (injection time, in milliseconds), thus controlling the amount of fuel injected.
      • Precision: These are high-precision components. Their orifices are very fine and sensitive to clogging (hence the importance of the filter).
  7. The Piping (Fuel Lines):
    • Function: To ensure the transport of fuel between the different components of the system.
    • Details:
      • Supply (HP): High-pressure resistant pipes (usually made of steel or reinforced synthetic material) between the pump and the fuel rail.
      • Return (LP): Low-pressure pipes (often made of hydrocarbon-resistant rubber or plastic) for excess fuel returned to the tank (in systems with a return line).
      • Sealing: The sealing of the entire circuit is paramount for safety and proper operation.
  8. The Filler Cap:
    • Function: To allow filling of the fuel tank while ensuring a tight and secure closure. It usually includes a vapor venting system.
    • Details: Often equipped with a locking system and a sealing gasket. It must be compatible with the type of fuel and comply with anti-pollution standards (vapor recovery).
  9. The Canister (Vapor Canister):
    • Function: To trap hydrocarbon vapors that naturally escape from the fuel tank to prevent them from being released into the atmosphere.
    • Details: Contains activated charcoal that absorbs the vapors. The engine control unit periodically commands a valve (purge valve) to purge these vapors into the intake manifold where they are burned in the engine, thus contributing to compliance with anti-pollution standards.
  10. The Fuel Pressure Sensor:
    • Function: To measure the fuel pressure in the fuel rail in real time.
    • Details: Sends an electrical signal proportional to the pressure to the engine control unit (ECU). The ECU uses this information to:
      • Control the fuel pump (flow/pressure).
      • Correct the injector opening time for optimal metering.
      • Detect anomalies (pressure too low = lack of power, pressure too high = risk of leak).
  11. The Engine Control Unit (ECU):
    • Function: The “brain” that supervises and controls the entire injection system (and much more).
    • Details: Receives information from multiple sensors (fuel pressure, air flow, throttle position, temperature, engine RPM, lambda sensor, etc.). Based on this data, it calculates in real time the optimal amount of fuel needed and commands:
      • The injector opening time.
      • The fuel pump pressure (in returnless or diesel common rail systems).
      • The canister purge.

Component Interaction:

The operation is a chain: Fuel is drawn from the tank by the pump. It passes through the filter to be purified. The pressure is regulated by the regulator (or by controlling the pump itself in returnless systems). The pressurized fuel is distributed by the fuel rail to the injectors. The ECU, based on information from its sensors (including the pressure sensor), commands the precise opening of the injectors to inject the right amount of fuel at the right time. Vapors from the tank are captured by the canister and purged to the engine. The whole system is connected by the piping and sealed by the filler cap.

  • Importance: An efficient Fuel Supply System ensures optimal engine performance.
  • Conclusion:

    Each component of the fuel supply system plays a specific and indispensable role in the chain from storage to injection. A malfunction of any one of them (weak pump, clogged filter, fouled injector, faulty regulator, leak in a pipe) can lead to a range of problems: hard starting, loss of power, misfires, high fuel consumption, excessive smoke, or even the inability to start. Regular maintenance (replacing the filter as recommended, using quality fuel) and prompt diagnosis in case of symptoms are essential to ensure the vehicle’s reliability, performance, and environmental cleanliness.

  • Environmental Impact: A high-performing Fuel Supply System reduces greenhouse gas emissions.
  • Technological advances allow for the optimization of the Fuel Supply System for better energy efficiency.

    In summary, the Fuel Supply System is crucial for the vehicle’s performance and durability.

    Gear Lever Stuck in Neutral: Causes and Solutions | Auto Expert

    Ready to hit the road, you find that your gear shift stubbornly refuses to leave the “Park” position. This malfunction, as frustrating as it is worrying, can ruin your day and force you to call a tow truck. Discover the possible causes and solutions to fix it. If you’re wondering why your stuck gear lever remains jammed, we have the answers.

    What are the causes of a stuck gear lever?

    Several technical failures can prevent your vehicle from coming out of neutral. Here are the most common origins:

    Failure of the Ignition Switch

    To release the lever, the vehicle must be in the “on” or running position. If the switch does not transmit this signal, the safety lock does not deactivate.

    Problem with the Gear Lever Lock Solenoid

    An open circuit or a seized solenoid can mechanically block the lever. If this component is faulty, replacing the entire gear lever assembly may be necessary.

    Faulty Brake Light Switch

    This system informs the computer that you are pressing the brake pedal. If it is defective, the car does not detect your action and maintains the lock.

    Seized Parking Pawl

    This is a metal pin that physically locks the transmission in the park position. It can sometimes get stuck.

    How to diagnose a stuck gear lever problem?

    Our diagnostic process begins with a mechanical inspection under the vehicle to inspect the gear lever and potentially manually unjam it. Our technicians then expertly assess each component of the locking system: solenoid, brake light switch, ignition switch. Access to the center console is often required for a thorough check. The procedure varies depending on the model (car, truck, 4×4).

    Preventive maintenance of the gear lever

    Although some failures are unpredictable, basic maintenance extends the life of the lever. Keep it clean, avoid spilling drinks, and operate it precisely and smoothly. If your lever shows signs of weakness, even occasionally, consult an automotive repair professional without delay.

    At HomeTowne Auto Repair & Tire, we specialize in all-makes repairs and electronic diagnostics. Do not hesitate to contact us for a personalized quote.

    Car Air Conditioning Leaks: Sources, Symptoms, and Diagnosis

    Car air conditioning leaks can occur in any part of the air conditioning system. Any component containing refrigerant is a potential leak point. While sometimes they are easy to spot, they can also be perfectly concealed. A car air conditioning leak can have significant consequences on the operation of your vehicle. It is crucial to maintain the air conditioning system in good condition, as a failure can lead to costly repairs and discomfort during the hot months.

    To better understand how the air conditioning works in your car and the reasons why leaks can occur, let’s examine the system’s components and the warning signs of a leak in more detail.

    The Consequences of an Air Conditioning Leak

    How to Prevent Air Conditioning Leaks?

    To prevent car air conditioning leaks from occurring, it is essential to perform regular system maintenance. This includes checking refrigerant levels, inspecting seals and connections for signs of wear, and cleaning the condenser to prevent corrosion. Additionally, it is recommended to run the air conditioning for a few minutes each month, even in winter, to keep the system in good condition.

    A leak in the air conditioning system doesn’t just mean less cool air in your car. It can also cause premature wear of the system’s components, which can lead to higher repair costs. For example, if the air conditioning compressor operates without an adequate level of refrigerant, it can overheat and eventually fail.

    Furthermore, leaks can lead to potential health problems. An air conditioning system that is not functioning properly can also promote the growth of mold and bacteria, which can contaminate the air inside the vehicle. This can cause allergies or respiratory issues for passengers.

    Common Sources of Air Conditioning Leaks

    It is essential to quickly detect any car air conditioning leak to avoid costly repairs and ensure optimal system performance.

    Car air conditioning leaks can have several origins. Improper or neglected maintenance can exacerbate these problems. The entire system should be inspected regularly, and any anomalies should be corrected promptly. Refrigerant leaks can also occur due to physical damage, such as road impacts or debris hitting vulnerable components.

    It is also vital to pay attention to signs of a faulty air conditioning system, such as strange noises, excessive vibrations, or a change in the odor of the air expelled from the vents.

    Rubber Seals

    With daily wear and heat cycles, rubber sealing seals become brittle and eventually leak.

    Best Practices for Diagnosis

    When diagnosing an air conditioning leak, it is recommended to follow a series of systematic steps. Start with a thorough visual inspection to detect obvious signs of leaks. Use a mirror to examine hard-to-reach areas. Then, apply a soapy solution to the seals and connections to identify bubbles formed by escaping gas. This simple method can often reveal leaks invisible to the naked eye.

    The Air Conditioning Condenser

    Corrosion, caused by external agents like weather or salt, can puncture the metal of the condenser and create micro-leaks. An impact can also damage it.

    The Evaporator Core

    The evaporator, located in the passenger compartment, can also have sealing defects, often indicated by the presence of ultraviolet dye in the condensation drain tube.

    Conclusion

    Car air conditioning leaks are a common but often overlooked problem by vehicle owners. By understanding the potential sources of these leaks and knowing how to detect them, you can avoid costly repairs and keep your air conditioning system in good condition. Remember that preventive maintenance is key to ensuring your air conditioning functions properly. If you suspect a leak, do not hesitate to consult a professional for an appropriate diagnosis.

    Ultimately, vigilance and care for your air conditioning system can ensure optimal comfort during your journeys, especially on hot summer days. Take care of your vehicle and protect yourself from the inconveniences caused by a car air conditioning leak.

    Rubber Lines and Connections

    These elements undergo extreme temperature variations, which can, over time, cause leaks to appear at the connections or hoses.

    How to Recognize the Symptoms of a Leak?

    The most obvious sign is an air conditioning system that no longer cools properly, often due to a low refrigerant level. To confirm a leak, technicians use several methods:

    Ultraviolet Dye: Added to the circuit, it becomes fluorescent under a UV lamp, revealing the precise location of the leak, even if it is minimal.

    Smoke: For significant leaks, the escaping refrigerant gas can be visible as smoke escaping from the engine.

    The Electronic Detector (“Sniffer”): Particularly useful for modern R-1234yf systems, this device detects the presence of the gas in the air.

    The Importance of Calling a Professional

    Although some diagnostics can be performed by knowledgeable vehicle owners, it is often preferable to call a professional for car air conditioning leaks. Qualified technicians have the necessary equipment to accurately detect leaks and perform the required repairs. They can also provide advice on preventive maintenance to avoid similar problems recurring in the future.

    Diagnosis always begins with a visual inspection to identify any obvious problems. If nothing is visible, a UV dye and tracer oil are injected into the system, which is then recharged. After the customer has driven for a few days, the vehicle is re-inspected to locate the leak thanks to the fluorescent trace left by the dye.

    HVAC Blower Motor Failure: Causes, Symptoms, and Solutions

    What can cause the failure of the blower motor? On a hot summer day, a reliable flow of fresh, cool air in your car is vital. The blower motor is responsible for sending this air through the vents. If it is defective, you and your passengers will be without air conditioning. It is important to understand the potential reasons for this failure to better anticipate and solve problems. Indeed, the blower motor plays an essential role not only in the thermal comfort of your vehicle but also in the quality of the air you breathe inside. A motor in good condition ensures optimal air circulation, thereby reducing the risk of condensation and mold formation.

    Symptoms of a Failing Blower Motor

    It is essential to recognize the symptoms of a failing blower motor to avoid costly repairs. Often, preventive maintenance can extend the life of this crucial component. By taking the time to listen to the noises emitted by your ventilation system and regularly checking the airflow, you can detect problems before they become serious.

    Is air no longer coming out of the vents when the air conditioning is on? Is the problem intermittent? The blower motor is often the culprit. Here are the common signs indicating that it needs to be replaced: If in doubt, it may be wise to consult a professional for a complete diagnosis, as some of these symptoms can also be related to other air conditioning or ventilation problems in the vehicle.

    Signs to Recognize

    – Weak or non-existent airflow at the highest speed levels, which may indicate that the motor is weakening.
    – Abnormal noises: grinding, humming, knocking, or vibration, which may signal internal damage to the motor.
    – A very loud buzzing, which may indicate an electrical problem or a motor imbalance, requiring immediate attention.
    – Fan speeds that no longer work. If one or more speeds do not work, the fault may lie with the motor itself or the resistor that controls the speed. A thorough inspection is recommended to determine the exact source of the problem.

    – Weak or non-existent airflow at the highest speed levels.
    – Abnormal noises: grinding, humming, knocking, or vibration.
    – A very loud buzzing, which may indicate an electrical problem or a motor imbalance.
    – Fan speeds that no longer work. If one or more speeds do not work, the fault may lie with the motor itself or the resistor that controls the speed.

    Main Causes of Failure

    Time, wear and tear, and poor operating conditions can cause the failure of this component. Several factors can combine their detrimental effects, making understanding the causes essential for the optimal use of your vehicle.

    The blower motor can encounter problems due to the accumulation of dirt and debris in the ventilation system. Environmental factors, such as pollution or pollen, can worsen this problem. It is therefore crucial to keep these elements in mind when maintaining your vehicle.

    A Neglected Cabin Air Filter

    Blower motors are sealed units. The best prevention is to keep the cabin air filter clean. Over time, it accumulates dirt, dust, leaves, and debris. If these elements clog the filter, the motor has to work harder to draw in air, causing it to overheat and potentially leading to premature failure. Regularly cleaning the air intake area (cowling) is also recommended. In fact, a clean filter can improve the efficiency of your air conditioning system and reduce fuel consumption.

    Blower motors are sealed units. The best prevention is to keep the cabin air filter clean. Over time, it accumulates dirt, dust, leaves, and debris. If these elements clog the filter, the motor has to work harder to draw in air, causing it to overheat and potentially leading to premature failure. Regularly cleaning the air intake area (cowling) is also recommended.

    In conclusion, the blower motor is a key element for your driving comfort and safety. Taking care of this component by regularly checking its condition and performing preventive maintenance can save you time and money in the long run. Remember that early warning signs can alert you to a potential failure. Be attentive and do not hesitate to consult a professional for a thorough diagnosis if you encounter problems.

    Electrical Problems and Overheating

    Wiring problems can occur. A bad connection, a poor ground, or a lack of resistance can cause extreme overheating. It is not uncommon to find the resistor connector and the blower motor connector melted and fused together, requiring the replacement of both parts. To prevent these problems, it is advisable to have your vehicle’s electrical system regularly checked by a professional.

    Wiring problems can occur. A bad connection, a poor ground, or a lack of resistance can cause extreme overheating. It is not uncommon to find the resistor connector and the blower motor connector melted and fused together, requiring the replacement of both parts.

    Rodent Intrusion

    Rodents can present their own challenges. They can enter through the air ducts, chew on electrical wires, or even build their nest in the cabin air filter, causing damage and blockages. To avoid this problem, it is recommended to use natural repellents or regularly check the condition of the air ducts. Furthermore, if you suspect an infestation, it is crucial to act quickly to avoid costly repairs.

    Rodents can present their own challenges. They can enter through the air ducts, chew on electrical wires, or even build their nest in the cabin air filter, causing damage and blockages.