Transmission fluid and gear oil are two different liquids that belong to the category of lubricants. Depending on the application of these oils in equipment, their functionality can vary significantly. When we talk about transmission fluid VS gear oil, many factors play a role in differentiating these two components.
So, let’s get started!
Transmission Fluid or Gear Oil: Which is Better
To understand the difference between transmission fluid and gear oil, aspects such as viscosity, heat resistance, and pressure tolerance play an important role. So, let’s measure the effectiveness of both fluids based on these aspects.
1. Viscosity
Viscosity indicates the thickness of a liquid. Transmission fluid has low viscosity. It is fluid and lubricates the delicate parts of the car’s system. The viscosity of transmission fluid ranges between 0W/5 and 5W/10. Transmission fluid is fluid because it must continuously flow from the engine to other parts to transmit power.
When talking about the viscosity of transmission fluid compared to gear oil, of course, gear oil is thicker. The reason is the function of gear oil, which is to lubricate the entire gear train. It provides a damping effect that protects the gears from damage caused by shocks. The viscosity of gear oil is 5W/30.
2. Heat Resistance
Transmission fluid also acts as a coolant. It typically transfers heat, resulting from friction, from various internal parts. But, since it is thin and has a lower boiling point, heat can reduce the lifespan of the transmission fluid.
Heat resistance of transmission fluid and gear oil. Source: Youtube
On the other hand, gear oil is capable of withstanding the temperature increase in the gearbox. Unlike transmission fluid, it does not evaporate when transferring heat from the gear train. Therefore, the thickness of gear oil increases its lifespan.
3. Pressure Tolerance
The operation of the gearbox involves significant pressure. Therefore, gear oil can easily withstand the highest pressure. Gear oil works well even with hypoid gears. The oil remains stable when the vehicle is running and operates consistently.
Transmission fluid, on the other hand, does not perform well under pressure. Instead, it is more effective at fulfilling other functions such as cleaning the channel between components and anti-foaming. When transmission fluid transfers power to the engine and other parts, airflow becomes vital. The anti-foam property of transmission fluid helps it combat airflow and function properly.
4. Gear Ratio
Gear oil is used in components with different gear ratios, such as manual transmissions and differentials, where gears are responsible for transferring power and torque to the wheels. Transmission fluid, on the other hand, is used in automatic transmissions that rely on a complex system of planetary gears and torque converters to vary gear ratios.
5. Maintenance Intervals
Gear oil is typically changed less frequently than transmission fluid. The drain intervals for manual transmission and differential oil can vary depending on manufacturer recommendations, but they are generally longer than the maintenance intervals for automatic transmission fluid.
6. Additives
Transmission fluids often contain additives that enhance friction properties, ensure better heat dissipation, and prevent foam formation. Gear oils typically contain additives that improve protection against extreme pressures, anti-wear properties, and corrosion resistance.
7. Equipment Compatibility
Gear oil is designed to withstand the high pressures and sliding friction that occur in gears. It contains specific additives to protect gear teeth and bearings from wear. Transmission fluid, on the other hand, is formulated to work with the clutches, bands, and valve bodies of an automatic transmission, where lubrication requirements are different.
The Verdict
You can use transmission fluid inside the gearbox, but it is not possible for an automatic transmission. Gear oil is far too thick for a transmission system and could block the entire functionality. In the worst case, use maintenance advice or contact a mechanic as soon as possible.
Transmission fluid or gear oil: which is better for your vehicle? Source: Youtube
The golden rule for choosing the best transmission or gearbox oil is the one recommended for your vehicle. This way, you can play it safe with your car’s durability. So, choose the most suitable fluid for your vehicle now!
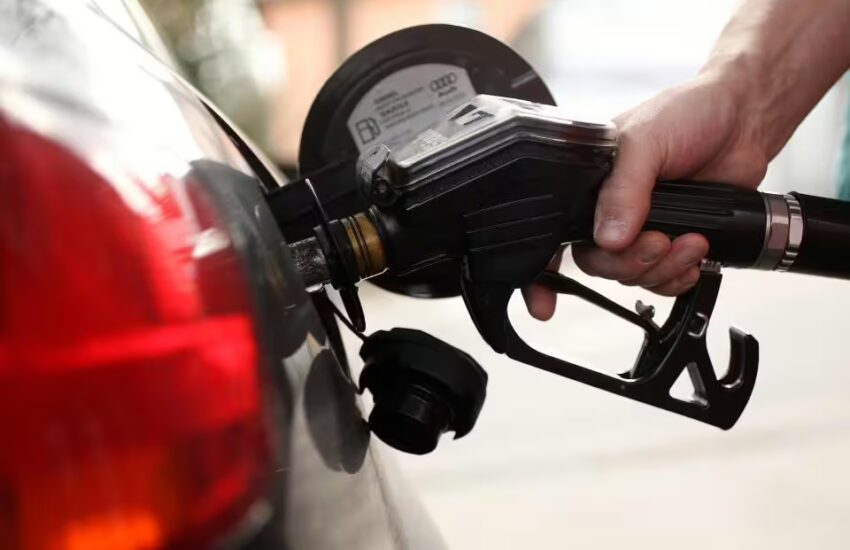
The greatest impact on fuel consumption?
Several questions come to mind when a car’s fuel consumption suddenly becomes poor. For example, what is the source of the problem? Is it the driving style, the engine oil, or a vehicle component causing the poor fuel consumption?
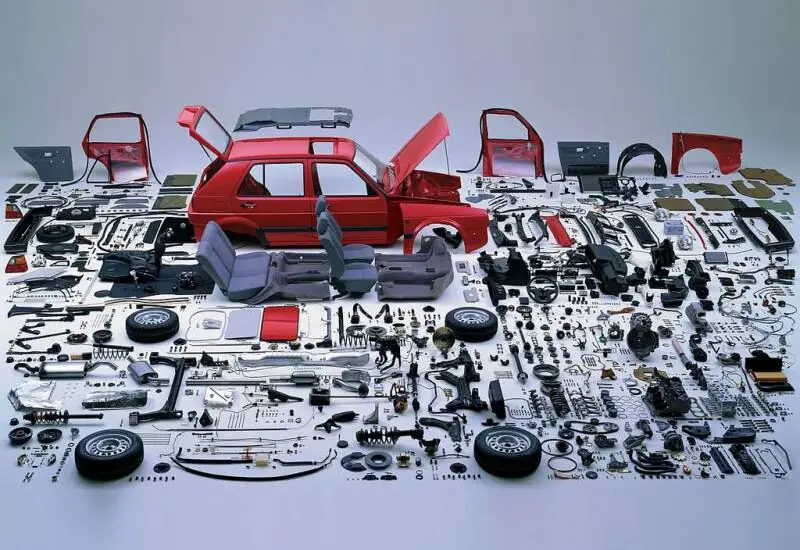
To find out the exact reasons, we have identified the vehicle component candidates that are largely responsible for impacting the vehicle’s mileage.
Important Car Parts for Fuel Economy
After spending a considerable amount on fuel every day, if you are now looking for ways to save that money, try replacing worn parts. Otherwise, follow some essential car part maintenance tips to increase mileage.
1. Oxygen Sensor
All cars manufactured after 1995 are equipped with this component mounted on the exhaust system. By calculating the flow of exhaust gases before and after the catalytic converter, the component sends the information to the onboard computer (adjusting fuel injection based on the data).
However, if this vehicle component that affects fuel consumption is not working properly, transmitting inaccurate data will directly affect fuel consumption.
2. Mass Air Flow Sensor
The most important component contributing to energy efficiency is the mass air flow meter. By measuring the amount of fuel entering the engine, the mass air flow sensor transmits the calculated data to the vehicle’s computer.
Here, if a faulty MAF disrupts the imbalance calculation, it generally affects fuel injection, leading to poor fuel consumption. Therefore, analyzing computer codes is what can help you determine the condition of the MAF.
Tip: the trouble code pointing to the MAF is a sign of a faulty component.
3. Air Filter
The very name “air filter” describes the component’s function. And if air continuously passes through dirty filters, it results in reduced fuel consumption (especially in older cars).
Vehicle components that save fuel. Source: Youtube
Therefore, replacing air filters on time is an easy, quick, and wise thing to do.
4. Spark Plug
New or clean spark plugs ignite the air/fuel mixture in the engine’s combustion chamber. However, in case of high fuel consumption, oil overflowing from these plugs can cause misfires.
In addition to that, when the car vibrates and struggles to accelerate, it clearly indicates insufficient fuel consumption. There are two reasons for this terrible fuel economy: either a worn ignition coil or a dead spark plug. And, usually, it’s the faulty ignition coil, resulting from engine heat.
5. Tires
A car’s energy efficiency and handling are directly affected by underinflated, misaligned, or worn tires. Responsible for maintaining friction between the vehicle and the road surface, their timely inflation, pressure, and alignment checks are essential!
Managing car fuel consumption. Source: Advance Auto Parts
Finally, in addition to maintaining these vehicle components, one can increase fuel economy even by following some driving tips like gradual acceleration and light braking.
The simplest method to replace a brake booster
You need to replace the brake booster when your car’s brakes don’t seem to be working properly.
A brake booster is a vacuum-powered machine that increases the pressure applied to the brakes.
It works by drawing power from the vehicle’s vacuum system and helping the ABS system exert the right amount of pressure on the brakes to make them work properly.
How to know if a brake booster repair is necessary?
The easiest way to know is to check if your car’s brakes are working correctly. Do you need to apply more pressure than usual to stop the car?
Does your vehicle take longer to stop after pressing the brake pedal? If yes, you probably need to replace the brake booster.
A faulty brake booster can lead to serious accidents. Therefore, you should address the issue as soon as possible. Discover the process of replacing the faulty brake booster with a new one:
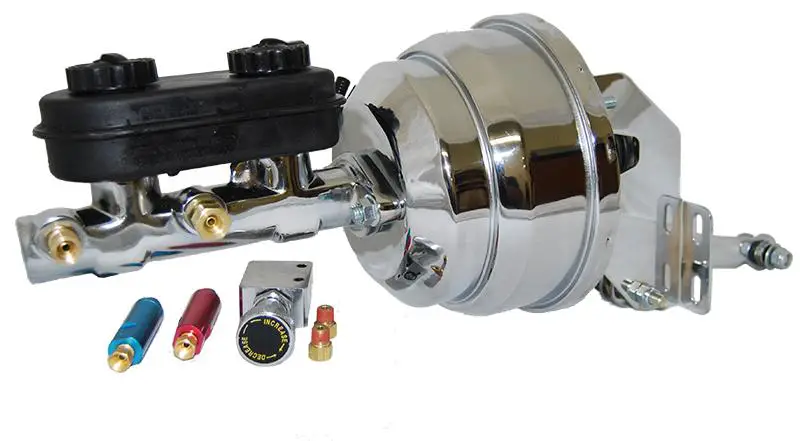
A faulty brake booster can lead to serious accidents. Photo credit: Performance Online
Brake Booster Replacement: Tools and Supplies
Screwdriver
A socket wrench
A tube nut wrench
Brake fluid
A floor jack
A new brake booster
Brake Booster Replacement: Instructions
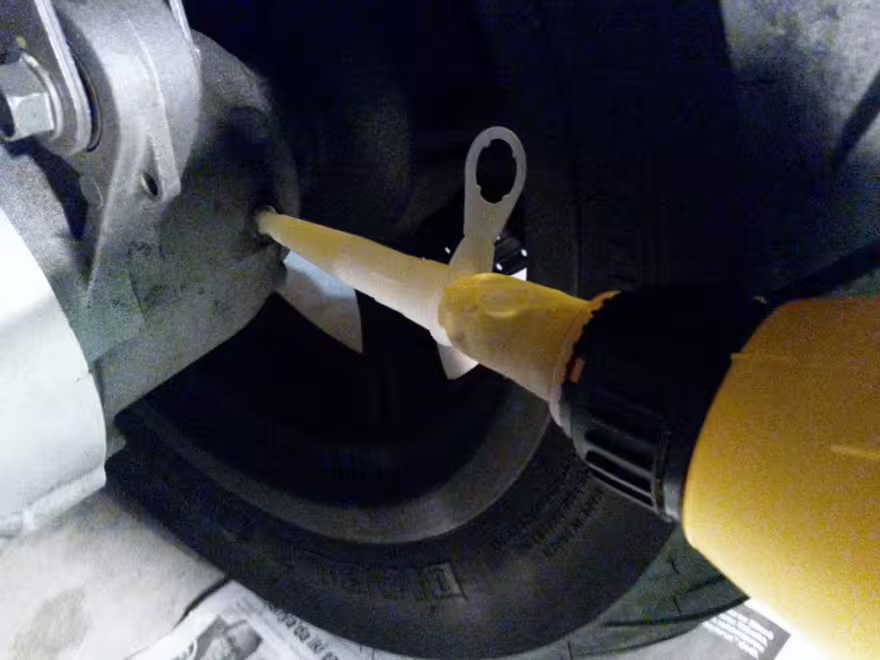
The brake booster is placed behind the brake master cylinder’s firewall. So, lift the car from that side with a jack and remove the tires.
Disassemble the master cylinder. Open the metal brake cover using a socket wrench to access the master cylinder.
Use the tube nut wrench to loosen the tube nuts of the brake lines that are connected to the master cylinder. Disconnect the cylinder from the brake lines using an open-end wrench.
Check the master cylinder to see if it has a leak or a defect. Proceed to the next step after inspection.
Remove the faulty brake booster. You will see the brake booster after removing the master cylinder. Disconnect it from the brake pedal and the vacuum hose by removing the nuts connecting it to the brake pedal.
Next, remove the bolts that keep it attached to the firewall. This way, you can completely disconnect it from the master cylinder.
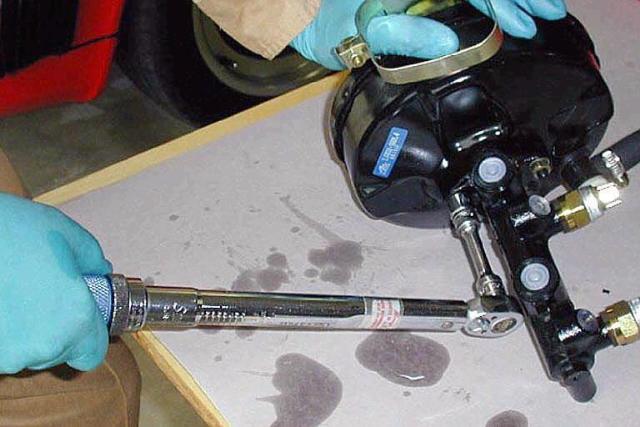
Check the master cylinder to see if it has a leak or a defect. Photo credit: Pelican Parts
Attach the new brake booster. Position the new brake booster in the place where the old one was. Attach it to the firewall by turning and tightening the bolts and nuts. Then, attach it to the brake pedal.
Reconnect everything. In this step, you will need to reconnect the brake lines and the master cylinder to the brake booster. You will need to fill the master cylinder with brake fluid in case it is empty.
Attach the tires, remove the jack, and start the engine to check if the braking system is working correctly.
FAQ
1. Can weather conditions affect the brake booster replacement process?
Extreme temperatures can affect some components you will handle during the replacement process, such as seals and the behavior of the brake fluid.
Cold can make rubber seals harder and more brittle, which can complicate their installation. Similarly, high temperatures can make some plastics and rubbers too soft. It is best to work in a temperate and stable environment.
2. Is there a way to test the functionality of the new brake booster before completing the installation?
Before fully attaching the new brake booster and reassembling all components, you can perform a preliminary check by ensuring the brake booster maintains vacuum. With the engine off, press the brake pedal several times to eliminate residual vacuum.
Then, while pressing the pedal, start the engine. The pedal should noticeably sink toward the floor if the booster is working correctly. This test confirms the booster’s ability to provide power assistance.
3. How do the make and model of my vehicle influence the choice of a replacement brake booster?
Brake boosters are not universally interchangeable between all vehicles due to differences in size, mounting configuration, and vacuum requirements.
Make sure to select a replacement part specifically designed for your vehicle’s make and model. Using an incorrect brake booster can lead to brake malfunction or installation issues.
4. What specific tools might I need that are not found in a standard toolkit?
Replacing a brake booster may require vehicle-specific tools, especially for detaching the master cylinder or the brake booster itself from the firewall. These may include special sockets for wrenches.
Additionally, a vacuum pump may be needed to test the booster’s vacuum capability.
5. Can replacing the brake booster affect my vehicle’s ABS system?
Although the brake booster itself is a separate component from the anti-lock braking system (ABS), care must be taken not to introduce air into the ABS module when disconnecting and reconnecting the brake lines to the master cylinder.
The presence of air in the ABS system may require a more complicated bleeding process, sometimes needing professional equipment to operate the ABS valves correctly.
6. After replacing the brake booster, why might the brake pedal feel different?
The brake pedal feel may change due to the new brake booster providing a different level of power assistance than the old one, especially if the old brake booster was failing and not providing adequate assistance.
A slight adjustment period is normal, but if the pedal feel is significantly different or does not return to normal after a few drives, recheck the installation and bleed the brakes to ensure there is no trapped air in the system.
Final Words
Considering these unusual aspects of brake booster replacement can help ensure a smoother repair process, enhancing both safety and performance after replacement.
Always consult your vehicle’s service manual for specific instructions and precautions, and consider seeking professional assistance if you encounter difficulties during the replacement process.
Water-contaminated fuel problem? Here’s what to do
Those who have been driving cars for a long time are familiar with this problem. Yes, the problem of water-contaminated gasoline is a real issue, and you need to know how to deal with it.
There can be incidents that may be your fault or the gas station’s fault that can lead to this contamination. So, before tackling this problem, you need to know why it happens.
How the Problem of Water-Contaminated Gasoline Occurs
There could be water in any gas tank, including in the best sedans and SUVs, and the reason could be one of the following two:
You may have accidentally left the gas cap open during rain or snow.
The gas station where you filled up your car had a faulty water filter, which was sending a quantity of water with the gasoline.
There is very little chance that condensation is the cause of this problem, as fuel tanks are usually very well sealed in most vehicles.
It could be due to one or the other reason. The fact is that you need to recognize it and find a way to remove the water from the gas tank.
Reasons behind the problem of water-contaminated gasoline (Photo source: istockphoto)
Symptoms of Water in the Gas Tank
Here are some symptoms that indicate the presence of water in the gas tank. If you notice them, be sure to resolve the problem as soon as possible. If water remains in the fuel tank for a long time, it risks rusting your car’s fuel system.
Sudden Change in Vehicle Performance
This change manifests as jerky driving. The car constantly stutters and hesitates during acceleration, especially when going up a slope or trying to reach highway speed.
Revving and Jerking at High Speed
Alternatively, you might feel like your car is accelerating or reaching a high speed when you don’t really expect it.
These symptoms of water-contaminated gasoline problem occur when the injectors suck in the water droplet present in the fuel.
Water and gasoline do not burn the same way. When water is sprayed by the injection, the piston receives no element to push into the combustion chamber.
This produces steam. So, when your car reaches a high speed, it’s likely a new injection of fuel after the water that is causing it.
How to Remove Water from the Gas Tank?
The first thing to do is to find a safe place and stop your car immediately, if the water hasn’t already done so. The simplest way is to drain the entire volume of gasoline and refill it with a new load.
It seems expensive, but it’s the best solution. After draining it, let it sit for a while.
The simplest way to solve the problem of water-contaminated gasoline (Photo source: furulevi/Youtube)
The best solution is to use a drying agent in the form of a fuel additive. Traditional drying agents need to be used with alcohol, which is a bit tedious.
It is generally suitable for older cars whose fuel system parts and seals are made with sensitive materials. However, the newer types are the best solutions for most modern cars.
If all this seems too technical for you, calling a professional mechanic will be the wisest thing you can do.
FAQ
How does water get into the gas tank?
Water can enter a vehicle’s gas tank through several pathways, including condensation inside the tank (especially during temperature changes), contaminated gasoline purchased from a gas station, or leaks in the tank or fuel system components that allow rainwater or moisture to enter.
Can water-contaminated gasoline damage fuel injectors?
Yes, water-contaminated gasoline can damage fuel injectors. Water does not compress and burn like gasoline, leading to improper fuel spray, reduced fuel efficiency, and can cause injectors to clog or fail.
Is there a way to remove water from my gas tank without draining it?
While some additives claim to remove small amounts of water by encapsulating the water molecules and allowing them to burn during combustion, significant water contamination usually requires draining the tank.
These additives should be used with caution and according to the manufacturer’s instructions.
How can I tell if the gasoline in my tank is contaminated with water?
Symptoms of water-contaminated gasoline include engine misfires, rough idling, difficulty starting the engine, and decreased fuel efficiency.
In some cases, you might notice a separation of layers in the gasoline if you look at it in a clear container, with water settling at the bottom.
Can water-contaminated gasoline cause rust inside the fuel tank?
Over time, water present in the fuel tank can lead to rust and corrosion, especially in metal tanks.
This not only compromises the tank’s integrity but can also lead to further contamination of the fuel system, as rust particles are carried along with the gasoline.
What should I do if I accidentally fill my tank with water-contaminated gasoline?
If you suspect you have filled your tank with contaminated gasoline, it is important to stop driving the vehicle as soon as possible to minimize damage.
Arrange for the vehicle to be towed to a service center where the tank can be drained, the fuel system flushed, and components inspected for any damage.
Are some vehicles more likely to be damaged by water-contaminated gasoline?
While all vehicles can be affected by water-contaminated gasoline, those equipped with high-performance engines or direct injection systems may be more sensitive to fuel quality issues.
These engines rely on precise fuel delivery for optimal performance, and water contamination can more easily disrupt their operation.
Can water-contaminated gasoline freeze in fuel lines during winter?
In very cold weather, water present in the fuel lines can freeze, potentially blocking the fuel flow and causing engine stalling or starting difficulties.
This phenomenon is more likely in regions with harsh winter conditions and underscores the need to promptly address any water contamination.
Final Words
Resolving the problem of water-contaminated gasoline is essential for maintaining vehicle performance and preventing long-term damage.
If you suspect your gasoline is contaminated, taking immediate action to address the issue can save you from more serious and costly repairs later on.
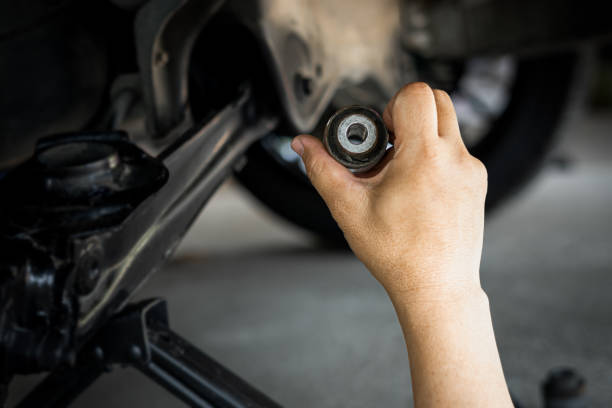
What are the signs of defective ball joints and how to fix them
Ball joints, which are part of the suspension system, play an essential role. These ball joints are responsible for connecting a car’s or any other vehicle’s control arm to the steering knuckles. In this way, the ball joints manage the overall movement of the front wheels and the suspension. Sometimes, ball joints wear out, but this can be identified using the symptoms of a faulty ball joint.
Before learning how to tell if a ball joint is faulty or the signs of bad ball joints, let’s find out what a ball joint is in a car.
What is a Ball Joint in the Suspension System?
A ball joint is an essential component of a car’s suspension. In modern car generations, all cars use ball joints. Furthermore, a ball joint is a spherical bearing placed in a mechanical socket. It plays a crucial role in the car, much like the ball-and-socket structure in the human body. In the car, it acts as the pivot point to connect the car’s control arms to the steering. The front ball joints allow the front wheels and suspension to move in different directions, thus providing optimal vehicle movement.
Ball joints are hinges for your vehicle’s wheels. So, if a situation of “faulty ball joints” occurs, the wheel’s performance will be worse, and the wheel will not retract into alignment. The wheel will not move straight, and this will have various other side effects on your car’s performance as well as safety. Therefore, it is necessary to diagnose the symptoms of a faulty ball joint to save your car in time.
Symptoms of a Bad Ball Joint: Knowing if a Ball Joint is Faulty
We will describe here some situations that occur only when there is a problem with the suspension system or the ball joints. In other words, these are the symptoms of a broken ball joint. It is recommended that once you encounter any of these conditions, take your car to a professional repairer, as leaving your car with the symptoms of a worn ball joint will damage your car and your health as we mentioned above.
The Steering Wheel Wanders
The first symptom of a faulty ball joint is the steering pulling to the left or to the right. At first, the signs may be subtle or not very pronounced and become noticeable enough during a single trip. However, this is one of the symptoms of a faulty ball joint, where the overall driving experience is compromised. When you feel that the vehicle is no longer as stable as before, something is not working correctly.
Steering pulling to the left or right is a symptom of a bad ball joint. (Photo: iStock)
It is quite noticeable every time you use this steering wheel, and it makes you think instead of giving you that stability. It’s as if the steering wheel shakes every time you take turns that were once precise.
This can be considered a stage where the ball joints have started to wear out, and therefore, one should not wait any longer. Driving without fixing the situation only makes it worse. The ball joints are not necessarily worn out, but they may be loose. Entrust it to a professional and find out the exact reason why you are not getting a quality drive.
Noise: Clunking or Knocking
If you hear a loud, dull noise while driving, it is due to faulty ball joints. Even a slight bump or your car going over a pothole can make you hear this noise. This indicates that there is a problem with the suspension and that due to worn parts, the shock absorption property is not working well.
At first, the noise may not be unpleasant, but over time, if you do not address the issue, it becomes more intense. This situation can be life-threatening and only gets worse over time. Ball joints affect the overall chassis of the vehicle, and if a ball joint breaks completely, you will have no control over the vehicle when moving it in a particular direction.
Tire Wear
Tire tread is also a good factor for recognizing whether your car has symptoms of faulty ball joints or not. You may experience an irregular ride where the tires wobble unusually. This happens because the ball joint causes the tires to point outward. As a result, the tire appears worn on one side and in good condition on the other. This condition is easily visible on both front tires when there is a problem with the joints.
One of the symptoms of a bad ball joint is excessive vibration coming from the vehicle’s suspension (Photo: iStock)
The wear occurs on one side of the tire tread and extends to the middle area to some extent. This pattern repeats on both tires, resembling camber wear, but in a milder version. The problem directly shows that the issue comes from the suspension system, and most often, it is the ball joint.
Excessive Vibrations from the Front of the Vehicle
One of the symptoms of a bad ball joint is excessive vibration coming from the vehicle’s suspension. Worn ball joints will be loose in their housings and vibrate excessively when the vehicle is in motion. The vibration usually comes from the affected ball joint, either on the right or left side of the vehicle. In some cases, car owners may even feel the vibration through the steering wheel.
The Danger of Worn Ball Joints
A worn ball joint is not a problem to postpone: a catastrophic failure of a ball joint will cause the front suspension to break and loss of control of your vehicle. Therefore, you should absolutely have your vehicle checked by your trusted mechanic, who has experience in diagnosing and repairing suspension problems.
If you continue to drive a car showing symptoms of faulty ball joints, the entire suspension can be damaged. In some cases, your car’s ball joint can easily seize. When it seizes, the movement it usually absorbs does not disappear, which has detrimental effects on the car’s performance. Therefore, the movement will be transferred to other components that are forced to accept the unusual movement due to the ball joints being the suspension arm bushings. As a result, the bushings will easily become damaged.
A bad ball joint can cause a lot of damage to your car (Photo: iStock)
Secondly, worn ball joints can lead to car accidents when they break completely. The ball joint can break in different ways. First, it can detach from the socket and break. Regardless of the type of break, the result is usually dreadful. Any damage to the ball joint means the car’s wheel can move in any direction. This problem can affect your ability to maintain optimal control of the vehicle when driving on the road. Car accidents can happen at any time. Be aware of this and take your car to the mechanic for testing and repair as soon as you notice the unusual movement of your car.
How Far Can You Drive with Faulty Ball Joints?
It depends on the severity of the damage to the ball joints or how worn they are. If you are driving with faulty ball joints, in most cases, you can drive for 800 km without a serious problem. However, you must first measure the intensity of the worn ball joints. If you find that the entire chassis is moving here and there, it is not safe to continue driving.
However, car owners can still drive a few kilometers even if their vehicle is making squeaking noises. So, there are no fixed rules regarding how many kilometers you can drive; you must prove your presence of mind in this case.
The Overall Replacement Cost
Generally, the overall cost of replacing a faulty ball joint depends on the condition of your vehicle. A rough estimate would be $220 to $300. This includes both the cost of parts and labor. Furthermore, the overall condition of the suspension system also affects the cost. To prevent your car battery from draining on its own, read the maintenance tips here.
You should go to several auto parts suppliers and confirm the prices. Choose the one that seems to offer a reasonable price, but don’t rush for a cheap alternative. The cost can be much higher if multiple parts are damaged in the suspension system or elsewhere in your car. Replace only the faulty joints; you are not obliged to replace all joints at the same time if some of them are working properly.
How Often Should Drivers Replace Ball Joints?
There is no fixed rule regarding the replacement of ball joints. However, whenever you take your car for maintenance or an oil change (if you don’t do it yourself), you can ask the repairer to ensure that everything is fine with the suspension. If you think you haven’t taken your car to a repairer for a long time, you should take it then and have the ball joints checked.
By regularly checking your car, you will never notice these symptoms. And if you notice any of these issues, try to get your car repaired as soon as possible.
Tip: drivers should check all symptoms of a bad ball joint, as they are easy to diagnose. It is always better to take precautions than to have regrets.
Conclusion
There are many different situations with ball joints: some ball joints lose their lubrication and can therefore be serviced. You will save money by performing an overhaul rather than a replacement. By having these ball joints re-lubricated, they do not let in external factors during driving and can thus come back to life.
We hope you now understand the symptoms of a bad ball joint and know what to do if it’s the same case for you.
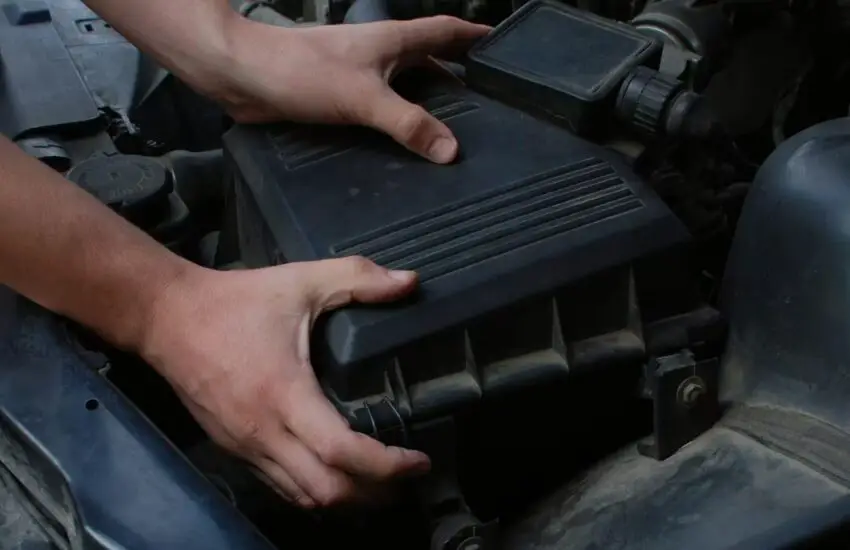
Three signs of a dirty car air filter you need to know
Your car’s engine combines both air and gasoline in the combustion chamber to create the power needed to move the vehicle. Air reaches the engine via the air filter, which prevents debris and dust from entering so the car engine can perform at its best. At the same time, the air filter must allow air to reach the engine to operate at optimal levels. However, over time, dirt and other contaminants clog the air filter, which affects the car’s performance. We will help you understand some apparent signs of a dirty car air filter and how to fix the problem.
How can I replace a dirty car air filter?
Most car manufacturers recommend changing the air filter every 10,000 to 15,000 miles or every 12 months. If you drive in heavily congested areas, you will need to stop and start more often, which will affect the air filter more. Remember: do not think that cleaning the air filter and the engine are the same thing.
1. What are the symptoms of a bad air filter in a car?
Many drivers often wonder what symptoms indicate that their vehicle is equipped with a faulty and dirty air filter. Below is a list of symptoms that will help you make the right decision about your car’s air filter. These symptoms are not solely due to a faulty air filter but may also indicate an underlying problem in the vehicle.
Complete guide to cleaning a dirty car air filter
2. Reduced fuel consumption
A car’s engine always compensates for a lower amount of oxygen by consuming more fuel to produce enough power to move the vehicle. However, if you notice that gasoline consumption decreases every day, it is time to change the air filter. This mainly applies to carburetor cars manufactured before 1980. Carburetors mix air and fuel to generate energy for the internal combustion engine. You can browse online for the best car air filter maintenance tips.
3. Reduced power
One of the symptoms of a clogged air filter that causes the car to respond poorly with jerky movements when you press the accelerator is reduced power. This may indicate that the engine is not getting enough air to operate. Therefore, replacing the air filter would also help improve airflow and the vehicle’s power.
4. Engine misfires
Limited air supply due to a dirty air filter in the car will always result in unburned fuel exiting the engine as soot residue. The residue will then accumulate on the spark plug, which will not provide the necessary spark to ensure the combustion of the air-fuel mixture. You will quickly notice that the engine does not start but misfires and has sudden jerks. This is one of the important symptoms of a bad air filter, which affects engine performance.
Reason to change a dirty car air filter
In summary
So, when any of the above symptoms seem to occur when you try to start your vehicle, there is a high chance that it is due to the dirty car air filter, which needs to be replaced immediately.
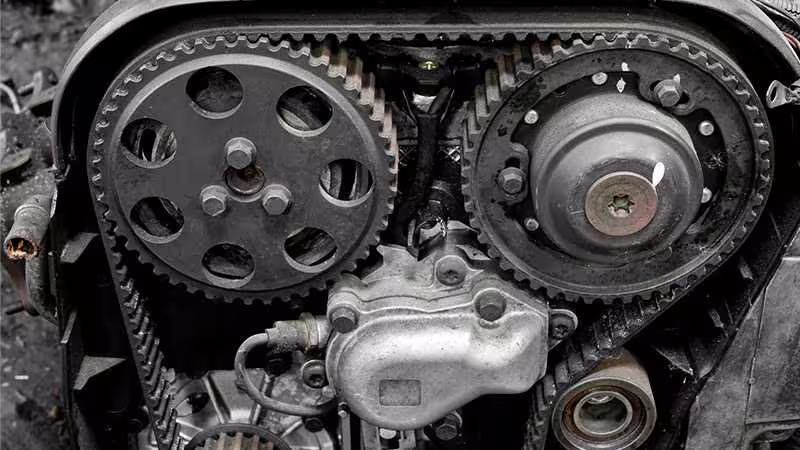
How long should an engine last
It is very difficult, if not impossible, to accurately estimate the lifespan of an engine. The longevity of automotive parts, including the engine, depends on many different factors. However, it is almost impossible. Therefore, once you know the factors that affect your engine’s lifespan, you will be better able to predict its potential longevity.
The longevity of automotive parts, including the engine, depends on many different factors. Source: Acura.com
What factors influence engine lifespan?
The first factor that affects your car engine’s lifespan is its composition. Car engines are made of several different metals, but the most common are iron and aluminum. In fact, some engines are made from a combination of 2 or more metals. Many trucks have engines with iron blocks and aluminum cylinder heads. Generally, iron block engines tend to be more durable and last longer than other types of engines because, year after year, iron is strong enough to withstand the incredible heat that an engine is capable of producing.
Iron block engines tend to be more durable and last longer than other types of engines. Source: Ebay
The next factor to consider when determining a car engine’s lifespan is the region where you live. If you live on a hill, your engine wears out faster because you regularly have to drive over rough terrain. Your engine undergoes more stress and will likely not last as long as if you usually drove on flat, smooth roads.
Another factor that affects the average lifespan of an engine is how the vehicle is driven. The harder an engine has to work, the shorter its lifespan tends to be. Another factor to consider is the tires. Your efforts to maintain your car will influence your car’s performance. If you maintain your car frequently, there is no reason why your car shouldn’t last a long time.
What is the average lifespan of a car engine?
As you are curious about how long engines last, we would say that there is no absolute rule in this matter. But the average lifespan is about 8 to 9 years or 150,000 to 170,000 miles. The new car models with innovation have extended the engine longevity to 10 years or 200,000 miles as an equivalent. Considering an engine’s lifespan will give you a basic estimate of its longevity. For example, as we estimate the average engine lifespan to be 10 years, and a car can travel 15,000 to 20,000 miles per year, three-year-old cars will have 45,000 to 60,000 miles.
The average lifespan is about 8 to 9 years or 240,000 to 270,000 km. Source: BMW Blog
How to extend your car’s lifespan? How to make your car engine last longer
You now know how long engines last. How can you maximize your car’s lifespan? The engine is an important part of a car, but if you want to preserve it and use it effectively, not everyone has the necessary knowledge to do so. Simple mistakes or certain difficult situations, if you don’t know how to handle them, can lead to unwanted damage:
First, take your car to the mechanic regularly for maintenance. This is the key idea for making your car last a long time. Frequent maintenance will help your car resolve any issues in time, so you will save on costs and also protect the engine’s lifespan. Only an automotive doctor understands your car’s problem. They are experienced technicians who can assist you in all areas, from transmission repair to routine maintenance. Whatever type of service you need for your foreign car, they are there to help you.
Second, since how you drive your car affects the car’s engine, be cautious when driving a car. Applications such as towing heavy loads, repeated extreme acceleration and deceleration, revving the engine beyond its redline, or driving at top speed for long periods can all reduce an engine’s lifespan. Therefore, try to avoid bad roads and drive your car carefully to increase your car’s lifespan.
Since how you drive your car will affect the car’s engine, be cautious when driving a car. Source: Motoraty
The most important thing for improving your engine’s lifespan, as well as your vehicle’s, is how the driver takes care of it, including changing the oil as well as performing regular maintenance as recommended by the manufacturer, and replacing spare parts at the right time, as indicated on the car’s dashboard. This not only helps extend the engine’s lifespan but also allows the vehicle to run stably and save fuel.
In addition to changing the oil regularly, also consider using a quality oil of the appropriate type and clear origin when replacing the engine oil. Regularly clean the engine under the hood and clean the air filter to ensure optimal air circulation in the engine.
Summary
Most motorists still wonder how long engines last. In general, the average longevity of a car is about 8-9 years, or even 10 years for new models. But it depends on many factors to estimate this figure, such as the engine material, how you drive it, or how you maintain your car. We recommend taking your car to a trusted garage for maintenance to ensure your car’s long lifespan. Remember to follow our blog for a better understanding of your car and maintenance tips.
Understanding the Problem: Overboost Pressure Too Low
You have identified a problem of excessively low boost pressure in your vehicle’s supercharging circuit.
What does this mean?
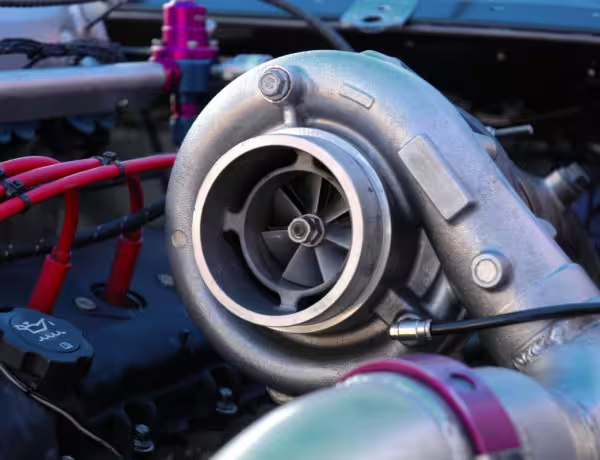
The supercharging circuit, mainly composed of the turbocharger, is responsible for increasing the pressure of the air entering the engine. This pressure increase helps improve combustion and, consequently, engine performance.
Excessively low boost pressure indicates that the engine is not receiving the necessary compressed air to operate optimally. This can lead to several symptoms:
Loss of power: The engine seems less responsive during acceleration.
Excessive consumption: The engine works harder to deliver the same power.
Black smoke from the exhaust: A sign of incomplete combustion due to a lack of air.
Engine warning light on: The vehicle’s computer has detected an anomaly.
What are the possible causes?
Several components can be the source of this pressure drop:
Faulty turbocharger:
Wear of moving parts: The turbo blades may be damaged, reducing their efficiency.
Oil leak: An oil leak can lead to turbo fouling or damage the bearing.
Stuck variable geometry: If the variable geometry system is stuck, the turbo cannot adjust its airflow according to the engine’s needs.
Issues with the air intake circuit:
Punctured or pinched hoses: Damaged intake hoses can cause a loss of pressure.
Clogged air filter: A dirty air filter restricts the airflow entering the engine.
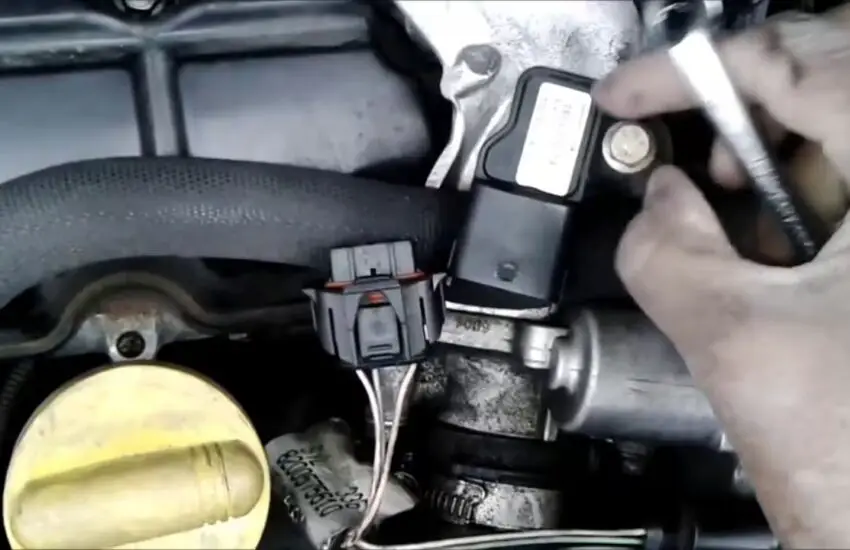
Failure of the boost pressure sensor: A faulty sensor can provide incorrect information to the computer, affecting engine management.
Faulty wastegate: If the wastegate does not close properly, some pressure may be lost.
Electrical issues: A faulty computer or damaged wiring can also be the cause of the problem.
What to do?
It is highly recommended to entrust the diagnosis and repair of your vehicle to a professional. A mechanic equipped with a diagnostic tool can accurately identify the cause of the pressure drop and perform the necessary repairs.
However, here are some tips while waiting to consult a professional:
Do not ignore the problem: A drop in boost pressure can lead to more significant damage if not addressed promptly.
Avoid sudden acceleration: Abrupt acceleration can worsen damage to the turbocharger.
Check the oil level: A lack of oil can damage the turbocharger.
In summary, excessively low boost pressure is a problem that should not be overlooked. An accurate diagnosis is essential to determine the exact cause and perform the appropriate repairs.
Would you like more information on a specific point? For example, you can ask me what the variable geometry of a turbo is for, or how a boost pressure sensor works.
How does a boost pressure sensor work?
The Essential Role of a Boost Pressure Sensor
In an internal combustion engine equipped with a turbocharger or a supercharger, the boost pressure sensor plays a crucial role in the optimal management of the engine. Its mission is to measure the pressure of the compressed air sent into the engine, in order to optimize the air/fuel mixture and ensure efficient and clean engine operation.
Simplified Operation
Pressure Measurement:
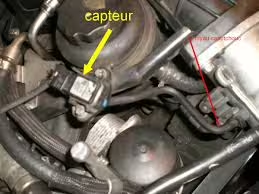
The sensor is usually installed in the intake manifold, upstream of the intake valves.
It consists of a pressure-sensitive element (often a diaphragm) that deforms under the effect of the air pressure.
This deformation is converted into an electrical signal proportional to the pressure, thanks to a transducer.
Signal Transmission:
The electrical signal is then sent to the engine control unit (ECU).
Signal Processing by the ECU:
The ECU analyzes this signal and compares it to the reference values stored in its memory.
Depending on the measured pressure, the ECU adjusts various engine parameters, such as:
The amount of fuel injected
The ignition timing
The variable geometry of the turbocharger (if equipped)
The operation of other components of the intake system
Why is this sensor important?
Optimization of the air/fuel mixture: A mixture that is too rich or too lean can lead to a loss of power, increased fuel consumption, and polluting emissions.
Engine Protection: By monitoring the boost pressure, the sensor helps prevent overpressure that could damage the engine.
Performance Improvement: Thanks to precise management of the boost pressure, it is possible to optimize the engine’s power and torque while reducing polluting emissions.
In Summary
The boost pressure sensor is an essential component of modern engine management. It plays a key role in optimizing the performance, fuel consumption, and polluting emissions of vehicles equipped with turbochargers or superchargers.
To Go Further
If you wish to deepen your knowledge on this subject, you can consult more technical articles or video tutorials. Do not hesitate to ask me other questions if you have any.
An internal combustion engine can suffer from a problem such as an exhaust manifold leak. Imagine the toxic fumes produced by the engine returning inside the car. Deadly, isn’t it? The exhaust manifold prevents these gases from returning to the vehicle. So it’s bad news, not only for the engine but also for the people inside the car, when the exhaust manifold has a leak.
If you suspect a leak in the exhaust manifold, you must immediately proceed with the repair. Any delay will only lead to more significant damage, such as to the catalytic converter, meaning more expensive repair work.
Symptoms of an Exhaust Manifold Leak
So, how do you know if something is wrong with this component? The warning signs are quite easy to detect: you hear a ticking noise or smell exhaust gases coming from the engine compartment.
Perform a visual inspection if you detect any of these signs. Black soot around the downpipe connection and the manifold is a nearly foolproof way to know there is a leak. Here are other symptoms:
Burning smell in the engine compartment
The engine makes excessive noise
Reduced acceleration power
Poor fuel efficiency
Reasons for an Exhaust Manifold Leak
Gas leaks from the manifold damage surrounding components over time. The list of damages they cause is as follows:
Slower warm-up time (which directly affects the fuel consumption rate)
Affect the functions of the oxygen sensors
Cause incorrect fuel mixture
Disruption of EGR valve functions
Burnt exhaust valves
Premature failure of the catalytic converter
The occurrence of these problems depends on the location of the leak. The risks of damage are lower when the leak is away from the catalytic converter and the engine.
The catalytic converter can fail. (Photo source: carid)
The common reasons for an exhaust manifold leak are:
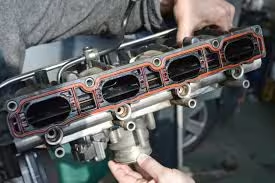
A Leak in the Manifold Gasket
Due to extreme heat, the metal of the gasket undergoes continuous expansion and contraction. This can cause a leak in the gasket, leading to bigger problems over time. The manifold gasket is responsible for sealing the entire exhaust system. A leak means the system is not properly sealed, which affects the car’s handling and performance.
When the gasket no longer functions, you will hear a noise in the exhaust when starting the car. But this noise will disappear after a while.
Cracked Manifold
The cause of manifold cracks is similar to that of a gasket leak. It starts as a hairline crack and creates noise when you start the vehicle. But it disappears after a few minutes once the manifold metal expands after being heated, which automatically seals the crack.
However, the crack gradually enlarges over time and the exhaust noise becomes persistent. You must repair it before it gets to that point.
Loose/Broken Bolts or Studs
A broken or loose mounting stud or bolt can cause a leak in the manifold. These bolts and studs wear out due to continuous heating and cooling cycles, creating a crack or hole in the manifold.
How to Repair an Exhaust Manifold Leak
As we saw earlier, an exhaust manifold must withstand intense heat and undergoes constant heating and cooling cycles. This is why it suffers from leaks, cracks, and other problems.
You can repair the manifold leak yourself. (Photo source: drive2)
How to solve this problem? Well, you need to replace it with a new one. This guide will show you the safest way to perform this task.
What You Will Need
A new exhaust manifold gasket
Ratchet, wrenches, and socket set
Torque wrench
A jack and jack stands
Degreaser and penetrating oil
Towels and shop gloves
Repair manual
Replacing the Exhaust Manifold: Steps to Follow
Before starting the repair or replacement, you must prepare the vehicle. This involves allowing enough time for the engine to cool down and disconnecting the negative battery cable.
The car must be parked on a flat surface (a garage would be an ideal place) and then set the parking brake. Lift the car off the ground using a jack and then place it on the jack stands.
You are ready. Now, move on to the repair work:
Check the Leak
This is important because you don’t want to have to deal with another leak after already handling one. So, examine the engine and the exhaust manifold to see how many leaks there are. Look under the hood to check if oil is leaking into the manifold.
WARNING
The engine must be cold during the inspection, as the manifold and other components could be burning hot. If you haven’t had time to cool the engine, at least wear a pair of safety gloves.
Remove the Bolts
After locating the leak or leaks, you can proceed with the repair work. In this step, you will remove the bolts that hold the manifold in place. Remove the engine cover or heat shields using a ratchet and sockets to access the bolts. You may need to disconnect the dipstick tube or the EGR valve intake hose for full access to the manifold.
The manifold is attached to the engine cylinder head using two large bolts. You may need to use wrenches, as they are supposed to be tight. To make the process easier, apply penetrating oil to the bolts and let them soak for at least 15 minutes.
Remember to apply slight pressure when loosening them, as excessive force can damage them or, worse, break the bolt head. If they still seem tight, spray oil again and try a few minutes later.
You can replace the gasket yourself. (Photo source: warpedspeed)
Replace the Manifold/Gasket
Remove the manifold from its housing, but do not remove it completely from the engine if you only need to replace the gasket. Slide the gasket out and insert a new one into the cylinder head slot.
Replacing the manifold is a lengthy and delicate operation as it needs to be completely disconnected from the engine. In this case, it is better to take the car to the mechanic.