The safe method for cleaning the radiator with vinegar

Flushing is the most sought-after method to remove all types of contamination from the radiator. You can also clean it by flushing the radiator with vinegar.

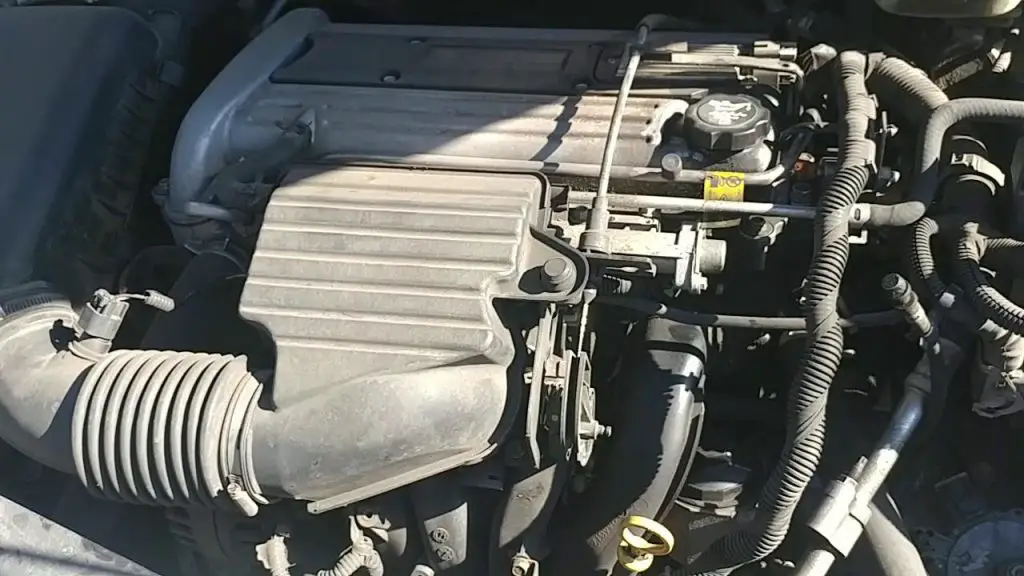
No matter how well you maintain your car, some of its parts, like the radiator, will become less efficient over time. A clogged radiator is a problem that often affects a vital part of the engine’s cooling system.

What are the signs that a radiator needs flushing?

If you experience any of these symptoms, it’s time to flush and clean the car’s radiator.
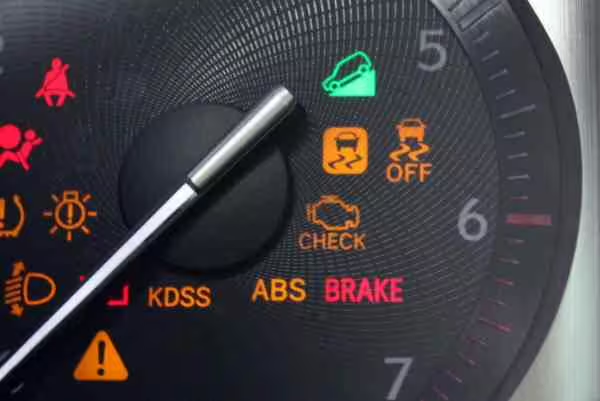
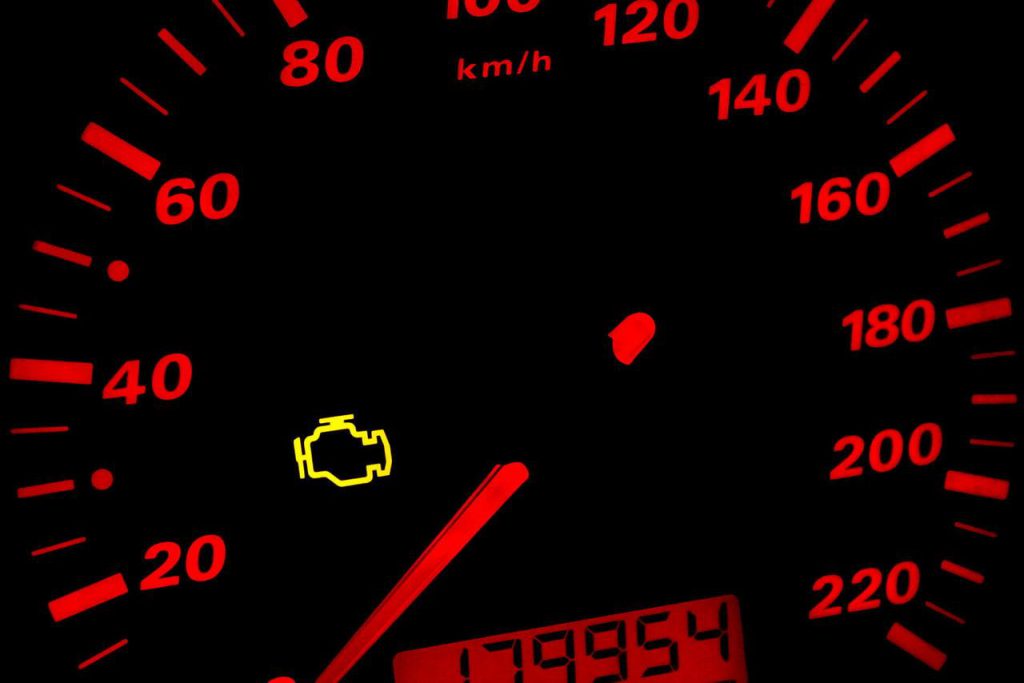
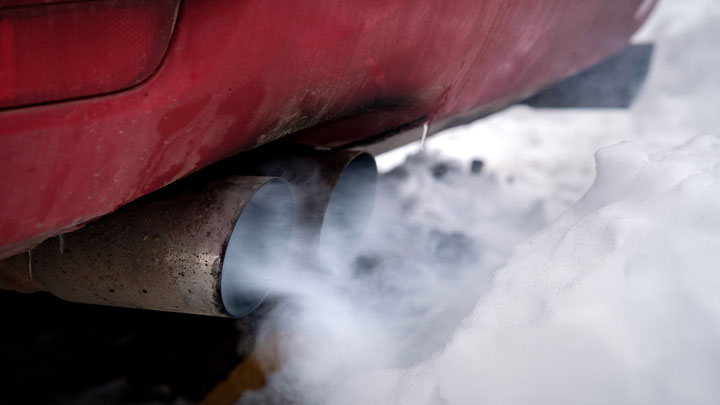
Overheating

Several factors can contribute to a vehicle overheating. A clogged radiator can be one of them.
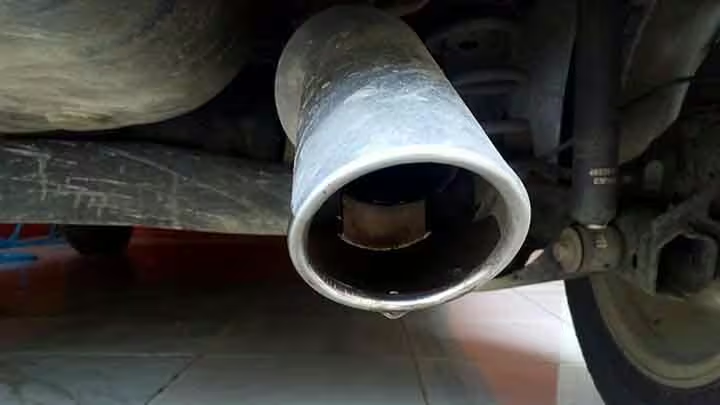
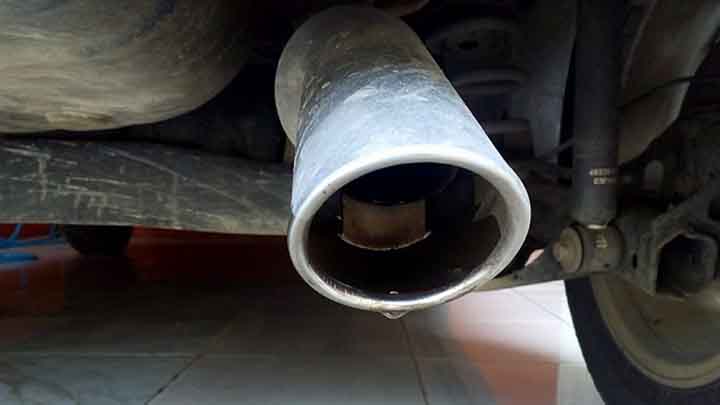
Leak

If there are signs of coolant leakage under the car, the radiator needs to be flushed.

Noise

Just like overheating, engine noise can occur for many reasons. If you hear a knocking sound in the engine, it might be due to a dirty radiator.

flushing the radiator
A dirty radiator can sometimes be a source of noise. (Source: Biswarup Ganguly / Wikimedia Commons)

How does flushing clean the radiator?

Over time, the coolant in the radiator accumulates contaminants and unwanted debris. It also causes corrosion, rust, and scaling in the radiator. A coolant flush can solve all these problems.

During this process, several liters of cleaner, water, and new antifreeze pass through the system and remove the old antifreeze and existing contaminants. Additionally, flushing lubricates the water pump and extends its lifespan.

In the first year, the car doesn’t need a flush if it has been driven less than 10,000 miles. If the radiator shows no signs of failure, you can flush it every 30,000 miles or as recommended by the manufacturer.

The process of flushing the radiator with vinegar

You can use various natural and chemical solutions to clean or flush the radiator. Before starting the process, remember to wear rubber gloves and safety glasses.

Let’s learn the step-by-step method for flushing the radiator with vinegar.

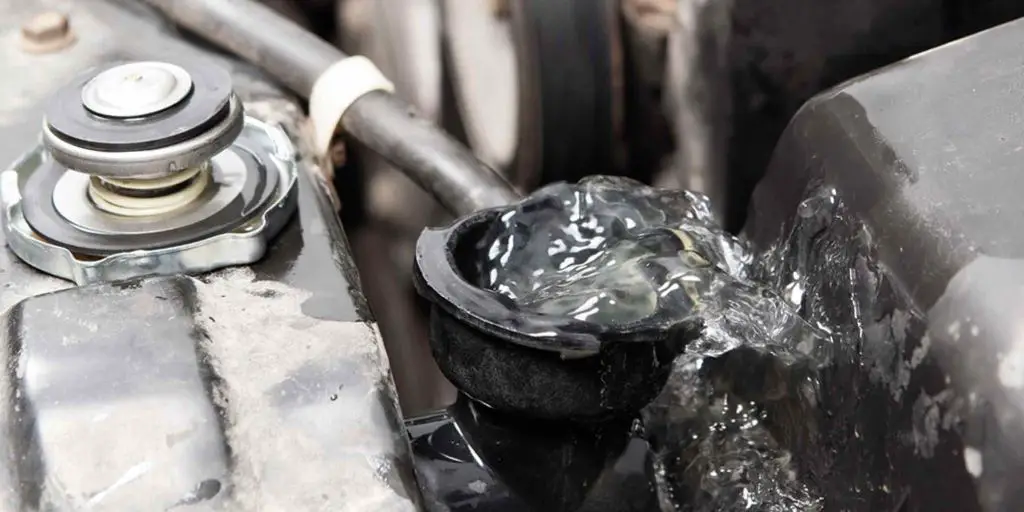
  1. First, place a shallow container on the ground under the radiator to catch the draining coolant. Since each country has specific regulations regarding the proper disposal of coolant, it’s best not to let the coolant seep into the ground.
  2. Now, move the radiator cap and loosen the radiator drain valve. The coolant will flow into the pan.
  3. When the radiator is empty, fill it halfway with water. Add one gallon of distilled white vinegar. Finally, fill the remaining part of the radiator with water.
  4. Close the radiator cap before starting the car. Let the car run for a while until it reaches ambient temperature.
  5. Leave the car overnight. Then, remove the radiator drain valve to drain all the contents of the radiator. During the draining process, flush the radiator using a hose.
  6. Once flushing is complete, put the correct mixture of coolant and water into the radiator to fill it.
flush the radiator
Use various natural and chemical solutions to clean or flush the radiator. (Photo: Auto Vfix)

FAQ on flushing the radiator with vinegar

1. How often should I flush my radiator with vinegar?

It is recommended to perform a vinegar flush every 2 to 5 years, depending on the age and usage of your vehicle. Regular maintenance helps prevent radiator-related issues.

2. What type of vinegar should I use to flush the radiator?

Distilled white vinegar is the most commonly used type for radiator flushing due to its mild acidity and effective descaling properties.

3. Can I use apple cider vinegar or other types of vinegar for this process?

Although distilled white vinegar is the preferred choice, other types of vinegar, such as apple cider vinegar, can also be used if needed. However, they may not be as effective.

4. How do I safely flush my radiator with vinegar?

The process generally involves draining the coolant, adding a water and vinegar solution, running the engine to circulate it, and then flushing it with clean water. You can find detailed instructions in our guide.

5. Can I perform a vinegar flush myself, or should I consult a mechanic?

A vinegar flush is a DIY process that many car owners can handle. However, if you are unsure or uncomfortable with the procedure, it is advisable to consult a professional mechanic.

6. Are there any risks associated with flushing a radiator with vinegar?

Although vinegar is generally safe, incorrect flushing or vinegar residue can lead to problems in the cooling system. It is essential to follow the correct procedure and ensure a thorough flush.

7. Will flushing my radiator with vinegar void my vehicle’s warranty?

A vinegar flush should not void your warranty if performed correctly. However, it is crucial to check your warranty terms and consult your vehicle manufacturer if you have concerns.

8. Can vinegar eliminate all radiator-related problems, such as overheating?

While vinegar can help prevent overheating caused by mineral deposits, it does not solve all radiator problems. Regular maintenance and diagnosis of specific issues are still necessary.

Conclusion

A clogged car radiator can lead to problems like overheating. You can choose to unclog it using the flushing method. Instead of using harsh solutions, flushing the radiator with vinegar is a safer choice.

Common Causes of the Traction Control Light Coming On

The function of the Traction Control System (TCS) is to provide driving assistance in unfavorable conditions such as slippery surfaces, rainy days, and rough roads. However, many drivers do not know why the traction control light stays on. This appears as a safety issue because it indicates a problem with the system.

What is Traction Control?

Traction control is the car component that uses wheel speed sensors to detect if a wheel is spinning faster than the others. If this happens, the ABS (Anti-lock Braking System) activates on the slipping wheel, slowing it down to maintain speed. Sometimes, the ECU will help reduce engine torque for the ABS to apply the brakes in time. Once it slows down and the car can grip the road, the brake in that area will be released.

Drivers may have rolling tires or slipping tires. Some car owners even have both. However, few of them know that a rolling tire has more grip than a slipping tire. If the front tires slip, the driver’s steering will be difficult. Sometimes, they may not even be able to steer. In this situation, the traction control system detects the problem and corrects it immediately.

Some automobiles are equipped with a stability control system. Like other cars, this control system relies on ABS application: it keeps the car in the intended direction, regardless of weather and terrain conditions. Working together, these two systems help drivers continue their journey even when the road is slippery.

The traction control light, the main focus of this article in our car, flashes as soon as wheel slip is detected. Even though this flashing is harmless, drivers should take note and drive more slowly. So, if you’re wondering what causes the traction control light to come on, this article is for you.

What is the Traction Control System Used For?

In modern vehicles, the TCS monitors stability and steering performance. It activates when the car is about to lose its grip on the road. The TCS light only comes on if there is a problem with the system that affects its operation.

When your vehicle does not have stable traction on the road, the TCS light is likely to illuminate on the dashboard. It may be a flashing TC symbol or an illustration showing a car losing control. It is possible that the traction control light stays on until the problem is resolved.

Why My Traction Control Light Stays On

In most cases, the TC light comes on when you accelerate. Amateur drivers may panic in this situation, but keeping a cool head will help you avoid any accidents.

traction control system
Stay calm if the car loses traction while driving (Source: allegro.pl)

Be cautious and focus on stabilizing the steering wheel as much as possible. The safety measure to take is to slow down the car and take it to a repair shop to fix the problem.

Here are some of the most common reasons why the traction control light comes on:

1. Faulty Wheel Speed Sensor

The most common reason why the traction control light stays on is the wheel speed sensor. Wheel speed sensors work with the TCS and the engine control unit, so there is a balance between wheel speed and traction. The sensors monitor the rotational speed of the wheels and send signals to the TCS if something is wrong.

Each wheel is equipped with a sensor that alerts the TCS to any changes so it can correct the error. The car will lose traction when the sensors cannot send the correct signals to the system. The light will come on when something like this happens.

2. Faulty Steering Angle Sensor

The steering angle sensor is an essential system for measuring the position of the steering wheel and the speed at which it returns to its initial position. You will find the sensor inside the steering column. This location allows for accurate measurement of the steering position and angle.

A faulty wheel speed sensor or defective wiring affects the connections between the TCS computer and the wheel. When this happens, the TCS cannot operate on the wheel, causing the light to stay on until the problem is resolved.

When the sensor is faulty, it cannot calculate and process information correctly. A set of wheel speed sensors on each wheel controls the TCS and ABS (Anti-lock Braking System) to tell your traction control computer whether each wheel is rolling correctly or slipping in some way. If the sensor detects slip, it activates the TCS to reduce power to the affected wheel to allow it to regain traction, causing the light to come on for a short period.

It is not safe to know if the steering angle sensor is having problems. Since the light is on, car owners should go to another place where a light inspection can be performed. However, a mechanic should check the traction control system immediately. To be more precise, the flashing light tells us that the TCS is not working properly. This means the system will not activate in poor road conditions, and drivers will face potential damage.

3. Poor Road Conditions and Bad Weather

Sometimes, bad weather and unfavorable road conditions can also be responsible for the traction control light coming on. The TCS may not effectively manage traction during heavy rain, storms, snow or ice, or when the road is muddy or rough with potholes. In these situations, the light may come on, indicating a problem with the system.

traction control light
Bad weather can be the reason why the traction control light stays on (Source: belfasttelegraph.co.uk)

In these conditions, there is nothing to do except slow down the car or park somewhere, waiting for the weather to improve. The light will turn off automatically when the road or weather conditions change.

4. Computer Issues with the TCS System

Modern vehicles are equipped with a central computer system that monitors and controls many internal systems. The Traction Control System (TCS) is part of it. The TCS computer plays a crucial role in the proper functioning of traction control by taking control of the system itself. If you find no apparent external cause that could affect the TCS, the computer system itself could be the cause. Sometimes, the program has errors or needs to be reprogrammed due to current programming issues.

A faulty computer system can significantly affect a vehicle’s performance, as it communicates with almost all other parts of the vehicle. The problem may be minor, and the system may simply need reprogramming. So, if car owners have their vehicle’s traction control light permanently on, the traction control system may have issues that need to be checked. But you must take the car to a certified professional for proper diagnosis and resolution, as this is a difficult problem.

Some drivers may wonder if it is safe to drive in a situation where the traction control light does not turn off? Our answer is no. A faulty traction control computer (TCS) prevents the use of wheel traction information. In other words, it has the same effects as a failing wheel speed sensor. This leads to the problem that the system will not work properly when it should.

5. Faulty Anti-lock Braking System

A problem with the Anti-lock Braking System (ABS) can cause the light to come on only if the TCS shares the same control module and diagnostic system with it. Since they are interconnected, a problem with the ABS will cause the TCS light to come on.

traction control light stays on
A faulty ABS could be another reason (Source: cars.ro)

When you take your vehicle to a mechanic to fix the TCS light issue, they should also check the ABS. This system is an integral part of car safety, so any problem must be resolved immediately. The ABS locks the wheels when you press the brake pedal and also prevents the wheels from slipping.

6. Faulty Steering Rack

The steering rack is one of the most well-known car components. It is connected to the steering wheel and also plays a crucial role in powering the steering system. By receiving high-pressure hydraulic fluid, the steering rack will help car owners control the steering wheel easily.

For this reason, if you have a faulty steering rack, drivers will have difficulty steering your automobile, especially on a rough road.

In conclusion, if you’re wondering why the traction control light stays on, car owners should consider the steering rack as a place to check.

7. Manual Control

Many cars are equipped with a button that allows the driver to disable stability control systems, as well as traction control. Sports cars are designed with the ability to disable stability and traction control systems, which can offer more control to drivers regarding the vehicle’s driving dynamics.

If automobiles are stuck in mud or deep snow, it is recommended to disable traction control to get out better. Sometimes, drivers even need a bit of wheel slip. However, if the traction control light does not turn off, traction control will likely reactivate when the car is restarted.

8. Limp Mode

Finally, limp mode is one of the main answers to the question: “Why does the traction control light stay on?” If car owners put their vehicle in limp mode, the dashboard lights up, and one of them is the traction control light. This mode also helps protect the powertrain while the car can be taken to the garage.

The Bottom Line

The traction control light stays on and turns off automatically if it happens due to an external cause like bad weather or unfavorable road conditions. Otherwise, you must take it to a repair shop to determine the main problem. A problem with the TCS will not affect any other car components or the engine. But it is likely to create safety risks and make driving risky in bad weather or poor road conditions.

Calibration of a Tire Pressure Gauge

When maintaining a car, calibrating a tire pressure gauge is very important. An incorrect reading can lead to technical problems like a blown-out tire. And when you’re driving at high speed, a blown-out tire can be disastrous.

So, make sure the air pressure in your tires is at the correct level. Calibrating a tire pressure gauge takes a little time.

Required Materials:

  • Plenty of water
  • 25-meter long hose
  • A building 25 meters or taller
  • A marker
  • Someone to help
  • A tire pressure gauge
  • 25-meter measuring tape

Step 1 – Mark the Hose

Unroll and straighten the measuring tape for at least 25 meters and place it next to the hose. Then use the marker to mark points indicating each meter and, more specifically, the 25-meter, 20-meter, and 10-meter points.

Step 2 – Go to the Top of the Building

Now, standing at the top of the building, unroll the hose. Try to keep the hose as straight and kink-free as possible. Then connect the end of the hose to the tire pressure gauge on the ground.

Step 3 – Check the Calibration

Gradually fill the hose until it reaches the 1-meter point. The appropriate reading should be 1.4223 PSI.

If the gauge reading seems accurate, continue filling. Each meter of water will increase the PSI by 1.4223. To reduce hassle, you can follow the chart below:

  • 10 m – 14.2 PSI
  • 20 m – 28.4 PSI
  • 25 m – 35.5 PSI

Step 4 – Recalibrate the Gauge

Even after reaching the first meter mark, if you find the value displayed on the gauge is far from reaching 1.4223 PSI, recalibrate and start again from step 2. And if it seems impossible to recalibrate, the tire pressure gauge must be faulty. Replace it.

Step 5 – Shorter Hose

If you use a shorter hose, then it’s possible to do the job without too much water, without tall buildings, and without other people.

The only drawback is that it will significantly reduce accuracy: a 3-meter gauge cannot maintain sufficient accuracy, like the 25-meter one.

Unless you don’t have all the resources needed to calibrate the gauge, don’t use the shortest hose.

Step 6 – Gas Station Gauges

Many people simply rely on gas station gauges, but they are not reliable, as the reading varies. The other option available to you is digital tire pressure gauges.

Calibrating a tire pressure gauge
Many simply rely on gas station gauges, but they are not reliable. (Photo: Dirt Rider)

But some of them are accurate, and others are not. Do all the relevant homework online or offline before proceeding to purchase a digital gauge. Finally, you can have the gauge calibrated by a professional for a fee.

FAQ on Calibrating a Tire Pressure Gauge

  1. What is the cost of professional calibration of a tire pressure gauge?

The cost of professional calibration can vary depending on your location and the service provider. It can range from $10 to $50 or more, but it’s advisable to get quotes from local calibration centers.

  1. Are there DIY methods to check the accuracy of a tire pressure gauge at home?

You can perform a basic accuracy check of your gauge using a known reference pressure, such as a recently calibrated gauge or a high-quality tire pressure gauge. Compare the readings to identify any discrepancies.

  1. Can I calibrate a tire pressure gauge myself if I have technical knowledge and equipment?

If you have the necessary technical knowledge and calibration equipment, you can attempt to calibrate some digital gauges. However, for accurate results, professional calibration is recommended.

  1. How do I know if my tire pressure gauge has been successfully calibrated?

Calibration is successful when your gauge consistently provides accurate measurements matching a known reference pressure. Perform multiple tests to ensure consistency.

  1. Is there a specific calibration interval recommended for tire pressure gauges?

While there is no fixed interval, it’s wise to calibrate your gauge whenever you suspect inaccuracies or at least every few months to maintain reliable readings.

  1. Can I use a tire pressure gauge immediately after calibration or is there a waiting period?

In most cases, you can use the gauge immediately after calibration. However, it’s recommended to confirm its accuracy using a few test measurements before relying on it.

  1. Can I calibrate a tire pressure gauge for different pressure ranges, such as high or low pressure readings?

Some calibration tools are designed for specific pressure ranges. Ensure the calibration tool you choose is compatible with the range you need for your gauge.

  1. Can I use a tire pressure gauge without calibration and still get reasonably accurate readings?

While a gauge may provide reasonably accurate readings without calibration, it’s best to calibrate it periodically to maintain accuracy and ensure consistent performance.

Conclusion

In short, calibrating a tire pressure gauge is a simple but essential maintenance task that should not be overlooked.

Ensuring the accuracy of your gauge is paramount for maintaining proper tire inflation, which, in turn, contributes to vehicle safety, fuel efficiency, tire longevity, and overall performance.

Signs of a Faulty Engine You Should Not Ignore

The engine is considered the heart or center of the vehicle. It’s what powers the car and gives it everything it needs to function properly. Imagine how a car would work if it wasn’t functioning properly. If we assume that the car is our body and the engine is our heart, we can better understand things. How would a man whose heart isn’t working properly function? Well, the body won’t be able to deliver optimal performance and value. The same goes for the car! When the engine fails or you notice signs of a faulty engine, it’s reflected in the vehicle’s performance.

The term “faulty engine” is meant to be very generic. It can be used differently by each person. So, it’s necessary to understand this issue to know how the engine failed. Let’s delve deeper into understanding what this means for people.

Signs of a Bad Engine: What’s Happening Under the Hood?

There are tons of things happening inside the hood that might not always be visible to you. So, any mechanism would show certain symptoms from time to time to alert you to a problem before it’s too late. Here are some signs indicating that the car is showing signs of engine failure.

1. Sluggish Engine Power

One of the signs you’ll notice is that the engine struggles to run at a normal pace. When this happens with your vehicle, you need to understand that an internal engine fault is disrupting the performance of the entire car. You might observe some signs of a faulty engine, including a vehicle shaking at high speeds or difficulties accelerating, etc. If the engine is causing too many problems, it’s mandatory to have it checked by a professional, just like we do when our body isn’t functioning well.

How to Teach Signs of a Bad Engine Like a Pro
A bad smell is one of the main symptoms of a bad engine that requires your attention.

2. Bad Smell Inside

The smell of a vehicle’s exhaust gases should always be noticed outside the vehicle. But if it happens the other way around, consider it a sign of a damaged engine. The strong smell of exhaust gases inside the car is something no one would want to experience. So, it’s always advisable to take your vehicle to a professional so they can check it properly, from the inside out. Ignoring such smells inside the vehicle would surely be a bad decision. A bad smell is one of the main symptoms of a bad engine that requires your attention.

3. Strange Sounds

How do you know if the engine is dying? A knocking noise from under the hood is one of the signs of a failing engine. Generally, it’s a fault in the mechanical parts of the engine, including pistons, moving parts, and other bearings. If this is also happening with your car, it’s time to take your vehicle to a reliable professional and have it checked immediately. If you choose to ignore this noise, you’ll have no choice but to live with a broken-down car. It’s always better to detect the problem early to make the best decision possible. Seek maintenance tips from experts if necessary!

The Secret of Signs of a Bad Engine
Entrust your vehicle to a reliable professional and have it checked immediately

4. Smoke from the Exhaust Pipe

There can be different reasons why the exhaust produces smoke. But how do you know if the engine is failing? Well, if the smoke is black, it’s a sign of a problem in the engine. It also means your vehicle is burning too much fuel, which will eventually affect your wallet. The issues could include a damaged air filter, a mechanical problem, or perhaps a clogged fuel return line. Most people usually don’t pay attention to black smoke coming from their vehicle. But the fact is you should, and that’s how you can keep your car running longer.

5. Engine Lights On

If there’s a problem with the engine, the dashboard warning lights stay on to alert you to the potential issue. Yes, your vehicle will try to show you the problem in every possible way. Then it’s up to you to decide how to handle it. Taking immediate action to fix the problem will surely help, and if you do nothing, your car will suffer. It’s one of the main symptoms of car engine failure you need to know about.

Your Key to Success: SIGNS OF A BAD ENGINE
The dashboard warning lights will stay on to alert you to the potential problem

6. Faulty Spark Plug

Spark plugs are the last part of the ignition system that comes into direct contact with the combustion chamber in gasoline cars. Spark plugs are often used to create ignition between two terminals to ignite a mixture of gas and fuel under high pressure.

By observing the spark plugs, it’s possible to assess the performance of a car engine. If the tip of the spark plug is golden brown (or brick red), it means the ignition system is working effectively and the engine operation is quite normal.

However, if the spark plug turns black, it means there’s a problem with the gasoline engine. This condition can be due to reasons such as a clogged or dirty air filter, an expired spark plug wire, a worn piston, a damaged carburetor, or an oil leak in the cylinder…

Additionally, white spark plugs are a sign of engine overheating. The cause could be due to inappropriate ignition timing, issues with the engine cooling system, lack of fuel…

Conclusion

The 6 signs of car engine problems mentioned above can help drivers quickly identify and diagnose common types of errors so they can handle them in a timely manner. When these signs of a bad engine appear, make sure to pay attention to them and get rid of them as soon as possible. After all, that’s what will keep your car running for years.

Introduction to Basic Tire Repair Tools

Having a set of tire repair tools is necessary if you don’t want to be left alone on the side of the road in an abandoned place because of a flat tire.

Learning how to use a tire repair kit can help you repair flat tires and assist you in an emergency.

Furthermore, the right tools and equipment are essential for the daily operation of any auto repair shop or automotive service center. They promote a safe environment and ensure that repair work will be carried out efficiently.

Basic Tools for Tire Repair

You need to have basic knowledge about tire repair supplies if you wish to repair a flat tire or seal a puncture.

Pliers

This is a hand tool used to pull, cut, or hold objects firmly. If your tire is flat due to a nail, stone, or other sharp objects, you need to use pliers to remove that foreign object.

Also keep an extra set of pliers in your tire repair kit, as they prove useful in various situations.

tire repair tools
This is a hand tool used to pull, cut, or hold objects firmly. (Photo: Ketai Industries)

T-Handle Insertion Tool

Every repair kit includes two T-handle tools: one is a rasp tool and the other is a needle insertion tool. They are used to clean the hole and secure the plug.

You need to use the rasp tool to clean the inside of the hole in the tire. Simply push it into the damaged area and slide it up and down.

Then, insert the repair plug into the eye of the needle insertion tool and insert the plug into the hole about 2/3 of the way.

Tire Plugs

These are pieces of rope used to seal the damaged area. In addition to those supplied with the kit, you should have a stock of extra plugs.

Rubber Cement

This is a type of adhesive obtained by mixing latex in a solvent, which can be hexane, toluene, acetone, or heptane.

Its function is to seal the tire plug in the place where there is a leak or puncture. It forms a strong but flexible bond between two objects.

tire repair tools
Its function is to seal the tire plug in the place where there is a leak or puncture. (Photo: Japanese Car)

Tire Inflator

This is one of the standard tire repair tools needed to prepare your vehicle’s tires for driving.

When it comes to tire repair supplies, it can be a portable device or an air compressor that does the job of pumping air into the tires once the repair work is completed.

Car Jack

You will need this to lift one side of the car. Indeed, it is sometimes not possible to repair a flat tire without removing the tire. In this case, you will need a car jack.

You can buy tire repair tools at any auto parts store or online. It is possible to buy a complete kit or additional tools depending on your needs.

FAQ

1. Can I use household tools instead of specialized tire repair tools?

Although some household tools may work in an emergency, it is better to use tools designed for tire repair, as they are specifically designed for the task and ensure safe and effective repairs.

2. How to properly use a tire pressure gauge?

To use a tire pressure gauge, remove the valve cap, firmly press the gauge onto the valve stem, and read the pressure displayed on the gauge.

Be sure to check the recommended tire pressure for your vehicle in the owner’s manual or on the driver’s door jamb.

3. What is a tire jack used for and how to use it safely?

A tire jack is used to lift the vehicle off the ground to replace or repair tires. Use it according to the instructions in your vehicle’s owner’s manual, ensuring it is placed on a stable surface and the vehicle is securely supported.

4. How can I repair a minor puncture using a tire repair kit?

A tire repair kit typically includes plugs or patches. To repair a puncture, locate the hole, insert the plug or patch, and carefully follow the kit instructions.

It is advisable to practice this procedure before needing it in an emergency.

5. Should I follow safety precautions when using tire repair tools?

Safety is essential. Always park your vehicle in a safe place, use hazard lights, wear appropriate safety equipment, and follow the manufacturer’s instructions regarding tool use.

6. Can I use tire repair tools for all types of tire damage?

Basic tire repair tools are suitable for repairing common punctures and minor damage. However, severe or extensive tire damage may require professional assistance or tire replacement.

7. Are there maintenance tips to keep my tire repair tools in good condition?

Keep your tools clean, well-maintained, and stored in your vehicle. Regularly check that they are in good working order, especially if they have not been used for an extended period.

8. Where can I buy basic tire repair tools, and are they available in different quality levels?

You can find basic tire repair tools at auto parts stores, online retailers, and some department stores.

Tools vary in quality, so it is advisable to invest in reliable and durable options to ensure their effectiveness when needed.

Watch this video from Project Farm to learn more about the tire repair kit!

https://youtube.com/watch?v=HcyscXvmXeY%3Ffeature%3Doembed

Conclusion

In conclusion, understanding and owning basic tire repair tools is an essential aspect of responsible vehicle ownership.

These tools constitute the first line of defense against common tire problems that can occur unexpectedly on the road.

Whether it’s a minor puncture, a sudden flat, or the need to check and adjust tire pressure, having the right tools at your disposal allows you to handle these situations quickly and confidently!

How to Bleed a Clutch: Bleeding the Slave Cylinder and Master Cylinder

Modern cars are equipped with hydraulic brakes, unlike older cars. It’s no longer a mechanical clutch but a hydraulic concept. Whenever you operate the hydraulic system, you need to bleed it to remove air pockets. The presence of air in the fluid contaminates the fluid and affects its performance. Here we provide the complete tutorial on how to bleed a clutch.

How to Bleed a Clutch: The Complete Step-by-Step Guide

There are two cylinders called master and slave. The clutch master cylinder acts as a reservoir for the brake fluid that connects it to the slave cylinder via the hoses. Whenever you press the clutch, the fluid flows from the master cylinder to the slave cylinder, and the gear shifting mechanism occurs. Let’s see how to bleed the clutch:

Prepare the Tools:

To know how to bleed a clutch, having the tools at hand makes the overall process easy and quick.

You will need the following materials:

  • Brake bleeder wrench or drive wrench of about 8 mm or 10 mm
  • Brake fluid according to the manufacturer’s recommendation
  • One to two feet of aquarium tubing
  • Catch pan
  • Empty water bottle
  • Floor jack
  • Gloves, glasses, cloths or paper towels for cleaning
  • Safety stands x 2, suction tool
  • Manual vacuum bleeder
How to bleed a clutch
The slave cylinder is located on the transmission either outside or inside (Photo source: autotoolsdirect)

Locate the Brake Master Cylinder and the Slave Cylinder

Once you have all the tools at hand, it’s time to find the master cylinder and the slave cylinder. Open the hood and go to the driver’s side to find the master cylinder. Once you’ve located the master cylinder, suck out the old fluid and refill it with new fluid using the suction bulb. This is useful when performing routine maintenance.

When you don’t know which fluid to use, refer to your manual and find out which fluid is recommended.

Next, it’s about locating the slave cylinder which you can find on the transmission. In most vehicles, it can be found on the outside, otherwise check inside. Follow the hydraulic line from the clutch master cylinder to locate the slave cylinder in the simplest way.

brake fluid
Use brake fluid as recommended by the manufacturer (Photo source: amazon)

Bleed the Slave Cylinder

To bleed the slave cylinder, you need to remove its valve using a wrench. The rest will be done by gravity. You need to use a container or pan underneath to catch the fluid; leave it open for two to three minutes.

Note: while bleeding the slave cylinder, monitor the master cylinder. The fluid level in the master cylinder should not drop too low, otherwise it will suck in air. Tapping on the slave cylinder will help release any remaining air pockets.

Access the slave cylinder and the bleeder fitting. Close the bleeder valve and use the aquarium tubing to connect to the bleeder fitting. Place the end of this tube in an empty bottle and fill the master cylinder with brake fluid.

Now, you need to press the clutch pedal and for that, you can ask for a friend’s help. Tell them to press the clutch pedal 10 to 15 times, then hold the clutch pedal fully depressed.

While the clutch pedal is still pressed, it’s time to open the bleeder using the wrench. This would allow fluid to come out of the slave cylinder. Close the bleeder valve when you no longer see air bubbles in the fluid; also release the clutch pedal. You will need another person as this operation cannot be done alone.

The Final Step

Finally, it’s time to test the clutch once the slave cylinder is bled. Start your car and test the clutch to check its operation. If you used the jack to lift the vehicle for the bleeding process, you can lower the vehicle before testing the clutch.

Note: you must not release the clutch pedal while the bleeder is still open, otherwise air will be sucked into the system.

If you feel the clutch is sticking or you notice unusual behavior that wasn’t present before, it is recommended to have the pedal checked by a professional. Also, if the pedal seems to be on the floor even after releasing it, there’s no need to worry. Just tap it a few times and everything should work fine.

If the problem doesn’t seem resolved, let the mechanic determine what’s wrong with the clutch system and have it repaired. Although, in most cases, the steps mentioned above are sufficient, you can always call a certified mechanic, otherwise you can follow some maintenance tips from experts.

Bleeding the Clutch Using the Manual Vacuum Pump

If you are considering using a manual vacuum pump for the bleeding process, here are the steps to follow.

Access the slave cylinder and, using the wrench, open the bleeder valve

When you don’t have another person to do the job and you’ve decided to use the vacuum pump, attach the pump to the slave cylinder.

Use the vacuum pump and open the bladder to suck the air bubbles from the slave cylinder. Also keep an eye on the fluid level while you are sucking the air.

When the air bubbles stop coming, you can close the bleeder valve.

Finally, you can test the clutch as everything should work now. If it doesn’t, entrust your car to a professional, as mentioned above.

the process of bleeding a clutch
Using a wrench to open the bleeder is a simple process (photo source: thewikihow)

Conclusion

If you have doubts about using a vacuum pump, you can always refer to the manual and clarify your doubts about its use. So here is the complete process of bleeding a clutch with the help of a friend and using the vacuum pump. Do as you see fit and eliminate the air bubbles from the system.

Reasons why water comes out of your car’s exhaust pipe

Seeing water dripping from the exhaust pipe can be alarming, but it’s not always serious. In some cases, condensation buildup is normal. In other cases, it signals major engine problems, such as a blown head gasket.

This article explores the possible reasons for water in your exhaust, from harmless to dangerous, so you can assess the severity and know if repairs are needed.

water coming from exhaust

When Water from Your Exhaust Pipe is NORMAL

It is completely normal for water to drip from your exhaust pipe, as long as it is not excessive. This is the main takeaway from this article, at the very least.

#1 – Natural Water Condensation

The internal combustion process isn’t without issues, as pollutants sometimes form throughout the process. The three main ones are water vapor, nitrogen, and carbon dioxide.

When you start your car, water vapor and CO2 mix. Then, once you reach your destination and turn off your vehicle’s engine, you will start to see this water vapor gather and accumulate inside your exhaust tips.

You might notice a few drops here and there, but this is nothing to worry about and is simply part of a car’s normal operation. Condensation is the cause of 99% of water-related exhaust issues.

white smoke coming from exhaust pipe

#2 – Catalytic Converter Producing Water Vapor

Oh my, catalytic converters, or “cats,” are just amazing, aren’t they?

So amazing that pranksters try to steal them right from underneath your car the moment you leave your vehicle unattended. A few minutes, a sawzall, and a very motivated gentleman will make your car sound like a race car, and for free.

Of course, you can drive without a catalytic converter, but you’ll likely be penalized by the annual emissions test or by the police. It’s better to have one.

In any case, a catalytic converter removes toxins created during the internal combustion process and creates a bit of water vapor as a byproduct of the process. This water vapor can accumulate on your exhaust tips and drip here and there.

The key takeaway is that, as a general rule, there is no need to worry when you see water droplets dripping from your exhaust tips, provided they are very minimal.

bad catalytic converter symptoms

Potential Problems That Can Cause Water in the Exhaust

#3 – Blown Head Gasket

When your engine gets REALLY hot, components tend to warp. In many cases, this is due to a blown head gasket. Your head gasket is like the VIP bouncer of your engine, preventing fuel, oil, and coolant from mixing at the party. When this bouncer doesn’t do his job, you have a recipe for disaster.

If you notice more water (perhaps a cup per hour) coming out of your exhaust pipe, you might be in for a bad time. Inspect the fluid. Is it clear? Or is it a bit murky and opaque? If it looks a bit muddy, it’s probably coolant. If so, turn off your vehicle immediately and open the hood.

Remove the oil filter cap. Is the fluid milky? Green? If so, these are the telltale signs of a coolant and fuel mixture. You now have fuel that doesn’t burn as well, oil that doesn’t lubricate, and coolant that doesn’t cool! You’ll end up with a milky, foul-smelling fluid coming out of your exhaust pipe, and you should take your vehicle to a mechanic as soon as possible.

Engine replacements are very expensive, believe me, and it’s something you want to avoid at all costs. Please ignore the kid on the corner who says “Engine replacement isn’t a bad thing, buddy.” Note: You have probably ignored a few check engine lights, maintenance intervals, or other signs by the time fluid is coming out of your exhaust, so make sure to check if the fluid is about a cup per hour and smells bad. It’s probably just water condensation.

#4 – Cracked Engine Block or Cylinder Head

Let’s talk about the engine block and cylinder head. These are crucial parts of your engine, and when they crack, you have a serious problem on your hands. This usually happens because your engine overheated or something physically damaged the engine.

cost to repair a cracked cylinder head

In rare cases, using water instead of proper coolant in extremely cold temperatures can cause freezing and expansion, which can lead to cracks. But with modern antifreeze, this is quite rare.

When coolant leaks into the combustion chamber or into the exhaust system due to these cracks, you will see water or steam coming out of the exhaust. You may also notice the coolant level dropping, your engine running hotter than usual, and your car’s performance dropping.

If you suspect this issue, prepare for a hefty repair bill. Repairing a cracked block or head is a major job, and it’s certainly not something you want to ignore. Believe me, your wallet will thank you for catching this early.

#5 – Faulty Pistons or Rings

symptoms of bad piston rings and valve seals

Typically, piston and piston ring failure does not cause water in your exhaust, unless the head gasket is also blown at the same time. One way to diagnose if your rings and pistons are blown is to look for black soot residue or an oily film at the ends of your exhaust.

You might also notice unusual engine noises, a sudden loss of power, increased oil consumption (please check your oil dipstick or level meter (WHY BMW?)), and overheating as indicated by your temperature gauge. While checking these issues, keep an eye on the type and amount of smoke coming from your exhaust when you start your car.

It’s less precise, but if you’re trying to specifically diagnose if your piston rings are faulty, watch for a dark blue/gray color from your exhaust when you rev your engine. This means your piston rings are faulty.

If you are replacing your head gasket due to water in your exhaust, it’s best to check these pistons and rings while you’re at it.

#6 – EGR Cooler Failure

car shaking at idle

Now let’s talk about the EGR (Exhaust Gas Recirculation) cooler. This little gadget is designed to recycle and reduce emissions. It’s mainly found in diesel engines, cooling the exhaust gases and sending them back for another round in the engine.

But when this guy leaks, it’s like leaving the garden hose on in your engine. Coolant starts seeping into the exhaust system and suddenly, your car thinks it’s an 1800s steam engine.

You might notice white smoke coming from your exhaust pipe, your coolant mysteriously disappearing, and your engine running at a much higher temperature than normal. While not as catastrophic as a cracked block or a blown head gasket, it’s still a “take it to a mechanic” situation.

Ignore it and your wallet might start crying louder than a teenager who lost their phone.

Diagnosing the Problem

A large part of the diagnosis can be done using your two original tools: your hands and your eyes. (Let him cook!)

First, start your car cold and go out to observe the exhaust tips. Is there a constant stream of water coming out? If so, turn off the engine. Then, go back inside.

Are there only a few drops? It’s just water condensation and you can probably drive the car safely, provided there are no other unrelated exhaust issues you are ignoring.

The Short Answer

In 99% of cases, water dripping from your exhaust pipe is due to normal condensation and is not a problem. However, if it’s a significant amount of water, have your car checked by a professional.

How to Lift a Car: A Detailed Step-by-Step Guide

There are many occasions that may require you to work under the vehicle. This could be changing a tire, checking the brakes, or inspecting for a leak or damage. Whatever the reason, it is absolutely essential to use the proper equipment and follow the correct procedure. After all, you will be working under the car, so even a small mistake can cause a serious accident. But how to safely jack up a car?

Jacking up a car may seem simple; it’s a preparation for performing actual tasks. But trying to take shortcuts or using poor quality equipment can cause a life-threatening accident. This process involves using the right equipment and carefully following instructions.

Why do you need to jack up a car?

The reasons can vary. The most common are draining engine oil, removing a wheel, and replacing a flat tire. In fact, you will need to lift the car to access the undercarriage parts.

Some questionable repair shops might scam you during repair work. They might simply top up the oil without draining the dirty oil, use inferior quality products, and overcharge for certain parts. If you know how to perform mechanical work in addition to jacking up a car, you can save a lot of money.

jacking up a car
Learning how to use a jack will save you from having to go to the mechanic. (Photo source: digitaltrends)

Knowing how to use a car jack can save you in an emergency when you don’t have access to outside help. However, never attempt to change a flat tire on the highway. It’s dangerous for you and other drivers. The best thing to do is call roadside assistance. If this service is not available, you must attract the attention of the highway police by hanging something white (a piece of cloth or paper) on the driver’s side window.

Never attempt to change a flat tire or do anything else by jacking up a car on a hill slope. If going downhill poses a risk of completely destroying the tire, you should park the car near the curb. To prevent the car from rolling downhill, turn the wheels towards the curb and block the wheels on the downhill side.

How to jack up a car: follow the step-by-step instructions

Lifting a vehicle with a jack is a simple operation, but one that requires the utmost caution. Safety must be the priority during this tedious task. This detailed guide will teach you how to jack up a car in the safest and most effective way.

The tools you need

To perform repair or maintenance work on a vehicle, you will need the right tools. Before starting the process, make sure you have these items on hand:

  • A jack
  • Jack stands (for added safety and stability)
  • A few pieces of wood blocks, which can work similarly to jack stands
  • Cinder blocks or something similar/wheel chocks
  • Lights like wireless LED lights (if the area is not well lit)
  • Utility gloves
  • Owner’s manual

How to jack up a car: steps to follow

If you want to complete the lifting smoothly, proceed exactly as indicated in the following steps. Do not attempt to improvise unless you are sure it will not cause an accident.

Park the car correctly.

The first thing to do is park the car on a flat asphalt or concrete surface. An uneven surface can cause the jack to shift or tilt, which can lead to serious injuries. If you have a garage, choose a flat spot to perform this operation.

Engage the parking brake and keep the gear selector in “Park.” In the case of a manual transmission, engage first gear. Turn off the ignition and remove the key.

Place the wheel chock.

A chock is a wedge made from sturdy materials. A wheel chock prevents the wheels from rolling unexpectedly. Its bottom is covered with rubber for better traction and a firm grip on the ground.

You must place the chock behind the wheels opposite to the ones you are going to jack up. For example, the right rear wheel should be chocked if you want to lift the left wheel. When lifting the left side of the car, use two chocks against the right front and rear wheels.

Prepare the floor jack.

This part of the procedure for jacking up a car involves preparing the floor jack for the task. The jack’s relief valve must be closed. If it is open, you must close it by turning the jack handle clockwise. Also check for any fluid leaks or damaged parts. You should never use a jack that shows signs of deterioration.

A hydraulic jack is an ideal tool for lifting a vehicle. Some people might be tempted to use the car’s emergency jack instead of spending money on another jack. Don’t do that. The emergency jack is for changing flat tires when there is no other option. A floor jack is stronger, more stable, and can support more weight.

Mark the safe lifting points.

Mark a point where you are going to position the jack. It should be on the part of the car you wish to lift.

Vehicles are likely to have designated areas where you can place the jack. A jack positioned on these points ensures it can support the weight of the entire vehicle without breaking.

There are places where you should never place the jack, such as under the body panel. Placing it in the wrong spot can lead to a life-threatening accident.

Place the jack under the vehicle.

Where to place the jack under the vehicle? This is important because it might not support the weight for long if the placement is incorrect. Place it just behind or in front of the wheel to lift a front or rear wheel respectively. Place it somewhere in the middle between the two wheels when you want to lift the entire front or rear section.

Some vehicles come with dedicated points for placing the jack. There should be one near each wheel, and another additional point may be located between the front and rear wheels. Consult the owner’s manual if you can’t find them. The points are probably marked by a small arrow.

If there aren’t any, calculate the midpoint of the subframe and position the jack under that point. There are certain non-structural components, including the steering rack, radiator, and oil pan, on which you should never place the jack.

The rear differential on some vehicles is strong enough to be used as a lifting point. But you must check the owner’s manual to be sure.

Adjust the jack’s position.

After placing the jack in the correct spot, the next step is to adjust its position because the angle of the car may change after being lifted. Readjusting the position will ensure the jack does not slip.

Lift the vehicle.

After completing all the necessary preparations for jacking up a car, here is the step where you finally lift the car. To do this, push the jack handle down and pull it up quickly.

Continue pushing and pulling the handle until the vehicle reaches the desired height. Once the operation is complete, carefully monitor the vehicle’s stability. It is important that the jack remains exactly on the designated point. If it needs readjusting, lower the vehicle by releasing the jack’s valve, then lift it again after repositioning.

Place the jack stand.

This is the time to place the jack stand (one or more, as needed) under the vehicle. Place the jack stand near the jack so it can firmly support the vehicle. Its location should be under a secure part mentioned above. When lifting both ends of the wheels, you should place jack stands on each side.

Then, you can remove the jack. Simply open its release valve and lower it until the car touches the jack stand. Let it rest on the jack stand while you remove the jack. However, if you don’t need to use the jack for another task, leave it under the vehicle for added safety.

how to jack up a car
A jack stand provides extra safety. (Photo source: techtelegraph)

Remove the jack.

The final step is to remove the jack when you have finished the maintenance or repair work. You need to push and pull the jack lever to raise the car a few inches in order to remove the jack stands. After that, slowly open the jack’s release valve to lower the car to the ground. Then, carefully remove the jack.

This is how to jack up a car when you need to perform a repair, maintenance, or inspection. After completing the task and safely removing the jack, you can get back behind the wheel.

What is a blow-by in a diesel engine and its causes?

Diesel car owners often face significant carbon deposit buildup and occasional engine contamination. The reason your vehicle’s engine behaves this way is blow-by in a diesel engine. Now you must be wondering what blow-by is in a diesel engine, right? Well, it’s not an ordinary issue but a drastic problem that can diminish the vehicle’s engine performance. Several causes are responsible for this behavior of your car’s engine.

So, let’s understand why the diesel engine behaves this way and what blow-by gas means:

What is Blow-by in a Diesel Engine? Causes and Solutions

A serious issue affects engine operation when a cylinder wall and piston have a faulty seal, allowing the air-fuel mixture to leak into the engine crankcase. This is what we call blow-by gases in a diesel engine. Possible causes of this problem can be poor performance, reduced torque and power, or even higher oil consumption. It’s always advisable to follow effective maintenance tips from experts for better understanding. Now let’s see what causes it and how it affects the vehicle.

What Causes Blow-by in a Diesel Engine?

Blow-by is a phenomenon that creates unwanted pressure waves; this process often generates unusual sounds and can damage certain moving parts inside the engine like a cylinder or piston. We often encounter this issue in gasoline engines; nevertheless, diesel engines always have this problem due to the high compression ratio.

Typically, blow-by occurs at the end of compression, at the beginning of combustion, when the spark plug hasn’t ignited yet and the air mixture in the car has spontaneously ignited. For diesel engines, fuel burns in many combustion areas. So, what are the causes of this problem:

1. Worn Pistons

One reason that can answer your question about what blow-by is in a diesel engine and what causes it is worn pistons. Unlike cylinder walls that amplify wear, pistons tend to become smaller. Since aluminum is a soft metal, it easily allows buildup in the combustion chamber and creates grooves in the piston. And this means the air-fuel mixture will accumulate in the crankcase.

WHAT IS BLOW-BY IN A DIESEL ENGINE
Over time, worn pistons cause engine leaks (Photo source: fragxpo)

2. Damaged Cylinder Walls

Another possible reason leading to blow-by in a diesel engine is damaged cylinder walls. With continuous use, the vehicle and its components wear out. This also includes cylinder walls. Continuous piston and piston ring scraping lead to damage to cylinder walls.

This creates a gap in the cylinder, enlarging it, which makes it easier for compressed gases to pass into the piston. We hope these points help you understand what diesel blow-by is. Worn cylinders can never function as they should. So it’s always recommended to keep an eye on the cylinder.

3. Broken Piston Rings

The third reason could be those broken piston rings. When looking for an answer to the question “what does blow-by mean in a diesel engine,” it’s important to mention this point. Broken or damaged piston rings can cause blow-by in a diesel engine. The incessant friction of the rings in the cylinder eventually damages it. The sealing capabilities of the piston ring can be expected to deteriorate significantly over time. This certainly leads to gases easily seeping behind the ring, which simply results in blow-by in a diesel engine.

WHAT IS BLOW-BY IN A DIESEL ENGINE
Broken piston rings are the culprits of blow-by (Photo source: innovationanddiscoveries)

Solutions for Blow-by in a Diesel Engine

Excessive smoke, decreased engine performance, or higher oil consumption can be the result of blow-by in a diesel engine. So, how can we fix this phenomenon? The steps below can help:

Check the PCV System:

The PCV, or Positive Crankcase Ventilation, is responsible for regulating crankcase pressure. If you notice a leak or a hose on the PCV system, you need to replace it to solve the problem.

Inspect and Change Piston Rings:

Faulty or worn piston rings are the most common reasons causing blow-by. The consequence is that the rings don’t create a proper seal and gases can’t escape. In this case, we recommend changing the piston rings, but it’s a rather complex task and you should entrust your car to a qualified mechanic to repair it.

Inspect Valve Seals and Cylinder Head:

Inspect the cylinder head for any signs of damage or warping. Damaged cylinder heads can cause blow-by. Additionally, worn valve seals can allow gases to bypass the piston rings. Replace faulty components if necessary.

The Crucial Point

We believe you may now have an answer to the question of what blow-by is in a diesel engine and what causes it. So it’s recommended to keep an eye on the piston, piston rings, and even the cylinder to ensure your vehicle operates properly.

Why Do Diesel Engines Have a Higher Compression Ratio? The Unrevealed Secret

The compression ratio is a determining factor in the behavior of any engine. It is the evaluation of the engine cylinder’s ability to compress fuel and air. Different engines, such as gasoline engines and diesel engines, have different compression ratios. However, the diesel engine’s ratio is comparatively higher. Why are diesel engine compression ratios higher than those of other engines? This question must be haunting you, and you will find the answer right now.

So let’s find out together!

Definition of Compression Ratio

For an engine to function properly under highly variable conditions, the following conditions must be met:

  • Air and fuel mixture
  • Good compression ratio
  • Ignition process

Thus, the compression ratio is calculated by the maximum volume of the cylinder (when the piston is at the bottom of its stroke) divided by its minimum volume (when the piston is at the top of its stroke).

  • Gasoline engine: The compression ratio will need to increase to help boost engine power, but the risk of knocking will be high.
  • Diesel engine: The compression ratio would need to be reduced to make the engine “quieter,” but in return, lower pressure and temperature conditions would reduce the auto-ignition capability, making combustion more difficult.

Therefore, the automotive engineer will need to limit the compression ratio of the engine using each type of fuel to a certain range.

Why Are Diesel Engine Compression Ratios Higher? – Main Reasons to Check!

Generally, the compression ratio of diesel engines is higher than that of gasoline engines (with the exception of some special gasoline engines like Mazda’s).

A typical gasoline engine has a compression ratio of about 8:1 to 12:1. However, in diesel engines, the compression ratio is typically around 15:1, and there are “special” diesel engines with compression ratios that can reach up to 25:1.

The main difference between gasoline and diesel engines lies in the ignition mechanism. While gasoline engines need spark plugs to carry out the combustion process of the compressed air-gasoline mixture, diesel engines operate on the principle of auto-ignition. When the air-diesel mixture is compressed at high pressure (high compression ratio), the heat generated creates the spontaneous combustion process. This characteristic gives diesel engines high energy efficiency.

To learn more about the reasons, we have listed below the main reasons why a diesel engine has a higher compression ratio than any other engine. So, take a look!

1. According to Application

Diesel engines are ideal for heavy vehicles such as locomotives, ships, trucks, and other gigantic automobiles. Therefore, they have a higher torque application. To start such a large vehicle, a large amount of energy is needed, which ultimately leads to an increased combustion rate. The compression of air is the process that occurs in a large cylinder inside an engine. Therefore, fuel is also burned rapidly. It produces more power inside the engine, which ultimately leads to a higher compression ratio. Therefore, the engine cylinder size and, of course, the application are the reason why diesel engines have a higher compression ratio.

Fundamental reasons why diesel engines have a higher compression ratio
Main reasons why diesel engines have a higher compression ratio (Photo source: everypixel)

2. Knock Avoidance

Knocking is a serious problem in engines. It occurs when there is abnormal combustion inside the engine cylinder. Knocking problems are generally more frequent in gasoline engines. When the compression ratio increases, the gasoline engine knocks, which is why it is not considered an ideal compression engine by many people. Coming back to the diesel engine, there is no knocking. The larger cylinders provide enough space for your fuel to flow and burn inside the engine.

The main reasons why an engine can produce knocking are:

  • Ignition delay inside the injectors
  • Increase in temperature inside the engine
  • When the fuel injector fails to completely ignite the fuel

Thus, to avoid engine knocking, the diesel engine has a maximum compression ratio.

3. Spark Plug

Gasoline or petrol engines require a spark plug to burn the fuel. The diesel engine does not need a spark plug to generate power, but the high compression ratio is enough to ignite the fuel. For the engine to auto-ignite, a higher compression ratio is needed. Furthermore, diesel is very volatile, and only air compression is enough to ignite the fuel. Thus, to prevent the engine from burning or presenting other hazards, a diesel engine is built to acquire a high compression ratio. Additionally, to handle any unexpected issues with the diesel engine, you can learn some useful maintenance tips from the experts.

Find out why diesel engines have a higher compression ratio
Why diesel engines have a higher compression ratio (Photo source: dailydriven)

Conclusion

So, whenever you wonder why diesel engines have a higher compression ratio, remember this useful information and choose the engine of your choice.