Cylinder Head Gasket Problems and Solutions

The standard practice for replacing a faulty head gasket is to call a mechanic. But that doesn’t mean you can’t detect problems and solve them at home.

In any engine, the head gasket is an important component. Any problem with the head gasket can be of two types: minor and major. If there is a minor problem or leak, the engine may then consume more oil or coolant. In a more serious case, the coolant and oil can mix. There is a fixed set of techniques to detect if there is a problem with your head gasket. Generally, a compression test is needed to diagnose an engine with a blown head gasket.

Problems with the Head Gasket

1. Coolant Consumption

Coolant consumption is a driver’s worst nightmare

In modern cars, the number of coolant passages is numerous. Through these passages, the coolant flows to rid the engine of excessive heat. The head gasket prevents the coolant from escaping the passages. When the head gasket is broken, the coolant reaches the combustion chamber and the engine consumes it. Check the exhaust pipe when the engine is running to detect a problem. If you notice that excess water or steam is escaping from the exhaust pipe, there may be a problem. Or, you can simply put your hand in front of the outlet to see if it is too wet or damp. After that, check under the hood while the engine is still running to see if there are any accumulated bubbles. One or more of these precisely indicate that you have a faulty gasket.

2. Oil Consumption

Regularly check the oil system. Source: Toyota

In any engine, the number of coolant passages is the same as the number of cylinder heads. The purpose of the oil passage is to transport the oil. When the oil moves between the cylinder head and the engine block, the head gasket seals these passages. A faulty head gasket can lead to excessive oil consumption. The common symptom is a whitish-bluish exhaust. After detecting any of these signs, you should look for a blown head gasket.

3. Oil Mixing with Coolant

If you find this mixture inside your vehicle, it will be terrible

Many people underestimate this problem, and it is one of the most common mistakes: a mix of coolant and oil means your car is in serious trouble. When the coolants mix, they significantly damage the properties of the oil. Gradually, the bearings and other engine parts are damaged.

Any sign of irregularities in the oil gauge means there is a serious gasket problem.

4. Exhaust Problems

A damaged head gasket can allow exhaust gases to leak into the cooling system, leading to the formation of air bubbles in the radiator or coolant overflow tank. This can also cause a noticeable exhaust smell or excessive pressure in the cooling system.

5. Loss of Compression

A failing head gasket can lead to a loss of compression between the cylinders. This can result in reduced engine performance, misfires, and poor fuel efficiency.

6. Overheating

When a head gasket fails, it can disrupt the engine’s cooling system, leading to overheating. This can be due to coolant leaks, restricted coolant flow, or combustion gases entering the cooling system.

Replacing the Blown Head Gasket with a New One

The old and broken gasket must be changed immediately

The installation process may vary depending on the specifications of the car you own. But in general, you need to follow the following process to replace a head gasket.

Tools and Materials

  • A head gasket that matches your old one
  • The vehicle owner’s manual
  • A set of wrenches
  • A pry bar
  • An applicator and RTV

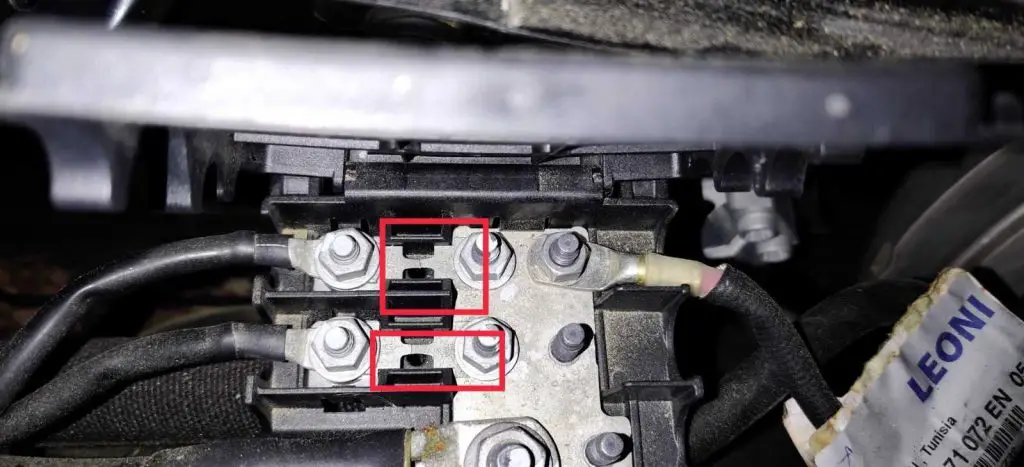
Disconnect the Battery

Make sure the engine is cold, then disconnect the negative battery cable to prevent accidental electrical shorts.

Drain the Coolant and Engine Oil

Locate the coolant and engine oil drain plugs and drain both fluids into appropriate containers. Follow the manufacturer’s guidelines for proper disposal.

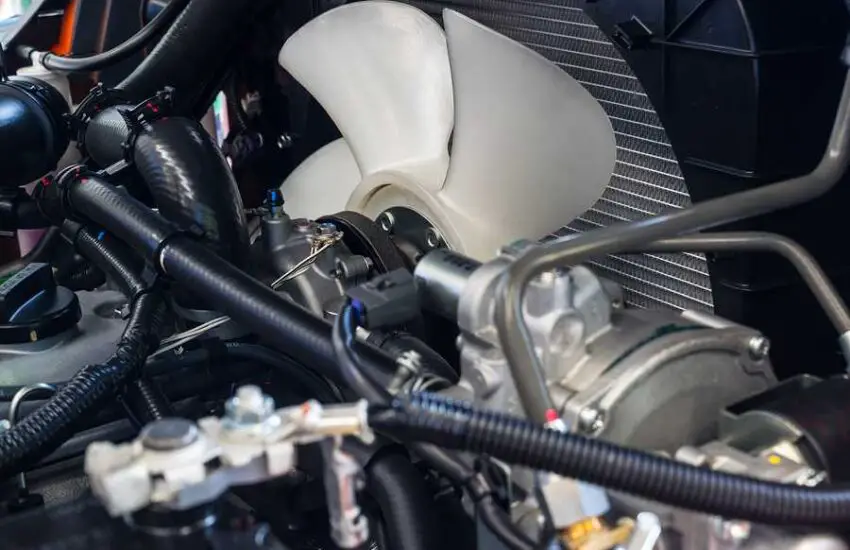
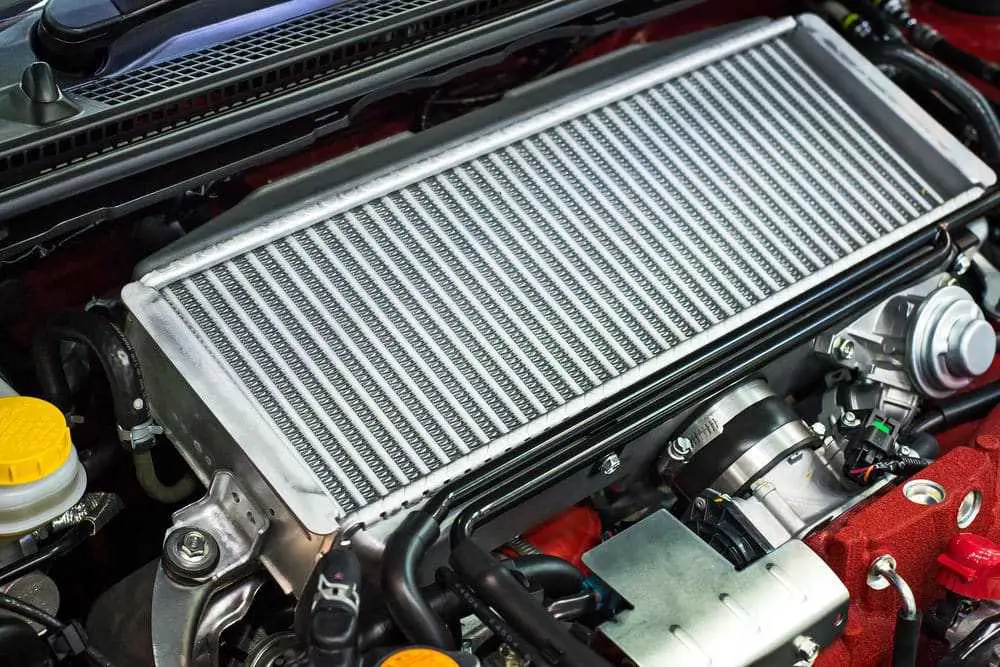
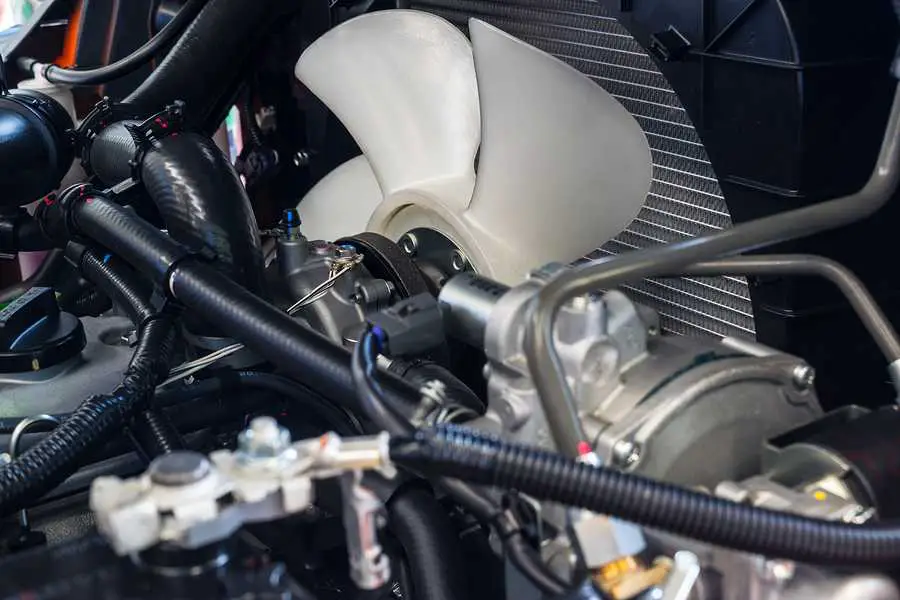
Access the Head Gasket

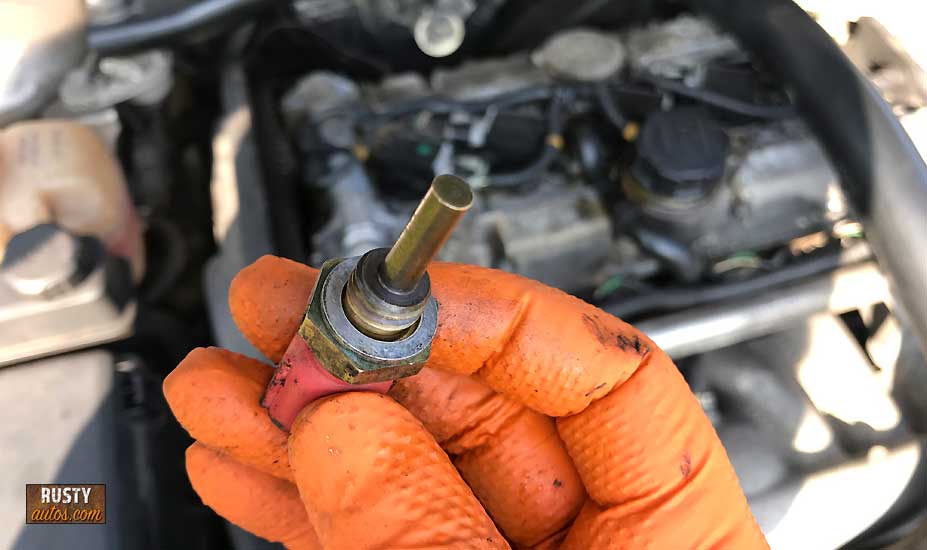
Accessing the head gasket is the most difficult task in this process. To do this, you need to have a good knowledge of the engine and its components. The first thing to remember is that the location of the head gasket is in the deepest part of the engine chassis. This is where the owner’s manual will prove useful. Carefully go through the manual to know how to access the gasket. Special caution is needed when removing the components as they are fragile. Also, keep them in order so you don’t have trouble reattaching them later.

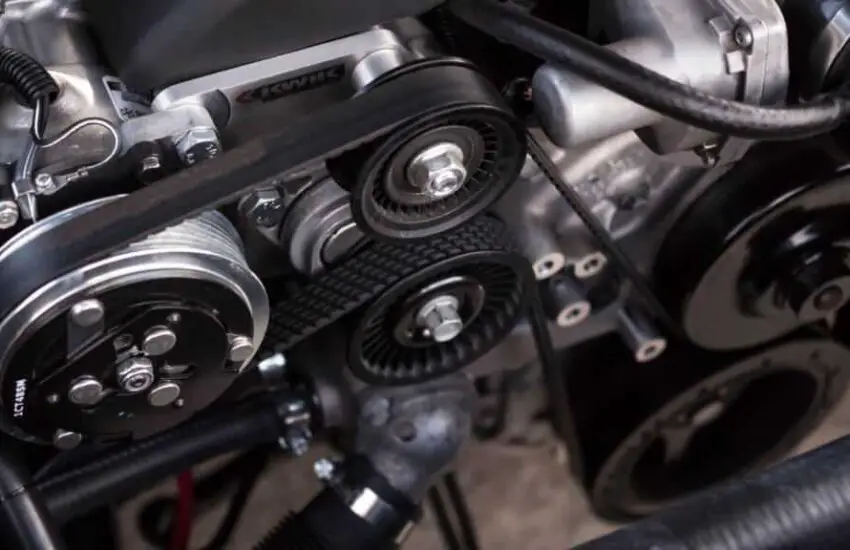
Remove the Necessary Components

An essential step to change the gasket

Start by removing the intake and exhaust manifolds, valve covers, the timing belt or chain (if applicable), and any auxiliary components that block access to the cylinder head.

Relieve Fuel System Pressure

Details on the gasket

If your vehicle is equipped with a fuel injection system, relieve the fuel pressure by following the manufacturer’s instructions.

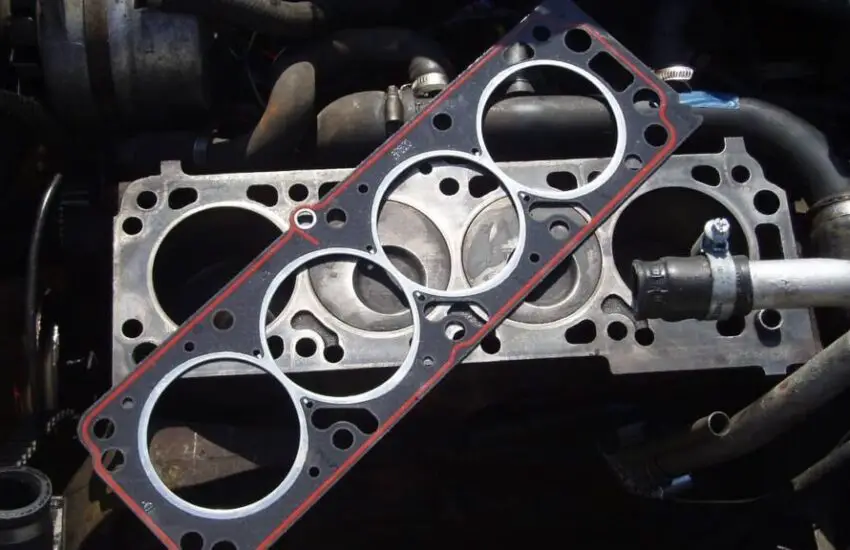
Remove the Old Gasket

First, use a wrench to loosen the bolts, then remove the head. Now take the pry bar to disassemble the faulty gasket. Carefully wipe the head underneath (location of the scrapped gasket). This way, the surfaces will be better suited for a new gasket.

Check the Cylinder Head and Replace the Gasket

A visual inspection is sufficient to detect any type of tear, damage, and wear. If everything looks good, carefully fit the new gasket to ensure the seal is tight. Make sure the new gasket and cylinder head are properly installed, without any gaps. Now, press firmly on the corners of the head. If an area remains unsealed, use the RTV to tighten it. When everything is done, carefully reassemble all components and try to start the engine, to see if the problem has been resolved.

Reassemble the Remaining Components

Reinstall all previously removed components, such as the timing belt or chain, valve covers, intake and exhaust manifolds, and any other parts removed during disassembly.

Reconnect the Battery

Reconnect the negative battery cable, start your engine, and check for leaks.

How much to replace a Tesla battery?

How much to replace a Tesla battery? Replacing the battery in a Tesla model could probably cost a few hundred dollars. Even more? Keep reading to find out the real price:

A bit about Tesla batteries?

Tesla is the world’s largest electric vehicle manufacturer, and many people wonder what type of batteries the company uses and what the specific features of these batteries are. Let’s now see how many types of battery cells Tesla has:

  • 1865 (18mm diameter, 65mm height): Roadster (original), Model S, Model X.
  • 2170 (21mm diameter, 70mm height): Model 3, Model Y
  • 4680 (46mm diameter, 80mm height): Model Y Made-in-Texas. This larger format cell is expected to be deployed in future models like the Cybertruck and the Semi.
  • LFP Prismatic Batteries: Model 3 and Model Y
How much does a Tesla battery cost? (Photo: evsrepublic.com)

All Tesla batteries are lithium-ion batteries, but not all are identical. There are several different primary cathode chemistries, each developed over the years. Three main types of cathodes in Tesla electric vehicles:

  • Nickel-Cobalt-Aluminum (NCA)
  • Nickel-Cobalt-Manganese (NCM)
  • Lithium Iron Phosphate (LFP)

Currently, Tesla uses solid-state lithium-ion batteries instead of liquid batteries, like many companies today. This technology is also applied by Tesla and Audi, not only to enable fast charging (only 30 to 45 minutes for a full charge), increasing battery lifespan, but also limiting the risk of battery explosion.

How long do Tesla batteries last

Thanks to continuous improvements in battery technology, Tesla batteries are designed to last for hundreds of thousands of kilometers, with some estimates suggesting they retain up to 70% of their capacity after 500,000 kilometers. For electric vehicle buyers, battery lifespan and degradation rate are very important. According to the latest data from Tesla, the Model S/X battery is expected to lose an average of 12% of its capacity after 200,000 miles (322,000 km). And research from Recurrent Auto based on battery data from about 6,300 Tesla Model 3s in the United States shows that on average, the battery still has about 90% of its capacity after 5 years of daily use.

According to Tesla, the vehicle will typically be scrapped after 200,000 miles in the United States and after 150,000 miles in Europe. This means the battery will outlast the electric vehicle in most usage cases, without significant range loss over its lifetime.

How much to replace a Tesla battery?

Typically, Tesla batteries can last from 10 to 20 years, so you don’t need to constantly worry about battery replacement. However, in some unfortunate cases, you must replace your Tesla’s battery, so be aware that the cost of replacing a Tesla battery is never cheap. The average cost to replace a battery in a Tesla ranges between $5,000 and $20,000 depending on the model, pack, and battery size. According to Recurrent estimates, replacing the Tesla Model 3 battery will cost about $180/kWh, or approximately $15,800, including labor for the entire battery. Currently, the Tesla Model 3 has a starting price of about $45,000; so you see the replacement cost represents more than a third of the total price of a new car.

Tesla Model Battery Replacement Costs
Model 3 Over $14,000
Model Y $5,000 – $5,500
Model S $13,000 – $20,000
Model X Over $13,000

Compared to other brands that produce electric vehicles, Tesla battery costs are significantly higher. In comparison, the battery cost for a Hyundai Ioniq is set at about $2,850. The battery cost is one of the main reasons why Tesla vehicles are more expensive than other brands or equivalent gasoline cars.

Ex: Current Automotive published the 2020 receipt for a customer replacing a refurbished 75 KWh battery in a Tesla Model 3:

  • Battery: $13,500
  • Labor: $2,299.27
  • Total: $15,799.27

Note: It is important to keep in mind that battery replacement will only cost you money if it is no longer under warranty. This means if your battery is covered by the manufacturer’s warranty, typically 8 years and 100,000 miles, you should get the battery replaced at no extra cost. So if you want to learn more about the Tesla battery warranty, follow the next part:

Tesla Battery Warranty

Tesla batteries can last from 10 to 20 years (Photo: pinterest.com)

Driving an electric vehicle with an expired battery warranty can be a major concern for many drivers, as you will spend a significant amount on battery replacement. Knowing the details of the warranty policies can help you be proactive about replacement and make the right decision regarding car usage. Here is how long Tesla warranties cover battery replacement for different models:

Model S 8 years or 150,000 miles, whichever comes first, with a minimum retention of 70% of battery capacity during the warranty period.
Model X
Model 3 Rear-Wheel Drive 8 years or 100,000 miles, whichever comes first, with a minimum retention of 70% of battery capacity during the warranty period.
Model 3 Long Range 8 years or 120,000 miles, whichever comes first, with a minimum retention of 70% of battery capacity during the warranty period.
Model 3 Performance
Model Y All-Wheel Drive
Model Y Long Range
Model Y Performance

The Tesla warranty only covers malfunctions or damage caused by manufacturing. If the battery is damaged due to collisions, exposure to fire, water, unauthorized service, poor maintenance, windstorms, off-road driving, and several other events, the owner will bear the costs.

When it comes to replacing your Tesla battery, you will have several different options:

  • Tesla Service Center: Taking your car to a Tesla service center or having one of its mobile service technicians come to your home can be the most reliable solution for replacing a Tesla battery, even if it might cost more. You can schedule a service appointment using the Tesla app.
  • Third-Party Repair Shop: Your second option is that you can take your Tesla to a non-Tesla workshop, but it might be harder to find one with expertise in Tesla vehicles. You will need to research the available options in your area to find the one that suits you. Replacement might be less expensive at a third-party repair shop, but make sure the mechanics have extensive experience working with Teslas.
  • Replace it Yourself: While it might be tempting to replace a Tesla battery yourself to save money on labor costs, it is generally not advised unless you have training and expertise in this area. Replacing an electric battery yourself can damage the vehicle and you might end up spending more to fix the problems caused by your DIY replacement.

Tips to improve Tesla battery lifespan

To get the most out of your Tesla battery, you can refer to a few tips below to help your battery last longer:

Always charge your Tesla, but not to 100%

Charging to 80% instead of 100% is a recommendation experts have long given to increase battery lifespan. However, few electric car owners are bothered by this, as they often charge overnight and wake up to a car with a 100% battery. Andy Slye claims that 80% is more than enough for daily use.

Driving Habits

If you drive like racers Scott Dixon, Tanner Foust, or Bubba Wallace, you will deteriorate your car’s and battery’s lifespan. Frequent acceleration, hard braking, and sharp steering negatively impact any part of the race car’s exterior.

Regular Maintenance

One of the most important factors that determine your car’s lifespan is you, the person behind the wheel. It is essential to adhere to your car’s maintenance schedule, even if an electric car has fewer faults than an internal combustion engine (ICE) vehicle.

How to Fix the Tire Pressure Sensor Fault

Seeing the tire pressure sensor error message on the instrument cluster while driving the car is quite common. Do you know how serious the problem is and how much replacing the tire pressure sensor will cost?

All automobiles manufactured after 2007 require a TPMS or tire pressure monitoring system. The system has sensors that monitor the pressurized air level inside the tires. The sensors provide real-time information about tire pressure.

What does the tire pressure sensor fault mean?

The tire pressure sensor fault message indicates a problem with one or more sensors in a vehicle’s Tire Pressure Monitoring System (TPMS). TPMS sensors are installed in the tires and are responsible for monitoring air pressure levels. They send signals to the vehicle’s computer system, which then displays the tire pressure readings on the dashboard.

Seeing this message is common. (Photo source: cargurus)

The error code indicates whether the pressure sensor is faulty or if the air pressure in the tires is too high or too low.

When the tire pressure sensor is malfunctioning too badly, it provides inaccurate readings. A faulty TPMS control unit or frayed wiring could also be the cause. Sometimes you can resolve the problem

Simply by resetting the TPMS, but replacement is the only option in some cases.

Symptoms of a faulty pressure sensor

The sensor is an electrical component and can therefore be damaged for many reasons such as age, heat from dirt, and irregular power supply. Some of the symptoms of high or low tire pressure sensor failure are:

1. Incorrect Readings

One of the main indications of a faulty pressure sensor is incorrect or inconsistent pressure readings. The sensor may provide readings significantly higher or lower than the actual tire pressure. This can be observed via the Tire Pressure Monitoring System (TPMS) display on the dashboard or with a separate tire pressure gauge.

2. A warning light on the dashboard

A faulty pressure sensor can trigger the TPMS warning light on the dashboard. The warning light may appear as a symbol resembling a tire with an exclamation point or the letters “TPMS”. This light usually indicates a fault in the tire pressure monitoring system.

3. False alarm

The car’s dashboard constantly displays warning alerts (indicating low tire pressure when the tires are actually properly inflated), but the tire is still in a normal condition. Furthermore, it is possible that when the tire pressure and temperature change, the parameters displayed on the screen remain unchanged.

4. Inconsistent behavior

A faulty pressure sensor can cause irregular behavior of the TPMS. For example, readings may fluctuate frequently or display different values each time the vehicle is started or while driving.

When the tire pressure sensor is faulty, the driver can resolve this issue by resetting or replacing the sensor. If the sensor is not receiving the signal, you must replace the sensor valve with a new one. To learn more about the detailed steps, let’s move on to the next part to find out:

How to fix the tire pressure sensor fault?

Manually check tire pressure

Before starting the repair process, you must ensure that all tires have the correct air pressure. There is a label behind the driver’s door that indicates the suitable tire pressure for your car. You can find the same information in the repair manual. Check the tires with a pressure gauge to see if they have the correct level or air pressure.

In case of overinflation, release some air until it reaches the correct level. Inflate with air if the tires are underinflated. Fill them with a bit more pressure than mentioned on the label when the tires are hot, as high temperatures lower the pressure label.

For example, if the tire pressure label indicates 240 kpa, the TPMS will display an error code when the pressure drops below this level. If you fill the tire to 240 kpa when the tires are hot, the pressure may drop to 220 kpa when they are cold.

Check the repair manual to see how to reset your car’s TPMS. Some models have a reset button. Simply push it after filling the tires with the correct pressure. You may need to drive some cars for at least 15 minutes for the warning lights to turn off.

Inspect the tire pressure sensor

Check tire pressure before resetting the TPMS (Photo source: bolt-ua)

Visually inspect the tire pressure sensors for any visible damage, such as physical impact, corrosion, or loose connections. Ensure the sensors are securely mounted on the tire valve stems. If the tire pressure sensor is found to be faulty and cannot be repaired, it may need to be replaced. Faulty sensors usually require professional assistance to ensure proper installation and calibration. A qualified technician can diagnose the faulty sensor using specialized diagnostic tools and replace it with a new sensor if necessary.

Replace the sensor battery

Generally, the average battery life of the sensor will be 2 to 6 years depending on the sensor valve’s position. After this period, if the sensor valve is not transmitting data to the car’s dashboard, your sensor may be out of battery. When the sensor valve is out of battery, the letter “L0” will appear in the parameter display position corresponding to that valve’s position. A sign that the tire pressure sensor is discharged is that one or more sensors are not sending a signal to the controller. So, if the tire pressure sensor uses a replaceable battery, it may be necessary to replace the battery.

The radiator fan is not working

The issue of radiator fan malfunction will cause enormous damage to the engine and therefore must be given immediate attention when it occurs.

As part of the engine cooling system alongside coolant, a radiator fan blows fresh air through the radiator as a means of heat transfer to prevent the engine from overheating.

Discover how a radiator and a radiator fan work, how to diagnose the radiator fan malfunction problem, and the common causes.

What is a Radiator Fan For?

Everything related to the proper functioning of your engine is a priority, after the engine itself. Another component that can lead to engine malfunction and failure is the radiator.

Quite different from the radiator in your home, a radiator in a car is an essential element of its engine cooling system.

The engine runs your car by generating combustion inside the combustion chamber, and with it also a large amount of friction. This results in a lot of heat inside the engine.

car radiator cooling fan not working
The radiator is the heart of the cooling system. Creator: Shutterstock

If this heat is not diverted elsewhere to cool the engine while it is running, the engine will become too hot and, like all other parts of your car, this will eventually cause enormous damage.

The radiator is one of the multi-part cooling systems of the engine, along with the lubricating oil that reduces friction and the exhaust system through which heat exits the combustion chamber.

When the thermostat located in front of the engine detects that the engine is reaching a dangerous temperature, the radiator then springs into action by releasing a mixture of water and coolant to quickly cool the engine.

There is a sensor on the lower passenger side of the radiator. It does the job of taking notes on the coolant temperature.

It sends signals to the radiator fan to turn on when the temperature exceeds 172°F. The fan should also turn on after turning on the air conditioner.

Placed between the radiator and the engine, cooling fans blow cooling air through the car’s radiator to cool the heated water and coolant mixture circulating through the radiator.

car electric fan not working
Radiator fans blow cooling air through the car’s radiator. Source: Adobe Stock

Radiator Fan Not Working: Symptoms

If you need to confirm whether it is working or not, you need to start your engine and let your vehicle idle. The safest way to check is to actually listen for the sound of the fan.

Turn the air conditioning to the maximum setting, this should trigger the cooling fan which will turn on immediately. In older cars, it usually takes about 15 to 20 minutes for the engine to reach the right temperature.

All you have to do is lift the engine hood and listen carefully for the fan noise. The best modern cars have very quiet engines so it may not be easy to hear the noise when you are inside the car.

If the fan kicks in immediately when the air conditioning is running at maximum volume, but it doesn’t work properly when the engine heats up later, the radiator fan may not be working properly.

Can I Drive My Car If the Fan Is Not Working?

Yes, your car can still run without a radiator fan, but you should never drive it. Your vehicle’s cooling system is crucial for engine performance and lifespan.

Whenever your engine overheats, you cause enormous damage to the precious engine.

As soon as you feel that your radiator fan is no longer working or that your car is not cooling, you need to take a few troubleshooting steps to determine what the problem is.

If you can’t figure it out, take your car to a mechanic immediately so they can determine the problem.

Radiator Fan Not Working: Common Causes

What prevents cooling fans from working? Here are 5 common problems that can affect your car’s radiator fan, making it obsolete or ineffective:

1. A Bad Fuse

This is a very common problem that leads to radiator fan failure: the fuse can blow or simply fall out.

You will need to consult the owner’s manual to know exactly where you can find the fuse, but once you do, it’s an easy task.

You will need to replace the radiator fan fuse if it is not working or missing.

Remember that if anything electrical in your car isn’t working, your first point of check is the fuse. Here’s how to test radiator fan fuses with a multimeter.

Car radiator fan not working
Check the fuses one by one. Source: AudiWorld

You need to check the voltage of a few fuses in the fuse box under the dashboard (numbers 3, 15, and 20) and in the fuse box under the hood (numbers 47 and 50).

Turn off the engine or turn the ignition key to IG2. Set the multimeter dial to “20” in the DCV section because you will be testing 12V circuits.

The multimeter’s black probe will go to the negative terminal of the battery (for fuses under the hood) or to a metal ground point on the car (for fuses under the dashboard).

Each fuse has two contacts where you need to touch the multimeter test probes to get the readings.

Touch the red probe to one of the two contacts and take the reading. The value should be around 12 volts.

No need to worry about recording the precise voltage value as it varies due to several factors including alternator output and battery charge. Touch the robe to another contact and take the reading.

What do the readings mean?

  • 12V on both contacts. This means the fuse is working correctly and you can simply check the next one.
  • 12V on one contact and 0V on the other. This is the sign of a blown fuse. You need to replace it.
  • 0V on both contacts. This means the fuse has no power, which is only possible if the black probe is not properly connected to the battery’s negative terminal or grounded to a metal part. Detach the probe, then reconnect it to take measurements.

2. Dead Wires

If you see the engine heating up but not the radiator fan, the fan wires could be the cause. Simply disconnect the two wires, negative and positive.

The standard direct current they must supply is 12V (approximately). Take a voltmeter and check for current. If there is none in one or both, you will need to replace it.

radiator fan not spinning
If you see the engine heating up but not the radiator fan, the fan wires could be the cause. (Photo: Honda Technology)

You will be able to locate the fan relay under the hood. Check the current between the relay and the fan. This is where the current must pass.

If there is voltage there, a fault in the fan is the reason why the radiator fan is not working. Then it is the fan that you will need to replace.

3. Broken Fan Clutch

The fan clutch is responsible for attaching the radiator fan to the engine and making it work. If this clutch fails, the fan will not work.

It is the usual wear and tear over the years that can cause corrosion, or even burning out, of the clutch springs. If you don’t find any other radiator fan problems, the clutch is probably the cause.

4. Insufficient Coolant Level

An insufficient coolant level in the engine can also lead to fan failure. Just look at the coolant reservoir and check if the level reaches the required maximum mark. If not, simply fill it up to the line and you’ll be good to go.

This is actually one of the most practical maintenance tips that helps you keep the engine as well as the cooling/heating system in good condition.

5. Defective Temperature Sensor

The temperature sensor is the mechanism that decides when the radiator fan should spring into action. To do this, it reads the temperature of the cooling system.

If this sensor is faulty, the fan will not be able to start its operation. You will likely find this sensor in the thermostat housing.

You can try disconnecting the wires and reconnecting them to the sensor, chances are it will work. Otherwise, you will need to have it replaced.

Radiator fan not working when AC is on
If the temperature sensor is faulty, the fan will not be able to operate. (Photo: Rusty Autos)

6. Faulty Radiator Fan Motor

If the radiator fan not working problem persists, you can check the fan by connecting it to another power source, i.e., direct battery power.

First, unplug the wiring connector. Check for any damage and clean the connector. Make sure the wires are securely fastened and are not damaged.

Next, look at the wires and identify which are power wires and which are ground wires to avoid confusion.

Then, connect the battery negative to the ground side of the fan connector, then connect the battery positive to the other wire.

You may need to consult your vehicle’s repair manual to see if your vehicle has a 4-terminal connector or three terminals, two for power and one for ground wires. After being connected to the battery, your radiator fan should start working.

However, if your radiator fan does not start working with direct power or runs at a very low speed, you then need to ensure that the terminal is not damaged and test the incoming voltage.

If there is indeed incoming power, the problem is a failing fan motor and you will also need to replace the fan motor.

Radiator Fan Replacement Cost

A radiator fan costs between $200 and $400. Additionally, your mechanic will charge you between $120 and $200 for labor depending on the make and model of your car.

Since the radiator is located right at the front, your mechanic does not need to open other components to remove the radiator fan.

If you also need to replace the fan motor, labor costs are estimated between $170 and $220, while parts cost between $530 and $680.

my radiator fan won't turn on anymore
The cost of replacing a radiator fan ranges between $300 and $700. Source: Ebay

How Long Does It Take to Replace a Radiator Fan?

Replacing a radiator is a laborious process and the duration varies depending on the skills of the service attendant.

It is unlikely that a professional mechanic will take more than 2 to 3 hours. It may take an additional 30 minutes to an hour because the process involves additional services like coolant disposal, broken belts, and a few other things, if necessary.

Experts may need two to three hours for installation.

You may need more time depending on the condition of some other parts. If the car is old, it is possible that the electrical connectors and terminals are damaged and the fasteners are broken.

You will need to repair and replace these parts for the radiator to resume operation. Some mechanics may also want to change the antifreeze and replace the radiator hoses.

Signs of a bad universal joint

Without a universal joint (or U-joint), you cannot drive a vehicle. To ensure your car’s health and your safety on the road, you need to be able to detect the signs of a bad U-joint.

What is a Universal Joint?

The universal joint is a driveshaft component found in rear-wheel drive trucks, SUVs and four-wheel drive trucks, as well as all-terrain vehicles.

This component transfers power from the transmission to the differential and compensates for the height misalignment between the transmission and the rear axle. Present in pairs on the driveshaft assembly, you cannot drive a vehicle without functional universal joints.

Each end of the driveshaft is connected to a universal joint. With each rotation of the driveshaft, the joints bend to correct the misalignment. Nowadays, rear-wheel drive cars use constant velocity joints instead of U-joints for smoother driveshaft rotations. In automobiles, there are two universal joints placed along the driveline. Car owners can locate them at the engine as well as the rear differential of rear-wheel drive cars. In some four-wheel drive automobiles, there are more U-joint connections along the drivetrain than in other vehicles.

Signs of a Bad Universal Joint: Clues to Look For

There will be certain symptoms of failing universal joints. Detecting these warning signs of a bad U-joint will likely prevent your car from being towed to a repair shop.

Squeaking Noises

Does your car squeak when it starts moving after the engine starts? It becomes noticeable when the car moves forward or backward, but disappears when the vehicle accelerates to more than 5 to 10 mph.

signs of a bad joint
Simply greasing the joints can solve this problem. (Photo Source: autoyas)

Why does this happen? Universal joints contain factory-lubricated bearing components. However, this grease can run out or evaporate over time. Each rotation of the driveshaft slightly twists the bearings. Thus, dry bearings cause metal-on-metal contact and excessive friction leads to squeaking and corrosion.

The squeals are a reminder that it is necessary to call a professional mechanic to diagnose and service the universal joints. Prompt maintenance will extend the life of the joints and prevent driveshaft failure.

A Clunking Sound

Clunking sounds are signs of a bad universal joint, especially when you hear them when shifting the vehicle from “Drive” to “Reverse”.

The clunking sound means the bearings allow the driveshaft to rotate a bit before stopping abruptly when the power is reversed. This may simply be the next stage after producing squeaks due to an insufficient amount of grease in the bearings. Some damage has already been caused at this stage and you cannot repair it, but maintenance will certainly slow down the deterioration.

Vibrations When Accelerating

The next stage of problematic bearings is a strong vibration felt when you accelerate the vehicle. This results from the unbalanced movement of the driveshaft.

When the grease dries out and the bearings are worn enough that they can no longer control the movement of the driveshaft. Its deviation from its regular rotation path causes this vibration.

Are you familiar with the vibrations caused by unbalanced wheels? The frequency of this vibration will be more intense because a driveshaft rotates at least three times faster than the wheels.

This symptom means that the universal joints have started to affect other components, including the transmission. Diagnostic and repair work is necessary at this point if you wish to avoid further damage.

Transmission Fluid Leak

This fluid leaks for many reasons and bad universal joints are one of them. You can be sure of this when the leak occurs at the rear of the transmission.

If you ignore the vibrations, the unstable rotations of the driveshaft are likely to wear out the transmission tailshaft bushing and the output shaft seal, causing a fluid leak.

When this happens, carefully inspect the transmission to discover the source of the leak and take repair measures.

The Car Doesn’t Move

This is the final stage of universal joint failure. You may have already seen a vehicle parked on the side of the road with its driveshaft lying underneath. This means the driveshaft literally fails and detaches from the rear axle or transmission. Repair at this stage may require replacing the driveshaft and even more.

Disconnected Driveshaft

In other cases, the U-joint is completely deteriorated and cannot connect the driveshaft. More precisely, the driveshaft has fallen off the car and become disconnected. In this situation, car owners must call a tow truck in order to replace a new driveshaft.

how long can you drive with a bad joint
Don’t wait for the car to break down. (Photo Source: autoyas)

Causes of Universal Joint Failure

The universal joint typically wears out, like any other automotive component. However, the driveshaft angle or speed is damaged most of the time primarily by extreme vehicle use. Other reasons are bearing lubrication, as well as vehicle modifications. As usual, if car owners can identify the cause of faulty universal joints, they can easily avoid problems and select a suitable replacement. In this article, we will list some of the most common causes of bad universal joints:

Heavy-Duty Use

One of the most common causes of universal joint failure is demanding tasks. Machines are like humans; they have limits. If car owners force their vehicles to perform heavy tasks such as off-roading and racing, they will be damaged quite easily. This also affects automotive components. Driveshaft and U-joint, for example.

If vehicles must regularly perform heavy tasks, owners may consider replacing standard U-joints with heavy-duty U-joints. The reason is that these automotive parts are designed for more strenuous activities.

Normal Wear and Tear

Even though they have a very long lifespan, universal joints can still wear out from intense driving, long-distance driving, as well as unfavorable driving conditions. This usually happens with SUVs and trucks, as they primarily drive off-road, towing, or hauling. As a result, the U-joints are more likely to wear out and need to be replaced much sooner than for a normal driver.

Loss of Grease

Last but not least, lack of lubrication is the cause of most bad U-joints. Car owners must take care of their universal joints, and proper chassis grease is part of that.

How Long Can You Drive with a Bad U-Joint?

When universal joints fail completely, you have no choice but to tow the car to a mechanic. To avoid this, you must detect the signs of a bad universal joint mentioned above.

Normally, universal joints last the lifetime of a vehicle. But anything in your car can break down at any time, so the joints may also need to be replaced.

If they are not functioning properly, you will need to replace them as soon as possible. Also consider replacing them in pairs to avoid more problems in the future. If you must drive for a while with faulty universal joints, do so without engaging 4WD. Using four-wheel drive can cause the axles to explode or tear.

The safest option for you and your vehicle is to seek professional help when you start noticing the symptoms of universal joint failure.

Conclusion

As stated earlier, universal joints are much less expensive than transmission work or a new driveshaft, so inspecting or changing them at the first signs of trouble is the best idea. Some factors can accelerate wear and cause premature failure. Therefore, selecting the right U-joint to mitigate these factors can mean better overall operation and less chance of them needing replacement.

Moog offers several replacement options, manufactured to standards higher than the originals, so we suggest trying them if you need to replace your vehicle’s universal joints.

The difference between smart key and keyless entry

Are you looking for a car with a keyless entry system or a smart key system? Although these two systems are interchangeable, they have major differences. When buying a new vehicle, one of the frequently asked questions concerns the car access system. This is where many people don’t know the difference between smart key and keyless entry for the vehicle. However, there’s no need to worry about this, as we will provide you with comprehensive information on this difference, including the features of both systems.

Smart Key or Keyless Entry – Know the Difference Here

First, you need to understand that every keyless or smart key has distinct technology. The primary difference lies in how they unlock the car doors. We recommend searching online for the best maintenance tips to protect the car from any unauthorized access.

The key is one of the most popular parts of vehicles, but many drivers are still confused between smart key and keyless entry due to some similar features. The ways to distinguish smart key from keyless entry below will help you identify the type of key that suits your needs. Now let’s see what differentiates one car door unlocking system from the other. First, let’s understand a bit about the keyless system.

Keyless Entry

On one hand, a car’s keyless entry system includes unlocking and locking the car doors using the conventional key or a button on the remote. However, you need to understand that keyless entry does not mean “keyless.”

When you enter the vehicle using the keyless entry system, you easily control the engine without using an actual car key for the ignition. It contains a built-in transponder that identifies the vehicle and activates the ignition systems. The best thing about it is that the car does not lock as long as the key remains inside the vehicle.

This means there’s no need to use the physical metal key to lock or start the car. That was the case with previous generations of cars. This is the first difference in the smart key vs. keyless entry debate.

Keyless Entry
No need for the actual key for ignition with keyless entry (Photo source: vox)

Smart Key

On the other hand, the Smart Key is a car key containing a microcomputer, which allows the owner to access and unlock the vehicle’s locking mechanism. It completely replaces the metal key found in many modern cars.

The driver can easily unlock or lock and start the car. This happens when the vehicle identifies radio signals from the Smart Key’s radio pulse generator. The technology also comes with a Start-Stop switch to control the car’s ignition.

In addition to the features provided by keyless entry, a smart key allows you to start the engine without physically inserting a key into the ignition switch. Instead, the smart key wirelessly communicates with the car’s ignition system, and as long as the key is within range, you can start the engine by pressing a button or turning a switch.

Siemens was the first to develop the electronic Smart Key system in the 1990s, while Mercedes-Benz developed its S-Class in 1998.

Smart keys often have additional features such as keyless entry, trunk opening, and remote engine start. They use advanced encryption technology and are designed to prevent any unauthorized access to the vehicle. Some smart keys also offer personalized settings, such as memorized seat positions and climate control preferences, which can be automatically adjusted based on the key used.

Overall, the main difference between keyless entry and a smart key is that keyless entry primarily focuses on unlocking and locking the doors, while a smart key provides these functions along with the ability to start the vehicle without physically inserting a key.

Final Note

One might prefer to use keyless entry and smart keys interchangeably. However, in the war between smart key and keyless entry, the latter is the majority’s preference. The reason is that keyless entry surpasses any car unlocking technology.

Understanding the Clutch Command and When to Use It

For any new car learner, understanding and using the clutch system reduces stress, particularly at traffic lights. For some, it’s also an intimidating experience, as the first challenge when learning to drive is stopping and moving the vehicle again. Therefore, if someone wants to acquire good clutch control skills, it’s essential that they first understand how the clutch system works and when to use it while driving.

Essential Components of the Clutch Control System

The clutch system consists of two discs: the friction plate and the pressure plate. The pressure plate is connected to the gearbox side of the system via an axle. And the friction plate is attached to the engine side via the crankshaft.

Clutch Control and Its Operation

This system is important for regulating the car’s speed in a manual transmission vehicle. The clutch control effectively transmits power from the engine to the gearbox.

There, the clutch interrupts the transmission when the gear is changed while moving or when it’s selected to shift from a stationary position.

To better understand the operation of clutch control, let’s delve deeper into its functioning.

1. Operating Principle of Clutch Control

Starting with pressing the clutch pedal, this action separates the pressure and friction plates from each other.

This means the wheels are separated from the car’s engine, preventing any power from reaching the wheels. But here, the plate along the shaft still rotates while the engine is running.

Now, once the car is in the desired gear, it’s time to lift the clutch pedal, which allows the plates to stick together again. However, things are different when in first gear.

At this point, the clutch pedal is released in such a way that the discs slowly come closer. Thus, allowing the car to roll smoothly by reconnecting the broken link between the engine and the wheels.

Clutch control works
Operating principle of clutch control. Source: Spotlightnow

2. Learning Clutch Control Techniques

You now know that it’s a technique to control the car’s speed. But what exactly is the technique? Let’s find an answer in advance.

First, when you’re in the driver’s seat, ensure the clutch pedal is working properly, fasten your seatbelt, start the engine, and set the handbrake to rest.

Once all that is done, now apply force to the clutch pedal and select first gear. Then, power the engine by gently pressing the accelerator and simultaneously, slowly lift your foot off the clutch.

At this point, when the clutch discs meet, it’s called the bite point. In fact, this bite point occurs multiple times while driving.

However, it’s important to remember that the force applied to the clutch pedal should be less than that applied during first gear.

When to Use the Clutch

There are certain defined situations where clutch control must be used, such as stopping or starting the vehicle, controlling the vehicle at low speed, and when changing gears.

car brake and clutch control
There are certain defined situations where clutch control must be used. (Source: Drive2)

Tip: When driving off-road, it’s wise to slow down the clutch engagement, otherwise the vehicle would stall as the gear shifts.

After learning about the clutch control system, practicing it can only make you an experienced driver. So, start today!

But also consider following some maintenance tips, which prevent wear and tear on clutch components.

FAQ

  1. When should I downshift using clutch control?

Downshifting is necessary when you need to reduce speed or prepare to stop. To downshift, press the clutch, shift to a lower gear, and release the clutch gradually while matching the engine speed to the new gear.

  1. Can clutch control help with hill starts?

Clutch control is crucial for hill starts. You need to use the handbrake, engage the clutch, shift into first gear, find the bite point, release the handbrake, and gradually release the clutch while applying the accelerator to avoid rolling back.

  1. Is clutch control different across vehicles?

The basics of clutch control are similar for most manual transmission vehicles, but the feel and engagement point of the clutch pedal can vary from car to car. It’s important to familiarize yourself with the specific vehicle you’re driving.

  1. Is clutch control necessary for automatic transmission vehicles?

No, automatic transmission vehicles do not require clutch control as the transmission system automatically manages gear changes and clutch engagement. Clutch control is primarily for manual transmissions.

  1. Can clutch control contribute to energy efficiency?

Yes, using clutch control techniques, such as coasting during deceleration and avoiding unnecessary gear changes, can contribute to better fuel efficiency in manual transmission vehicles.

  1. Is it acceptable to “ride” the clutch while waiting at a red light?

It’s generally not recommended to keep the clutch pedal partially depressed for long periods at a red light. Instead, shift to neutral and release the clutch while keeping your foot on the brake pedal.

  1. Can clutch control be used for smooth parking maneuvers?

Yes, clutch control is beneficial for parking in tight spaces or performing precise maneuvers. It allows for fine control over the vehicle’s speed and direction.

  1. Should I use clutch control when driving in slippery or off-road conditions?

Yes, clutch control can be particularly useful in low-traction situations. It allows you to modulate the power delivered and maintain better control over the vehicle’s movements.

  1. Is it possible to burn out the clutch by using it excessively?

Yes, excessive or improper use of the clutch can lead to premature wear and potentially damage the clutch. It’s important to use proper clutch control techniques to extend the clutch’s lifespan.

Conclusion

Understanding and mastering clutch control takes time and practice, but it’s a valuable skill for driving manual transmission vehicles.

If you have more specific questions or need further clarification on any aspect of clutch control, feel free to ask CFJ at any time.

Common Symptoms of a Bad Alternator You Shouldn’t Miss

An alternator plays a very important role in a vehicle’s electrical power system. A faulty alternator can cause many serious problems for your car in several ways. So to help you avoid these situations, here is a list of several symptoms of a bad alternator to know. Stay tuned!

What is the purpose of an alternator?

First, let’s learn some basics about the effect of an alternator on your car. Whenever you start your engine, the alternator works to charge the battery and power the car’s electrical systems. There is a wide range of electrical systems and devices in your car, beyond the MP3 player, stereo system, air conditioning, and lights. New cars are equipped with computers and sensors that all require electricity to function. From GPS systems to lights, the alternator powers all of these. If the alternator is faulty, many electrical devices in your car will stop working.

bad alternator symptoms
Why know if the alternator is faulty  (Photo Source: AndreyPopov/Getty Images)

When this happens, it’s time for you to replace the alternator with a new one. The following symptoms will give you an idea of what’s wrong, check them now:

Symptoms of a Bad Alternator

1. Dimming Lights

Normally, a failing alternator causes flickering or dim lights. This is more obvious when you drive your car at night, but also noticeable in the dome light and dashboard lights. If the lights brighten as the RPM increases, it certainly means your alternator is faulty or dead.

2. Strange Noises

The next on the list of bad alternator symptoms concerns strange noises. After running long enough, the serpentine belt could have stretched and not effectively spin the alternator pulley, leading to a lack of charging. Generally, this leads to a strange sound. On the other hand, the internal bearings can also wear out, producing a grinding or growling noise.

3. Engine Stops Running

If your engine suddenly stops running while you’re on the road, it will surely be one of the bad alternator symptoms. Fuel injection requires an appropriate amount of electricity to function, without which the engine will stop running quickly.

4. Check Engine Light

One of the other signs of a faulty alternator appears on the service engine light. This sign varies by brand and model, but basically, when the alternator starts to fail, it may illuminate an “ALT,” a battery icon indicator, or a “Check Engine” light.

5. Electrical Problems

Of course, when the alternator is about to fail, many electrical devices such as MP3 players, the stereo system, power windows, or seats may take time to operate. If there isn’t enough power, the devices sometimes won’t work effectively or will suddenly stop working, like the MP3 player turning off by itself.

6. Dead Battery

how to tell if the alternator is faulty
A faulty alternator leads to a dead battery. (Photo Source: Freeimages.com)

Yes, a battery can also fail for other reasons. But a dead alternator is usually the cause of a dead battery because it provides no energy to recharge it. Car batteries don’t hold too much energy in the long term. They provide enough electrical power to start the starter and circulate energy to get the whole job spinning.

How to Diagnose a Failing Alternator?

Preparation:

  • Code reader
  • Safety glasses
  • Multimeter

When your car shows some of the above symptoms, it’s time to diagnose the alternator. Here are some steps to look for:

1. If the “Check Engine” light comes on, connect a code reader to the diagnostic port. If it displays code P0562, it means your alternator is about to die. (Note: this code is different depending on the car’s make, model, and year). Have it checked before it dies.

2. If you think your car has a faulty alternator but there is no clear sign, open the hood and check the condition of the belt. If the belt is slightly burned and glazed, it means it’s slipping. When the belt is too loose, instead of rolling on the pulleys, the belt slips on them. The metal-rubber friction heats the belt and wears it out quickly. In this case, you just need to replace the serpentine belt or adjust the tensioner so the belt is perfect.

3. If everything looks good under the hood, it’s time to use your multimeter and perform the checking process below:

  • Park the car on level ground and set the parking brake
  • Wear safety glasses
  • Set the meter to 15-20V DC and connect the wires to the battery – the negative wire to the negative terminal and the positive wire to the positive terminal of the battery. The number should be around 12.6 Volts.
  • Then, start the engine and check the voltage again very carefully. If the alternator is in good condition and is charging the battery, the minimum figure is about 14.2 Volts. If the voltage is good, turn on the radio, heater, interior lights, and any other electrical devices. The meter should show a number above 13 volts. If the figure is below 13 volts, you will need to buy a new alternator for your vehicle.

Questions and Answers

1. Can a faulty alternator damage a battery?

A faulty alternator will lead to a dead (discharged) battery, preventing the car from starting or running. As we know, the alternator is responsible for charging the battery while the engine is running. If the alternator is faulty and fails to charge the battery properly, the battery’s energy reserve will gradually deplete. Over time, the battery will weaken and eventually die.

A faulty car alternator will affect the charging process and the battery’s operation. At the same time, the car’s electrical equipment also operates abnormally and cannot function at its maximum capacity.

2. How long will alternators last?

Car manufacturers recommend replacing the alternator when it has reached 4 to 8 years of operation or traveled more than 150,000 km or 60,000 miles in some special cases. In some special cases, these times or miles may be earlier to avoid excessive depreciation on this part. Several factors can affect its lifespan, including the number of electrical devices the car has, the quality of the part, and the conditions under which the car is driven.

3. What causes a faulty alternator?

Faulty diodes are the common cause of alternator failure. The diodes are part of the rectifier assembly converting the AC output of the alternator to DC. The charging output of the alternator passes through 6 diodes in the rectifier assembly before going to the electrical system and the battery. Therefore, the higher the charging load, the more they heat up. Depending on each alternator failure situation, there will be different repair methods. In most cases, when a part is damaged, you just need to replace it in the alternator. However, if the damage is irreparable, it’s better to replace the car generator with a new one.

Conclusion

So now you know how to tell if the alternator is faulty and how to fix this problem. For other maintenance tips, keep following to be updated daily.

How to install a GPS tracker in a car

People no longer use maps to navigate roads when driving their cars. GPS devices have long taken over that role. Additionally, they serve as anti-theft tools and for monitoring driving skills, and are an essential component in businesses like car rentals. Considering all the positives, you might consider equipping your vehicle with such a device. But do you know how to install a GPS tracker in a car?

A GPS system can provide real-time location information of an object. Furthermore, you’ll get data on the car’s speed, movements, and directions. A modern unit is equipped with many innovative features such as setting up a geo-fence, an alarm system for the car that deviates from predefined routes, providing information on stops, and much more.

GPS Tracker in a Car: Is It Necessary?

A GPS device is a data collection device that includes all information about your vehicle. Based on this, drivers can use it to monitor and manage their vehicle’s system via mobile phones/computers connected to the internet with information on the vehicle’s current location, driver, speed, distance traveled, current location, fuel, etc. This information will be continuously updated and displayed on the screen anytime and anywhere.

To answer the question of whether to install a GPS device, we need to understand that using GPS devices on cars can protect your car from theft. Additionally, the benefits of installing a GPS device can be mentioned as follows:

  • A GPS can identify the location with 100% accuracy, helping to protect the car from theft. This equipment is an effective assistant in finding the vehicle’s coordinates to report to authorities for handling or assistance in case of an unexpected incident.
  • Car GPS navigation also has the functionality to store detailed information about the vehicle’s route such as total mileage and fuel consumption… This is very useful when you need to control travel schedules and update the vehicle’s status in real-time.
  • On the other hand, the GPS is designed to issue warnings when the vehicle exceeds speed or deviates from predefined routes to ensure passenger safety.

How to Install the GPS in the Car?

Installing a GPS in a motor vehicle is not complicated. Following these 3 steps to install the GPS in a car will help you understand the process in no time.

how to install GPS in the car
You can wire the device. (Photo source: gps7)

Step 1

The first step is to find a power source for the device. There are two ways to draw its power:

Wired – Attach it to the vehicle’s internal wiring by splicing a few wires. However, modifying the wiring could void the car manufacturer’s warranty. This means the manufacturer or authorized dealer will not cover repair costs or be responsible for replacing a part. Furthermore, the wiring must be done by a professional. Amateur work can damage the electronics and affect your car’s performance.

Plugged – The GPS device may come with a power cord and an adapter. In this case, you can simply plug it into the OBD port (located under the steering wheel). The plug of some devices might be compatible with the car’s cigarette lighter port.

Wireless GPS units for RVs with a plug-in function are easy to install and the process requires no professional skills. Additionally, it does not void the manufacturer’s warranty. The plug-in system is the best in terms of convenience and accuracy.

Step 2

Modern GPS devices likely come with a mount and an attached suction cup. You need to place the device in the mount and mount it on the dashboard or windshield.

how to install GPS in the car
The dashboard is the right place to secure the GPS. (Photo source: Crutchfield)

Securing the device with the windshield might not be a good idea as it can cause distraction and partially block the view. Attach it to the dashboard, in the center or away from the driver’s seat. The suction cup will firmly stick the device to the surface.

Step 3

After plugging the power cord into the designated location, store the extra length of the cable out of your sight using a cord organizer. The final part of installing the GPS in a car involves taking the car for a short drive to see if the device works.

How a Mixed Door Actuator Works

A blend door actuator controls the temperature and airflow in a car. If your vehicle only blows cold air, or if you can’t change the airflow, it may be due to a faulty actuator.

Sometimes the fix requires recalibration, and sometimes you need to replace the broken part. Which route to take depends on your assessment.

In any case, we will describe here how an actuator works and how you can replace it.

Blend Door Actuator: How Does It Work?

A blend door actuator is a small electric motor housing a plastic construction. The unit also integrates a door position sensor that sends information to the air conditioning computer.

This actuator therefore controls the temperature and direction of the air according to the settings. The settings work for different aspects such as temperature, floor, mid-vent, defrost, and fresh air. This way, a passenger can control the air temperature and the direction they want that air to flow.

Depending on the make and year of manufacture, the number of these units varies so that passengers can adjust the air for their comfort.

Use the area under the dashboard to access the blend door actuator (Photo source: Marketing Magic)

Why Does an Actuator Go Bad?

The blend door actuator controls the rotation of the air door. This device is a motor that resides in a secure structure. The unit can fail if the motor is burnt out and, as a result, it no longer works.

The next reason could be the structure in which the motor resides. If something is wrong or the structure breaks, the motor may malfunction or operate with some kind of noise.

So now that you know what a blend door actuator is and what can go wrong, calling a professional resolves the issue promptly. You can also opt for the DIY route, and for that, here are the steps.

Replacing the Blend Door Actuator

To replace the blend door actuator, you need to purchase a specific kit that you can order online or buy from a nearby repair center. Doing it yourself can save you the labor cost, and you only pay for the kit itself.

You should start by removing the plastic cover under the car’s dashboard. Use a small socket and a ratchet to remove the bolts, and you will be able to remove the plastic cover.

Once the cover is removed, you will see the wiring and various controls. Here you will find the temperature actuator on the right side that works for the dual climate controls.

Here, you will need a small screwdriver to detach the safety clip from the actuator’s wiring. Gently remove the wiring connector and release the actuator.

Check if any connection is broken or if there is rust around. Proceed to the next step after learning “what a blend door actuator is for“.

You may find other screws that can be easily removed using the screwdriver. Remember to place all your screws properly so you don’t lose them.

replace blend door actuator
To replace the blend door actuator, you need to purchase a specific kit. (Photo: How2.101)

Once all the screws are removed, you can remove the actuator for further operation.

Also make sure the vent door is not stuck; manually rotate it in both directions to ensure this.

Ensure there is no obstruction holding the air door; remove dust and debris before installing the new actuator. So the idea is to check the entire assembly and not just the actuator.

Continuing the Process, These Steps Follow

To test the operation of the blend door and verify you are changing the correct actuator motor, turn on the fan motor and operate the door in each direction. You will be able to feel the temperature of the air change or the ventilation level.

When you buy the actuator, it must match the current one. Check that the cable harnesses are identical as they need to go directly with the terminals.

Now it’s time to install the new actuator. Reproduce the positioning of the old actuator and place it accordingly. When tightening the screws, don’t overdo it as they are mounted in a plastic housing that can break.

Once you have done the screws, apply slight pressure to the cable harness connector so it snaps into the actuator. When you hear a click with this push function, it means the connector is properly installed.

what is a blend door actuator
A malfunctioning air door leads to poor air regulation (Photo source: zoopy)

When you are sure all wires and bolts are securely fastened, it’s time to put the plastic cover back on. Once you have put the plastic cover on, tighten it using the mounting screws; everything needs to be put back in order.

Next, your job is to check the blend door actuator by using the air conditioning to see if it blows hot and cold air. In most cases, the problem should be fixed, and if not, there is no harm in handing your car over to a professional repairer.

Sometimes there may be a major issue, which can be confirmed after a thorough check. Take a look at some maintenance tips to ensure you are performing the procedure correctly so nothing frays.

FAQ

  1. What are the signs of a faulty blend door actuator?

Common signs of a failing blend door actuator include inconsistent temperature control, strange clicking or tapping noises from the dashboard, and poor airflow distribution.

If you are unable to adjust the temperature correctly, or if hot or cold air only comes out during specific events, regardless of your settings, the blend door actuator may be the cause.

  1. Can a blend door actuator be repaired, or does it need to be replaced?

In some cases, a blend door actuator can be repaired by replacing the internal gears or components. However, it is often more practical to replace the entire actuator, especially in electric actuator systems, as they can be complex to disassemble and repair.

  1. How can I diagnose a blend door actuator problem?

Diagnosing a blend door actuator problem typically involves checking error codes using a diagnostic scanner, listening for unusual noises when adjusting the temperature, and visually inspecting the actuator for any physical damage.

Additionally, consulting the vehicle’s service manual for specific diagnostic procedures can be helpful.

  1. Is it possible to replace a blend door actuator yourself, or should it be done by a professional?

Replacing a blend door actuator can be a DIY project if you have mechanical skills and the necessary tools. However, the difficulty can vary depending on your vehicle’s make and model.

Some blend door actuators are relatively easy to access and replace, while others may require more extensive dashboard disassembly.

If in doubt, it is best to consult your vehicle’s service manual or seek the help of a professional mechanic.

  1. Are there any maintenance tips to prevent blend door actuator problems?

Regularly changing your vehicle’s cabin air filter can help prevent debris from entering the HVAC system, which can reduce strain on the blend door actuator and extend its lifespan.

Additionally, avoiding sudden temperature changes in the cabin can help reduce wear and tear on the actuator.

Conclusion

Check the blend door actuator on all settings to ensure it is functioning in all modes.

Furthermore, the door might be stuck, and there might be no problem with the actuator. You can confirm this before buying the actuator so you can determine which part is faulty.

This can save you money that you would otherwise spend on the actuator. If it’s just a calibration issue, troubleshooting will be easier and less costly than when you have to perform a replacement.

If in doubt or if you don’t want to deal with the technical details, calling a professional would be a wise decision.