Symptoms of a Bad Fuel Injector

Vehicles manufactured before the 1980s were equipped with a carburetor. But today’s automobiles are equipped with an advanced electronic fuel injection system. As part of this system, a fuel injector functions to spray fuel into the engine. Any problem will seriously affect engine performance and can make driving difficult. It is necessary to detect bad fuel injector symptoms before your precious car suddenly breaks down.

What is the purpose of a fuel injector? Well, it supplies the engine with fuel to facilitate the internal combustion process. It sprays fuel into the engine cylinder via a nozzle. The Engine Control Unit (ECU) monitors the injector’s operation and ensures it sends the correct amount of fuel to the engine at the right time.

Bad Fuel Injector Symptoms

Fuel injectors are unlikely to malfunction if you clean them regularly. When maintenance is not up to par, they can become clogged with dirt and fail completely.

What happens when fuel injectors fail? It certainly affects engine performance. A bad fuel injector will spoil the quantity, timing, angle, pressure, or pattern of the sprayed oil. In any case, the car will not perform as it should.

Here are some common symptoms of a bad fuel injector:

Engine Performance Problems

Fuel injectors not working properly means the engine does not receive enough sprayed fuel. As a result, the combustion process does not start, leading to engine misfires and creating several performance-related issues, such as difficulty accelerating, hesitation after pressing the accelerator pedal, and lower fuel economy.

Bad injectors cause engine problems.

All these problems are due to an incorrect air/fuel ratio. A delay in this case will lead to overheating and even engine stalling.

Rough Idle

Due to an incorrect amount of fuel in the engine, the vehicle’s RPM drops below the optimal level at idle. As a result, it starts to idle irregularly or roughly. The engine may also stall if the RPM level drops too low.

Engine Vibrations

The fuel sprayed by the injectors facilitates the combustion process. When one of them is faulty, the corresponding cylinder will not be able to fire. The consequence is engine hiccups or constant vibration while driving.

Vibration is one of those bad fuel injector symptoms that correspond to many other engine problems from other sources. Diagnose the fuel injection system to ensure the problem comes from the injectors.

Check Engine Light Illuminates

After all these engine problems, it makes sense that a faulty injector triggers the check engine light. The ECU illuminates the light when it detects an anomaly such as an engine misfire, clogged injectors, or an electrical issue.

Fuel Leak

Due to age, the fuel injector can become punctured or damaged. Oil will escape through the opening when this happens, causing it to leak from the injector body. This could also come from the injector seal, which will only worsen over time. A visual inspection is enough to discover the trace of gasoline on the injector surface or on the fuel rail.

Fuel Smell

A chain reaction from a fuel leak will be a fuel smell. Whether it’s a leak at the injector or its seal, you will smell a gasoline odor. This happens because the oil does not burn as the injector is not functioning correctly. A faulty sensor or fuel lines could also be the cause. Whatever the reason, any kind of gasoline smell must be addressed immediately, lest it turn into a huge safety hazard.

Failed Emissions Test

Bad fuel injector symptoms also include excessive emissions due to incomplete or irregular gasoline combustion. A leak in the injector can make the air/fuel ratio so rich that it can burn out the catalytic converter.

Fuel injectors are essential to a car’s operation and drivability. You should entrust the car to a professional mechanic if it shows any of the signs mentioned above.

Cleaning is the best solution.

Water pumps: what you need to know

Your car’s water pump circulates coolant throughout the engine, where it absorbs heat, and into the radiator, where the coolant is cooled and then recirculated back to the engine to start the process over. (For this reason, the water pump is sometimes called a “coolant pump,” since coolant is a mixture of water and antifreeze.) If the water pump fails to circulate the coolant, the engine will typically overheat very quickly. So, what can cause a water pump to fail and when should you consider replacing it?

What can cause a water pump failure?

Sometimes, it’s not the pump itself that fails; it’s what drives the pump. While most automotive water pumps are driven by the engine via a belt, in some cars, particularly hybrids, the water pump is driven by an electric motor.

In the case of a belt-driven water pump (found in most cars on the road today), the pump will stop working if the belt driving it breaks. This is typically the accessory drive belt, which you can usually see on the outside of the engine (it’s often called a serpentine belt due to how it winds around the pulleys of the components it drives). In some cases, however, the pump may be driven by the engine’s timing belt or timing chain, located inside the engine.

If the pump is driven by the serpentine belt and the belt breaks, you will usually get a “warning” because the battery light should come on on the dashboard or the steering wheel will become hard to turn. This is because the serpentine belt also typically drives the alternator that recharges the battery and, in some cases, the power steering pump.

If the battery light comes on, stop the car as soon as possible and check if the serpentine belt is still in place. (The battery light can also come on because the alternator is faulty, but that is less likely to cause an immediate problem; overheating can.)

In some cars, the power steering pump is also driven by the serpentine belt, and the steering wheel will become hard to turn if the belt breaks. However, many newer cars have electric power steering, in which case the “hard steering” warning will not materialize. If you continue driving, the next indicator will likely be the temperature light coming on.

If the water pump is driven by the internal timing belt or chain and the belt or chain breaks, you don’t have to worry about the engine overheating because the engine will stop running immediately.

Whether the water pump is driven by a belt or an electric motor (which can also fail), the pump itself can have issues. These problems often start with a coolant leak or a squealing noise, so either would warrant taking the car to a mechanic to have it checked. Your engine overheating is another indication that the pump might be faulty.

When should the water pump be replaced?

Although a water pump contains wear components such as seals and bearings, as well as a fan-like impeller that can fail, it is not typically replaced simply as a maintenance item, as it’s not uncommon for a water pump to last at least 100,000 miles. You can help extend the pump’s life by replacing the coolant at the intervals recommended by the manufacturer, as coolant contains additives that help lubricate the pump and prevent corrosion, and these additives “wear out” over time.

However, if the water pump is driven by the internal timing belt or chain, it is often recommended to replace the water pump when you replace the belt or chain, as it will eventually wear out. This is because a large part of the repair cost is due to the amount of labor, and the mechanic often has to remove the water pump anyway.

What to do when your brakes lock up

What to do when your brakes lock up? First of all, it’s a frightening situation if you’re driving. Having no control over the car speeding down the road is downright dangerous. However, it could be an expensive repair job, even if you’re not driving when the car’s brakes are locked.

Discover why brakes lock up and what you can do when it happens. Remember that if you have no mechanical skills, tow the vehicle to an auto repair shop for the best service.

What causes brakes to lock up?

Several reasons can trigger this unfortunate event. The elements that may or may not cause brakes to lock up while driving are:

  • Overheated braking system
  • Using incorrect brake fluid
  • Misaligned brake booster rod
  • Damaged or broken calipers, rotors, or drum brake backing plates
  • Faulty ABS component, proportioning valve, or parking brake mechanism
  • Worn caliper pistons or wheel brake cylinders
what causes brakes to lock up
A damaged brake caliper could be the cause. (Photo: naijauto)

What to do when your brakes lock up?

What you need to do depends on how many wheels are locked. Lift the car with a jack and spin the wheels by hand.

It might be a mechanical issue if only one wheel is stiff. Look for a clogged fluid hose or a broken spring.

A clogged hose transfers fluid to the wheel cylinders but prevents it from returning when you release the brake pedal. For this reason, the brakes remain “activated” and appear locked.

A stuck parking brake could cause both wheels on the same axle to lock. This mainly happens to the rear wheels since the parking brake operates on the rear axle.

How to unlock brakes when all wheels are locked? In this case, a faulty or misaligned master cylinder is likely the cause.

What to do when the front brakes lock up while driving?

What causes brakes to lock up while driving? This occurs when you lose control while driving on a slippery surface and brake sharply in a desperate attempt to stop the car. This will only lock the braking system and leave you helpless on the road.

What to do when your brakes lock up?

If the car is not equipped with ABS brakes, release brake pressure when you realize it’s starting to lock. Continue to press and release the brake pedal in rapid succession until the vehicle stops.

brakes locked while driving
Call a professional for brake issues. (Photo: brake bleeder)

A vehicle with ABS brakes is unlikely to lock up unless a component of the system is damaged. Damaged disc brakes, calipers, rotors, wheel bearings, and a handful of other parts can cause locking.

A car with ABS will automatically prevent locking when you start to lose traction on rough tracks. It will pump the brakes so you don’t have to do anything.

All you’ll feel is a pulsating sensation in the brake pedal during hard braking. Simply ignore it and maintain pressure on the pedal to stop the car safely.

FAQ

  1. How can I prevent my brakes from locking up?

Preventing brake lock-up involves adopting good driving habits, such as gentle and progressive braking, as well as regular brake maintenance. Regularly inspect your vehicle’s braking system and ensure the ABS is functioning correctly.

  1. What immediate action should I take if my brakes lock up while I’m driving?

If you find yourself in a situation where your brakes lock up, the first step is to immediately release the brake pedal.

Then steer your vehicle in the desired direction, avoiding sudden movements. Gradually reapply the brakes with less pressure to regain control.

  1. Is it safe to continue driving with locked brakes?

No, it is very dangerous to drive with locked brakes. It could lead to loss of control and accidents. Prioritize releasing the brakes, regaining control of your vehicle, and addressing the underlying issue before continuing your journey.

  1. How can I determine if my ABS is faulty?

An ABS malfunction can often trigger a warning light on your vehicle’s dashboard. Additionally, if you notice uncontrolled wheel skidding when you brake, it could be a sign that your ABS system is not working properly.

  1. Should I pump the brakes if they lock up?

It is important not to pump the brakes if they lock up. Instead, use a steady and gentle application of the brake pedal to regain control. Pumping the brakes can worsen the problem, especially if your vehicle is equipped with ABS.

  1. What should I do if my brakes lock up in adverse weather conditions, such as rain, snow, or ice?

In slippery conditions, such as rain, snow, or ice, brake lock-up can be more challenging to handle.

In such situations, release the brake pedal, steer into the skid (the direction in which the rear of the vehicle is sliding), and gently apply the brakes to regain traction and control.

  1. Is it advisable to attempt to repair locked brakes myself?

Repairing locked brakes is a complex and potentially dangerous task. It is recommended to seek the expertise of a qualified mechanic for proper diagnosis and repair.

Attempting to fix brake problems without the necessary knowledge and tools can pose risks to your safety and your vehicle’s operation.

Conclusion

When your brakes lock up, it can be a frightening experience, but knowing how to react can help you stay safe on the road.

So in the end, what to do when your brakes lock up? The key is to stay calm, release the brake pedal, and steer in the direction you want to go. Avoid sudden or sharp movements that could worsen the situation.

If you’re unsure about the condition of your brakes or if they lock up repeatedly, consult a qualified mechanic to diagnose and resolve the issue, ensuring your vehicle’s safety.

Should I use windshield washer fluid or is water acceptable?

If you’ve ever run out of windshield washer fluid when you didn’t have any on hand, you might have wondered if you really need a special fluid or if you could simply use plain water instead. Water is readily available almost everywhere, and filling your reservoir with it would save you a trip to the store. Is plain water an acceptable substitute for windshield washer fluid?

Windshield Washer Fluid vs. Plain Water

If you live in a place where the temperature never drops to freezing, you might get by with clear water—but even then, water doesn’t have the cleaning power of a specialized cleaning fluid to remove bugs, bird droppings, road grime, and other dirt that accumulates on windshields. Windshield washer fluid contains ingredients designed to clean these stubborn messes. Most products are made of methanol and other alcohols like ethylene glycol. Many also contain small amounts of ethanol or alcohol-based antifreeze to prevent the product from freezing during the winter months. The ingredients in windshield washer fluid work together to give you a clean, streak-free windshield, no matter how cold it is outside.

The main advantages of water are that it’s cheaper than windshield washer fluid and more environmentally friendly. Its main drawbacks are its lack of cleaning solvents and detergents and the fact that it freezes at 32 degrees Fahrenheit, making your vehicle’s washer system useless in cold weather. So even if you live in a very warm climate, keep in mind those trips to Grandma’s in Minneapolis; you don’t want to get stuck in a snowstorm without being able to clean your windshield because you didn’t want to stop at the store to get windshield washer fluid.

Windshield Washer Fluid Works Better but Comes at a Cost

Fluids specifically formulated to clean windshields generally do a better cleaning job than plain water and typically don’t freeze until 20 degrees below zero or lower. The bad news about windshield washer fluid is that it’s usually made of ethanol or methanol, which are toxic to people and animals and can harm the environment. Windshield washer fluid also often includes a dose of ethylene glycol, a toxic alcohol used in automotive antifreeze. These substances can damage paint finishes as well as some plastic and rubber parts of vehicles.

For health and environmental reasons, some vehicle owners make their own windshield washer fluid from non-toxic substances. We have no experience with these homemade preparations and cannot guarantee their effectiveness. However, some people use ingredients like white vinegar and distilled water to clean windshields without using toxic fluids.

Despite the toxicity of over-the-counter windshield washer fluids, it can be downright dangerous to drive without them in many parts of the country, especially in winter. Snow, slush, ice, and road salt can quickly make a windshield unusable. Frequent washing with a high-strength windshield washer fluid designed for winter conditions is the only way to clear away the grime so you can see where you’re going.

Electric Vehicles: Understanding the Terminology

Electric vehicles have their own terminology – some familiar, others technical – that can seem mysterious and confusing to the uninitiated. Knowing what these terms mean is essential to deciding not only if an EV is right for you, but also which EV is best for you. For example, do you care how quickly your car accepts gasoline from the pump? No, but you will need to know how fast your car and your home can replenish a battery to take advantage of home charging, and there is no standard answer. But we can get you closer through an understanding of charging-related terms, and more.

Alternating Current (AC)

The form electricity takes in the grid and in homes and other structures

With alternating current, electrons regularly change direction. The relevance of AC in the EV world is that all batteries require direct current (DC), in which electrons always flow in the same direction. So, whenever a vehicle is charged, AC must be converted, or rectified, into DC.

In Level 1 and Level 2 charging, a hidden component in every EV called the onboard charger module handles this task, as well as controlling the charging rate. In the case of public DC fast charging, the charger is external and supplies DC directly to the car’s battery, bypassing its onboard charger module, which is a bottleneck for current flow. The DC fast charger starts with nearly twice the household voltage and rectifies AC externally using components too large for a car to accommodate. These are the two reasons why DC charging can be much faster than Level 2.

Alternating current gets its name because the current changes direction, which happens 60 times per second in the U.S. It’s hard to grasp what that means, and it’s even more confusing when you dig deeper and learn that when the current reverses, technically, it goes from positive to negative in the same conductor. But AC has advantages over DC, such as minimal losses when transmitted over long distances, and the fact that transformers can be used to increase or decrease its voltage. Ironically, most electric cars use AC drive motors, so yes, the DC from the battery must be converted back into AC, a process called inversion, to propel the vehicle. In fact, hybrids typically use AC motors, meaning the current is literally constantly being converted from AC to DC or vice versa. Whenever these conversions occur, whether inside the car or outside, energy losses are associated.

Conventional gasoline and diesel vehicles use belt-driven alternators, which are AC generators, even though all electrical demands are DC.

Alternator

A type of generator that produces alternating current

In all modern conventional cars, the gasoline or diesel engine drives an alternator via a belt to generate the electricity that keeps the starting battery charged and powers the lights, electronics, and other electrical components on board. Nowadays, literally all these devices require DC, which makes a type of generator that produces only alternating current seem like an odd choice, but alternators are the generator of choice because they are smaller, lighter, and more durable, mechanically, than DC generators – three of the criteria that most interest automakers. This has been the case since the 1960s, when solid-state rectification (converting AC to DC) became viable. Alternators incorporate such rectifiers and voltage regulators to ensure the proper DC voltage.

Amps

Abbreviation for amperes, a measure of electrical current that EV owners are most likely to encounter when setting up Level 2 home charging.

Level 2 means 240 volts, but the amount of energy delivered to the car also depends on current flow, which varies significantly among Level 2 chargers. To use the classic plumbing analogy for electricity flowing in a wire, voltage represents the pressure forcing water through a pipe, and current is the water flow determined mainly by the pipe’s diameter. To get more water out of the end of the pipe, you can either increase the pressure or the pipe diameter. It’s the same with electricity: increase the voltage or the current (amperage) to get more power (measured in watts) at the other end of the wire. Just like the pipe, a larger diameter wire has less resistance and allows for greater current flow.

Amperes are the unit for the electrical service a home can distribute from the utility – like 50, 100, or 200 amps – and the current a given circuit or a Level 2 charger can pass.

Battery Pack

The complete energy storage component in an electric or hybrid vehicle, including the individual battery cells as well as supporting electronics and, typically, thermal management provisions.

The cells in a pack, regardless of type, are usually grouped into modules, which add structure and simplify replacing faulty cells. Packs include a battery management system that tracks the pack’s state of charge and monitors cell voltages and temperatures. Packs contain their own fuse and a means of manual disconnection from the rest of the vehicle for maintenance. Contactors (heavy-duty relay switches) are typically present, especially in pure battery-electric systems, to isolate the battery from the vehicle if it fails an onboard safety test or if a collision is detected.Nissan Leaf 2011 Battery Pack 1 jpgNissan Leaf 2011 Battery Pack | Manufacturer Image

Battery electric vehicles use circulating liquid to manage battery temperature, except for the Nissan Leaf (pack shown), which has no active thermal management. In most of these packs, there are channels through which coolant (usually a mix of water and conventional antifreeze) flows and then exits the battery to be conditioned either in a simple radiator or in a heat exchanger connected to an air conditioning or heat pump circuit.
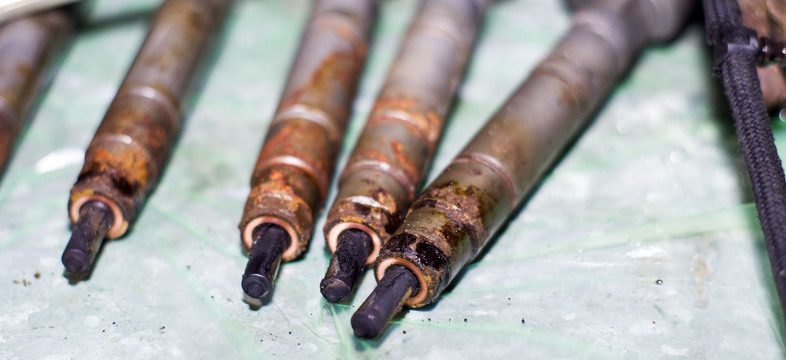
Battery Cell

The smallest component of a battery, hundreds of which may be needed to achieve the voltages necessary to power a hybrid or electric car.

Like all other individual battery cells, these operate at only a few volts each. (What we call a battery with a higher voltage, like a 12-volt car battery, is itself a collection of separate cells in a case – in this example, six cells.) Lithium-ion battery cells come in three basic types, namely three shapes: cylindrical, prismatic, and pouch. The cylindrical batteries that power some EVs look so much like something you might put in a flashlight that one might think they are unsophisticated. Detractors have said as much about their packaging efficiency because their shape leaves space between them, but Tesla seems to have done very well for most of its history, even though the brand is now interested in prismatic cells, which are shaped like a deck of cards or a candy bar. The style of choice among most other EV manufacturers has been the pouch, which resembles a nearly empty Ziploc mylar sandwich bag. Unlike the other two styles, the floppy pouch relies on a battery module for its structure.volt pouch cell oem jpgChevrolet Volt Battery Pouch Cell | Manufacturer Image

Battery Module

A structural subset of an electric vehicle’s battery pack in which the battery cells are divided and contained for monitoring and, if necessary, replacement

Since a battery cell’s voltage is on the order of a few volts, dozens or even hundreds of them are used in EVs, grouped into enclosures that provide structure (particularly important for pouch cells) and simplify wiring. Each module typically has its own voltage and temperature sensor and has only two terminals, regardless of the number of cells wired together, which depends on the manufacturer’s design. Typically, modules include insulated channels through which coolant flows to manage the thermal state of the battery pack.

Combined Charging System (CCS)

A nearly universal (except for Tesla) EV charging connector on the U.S. market that combines the J1772 AC connector with two conductors for DC fast charging into a single composite port.

While early Japanese-origin electric cars relied on a separate connector called CHAdeMO for DC fast charging, most new EVs with this capability (except for Tesla, which has its own connector) provide this composite CCS port. When searching for public charging options online or via an app, owners of these cars must select J1772 for Level 2 charging and CCS for DC fast charging.charge ccs connector car ccs connector uncovered jpgCombined Charging System Gun (left) and Car Port |

Direct Current (DC)

The form electricity takes in batteries and in most electronic circuits

With direct current, electrons flow in a single direction. The main relevance in the EV world is that electricity is transmitted in the power grid as alternating current (AC). So, whenever the car’s battery is charged, AC must be converted or rectified into DC. With Level 1 and Level 2 charging, the car itself accomplishes this via an invisible component called the onboard charger module. DC fast chargers start with nearly twice the household voltage and rectify AC externally using bulky components often hidden away from the charging area before supplying DC directly to the car’s battery, bypassing its integrated charger module, which is a bottleneck for current flow.

Although some EVs use DC drive motors, most use AC motors, meaning the vehicle must convert the battery’s DC into AC to accelerate – and vice versa during regenerative braking. Rectification and inversion, which is the name for DC-to-AC conversion, result in inefficiencies, but automakers choosing AC motors are thinking about the vehicle’s overall performance and efficiency, not a single component or process. For what it’s worth, even a conventional vehicle relies on AC through the use of an alternator, which is a generator that produces AC, even though DC reigns throughout the vehicle.

DC Fast Charging

A type of public charging that can charge compatible vehicles several times faster than the fastest Level 2 AC charger by supplying higher DC voltage directly to the battery. Tesla Superchargers are DC fast chargers.

Current EVs are better suited for DC fast charging when time is of the essence (e.g., on a long trip or when range is low). The term “fast” is in the name, but EV beginners won’t find DC fast charging comparable to a gasoline fill-up, which can provide hundreds of miles of range in minutes. Automakers generally claim DC fast charging involves 30-minute sessions, but that rarely represents a full charge. While more and more automakers include free DC fast charging with the purchase of a new EV, almost all acknowledge that frequent fast charging will compromise the vehicle’s battery life. When there is a cost, fast charging is more expensive than public Level 2 charging, usually enough to negate the financial benefits of electric driving with home charging.electrify america charging station gulfport oem jpgElectrify America Charging Station | Manufacturer Image

DC fast chargers and the three-phase AC they require make them extremely expensive for home installation. The power they provide ranges from 24 to 350 kW, but there is no guarantee the EV, regardless of its own acceptance specification, will charge at that rate.

Destination Charging

A new name for public Level 2 charging where EVs can be parked long enough to add appreciable miles

Popularized by Tesla, the term destination charging aims to distinguish slower away-from-home charging from DC fast charging (or Supercharging, in Tesla parlance).

Drag Coefficient (Cd)

A measure of a vehicle’s resistance to the air it passes through

The sleeker shape of current vehicles reflects an aerodynamic movement that started several decades ago, partly to improve fuel efficiency. Drag, like a stuck parking brake or any other form of resistance, opposes the effort of the engine or drive motor. The higher a vehicle’s drag coefficient, the harder its engine works and the more fuel it consumes, whether gasoline, diesel, or electricity.

A vehicle’s drag coefficient is influenced not only by its size and shape but also by the surface area of its underside and how high it sits off the ground. Vehicles that hug the ground tend to be more aerodynamic, which is why modern vehicles with active suspensions are often designed to automatically lower at highway speeds. There’s no doubt that the most efficient vehicles on the market – typically hybrids and electrics – are hatchbacks, because the high rear end is inherently more aerodynamic than a traditional sedan or coupe with a trunk that drops abruptly from the roofline. Vehicle designers work in wind tunnels to try to gain hundredths of a point on future models. After going as far as possible with general shapes, engineers have turned their attention to airflow around the wheels, in and above engine compartments with active grille shutters and flush exterior door handles, which increasingly retract flush with the body sides. Side mirrors are a long-standing target that would be replaced by cameras if not for federal and state regulations requiring named mirrors.

EVSE

Electric Vehicle Service Equipment (or Supply Equipment)

An EVSE is what we commonly call an electric car charger, whether it’s the provided maintenance charging cord or a more robust Level 2 unit you can install at home or find at a “destination” public charging station. The reason for this different name is that, in electronics, the name charger is technically reserved for the component that handles battery charging and, if necessary, converts AC to DC. The EVSE does neither. Every car is equipped with an onboard charger, which you can’t see, that fulfills these roles. The EVSE is primarily a safety device that protects you and your vehicle from damage, incorporating a bit more than a ground-fault circuit interrupter, switches, and circuits that communicate how much power it can supply to an EV.

Whether it’s a J1772 or Tesla connector, 240 volts is a lot to hold in your hand, especially if you’re outside in the rain. The EVSE will not provide high voltage to the cable until the connector is plugged into the EV. Once inserted, the car can detect the EVSE’s pilot signal, which indicates how much power it can supply. Charging can then begin, and the EVSE triggers a heavy-duty switch, called a contactor, that powers the cable. You can usually hear this contactor click. Similarly, if you remove a connector from an EV, as soon as you press the unlock button, the car and EVSE stop charging, so there is no danger.

Frunk

A contraction of “front” and “trunk” representing the front trunk that the elimination of a front-mounted internal combustion engine often makes possible in electric vehicles.

Like the name itself, frunks tend to amuse and satisfy people, and they can add versatility to a vehicle, but they aren’t always an advantage. We remind buyers not to lose sight of the vehicle’s overall cargo capacity. For example, the Volkswagen ID.4, which has no frunk, offers more cubic feet of storage volume behind the rear seat than its competitor, the Ford Mustang Mach-E, when its frunk and rear cargo volumes are combined.

Inverter

An electronic component that converts direct current to alternating current

Inverters are crucial components in electric cars, as well as most hybrids, because the vast majority of electric motors used in both types of vehicles are AC while batteries are always DC, making conversion necessary via a traction inverter, so named because its sole task is to create AC to power an AC traction motor. The term inverter has also proliferated due to Ford’s use of this technology in its Pro Power Onboard option that powers 120- and 240-volt outlets in the beds of 2021 F-150 hybrids (and, subsequently, F-150 Lightning EVs). This system can supply AC power from the hybrid battery alone, even if a low state of charge will cause the hybrid truck’s engine to start. Pro Power Onboard recalls so-called inverter generators, backup generators that similarly generate AC, rectify it to DC, and then convert it back to AC. That seems ridiculous, but it’s this redundant conversion that allows inverter generators to run their engines at variable speeds depending on load – a more efficient and quieter approach – leaving AC production to the electronics. Conversely, conventional generators are actually alternators that must run at a constant speed (full speed and maximum power, essentially) just to maintain a constant 60-hertz AC cycle.

J1772

The international SAE standard governing EV charging, but also the name of the type of charging connector on most non-Tesla EVs and chargers in the U.S.

J1772 isn’t a very good name for

Symptoms and causes of an overfeeding leak

Detecting a boost leak in a car can be challenging. These leaks can damage the entire engine and turbocharger. It is crucial to detect and repair the leak as quickly as possible to prevent further damage. You may face higher repair costs if you don’t address the issue promptly. However, the symptoms of a boost leak can tell you a lot about this vehicle problem.

Your car’s engine may eventually perform poorly. The engine’s power drops to the lowest levels, and the vehicle might start making strange noises.

Before discussing some of the symptoms, drivers should understand what a boost leak is.

Definition of a Boost Leak

A car engine includes pipes, seals, hoses, clamps, and many other components. These loose or damaged components can lead to a boost leak. A boost leak also occurs when the supercharger cannot handle the air pressure, which typically comes from the intake path before the engine cylinders. Car engines equipped with turbochargers exert enough pressure on the components to produce optimal performance. But when a clamp cannot handle this pressure, air begins to escape, resulting in a boost leak.

In short, it is usually an air leak that affects engine performance.

This typically happens with engines equipped with turbo engines rather than non-turbo ones. More specifically, the hoses and pipes associated with the turbo are directly exposed to the heat of the engine compartment and the turbo’s pressure, leading to cracks and leaks. Another situation is due to a loose engine mount. In addition to the engine’s torque, the pressure can twist a pipe and create leaks. Boost leaks also occur in non-turbo engines, but the chances are low. The number of pipes, hoses, and clamps is lower in non-turbo engines.

The Ultimate Explanation of Boost Leak Symptoms

To understand how to check for boost leaks, we have prepared a list of symptoms and causes of turbo boost leaks:

Poor Acceleration

A car that accelerates poorly is one of the main symptoms of a boost leak. The vehicle ends up performing poorly when there is a leak issue inside the engine. Car owners may experience a loss of power during acceleration.

Faulty clamps and flexible pipes are the main causes of this problem. You may need to repair the boost leak to achieve faster acceleration.

What are the symptoms and causes of a boost leak?
Boost Leak Symptoms – The Final Explanation (Source: naver)

Fuel Consumption

An engine with a boost leak problem will certainly consume more fuel. According to expert maintenance tips, checking the vehicle’s average fuel consumption would help identify the issue.

Turbochargers give the engine the power it needs to perform better. But faulty vacuum hoses lead to higher fuel consumption. Detecting and repairing couplers, clamps, and flexible hoses would help eliminate the problem.

Check Engine Light

To know how to find a boost leak, the engine light can be a clue. If drivers see a flashing check engine light on the dashboard, it is highly likely they have a boost leak. The only way to resolve this issue is to go to a garage and have mechanics read the error codes.

Smoke and Noise from the Engine

Other symptoms include smoke from the exhaust and the noise of a boost leak from the engine. The engine starts burning more fuel and produces black smoke. Faulty components inside the engine always lead to strange noises.

The main cause of this problem can be loose clamps or cracks. The boost leak generates excessive heat inside the engine, causing cracks in various components.

Repairing it as soon as possible is important to save money in the future. A full engine repair will certainly cost more than fixing a boost leak.

Detect and repair these boosted leak symptoms
Boost Leak Symptoms – Everything You Need to Know Is Here (Source: Pixabay)

How to Fix a Boost Leak

After drivers have a thorough understanding of all boost leak symptoms, it is now time to determine the method for repairing a boost leak.

Buy a Boost Leak Tester

Have you ever wondered why car mechanics can detect a boost leak so quickly? The answer is to perform a boost leak test using a testing device. Instead of struggling to test whether your car is leaking or not, this device will test it for you. It is recommended to have one so that car owners don’t have to spend time and money at a mechanic’s garage.

The way to use this tester is very simple: remove the turbo intake and place the boost leak tester, then car owners will attach an air compressor to the system and wait for the pressure to rise. You can find the damaged spots by listening for air leaks.

However, if you don’t have a testing device and still want to look for the boost leak, we offer a second method:

Check the Couplers and Clamps

The clamp is one of the most common factors for boost leaks, so our recommendation is to check the clamps and couplers connected to the engine. What you’re looking for are loose clamps.

To find the errors, we need to look even deeper inside. After examining the compressor housing, car owners will look around the vacuum lines and the blow-off valve controller. Around these areas, it is suggested to inspect the clamps to see if they are properly tightened.

Repairing a Boost Leak

As we all know, loose couplers and clamps are the cause of leaks.

Drivers can start by tightening them and see what happens next. If the leaks don’t stop, it is recommended to call a mechanic.

Frequently Asked Question

How to Know If You Have a Boost Leak?

There are two most common solutions for checking boost leaks: the intake pressure test and the smoke test. Drivers can start by pressurizing the intake, then applying soapy water. If there are bubbles, there are boost leaks. The same technique applies to the smoke test, but instead of using soapy water, the smoke tester will provide a visual indication.

What Does a Leaking Turbo Mean?

Although many different factors can cause oil leaks, most of them come from compressor and turbine housing issues. While boost leaks can slowly affect the engine, oil leaks significantly damage bearing systems. For this reason, it is recommended to take your car to a mechanic’s workshop immediately.

What Can Cause Turbo Failure?

There are three main causes of turbo failure: oil contamination, lack of oil, and damage from foreign objects. More specifically, oil is the primary cause of turbo failure.

Final Words

That’s everything you need to know about the symptoms and causes of boost leaks. Neglecting a boost leak would not be good for the engine or the turbo’s lifespan. You risk damaging your engine’s turbo or the engine itself. By understanding these boost leak symptoms, drivers should keep these components in good condition, as it is necessary to add years to the engine’s life.

How to Test the Wheel Speed Sensor: The Fastest Method

Today, we will learn how to test the wheel speed sensor when you suspect it is malfunctioning, so that smooth driving doesn’t come to a halt.

A wheel speed sensor, as the name suggests, detects the speed of a wheel. The sensor reads the total number of wheel rotations and informs the driver. Therefore, it can be said to function like a tachometer.

There is a simple and quick method to perform the speed sensor test.

How to Test the Wheel Speed Sensor: Avoid Penalties

It is essential to monitor the speed sensor because it allows the driver to know the speed. This way, they drive in a controlled manner. In the United States, you can easily be penalized with speeding tickets.

These tickets affect your overall driving record, which can cause you trouble when choosing a job or insurance for your vehicle.

We will discuss the wheel speed sensor in more detail: to determine if the sensor is faulty or not, we use the stator ring. The faster the stator ring spins, the greater the voltage generated.

Car owners can connect a code tool to pinpoint the sensor. They can also check them manually.

When the speed sensor is working correctly, you know the driving speed so you can control it accordingly. This is actually the most important thing every driver wants. Let’s move on to the method of testing a speed sensor.

Preparing the Car

When you are ready to test the speed sensor, you must first prepare your car. Place your vehicle on level ground and turn off the engine.

To proceed further with “how to test the wheel speed sensor“, use the transmission in park settings with the parking brake.

You need to use a jack to lift your car in order to remove the tire for part replacement and testing purposes. This allows for testing the sensor since your vehicle is in the correct position. Keep all tools within reach so you don’t have to rush to grab them.

Here are the tools you need:

  • Your car’s manual
  • Floor jack
  • Tire iron
  • Assistant
  • Voltmeter
  • Electrical cable
  • Torque wrench
It is important to prepare the car for this test
You will need a few tools to follow the speed sensor testing process. (Photo: driving.co.uk)

Continuing the Steps – Removing the Connector

Access the wheel speed sensor once your car is raised on the jack and you have removed the wheel. There, you need to locate the electrical connector.

In most cases, it is located near the wheel frame. New car owners are often confused by other cable harnesses connected to the wheel, such as the brake pad wear sensor.

Disconnect the sensor wire by unlocking the safety latch and gently remove it. This will expose the sensor terminals you will need for testing purposes. Alongside these terminals, you can also see the voltmeter probes.

Working with the Voltmeter

The terminals you have exposed will be used with the voltmeter. You see these probes in the voltmeter; these probes need to be attached to the sensor terminals.

You must use the alligator clips provided with the meter to securely fasten the sensor.

When connecting the sensor terminals for the wheel speed sensor test, ensure that the probes do not touch each other. Otherwise, the sensor will not be able to provide correct results.

A voltmeter with handheld probes is most likely to cause fluctuating readings. Avoid having these probes if you want accurate readings. This will overall make testing quite easy.

When you see that the probes and terminals are well connected, it’s time to activate the alternating voltage. You can immediately see the readings on the meter going up and down. This indicates that the sensor is ready to be tested.

The voltmeter probes are attached to the sensor terminal
Test the sensor using the voltmeter (Photo Source: Autometer)

Finally Moving to the Test

Now, we finally move on to the progression of the test. We understand that the wheel or hub creates a voltage by observing the voltmeter’s rotation, as it depends on the speed.

To get the readings on the voltmeter, you need to spin this wheel or the hub. The readings vary depending on the wheel’s speed. Consequently, it shows the meter readings dropping to zero once the wheel stops.

If you can see the values displayed on the meter when you spin the wheel, it indicates that the sensor is working. Conversely, if no value appears on the meter, regardless of the spinning, it indicates that the sensor is faulty and you should consider replacing it.

Tip: when you cannot find the sensor wire connector, consult the driver’s manual provided with your car.

Replacing the Wheel Speed Sensor

Once you have determined that there are no readings in the voltmeter, it means you need to replace the speed sensor. Access the nuts or clips holding the sensor and unscrew them. This will detach the sensor from the vehicle so you can remove it.

Before installing the new sensor, inspect the area and look for any signs of rust. Take sandpaper and scrape the surface where you will place the new sensor.

Once the new sensor is in place, tighten it using the provided screws or clips. Test the sensor using the voltmeter, and it should now show you the measured values when you spin the wheel.

If you removed the brake pads and discs to get a clear view of the speed sensor, put them back as well.

Clean the rust before replacing the voltmeter
No reading in the voltmeter means it is necessary to replace the voltmeter (Photo Source: Pakwheels)

In this way, you must put everything back in order or assemble the parts correctly. Once you are done with the brake pads and sensor parts, it’s about putting those wheels back on the hubs. Adjust them all perfectly and tighten using the wheel nuts with a ratchet and socket.

Use the jack again and put the vehicle back in place using the jack stand. Lower the vehicle until it reaches the ground, in the default position.

It’s time to tighten the wheel or use those wheel nuts to mount the wheel onto the vehicle. Use the nuts and tighten them by hand. Once they seem well fitted, use a torque wrench.

The torque wrench must be set according to your vehicle’s torque capacity. Use the manual to find your car’s torque range and set it accordingly.

Now, go to those nuts and secure them safely using the torque wrench. You should be finished in a minute or two!

Conclusion

It is important to call a professional in case of a problem
Park the car on flat ground with the emergency brake engaged to begin testing the wheel speed sensor (Photo Source: rookiegarage)

In the final step, you are supposed to test the vehicle to ensure everything is working correctly.

Also observe the wheel speed sensor or if you are informed of the vehicle’s current speed. And that’s how to test the wheel speed sensor and replace it if the sensor fails!

How to Clean Drum Brakes

Over time, drum brakes become a hub for debris and dirt due to their continuous use. Taking care of drum brakes thus becomes essential to maintain the car’s braking system. If you don’t know how to clean drum brakes, reading the following process may be helpful.

How to Clean Drum Brakes – A 4-Step Process

The lubrication of the drum brake can be removed if exposed to wet or dusty terrain.

This, in turn, can lead to an unwanted screeching noise from the car once the brakes are applied. Such a symptom indicates the need to clean the drum brakes. Read on to find out how.

1. Bleed the Brake Fluid

The first step in knowing how to clean drum brakes is to drain the brake fluid.

Locate the master cylinder and proceed by draining at least half of the brake fluid. Replace the drained brake fluid with new fluid once the old one is disposed of.

Remember to follow the guidelines and standards set by the authorities regarding oil disposal.

2. Remove the Wheel

This process is similar to changing a tire in case of a flat. Take a tire iron and loosen each lug nut by turning it counterclockwise.

Now proceed to jack up the car using the jacks. Then, use your tire iron again to completely remove the loosened nuts.

Benefits of Cleaning Drum Brakes (Photo Source: carfromjapan)

You can now remove the tire by simply and slowly pulling it from its position. If you’ve never done this before, refer to maintenance tips for the process of changing a tire.

3. Remove the Drum Brake

The first step is to locate the access hole present just outside the drum brake. Rotate the brake drum to align the drum adjustment screw with the access hole.

Now turn the adjustment screw so that it closes. The drum shoes should then detach from the wheel.

You can now proceed to remove the drum from the car. If the drum doesn’t come off on its own, continue by unscrewing the drum with a screwdriver to remove it.

4. Clean the Drum

Once the drum brake component has been removed from the car’s system, you can proceed with cleaning the drum brakes.

You can use a commercial brake cleaner or simply use water and soap to remove the accumulated debris on the drum brake.

Tips for Cleaning Drum Brakes (Photo Source: offroad)

Now apply lubricant wherever metal-to-metal contact occurs, for example, on the part where the shoe slides.

Now you’re done! You can proceed to put the drum and wheel back in place by following the steps mentioned in reverse order.

FAQ

  1. How often should I clean my drum brakes?

The cleaning frequency can vary depending on driving conditions, but it’s good practice to inspect and clean your drum brakes during regular maintenance, for example, when you change your brake pads.

  1. What tools and materials do I need to clean drum brakes?

You will need a jack and jack stands, a lug wrench, a wrench or pliers, a can of brake cleaner, a wire brush, a clean cloth, and safety equipment like gloves and safety glasses.

  1. Can I clean drum brakes without removing the wheels?

It is possible to clean drum brakes without removing the wheels, but it is generally easier and more thorough to do so. Removing the wheels allows better access to the brake components.

  1. How do I safely lift the car to access the drum brakes?

Use a jack to lift the car off the ground and support it with jack stands to ensure stability and safety while you work on the brakes.

  1. What is the process for cleaning drum brakes?

The process typically involves removing the drum, cleaning the brake components with brake cleaner and a wire brush, inspecting for wear and damage, and reassembling everything properly.

  1. How do I know if my drum brakes need to be replaced instead of just cleaned?

If you notice significant wear, scoring, or grooves on the drum, or if the brake shoe linings are worn to a dangerous level, it’s time to replace the drum brakes rather than just cleaning them.

  1. Can I reuse the old brake shoes and hardware after cleaning the drum brakes?

It is generally recommended to replace worn or damaged brake shoes and hardware when cleaning drum brakes for optimal braking performance and safety.

  1. Should I take safety precautions when cleaning drum brakes?

Yes, always use safety equipment like gloves and safety glasses, and follow proper safety procedures when working under a vehicle. Ensure the car is securely supported by jack stands.

  1. What are the benefits of properly cleaned drum brakes?

Properly cleaned drum brakes can improve braking performance, extend the lifespan of your brake components, and ensure safer driving conditions.

Conclusion

Cleaning drum brakes is a crucial aspect of maintaining your vehicle’s braking system.

By following the step-by-step process outlined in our current guide on how to clean drum brakes, you can ensure that your drum brakes remain in good condition, providing safe and reliable braking power.

Regular cleaning helps prevent brake dust buildup and extends the lifespan of your brake components, thus contributing to the safety of your vehicle and its passengers.

So don’t neglect this important maintenance task and always prioritize your vehicle’s safety by keeping your drum brakes clean and well-maintained.

What is wheel alignment and what are its effects on vehicle performance

In this article, we will focus on what caster is and its effects on a vehicle’s performance.

Three common measurements make up the geometry of an automobile’s suspension. Caster is one of them, while the other two are camber and toe. You can adjust these variables to correct the suspension angle and solve various car problems.

Remember that the suspension system includes the tires and their pressure, shock absorbers, springs, and linkages—all the components that connect a car’s chassis to the wheels.

So, you can imagine how important these three measurements are.

What is Caster?

The caster angle, also called the castor angle, is the measured tilt from the top of the steering axis to the bottom of the wheel when the former is attached to the latter. This angle assesses the tilt of the axis in both directions.

Simply put, it is an alignment setting that occurs only on the front wheels when they turn. It is measured on the steering wheels when the vehicle is viewed from the side.

To visualize the angle, you can imagine the steering axis connecting the lower pivot point or the ball joint to their upper counterpart, respectively. This formation creates a gradient with the steep line passing directly through the lower pivot point.

what is a caster on a car
You can imagine the steering axis connecting the lower pivot point or the ball joint to its upper counterpart. (Photo: astrosafari)

The ease of steering the wheel and the vehicle’s stability depend on the caster. A zero or neutral caster will create a vertical shock absorber or a perfect spring.

Depending on the type of suspension, the wheel’s position will be south of the upper ball joint or the strut mount point while the axis will be vertical relative to the road.

Positive caster occurs when the wheel and the lower pivot point remain ahead of its upper counterpart.

Nowadays, vehicles apply this caster angle to prevent the vehicle from turning or inadvertently straying from the straight path when driving at high speed.

Negative caster occurs when the upper pivot point remains in front of the lower pivot point. When the vehicle drifts away from the straight line you want to head towards, it indicates the presence of negative caster.

Positive Caster vs. Negative Caster

We have already discussed what caster is and how it becomes positive or negative. Now let’s discover the effects of these angles.

The Effects of Positive Caster

As you already know, positive caster occurs when the steering axis tilts in front of the vehicle’s axis. It pushes the coil spring above the shock absorber towards the rear of the vehicle at the moment of driving.

A driver can distinctly feel the effects of positive caster when driving the car in a forward motion.

Due to the huge amount of self-aligning torque on the front tires and wheels created by the upper ball joint or the strut mount, the vehicle will remain stable in its lane when you drive in a straight line.

The effect of this caster angle generates tension that keeps the front wheels straight when driving at high speed.

Another effect of this torque is that the steering wheel returns to the 12 o’clock position in a turn. Otherwise, the car drifts from its straight path.

Positive caster is essential for improving a vehicle’s cornering performance and road holding. It increases traction by maximizing tire friction with the ground, which helps the vehicle stay grounded.

Increasing positive caster too much is not a good idea because it will make the steering heavier and harder to turn.

However, you don’t have to worry about it in modern vehicles because they have a power steering system to cancel out the heaviness of the steering wheel.

Another issue is that it can accelerate tire wear, even if the effect is not direct. Poor alignment of tires and wheels along with excessive positive caster can worsen the tire wear problem.

The Effects of Negative Caster

What is caster when it becomes negative? In this case, the steering axis tilts behind the vehicle’s vertical axis. Most older cars suffer from this problem due to the absence of a power steering system.

Setting a negative caster was the only way to make the steering wheel easier to turn in these cars.

negative caster effects
Taking turns becomes difficult with negative caster. (Photo: Hagerty)

Due to this negative caster, the steering wheel of older vehicles often feels too light, and it becomes difficult to keep the vehicle on the right track in a turn.

FAQ

1. What are the effects of positive caster on vehicle performance?

Positive caster tends to improve straight-line stability and steering returnability.

It ensures a self-centering effect, which makes the vehicle’s wheels naturally want to return to a straight position after a turn. This improves high-speed stability and helps maintain a straight path while driving.

2. Are there any disadvantages to having a high positive caster angle?

Although positive caster has its advantages, excessive positive caster can lead to increased steering effort at low speeds, making parking and maneuvering more difficult.

It can also increase the risk of “caster shimmy” or vibrations in the steering system if not properly balanced.

3. How does the caster angle affect tire wear?

A6: Incorrect caster angles can lead to uneven tire wear. Excessive positive caster can cause wear on the outer edges of the tires, while excessive negative caster can cause wear on the inner edges. Properly balanced caster helps ensure even tire wear and maximize their lifespan.

4. Can the caster angle be adjusted on a vehicle?

The caster angle can often be adjusted by a qualified mechanic or at an alignment shop. Adjusting the caster typically involves modifying the position of the upper or lower control arm mounting points, depending on the vehicle’s suspension design.

5. Is the caster angle the same for all vehicles?

No, caster angles vary from vehicle to vehicle and are determined by the vehicle’s design and intended use.

Different types of vehicles (e.g., sports cars, trucks, or sedans) may have different caster angles to optimize their handling characteristics.

Final Words

The power steering system is a revolutionary addition to modern vehicles. By using positive caster, this system increases road and driving safety by promoting stable driving.

Nowadays, cars are designed in such a way that their chassis and engine do not support negative caster.

If your vehicle pulls to one side while you are driving at highway speed or taking a turn, you need to diagnose a bad suspension alignment.

How to Resurface a Flywheel

A significant amount of friction occurs when the clutch disc presses against the flywheel. It adheres to the surface and helps the car move forward on the road. This grip begins to loosen when the lining wears out. Therefore, when replacing the pressure plate, people often ask: “How to resurface a flywheel?” So, let’s discuss the process!

How to Resurface a Flywheel: Comprehensive Inspection and Resurfacing

A car’s flywheel has various functions, including storing energy to keep the crankshaft moving and balancing rotating assemblies.

It provides power by smoothly transmitting energy to the transmission. The clutch assembly helps the engine deliver power to the transmission.

Every flywheel will need resurfacing at some point. Generally, people prefer to do it when replacing the clutch or pressure plate. The flywheel’s mass absorbs the heat generated by the clutch’s normal operation.

The clutch generates more heat when it starts to slip or is abused. It can also develop cracks and blisters on the flywheel surface.

Thus, according to expert maintenance advice, a thorough inspection of the flywheel is necessary to detect damage and assess its condition. Below are two main methods for resurfacing a flywheel.

Flywheel Cutting

A brake lathe is needed to begin the cutting technique. The procedure must be performed carefully because mounting a flywheel on the lathe is not an easy task. The drawback of this method is that it leaves uneven areas.

How to resurface a flywheel
The flywheel is an essential component of an automobile. (Photo source: autmexico)

Since the brake lathe does not treat hard spots, people prefer to remove a large amount of metal. When you want to know “how to resurface a flywheel“, you need to be familiar with both cutting and grinding techniques.

In vehicles with hydraulic linkages, the bearings may be limited. It is imperative to understand that the clutch tends not to release fully when too much metal is removed.

Flywheel Grinding

This is the most commonly used technique for flywheel resurfacing. A block grinder is needed to perform the task effectively. Compared to the dedicated flywheel grinder, head and block grinding equipment requires a high setup time.

Make sure to check if a machine shop has a dedicated flywheel grinder for a stepped flywheel. If not, look for another shop that has specific equipment for this job.

Maintaining the correct clutch height becomes essential in the case of a stepped flywheel.

Care must be taken to remove an equal amount of metal from both surfaces. You can measure this using a flywheel depth gauge.

How to resurface a flywheel
Cutting and grinding help in learning how to resurface a flywheel. (Photo source: carus)

To achieve the necessary flatness with minimal metal removal, a dedicated flywheel grinder works effectively by eliminating hard spots and leaving a uniform surface. This process typically takes barely five minutes.

In the process of learning how to resurface a flywheel, the equipment becomes of the utmost importance.

The crankshaft flange allows for mounting the flywheel and centering a recessed flywheel. Wet grinding with silicon carbide stones helps.

What About Dual-Mass Flywheels?

In the case of BMW, General Motors, and Porsche models equipped with a dual-mass flywheel, no resurfacing is necessary. Replacement becomes necessary when the dual-mass flywheel is worn.

On Ford vehicles, the resurfacing process requires removing the bolts and separating the primary and secondary flywheels. The Ford automobile manufacturer suggests using new bolts when reassembling the flywheels.

For applications such as the Ford 7.3L and GM 6.5L diesel trucks, ordinary solid flywheels are used to replace the expensive dual-mass flywheels.

The same clutch is not suitable for solid flywheels. To enhance the transmission’s torque capacity, they manufacture it with a larger diameter clutch in mind.

What Should Be Considered When Replacing the Clutch and Flywheel?

When replacing the clutch, all critical parts of the system should be replaced. From the pressure plate to the clutch disc and the release bearing, everything must be replaced.

On some vehicles, it is also necessary to replace the pilot bearing or bushing. It works by aligning the clutch disc on the flywheel.

This will lead to rapid wear of the clutch and release bearing after they are worn. A serious consequence is the clutch disengagement problem.

No indexing of the flywheel position on the crankshaft is mandatory when replacing a flywheel on an internally balanced engine.

However, index positioning becomes crucial in the case of an externally balanced engine. The technique here is to mark the position before removing and reinstalling the flywheel on the crankshaft.

This pro tip will help you maintain the engine’s balance accurately. Mark the flywheel when you are unsure if an engine is internally or externally balanced. This will help you install it in exactly the same position as before.

How to resurface a flywheel.
Mark the position before removing the flywheel from the crankshaft. (Photo source: hybridcars)

Car Flywheel FAQ

1. How much material should I remove when resurfacing a flywheel?

The amount of material to remove depends on the condition of the flywheel and the manufacturer’s specifications. It is essential to consult the service manual or manufacturer’s recommendations for your specific vehicle.

2. Can I reuse a flywheel after resurfacing, or do I need to replace it?

Flywheels can generally be reused after resurfacing if they meet the manufacturer’s specifications and are within the allowed tolerances. If the flywheel is excessively worn or damaged, it may need to be replaced.

3. What are the benefits of resurfacing a flywheel?

Resurfacing a flywheel restores its smooth and flat surface, ensuring proper clutch engagement, reducing clutch slippage, and improving overall vehicle performance. It can also extend the lifespan of the clutch components.

4. How much does flywheel resurfacing cost?

The cost of flywheel resurfacing can vary depending on your location and the workshop you choose. It is best to obtain quotes from local automotive service providers for accurate pricing.

5. Can I resurface a flywheel multiple times?

Flywheels can be resurfaced multiple times, but the amount of material that can be removed is limited. Excessive resurfacing can lead to a loss of flywheel performance, necessitating its replacement.

Final Notes

A car’s flywheel is a crucial element of automobiles. Considering the information above, you will be greatly assisted in your quest to know how to resurface a flywheel.

It is highly recommended to seek a professional if you are a beginner or have never performed flywheel resurfacing before.