How Long Do Shock Absorbers Last

Many drivers are unaware of how essential shock absorbers and struts are to vehicle safety. Like all components of the powertrain, shock absorbers and struts can wear out over time. You need to know how long shock absorbers last and when to replace shock absorbers and struts to detect faulty ones and protect your car’s safety.

What are shock absorbers and struts?

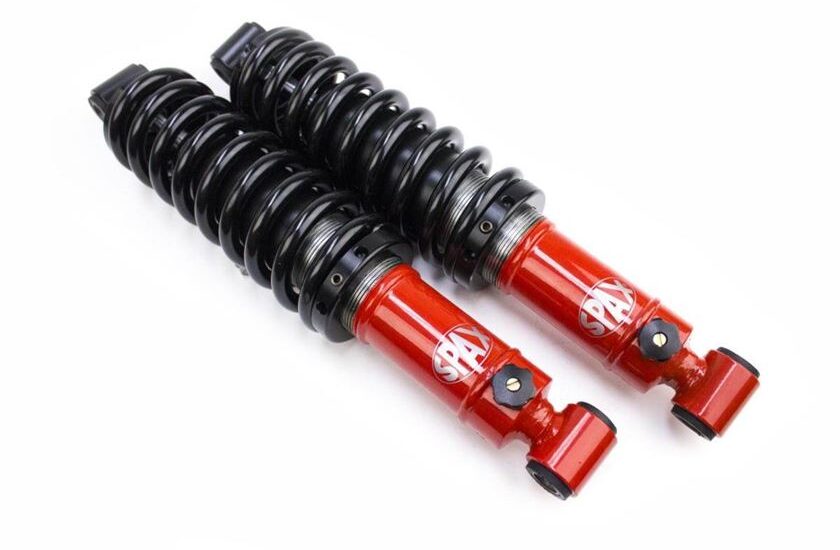
Many people use the terms interchangeably, but shock absorbers and struts are two different parts of a car’s powertrain. They are part of the suspension system that dampens shocks and vibrations when the car is on the road.

The suspension can be of several types, but the most common consists of a combination of shock absorbers and struts. On modern vehicles, shock absorbers remain on the rear wheels while struts are found at the front. They mitigate the vehicle’s lateral movements caused by bumpy roads.

Struts are different components.

Shock absorber and strut assemblies work continuously, whether the car is moving or not. For this reason, they deteriorate more quickly. But how long do shock absorbers last and what is the lifespan of struts?

How long do shock absorbers last?

The lifespan of shock absorbers, as well as struts, is at least 4 to 5 years. However, this depends on road conditions. The lifespan can extend up to 10 years if you drive the car mainly on smooth pavement. Similarly, it can be less than 5 years if you primarily drive on uneven roads filled with cracks and potholes.

Some experts use mileage to track the condition of shock absorbers and struts. The general rule is that shock absorbers last at least 50,000 miles before needing replacement. But again, it’s difficult to predict an exact figure when it comes to the lifespan of struts or the lifespan of shock absorbers. They might not last as long if the roads the car was driven on were not smooth and flat.

So, how long do shock absorbers last? The regular numbers are either 5 years or 50,000 miles. But it can be more or less depending on the condition of the roads. The same rule applies to strut assemblies.

Symptoms of bad shock absorbers and struts

Once shock absorbers and struts start to wear out, they bottom out quite quickly. The seals around their joints begin to wear out, and the fluid or gas inside leaks.

Shock absorber failure is a huge safety issue. (Photo: Lexus)

Watch out for these signs as they warn you of shock absorber and strut failure:

  • Moisture on the top of these components or drips on the side in the case of a fluid-based unit.
  • In turn, it feels like the rear of the car is a bit “loose.” Furthermore, the rear seems more bouncy than usual.
  • Knocking noise coming from the rear suspension.
  • Driving on rough and uneven roads becomes tiresome due to excessive shaking and jolting.
  • The car does not sit level with the ground.
  • Excessive bouncing: If you notice your vehicle bouncing excessively after hitting bumps or dips in the road, it could be a sign of worn shock absorbers or struts. The bounce may be more pronounced, and the vehicle may take longer to regain stability.
  • Poor handling and stability: Worn shock absorbers and struts can lead to decreased vehicle stability, causing excessive swaying or leaning of the car during turns or maneuvers. You might experience a loss of control or a floating sensation while driving.
  • Fluid leaks: If you observe oil or fluid leaking from the outside of the shock absorbers or struts, it indicates damage or failure. The presence of fluid is a clear sign that the internal seals have deteriorated and the component needs to be replaced.

Regular maintenance and inspections by a qualified mechanic are essential to ensure the proper functioning of your shock absorbers. They can assess the condition of the shock absorbers and determine if replacement is necessary based on factors such as wear, leaks, or reduced performance. Remember that worn shock absorbers can negatively impact handling, braking, and the overall safety of your vehicle. Therefore, it is important to address any issues promptly.

How to Bleed ABS Brakes: With and Without Scan Tools

Do you know how to bleed ABS brakes? Bleeding is necessary when replacing an ABS modulator or other hydraulic components. It may not be necessary during a wheel-level hydraulic repair, but you must be careful not to let air into the system. You need to bleed brake systems when air bubbles enter the system during a repair or replacement task.

An anti-lock braking system (ABS) tolerates air bubbles and contaminated fluids less than a non-ABS system. An ABS hydraulic pump uses thousands of psi to push brake fluid through tiny valves. Contaminated fluid can easily damage the valves and pump, so you should never delay when the system needs to be bled. Although bleeding ABS brakes is difficult because the high pressure in the pump whips the air bubbles and brake fluid into a foamy substance.

The Need for ABS Brake System Bleeding

We already mentioned that the system needs to be bled due to air bubbles present in the system. But how do these air pockets form inside the system?

Well, whenever the brake lines are opened to repair or change certain parts such as wheel cylinders, calipers, or ABS units, air enters the system.

Any brake-related repair lets air into the system. (Photo source: istockphoto)

When there are air pockets inside the lines, the brake pedal feels spongy and the whole system feels unbalanced. For this reason, brake bleeding is mandatory for any brake work. Skipping it would lead to various braking problems after some time, as without bleeding, you not only let the air pockets remain but also push contaminants through the system.

Flushing the brake fluid every two to three years is part of the regular maintenance schedule. This will keep the system free of contaminated fluid and air bubbles.

How to Bleed ABS Brakes: A Technique for All Types of Units

Bleeding involves removing air pockets and replacing the old fluid. The old fluid must be changed because polluted fluid absorbs moisture from the air and lowers its boiling point. Such degradation affects braking performance.

Things You Will Need

  • A few 8-ounce cans of brake fluid
  • Plastic tube
  • Car jack and jack stands
  • A turkey baster
  • A hex key
  • Cloths or microfiber towels
  • Spacer
  • A small bottle
  • Gloves and safety glasses

The ABS Brake Bleeding Procedure

Before removing bolts and loosening nuts, you will need to prepare for bleeding the brakes. This includes lifting the vehicles and removing all four wheels. You can also work by keeping the wheels in place, but lifting the vehicle high enough to be able to use a wrench on the bleed valves.

Loosen the Bleed Valves

After preparing the vehicle, your first task is to loosen the bleed valve bolts. Use a hex key for the job. If the bolt threads seem rusty, spray some penetrating oil the day before. This will make the job easier as you can break the corrosion with a few light taps with a hammer.

Be careful when doing this as these small hollow bolts can break if you apply excessive force. If this happens, you will need to replace the wheel cylinders or brake calipers (depending on the vehicle model), meaning a loss of time and additional money.

Carefully loosen the bolts so they don’t break. Leave them closed without removing them completely. Let’s move on to the next step: how to bleed ABS brakes.

Remove the Old Fluid

Use the turkey baster to remove the old fluid and deposits from the master cylinder reservoir. Use a lint-free cloth to remove sludge from the reservoir. Be extremely careful when handling brake fluid as it is corrosive. An accidental spill on a painted surface will immediately dissolve the paint. You should also wear gloves so they don’t touch the skin.

Bleed the ABS System

Take a piece of plastic tube (any type of cheap tube will do) and push one end onto the brake bleed bolt. The other end will go into a small bottle filled with an inch or two of fresh brake fluid. This little trick will prevent air from re-entering the caliper or brake cylinder.

By releasing the line pressure, the pedal will move from its position. To prevent this, place a spacer under the pedal. Then, fill the master cylinder reservoir with new, clean fluid and close its opening by replacing the cap. Otherwise, every time you release the pedal, fluid will spurt out through the reservoir opening.

You will need an assistant during this bleeding process. At this point, ask them to press the brake pedal with a force you would apply to stop the vehicle at a traffic light. Tell them to maintain pressure while you turn the bleed bolt a quarter turn.

This would force some contaminated fluid out through the end of the tube going into the bottle. Close the bleeder when the flow stops completely. Then, ask the assistant to release pressure on the pedal.

This is how to bleed ABS brakes. However, you are not finished yet. Repeat this process until clean fluid comes out of the bleeder. After that, tighten the bleed bolt and move to the next wheel to repeat this same procedure.

Siphoning the old fluid with a turkey baster. (Photo source: sunliv)

Throughout this entire process, keep filling the reservoir with fresh fluid. Never let the fluid level drop below half of the reservoir. Otherwise, air could enter the master cylinder.

Furthermore, you must not skip any of the bleeding steps, as this could draw air into the caliper.

Bleeding with a Scan Tool

Many ABS modulators are not equipped with bleeders. In this case, use a scan tool to operate the pump and valves. How to bleed ABS brakes with a scan tool?

The scan tool is mainly needed to activate the pump and operate the valves to bleed those areas. For example, the Ford version of the EBC 310 requires an NGS scan tool for bleeding. This tool helps operate the dump valves and activate the pump so that it becomes possible to bleed those areas.

The telltale signs of engine oil that is too old: what should you know?

The telltale signs of old engine oil. Have you noticed your engine running less smoothly lately? You might need to change your engine oil. Engine oil is essential for the proper functioning of your vehicle, but it deteriorates over time. So, how can you tell if your oil is too old and it’s time to change it? In this article, we will outline the telltale signs of worn engine oil that you need to know. Unusual noises, increased fuel consumption, a pungent smell, or reduced power can be signs of outdated engine oil. It’s important to recognize these signs to avoid potential further damage to your engine. Additionally, you will discover in this article how to maintain your engine oil to extend your engine’s lifespan and avoid costly repairs. You will learn how to check the oil level, when to do an oil change, and how to choose the right oil for your vehicle. Don’t let worn engine oil slow you down. Keep reading to learn more about the telltale signs and the steps to take to keep your engine in good working condition.

The importance of engine oil in a vehicle

Engine oil plays a crucial role in the efficient operation and longevity of a vehicle’s engine. It acts as a lubricant, reducing friction between the moving parts of the engine and helping to dissipate the heat generated by the engine’s operation. Without adequate engine oil, engine components can wear out prematurely, leading to costly repairs or even complete engine failure.

What happens to engine oil over time?

Over time and with use, engine oil undergoes a natural degradation process. It breaks down due to heat and accumulated contaminants, which diminishes its lubrication and protection capabilities. Additionally, it can become diluted with unburned fuel and accumulate dirt particles, reducing its effectiveness and potentially damaging the engine.

Signs of used engine oil

Several signs indicate that engine oil has reached the end of its useful life. These signs include a dark or opaque color, a thinner consistency than normal, a burnt or rancid smell, as well as the presence of visible particles. These signs indicate that the oil is no longer effectively fulfilling its role of protection and lubrication.

How to check if engine oil is old?

To check if engine oil is worn out, it is recommended to consult the vehicle owner’s manual for the recommended oil change interval. Additionally, an oil quality test can be performed using a dipstick or by consulting an automotive maintenance professional.

The consequences of using used engine oil

Using used engine oil can have serious consequences on the vehicle’s engine. Insufficient lubrication can lead to engine overheating, premature wear of parts, and potentially engine failure. Moreover, used engine oil can lead to the accumulation of harmful deposits in the engine, reducing its efficiency and durability.

How often should engine oil be changed?

The frequency with which engine oil should be changed depends on several factors, including the type of oil used, driving conditions, and the vehicle manufacturer’s recommendations. Generally, it is recommended to change the engine oil every 5,000 to 10,000 kilometers or every 6 months to a year, whichever comes first.

The proper disposal of used engine oil

It is crucial to properly dispose of used engine oil to avoid harming the environment. Automotive recycling centers or auto repair shops often accept used oil for proper recycling. Used oil should never be poured down drains or into landfills, as this can contaminate water and damage the ecosystem.

Tips for keeping engine oil fresh

To keep engine oil fresh and extend its lifespan, it is recommended to regularly check the oil level and top it up if necessary. Additionally, it is important to follow the manufacturer’s recommendations for vehicle maintenance and use quality oil that meets the engine’s specifications.

The role of engine oil in vehicle performance

Quality engine oil is essential to ensure optimal performance of a vehicle’s engine. By providing adequate lubrication, it reduces friction between moving parts, allowing for smoother and more efficient engine operation. Quality engine oil can also help improve fuel consumption and reduce polluting emissions.

Conclusion

In conclusion, engine oil plays a vital role in the operation and durability of a vehicle’s engine. It is essential to regularly monitor the quality and level of the oil, as well as to adhere to the recommended oil change intervals to keep the engine in good working condition. By taking care of the engine oil, you can extend the engine’s lifespan and ensure optimal vehicle performance in the long term.

Common Rail Pressure Sensor Problem 2.0 HDi: Complete Guide to Solve the Issue

Explanation of Code P2137: “Throttle/Pedal Position Sensor/Switch ‘D’/’E’ Voltage Correlation”


Severity

  • Level: 🔴 High (risk of complete loss of throttle control).
  • Urgency:
    • Engine may stall while driving (immediate danger).
    • Limp mode activated (reduced power).

Common Symptoms

  • 🚨 Check Engine Light on (MIL) with code P2137.
  • 🛑 Stuck throttle (engine RPM frozen).
  • 🐌 Sudden loss of power (even at cruising speed).
  • 🔄 Unstable idle or stalling at stop.

Common symptoms of a faulty rail pressure sensor

A faulty rail pressure sensor can cause various symptoms, including engine misfires, loss of power, starting difficulties, jerking during acceleration, and even sudden engine shutdowns. These signs often indicate a disruption in the fuel injection system, requiring immediate attention.

Diagnostic methods to identify the problem

To diagnose a problem with the rail pressure sensor, several methods can be used. This includes using an OBD scanner to read fault codes, checking fuel pressure with a pressure gauge, as well as a visual inspection of the sensor itself and its electrical connections.

Step-by-step guide for replacing the rail pressure sensor

Replacing the rail pressure sensor can be done by following a few simple steps. First, it is essential to locate the sensor on the engine, then disconnect the battery for safety reasons. Next, simply remove the old sensor, replace it with the new one, and reconnect all electrical connections.

Troubleshooting tips for related issues

In case of related issues, such as fuel leaks or pressure regulator malfunctions, it is important to check the entire fuel injection system to ensure no other component is faulty. Additionally, regular system cleaning can help prevent future problems.

Preventive measures to avoid future rail pressure sensor problems

To avoid future problems related to the rail pressure sensor, it is recommended to follow regular vehicle maintenance, including replacing the fuel filter according to the manufacturer’s recommendations and using quality fuel. Additionally, careful and attentive driving can help prevent premature wear of fuel injection system components.

Main Causes

  1. Wiring problems:
    • Corroded/deformed throttle body connector (“pigtail”).
    • Wires shorted to ground or bare wires.
  2. Electronic throttle body failure:
    • Seized gears (deformed cover).
    • Failed throttle actuator motor.
  3. Faulty accelerator pedal position sensor:
    • Incorrect or intermittent signal.
  4. PCM/ECM error:
    • Reprogramming needed (e.g., after throttle body replacement).

Diagnostic Procedure (Detailed Steps)

Step 1: Check Technical Service Bulletins (TSB)

  • Example: TSB NTB14-058 for Nissan (stalling issues related to code P2137).

Step 2: Inspect the “Pigtail” Connector

  • Location: On the throttle body (common models: Nissan Altima, Renault Mégane IV).
  • Action:
    • Disconnect and inspect the female terminals (corrosion, bent pins).
    • Clean with CRC contact cleaner spray and apply dielectric grease.

Step 3: Test the Accelerator Pedal Position Sensor

  • Multimeter:
    • Measure voltage on the signal wire (0.5V to 4.5V progressive).
    • If voltage jumps or is absent → Replace the sensor.

Step 4: Check the Throttle Body

  • Remove the cover: Check plastic/metal gears for wear or binding.
  • Throttle actuator motor test:
    • Direct 12V power supply → Throttle plate should open/close.
    • If no movement → Throttle body is faulty.

Solutions & Costs

Problem Solution Average Cost
Faulty throttle body Replacement (new or used) €200 – €800
Failed pedal sensor Replacement €80 – €150
Wiring repair Replace the “pigtail” connector €30 – €100
PCM reprogramming At dealership €100 – €300

Mistakes to Avoid

  • Forcing the gears: Risk of breaking plastic teeth.
  • Forgetting the relearn procedure: Necessary after replacement (e.g., Nissan = 5 pedal presses).

Frequently Affected Models

  • Nissan Altima (2013-2018): Recurring connector issues.
  • Renault Mégane IV (1.2 TCe): Fragile throttle body.
  • Toyota Camry (2015-2020): Accelerator pedal sensor failure.

Practical Case

  • Problem: Code P2137 on a 2016 Nissan Altima with stuck throttle.
  • Diagnosis: Corroded throttle body connector (oxidized terminals).
  • Solution: Cleaning + connector replacement (€40).

Pro Tips

  1. Handle with care: The electronic throttle system is highly sensitive.
  2. Relearn procedure:
    • Nissan: Ignition ON → 5 rapid pedal presses → Wait 7 seconds → Start engine.

Effective solutions for solving a heating problem in your car

Effective solutions for solving a heating problem in your car. Heating problems in your car can be extremely frustrating, especially during the freezing winter months. Turning on the heat and waiting for warm air to come out of the vents can seem like an eternity. Fortunately, there are effective solutions to fix these heating issues and keep you warm during your journeys. Whether your car isn’t producing enough warm air or no warm air is coming out of the ventilation system, there are several potential causes for these problems. It could be a faulty thermostat, a coolant leak, a defective fan, or even an electrical issue. To resolve these problems, it’s important to understand their origin. In this article, we will present several effective solutions for solving heating problems in your car. You will learn how to check and replace the thermostat, how to diagnose and repair coolant leaks, and how to fix fan or power supply issues. Don’t let heating problems prevent you from enjoying your car rides during the cold months. Discover these effective solutions and stay warm and comfortable, no matter the outside temperature.

Common heating problems in cars

When the biting cold of winter sets in, your car’s heating system becomes an essential ally for making journeys comfortable. However, sometimes this system malfunctions, which can make trips unpleasant. In this article, we will explore common heating problems in cars, as well as the signs indicating that something isn’t working correctly.

Signs indicating that your car’s heating system is not working properly

When your heating system isn’t working properly, several signs may appear. You might feel cold air blowing from the vents, even when the setting is on maximum heat. Similarly, strange odors or unusual noises coming from the heating system can signal an underlying problem.

Diagnosing your car’s heating problem

Identifying the exact source of the heating problem in your car can be challenging, but it’s worth it to regain optimal comfort during your journeys. Start by checking the coolant levels and ensure there are no leaks. Then, examine the fuses and relays related to the heating system.

Possible causes of heating problems in cars

Heating problems in cars can be caused by various factors. Coolant leaks, a faulty thermostat, a clogged radiator, or a failing heater fan are among the most common causes.

Simple DIY solutions for heating problems in cars

For minor heating issues, there are DIY solutions that can be attempted. For example, bleeding air from the cooling system, replacing a faulty fuse, or cleaning debris from the radiator can sometimes resolve the problem.

Tips for maintaining your car’s heating system

To avoid heating problems, regular maintenance is essential. Make sure to have your cooling system checked periodically, replace the coolant according to the manufacturer’s recommendations, and regularly clean your car’s air filters.

When to call a professional for car heating problems?

If heating problems persist despite your diagnostic and DIY efforts, it’s time to call a professional. A qualified mechanic can perform a thorough diagnosis and carry out the necessary repairs to restore the proper functioning of your heating system.

Cost-effective solutions for car heating problems

Before replacing expensive components, consider cost-effective alternatives such as repairing rather than replacing. Sometimes, a simple repair may be enough to solve the problem, saving you on repair costs.

Preventive measures to avoid heating problems in cars

To prevent future heating problems, adopt preventive measures such as regular checks, proper use of the heating system, and paying close attention to early warning signs of potential issues.

Conclusion: Importance of addressing heating problems in cars

In conclusion, heating problems in cars can compromise your comfort and even your safety on the road. By understanding the signs of malfunction, performing proper diagnosis, and taking preventive measures, you can avoid the hassles related to your car’s heating and enjoy pleasant journeys, even in cold weather. Don’t underestimate the importance of keeping your heating system in good working order, as it can make all the difference in your daily commutes.

Faulty Exhaust Temperature Sensor: Symptoms, Solutions, and Prevention

Is your car engine running hotter than usual? Are you hearing unusual noises, experiencing engine misfires, or noticing a decrease in overall performance? If so, your exhaust temperature sensor might be faulty. In this article, we will examine the symptoms indicating a faulty exhaust temperature sensor, possible solutions to fix this issue, and provide you with prevention tips to avoid future breakdowns. The exhaust temperature sensor is a key component of your car’s engine management system. It measures the temperature of the exhaust gases to ensure the engine runs optimally and emissions are controlled. A failure of this sensor can lead to poor engine management, increased fuel consumption, and a decline in the vehicle’s overall performance. To learn more about the symptoms of a faulty exhaust temperature sensor, solutions to address this problem, and preventive measures you can take, continue reading this article.

Common Symptoms of Exhaust Temperature Sensor Failure:

When the exhaust temperature sensor begins to show signs of malfunction, several indicators can signal an imminent failure. It is crucial to recognize these symptoms to act quickly and prevent more significant damage to your vehicle.

  • Engine light illuminated on the dashboard
  • Loss of engine power
  • Increased fuel consumption
  • Abnormal smoke emissions
  • Difficulty starting the engine

Causes of Exhaust Temperature Sensor Failure:

Understanding the possible causes of exhaust temperature sensor failure is essential for effective repair. Various factors can contribute to this failure, from normal wear and tear to more complex issues.

  • Natural wear due to age
  • Accumulation of dirt and debris
  • Exposure to extreme temperatures
  • Electrical or connectivity problems

Diagnostic Process for Exhaust Temperature Sensor Failure:

The diagnostic process is crucial for accurately identifying issues related to the exhaust temperature sensor. Proper diagnostic methods allow for quick localization of the source of the malfunction.

  • Using an OBD scanner to read error codes
  • Visual inspection of the sensor’s condition
  • Testing sensor continuity and resistance

Solutions for Exhaust Temperature Sensor Failure:

In case of exhaust temperature sensor failure, vehicle owners have several options. The choice will depend on the severity of the problem and the resources available for repair.

  • Replacing the faulty sensor
  • Cleaning the sensor to remove deposits
  • Checking and repairing electrical connections

Preventive Measures for Exhaust Temperature Sensor Failure:

Prevention is often the best approach to avoid costly exhaust temperature sensor failures. Simple preventive measures can extend the lifespan of this crucial component of the exhaust system.

  • Regular maintenance of the exhaust system
  • Cleaning the sensor during service checks
  • Using quality fuels to reduce emissions

Importance of Regular Maintenance of Exhaust Temperature Sensors:

Regular maintenance of exhaust temperature sensors is essential to ensure the proper functioning of the vehicle. Paying special attention to these components can prevent unexpected failures and guarantee optimal performance.

  • Improved engine performance
  • Reduction in polluting emissions
  • Fuel savings

Common Misconceptions About Exhaust Temperature Sensor Failure:

Some misconceptions persist about the causes and consequences of exhaust temperature sensor failure. It is essential to dispel these false notions for an accurate understanding of the problem.

  • Sensor failure does not affect engine performance
  • It is difficult to diagnose an exhaust temperature sensor problem
Oxygen sensor O2 in the exhaust pipe for calculating the ingredients in the engine system.

Expert Tips in Case of Exhaust Temperature Sensor Failure:

  • Do not ignore symptoms and warning signs
  • Consult a professional for an accurate diagnosis
  • Replace the sensor as soon as possible to avoid further damage
  • Experts recommend specific actions in case of exhaust temperature sensor failure. These tips can help vehicle owners effectively manage issues and avoid costly repairs.

Conclusion: Maintaining your exhaust temperature sensor in perfect condition is essential to ensure your vehicle’s proper functioning, reduce polluting emissions, and save fuel. By following preventive measures and acting quickly in case of failure, you can extend the lifespan of your sensor and avoid more serious problems.

Signs of Defective Rear Wheel Bearings

You are on the road and you notice signs of weakness coming from the rear wheel of your vehicle. It is important not to ignore these signs, as they could indicate a faulty rear bearing. When the rear bearing is damaged, it can cause serious safety issues and compromise the handling of your vehicle. Therefore, it is essential to take action quickly to resolve this problem. In this article, we will introduce you to the most common signs of a faulty rear bearing and give you advice on what to do when you identify them. We will also discuss the importance of regular maintenance and seeking the help of a professional to carry out the necessary repairs. Do not let a faulty rear bearing compromise your safety and that of others on the road. Be attentive to the signs and take appropriate measures to mitigate potential risks. Follow our tips and extend the life of your vehicle by keeping your rear bearing in good condition.

The Importance of Rear Wheel Bearings

Rear wheel bearings are often overlooked when it comes to maintaining a vehicle, but their proper functioning is essential for ensuring safe and smooth driving. These components play a crucial role in the proper functioning of the rear wheel, facilitating its rotation while supporting the vehicle’s weight and absorbing road shocks. Understanding the signs of faulty rear wheel bearings, as well as the steps to diagnose and replace them, is therefore essential for maintaining your vehicle’s performance and safety.

Common Signs of a Faulty Rear Wheel Bearing

Faulty rear wheel bearings can manifest in different ways. The most common signs include grinding or growling noises coming from the rear wheel, a feeling of play or vibration in the steering wheel or vehicle body, and impaired handling, especially during turns or braking. A visual inspection of the rear wheel may also reveal excessive play or signs of grease leakage around the wheel hub.

Diagnosing a Faulty Rear Wheel Bearing

To diagnose a faulty rear wheel bearing, it is important to carry out a thorough inspection of the vehicle. This may include a visual check of the rear wheel, looking for any signs of damage or excessive play. Additionally, a road test can help identify abnormal noises or vibrations associated with a faulty bearing.

Steps for Replacing a Faulty Rear Wheel Bearing

Replacing a faulty rear wheel bearing requires several steps. First, it is essential to lift and secure the vehicle properly. Then, the brake and suspension components must be disassembled to access the wheel hub. Once the hub is exposed, the faulty bearing can be removed using specific tools and then replaced with a new quality bearing. Finally, all parts must be reassembled carefully, and the braking system should be bled if necessary.

Tools and Materials Needed for Rear Wheel Bearing Replacement

To replace a rear wheel bearing, you will need specific tools and materials, including socket wrenches, pliers, a bearing puller, bearing grease, and seals. It is also recommended to have a workshop manual specific to your vehicle to guide you through the replacement process.

Seeking Professional Help for Rear Wheel Bearing Replacement

Although replacing a rear wheel bearing can be done by an experienced DIYer, it is often better to call a professional. Qualified mechanics have the knowledge and expertise needed to correctly diagnose problems, choose the appropriate replacement parts, and perform repairs safely and effectively. Additionally, using a professional can guarantee a warranty on parts and labor, providing extra peace of mind.

Preventive Maintenance of Rear Wheel Bearings

To extend the life of rear wheel bearings and avoid costly breakdowns, it is recommended to follow a regular preventive maintenance schedule. This may include periodic lubrication of the bearings, visual inspection of the rear wheels during every oil change, and immediate repair of any signs of damage or wear.

Cost of Replacing Rear Wheel Bearings

The cost of replacing rear wheel bearings can vary depending on several factors, including the type of vehicle, make and model, as well as the labor required to perform the repairs. Generally, replacing a rear wheel bearing can cost between X and Y dollars, including the price of parts and labor.

Conclusion

In conclusion, rear wheel bearings play a crucial role in the proper functioning and safety of a vehicle. Understanding the signs of faulty bearings, as well as the steps to diagnose and replace them, is essential for ensuring safe and worry-free driving. By following a regular preventive maintenance program and relying on a qualified professional when necessary, you can extend the life of your rear wheel bearings and avoid costly breakdowns on the road.

How to Fix a Car Air Conditioner Leak

The car’s air conditioner isn’t blowing cold air – this seems like the most terrifying thing to discover during a long trip in the middle of the sweltering summer heat. The truth is, an air conditioning problem is quite common due to the frequency of damaged components and leaks. If the refrigerant level drops despite repeated refills, there must be a puncture somewhere. You need to know how to check the car’s air conditioning for leaks and how to repair car air conditioning leaks.

How to Find a Leak in a Car’s Air Conditioner

Before knowing how to repair air conditioning leaks in a car, you need to learn how to find them. The car’s air conditioner leak can occur in several components. Here are the most common air conditioning leaks in cars and how to find them.

A Visual Inspection

Check the refrigerant lines, condenser, and compressor for any residue of PAG oil or refrigerant. This is an effective method for a slow leak.

Soap Solution

Fill a spray bottle with water and a thick soapy solution. Fully charge the AC system and spray the liquid on all components. Bubbles will form if there is a break. This technique works well except for detecting a crack on the front seal of the evaporator or compressor.

Finding the leak is difficult. (Photo source: pexels)

Black Light

Some refrigerants are pre-mixed with a UV dye that appears under black light. However, this will not work if there is a leak at the front seal or the evaporator.

Use a Sniffer

A sniffer is a device used to detect a car air conditioning leak. It detects the chemical components of the refrigerant.

However, the air conditioning system must be clean, and tests must be performed in an enclosed space. The device is sensitive to dirt and air, and these elements can alter the readings.

How to Repair Air Conditioning Leaks in a Car?

Repairing car air conditioning leaks is a complex and costly process. However, you can still do it provided you have adequate mechanical knowledge, the right tools, and patience. If you are curious to know how to repair air conditioning leaks in a car, these two methods will be useful to you:

Apply a Super Seal

Sealant is an inexpensive and quick way to patch small leaks in the air conditioning system. You can find R-134a Super Seal in almost any auto parts store.

How to use it?

Super Seal will seal small punctures. (Photo source: acprocold)

Start the engine and turn the air conditioning and fan knobs to maximum. Attach a hose to the Super Seal can and connect the hose coupler to the low-pressure port.

After transferring the liquid, fill the system with R-134a refrigerant. Run the air conditioner for at least 15 minutes to allow the Super Seal to spread throughout the system.

Work on the Evaporator

No Super Seal can repair an evaporator leak. You must either repair it or replace it completely. You can cut and crimp the tube to repair pinhole-sized breaks. A bit of soldering can help in this regard.

When the puncture or punctures are larger, replacing the evaporator with a new one is the only solution. You must remove the dashboard to access the evaporator. You must also vacuum the system before recharging it.

FAQ on How to Repair Air Conditioning Leaks in a Car

  1. What are the common signs of air conditioning leaks in a car?

Common signs of an AC leak include a noticeable decrease in cooling efficiency, warm air blowing from the vents, hissing or unusual bubbling noises, or a distinct refrigerant smell inside the car.

  1. How much does it cost to repair air conditioning leaks in a car?

The cost of repairing an AC leak varies depending on the extent of the damage, the type of repair needed, and the specific vehicle. It can range from a few hundred to over a thousand dollars, including parts and labor.

  1. Is it safe to use DIY AC leak repair kits?

DIY AC leak repair kits are available, but their effectiveness can vary. It is essential to follow the instructions carefully. However, professional repairs are generally more reliable for long-term results and safety.

  1. Can I recharge my AC refrigerant after repairing a leak?

If you have repaired the air conditioning leak, it is essential to recharge the refrigerant to the correct levels. It is best to entrust this operation to a professional to ensure proper handling of the refrigerant and optimal cooling performance.

  1. Can AC leaks be prevented?

Regular maintenance of the air conditioning system can help prevent leaks. This includes checking for worn seals or damaged components during routine maintenance and ensuring the system is well-maintained to avoid unnecessary stress on its parts.

  1. What should I do if I suspect air conditioning leaks in a car?

If you suspect air conditioning leaks in a car, it is advisable to have it inspected and repaired by a qualified technician. Ignoring the problem can lead to greater damage and reduced cooling performance.

Conclusion

Knowing how to repair an air conditioning leak in a car and addressing an air conditioning leak as soon as possible is essential to maintaining a comfortable and functional air conditioning system.

Although diagnosing and repairing the leak can sometimes be a complex task, it is important to follow a systematic approach. Identifying the source of the leak, whether it comes from the pipes, connectors, or the air conditioning compressor, is the first crucial step.

Always use the appropriate tools and materials recommended for AC system repairs to ensure good sealing and safety!

Changing Automatic Transmission Fluid: Essential Information

Automatic transmission fluid serves two essential roles: lubrication and cleaning. The fluid circulates through various components to reduce friction between them and collect sediments that can circulate in the system and cause damage.

Role of Automatic Transmission Fluid (ATF):

  • Lubrication of the transmission’s moving parts.
  • Cleaning and removal of sediments and contaminants.

Why Change ATF?

  • Ensure proper operation and longevity of the transmission.
  • Avoid costly transmission problems.

Signs Indicating the Need to Change ATF:

  • Unusual gear shifts (jerking, slipping).
  • Dark or burnt color of the fluid.
  • Burnt smell of the fluid.
  • Low fluid level.

Steps for Changing ATF:

  1. Check the type of ATF recommended by the manufacturer.
  2. Drain the old ATF.
  3. Replace the ATF filter (if applicable).
  4. Flush the transmission system (optional).
  5. Fill the system with new ATF.
  6. Check the fluid level and adjust if necessary.

Important Points to Remember:

  • Use the type of ATF specified by the manufacturer.
  • Carefully follow the instructions in the vehicle’s manual.
  • Clean the torque converter during flushing.
  • Properly seal the transmission pan.

Benefits of Changing ATF:

  • Improved transmission performance.
  • Reduced wear and tear.
  • Extended transmission lifespan.
  • Improved fuel economy.

Frequently Asked Questions (FAQ):

What type of ATF should I use?

Consult your vehicle’s manual for the recommended type of ATF.

How to check the ATF level?

Refer to your vehicle’s manual for specific instructions.

Can changing ATF improve fuel economy?

Yes, changing ATF can improve fuel economy by optimizing transmission operation.

Should I do a complete flush or a simple ATF change?

A complete flush replaces more fluid than a simple change. The choice depends on your vehicle and its condition.

Should the ATF filter be changed at the same time as the ATF?

It is generally recommended to change the ATF filter when changing the ATF.

Is it necessary to change ATF if it is synthetic ATF?

Yes, even synthetic ATF degrades over time. Change intervals may be longer, but a change is still necessary.

How to dispose of old ATF?

Take the old ATF to a recycling center or hazardous waste disposal facility.

What to do if I accidentally use the wrong type of ATF?

Have the ATF drained and replaced with the correct type by a professional.

Can changing ATF solve transmission problems like slipping or harsh shifting?

Changing ATF can improve transmission performance, but it may not solve all problems. Consult a professional for diagnosis and repair.

Can I tow a trailer immediately after changing ATF?

It is advisable to drive your vehicle for a short period after changing ATF to check for leaks and issues before towing a trailer.

Can I use a generic ATF or should I use the manufacturer’s brand?

It is generally better to use the ATF brand recommended by the manufacturer. However, some generic brands may be compatible; check approvals and compatibility before using them.

Conclusion:

Changing ATF is an important part of your vehicle’s maintenance and can contribute to the longevity and performance of the transmission. It is important to follow the manufacturer’s recommendations and use the appropriate type of ATF for your vehicle.

Coolant shortage in your car

If you want to keep your car running smoothly on the road, maintaining proper antifreeze levels is essential. Without antifreeze, having a vehicle would be pointless. As the saying goes, “Small things come in big packages.” The same applies to coolant, which may seem insignificant but can prevent your car from functioning. Keep reading to learn what happens when your car lacks coolant.

What Happens When Your Car Lacks Coolant? The 3 Common Effects

Coolant, or what you might call antifreeze, is a fluid that regulates the engine’s temperature. The role of antifreeze is crucial, and its absence could lead to disasters. Sometimes, you might tend to ignore the low coolant warning light and overlook the consequences. What are they? Let’s explore this in detail for your better understanding.

1. Engine Shutdown

Coolant is present to cool down the very hot components of the engine. Without coolant, the engine parts would heat up but never cool down. This, in turn, would cause the engine to fail and deteriorate the corresponding parts. When the engine fails, the heart of the car breaks down; thus, your car loses its essence of existence.

Today, with the advent of new technologies and modern cars, things have changed for the better. As soon as the coolant level drops, the engine automatically stops. This is a sign indicating the need to top up the coolant. Simply put, you won’t be able to drive further until you provide the right dose of coolant to the system. This is the worst thing that happens when your car lacks coolant.

Learn all about what happens when your car lacks coolant. (Photo source: istockphoto)

2. Car Heater Malfunction

The car heater uses the residual heat that the coolant absorbs from the engine. It’s clear that without coolant, the heater won’t receive the dose of heat it needs to function. Under such circumstances, the heater wouldn’t blow hot air at all, or it might blow hot air continuously.

This would be an extreme situation that you wouldn’t be able to handle. Driving in winter would be a task you couldn’t fully enjoy. Even if you’re wondering what’s wrong, checking the coolant levels would prove useful here. You can also refer to maintenance tips to detect symptoms of low coolant levels.

3. Poor Fuel Economy

The benefit of an engine running at the right temperature is reflected in its fuel economy. This is a crucial factor every car owner must consider as fuel prices rise. If you witness a drop in the MPG reading, it would be appropriate to check the coolant levels.

The truth about what happens when your car lacks coolant. (Photo source: feelgoodcars)

When the coolant level is low, the engine doesn’t lose its “overheating” state, leading to inefficient fuel combustion. Once this happens, the emissions from the exhaust would also increase exponentially. This would further deteriorate your carbon footprint, a key parameter for meeting environmental needs.

According to automotive technical experts, coolant operates in a closed circulation system, making its loss difficult. Normally, during the first 2 to 3 years of use, a small amount of coolant may be lost. If the car owner notices rapid coolant loss, it’s advisable to have the vehicle inspected and repaired.

Coolant leaks and losses can occur due to damaged hoses and perforations. However, detecting coolant leaks can be challenging for car owners, as these areas are often located deep within the engine compartment.

Expert Tip

To ensure the coolant always functions properly, you should follow these tips below:

Regularly Check the Coolant Level

Before each trip, the driver should open the hood and check the coolant level in the auxiliary tank. Make sure the coolant is always maintained at a safe level (between the Max and Min lines). If the coolant level is below the Min line, add some immediately.

Monitor the Temperature Gauge

While driving, occasionally pay attention to the coolant temperature gauge. If the temperature needle points to the Hot level, immediately stop the car, open the hood to let the car cool down, and check for any issues.

Do not open the coolant tank cap when the engine is running. If you need to stop the vehicle because the temperature gauge is too high or the vehicle has a problem, do not open the coolant tank to check the water level immediately due to the coolant. During boiling, the high pressure in the tank can cause strong splashes of water onto the face and limbs, causing burns.

You Should Use Specialized Coolant

To keep the engine durable, you should use specialized coolant. This type of coolant allows heat to be conducted quickly and doesn’t accumulate residue. At the same time, specialized water has an easily recognizable color, making it easier to visually check for coolant leaks.

Wrap Up

By looking at what happens when your car lacks coolant, you’ll understand the importance of maintaining it. Never overlook small symptoms, as they can lead to irreparable disasters that could cost you a fortune.