Why do car brakes squeal in reverse

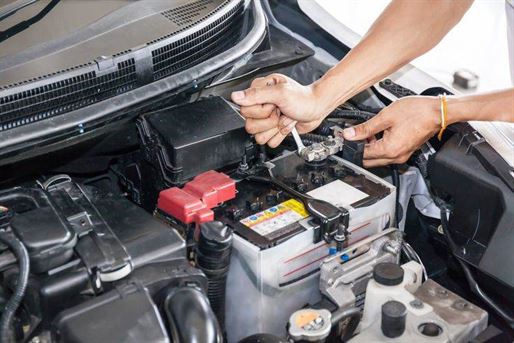
The issue we want to discuss in this article is that you have suddenly started hearing a brake squeal only when you reverse your car. You wonder what has happened to the braking system. Many drivers thought it might be because the brakes were already worn out. Yes, but that’s not the only reason; there are still many causes for your braking system to squeal. Let’s find out why car brakes squeal in reverse!

Why do car brakes squeal in reverse?

Car brakes are designed as a safety device when you drive your car. However, no driver wants to hear an annoying sound every time they press the pedal to get out of their vehicle. Why do my brakes squeak in reverse? The reasons will be revealed just below:

Why my car squeaks when I turn (Photo: pinterest.com)

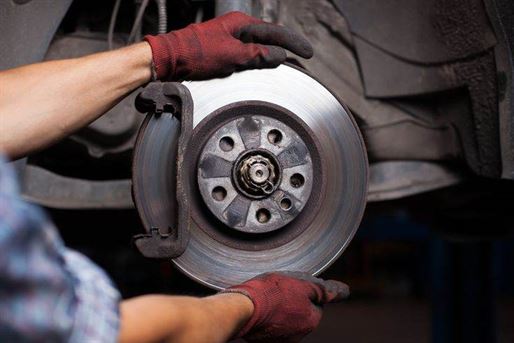
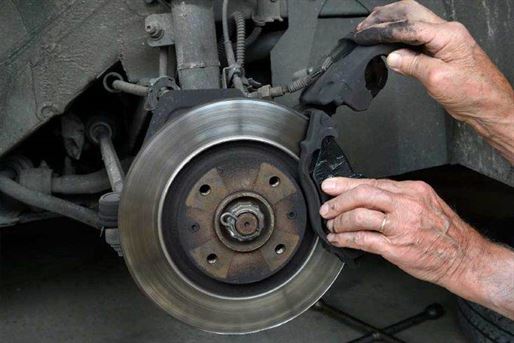
Rear brakes hitting the rotor

Actually, this is not a cause for concern for your car. This problem often occurs on cars equipped with 4-wheel disc brakes due to the relative position of the caliper bracket and the brake pad wear indicator. When you press the pedal and move forward, there is enough tension on the spring steel indicator so that there is no strange noise. But in reverse, you will hear the brakes squealing. In this case, it is a feature of certain car models and not a fault or damage.

Damaged brake pad

The second reason is due to a missing or defective brake pad. These metal parts are often overlooked during disassembly, or forgotten to be installed when changing brake pads, causing brake squeals when the vehicle is in reverse. Therefore, you must pay attention to the installation of the brake pads when replacing them or replace them if they are damaged.

The squealing is caused by the wear indicator bar.

If your car hears a brake squeal even when moving forward or backward, it may be due to the wear indicator bar located at the end of the brake pads. This rod can rub against the brake disc and cause annoying squeals when the vehicle is moving. It is also a sign that you need to replace the brake pads.

Check the friction surfaces

The car squealing in reverse can be caused by a piece of metal getting between the brake pad and the brake disc, causing this squeal. Sometimes, it could be a large rock stuck between the brake disc and the shield guard, which created an annoying noise. You can check and clean the surface of the brake pads and brake discs to solve the problem.

Noise due to lack of lubrication

Furthermore, the noise can also be caused by the brake pads; the back of the brake pads has a metal plate, and they are in contact with the metal brake, so if they are not lubricated, it will cause noise. Thus, when removing the brake pads for replacement, you need to put a little grease on the back of the brake pads to limit noise during braking. But do not apply too much as it could make the brake pads dusty.

Faulty brake pad sensor

The brake pad sensor sometimes makes a noise to signal to the owner that it is time to replace this part; the squealing from this position may be due to metal friction when the brake pads are worn, causing the metal clip to rub against the rotor producing a squeal. One of the consequences of a damaged brake pad sensor is that it is noisy and can damage the rotor, so as soon as you hear this noise, you must replace it immediately to protect the other parts and at the same time improve the operating efficiency of the car’s brake.

Uneven wear of brake discs.

This is also the reason why the car makes noise in reverse or forward. You can move the brake disc forward and backward to have better contact with the brake pads and not cause squealing.

Other reasons

Sometimes, the cause of this problem does not come from the braking system. Because in reverse, we often fully use the steering wheel locking device when we back out of the driveway and move forward onto the road. In this case, the problem may be related to the steering system, as we typically press the brake pedal to stop the car in a fully locked state before the car shifts into drive and begins to steer. Twisted belts and inefficient operation of the power steering pump are the cause of brake squealing when you reverse.

How to prevent brakes from squealing in reverse?

How to stop brakes from squeaking without taking the tire off (Photo: pinterest.com)

Depending on the cause of the brake squeal, the treatment will be different. To facilitate checking and diagnosing the cause, you need to remove the car’s wheel.

Clean the braking system

If your car’s brakes are squealing due to dirty brake pads or if the brake discs are dirty, simply clean the braking system. Use brake cleaner and a wire brush to clean the rotors, caliper, and caliper bracket; avoid cleaning rubber parts so as not to damage them. If the strange noise is due to worn brake pads, the brake pads must be replaced. If the brakes are noisy due to loose studs, loose brake pads, etc., simply tighten or replace the brake pads if they are worn.

Replace the brake with suitable material

One of the most effective ways to prevent brakes from making squealing noises in reverse is to replace the brakes with a more stable friction material. As you all know, original brake pads are often appreciated in terms of performance and material longevity, but over time, they will have noises due to rust on the brake disc. If you are willing to spend, you can use high-quality metal brake pads or high-quality ceramic brake pads to reduce noise during braking.

However, many manufacturers recommend using high-quality ceramic brake pads. Because this material is capable of operating stably at high temperatures and recovers quite quickly, this material creates dust. It is small and does not affect the brakes like metal brake pads do. So you can be assured that it will not make annoying noise. Furthermore, according to research conducted by the world’s two largest brake pad manufacturers, Akebono and Raybestos, ceramic brake pads have good performance, brake discs wear less during prolonged operation, and most importantly, impressive noise control capability. Finally, you should take your car for periodic maintenance of the braking system to ensure absolute safety when traveling on the road, protecting yourself and other road users.

Note: Before reassembling the entire wheel, you should get into the habit of applying a little anti-seize on the bolts; this will help you avoid problems when removing the nuts in the future.

Try installing the brake pads before applying an anti-seize. If it is too tight, use sandpaper or file the brake pad at the contact point.

Wrap-up

Whenever you hear a strange noise coming from your braking system, whether moving forward or backward. It is always a sign telling you that the braking system needs to be inspected to prevent further damage. Do not put yourself in danger by continuing to drive your car with this symptom. In this blog article, we have discussed the common reasons as well as the solution to fix this problem. I hope this information will be useful to you.

How to Simply Fix a Leaking Sunroof in Your Car

We believe there are few things worse than getting into a car with a wet interior after heavy rain or a storm when your sunroof is leaking. You can ensure this doesn’t happen again with a few simple procedures that work on any make or model. Let’s follow the steps below to learn how to fix a leaking sunroof in your car.

Sunroof – Is It Really Necessary for Your Car?

The concept of the sunroof, described as a temporary movable roof above a car, became known in the late 1920s and early 1930s and evolved into many models over time up to the present day. This part is designed with many different models and sizes, suitable for each vehicle model and needs such as pop-up sunroofs, top-sliding sunroofs, spoiler sunroofs, and built-in sunroofs.

The goal of creating a sunroof is considered practical as it helps reduce wind noise more than opening the side windows and allows users to more easily let fresh air into the car and feel more elegant than opening the side windows. Since its development, this design has been highly appreciated by drivers because it offers a much better experience than a sedan. Up to now, the sunroof has benefited from many improvements, fulfilling the following important roles:

How much does it cost to fix a sunroof (Photo: pinterest.com)

Expel Polluted Air from the Car

Sunroofs are made according to the principle of convection (hot air above, cold air below). When you use a car, body heat and hot air will make the interior space very stuffy and uncomfortable. At this point, opening the sunroof will release hot air and polluted air from your car, letting in natural air from outside, bringing comfort and ventilation.

Useful Exit

This is the main feature and also the outstanding advantage of a sunroof. In emergency situations such as the car falling into water or an accident where the driver cannot exit the cabin through the side door, the sunroof serves as an important exit. This helps drivers handle it themselves without spending too much time and effort.

Reduce the Temperature in the Car

Hot weather will cause the temperature inside the car to rise, heat will accumulate on the car’s ceiling, causing a feeling of discomfort. Furthermore, the air conditioner also takes some time to turn on and cool down. With a sunroof, simply open it, and the heat quickly escapes outside. Therefore, installing a sunroof helps make the space inside the cabin more airy and comfortable.

One cannot deny the benefits of the sunroof in terms of aesthetics as well as convenience for users. Many car manufacturers include the sunroof equipment on the list of options applied to expensive versions, to increase value, but in reality, there are inconveniences that car owners do not anticipate. Besides some drawbacks such as increased maintenance costs, posing a danger if used carelessly, and reduced engine aerodynamics, a leaking sunroof is also a big problem that concerns many drivers.

Symptoms of a Leaking Sunroof You Should Know

Sunroofs are a great additional option for many vehicles, but they can cause unwanted problems such as moisture leaks inside your car, which can lead to mold and other issues. It will be a good idea if you can notice the signs of a leaking sunroof to have timely methods. If the sunroof cracks or leaks are significant, you will easily notice the water leakage phenomenon. But for a minor crack, it needs to be inspected carefully to detect the problem:

  • If you detect a lot of steam condensing inside your car, it could be a sign of a leaking sunroof. Condensation occurs when the humidity is much higher than normal. Due to the high humidity, you will smell a strange odor like mildew in your cabin at that time. 
  • Cracks on the sunroof: This is a sign that can be easily observed visually. Even though the sunroof is made of tempered glass, it can still be damaged because it is not unbreakable glass. Cracks can occur due to falling objects or debris while driving. You will need to consult a professional to repair or replace the glass. 
  • In addition, there are other signs like mold spores on the carpets and chairs or water stains on the seats or carpets.
Over time, dirt and debris can accumulate and clog the drain. (Photo: pinterest.com)

How to Fix a Leaking Sunroof in Your Car?

Before going to discover the methods to handle the leaking sunroof, we need to know what the culprit of this problem is:

What are the Reasons for a Leaking Sunroof?

There are some common causes you cannot ignore:

A Clogged Sunroof Drain: The sunroof drainage system uses holes and channels to drain accumulated water. Water is directed to tubes that carry it to the bottom of the vehicle, where it is eventually released. Over time, dirt and debris can accumulate and clog the drain. When the drainage system doesn’t work properly, your sunroof can leak.

Damaged Seals: The sunroof opens and closes along a predetermined path and it must be completely watertight to prevent water from entering the cabin. If cracks develop in the seal or rail, rain will easily enter your car at that time.

Debris Buildup: Another reason that can cause a sunroof leak is when dirt or debris accumulates in the seal, the sunroof will get stuck and cannot close completely. 

How to Seal a Sunroof in Your Car?

Automotive experts have stated that due to weather conditions in some countries, installing a sunroof can sometimes cause many problems for drivers if it leaks. In particular, solving the above problem will become expensive if you don’t know how to do it. If you are unsure about performing a repair process yourself, you can consult professionals or entrust your car to a trusted mechanic, who will help you correct this error while a faulty seal could be the problem of your leaking sunroof:

Clean the Drain/Track with a Soft Towel

How to clean sunroof drains? When there is a leak or moisture on the roof, the first thing to do is park the car in a dry place and check the drain line on the sunroof. Use a damp cloth to carefully clean the sunroof track of debris that could potentially get into the drain. You should also wipe the seals to ensure there is nothing stuck inside that could create an opening when the sunroof is closed. 

Clean the Water Lines with Compressed Air or Metal Wire

In this method, you need to locate your sunroof drains. Depending on your vehicle, there could be four and they would be located in the corners of the sunroof opening. They lead to tubes that carry the liquid through the windshield frame to the bottom of your vehicle. Pour a small amount of water into the drains and look under your car to see if it flows out. If there is no puddle on the ground, your drain line is clogged. To clean your drain line, use compressed air or metal wire to dislodge debris that might be clogging the tube. Most debris would be near the top opening of the tube. 

When using metal wire, you need to use a small, thin piece of metal wire to thread it inside the tube. Then, rotate the piece of string in two different directions while pushing inward. Note that the ends of the wire should not be used to avoid damaging this plumbing system.

Repair or Replace the Cracked Rubber Seal

Regularly observe for cracks or deformations along the rubber gasket. This is because, over time, the seals will age and crack due to frequent exposure to sun and rain. Look for places where the seals are waterlogged or moldy to replace or repair them promptly. The way to fix this situation is to spread a thick layer of liquid electrical tape over the seal to cover all cracks. Then, while waiting for the liquid to dry and form a protective layer against water, firmly press the adhesive tape onto the rubber gasket and let it dry completely.

After applying the above methods, close the sunroof and try rinsing to check. If water still flows inside, try again. If the sunroof still cannot be repaired, it’s best to take the car to a reputable repair center for timely inspection and handling. Ideally, the sunroof should be cleaned regularly to avoid staying in the car and having to let in water when it rains. It can be very expensive to repair a leaking sunroof. How much does it cost to fix a sunroof? You may have to pay between $250 and $750, or even more, to replace a sunroof, including parts and labor.

Final Thoughts: How to Fix a Leaking Sunroof in Your Car?

Drivers should not be subjective about the situation of seepage or leakage in the car cabin. Because if left for too long, it can affect the electrical system and the vehicle’s operation. The cost of repairs when the car is heavily soaked can be very high. To avoid paying this cost, you can protect your sunroof by maintaining and cleaning this part regularly. When your sunroof shows signs like sticking, leaking, or strange noise. You should have it checked by a trusted mechanic. Do not delay this problem, as it could lead to more expensive repairs. In particular, leaks can wreak havoc on your car, causing moisture and mold buildup.

What to do after replacing the mass air flow sensor

If your car is running poorly and sometimes black smoke is coming from the exhaust pipe, you might have a faulty air flow sensor on your engine and it’s time for you to replace it. Normally, all drivers think that replacement is just enough to make your car run properly, but most of us don’t know that there are some important remarks after this replacement process. What to do after replacing the mass air flow sensor? In this article, we will give you all the steps before and after to consider when replacing a MAF sensor.

What is a Mass Air Flow Sensor for?

A MAF (Mass Air Flow) sensor is located on the engine’s intake manifold. This part includes the ECU controller, the resistor, and the heating wire. The main task of the MAF sensor is to measure the amount of air entering the engine’s intake. It is crucial to control the air mass to calculate the amount of fuel you need to add to achieve the desired air-fuel ratio (AFR). The sensor’s ECU control unit will analyze and then control the intake air flow to be just sufficient, thus helping the engine to operate with the greatest efficiency. Understand the importance of this sensor, so even small damages to the mass air flow sensor will also affect engine performance, consume a lot of fuel, and greatly affect the car ride.

What is a mass air flow sensor for in your car? (Photo: bmwrepairguide.com)

What are the causes of a faulty mass air flow sensor?

The failure of the mass air flow sensor can be due to many different causes. In particular, the sensor is covered with too much dirt or grease, which is the main reason why the ECU misinterprets the input signals. Furthermore, this part is affected by the engine’s high temperature for a long period without being replaced, which also easily causes poor analysis of the intake air flow.

Additionally, the air filter is not maintained and replaced periodically, leading to many impurities penetrating, which will directly affect the quality of the air intake into the engine. The best solution if you do not wish to replace a MAF sensor is to regularly check and maintain the air filter and especially the MAF sensor at reputable garages to quickly detect the faulty one and have quick solutions.

Brief steps to replace a mass air flow sensor

If the mass air flow sensor is severely damaged, the driver should perform the replacement steps in the order below:

Step 1: Open the hood and turn off the ignition of your car.

Step 2: The negative (red) cable must be disconnected to avoid any danger during implementation. Locate the MAF sensor on the intake. It is usually found in the air ducts between the intake manifold and the air filter housing of your engine.

Step 3: Grab the cable harness connecting the MAF sensor and the powertrain in the engine compartment and remove it from the sensor. Then, you will gently remove the electrical connector and the clamps that hold the mass air flow sensor in place on your vehicle’s air intake.

Step 4: Replacement with a new mass air flow sensor: Compare a new sensor with the old one to ensure you have the correct sensor for your car. All connections and holes must match on both parts. After carefully checking, install the new mass air flow sensor into your vehicle, then reverse the removal process to connect the wiring and clamps.

Step 5: Reinstall the sensor and the battery connections and turn on the ignition switch. And clear the ECU memory with an OBD code reader and try to restart the car.

Do you think step 5 is the final step in this process? Not yet! When you replace a part in your vehicle, you sometimes expect unwanted side effects and the MAF sensor is no exception. You might encounter problems related to a MAF sensor even after replacing it with a new one.

Possible problems after replacing the mass air flow sensor

Is replacing the mass air flow sensor enough to make your car run smoothly? (Photo: mycarmakesnoise.com)

Sometimes we have received a lot of feedback from our drivers indicating that their vehicles are still not running properly, even with a new MAF valve. And there are common problems you might encounter after replacing a MAF sensor:

The “Check Engine” light is still on

We know it would be frustrating to notice that your engine check light comes on after replacing a MAF sensor. You already knew that a MAF sensor can be responsible for performance and circuit malfunction codes. However, fuel trim and misfire codes can also be connected to it. This means that as soon as a MAF sensor fails, other sensors mounted around the engine will immediately detect it and send a warning to the central control unit.

Flat spot during acceleration

Once the MAF sensor replacement is completed, if you still have difficulty accelerating in road traffic or during overtaking, it means your ECM might be limiting injection due to a new MAF sensor problem.

Rough idle

It is not uncommon for you to notice that your engine is not idling correctly or is running a bit roughly after its replacement. The reason is that your new MAF sensor might have problems. Without the right amount of fuel, it’s hard to get a smooth idle. At that moment, the amount of air supplied to the engine compartment is unstable, causing excessive and insufficient combustion of the mixture inside the cylinders, directly affecting engine performance. Your engine might not start properly if the MAF sensors are not working correctly, especially at idle.

Why do problems still occur after replacing an old MAF sensor?

These problems worry drivers because they don’t even know what the reasons are. This problem occurs due to several possible causes:

Faulty installation

Faulty installation is one of the most common reasons that prevent your vehicle from running properly after replacing a new MAF sensor. As we know, the MAF sensor replacement process is quite complicated. So, when we perform this process at home, we often encounter errors in the replacement process, such as missing steps or a wrong process. And the result is that the new MAF sensor will lose its function.

Forgetting to reset the ECU

Not resetting your car’s computer is the second thing you easily forget when changing a MAF sensor. As we know, a MAF sensor will collect associated information to select the exact amount of fuel, then transfer this data to your Engine Control Unit (ECU). The ECU works and provides the engine with the correct amount of fuel. If you do not reset the ECU, the sensor codes will not be synchronized with the computer at the moment. The codes will help mechanics diagnose problems related to the mass air flow sensor. Therefore, when some codes are not synchronized with the ECU, you will see problems like the check engine light being on or your car not running properly…

Having a bad new MAF sensor

Buying the wrong sensor is the most common reason encountered by many drivers when replacing the sensor on the vehicle. The MAF sensor sends a signal to the ECU regarding the amount of air entering your engine. In fact, there are different types of sensors that have the same functions like MAP sensors or air flow sensors that use moving flaps (older model). That’s the reason why you cannot simply change your old type of sensor with a sensor from another brand or from one manufacturer to a sensor from another even if these sensors are of the same type.

What to do after replacing the mass air flow sensor?

Our final mission when replacing the faulty MAF sensor is for this sensor to be recognized by your engine. However, in some way, problems can still occur after the replacement process, all of which can be avoided if you follow a few simple but important steps after replacing the MAF sensor:

Disconnect your car battery

When you have finished installing the mass air flow sensor, the process is not yet over. Instead, it takes a few more steps to completely replace it. And disconnecting your battery for about 10 to 15 minutes is highly recommended. The purpose of this step will help the car’s ECU have enough time to reset and delete the old information and update the new setting to record the new parameter with the new replacement. Not all vehicles can automatically reset the error code if you disconnect the battery for several minutes. So you should try this step to ensure that your MAF valve is working correctly. When connecting your battery, the ECU will start loading all the information related to the new MAF sensor. When the battery is removed, it should not cause any problems.

Ensure the replacement is correct

If you are performing the MAF sensor replacement at your home, let’s make sure you follow the instructions correctly. A poorly installed MAF leads to erroneous readings that cause the ECU to send incorrect amounts of fuel to your engine. Furthermore, the consequence can be an incorrect air-fuel mixture causing rough idle. There are a few remarks to consider when replacing your new MAF sensor:

  • When receiving a new MAF sensor, you should notice the type of connections and ensure you have the appropriate tools to disconnect and reconnect the sensor to the intake manifold and air box.
  • Check all the steps you have performed to ensure you haven’t forgotten anything and that it is done effectively.
  • When replacing the MAF sensor, you must be careful not to touch the sensing element inside the MAF sensor. This element is very fragile and is often exposed when removing the sensor.
  • Make sure you have the correct MAF sensor. Read the number on the old sensor carefully and compare it with the OE number in the description of your new sensor. Usually, the description will indicate the initial number, the OE number, or the reference number.
  • It is often necessary to do a road test to recalibrate the other sensors in the engine. In some situations, it must reset the inactive installation or other settings using the appropriate diagnostic tool.

ECU Reset

Resetting the ECU means deleting all the memory of your car’s computer to get rid of all errors and mistakes in the settings. In most modern models, the ECU and ECM will automatically reprogram themselves after replacing the MAF sensor. But on some older models, this is not possible and you therefore need to reset the ECU. It is the most effective way to handle problems when replacing the new MAF sensor. Recalibrating the computer sometimes requires a few technical details that will depend on your vehicle type. You can reset the ECU in 2 ways: by removing your car’s battery (modern vehicles) or by using an automatic scanner (OBDII scanner).

Final thoughts

When a mass air flow sensor is faulty, it cannot accurately move the air flow into your engine, causing the ECU to miscalculate the amount of fuel injection. This causes a few problems: stalling, rough idle, and poor acceleration. Understanding the importance of this sensor, whenever you replace it. Make sure to follow the procedures and steps to help your car achieve the best performance.

How to Find a Coolant Leak

How to Find a Coolant Leak If one unfortunate morning, you see blue fluid dripping from under your car, pooling on the ground, it’s an alarming situation. Perhaps your engine coolant has leaked. The reasons for this leak are numerous. And thanks to our experience repairing hundreds of cases, we will reveal the specific causes and how to find a coolant leak and the ways to repair it.

What is Car Coolant?

Automotive engine coolant is a specialized solution that maintains the ideal temperature for car engine operation. With the exclusive formula from manufacturers, the coolant will absorb the heat radiated by the engine, raising the boiling point of water and lowering the freezing point.

The Role and Use of Automotive Coolant

Thanks to this coolant, the car engine can perform better and become more durable over time. If the coolant reservoir is empty, the car engine will overheat, causing an explosion. Therefore, automotive coolant is a solution that car owners must regularly check and inspect.

During car operation, fuel burns in the cylinder, releasing a large amount of heat. And when the heat is too high, the engine’s resistance decreases, leading to damage to parts and thermal stress. At the same time, the lubricating effect of the oil will be reduced. Since then, the friction on the engine surface will increase simultaneously, affecting the performance and lifespan of the car engine.

Even more dangerous, when oil reaches a temperature of 200 to 300 degrees Celsius, it ignites spontaneously, potentially causing a risk of fire and explosion. Therefore, the car coolant acts as a bridge to transfer heat from the engine block to the cooling reservoir to help the car engine temperature not exceed the allowed limit.

Furthermore, one of the indispensable roles of engine coolant is to lubricate and prevent corrosion of components. If it’s not engine coolant but regular filtered water, your car engine will quickly “start up” due to corrosion.

So there is no doubt that a coolant leak over time will lead to serious consequences. Insufficient coolant or low coolant level will directly affect the engine’s ability to cool. An engine operating under prolonged high-temperature conditions with a coolant leak can lead to many serious consequences that may not be announced.

Coolant is like the blood of a car. (Photo: Sapin0002)

Signs You Might Have a Coolant Leak

If there is a coolant leak in your car’s system, you might immediately notice these signs because they are quite visible and easy to realize.

  • A sweet smell/aroma comes from the vehicle after you’ve driven it or when you’re around the car. You can also smell it behind the steering wheel.
  • Puddles under the car appear in orange, green, pink, or blue-green colors after you move away from a parking spot. To explain the colors, coolant manufacturers typically use these dye colors to differentiate coolant from other fluids used in cars. Engine oil is gold/dark yellow or black (when dirty) and dark red is for transmission fluid.
  • The car gets hot or overheats without a common reason that you’ve checked.

That said, below are 5 common places where you can find the coolant leak that you might want to monitor closely, so let’s follow along.

How to Find a Coolant Leak?

To find the coolant leak, drive the car until the engine is warm. After that, park your car on a clean, dry sidewalk or in a safe, clear driveway if possible.

Next, turn off the car and let it cool down. Be cautious because when the car is heated, the coolant will be hot and under pressure. Do not open the crankcase cap or the radiator cap. And then we are all set under the hood.

Once the car has cooled for 15 minutes, look under the car for any antifreeze-colored water. If no fluid smells like coolant, get on your knees to scan the underside of your car and see if you can spot anything else that is wet or dripping.

1. Cracked/Punctured/Torn Radiator

The radiator is a part that wears out a lot due to the nature of its operation. Over time, radiators corrode. And this can be the frequent cause of the radiator being punctured, causing a coolant leak.

Furthermore, the seal between the radiator and the tank can wear out, causing a leak. There could also be a leak from one of the pipes connected to the radiator. Over time, these tubes become brittle and break easily.

2. Coolant Radiator Cap

The coolant reservoir cap is not only tasked with preventing coolant from escaping but also ensuring stable pressure inside. When the radiator cap functions correctly, it creates a protective shield, keeping the radiator in good working condition at the right pressure.

However, over time, the radiator cap will wear out, unable to create protection as good as the original. From there, the coolant can leak outside. So, the first place you can check for a coolant leak might be the coolant radiator cap.

3. Broken Head Gasket

You might not know that the head gasket is responsible for keeping the engine oil and coolant separate. When a piece of pretzel is underperforming, you might not even know what’s happening because a leak could be inside.

However, you might notice coolant in the engine oil or vice versa. You will also see the engine temperature start to rise. Eventually, the coolant will leak outside the engine, indicating more serious problems.

4. The Pump is Broken

The water pump is responsible for circulating the coolant throughout the system and is monitored by a belt. This belt connects to the engine’s crankshaft, but this part can corrode and leak.

The water pump itself can also be affected by external influences leading to leaks. Regardless, if the pump isn’t working properly, the coolant cannot circulate correctly, which will cause the engine to overheat.

5. The Auxiliary Coolant Reservoir is Faulty

In the car’s engine compartment, you will find an auxiliary coolant reservoir. It is connected to the radiator by a flexible hose. Its main task is to supply coolant to the radiator when needed. However, time causes the auxiliary coolant reservoir to age, which can lead to cracks and leaks.

After checking all the above parts but you still haven’t found the leak, combined with the smell that seems stronger inside your vehicle than outside, the problem might be from inside the heater. Usually, car heaters use a small radiator to warm the cabin. If the car carpet is suddenly wet or the windows seem to fog up faster than usual, the heater radiator might have issues. Heater problems are quite difficult to find and fix because it’s a part of the air conditioning system concealed by the dashboard. If this is your case, unless you are familiar with tools and repair projects yourself, contact technical support.

What Should You Do If You Can’t Find the Coolant Leak Point

Not finding a coolant leak in the above positions does not guarantee that you won’t have to deal with a hidden leak. Once your engine is completely cooled, check your coolant level to see if it’s low. The coolant level indicator is on the side of the translucent plastic reservoir, and its level should be between the min and max marks. If the reservoir is still full, the smell probably isn’t from a coolant leak.

On the other hand, if the reservoir level is below the minimum mark or if it has been dry for a while, you might have a problem.

It’s time to ask for help from an expert technician if you can’t find the coolant leak point. (Photo: RonFullHD)

How Long Can You Drive With a Coolant Leak?

Have you ever wondered how long you can drive with a coolant leak? If you are facing this issue, we suggest finding methods to resolve it as soon as possible and avoid leaving it intact or ignored. You need to know that any problem related to the cooling system or coolant reservoir will not be solved by self-healing methods and may even erode faster. The early signs of a car coolant leak are not hard to notice. Therefore, one should always pay attention to possible symptoms to avoid being stranded on the road in the middle of nowhere.

If you believe in your luck and have just discovered a coolant leak in your car, driving your car for a few days might be tolerable by filling the coolant reservoir with pure water if it becomes low.

However, it is always ideal with the correct 50-50 mix of coolant and water to fill your cooling system’s reservoir, which is especially suitable in winter. If you add only water to a reservoir on a freezing winter night, it will quickly turn into ice. And ice in any engine system is never a good sign. The expanded area created by the ice can cause the radiator and brake hoses in the cooling system to burst, crack a cylinder head or the engine block, and then slowly damage your car’s engine and cooling system. Generally, car coolant lowers its freezing point between -35°F and -36°F to prevent damage from frozen water. So, have your car inspected and repaired quickly to avoid more severe and costly engine damage.

Note that ethylene glycol coolant is toxic if accidentally ingested. This danger can occur at any time, with the highest risks being for children and pets, as its sweet smell can attract insufficiently aware individuals. Therefore, always keep the solution out of reach of your children and wear protective clothing when using it.

Wrap Up

Above are the most detailed instructions on how to detect a coolant leak that we wish to share with you. Hopefully, the above sharing will allow you to more easily check and maintain your coolant reservoir, cooling system, and your car’s engine as a whole. But if you cannot inspect it yourself, you can take the car to a professional workshop.

For more

The sound of your hybrid cars is so strange – here are the reasons

Hybrid cars (powered by electricity and gasoline) that operate too quietly are considered “dangerous” by many people. Some believe these hybrids should be a bit “louder.” To address this issue, many countries have requirements regarding hybrid car noise. Specifically, both plug-in hybrid vehicles and hybrids must make noise when traveling at low speeds (<30 km/h) to ensure pedestrian safety.

Equipped with a sound emission system, we sometimes still hear the strange noise of hybrid cars and wonder if it’s just a normal hybrid sound or if there’s a problem with your car? To better understand the issue, let’s read the article below.

Sometimes you’ll hear strange hybrid noises and wonder what happened to your car? (Photo: flickr.com)

Why Hybrid Car Noise Is So Strange

Hybrid Brake Is Damaged

As with any other conventional car, the working principle of the brake is: when the driver wants to stop or slow down, they must apply sufficient braking force to make the wheels turn slowly or stop completely. But during this process, the car’s brake shows signs of failure. One of the most obvious signs is noise during braking. What causes this phenomenon? The reasons can be:

  • Worn brake pads: If brake pads are used for a long time, the rear metal surface will slowly wear away. This causes metals to collide with each other and creates noise.
  • Torn pads: A torn pad will create conditions allowing parts of the braking system to rub against each other like rotors.
  • Faulty brake discs: Worn brake discs are the source of the annoying noise in the braking system. Brake discs that are no longer flat will cause a strange noise.

Automated Transmission Failure

Electric and hybrid vehicles often use direct or automatic transmissions. When the hybrid transmission is damaged, you may hear obvious sounds like clunking noises, vibrations, and metal clanging.

Some causes that can be cited are improper use of the automatic transmission such as carrying heavy loads, frequently driving on uneven roads, shifting gears when the car is at high speed, or before coming to a complete stop… All these mistakes cause the engine to overheat, making it difficult to shift gears.

Additionally, other reasons can be listed: worn transmission, damaged wheel bearings, or continuous driving of a car under difficult conditions. If the pump shaft or machine is faulty, you may hear a humming sound.

A Hybrid Engine Has a Problem

As you know, unlike diesel and gasoline engines, hybrid engines produce much less noise. The HEV engine is composed of energy and gasoline from the battery. Although it is much quieter, drivers will sometimes hear strange noises: squealing, tapping, clicking, knocking… coming from the car’s engine, and this may worry you. Causes include a dirty air filter, a damaged spark plug or spark plug wire, a clogged fuel filter, or a catalytic converter.

Check the hybrid engine to repair it immediately (Photo: flickr.com)

Types of Hybrid Car Sounds

Do all noises from a hybrid car mean your car has a problem? The answer is “No.” There are many types of hybrid car noises, which can easily confuse you about your car’s condition: “Is one of the car parts damaged?” Below, we’ll discuss some types of normal noises; you don’t need to worry when you hear them:

  • When the hybrid engine stops, the cooling system pumps hot coolant into the thermos tank. You can actually hear the pump humming for a few seconds while it fills the thermos tank.
  • If you’re driving at low speed, you hear a strange noise and wonder: What happened to my hybrid car? In this situation, your car is completely normal. Specifically, the Acoustic Vehicle Alerting System (AVAS) of electric and hybrid vehicles must emit a clear and continuous sound when the car is moving at a speed below 19 km/h so that pedestrians know the car is in motion. The volume of this system can range from 56 to 75 decibels (similar to an indoor conversation or an electric toothbrush). The noise emitted will increase when the car accelerates.
  • The only noise that electric vehicles tend to make is from tires or wind resistance, and this only occurs at higher speeds.

FAQ

Why Does the Toyota Prius Make a Loud Engine Noise?

The Toyota Prius is the world’s first mass-produced hybrid (gasoline-electric) vehicle. At the same time, it is also a popular car model due to its fuel economy benefits and environmental friendliness. But there are some complaints about this car’s noise. Problems can range from a simple dirty spark plug to more serious issues like a damaged muffler or catalytic converter.

Do Hybrid Cars Need to Be Recharged?

With a full hybrid or mild hybrid vehicle, the car does not need to be recharged because the internal combustion engine will both serve as the engine and provide power to the hybrid battery. As for plug-in hybrid cars, the battery must be charged by an external power source.

How to Maintain a Hybrid Battery?

Basically, the battery does not require periodic maintenance; the part that needs periodic maintenance is the cooling system’s air filter. This air filter should be cleaned every 10,000 km and replaced every 30,000 km.

Toyota Start Control Malfunction: Causes & Solutions

Launch Control (DSC) is a key innovation by Toyota to prevent accidents related to harsh accelerator use or incorrect gear shifting. Learn how to identify and fix its malfunctions.


What is Launch Control (DSC)?

The DSC regulates engine power during an inappropriate gear shift under acceleration. For example, if you shift from reverse to drive without releasing the accelerator in a parking lot, the system automatically reduces power to prevent sudden acceleration.

  • Operation: The ECU (Engine Control Unit) analyzes speed, pedal position, and engaged gear. If a risk is detected, it limits engine torque.
  • Affected Models: Mainly recent Toyotas with automatic or CVT transmissions (e.g., Corolla, RAV4, Prius).

Symptoms of a Failing DSC

Erratic Behavior: Jerking, skidding, or instability in turns.

Warning Light: A ⚠️ or “DSC” symbol appears on the dashboard.

Starting Issues: The vehicle struggles to start or stalls.

Loss of Power: Weak acceleration, even with the pedal fully pressed.

Launch Control Malfunction: Common Reasons.

A drive control system malfunction can be considered a major step in improving the safety of Toyota models (Photo: cargurus.com)

5 Main Causes of Malfunction

Cause Explanation Impact
Faulty ECU The engine control unit does not process sensor data correctly. Errors in DSC and engine control.
Failed Ignition Coil A faulty coil causes misfires, disrupting the ECU. Flashing engine light, loss of power.
Blown Fuse A fuse related to the DSC or ECU interrupts the electrical circuit. DSC inactive, electrical equipment out of service.
Dirty ABS Sensor Dirt blocks the wheel speed signal. ABS disabled, DSC ineffective.
Weak Battery Insufficient voltage disrupts electronic systems. Hard starting, random malfunctions.

Step-by-Step Solutions

1. Clean the ABS Sensor

  • Tools: Microfiber cloth, electronic cleaner.
  • Steps:
    1. Remove the sensor (usually near the wheels).
    2. Clean gently without water.
    3. Reinstall and test the system.

2. Check Wiring and Fuses

  • DSC Fuse: Consult the manual to locate the fuse (often in the fuse box under the hood). Replace if blown (cost: €5-10).
  • Wiring: Inspect ECU and DSC connectors for broken or corroded wires.

3. Diagnose the ECU and Ignition Coil

  • OBD2 Scanner: Use a tool like Toyota Techstream to read error codes (e.g., P0351 for a faulty coil).
  • Coil Test: Measure resistance (expected: 0.5–2 Ω primary, 6,000–10,000 Ω secondary).

4. Replace the Battery

  • Test: A good battery shows 12.6 V with the engine off.
  • Recommended Models: Panasonic, Bosch (4-year warranty).

Repair Costs

Intervention Price (€)
Fuse replacement 5–20
ABS sensor cleaning 50–100
Ignition coil 80–200
New battery 100–300
ECU diagnostic 80–150

FAQ

Q: Can the DSC completely disable the engine?
A: No, it only limits power. Stalling suggests another issue (e.g., coil, battery).

Q: How to reset the DSC warning light?
A: Use an OBD2 scanner or disconnect the battery for 15 minutes. If the light returns, consult a mechanic.


Prevention

  • Regular Maintenance: Check spark plugs, battery, and levels every 20,000 km.
  • Smooth Driving: Avoid harsh gear changes.

In Summary: A failing DSC compromises your safety. Act as soon as the warning light appears by checking fuses, sensors, and battery. For complex issues (ECU, coils), consult an authorized Toyota garage.
The car battery is not sufficiently charged. This will cause your engine to stall or the starting time to be longer than usual (Photo: pinterest.com)

Nissan VQ Series Engines: Everything You Need to Know

The Nissan Motor Company’s VQ engine series is used in the automaker’s sedans, trucks, SUVs, and crossover utility vehicles. The VQ series engine is also used in some Infiniti vehicles. If you haven’t heard of this engine series or only have a superficial understanding of it, you’ll be interested to know that this series is the successor to the original Nissan VG engines.

Do some research on the Nissan VQ engine series and you’ll find it ranks among the industry’s best for good reason. In fact, the engine series has been highlighted for its merits by Ward’s popular 10 Best Engines list nearly every year of its existence. It is the only engine series to appear on the list every year the award has been given. Let’s take a closer look at what the VQ series engines actually are.

The Basics of the VQ

Photo: Shutterstock

Nissan’s VQ engines are piston engines and feature six cylinders. The engine consists of an aluminum block highlighted by aluminum cylinder heads and 4-valve engineering. These engines originally contained the automaker’s MPFI system, an acronym for Multi-Point Fuel Injection. This system is of sequential design. The engine series later transitioned to a version with variable valve timing, including direct fuel injection instead of MPFI. Examples of Nissan vehicles equipped with the VQ series engines include the company’s luxurious Maxima, the affordable Altima sedan, the highly popular 350Z sports roadster, the Quest minivan, and the Murano utility vehicle.

The Road to Success for the VQ Series

It’s no secret that competition in the automotive industry is an endless race to compete with other automakers equipped with the latest technologies and engineering feats. This fierce competition largely explains why Nissan’s VQ series engines took a backseat to the competition after several strong years. In fact, the automaker’s engineers took an eight-year hiatus from the VQ series after the engine range failed to compete in terms of fuel economy and refinement.

The very first Nissan VQ engine arrived on the market in 1994. Originally present in the Nissan Maxima as well as the Infiniti i30, this fully aluminum V6 engine was available with displacements of 2.0 liters, 2.5 liters, and 3.0 liters. The 3.0-liter displacement VQ provided 205 lb-ft of torque and 190 horsepower. The compact engine was easily transported thanks to its lightweight components, bidirectional cooling design, molybdenum pistons, and micro-finished crankshaft.

The return of the Nissan VQ series engine was met with great fanfare. The reborn VQ engines are even more efficient in terms of engine operation as well as fuel economy. The engine series now adheres to emissions regulations, including the Mobile Source Air Toxics standards, or MSAT for short. The Noise, Vibration, and Harshness (NVH) of the series engine is revered throughout the industry. An added bonus: the 300 horsepower of the engines. This improvement was achieved without any reduction in the quality or performance of the engine components. The engine’s NVH is superior to that of the 2016 Maxima as well as the 290 horsepower VQ 6-cylinder used in the 2015 model. In short, the Nissan VQ series engine is back and better than ever.

Breaking Down the VQ Series Engine

Drive around town in a Nissan equipped with a VQ series engine and you’ll find it is smooth, quiet, and performs better than expected. The refreshed VQ series engine features a fully revised intake manifold, highlighted by shorter and thicker channels. The superior flow in the cylinder head/combustion chambers offers higher output and reduced vibration thanks to its reinforced oil pan.

The reduction in friction combined with the mid-lock cam phasing improves combustion. The engines’ exhaust valves prevent heat from compromising the combustion chambers. The result is responsive yet lightweight power, perfect for continuously variable transmissions. The engine’s superior mid-range ensures top performance even when reaching over 6,600 RPM.

The Smooth and Silky Engine Every Gearhead Appreciates

As any gearhead knows, engine performance is at the heart of automotive functionality and on-road performance. Nissan’s VQ engines are revered throughout the industry for their smoothness, elite balance, and seamless functionality, regardless of external conditions. The underlying engineering of the engine is the source of its success. Designed with a displacement between 2.0 liters and 4.0 liters, the VQ engines have been modernized to provide additional power in all the different types of Nissan vehicles. Nissan engineers have mastered the delicate balance between efficiency and performance without sacrificing NVH levels.

Only the most knowledgeable automotive expert knows that Nissan engineers went so far as to precisely optimize the shape of the VQ series engine’s cylinder head ports to increase tumble flow while simultaneously reducing flow restriction. The automaker’s engineers accomplished this impressive feat by implementing complex fluid dynamics. In addition to an exhaust cam phaser with a widened event angle as well as a low-restriction exhaust catalyst, the engines’ valve timing has also been precisely tuned.

Now that you have an insight into the Nissan VQ series engines, it’s time to start your drive and imagine the inner workings of your Nissan VQ series engine while cruising around town.

How a Fan Clutch Works in a Car

How a Fan Clutch Works in a Car, Hey gearheads! Today, we’re going to discuss a critical but often overlooked part of your vehicle: the fan clutch. Many people don’t know what a fan clutch is or how it works. Well, we’ll look at the inner workings of a fan clutch and see how it helps keep the car engine cool. So buckle up because we’re about to take a ride into the world of automotive engineering.

What is a Fan Clutch For?

Fan clutches are one of those parts you don’t really think about until they stop working. But it’s usually a big problem when they go out. That’s because the fan clutch is responsible for regulating the engine temperature by controlling the amount of power transmitted to the car’s cooling fan. Simply put, the fan clutch prevents the engine from overheating.

Fan clutches operate using a thermostatic formula. It doesn’t engage when the engine temperature is average, allowing the cooling fan to freewheel. This way, the engine warms up quickly, reducing unnecessary load. On the other hand, the clutch engages the fan when the temperature rises, which cools the engine.

fan clutch
The clutch helps keep the engine cool. (Credit: YouTube/KitMastersInc)

How a Fan Clutch Works

So, how does it work? Well, let’s take a look at the anatomy of a fan clutch.

The main function of a fan clutch is to maintain the on/off operation of the fan in the cooling system. The fan engages when the engine overheats or the car is moving slower than it should. It disengages once the engine temperature has dropped to an average level. It also stops spinning when the car is moving at a speed that pushes air through the radiator.

There are two types of fan clutches: thermal and non-thermal. Thermal ones are the most efficient, while non-thermal ones are more economical.

Thermal Clutch Mechanism

This clutch uses a bimetallic spring to detect temperature changes. Depending on the volume of air passing through the radiator, the spring expands or contracts.

When the car is idling or moving slowly, there isn’t enough airflow to cool the engine. This causes the engine to generate more power and heat, making the spring expand. This opens a valve to a chamber containing liquid silicone. This fluid enters the clutch and engages it at 70 to 90 percent of the water pump speed. The rotation of the fan clutch speeds up the car, forcing a high volume of air through the radiator.

The airflow cools the spring, which contracts and disengages. It slows down the cooling fan, making it spin at 20 percent of the water pump speed. This process is repeated in a cycle to maintain the correct engine temperature.

Non-Thermal Clutch Mechanism

A non-thermal fan clutch engages repeatedly and spins at about 30 to 60 percent of the water pump speed. Its price is lower than a thermal clutch, but it’s less effective at cooling the engine at low speeds. It also cannot provide long-term service.

Conclusion

A fan clutch is an essential part of your car’s cooling system. It prevents the engine from overheating, thus avoiding serious damage to the car. So, if the fan clutch starts to fail, make sure to repair it as soon as possible.

A Guide to Installing Automatic Headlights in Older Cars

A Guide to Installing Automatic Headlights Did you know that most new cars come equipped with automatic headlights? If your car doesn’t have this feature, it can be difficult to drive at night. Automatic headlights are designed to turn on when it’s dark outside and automatically switch off when the sun rises. Let’s see how to add these lights to an older vehicle, so you can finally get some relief when driving in the dark!

Installing Automatic Headlights in an Old Car

Older cars may not come with automatic headlights, but that doesn’t mean you can’t upgrade them. Installing automatic headlight bulbs in an older car is quick and easy with the right tools. These lights work when a photoelectric sensor is placed around the windshield area. The sensor alerts a control unit about the outside lighting conditions. Based on this signal, the control unit turns the headlights on and off.

There are many aftermarket automatic headlight kits that make it easy to install this setup in an old car. A good kit will cost around $50, and you can install it at home to save on costs. Let’s see how to do it in just a few steps!

Many aftermarket lighting kits are available. (Credit: Dreamstime/TNS)

Setting Up the Photoelectric Sensor

You need to find a suitable location that receives the most sunlight. This could be at the base of the windshield or near the rearview mirror. The sensor works when exposed to sunlight. Once you’ve found the right spot, secure the sensor using double-sided tape or even a bit of adhesive glue if needed. If it comes with a mounting bracket, you can simply use that.

Mounting the Control Unit

You need to find a suitable location, which could be the center console or under the dashboard. The back of the glove compartment is also a good spot to mount this control unit.

For installation, use the mounting hardware provided with the kit. You can also use adhesive or double-sided tape.

Wiring

You’ll need to wire both the sensor and the control unit. Connect them with the power and ground wires and tighten them securely. The connections should be as neat and secure as possible. Then, wire the connection between the control unit and the factory light switch.

If you’re doing this without expert help, remember to refer to the car’s wiring diagram. Otherwise, there could be a mistake when joining the wires.

Test the Lights

The final step is to test the automatic headlights. When the lights are on, place your hand over the photoelectric sensor and make sure it turns off when you block the sunlight. If everything works as it should, then congratulations!

Conclusion

If you’re wondering whether it’s possible to add automatic headlights to your old car, don’t worry. It’s a quick process that can be done in less than an hour if you have all the proper equipment and tools on hand. Enjoy your new lighting system!

The remote key does not unlock the car door

A remote key is very convenient, but it’s frustrating when the remote key does not unlock the car door. A dead key fob means you are locked out of the car, which is the last thing anyone would want when in a hurry.

A smart key fob can stop working for several reasons, and diagnosing them is quite simple. In most cases, it’s a faulty battery, but there can also be a few other issues.

Troubleshooting the Remote Key Not Unlocking the Car Door

Before starting to diagnose the causes, you can use a spare key fob (if you have one) to see if the problem is with the remote or the car door.

If the spare remote can lock and unlock the door, you will know for sure that there is a problem with the main remote.

Here are the things you can do to fix the problem.

Replace the Battery

If the smart key fob shows no physical damage, the simplest solution to fix this issue is to change the battery. Open the battery cover and remove the battery with something like a small screwdriver or a key.

Take note of the numbers on the battery and replace it with a similar battery. If a dead battery is the cause of the problem, the remote key should work after replacement.

Change Broken Internal Contacts

The casing of a key fob is mainly plastic and is exposed to a lot of abuse. The two most vulnerable components are the buttons and the battery terminal contacts.

A visual inspection is enough to tell if the terminals are broken or loose. Soldering them back into place will likely solve the problem.

Change the battery contacts if they are broken. (Photo Source: carkeysplus)

Buttons can also be soldered in place if they seem loose. But there is no way to repair them when the buttons are broken or when the rubber buttons are not properly seated in their slots.

Unlock the Door Manually

If the problem occurs due to a dead battery but there is no store to buy a new one, hold the key fob against the door handle and try to pull it.

There might be a little juice left in the battery that can open the door when you keep the key fob close by.

Remote Door Unlocking

If the remote key fails to unlock the car door even after replacing the battery or fixing the battery contacts, try a remote unlocking service.

Most car brands offer a remote door unlocking service for emergencies, such as a broken smart key fob and keys locked inside the car. You will need to set up these services in advance.

For example, American car brands, including Fiat, Chrysler, Jeep, and others, use the Uconnect Access service for their vehicles.

You must be subscribed to Uconnect to benefit from the vehicle’s remote start function. It also offers a few additional services such as calling roadside assistance and 9-1-1, vehicle location, stolen vehicle assistance, etc.

Similarly, BMW, Chevrolet, Lexus, Mazda, Honda, Nissan, Jaguar, and many other car manufacturers offer this remote car door unlocking service.

If your car does not have such an option, which is very unlikely, you can always call a roadside assistance service for help.

Get the Hidden Key

Vehicles have a physical key to lock and unlock the door. If you lock and open your car door with the smart key fob, this key is probably hidden inside the key fob.

There should be an unlock button or a latch on the remote; pressing this button will release the spare key.

But some vehicles may not have a visible keyhole. Don’t worry. They have a concealed keyhole near the door handle. A trim piece is there with a small slot to insert the key.

You may need to remove the trim piece to access the keyhole. Be careful as this could chip the paint or damage the trim.

Find the hidden key in the key fob. (Photo Source: mad4wheels)

When the physical key can lock or unlock the door, make sure the lock mechanism is working properly. There could be an electrical issue preventing the remote from connecting to the door’s receiver sensor.

Reprogram the Smart Fob

These are mainly the reasons and troubleshooting options when a remote key does not unlock the car door. Sometimes, the remote still doesn’t work after checking for all possible reasons.

In this case, you may need to reprogram the remote to pair it with the car’s receiver. However, this will require getting into the car and inserting the keys into the ignition.

Without starting the engine, turn the key several times to the “on” and “lock” positions until you hear a chime, which means the reprogramming is successful.

FAQ on the Remote Key Not Unlocking the Car Door Problem

  1. What should I do if replacing the remote key battery doesn’t solve the problem?

If changing the battery doesn’t solve the problem, it could be due to other factors such as damaged key buttons or an issue with the car’s central locking system.

In this case, it is advisable to seek professional help or consult your vehicle’s manual for troubleshooting steps.

  1. Could electronic interference prevent my remote key from working?

Yes, electronic interference from nearby devices or radio signals can disrupt the communication between the remote key and the car’s receiver.

Try unlocking the car from a different location or use the key fob at another time to rule out any interference.

  1. What should I do if I have a spare key that works fine, but my main remote key doesn’t unlock the door?

If your spare key works correctly but your main remote key does not, it is possible that the main key is damaged or malfunctioning. You may need to replace or repair the main remote key.

  1. Can I manually unlock the car door if the remote key doesn’t work?

Yes, most vehicles have a manual keyhole on the driver’s or passenger’s side door that you can use to unlock the car manually. Refer to your car’s manual to locate the keyhole and learn how to use it.

  1. What should I do if none of the remote keys work on my car doors?

If none of your remote keys work on the car doors, it may indicate a problem with the car’s central locking system or a malfunction of the receiver.

Consult your vehicle’s manual for guidance and consider seeking help from a professional mechanic or dealership for thorough diagnosis and repair.

  1. Is there a way to reset or reprogram my remote key to work with the car again?

Some remote keys can be reprogrammed or reset to work with the car again. Refer to your car’s manual or contact a dealership or a locksmith specializing in car key programming for assistance with reprogramming.

  1. Can extreme weather conditions affect remote key performance?

Extreme weather conditions, such as extreme cold or heat, can affect remote key performance.

Batteries may drain faster in extremely cold weather, and electronic components can be sensitive to extreme temperatures. Keeping your remote key in a moderate temperature environment can be helpful.

  1. When should I consider seeking professional help for a remote key problem?

If you have tried basic troubleshooting steps like replacing the battery and still cannot unlock the car door with your remote key.

If you suspect there is a problem with the car’s central locking system, it is best to seek help from a dealership or a qualified locksmith specializing in car key systems.

Conclusion

When troubleshooting a remote key that does not unlock the car door, several potential issues could be at play. It could be a dead key battery, a faulty key fob, or problems with the car’s central locking system.

To resolve this issue, start by checking and replacing the remote’s battery, ensuring it is properly synchronized with the car.

If the problem persists, consult the vehicle’s manual for specific troubleshooting steps or seek the help of a professional locksmith or dealership for more in-depth diagnosis and repair.