Car alarms: what types are there and how do they work
A spare car alarm can give you what you need to make your car safe again.
You’re standing in your living room looking at your brand new car. A warm feeling runs through you and it’s not coming from the central heating. It’s both a machine and a work of art, you think as you turn away and head to bed. This blend of Daimler and Dali is just as appealing to others and there would be nothing worse than coming down the next morning to see just an empty driveway staring back at you. While all cars, whether cheap or high-end, come with a door-locking anti-theft system, these can be easily broken. Even if your car already has a manufacturer-installed car alarm system, an additional car alarm will help provide extra protection for your vehicle and ensure you get that warm feeling every time you look at it (Okay, okay… maybe you just want to get to work in the morning). In addition to dealing with the best car alarms you can add to your car, we’ve also covered common problems for built-in and spare car alarms.
CAR ALARM TYPES AND FEATURES
There are different types of car alarms that your car might already be equipped with or that you might consider installing. In addition to the different ways of activating the car alarm, it can operate in a different way, have different ways of indicating that it is active, and there is a whole range of different capabilities for some alarms.
AUDIBLE ALARMS
The simplest car alarms are audible car alarms. They work using sensors placed in different locations on your vehicle. If something disturbs the sensors, they activate and a hidden alarm in the car goes off. You can adjust the sensitivity levels of the sensors so they detect the slightest movement or they can be reduced to ensure it doesn’t go off at the touch of a feather. While some systems flash the car’s lights and more advanced systems can alert users remotely when the alarm is triggered, almost all systems will operate in conjunction with audible alarms.
ACTIVE OR PASSIVE SYSTEMS
A car alarm can also be active or passive. This refers to how the alarm is activated.
A passive system arms itself automatically once the ignition is turned off and the last door is closed. Active alarms require the user to press a button on the transmitter to arm and disarm their system.
Most alarms can be set up as passive or active and it’s a matter of preference here. It may be interesting to know, however, that you can probably get a discount on your insurance if you use passive alarm systems.
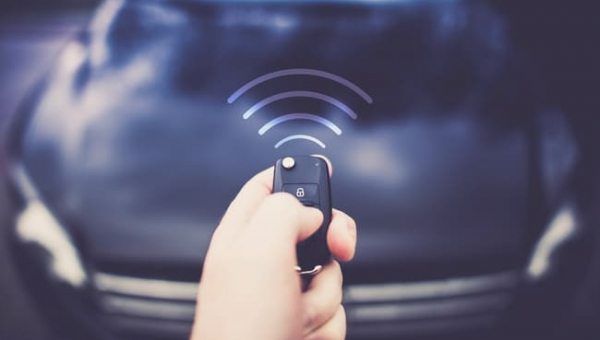
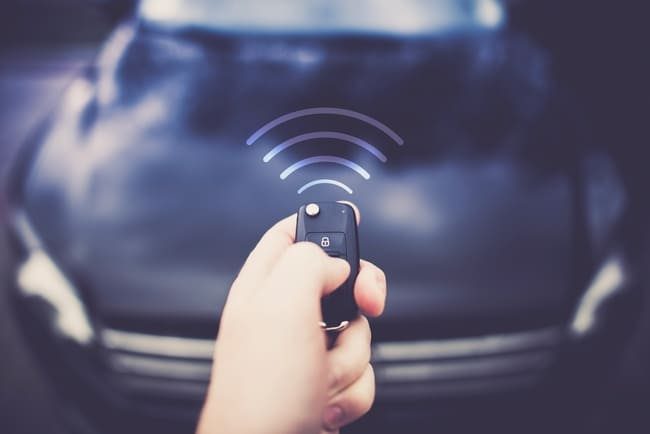
TWO-WAY REMOTE SYSTEMS
A more advanced car alarm system is a two-way remote car alarm. These systems provide two-way communication between the alarm and the key fob on a driver’s keychain. Some more technologically advanced systems will even have small LCD screens on the key fob. Basic and older systems simply trigger an audible alarm and flash the vehicle’s lights to deter potential car thieves (or scare off cats that accidentally set off the alarm). However, two-way remote alarms can communicate their status to the owner sometimes up to a kilometer away. This communication is also not limited to a simple report that the alarm has been triggered. It can include notifying the owner if someone breaks into the car or even if the alarm goes off for any reason. Your system may have a remote start function for the car alarm, which allows you to use the remote control to start the car remotely.
AFTERMARKET CAR ALARMS
There are a few points to keep in mind when buying a spare alarm. The first thing to consider is installation, as this can sometimes be a challenge. There will be a lot of wires and ideally, you need to be familiar with your car’s electrical system. You can of course leave it to a professional to do it. Some aftermarket systems, however, make installation extremely easy. Some alarms can easily be installed on the car roof with glue and others have solar cells, which absorb sunlight and reduce the need to connect the alarm to the car’s electronics.
The range of the alarm is something that could be a deciding factor. Some alarms claim to have a range of one mile, but you are unlikely to ever need to lock the car from that distance. It’s better to think about the strength of the alarm rather than the range. This way, you can be certain that even from a distance, you can secure your car by simply pressing a button.
A car alarm with motion sensors is now a common feature of most new cars. The quality of these motion or shock sensors in your alarm system determines the sensitivity of the system and what triggers it. As mentioned above, this can often be adjusted, but checking how sensitive it can be is a great idea before buying. We recommend using a system with responsive shock sensors capable of triggering the alarm when your car is hit by a significant impact or when someone smashes the car window. As for the power of the alarm, anything over 100 decibels will truly terrify any potential crooks.
As technology has progressed in recent years, car alarms have kept up well. There is a wide variety of alarm systems accessible and monitored via your smartphone. This adds a level of convenience that allows you to effortlessly control your car and use your phone as an additional remote control. Some units are equipped with features that send you email or SMS alerts in case of a security breach. A smartphone app also comes with a GPS tracking feature that can be extremely useful if your car is stolen. Whether it’s an aftermarket system or a built-in add-on module, however, it will be much more expensive than the standard bog system.
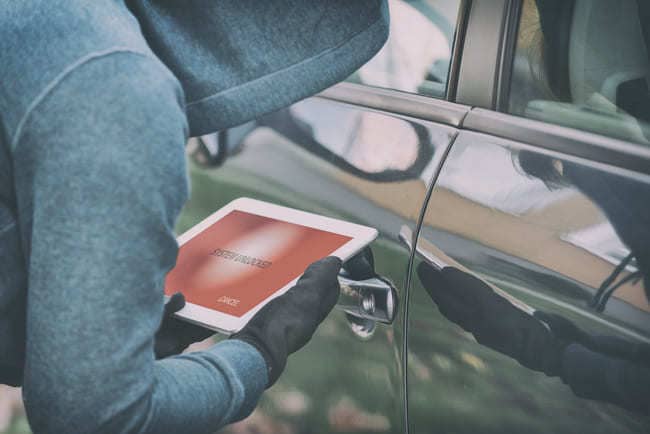
Smartcar alarm manufacturers understand that we live in an advanced digital age and there are bound to be tech-savvy thieves waiting for us.
That’s why many offer a system with encrypted transmission. Encrypted transmission simply means that the signals your remote sends to your alarm system can only be decoded by the system and no other device. In most cases, cybercriminals will attempt to intercept the signals sent between your remote and your car alarm system to gain access to your car (no more crowbars needed!). With encrypted transmission, however, the alarm system will be able to recognize what an authentic remote signal is and what a hacker’s signal is, and then block them accordingly.
COMMON CAR ALARM PROBLEMS
There are many common car alarm problems that can drive you up the wall. From your car alarm going off randomly at night to when your car alarm goes off when unlocking it with your key and making the entire supermarket parking lot stare, they can be really annoying. They can even pose a real safety threat if you find yourself with a car alarm that goes off while driving! Here are some of the causes of the most common problems and a few temporary fixes.
Remember: as with any electrical component on your vehicle, if it’s a serious issue, it’s always better to leave it to an expert.
YOUR CAR ALARM GOES OFF RANDOMLY
This could be caused by a wide variety of faults in the internal circuit of the alarm console. By random, we mean the alarm goes off even when there’s nothing around. Normally, you can stop the alarm by simply turning on the ignition or sometimes even by unlocking the car.
If that doesn’t work, you can also try turning off the alarm button, located under your steering wheel. However, if that doesn’t solve the problem, you may need to remove the alarm fuse. You’ll need to locate the fuse box, usually located under the steering wheel on pre-installed systems or under the hood in aftermarket systems. Your car manual or kit will give you the exact location of the fuse box. Remove the fuse using tweezers to disable the alarm. If that doesn’t work, your last resort should be to disconnect the negative terminal of the car battery to disable it. This is the last option because it of course means you cannot start the car when the negative terminal is disconnected. If it keeps happening, take it to a garage to have it checked.
ALARM CANNOT BE ACTIVATED AND DEACTIVATED
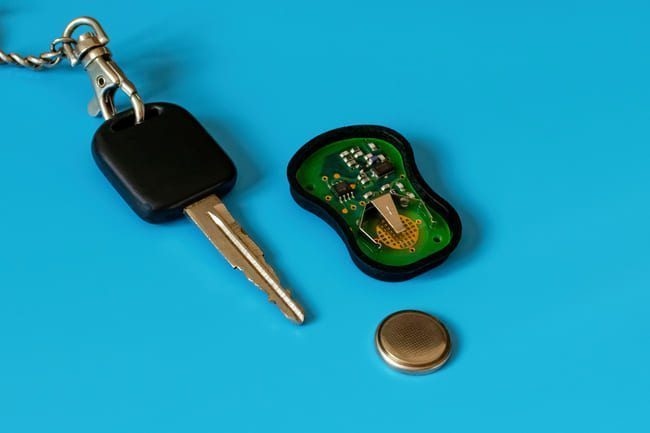
Sometimes it’s not the alarm itself that is faulty, but the remote control. If the battery inside a car alarm remote starts to run out, it can mean you cannot activate (or more embarrassingly deactivate!) your car alarm.
If you find that you cannot activate or deactivate the alarm using the remote, start by replacing the battery and see if that makes a difference. If not, there could be more of a problem with the sensor that connects the two. This will likely require more professional help and you should have it checked at a garage.
CAR ALARM BATTERY PROBLEMS
A car battery can cause all sorts of problems with your car alarm, mainly the fact that your car alarm will go off randomly. In addition to the internal circuit causing problems, if your car alarm goes off in the middle of the night, an old battery is often the issue. Car alarms are actually designed to go off if the battery is too low to alert you to the fact that it is dying. It may not be an accident if the alarm goes off, but as a warning sign that something is wrong with your battery. This will likely happen after about 5 years of using the battery.
The alarm going off randomly when you’re not using the car can also indicate that the battery is dying or that the connections have corroded. This would mean they are sending inconsistent power signals throughout the vehicle.
A corroded or faulty battery can also cause you problems, even if it is fully charged. It can still send the wrong signals to the car alarm. Rusty and worn terminals essentially send the same signals as a dying or discharged battery to the car’s systems. This doesn’t just mean the car alarm might malfunction, but all the electrical systems in your car. The car alarm going off could be a sign that something more serious is going on under your car’s hood.
How to start a car with a dead battery
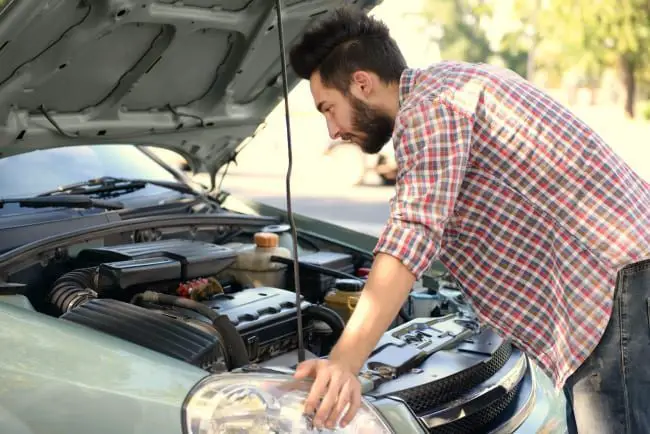
Many drivers have faced the situation where the engine was impossible to start due to a dead battery. This often happens when it’s freezing cold outside or, for example, when you forgot to turn off the exterior lights or the car radio. The problem of starting the vehicle can be solved by connecting your battery to the battery of another vehicle. For this, you will need a set of jumper cables. In this article, we explain how to properly connect the jumper cables. Let’s find out the correct order of steps.
1 Safety Precautions
2 Which Vehicles Are Unsuitable for Jump Starting
3 How to Find Out if It Is Safe to Jump Start Your Vehicle?
4 16 Steps for Properly Jumping Your Car
5 How to Jump Start a Car Without Another Car?
SAFETY PRECAUTIONS
Make sure there are no children near the area where the procedure will be performed. If necessary, move them to a safe distance.
Read the vehicle’s manual carefully. Some models cannot be jump-started.
When performing the work, wear rubber gloves and protective glasses. Do not touch the terminals and metal parts of the car body with bare hands when they are live.
WHICH VEHICLES ARE UNSUITABLE FOR JUMP STARTING
Never start a car with another car whose on-board voltage is higher or lower than your car’s. For example, if your vehicle is equipped with a 12 V battery, it should not be connected to a 24 V or 6 V battery, to avoid overvoltages.
It is not advisable to connect vehicles with gasoline and diesel engines because their batteries have different cold cranking amps, therefore the process will be either ineffective or risk damaging the electronic devices.
It is forbidden to jump-start a car with faulty wiring, a leaking battery, or other defects. Therefore, for example, if your battery has become discharged due to long unsuccessful attempts to start the engine, seek professional help.
It is not advisable to connect to a vehicle whose battery is not fully charged.
HOW TO FIND OUT IF IT IS SAFE TO JUMP START YOUR VEHICLE?
Make sure your car is in good working order. For this purpose:
Inspect the engine compartment. The wires should not be covered with a thick layer of dirt and there should be no cracks or streaks on the battery.
Inspect the alternator wires. If they are cracked, the voltage will likely not reach the battery terminals. In this case, jump-starting a car with another battery is pointless because the battery of the started vehicle will discharge immediately.
Try turning on your headlights, side lights, and ambient lighting. If they turn on and are bright, it means the battery is not the problem and jump-starting will not help start the car. If the listed devices do not turn on and the horn does not work either, the battery is dead. Sometimes, the dim light of the lamps is a sign of a low battery charge.
If possible, measure the voltage at the battery terminals. If it is above 12.6 V, the battery is in good condition and you need to look for a malfunction in other components and assemblies: the starter, starter solenoid, ignition switch, etc.
Check if a strong smell of fuel is coming from under the hood. If so, jump-starting your car with jumper cables is dangerous as it can cause a fire.
After that, you need to make sure that the donor car’s battery is fully charged. Turn on the headlights or interior lighting. The lights should emit a bright light. If possible, measure the voltage at the battery terminals with a multimeter. It should be between 12.6 and 12.9 V.
16 STEPS FOR PROPERLY JUMPING YOUR CAR
Park the vehicles facing each other at a distance of 45 to 50 cm between them – so that the length of the cables is sufficient to connect them. Caution: the vehicles must not contact each other in any way.
In cars with automatic transmission, set the gear selector to “Park” mode, in those with manual transmission – to “Neutral”.
Make sure to stop the donor vehicle’s engine.
Engage the parking brake on both vehicles.
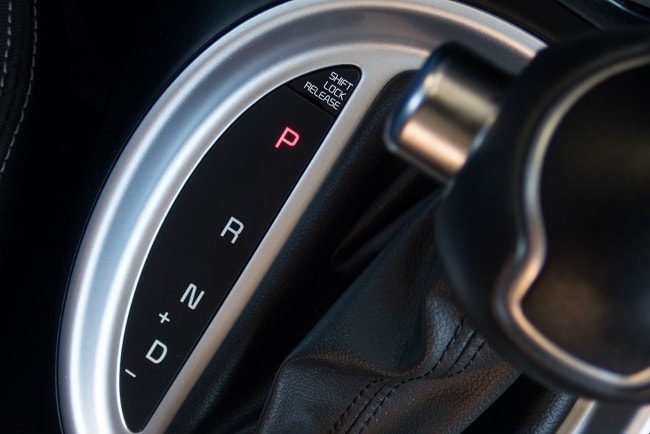
Remove the keys from the ignition switches of the cars and open the doors of the car with the dead battery. Otherwise, when voltage is supplied, the car’s anti-theft system may trigger and lock the doors.
Open the hood. Find the battery. Its exact location is specified in the vehicle’s manual.
Inspect the battery. Find two terminals. The positive is usually the larger one and marked as “POS” or “+”, and the negative – as “NEG” or “-“. The positive terminal is often red in color, negative – black. When connecting the jumper cables, it is very important not to mix up the terminals.
If necessary, clean dirt and oxides from the terminals with a cloth or a wire brush.
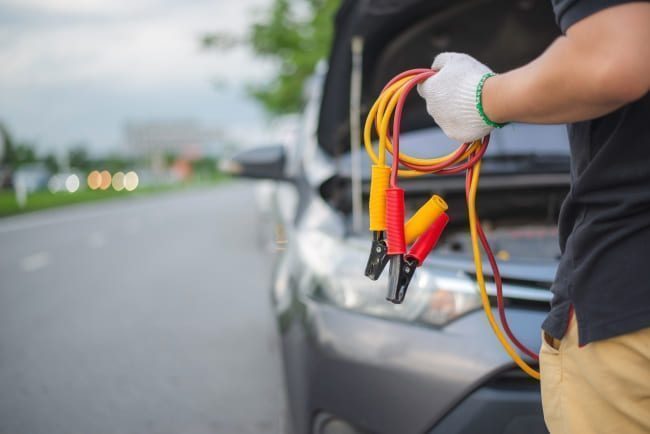
Look at the set of jumper wires. The kit should include two cables. One of them is usually red and the second is black. Note that the cables themselves may be a different color but the alligator clips at their ends are almost always red and black. This color coding helps avoid errors when connecting the wires.
Connect the cables in the following order:
a red clip – to the positive terminal of the dead battery;
the second red clip – to the positive terminal of the donor car;
a black clip – to the negative terminal of the battery on the donor car;
the second black clip – to an unpainted metal part of the vehicle with the dead battery. This could be a nut or bolt on the engine block.
Make sure the cables do not touch the moving parts of the engine.
Start the donor car’s engine and let it run for 10 to 20 minutes. Stop the engine.
Try to start the engine of the car with the dead battery. If you succeed, do not turn off the engine for 10 to 20 minutes. This duration should be enough to recharge the battery a bit.
If the car does not start, repeat the procedure: start the donor car’s engine and let it run for a while, stop it, and try to start the other vehicle. Caution: do not engage the starter of the car being jump-started while the donor car’s engine is running: this can cause its alternator to fail.
If the start was successful, disconnect the cables in the reverse order:
black clip – from the negative terminal of the donor car;
the second red clip – from the positive terminal of the donor car;
red clip – from the positive terminal of the donor car;
red clip – from the positive terminal of the battery that was dead.
If, after several attempts, you cannot start the engine, visit a garage for help: your battery may be completely depleted and it will be necessary to restore or replace it, or some other vehicle systems may be faulty. In particular, the engine may not start if the following components are defective:
fuses;
input;
ignition switch.
HOW TO JUMP START A CAR WITHOUT ANOTHER CAR?
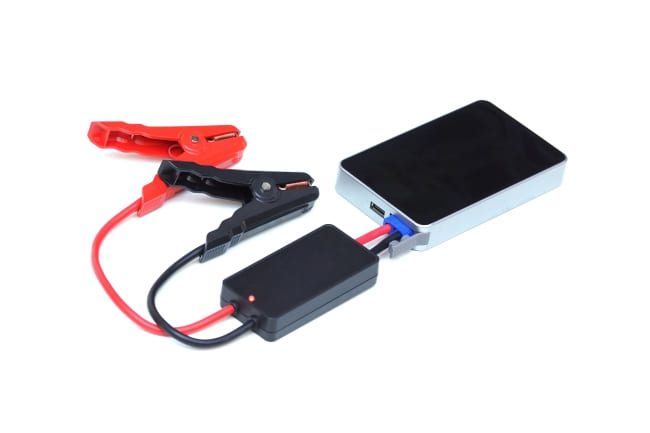
To start a vehicle, you can use a portable jump-starting device – a jump starter. It operates based on lithium polymer batteries and, therefore, despite its compact size, it provides fairly high starting amps. You can buy such a device if, for example, your vehicle is used in difficult conditions, especially in regions with cold winters.
The device must be directly connected to the battery terminals. During this operation, it is also very important to observe the polarity. For more information on how to properly connect the jumper cables, carefully read the jump starter’s manual.
Usually, it is necessary to follow these steps:
Connect the red cable provided with the device to the positive terminal of the battery.
Connect the black cable to the negative terminal of the dead battery.
Insert the connectors from the other ends of the cables into the corresponding outlets of the portable jump-starting device.
Select the desired mode of the jump starter and turn on the device.
Start the engine.
Conclusion
A dead battery is a problem that even experienced drivers can encounter. It’s good that it can be solved by a relatively simple method – jump-starting. All you need is a set of jumper cables and another battery. By following all the advice above, you can easily jump-start a car with another battery, even if you became a driver not so long ago.
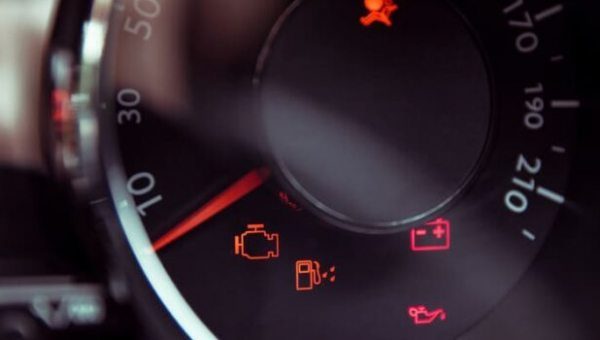
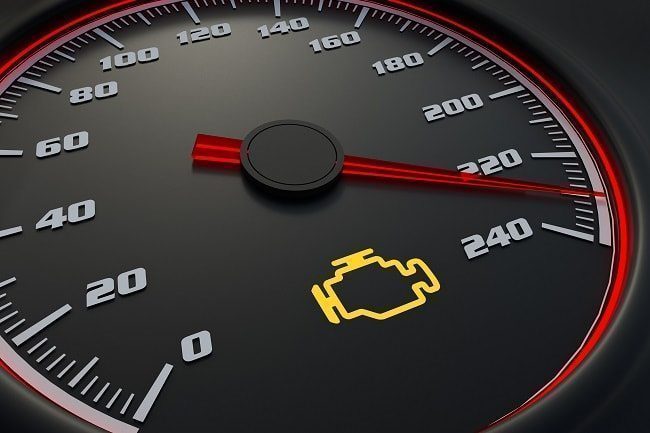
Car Dashboard Symbols: What They Mean and Why They Shouldn’t Be Ignored
Automobiles have come a long way since the first single-cylinder engines used in the 1880s and the more complex and sophisticated they have become and the smarter and more convenient their features are, the more problems we can have. To keep us informed about what is precisely happening under the hood of our cars and the technical systems that ensure the proper functioning of these modern miracles, our dashboards now have more warning icons than the Millennium Falcon and can leave us perplexed, confused, and sometimes even anxious.
There is almost nothing worse than seeing a red light suddenly come on while you are driving without having any idea what it means and the urgency of the problem. With our accessible guide to the most common car dashboard warning symbols and indicators, you will know exactly the meaning of each warning signal.
THE COLOR OF WARNING ICONS
Generally speaking, the color of a symbol is related to the urgency of solving the problem and works on the basis of traffic lights.
If the light is green, it often means there is no problem and a function has simply been activated (for example, the lights or turn signals are always green).
When a symbol with a yellow light appears, something has definitely gone wrong, but it does not need to be fixed immediately (although it should certainly be resolved as soon as you have the opportunity). The windshield washer fluid level is a good example of this. When this level is too low, the windshield wipers cannot function properly. This will not prevent you from driving right away, but could be dangerous in the near future.
This of course means that when the red light comes on, something is really wrong and will affect or is already affecting the car’s fundamental functions.
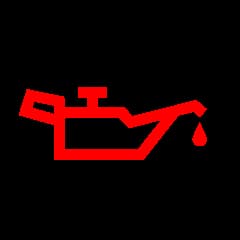
Oil Pressure Warning.
This image of an old-fashioned oil can lets you know that there is a problem with your car’s oil pressure system. You may be low on oil or your oil pump may not be pumping enough fluid to effectively lubricate your car’s internal surfaces. If this is not fixed quickly, you will soon find that your engine begins to wear out and this could be very costly. You must: Check the oil level and pressure.
Tire Pressure Warning Light.
This dashboard warning signal tells you that the pressure in one or more of your tires is too low and needs to be addressed. Also known as the TPMS symbol, it is a fairly important icon. Driving with low tire pressure can be extremely dangerous as it greatly increases the likelihood of a tire bursting while you are driving, meaning you could lose control of your vehicle and put yourself in danger. Even if this worst-case scenario does not happen, low tire pressure also negatively impacts fuel consumption and causes your tires to wear out too quickly. Putting a little more air in those tires could save you a lot of money in the long run. You must: Check the pressure of all your tires and increase it if necessary (it should normally be between 30 and 35 psi). Cold weather can cause pressure to drop, so be sure to check regularly.
Engine Temperature Warning.
When this symbol appears on your dashboard, it means your engine has overheated. A common cause of this is a lack or problem with the coolant (antifreeze) in your engine, but there may be other reasons such as a broken water pump or issues with your car’s radiator. It is very important to address this issue immediately, as an overheated engine could lead to warping of the pistons and cylinders or cracking of the engine block, causing serious damage. You must: Make sure you have enough coolant and if the problem persists, consult an expert.
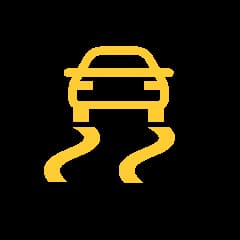
Traction Control Light.
If your car’s anti-skid system is activated, you will see this symbol on the dashboard. The traction control system uses the anti-lock braking system to determine if any of your wheels are spinning faster than the others. It will apply the brakes if it detects a wheel is spinning and you will have traction again. It is really useful for driving in rain or snow and it can indicate to you that road conditions are more dangerous than you think and you should consider slowing down.
Anti-lock Brake Warning Light.
This may look like a warning symbol that requires you to go to the gym more often, but it actually tells you that you have a problem with your anti-lock brakes. As we know, anti-lock brakes work to keep your car safely in contact with the road, so if there is a problem with the system, it is important to get to the bottom of it as soon as possible (or all that hard work on your abs will have been for nothing). It is worth keeping in mind that whenever you start your vehicle, the system performs a self-check and may light up for a few seconds. If it goes away immediately, however, you are good to go. You should: Have your system checked by an expert if the light is persistent.
Traction Control Malfunction.
This warning icon indicates that your vehicle’s traction control system may have a broken or damaged sensor or another issue. In some cars, the same control module operates the anti-lock brakes and the traction control system, so the light sometimes comes on if there is a problem with your ABS. You should: Once again, have it checked by an expert as it may need to be recalibrated.
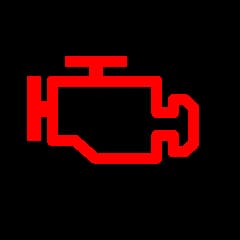
Engine Warning.
Also known as the “check engine light,” when this symbol lights up on your dashboard, it is usually accompanied by a sinking feeling in the pit of your stomach. The light could be a minor issue, such as a faulty gas cap, or it could mean something more serious, like a misfiring engine. In many cases, it means you will be visiting the car dealership to fix the issue and resolve the problem quickly. You should: When you see the light, the best thing to do is to stop the car, pull over to the side of the road, and check your gas cap and other systems. If the light is flashing, you absolutely must stop driving. In most vehicles, the flashing check engine light lets you know that the problem is relatively serious and is going to cause fairly severe damage if you try to bury your head in the sand and ignore it.
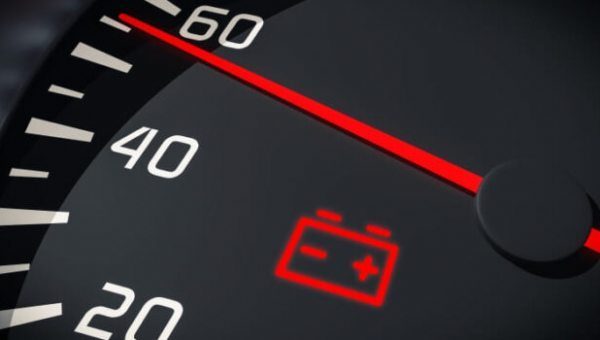
Battery Alert.
From this warning symbol, we can tell that there is a problem with the car’s charging system. The symbol can be misleading, however, as the problem may not be coming from your battery. It could mean that the battery cable is loose or damaged, but it could also indicate that your alternator belt is broken. There are telltale signs if it is your battery: the clock display may start to fade and the headlights may start to dim. If you wait too long, your vehicle may shut down completely or refuse to start – very frustrating before the morning commute! It is best not to ignore it. You must: Make sure your battery is fully charged.
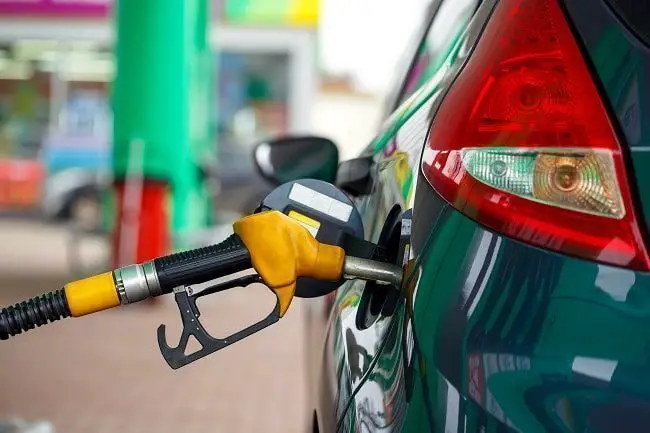
Low Fuel Indicator.
This is a fairly obvious symbol that most drivers are familiar with and it simply means that you are running low on fuel and need to refill. While it may seem like an adventurous idea to see if you can make it home without refueling, it is not a good idea if you have a long way to go. Who knows what will happen with the weather or traffic, so do yourself a favor and fill up as soon as possible. You should: Find the nearest garage or gas station. Simple!
Airbag Indicator.
This symbol lets you know that there is a problem with your airbags, one of them, or the system as a whole. The airbags in your car protect you in the event of an accident and it is imperative that you resolve this issue as soon as possible. Do not wait to find out what the problem is! You must: Check your airbags or take the car to a specialist who can help you resolve the issue.
Fog Light Indicator.
If you are navigating through difficult weather conditions and using your fog lights, you will see this symbol. It is important to note, however, that fog lights should only be used if your visibility is less than 100 meters, otherwise they could blind other road users and pose a hazard. You should: Check if you need to use your fog lights and if you do not, turn them off.
Why Engine Misfires Are Dangerous and How to Avoid Them
An engine misfire is a malfunction where one or more of its cylinders do not work. This causes excessive wear and overheating of the engine and leads to scratches on the surfaces of the pistons and cylinders. In the following, we will explain how to recognize this problem and how to solve it.
FIVE SIGNS OF MALFUNCTION
The engine shakes at idle. Sometimes, the vibrations are so strong that you can feel them in the steering wheel, gear lever, and body. Additionally, the engine’s idle speed is unstable.
Reduced engine power. You can particularly notice malfunctions in the engine’s operation when you press the accelerator pedal, as well as jerking during acceleration. The “Check Engine” light may come on on the dashboard.
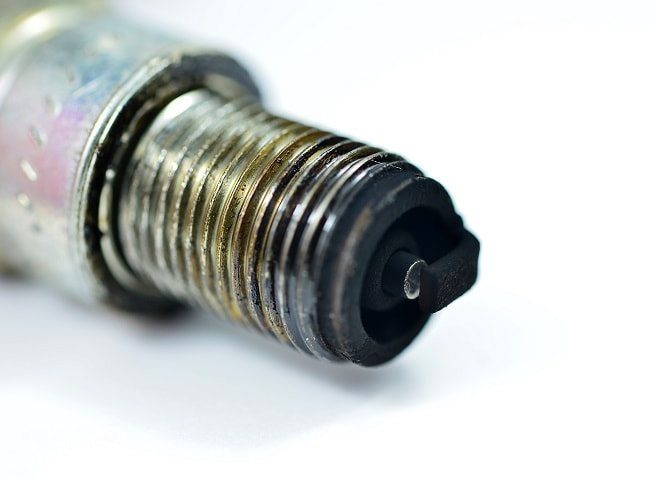
Carbon deposits on the spark plugs and cracks in the high-tension wires. These are usually easy to spot during parts inspection.
Unusual noises when the engine is running. For example, intermittent sounds may be heard instead of a regular hum.
Increased fuel consumption. This is usually caused by issues with the fuel mixing and ignition processes.
THREE CAUSES OF ENGINE MISFIRE
Problems in the ignition system. Faulty spark plugs, broken coils, high-tension wires, or incorrect settings can cause ignition that is too early or too late, which in turn disrupts the combustion process of the air-fuel mixture and leads to engine malfunction.
Disruption in fuel supply and mixing processes. Dirty fuel injectors and malfunctioning solenoid valves, clogged air filter, leaks in the intake or fuel supply systems, or in the brake booster can cause a lean or rich air/fuel mixture, which affects combustion efficiency. Failure of the mass air flow sensor, throttle position sensor, or idle air control valve has similar consequences.
Leakage from the combustion chamber. This is usually caused by burnt valves, pistons, head gasket, and scratches on the cylinder surface. It can also be caused by incorrect valve adjustment, faulty lifters or hydraulic lifters, or incorrect valve timing.
SIX TIPS
Replace consumables on time. For example, air filters should be replaced every 10,000 to 15,000 km. Depending on the type, spark plugs last between 30,000 and 100,000 km, and fuel injectors from 100,000 to 120,000 km.
Clean fuel injectors regularly, about once a year. To do this, add a special additive to the fuel. In case of heavy soiling, you should go to a service station.
Use only high-quality engine oil. Engine wear products can cause engine overheating, piston ring sticking, and component destruction. It is recommended to change the lubricant and oil filter every 10,000 to 15,000 km.
Use high-quality fuel. This will prevent carbon buildup on the surfaces of engine components.
Let the engine run at the highest RPM from time to time. This will briefly increase the temperature in the combustion chambers to 500°C and clean the spark plug tips of deposits.
When maintaining the engine, tighten all threaded connections with the torque specified in the vehicle’s technical documentation. This will ensure the tightness of all joints and the integrity of the sealing elements.
Conclusion
An engine misfire not only affects its performance but is also a symptom of serious defects. That is why it is important to perform a thorough engine diagnosis at the first signs of a problem and repair the fault as quickly as possible. Timely engine maintenance ensures long and trouble-free operation.
What should I do if the key is stuck in the ignition switch
You may have encountered a situation where, before leaving on a trip, you realize that the key won’t turn in the ignition switch. Sometimes, you manage to turn it after all, but when you arrive at your destination, you can’t remove it from the switch. In this article, we look at the reasons why it gets stuck and suggest the simplest methods to solve the problem.
1 10 Reasons Why the Ignition Key Won’t Come Out of the Ignition Switch
1.1 Your Steering Wheel is Locked
1.2 The Key is Deformed
1.3 The Door Lock is Frozen
1.4 The Car Battery is Flat
1.5 The Key Teeth are Worn
1.6 The Switch Cylinder is Defective
1.7 The Switch Cylinder and Key are Dirty
1.8 Wrong Gear Selection
1.9 The Key Hasn’t Been Put in the Proper Position
1.10 The Component is Broken
10 REASONS WHY THE IGNITION KEY WON’T COME OUT OF THE IGNITION SWITCH
YOUR STEERING WHEEL IS LOCKED
Almost all modern cars are equipped with an anti-theft protection system. In some cases, it locks the steering wheel and the ignition switch to prevent intruders from driving your car. The lock is triggered when you turn the steering wheel without a key in the ignition switch, or when you try to use another key or a very worn key. Sometimes the problem is caused by an attempt to turn a key that is not fully inserted into the cylinder. Additionally, the protection system can be triggered when the car’s wheels are fully turned to one side, for example when you park on a steep slope, or if the front wheels are resting against the curb or another obstacle. Usually, when the locking function is activated, you can hear a distinctive click and cannot remove the key from the ignition switch at all.
What to do: Gently turn the steering wheel from side to side while trying to turn the key in the switch. This will help unlock the steering wheel. Do not pull too hard on the key to avoid breaking it.
THE KEY IS DEFORMED
If you carry it in your pocket or wallet, or use it for other purposes, it can bend. Sometimes this means the key won’t turn, won’t come out of the ignition, or can’t even be inserted.
What to do: Have you noticed that your key is bent? Do not try to use it, to avoid damaging the switch cylinder. Start the car with a spare ignition key. If you don’t have one, contact an automotive locksmith. Their specialists will restore the shape of the old key in no time or make a copy. If you have inserted a bent key into the ignition switch and it is stuck there, seek professional help to have it removed.
THE DOOR LOCK IS FROZEN
This can happen if it’s cold outside and water has accumulated in the lock cylinder.
What to do: If your car has been parked outside in freezing cold or in an unheated room for a long time and you think the lock has frozen, try to thaw it. To do this, warm your key using a lighter or a candle and insert it into the lock. Repeat this step several times. You can also use a special lock de-icer. To avoid further problems, ensure stable operation of the ventilation system. Before storing your car long-term, ventilate the interior to reduce the temperature inside and prevent condensation.
THE CAR BATTERY IS FLAT
In some cars, when the battery is discharged, the key is locked in the ignition switch.
What to do: Turn on the headlights. If the lights don’t come on, the problem is likely the battery. Using a voltmeter, measure the voltage across the car battery terminals. If it is less than 11.7 V, the battery is completely discharged and you will probably need to replace or restore it. If you don’t have a multimeter, try to restart the car. If it works, the problem is with the battery. Otherwise, the failure is of another nature.
THE KEY TEETH ARE WORN
Poor quality products made from non-durable materials suffer from abrasive wear quite quickly. The key becomes loose in the switch and cannot interact properly with the moving parts of the ignition switch cylinder.
What to do: Compare the key you are using with the spare key. If you see signs of wear, replace it. If the old key is stuck in the ignition switch, try gently turning it back and forth and shaking it in and out. You will likely succeed in finding the movement that activates the mechanism.
THE SWITCH CYLINDER IS DEFECTIVE
It also wears out over time. This can happen even faster due to the habit of many drivers attaching heavy keychains and other ornaments to their keys. When the car is moving, they create an additional load on the mechanism’s parts.
What to do: If you manage to remove the key from the ignition switch, use the spare key. If it also gets stuck, the switch cylinder is worn out. Contact a garage to have it replaced.
THE SWITCH CYLINDER AND KEY ARE DIRTY
Using the wrong lubricant leads to a buildup of dirt inside the mechanism and can cause it to stick over time. Usually, the key’s notches get dirty if it is used for purposes other than intended, for example, to tear packaging tape when opening packages.
What to do: To clean the switch, use WD-40 or another penetrating oil by spraying it directly into the keyhole. If possible, blow out the cylinder with compressed air. After blowing out and cleaning the switch, lubricate it. Wipe the key with a lint-free cloth soaked in WD-40, alcohol, or solvent.
WRONG GEAR SELECTION
In cars with automatic transmission, the key will be locked in the ignition switch until you put the selector lever in Park. To unlock the switch in manual transmission vehicles, the gear shift lever must be in neutral.
What to do: When parking your car, make sure the automatic transmission selector lever is in the Park position. If it is not, but you have already stopped the car and turned off the engine, press the brake pedal and put the selector lever into the Park position. Try to carefully extract the key. If this is impossible, check if the selector lever can be locked in this position. If you can move it even after the engine is off, take your car to a garage to have the torque converter, cable, and automatic transmission lever and brake pedal lock mechanism checked.
If your car is equipped with a manual transmission, press the clutch pedal, put the gear lever in neutral, and retrieve the key from the ignition switch while gently shaking it.
THE KEY HASN’T BEEN PUT IN THE PROPER POSITION
Sometimes drivers forget to turn the key to the “Lock” position.
What to do: Look at the ignition switch. It has several marks corresponding to different modes: “Ignition on”, “Engine start”, “Lock” (or “Park”). Make sure the key is in the “Locked” or “0” position. If necessary, change its position.
THE COMPONENT IS BROKEN
Applying too much force when trying to turn the key in the ignition switch can cause it to break. It is difficult to extract the part of the key left in the mechanism.
Action: Try to remove the fragment using a special extractor. If you do not have such a tool, seek professional help. Do not use improvised means to extract the broken tip, as you could damage the cylinder.
Conclusion
Despite its simple design, the ignition key is a very important element and requires appropriate attention from the driver. A car can only be started if this component is in good working order. If your key is stuck in the ignition switch, follow our advice.
How to Repair Car Seats Yourself
Tears, rips, and burns in your car seats can make your car’s interior look shabby and worn out. Do your own upholstery with our guide!
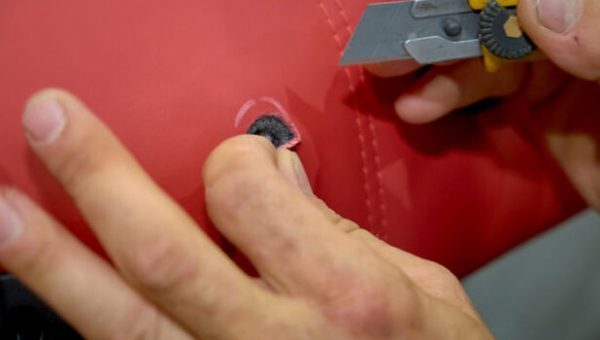
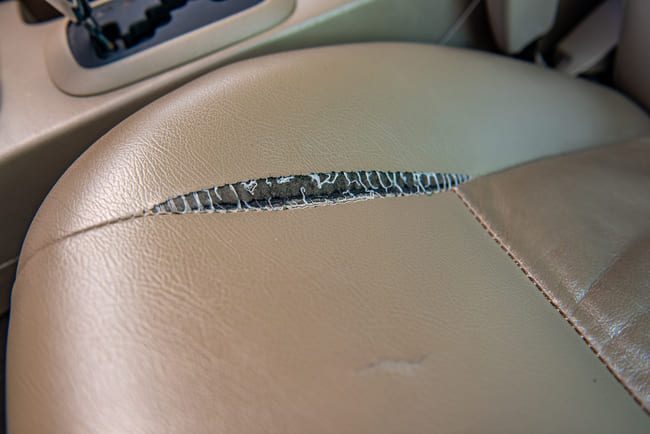
Having a tear or hole in your car seat upholstery can be incredibly frustrating. Unlike so many other problems related to your car’s aesthetics, nicks in the upholstery don’t just disappear with a simple wipe or easy replacement. They can make your car’s interior look poorly maintained and unkempt. Worse still, the longer they stay there, the more likely they are to get worse. A small hole turns into a small tear, which turns into a rip, which becomes a gaping giant gash with foam escaping that you can’t take your eyes off!
Taking your car to a garage to have the upholstery repaired or changed can be very expensive, but it’s also something you can do yourself. It’s not always easy to repair or replace car covers and you may need tools to do it, but with a little patience and our comprehensive guide, you can certainly do it. There are a variety of options for renewing the upholstery and there is a wide range of replacement kits available to completely replace car seats or materials that will help correct problems. Whatever type of material your car seats are made of and whatever the problem, we have some ideas and tips to get rid of your tears and make your car look factory-fresh again.
TYPES OF UPHOLSTERY
Before you can repair your car seat cover, it’s important to know what type of material you’re dealing with, as they all have different characteristics and require several different approaches.
Car seats are usually covered with one of the following materials.
Nylon is one of the most common types of automotive upholstery and is known for its durability and ability to withstand heavy use. Nylon is quite porous and will pick up dirt and debris every time you drive your car, so even without tears, you might decide to replace your nylon sooner.
Polyester is another popular choice for automotive upholstery and it’s designed to look like suede. This soft fabric is quite comfortable but can tear and rip easily.
Vinyl has been a popular upholstery choice for a long time due to its strength and ease of cleaning. If it tears or a hole appears, it can be a bit more difficult to repair. It may look like leather, but it’s a smart, animal-friendly imposter: faux leather upholstery is a popular choice for luxury cars, and it’s relatively easy to keep clean, strong, and scratch-resistant.
Leather seats are often a sign of a high-end luxury car. Leather upholstery requires special maintenance and cleaning products to keep it looking sharp, but it’s extremely durable and strong. However, it is much more difficult to repair than other, cheaper materials. Repairs on leather, especially new or light-colored leather, can also be very visible if not done correctly.
COMMON UPHOLSTERY PROBLEMS
Some of the most common problems people see with car seats are tears or rips. These can come from clothing catching on the seat or luggage or other objects cutting into it with hard or sharp edges. Frayed seat edges or seams are also a common problem and mainly come from age alone. Seams can also become unstitched, although this is unlikely. Burns, often caused by cigarettes, can also damage the surface of your seats. There can also be problems with car seat padding. If there is a tear deep enough, the padding can come out, or it can simply become too compressed and no longer supportive. Specifically for leather or vinyl, the seat may start to “crack” or show imperfections, such as small scratches. All these different problems will need to be dealt with in a different way,
TOOLS NEEDED
The tools you’ll need of course differ depending on what needs to be repaired, but these are tools you might find useful for general repairs or for car upholstery maintenance.
Clean cloth(s)
Canvas patches serving as seat back support
Fine or medium sandpaper
Leather repair kit, paints, or pre/post treatment solutions (depending on the type of repair)
Tweezers
Scouring pads
Putty knife
Rubbing alcohol
Scissors
REPAIRING MINOR ISSUES
To start, let’s address some of the most common minor problems such as tears and rips. Before starting however, it’s important to recognize that if you do it yourself, a repaired seat tear will never be completely unnoticeable. If you want it to look like new, you’ll need to take it to a professional upholstery shop.
SMALL HOLES, TEARS, RIPS, OR BURNS IN CLOTH/FABRIC CAR SEATS
The best way to repair fabric seats is usually to use a patch on the seat cover to hide this type of wear and support the remaining seat fabric. You’ll want to try to find a patch that not only matches the color of the seat you’re working on, but also the type or pattern, and find a material that has the necessary strength to handle regular use. It’s worth asking for recommendations at a local garage or checking online if you can find a specific fabric for this type of repair.
You’ll need to cut the fabric to match the size of the hole in the fabric or the length of the tear before applying it to the seat. It should comfortably cover the hole or tear, but it’s up to you to determine how much excess material will join the current seat fabric. This can then be placed directly over the hole or small tear and, hopefully, blend seamlessly into the seat cover.
You have two options for applying the patch: use an adhesive patch or sew or stitch the material directly onto the seat. Most patches can be attached using contact adhesive, usually available as a spray. You can also use heat (from an iron or heat gun) to ensure a strong bond on the material. Some people worry that if they don’t sew it, it won’t be as effective, but the adhesive works just as well.
TEARS IN CLOTH/FABRIC SEATS
For a tear or rip more than a few inches in diameter, a patch won’t be suitable; it will leave the seat ugly and mismatched. Professional repair is always the best bet from an aesthetic standpoint in this situation, but there are DIY options available, the first of which is to re-stitch the tear.
Using a curved needle and thread, hold the two sides of the torn fabric together and stitch the tear using an X-stitch from top to bottom. Over this, you’re going to apply a larger patch, so that initial X-stitch will hold the sides together under the patch. From there, it’s very similar to the process described above. Choose a patch that matches the seat cover fabric and use an adhesive to cover the seams. Here, you won’t need to use too much adhesive; it’s the stitching that holds the seat together and not the glue.
TEARS IN LEATHER, FAUX LEATHER, OR VINYL
Tears on leather are slightly more delicate than tears on fabric seats, mainly because the material is different and requires much different treatment.
When the seat fabric splits and it’s not right against the seams, we’re in a good position because we have access to the back of both sides of the tear. Our solution is going to be to glue a piece of fabric (not leather, just ordinary fabric) to the back so that the two sides come together, and any gap can be filled with a filler specially designed for leather seats.
The first step is to ensure that the fabric, whether it’s leather, vinyl, or faux leather, is not connected to any seat padding or any other material that might be used to secure it; we just want to be able to access the fabric itself. If it is connected, you may need to use a piece of plastic or a knife to release the material from the padding, but be sure to do so carefully.
Next, apply adhesive to the patch. You won’t need to use much here, but enough to ensure it sticks on both sides. Slide it behind the seat cover and make sure it touches both sides. Take the two sides of the tear and hold the gap closed while the glue dries (this isn’t as easy as it sounds). It’s important to use an appropriate patch fabric. A piece of strong suede or duck cloth used for uniforms works well. The critical factor for the woven fabric is that it doesn’t stretch or change shape when subjected to stress, i.e., when you sit on it! If the color closely matches the seat, that’s a bonus.
Next, you need to apply a weight or constant pressure to the area so that the patch adheres effectively to the adhesive, as the glue can take some time to dry. This can be done using any type of weight or a pressure clamp to hold it in place.
The surface of the leather is always curved, due to the padding pushing it up, so you need to press hard enough to flatten the curve. If the tear is quite large, be sure to use a weight large enough to cover almost the entire space. If you don’t, one side would be overpowered and that could mean the gap tightens and worsens further. If possible, use clamps to reduce the gap while applying pressure. As for the adhesive you use, it’s best to look for a specific fabric adhesive. We’ll come to a few good brands for this later.
If the leather is thick, once the gap is closed, you can use a filler material to bring it back to an even surface. Various fillers will work and see below again for some product recommendations. The main requirements are that it is flexible, non-shrinking, and can be colored or painted in some way.
CRACKS, CREASES, AND HOLES IN LEATHER OR VINYL
Repairing cracks and creases in leather and vinyl is also a bit more complicated than dealing with fabric seats. However, there are many more products that can help in this process, so don’t be discouraged!
The first step is to ensure the seats are perfectly clean. Using specific leather seat cleaning products will ensure that any fillers or sealants used will truly adhere and apply well to the surface of the leather seats.
For small cracks, a temporary solution may simply be to use a leather color restorer or restoration product. These are widely available and will simply add color to the faded leather. They won’t change the surface but will give the appearance of new leather. This is only a very short-term solution, however.
For small holes, a leather and vinyl compound or coating can be used to fill the void. These can then be painted to blend into the leather seat (although for this to be effective, the entire seat really needs to be coated). Some are heat-activated, meaning you’ll need something to heat the liquid. Using a small trowel or spatula, you can insert and spread the filler into the holes. You need to do this in stages and layers to create the best finish and the strongest repair. Layer by layer, slowly fill the hole until it is flush with the surrounding leather. Feel the surface with your fingers to make sure it’s truly flat and level. Different products will need to be applied in different ways, so check the instructions provided with each product. Once you’re satisfied that the layer is relatively flush with the rest of the seat,
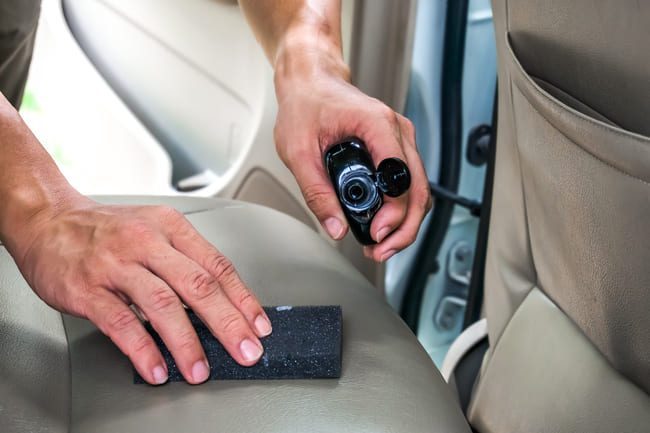
For anything more than discoloration and more severe cracks, heavier repairs are needed. Use masking tape to cover any parts of the seat that are not leather, for example the plastic bracket used to adjust the seat tilt angle or any fabric under the leather, then use fine sandpaper to level the existing damaged leather and remove any loose or compromised leather, creating a uniform, flat surface. There may be a lot of peaks and valleys or leather that is lost, but it’s important that the surface is as flat as possible by sanding or cutting off these protruding pieces. If we get the surface as even as possible, we won’t need to use as much filler and it will look much better and last much longer.
As with small holes, for our cracks, we’re going to use a leather or vinyl filler. Many of these are specially designed to reduce the appearance of cracks and can take about 20 to 30 minutes to dry and seal. They are often not heat-activated, but a heat gun can of course speed up the process. Spread the filler or putty evenly over the cracks and try to ensure it blends seamlessly with the surface, wiping off any excess. Apply only a small amount at a time using a spatula and your fingers in tight areas and be sure not to overdo it. Once you’re satisfied that the gaps have been filled as much as possible and the seat looks relatively even, sand lightly to remove any tiny ridges or uneven surfaces created by the filling. You can repeat this as many times as you like to get the best surface.
If cracks have completely worn through the seat, especially on the seat’s curvature, it may need to be re-stitched and replaced. There are limits to what you can do with products designed to repair small cracks, but these can still be smoothed using fillers and painted to match. The end result won’t be perfect, but will be cosmetically and aesthetically better than before and it can strengthen the area to prevent further damage.
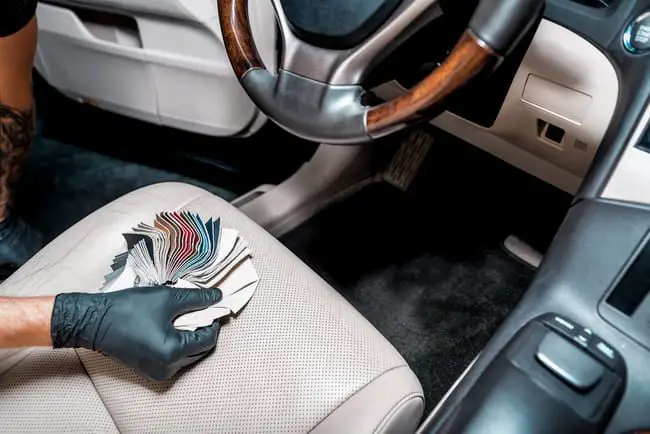
PAINTING LEATHER
Once the cracks and holes have been repaired, it’s time to paint. Use a topcoat color selector to help you choose a shade to paint the seat. There are a variety of products to do this, but Global Smart Repairs offers a particularly good range to help you mix and match/find the right color.
Once you’ve selected your color, use a spray gun to paint the entire seat, not just the affected area. This will ensure it’s not obvious that an area has been repaired. Apply the paint evenly and not too thickly, keeping the air spray gun close to the surface so that the paint is smooth and still wet when it touches the surface. You should aim to find a good distance and keep moving while you paint, aiming for a light but adequate coating. The paint must be specially designed for leather and normal water-based paint won’t cut it. Water-based paints have poor durability and lack chemical and UV resistance properties, as specific leather paints should. Once you’re satisfied with the paint job, you can apply a protective coating to further increase durability.
LEATHER REPAIR KITS
When it comes to leather repair, many kits are available with
The advantages and disadvantages of sports air filters
Give your car a breath of fresh air with a high-performance air filter.
Engines are a lot like humans – we all need air to function properly. Limit your engine’s air supply and it won’t work as well as it should, which usually results in increased fuel consumption. Engines need all the oxygen they can get for combustion, but they only want pure air, not all the other debris and tiny particles that can come with it. That’s where an air filter comes in handy.
As the old saying goes, not all air filters are created equal. There is a variety of choices, especially when it comes to performance or sport air filters for cars. Here, we will give you all the information you need about what they are, how they work, and how to choose the best air filter for your car.
WHAT IS AN AIR FILTER?
An air filter is what prevents debris and dirt from entering your car’s engine through the intake manifold valves.
Cars rely on an air-fuel mixture to power the engine and the purer the air, the better it is for the engine. The air filter will ensure that this is as clean as possible, not only removing large pieces of dirt and debris but in some cases stopping particles that would unbalance the air-fuel mixture and lead to worse performance or “misfiring.”
In addition to ensuring that performance remains constant, a good air filter will ensure that fuel consumption remains low. If the air drawn in is not “pure,” then more fuel will be needed to achieve the required engine power. Since the engine heats up as part of the combustion process necessary to power the car, a constant flow of clean, fresh air also prevents your car from overheating.
All of the above harms your car’s overall performance, but in addition, air filters play a huge role in your car’s efficiency and lifespan. Dirt or other particles entering your car’s engine can damage working parts and lead to very expensive repairs.
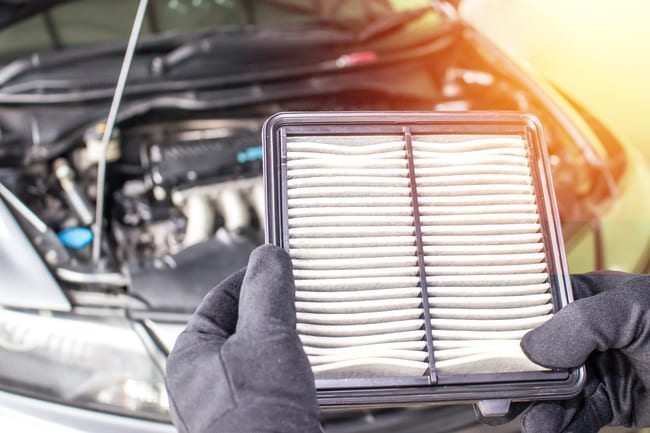
Due to the work they do and the fact that they have a limited capacity to collect dirt, air filters can become clogged and prevent air from passing through. In this case, they will need to be replaced. If you do not replace it, your engine’s performance will begin to decline, and dirt and grime can also mix with the oil supplied to the engine, which will wear down engine components over time.
Until the 1980s, air filters were round paper elements, but manufacturers began using flat filters that channeled air to fuel-injected engines. This would ensure that the systems remain cool.
However, factory air boxes often reduce power. The air intake passages provide the engine with enough air to stay cool when running, but they are not intended for the best performance.
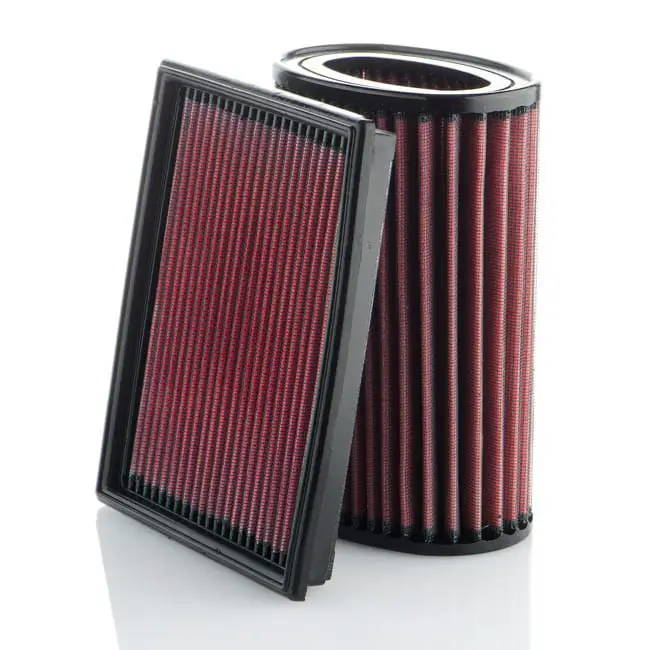
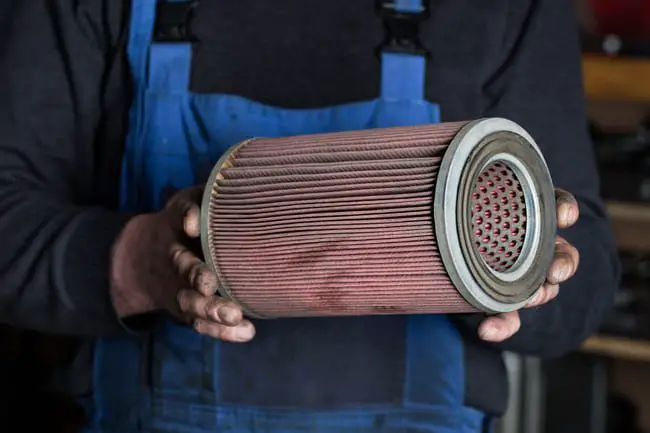
WHAT IS A SPORT AIR FILTER?
While most standard filters are made of paper and need to be replaced when they reach their capacity, there are also special filters for sports or performance. These fit into the original housing and never need to be replaced. While factory-installed air filters are primarily designed to prevent dirt from entering the engine, a good performance air filter must find the perfect compromise of balancing filtration with airflow. The more air in the engine, the more power you can get.
For this reason, in the quest for increased power, a performance air filter is one of the simplest upgrades to make. Since the filter is the first part of the intake system, the amount of air it lets into the engine has a direct correlation with the power the engine can potentially produce. Allowing more air to enter by using a less restrictive sport air filter will therefore give your car the potential for increased power.
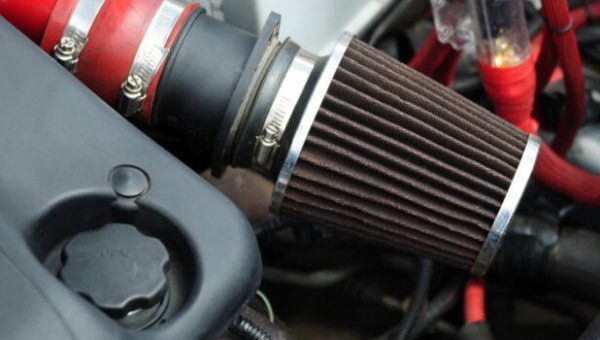
Most sport air filters are conical, meaning they are sometimes called cone air filters. This shape allows for a larger surface area when taking in air, although some can also be wedge-shaped. The filter element can be simply made of paper, but it is more often made of foam and designed to draw in more air from colder places than the factory air filter, thus keeping the engine cooler and helping you achieve optimal performance.
WHAT ARE THE ADVANTAGES?
There are many advantages to sport air filters.
As briefly mentioned above, these filters do not need to be replaced. Unlike paper filters that can clog quite easily and need to be replaced regularly, all you have to do with sport air filters is clean them about every two years or so. This is because they do not clog as quickly or as easily because the filter has a larger surface area, but they offer better airflow and better filtration of the air entering your engine.
Since you never have to wonder when to change your cone air filter, you just need to think about how to clean the cone air filter, and another advantage of this is that it is relatively simple.
Most filters recommend cleaning after about 10,000 km as they can be quite dirty. There are a variety of filter cleaning kits available online that come with specific cleaners to use on your sport filter, as well as an oil to apply afterward so it continues to work as well as possible. These can simply be soaked in the cleaning substance, then left to dry, while brushing off as much dirt as possible during the process. Simple!
They will also improve your performance. If your engine gets more air, it can perform better. A question often asked by skeptics is, do cone air filters actually work, and the simple answer is yes. In fact, the best sport air filters can increase your power by about 3 to 5 HP and increase your torque.
Some more expensive units will also come with a cold air intake unit. This acts to draw air from outside the car instead of replacing the hot air used inside the engine compartment. This cold air is denser and will therefore burn better, further improving your engine’s performance. The free-flow intake pipe also draws in less turbulent air that moves faster and contains more oxygen than factory-installed air filters.
WHAT ARE THE DISADVANTAGES?
A sport air filter sounds louder than a normal air filter because the larger volume of air is less restricted. Although the increased air is necessary for performance, it will make your car roar much more than normal. This may not be particularly friendly when driving through sleepy villages at night, but it certainly makes your car much more dynamic.
Another issue that has been noted is that due to the increased air intake, high-performance filters can actually expose your engine to more dirt and debris. This increased intake of foreign objects can wear down the internal moving parts of the engine more and cause damage there, although this is quite rare.
A final issue, especially with cold air intakes, is that water from the road (and with it mud and other forms of dirt) can splash and soak your filter, and water can even enter your engine. However, there are ways to avoid this, such as by purchasing a hydroshield and making sure not to drive through roads with high water levels. Getting a decent filter from a reputable brand and paying a fair price should actually put an end to all these problems. As with many car parts, the more you spend, the fewer risks there are for your engine.
HOW TO INSTALL A SPORT AIR FILTER
Installing or removing a sport air filter to clean it is a relatively simple process.
Open the hood to expose the engine compartment and the air filter should be located either in the engine cover itself or in a separate housing, although this of course varies depending on car and filter manufacturers.
Check your car’s manual if you are unsure where it is located. Unscrew the fasteners or open the clips of your old air filter. You simply need to attach your new replacement cone air filter to the location of the old air filter. Most universal sport air filters have a clip or screw that holds them in place and will come with instructions on how to attach them.
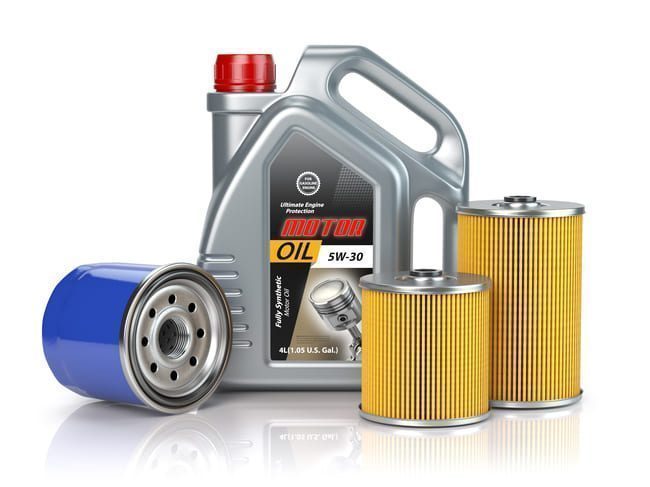
Best Oil Filters: Top 7 Brands
We’ve filtered out the worst to leave you only the best oil filters.
Oil is the lifeblood of your car; it keeps the working parts of your engine in good working order by letting them slide against each other, meaning you get the best performance. Just as you wouldn’t want dirty blood circulating around your body, you don’t want dirty oil flowing around your car’s engine. Ensuring this never happens is the role of the oil filter, and a poor-quality filter can shorten your engine’s lifespan and cause other serious problems. It may be a small part of your car’s lubrication system, but it plays a very big role. There are several types of oil filters. So our guide will introduce you to some of the best oil filter brands and tell you which is the best oil filter to use.
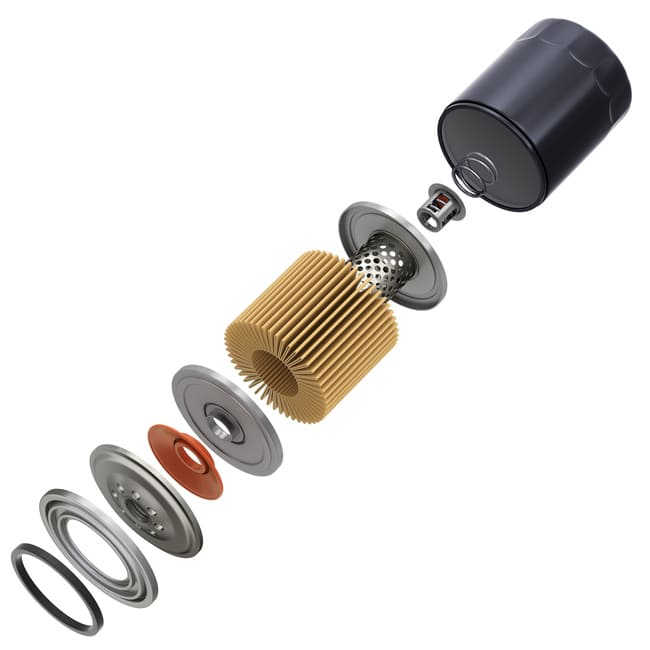
WHAT IS THE PURPOSE OF AN OIL FILTER?
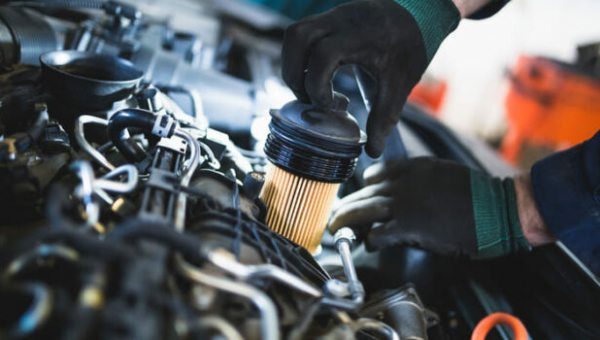
To put it simply, the oil filter removes dirt, sediment, or other impurities from the engine oil as it circulates around your engine. It plays an absolutely crucial role in ensuring your engine runs properly. It is a small cartridge containing a filtration system, which is connected to the engine, and the location of the oil filter is usually the same in all cars. When the oil has circulated around all the moving parts of the engine, it is then pumped through the filter, which removes impurities and contaminants.
Dirt and sand can enter the engine in various ways, and if even small particles of hard substances get into the oil flow, they can rub up and down against essential parts of the machinery (mainly the pistons and cylinders) and can wear them out much faster. In the worst case, one of these pieces of dirt or stone can be large enough to lodge in a part of your engine and prevent a piston from moving or a valve from closing. This would have serious consequences on your engine’s overall performance and could lead to very expensive repairs. The oil filter ensures this does not happen.
Oil filters do not last forever. Over time, dust and dirt build up in the oil filter and it begins to clog. It stops working as effectively as before and it’s time to replace it. The duration depends, as we will see below, on the quality or type of oil and filter and driving conditions.
BUT WHY DO I NEED A GOOD OIL FILTER FOR MY CAR?
In addition to the damage caused by unfiltered oil described above, using a bad filter can cause oil leaks and a poorly fitted filter can simply fall off – certainly something that won’t be good for your car when you’re speeding down the highway late for an important meeting.
Many manufacturers recommend getting a new oil filter every time you change your oil. This can range from 3,000 to over 15,000 miles. That’s a lot of mileage, so it makes sense to get the best possible oil filter. This is especially true when using synthetic oil, as it contains additives and detergents that prevent dirt particles from settling in the engine. This means they don’t need to be changed as often, but the filter has to work much harder. Getting a high-quality filter will limit the risk of these floating particles damaging engine parts.
A top-notch filter will also protect against oil oxidation. Regardless of the situation or conditions, oil reacts with oxygen in a process called oxidation. This ongoing chemical reaction increases the oil’s viscosity and makes it less effective, in addition to causing sludge buildup. An oil filter prevents the physical byproducts of this from entering the engine and prevents it from being damaged.
The engine always operates at high temperatures, and preventing it from overheating is also one of the many tasks of the oil filter. A buildup of dirt and impurities in the oil can reduce thermal conductivity, meaning the oil draws less heat away from the engine’s moving parts. This will cause the engine to overheat, just as when poor-quality oil is used.
Perhaps the greatest benefit of a good oil filter is extended engine life. Since the filter allows oil to flow cleanly and smoothly, removing any debris that could cause damage, your engine will always be powerful and last a long time.
WHAT MAKES A GOOD QUALITY OIL FILTER?
The key elements of an oil filter are the filter element, the anti-drain back valve, and the gasket or seal. The materials they are made of can have a direct impact on the oil filter’s effectiveness.
Anti-drain back valves prevent oil from flowing back into the reservoir unfiltered and can be made of rubber or silicone. Rubber valves are cheaper and often indicate rather poor quality, although they may be suitable for engines using conventional non-synthetic oils. Overall, they tend not to last as long and often become quite stiff after about 3,000 miles of use. The fact that they are not as flexible can mean they do not form a tight enough seal. Silicone, on the other hand, lasts much longer and retains its flexibility, but is more expensive than rubber. As is often the case, you get what you pay for. Silicone can go 6,000 to 8,000 miles and still reseal. It therefore makes a good seal and prevents unfiltered oil from flowing back.
The type of filter element is also very important in determining the filter’s effectiveness at keeping the oil clean. This is the material that actually filters the oil. It is made of cellulose, synthetic material, or a blend of both and can often look like cardboard. Synthetic elements are usually made from polyester, glass, cotton, or nylon and have better filtration capacity due to tightly woven fibers. They can capture even tiny impurities in the fluid without slowing the oil flow and are very difficult to tear or rip, making them robust with great longevity. Cellulose elements are cheaper than synthetic elements, but the quality is worse. Blended elements offer a better choice in terms of cost and performance. Some high-quality oil filters have a metal mesh on top of the filter element, which removes larger pieces of debris before the oil reaches the filter element. This protects the material and ultimately makes it last much longer.
The oil filter’s capacity refers to the filter’s ability to hold the contaminants it extracts from the oil and continue to function effectively, meaning it does not need to be replaced. The type of element and the filter’s construction will impact this capacity. The higher the capacity, the more miles you will get out of it. Some high-quality filters will have a bypass valve that allows unfiltered oil to enter the engine, so it can continue to operate. Others, which do not have this bypass valve, may prevent any oil from entering the engine when they reach their capacity.
The size and shape of the filter are also worth considering, as not all filters fit all cars. Your manufacturer may also recommend certain filters or be designed for a specific filter. For example, some Land Rover models may be fitted almost exclusively with Wix oil filters due to their size. There are no common standards for oil filters, meaning each car brand and model has its own specifications. The oil filter’s weight and housing design determine whether it can be installed in your car or not. Make sure the filter’s specifications match your car’s requirements as outlined in the owner’s manual. If the oil filter housing is too heavy, it can also affect your vehicle’s performance.
THE TOP 7 OIL FILTER BRANDS
1. BOSCH
For conventional and blended filters, Bosch may offer the best oil filter on the market. Their filters feature a robust, thick blended filter element with high glass content and the ability to hold up to 14 grams of dirt. They are sturdy, reliable, and fit well in most Asian and European vehicles.
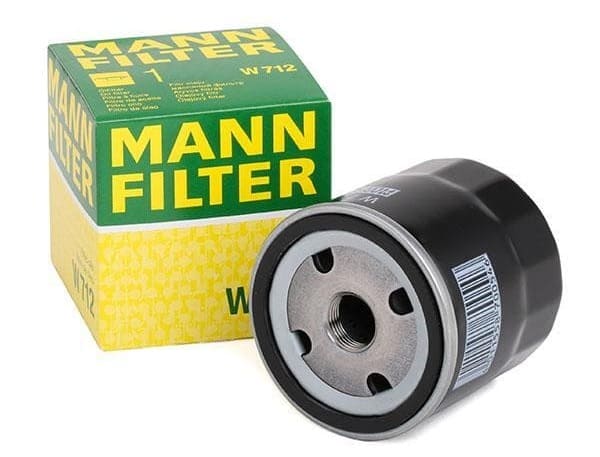
2. MANN-FILTER
Mann-Filter focuses on high performance and incredible durability. Their filters feature anti-drain back and bypass valves, and the filter elements have been specially designed for modern engines. They offer a wide variety and claim to be the safest option and the trucker’s choice of oil filter.
3. MAHLE ORIGINAL
Mahle offers very interesting options for those looking for a new replacement oil filter. In addition to selling premium oil filters with fully synthetic elements, they also have the cheaper and more environmentally friendly option of replacing only the element itself rather than the housing, an “oil filter cartridge” as they call it.
4. K&N
For racing and high-speed driving, K&N offers the perfect design. A nut at the bottom and slots on each side help keep the filter in place, even during high-speed travel. It has a silicone anti-drain back valve and a thickness of 77mm, which is thicker than your average filter.
5. VALEO
Valeo filters are designed to provide the highest standards of filtration quality and meet all their users’ needs. Their impressive oil filter technology blocks particles as small as 40 microns (40 µm), half the width of a human hair.
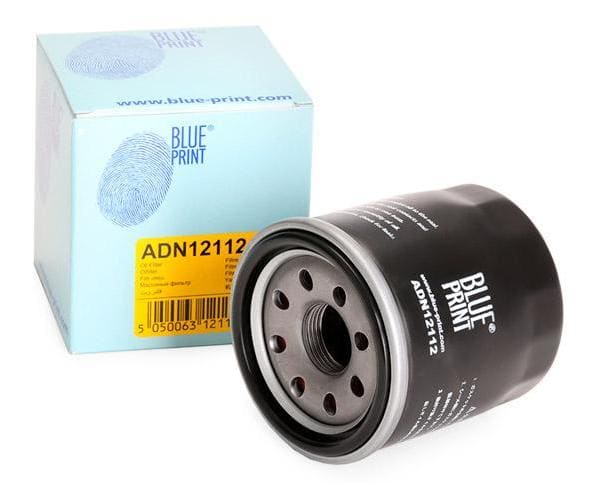
6. BLUE PRINT
Blue Print offers filters for gasoline, diesel, electric, and hybrid cars, and their replacement filters are designed to meet the required standards of most vehicles so they can be easily replaced. Blue Print filters are made from premium materials.
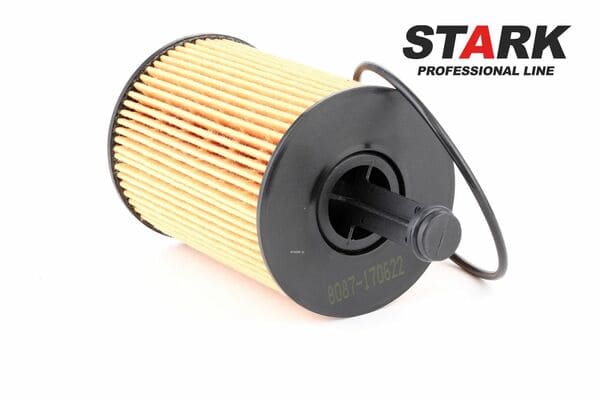
7. STARK
Stark products claim to offer long life, good flow, and reliable rubber sealing elements. They are equipped with anti-drain back and bypass valves to ensure timely oil supply immediately after starting the engine and avoid damaging its components if the filter element has reached its capacity.
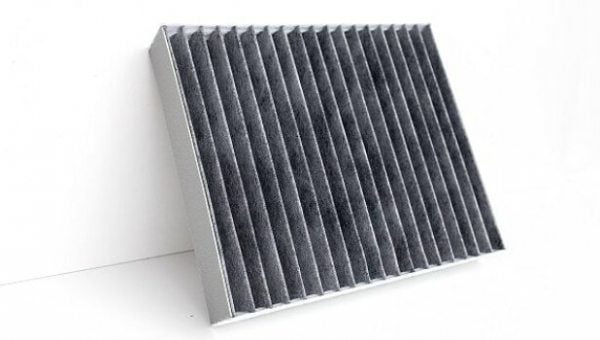
How to choose and replace cabin air filters
Dust, soot, rubber particles, abrasive substances, ozone, nitrogen oxides, sulfur and carbon dioxide, benzene, and plant pollen in spring and summer enter the car through the vents with the air. Due to the enclosed space, the concentration of these substances inside the cabin can be several times higher than outside. Inhaling polluted air can tire the lungs and cause allergic reactions. The cabin filter (or pollen filter) is designed to solve this problem. Here is our advice for choosing a high-quality filter suitable for your car.
Why it is important to replace this part in due time
A pollen filter is a consumable part, so it must be replaced regularly. It is recommended to change it at least once a year or every 15,000 km. If you live in a big city and are often stuck in traffic jams or, conversely, if you drive on dusty country roads most of the time, you may need to replace it more often.
A dirty filter can reduce the efficiency of the air conditioning, heating, and ventilation systems, as the filter’s resistance to airflow increases due to dirt buildup. Windows fog up heavily in rainy weather, and over time, pathogenic bacteria and fungi begin to grow on the surface of the filter element.
Sometimes the filter element deforms, and the airflow bypasses it, allowing all contaminants to enter the cabin.
The different types of cabin filter
Nowadays, the following types are popular:
Conventional barrier filter. These are dust traps. They are made of special paper or synthetic fibers. They usually consist of several layers. Each is designed to trap particles of a certain size. It is worth noting that using synthetic fibers as the filtering material is preferable because they can ensure effective cleaning without offering resistance to airflow. In high-quality filters, one of the layers may use an electrostatic charge that allows its fibers to capture even the smallest dust particles.
With absorbent layers. Each of these layers has a textile base with activated carbon granules up to 0.5 mm. The granules have a porous surface that absorbs molecules of toxic substances that enter the car through the air. Such filters are more expensive but guarantee finer cleaning. Additionally, they neutralize unpleasant odors.
With an antibacterial layer. This layer is made of a bactericidal material, usually polyphenol. It binds and neutralizes bacteria and allergens and inhibits mold growth by several dozen times. These parts are the most expensive as they guarantee maximum protection.
4 tips from AUTODOC on choosing and using cabin filters
Choose products from reputable manufacturers. We recommend Mann-Filter, Bosch, Mahle Original, Stark Automotive, Knecht, K&N, and Ridex. In low-quality items, less material is used for the filter layers, which results in better air purification. Poor-quality products may even have a fake carbon filter that is actually just a conventional dust filter with one of its layers painted black.
Check the condition of the pollen filter if you notice any of the following:
an unpleasant smell inside the car;
it is cold in the car even when the heater is on or hot when the air conditioning is activated;
dust starts to accumulate on the dashboard.
Choose the replacement part in strict accordance with your vehicle’s specifications. It is impossible to install components larger than necessary. Parts smaller than standard ones allow unfiltered air to enter the cabin.
When installing the filter, make sure to position it correctly. The airflow direction should be marked on the side of the part, which is particularly important for carbon and anti-allergy filters.
Conclusion
The pollen filter does not directly affect the operation of the car’s basic systems and assemblies, such as the engine or transmission. For this reason, some car owners do not bother to replace it in a timely manner. This can be dangerous for your health. High-quality components are capable of trapping up to 99% of dust and allergens. That is why you should not skimp on this part. By following our simple tips, you will ensure a comfortable and safe car environment for a long time.
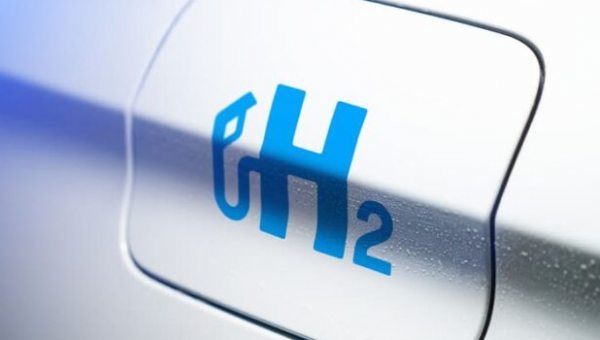
Top 5 Best Hydrogen Cars 2020
Hydrogen Cars: Just Another Hype or the Holy Grail of Green Automotive?
The future of the automobile will be without diesel or gasoline, at least according to the EU and the UK government. After committing to making almost all new cars and vans zero-emission by 2040, Boris Johnson unveiled in February 2020 his plan to postpone the ban on selling new petrol and diesel cars until 2035. As this shift towards vehicles that do not run on fossil fuels accelerates, people are turning to hybrids and electric cars. However, there is another option that people seem to forget, although it has existed in various forms for several hundred years: hydrogen fuel cell vehicles.
Cars equipped with hydrogen fuel cells burn no fossil fuels, produce no pollution or greenhouse gases, operate with the same chemical reaction that powers rockets, and travel twice the distance of a Tesla, meaning they are a credible and effective alternative to electric cars as part of a fossil fuel-free future.
If you haven’t heard of this utopian car yet, you wouldn’t be alone. Only Toyota, Honda, and Hyundai have already established fuel cell vehicle (FCEV) production lines, and it’s rare to see one outside of California, the hub where this technology is slowly but surely developing.
This could change, however: the UK government announced in 2017 a £23 million fund to support the development of cars with hydrogen fuel cells and infrastructure, and Transport Minister John Hayes noted that “hydrogen fuel cell electric vehicles can play a vital role… in helping us reduce harmful emissions.” This funding is certainly needed, as there are currently only about 17 hydrogen refueling stations in the UK (most in London, you guessed it) and none in the US outside of California.
There are clearly startup issues, but if FCEVs follow the same path as electric vehicles, it’s important to ask what these hydrogen cars are, how good they really are, and what are the best hydrogen cars on the market?
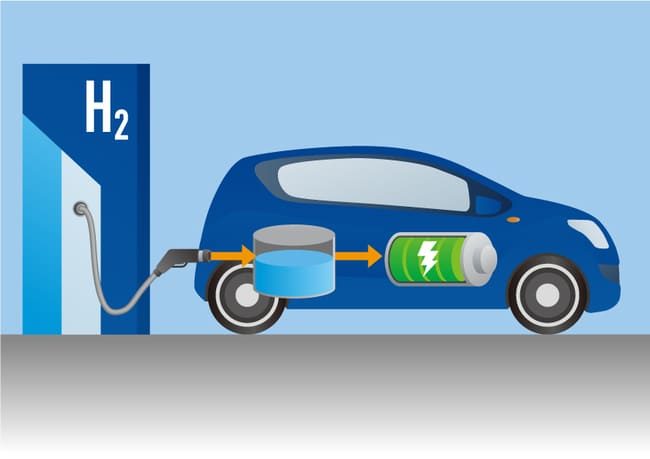
HOW DO HYDROGEN CARS WORK?
Despite running on gaseous fuel, hydrogen cars are technically also electric cars; they are powered by an electric motor rather than a gasoline or diesel engine. Hydrogen is stored in a tank, which is connected to the fuel cell. Hydrogen enters the fuel cell and mixes with oxygen from the ambient air. Hydrogen and oxygen react and combine to produce electrical energy and harmless water vapor, which is then expelled as a byproduct.
There are no moving parts in the fuel cell, just a chemical reaction that creates electricity to power the engine. The battery where electricity is stored, known as the Peak Power Battery, is significantly smaller and therefore lighter than the battery of a standard electric vehicle, as it is constantly recharged by the fuel cell, as well as by regenerative braking in some models, a process in which the electric motor converts the car’s kinetic energy into electrical energy and feeds it into the backup battery.
Hydrogen tanks are refueled in a way that is almost the same as gasoline and diesel; gaseous hydrogen is pumped into the tank as you would with gasoline. For a vehicle that could change the world, the system as a whole is incredibly simple.
THE ADVANTAGES OF HYDROGEN CARS
Quiet Engines: Like most other electric vehicles, hydrogen cars have virtually no engine noise and dynamic startup, as electric motors provide maximum torque, even at low speeds. They are actually so quiet that some cars have been equipped with pedestrian warning systems to make noise when hydrogen cars are parking, reversing, or maneuvering.
Faster Refueling: The biggest complaint about electric cars is often that they take forever to refuel. Even with a high-power charging station, it can take up to 30 minutes for a normal electric car and several hours if a normal charging station is used. A hydrogen vehicle can be fully refueled in just three to five minutes. It’s also familiar to refuel using a pump, as you would with a gasoline or diesel engine.
No Harmful Emissions: The only thing emitted by a hydrogen fuel cell car is water. This means no CO2 emissions from the car.
A Range That Rivals Diesel and Gasoline Equivalents: Another issue with normal electric cars is that even with a full battery, they may struggle to cover half the distance of a conventional car with a full tank of gasoline. With a range of about 300 miles per tank, hydrogen cars are on equal footing with many conventional vehicles. Once it also has a full tank, a fuel cell vehicle can travel as far as a gasoline vehicle. The Toyota Mirai has the shortest range of all commercial fuel cell sedans currently on the market, and it travels 317 miles on a full tank. That’s nearly 50% more range than the 220 miles that the base Tesla Model 3 can travel on a single charge. More importantly, this range does not deteriorate in cold weather, as can happen with other electric vehicles.
It’s a Growing Industry: As we’ll see in a moment, the infrastructure and support for hydrogen cars are not quite where they need to be at the moment. That said, one of the advantages of hydrogen cars is that some key players are investing. In addition to BMW and Mercedes-Benz in Germany, General Motors is researching a fuel cell van in the US, and Toyota is testing a hydrogen tractor-trailer. Residents of Orange County, California, have been able to take a fuel cell bus to their destination since 2016, and 25 of them are in service in the county. This is good news for anyone looking for a new car that will last and avoid being forced to upgrade due to government environmental legislation. Fuel cell cars are also likely to be a good investment and retain their resale value, unlike gasoline or diesel cars.
THE DISADVANTAGES OF HYDROGEN CARS
Refueling: This is one of the major problems with hydrogen cars. There are currently only 17 hydrogen car filling stations in the UK, and each station costs £1.3 million to build. By the end of 2019, there were only 40 in the US and about 80 in Germany, the European nation that has perhaps shown the most interest in hydrogen as a car fuel. The problem is also a bit of a catch-22 situation: because so few hydrogen cars exist, no one wants to invest in refueling stations, and because there are so few refueling stations, no one wants to buy hydrogen cars. This problem won’t be resolved anytime soon.
Expenses: Although the cost of refueling a hydrogen car is similar to that of traditional fuels (about 17.4 pence per mile for a hydrogen car versus 16.3 pence per mile for a conventional car), storing gasoline isn’t cheap, and the technology itself is expensive to develop. Fuel cells are expensive, and that makes the cars themselves expensive too. The few models currently on the market cost an average of $80,000 (just under £62,000) for a mid-range or upper mid-range vehicle. That’s almost twice as much as comparable all-electric or hybrid vehicles. Part of the problem is the need for the precious metal platinum, which acts as a catalyst when energy is produced. That said, the UK government supports their purchase with a grant of about £3,000.
Car Size: Hydrogen tanks take up a lot of space in cars, and most hydrogen vehicles so far have more than one. This means they tend to be quite large (SUVs or large sedans), which once again means they are not cheap and may not be ideal for driving hydrogen cars in UK cities. However, this is something that the small Welsh car manufacturer Riversimple is trying to solve with its small and stylish Rasa car. It’s worth looking into if you can see a hydrogen car in your future.
Possible Safety Risks: Gasoline is flammable, but we’ve been driving gasoline cars for years without complaint. Hydrogen is also flammable, but many people perceive it as a huge risk. In June 2019, two incidents occurred that seem to prove the critics’ point: a chemical plant producing hydrogen in Santa Clara exploded, leaving FCV users in California short of fuel, and a few days later, a refueling station in Sandvika, Norway, exploded. For many, this clearly showed that hydrogen can be a dangerously explosive gas and led some to wonder: are hydrogen cars safe?
5 BEST HYDROGEN CARS
TOYOTA MIRAI
Toyota clearly has big plans for the Mirai, as it means “future” in Japanese. Its sleek and elegant look complements its excellent handling, but it is expensive and rare: starting at £65,000 before the government’s £3,500 ultra-low emission grant, only 15 will be released in the UK in 2020.
HONDA CLARITY
With Clarity, of course, referring to the lack of emissions from Honda’s first fuel cell vehicle, that’s not the only thing it has going for it. The Clarity offers attractive performance, top-notch engineering, and provides great range and comfort. Unfortunately, it can’t even be leased in the UK yet.
HYUNDAI NEXO
Following on from the Hyundai ix35 FCEV, the Nexo offers a guaranteed great range of 414 miles, with even more possibilities thanks to regenerative braking. The South Korean manufacturer claims it can even purify the air around it – and for a huge amount of £68,000, you’d expect that at a minimum.
MERCEDES-BENZ GLC F-CELL
The GLC F-Cell is Mercedes’ first attempt with an FCEV, and it looks promising so far. The tank has a capacity of 4.4 kg of hydrogen, giving it a range of 478 km and a power output of 155 kWh. More importantly, 90% less platinum was used, making it potentially very affordable.
BMW HYDROGEN X5
Scheduled to go into production in 2022, the X5 will have a total power of 368 hp, a total of 6 kg of hydrogen in its two H tanks, and regenerative braking to help support the battery. Refueling is said to take between three and four minutes, and this could be a very strong offering for the future.