Lexus Electrifies Tokyo With Visionary Concepts
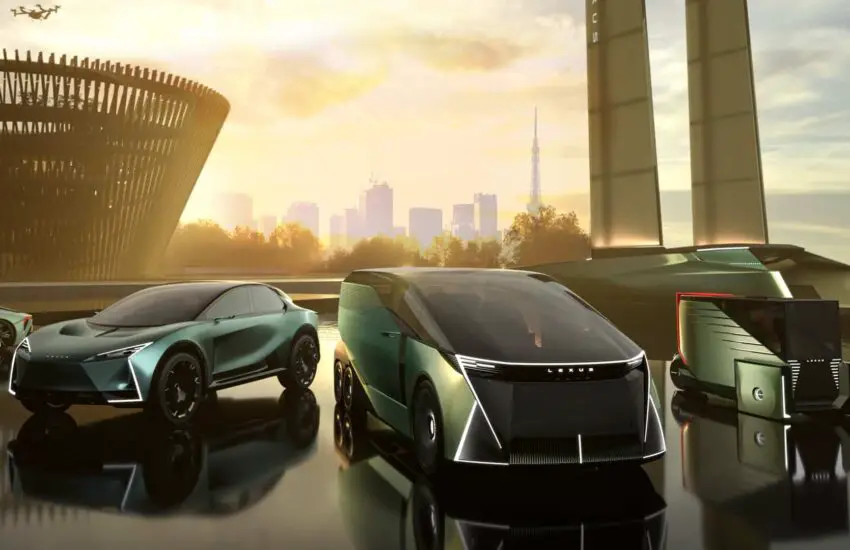
Lexus stunned attendees at the 2025 Tokyo Motor Show with a trio of groundbreaking electric vehicle concepts, signaling a radical new design direction. The Japanese luxury brand’s display focused on redefining space, comfort, and sustainability, with one model in particular challenging conventional automotive architecture.
The Six-Wheel MPV: A New Category
Center stage belonged to an extraordinary six-wheeled multi-purpose vehicle concept. This innovative design features a unique 6×2 wheel configuration, with four front wheels for enhanced stability and two rear wheels for propulsion. The elongated wheelbase creates an unprecedented interior cabin space, offering lounge-like seating arrangements with fully rotating captain’s chairs and modular seating systems.
Advanced Technology Integration
Beyond its striking appearance, the concept incorporates cutting-edge technologies including steer-by-wire systems and individual wheel torque vectoring. The extended front axle allows for tighter turning circles despite the vehicle’s substantial length, while the additional wheels provide superior weight distribution and braking performance. The glass roof integrates transparent solar panels that supplement the vehicle’s power needs for auxiliary systems.
Sustainable Luxury Focus
Lexus emphasized the use of innovative sustainable materials throughout the concept vehicles. The six-wheel MPV features seats upholstered in fabric made from recycled ocean plastics and interior trim crafted from compressed bamboo fibers. The dashboard incorporates a new type of plant-based leather alternative that offers both luxury appeal and environmental responsibility, setting new standards for eco-conscious premium vehicles.
The Tokyo Motor Show presentation positions Lexus as a forward-thinking brand willing to challenge automotive conventions. These concepts demonstrate how electric platforms can enable entirely new vehicle architectures that prioritize both passenger experience and environmental sustainability, potentially influencing production vehicles for the next decade.