P0404 Exhaust Gas Recirculation Circuit Malfunction

Meaning of Code P0404

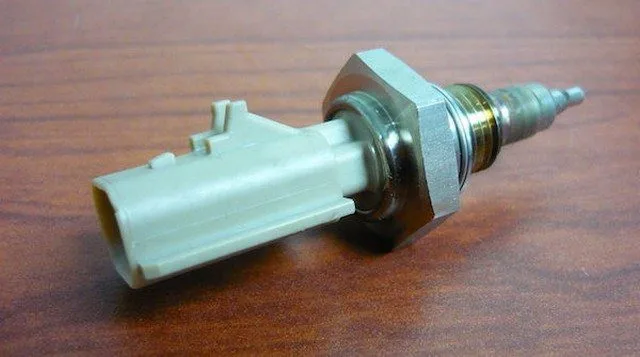
This generic OBD-II code indicates a problem with the EGR (Exhaust Gas Recirculation) valve control or feedback circuit. The PCM detects an inconsistency between the desired and actual valve position, often due to electrical or mechanical issues or carbon buildup.


Severity

Moderate to high level:

  • Risk of increased pollutant emissions (NOx).

  • Possible unstable idle or engine stalling.

  • Requires intervention to prevent damage to the catalytic converter or performance degradation.


Common Symptoms

  • Check engine light on (MIL).

  • Irregular idle or engine stalling.

  • Loss of power during acceleration.

  • No visible symptoms in some cases (intermittent failure).


Possible Causes

  1. Clogged EGR valve (carbon buildup).

  2. Electrical failure:

    • Short circuit or open circuit in the control/feedback wires.

    • Issue with reference voltage (5V) or ground.

  3. Faulty EGR valve (coil, position sensor).

  4. PCM failure (rare).


Diagnostic Procedure

Step 1: Using a Diagnostic Tool

  • Connect an OBD-II scanner to check:

    • The desired position vs actual position of the EGR valve.

    • Associated codes (e.g., P0400, P0401).

  • If values differ, suspect a clogged valve or electrical issue.

Step 2: EGR Valve Inspection

  1. Mechanical cleaning:

    • Remove the valve and clean carbon deposits with a decarbonizing agent.

  2. Electrical test:

    • Disconnect the connector and measure the reference voltage (5V) on the circuit.

    • Check for continuity and absence of short circuits in the wires.

Step 3: Circuit Verification

  1. Control circuit:

    • Use a multimeter to measure the control circuit voltage (should vary with valve opening).

  2. Ground circuit:

    • Ensure the ground is intact (resistance < 1 Ω between ground terminal and battery).

Step 4: EGR Valve Test

  • Activate the valve via the scanner and observe its movement.

  • A functional valve should respond instantly (audible click).


Recommended Solutions

  • Clean or replace the EGR valve if clogged or faulty.

  • Repair electrical circuits (replace damaged wires, secure connectors).

  • Update the PCM if technical service bulletins (TSB) recommend it.


Related Codes

  • P0400: Insufficient EGR flow.

  • P0401: EGR flow below expectations.

  • P0402: Excessive EGR flow.

  • P0403: EGR control circuit issue.

  • P0405/P0406: EGR position sensor failure.


Precautions

  • Wear gloves to avoid burns (hot exhaust system).

  • Use a specific cleaner for carbon deposits (avoid abrasive tools).

P0405 EGR Sensor A Circuit Low

P0405 code is a generic diagnostic trouble code (DTC) related to the powertrain, applicable to vehicles equipped with OBD-II. Although generic, repair steps vary by make and model. This code indicates a malfunction in the exhaust gas recirculation (EGR) system, specifically an EGR valve feedback circuit with abnormally low voltage.


2. EGR System Operation

Role of the EGR

  • Reduces NOx (nitrogen oxides) emissions by lowering combustion temperatures.

  • Injects inert exhaust gases into the cylinders, limiting the amount of available oxygen.

EGR Activation

  • Not activated: During cold start or at idle.

  • Activated: During partial acceleration, deceleration, or depending on engine load and temperature.

Types of EGR Systems

  1. Electrical systems:

    • Controlled directly by the PCM (powertrain control module).

    • Components: 1-2 grounds, 12V power supply, 5V reference circuit, feedback circuit.

  2. Vacuum systems:

    • Use a vacuum solenoid controlled by the PCM.

    • Include an electrical connector for feedback.


3. Symptoms of Code P0405

  • Illumination of the malfunction indicator lamp (MIL).

  • Unstable idle or loss of power.

  • Increased pollutant emissions.


4. Possible Causes

  • Electrical problems:

    • Short to ground or voltage in EGR circuits.

    • Damaged wires, loose terminals.

  • Mechanical failures:

    • EGR valve stuck (carbon, debris).

    • Faulty PCM (often accompanied by other codes).


5. Diagnostic Procedures

Step 1: EGR Valve Test

  • Use a scan tool to command the valve.

    • If feedback is normal → Intermittent problem (e.g., freezing or dirt).

    • If no response → Check wiring and power supply.

Step 2: Electrical Circuit Check

  1. 5V reference circuit:

    • Measure voltage with a voltmeter (KOEO: Key On, Engine Off).

    • No 5V: Look for short circuits or open circuits.

  2. EGR signal circuit:

    • Connect the 5V to the signal circuit.

    • If the scan tool does not indicate 100%, check for short circuits to ground.

Step 3: Replacement or Repair

  • If wiring is intact → Replace the EGR valve.

  • If PCM is suspected → Check for other codes.


6. Related EGR Codes

  • P0400: Insufficient EGR flow.

  • P0401/P0402: EGR flow too low/high.

  • P0403/P0404: Control circuit problem.

  • P0406-P0409: Circuit or position anomalies.


7. Conclusion

P0405 code indicates an EGR valve feedback problem, often related to electrical faults or clogging. A methodical check of the circuit and valve allows quick identification of the malfunction source. If in doubt, consulting a professional is recommended.

Exhaust Gas Recirculation Sensor A Circuit High

Code P0406: Meaning, Causes, and Solutions

What is Code P0406?

Code P0406 is a generic powertrain code. It is considered “generic” because it applies to all vehicles (1996 models and newer), although repair steps may vary by manufacturer.

This code is related to the EGR system (Exhaust Gas Recirculation), a device designed to reduce combustion temperature and limit nitrogen oxide (NOx) emissions. It does this by reinjecting a portion of the exhaust gases into the cylinders, where they mix with air and fuel. This recirculation slows down combustion and thus lowers the temperature.

The EGR valve can operate in two ways:

  • Vacuum-operated: controlled by a vacuum solenoid, which is managed by the PCM (Powertrain Control Module).
  • Electronic: directly controlled by the PCM via one or more integrated solenoids.

An EGR valve position sensor allows the PCM to monitor its operation. If the sensor reading is abnormally high for an extended period, code P0406 is stored.


Symptoms of Code P0406

The most common signs include:
✔️ High combustion temperature (causing increased NOx emissions)
✔️ Check Engine Light (MIL) illuminated
✔️ Engine hesitation while driving
✔️ Intermittent stalling


Possible Causes of Code P0406

🔧 Short circuit in the EGR sensor signal circuit to battery voltage (B+)
🔧 Short circuit in the EGR sensor signal circuit to the 5V reference circuit
🔧 Open ground circuit in the EGR sensor
🔧 Open signal circuit in the EGR sensor
🔧 Failure of the EGR sensor or solenoid
🔧 Debris blocking the EGR valve in an open or closed position


How to Repair Code P0406?

1. Basic Checks

✅ Disconnect the EGR valve and try to start the vehicle.

  • If the engine does not respond, remove the valve and inspect it for any debris. Clean it and reinstall it.

✅ If the problem persists, block the EGR port and try to restart.

  • If the engine starts, the EGR valve is stuck in the open position and must be replaced.
  • If the engine still does not start, the issue may be a short circuit in the wiring.

2. Diagnostic Tool Check

✅ Check the EGR position using an OBD2 scanner by comparing the actual value with the desired value.
✅ If the reading is 5V or higher, check the signal circuit for a short to the reference circuit or battery voltage (B+).
✅ Check the ground continuity and repair any detected issues.

3. Diagnosis on a Vacuum-Controlled EGR Valve

✅ If disconnecting the vacuum source allows the engine to start, the EGR solenoid is likely faulty and allowing constant vacuum. In this case, replace the solenoid.

✅ If the engine runs normally despite the code, suspect a wiring problem. Inspect the wiring harness and repair any issues.

✅ If the wiring is in good condition but the code persists, replace the EGR valve.


Other Codes Related to the EGR System

🔎 Related codes: P0400, P0401, P0402, P0403, P0404, P0405, P0407, P0408, P0409

P0407 Low EGR Sensor B Circuit

What does it mean?

This code is a generic powertrain group code. It is considered generic because it applies to all makes and models of vehicles (1996 and newer), although specific repair steps may vary slightly by model.

There are different EGR (Exhaust Gas Recirculation) system designs, but they all function similarly. The EGR valve is a PCM (Powertrain Control Module) controlled valve that allows measured amounts of exhaust gases to return to the cylinders to be burned with the air/fuel mixture. Since exhaust gas is an inert gas that displaces oxygen, reintroducing it into the cylinder can lower combustion temperatures, which helps improve NOx (nitrogen oxides) emissions.

EGR is not needed during cold starts or at idle. EGR is activated under certain conditions like startup or idle. EGR is activated under certain conditions such as partial acceleration or deceleration depending on engine temperature and load, etc. Exhaust gases are supplied to the EGR valve from an exhaust pipe, or the EGR valve may be mounted directly in the exhaust manifold. When needed, the valve is turned “on,” allowing gases to flow into the cylinders. Some systems divert exhaust gases directly into the cylinders, while others simply inject them into the intake manifold where they are then drawn into the cylinders.

Some EGR systems are quite simple, while others are a bit more complex. Electrically controlled EGR valves are directly controlled by the PCM. A wiring harness plugs into the valve itself and is controlled by the PCM as needed. These can have 4 or 5 wires. Usually, 1 or 2 12-volt ignition power grounds, a 5-volt reference circuit, and a feedback circuit. Other systems are vacuum-controlled. These are quite simple. The PCM controls a vacuum solenoid that, when activated, allows vacuum to move to the EGR valve and open it. There should also be an electrical connector on this type of EGR valve for the feedback circuit. The EGR system’s feedback circuit allows the PCM to see if the EGR valve pintle is actually moving as it should.

If the feedback circuit detects that the voltage is abnormally low or that its position is lower than commanded, P0407 may set.

Note: This code is basically identical to P0405. The difference here is that the P0405 DTC refers to sensor “A,” and P0407 refers to EGR sensor “B.” Refer to a vehicle-specific repair manual for the location of your “A” and “B” sensors.

Symptoms

Symptoms of a P0407 DTC may include:

MIL (Malfunction Indicator Lamp) illumination

Causes

Potential causes of a P0407 code include:

Short to ground in the EGR signal or reference circuits
Short to voltage in the ground or EGR signal circuits
Faulty EGR valve
Faulty PCM wiring issues due to chafing or loose terminals

Possible Solutions

If you have access to a scan tool, you can command the EGR valve. If it responds and the feedback indicates the valve is moving correctly, the problem may be intermittent. Sometimes, in cold weather, moisture can freeze in the valve and cause it to stick. Once the vehicle warms up, the problem may go away. Carbon or other debris can lodge in a valve, which can also cause it to stick.

If the EGR valve does not respond to your commands with the scan tool, disconnect the EGR harness connector. Turn the key to the on position, engine off (KOEO). Using a voltmeter, check for 5 volts on the EGR valve reference wire. If there is no 5 volts, is there any voltage at all? If there is 12 volts, repair the short to voltage in the 5-volt reference circuit. If there is no voltage, connect a test light to battery voltage and probe the 5-volt reference wire. If the test light illuminates, the 5-volt reference circuit is shorted to ground. Repair as necessary. If the test light does not illuminate, check for an open in the 5-volt reference circuit. Repair as necessary.

If there is no apparent issue and there is no 5-volt reference, the PCM may be at fault, but other codes will likely be present. If 5 volts are present on the reference circuit, connect the 5 volts to the EGR signal circuit. Now, the EGR position on the scan tool should read 100%. If it does not, connect the test light to battery voltage and probe the EGR signal circuit. If it lights up, the signal circuit is shorted to ground. Repair as necessary. If the light does not illuminate, look for an open in the EGR signal circuit. Repair as necessary.

If, after connecting the 5-volt reference circuit to the EGR signal circuit, the scan tool’s EGR position reads 100 percent, check the terminal voltage at the EGR valve connector. If the wiring is correct, replace the EGR valve.

Related EGR codes: P0400, P0401, P0402, P0403, P0404, P0405, P0406, P0408, P0409

Code P0408: EGR Valve Circuit B Malfunction – Causes and Solutions

The P0408 fault code is a generic OBD-II code related to the Exhaust Gas Recirculation (EGR) system. It indicates an electrical issue in the EGR valve position sensor circuit B. This guide details the causes, symptoms, and solutions to fix this malfunction.


Understanding Code P0408

The DTC P0408 indicates an anomaly in the EGR position sensor circuit B. The EGR’s role is to reduce NOx emissions by reintroducing a portion of the exhaust gases into the engine. If the sensor detects a voltage that is too high (close to 5 volts) for an extended period, the Powertrain Control Module (PCM) records the P0408 code and activates the Malfunction Indicator Lamp (MIL).


Symptoms of Code P0408

  • Illuminated check engine light.
  • Engine overheating and increased pollutant emissions.
  • Engine misfires or stalling intermittently.
  • Loss of power during acceleration.

Possible Causes of P0408

1. Electrical Problems

  • Short circuit in the EGR sensor circuit.
  • Damaged wires or corroded connectors.

2. Mechanical Failure

  • EGR valve stuck open or closed due to carbon deposits.
  • Faulty EGR solenoid preventing the valve from functioning correctly.

3. Faulty EGR Position Sensor

  • Sending an erroneous signal to the PCM.

Solutions to Fix Code P0408

1. Checking the Electrical Circuit

  • Use a multimeter to test the EGR sensor voltage.
  • Look for short circuits or damaged wires.
  • Clean connectors and replace faulty components.

2. Inspecting and Cleaning the EGR Valve

  • Remove the valve and eliminate carbon deposits with a specific cleaner.
  • If the valve is stuck, consider replacing it.

3. Testing the Control Solenoid

  • Disconnect the vacuum hose from the EGR valve and observe engine changes.
  • Replace the solenoid if necessary.

4. Real-Time Data Analysis

  • Compare the actual position and desired position of the EGR using a diagnostic tool.
  • If the voltage remains at 5V, inspect the signal circuit.

Other EGR Codes to Monitor

  • P0400: Insufficient EGR flow.
  • P0401: EGR flow too low.
  • P0406: EGR sensor circuit A (similar to P0408).
  • P0409: EGR control circuit malfunction.

Conclusion

The P0408 code requires a thorough check of the EGR system, particularly the electrical circuit and the valve. Regular maintenance helps prevent this issue. If the fault persists after intervention, it is advisable to consult a professional for further diagnosis. For more information on OBD-II codes, refer to our guides on P0406 and P0409.

P0409 Exhaust Gas Recirculation Sensor “A” Circuit

What Does It Mean?

This is a generic powertrain diagnostic trouble code (DTC), meaning it applies to all makes/models from 1996 onward. However, specific troubleshooting steps vary by vehicle.

The onboard diagnostic (OBD) trouble code P0409 is a generic code indicating a problem in the exhaust gas recirculation (EGR) valve electrical circuit.

The purpose of the EGR valve is to introduce a regulated amount of exhaust gas into the intake manifold. The goal is to keep cylinder head temperatures below 2500°F. Oxygen nitrates (Nox) form when temperatures exceed 2500°F. Nox is responsible for smog and air pollution.

The control computer, either the powertrain control module (PCM) or electronic control module (ECM), has detected an abnormally low, high, or non-existent signal voltage.
EGR Operating Principles

The P0409 trouble code refers to the same issue across all vehicles; however, there are many types of EGR systems, sensors, and activation methods. The only similarity is that they all route exhaust gases into the intake manifold to cool cylinder head temperatures.

Introducing spent exhaust gases into the engine at the wrong time reduces power and causes rough idling or stalling. With this in mind, the computer programming only opens the EGR when engine RPM is above 2000 and closes it under load.

Symptoms

Symptoms depend on the EGR pintle position at the time of failure.

    The service engine soon light will illuminate, and OBD code P0409 will be set. Additionally, a second code related to EGR sensor failure may be set. Code P0405 relates to low sensor voltage, and P0406 relates to a high voltage situation.
    If the EGR pintle is stuck partially open, the vehicle may not idle well or may stall.
    Knocking sounds may be heard under load or at high RPM.
    No symptoms at all.

Potential Causes

  •     Faulty EGR sensor
  •     Defect in the sensor wiring harness
  •     EGR pintle stuck in closed position with carbon buildup preventing opening
  •     Lack of vacuum at EGR solenoid
  •     Faulty EGR solenoid
  •     Faulty EGR position sensor
  •     Faulty differential pressure feedback EGR sensor.

Repair Procedures

All EGR valves have one thing in common: they recirculate exhaust from the exhaust to the intake manifold. Beyond that, they differ in their methods of regulating pintle opening and detecting its position.

The following repair procedures address the most common issues responsible for the majority of EGR system failures. Wiring harness or sensor failures require a service manual to determine proper wire identification and diagnostic procedures.

Keep in mind that wiring differs between manufacturers, and computers do not respond well if the wrong wire is probed. If you probe the wrong wire and send excessive voltage through the computer’s sensor input terminal, the computer may fry.

Similarly, if the wrong connector is unplugged, the computer could lose its programming, requiring the vehicle to be restarted only after the dealer reprograms the computer.

    Code P0409 indicates a circuit malfunction, so check the EGR sensor connector for corrosion, bent or pushed terminals, or loose connections. Clean any corrosion and reinstall the connector.
    Remove the electrical connector and remove the EGR. Check for coking in the EGR intake and exhaust. Clean any coking as needed so the pintle moves up and down smoothly.
    Check the vacuum line from the EGR to the solenoid and replace it if defects are found.
    Check the solenoid electrical connector for corrosion or defects.
    If the vehicle is a Ford, follow the two vacuum hoses from the EGR to the differential pressure feedback EGR (DPFE) sensor at the rear of the manifold.
    Check both pressure hoses for corrosion. Experience shows these hoses can clog with exhaust carbon. Use a small pocket screwdriver or equivalent to clean the hoses of corrosion, and the sensor will resume functioning.

If the most common tests do not resolve the issue, a maintenance manual is needed to continue testing wiring circuits. The best solution is to take the vehicle to a service center with the appropriate diagnostic equipment. They can quickly identify and repair this type of problem.

Related EGR Codes: P0400, P0401, P0402, P0403, P0404, P0405, P0406, P0407, P0408

P040A EGR Temperature Sensor A Circuit

What does it mean?

This is a generic diagnostic trouble code (DTC) that generally applies to OBD-II vehicles. This may include, but is not limited to, vehicles from Mazda, VW, Audi, Mercedes Benz, Ford, Dodge, Ram, etc.

Although generic, the exact repair steps may vary depending on the year, make, model, and powertrain configuration.

Before EGR (Exhaust Gas Recirculation) systems were effectively introduced in vehicles in the 1970s, engines were actively wasting unburned fuel and expelling it into the atmosphere. Nowadays, however, a vehicle must meet certain emission standards to proceed with production.

The use of EGR systems has significantly improved emissions by recirculating fresh exhaust gases from the exhaust manifold and/or other parts of the exhaust system and recycling or burning them again to ensure we efficiently burn the fuel we pay for with our hard-earned money!

The function of the EGR temperature sensor is essentially to provide a way for the ECM (Engine Control Module) to monitor the temperature in the EGR system and/or adjust the flow accordingly using the EGR valve. It does this easily by using a common temperature-sensitive resistance-type sensor.

Your OBD (On-Board Diagnostic) scan tool may display P040A and related active codes when the ECM detects a fault in the EGR temperature sensor or its circuits. As I mentioned earlier, the system involves the exhaust, which is hot—not only that, but you’re dealing with one of the hottest areas of the vehicle, so be aware of where your hands/fingers are even with the engine off for a short period of time.

The P040A code for the Exhaust Gas Recirculation Temperature Sensor Circuit A is set by the ECM when a general malfunction is detected in the “A” EGR temperature sensor circuit. Refer to a vehicle-specific repair manual to determine which part is the “A” circuit for your particular application.
How severe is this DTC?

The severity here varies significantly depending on your specific issue, but I wouldn’t classify it as severe since the entire system was introduced in vehicles simply as an emission reduction strategy. That being said, exhaust leaks are not “good” for your vehicle, nor are leaking or faulty EGR temperature sensors, so maintenance is key here, sooner or later!

An example of an EGR temperature sensor:
P040A EGR Temperature Sensor
What are some of the symptoms of the code?

Symptoms of a P040A trouble code may include:

Failure of state/provincial smog or emissions test
Engine noise (knocking, ticking, rattling, etc.)
Louder exhaust
Excessive exhaust odors

What are some common causes of the code?

Causes

of this P040A engine code may include:

Faulty or damaged EGR (Exhaust Gas Recirculation) temperature sensor
Leaking EGR temperature sensor gasket
Cracked or leaking exhaust pipe where the sensor is mounted
Burned wiring harness and/or sensor
Damaged wire(s) (open, short to power, short to ground, etc.)
Damaged connector
ECM (Engine Control Module) issue
Poor connections

What are the troubleshooting steps for P040A?
Basic Step #1

The first thing I would do here is check everything we can see by simply inspecting the sensor and the surrounding EGR system, looking for exhaust leaks in particular. Also check the sensor and its harness while you’re at it. Remember what I said about those high temperatures? They can wreak havoc on plastic and rubber insulated wires, so inspect them carefully.

TIP: Black soot can indicate an exhaust leak around the area.
Basic Step #2

Many EGR issues I’ve seen in the past have been caused by soot buildup in the exhaust, potentially due to a number of things (poor maintenance, low-quality fuel, etc.). In this case, it’s no exception, so it may be wise to clean your EGR system or at the very least the temperature sensor. Be aware that sensors mounted in exhaust systems can feel seized when you attempt to remove them.

Remember that these sensors are subjected to significant temperature fluctuations, so a bit of heat using an oxy-acetylene torch (not for the layperson) can help loosen the sensor. Once the sensor is removed, use carburetor cleaner or a similar product to effectively soak the soot. Use a wire brush to dislodge soot in heavily built-up areas. When reinstalling the cleaned sensor, be sure to apply some anti-seize to the threads to help prevent seizing.

NOTE: The last thing you want to do here is break the sensor inside the manifold/exhaust. This could be a costly mistake, so be careful when loosening the sensor.
Basic Step #3

Check the sensor’s integrity by measuring the actual electrical values against the manufacturer-specific desired values. To do this, use your multimeter and follow the manufacturer-specific pin testing procedures.

P040B EGR Temperature Sensor Circuit Range

What Does It Mean?

This is a generic diagnostic trouble code (DTC) that generally applies to OBD-II vehicles. This may include, but is not limited to, vehicles from Mazda, VW, Audi, Mercedes Benz, Ford, Dodge, Ram, etc.

Although generic, the exact repair steps may vary depending on the year, make, model, and powertrain configuration.

Before EGR (Exhaust Gas Recirculation) systems were effectively introduced into vehicles in the 1970s, engines actively wasted unburned fuel and expelled it into the atmosphere. Nowadays, however, a vehicle must meet certain emission standards to proceed with production.

The use of EGR systems has significantly improved emissions by recirculating fresh exhaust gases from the exhaust manifold and/or other parts of the exhaust system and recycling or burning them again to ensure we efficiently burn the fuel we pay for with our hard-earned money!

The function of the EGR temperature sensor is essentially to provide a way for the ECM (Engine Control Module) to monitor the temperature in the EGR system and/or adjust the flow accordingly using the EGR valve. It does this easily by using a common temperature-sensitive resistance-type sensor.

Your OBD (On-Board Diagnostic) scan tool may display P040B and related active codes when the ECM detects a fault in the EGR temperature sensor or its circuits. As I mentioned earlier, the system involves the exhaust, which is hot—not only that, but you’re dealing with one of the hottest areas of the vehicle, so be aware of where your hands/fingers are even with the engine off for a short period of time.

The code P040B Exhaust Gas Recirculation Temperature Sensor Circuit A Range/Performance is set by the ECM when a functionality or out-of-range issue is detected in the EGR temperature sensor circuit A. Refer to a vehicle-specific repair manual to determine what the “A” part of the circuit is for your particular application.
How severe is this DTC?

The severity here varies greatly depending on your specific issue, but I would not classify it as severe given that the entire system was introduced to vehicles simply as an emission reduction strategy. That being said, exhaust leaks are not “good” for your vehicle, nor are leaking or faulty EGR temperature sensors, so maintenance is key here, sooner or later!

An Example of an EGR Temperature Sensor:


EGR Temperature Sensor P040B

What Are Some of the Symptoms of the Code?

Symptoms of a P040B trouble code may include:

  • Failure of state/province smog or emissions test
  • Engine noise (knocking, rattling, ticking, etc.)
  • Louder exhaust
  • Excessive exhaust odors

What Are Some Common Causes of the Code?

Causes of this P040B engine code may include:

  • Faulty or damaged EGR (Exhaust Gas Recirculation) temperature sensor
  • EGR temperature sensor gasket leak
  • Cracked or leaking exhaust pipe where the sensor is mounted
  • Burned wiring harness and/or sensor
  • Damaged wire(s) (open, short to power, short to ground, etc.)
  • Damaged connector
  • ECM (Engine Control Module) issue
  • Poor connections

What Are the Troubleshooting Steps for P040B?

Basic Step #1

The first thing I would do here is check everything we can see by simply inspecting the sensor and the surrounding EGR system, looking for exhaust leaks in particular. Also check the sensor and its harness while you’re at it. Remember what I said about those high temperatures? They can wreak havoc on plastic and rubber insulated wires, so inspect them carefully.

TIP: Black soot may indicate an exhaust leak around the area.

Basic Step #2

Many EGR issues I’ve seen in the past have been caused by soot buildup in the exhaust, potentially due to a number of things (poor maintenance, low-quality fuel, etc.). In this case, it’s no exception, so it may be wise to clean your EGR system or at the very least the temperature sensor. Be aware that sensors mounted in exhaust systems may feel seized when you try to loosen them.

Remember that these sensors are subjected to significant temperature fluctuations, so a bit of heat using an oxyacetylene torch (not for the layperson) can help loosen the sensor. Once the sensor is removed, use carburetor cleaner or a similar product to effectively soak the soot. Use a wire brush to dislodge soot in heavily built-up areas. When reinstalling the cleaned sensor, be sure to apply some anti-seize compound to the threads to help prevent seizing.

NOTE: The last thing you want to do here is break the sensor inside the manifold/exhaust. This could be a costly mistake, so be careful when loosening the sensor.

Basic Step #3

Check the sensor’s integrity by measuring the actual electrical values against the manufacturer-specific desired values. To do this, use your multimeter and follow the manufacturer-specific pin testing procedures.

P040C – Exhaust Gas Recirculation Temperature Sensor ‘A’ Circuit Low

What does it mean?

This is a generic diagnostic trouble code (DTC) that generally applies to OBD-II vehicles. This can include, but is not limited to, vehicles from Mazda, VW, Audi, Mercedes Benz, Ford, Dodge, Ram, etc.

Although generic, the exact repair steps may vary depending on the year, make, model, and powertrain configuration.

Before EGR (Exhaust Gas Recirculation) systems were effectively introduced into vehicles in the 1970s, engines were actively wasting unburned fuel and expelling it into the atmosphere. Nowadays, however, a vehicle must meet a certain emission rate to proceed with production.

The use of EGR systems has significantly improved emissions by recirculating fresh exhaust gases from the exhaust manifold and/or other parts of the exhaust system and recycling or burning them again to ensure we efficiently burn the fuel we pay for with our hard-earned money!

The function of the EGR temperature sensor is essentially to provide a way for the ECM (Engine Control Module) to monitor the temperature in the EGR system and/or adjust the flow accordingly using the EGR valve. It does this easily by using a common temperature-sensitive resistance type sensor.

Your OBD (On-Board Diagnostic) scan tool may display P040C and related active codes when the ECM detects a fault in the EGR temperature sensor or its circuits. As I mentioned earlier, the system involves the exhaust, which is hot—not only that, but you’re dealing with one of the hottest areas of the vehicle, so be aware of where your hands/fingers are even with the engine off for a short period of time.

The P040C code for the Exhaust Gas Recirculation Temperature Sensor Circuit A Low is set by the ECM when a low electrical value is detected in the EGR temperature sensor “A” circuit. Refer to a vehicle-specific repair manual to determine which part is the “A” circuit for your particular application.
How severe is this DTC?

The severity here varies considerably depending on your specific issue, but I wouldn’t classify it as severe given that the entire system was introduced to vehicles simply as an emission reduction strategy. That being said, exhaust leaks are not “good” for your vehicle, nor are leaking or faulty EGR temperature sensors, so maintenance is key here, sooner or later!

An example of an EGR temperature sensor:


EGR Temperature Sensor P040C
What are some of the symptoms of the code?

Symptoms of a P040C trouble code may include:

Failure of state/province smog or emissions test
Engine noise (knocking, ticking, rattling, etc.)
Louder exhaust
Excessive exhaust odors

What are some of the common causes of the code?

Causes

of this P040C engine code may include:

Faulty or damaged EGR (Exhaust Gas Recirculation) temperature sensor
Leak from the EGR temperature sensor gasket
Cracked or leaking exhaust pipe where the sensor is mounted
Burned wiring harness and/or sensor
Damaged wire(s) (open, short to power, short to ground, etc.)
Damaged connector
ECM (Engine Control Module) issue
Poor connections

What are the troubleshooting steps for P040C?
Basic Step #1

The first thing I would do here is check everything we can see by simply inspecting the sensor and the surrounding EGR system, looking for exhaust leaks in particular. Also check the sensor and its harness while you’re at it. Remember what I said about those high temperatures? They can wreak havoc on plastic and rubber insulated wires, so inspect them carefully.

TIP: Black soot can indicate an exhaust leak around the area.
Basic Step #2

Many EGR issues I’ve seen in the past have been caused by soot buildup in the exhaust, potentially caused by a number of things (poor maintenance, low-quality fuel, etc.). In this case, it’s no exception, so it may be wise to clean your EGR system or at the very least the temperature sensor. Be aware that sensors mounted in exhaust systems can feel seized when you try to remove them.

Remember that these sensors are subjected to significant temperature fluctuations, so a bit of heat using an oxyacetylene torch (not for the layperson) can help loosen the sensor. Once the sensor is removed, use carburetor cleaner or a similar product to effectively soak the soot. Use a wire brush to dislodge soot in heavily built-up areas. When reinstalling the cleaned sensor, be sure to apply some anti-seize compound to the threads to help prevent seizing.

NOTE: The last thing you want to do here is break the sensor inside the manifold/exhaust. This could be a costly mistake, so be careful when loosening the sensor.
Basic Step #3

Check the sensor’s integrity by measuring the actual electrical values against the manufacturer-specific desired values. To do this, use your multimeter and follow the manufacturer-specific pin testing procedures.

P040D – Exhaust Gas Recirculation Temperature Sensor ‘A’ Circuit High

How serious is this DTC?

The severity here varies considerably depending on your specific issue, but I wouldn’t classify it as serious given that the entire system was introduced in vehicles simply as an emissions reduction strategy. That being said, exhaust leaks are not “good” for your vehicle, nor are leaking or faulty EGR temperature sensors, so maintenance is key here, sooner or later!

An example of an EGR temperature sensor:

What are some of the symptoms of the code?

Symptoms of a P040D fault code may include:

  • Failure of state/provincial smog or emissions test
  • Engine noise (knocking, rattling, ticking, etc.)
  • Louder exhaust
  • Excessive exhaust odors

What are some common causes of the code?

Causes of this P040D engine code may include:

  • Faulty or damaged EGR (Exhaust Gas Recirculation) temperature sensor
  • Leak from the EGR temperature sensor gasket
  • Cracked or leaking exhaust pipe where the sensor is mounted
  • Burned wiring harness and/or sensor
  • Damaged wire(s) (open, short to power, short to ground, etc.)
  • Damaged connector
  • ECM (Engine Control Module) issue
  • Poor connections

What are the troubleshooting steps for P040D?

Note: For reference, this code is more commonly found on Ford Powerstroke and Dodge/Ram Cummins vehicles.
Basic Step #1

The first thing I would do here is check everything we can see by simply inspecting the sensor and the surrounding EGR system, looking for exhaust leaks in particular. Also check the sensor and its harness while you’re at it. Remember what I said about those high temperatures? They can wreak havoc on plastic and rubber insulated wires, so inspect them carefully.

TIP: Black soot can indicate an exhaust leak around the area.
Basic Step #2

Many EGR issues I’ve seen in the past have been caused by soot buildup in the exhaust, potentially caused by a number of things (poor maintenance, low-quality fuel, etc.). In this case, it’s no exception, so it may be wise to clean your EGR system or at the very least the temperature sensor. Be aware that sensors mounted in exhaust systems can feel seized when you attempt to remove them.

Remember that these sensors are subjected to significant temperature fluctuations, so a bit of heat using an oxyacetylene torch (not for the novice) can help loosen the sensor. Once the sensor is removed, use carburetor cleaner or a similar product to effectively soak the soot. Use a wire brush to dislodge soot in heavily built-up areas. When reinstalling the cleaned sensor, be sure to apply some anti-seize compound to the threads to help prevent seizing.

NOTE: The last thing you want to do here is break the sensor inside the manifold/exhaust. This could be a costly mistake, so be patient when loosening the sensor.
Basic Step #3

Check the sensor’s integrity by measuring the actual electrical values against the manufacturer-specific desired values. To do this, use your multimeter and follow the manufacturer-specific pinout test.