P0039 Turbocharger Bypass Valve Control Circuit Performance

Code P0039: Definition and Explanations

The diagnostic trouble code P0039 is a generic powertrain code (OBD-II). It indicates a problem with the range or performance within the control circuit of the turbocharger or supercharger’s wastegate bypass valve. This code applies to most vehicles (1996 and newer), including those from brands like VW, Dodge, Saab, Pontiac, Ford, and GM.

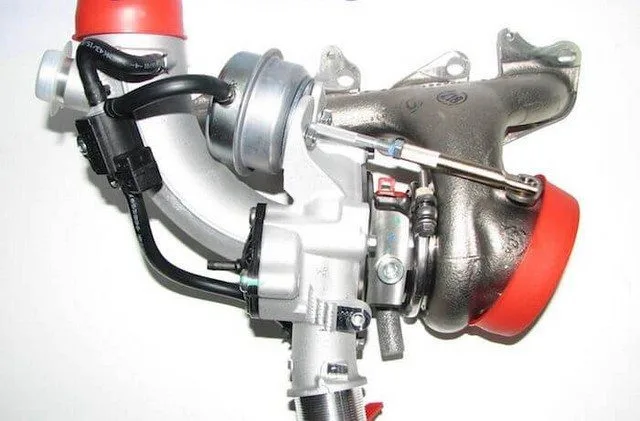
Function of the Wastegate Bypass Valve

The wastegate is an essential component. It is designed to release excess boost pressure generated by the turbo or supercharger, keeping it within a safe range (typically between 9 and 14 psi). This mechanism protects the engine from excessive pressure levels that could cause damage.

Its control is managed by the Powertrain Control Module (PCM). The PCM analyzes data from various sensors (including the Manifold Absolute Pressure (MAP) sensor) to calculate the optimal pressure. It then activates the wastegate via a solenoid, an electric motor, or, less commonly, a vacuum system. Code P0039 is triggered when the PCM detects an inability to properly regulate this pressure.

Severity and Symptoms of Code P0039

This fault is serious. Uncontrolled boost pressure can cause severe engine damage. It must be diagnosed and repaired urgently.

Common symptoms include:

  • 💨 Significant loss of engine power
  • 🔊 Abnormal whistling sounds from the turbo or ducts
  • 🌡️ Engine or transmission overheating
  • 🚗 Excessive exhaust smoke
  • ⚡ Premature fouling of spark plugs
  • ⚠️ Engine knocking (detonation)
  • ❗ Appearance of related fault codes (misfires, knock sensor)

Probable Causes of the P0039 Fault

Several elements can be the source of this code:

  • 🔌 Faulty electrical circuit (short circuit or open circuit) in the control system
  • 📟 Malfunctioning Manifold Absolute Pressure (MAP) sensor (most common cause)
  • ⚙️ Failed wastegate actuator or solenoid
  • 🚪 Wastegate valve itself stuck or defective
  • 🌀 Cracked, disconnected, or collapsed vacuum lines (on vacuum systems)
  • 🔋 Oxidized, loose, or damaged electrical connectors
  • 💻 Rare PCM or boost control module failure

Diagnosis and Repair Procedures

Before any intervention, consult the manufacturer’s Technical Service Bulletins (TSBs). Your problem might be a known issue with an official fix.

Recommended diagnostic steps are:

  1. Visually inspect all wiring, connectors, and vacuum lines for obvious damage.
  2. Using a multimeter, test the wastegate control circuit (solenoid) to check its resistance and for the absence of a short circuit.
  3. Use a diagnostic tool to check the MAP sensor real-time data and compare the values with the manufacturer’s specifications.
  4. Test the operation of the wastegate actuator (if possible with an activation tool).
  5. If all peripheral components are functional, a PCM failure becomes a possibility, although rare.

Tip: Always refer to the specific vehicle’s service manual for exact test values and procedures.

Conclusion and Call to Action

Code P0039 indicates a critical malfunction in the boost system. Ignoring this code can lead to costly repairs.

**Experiencing this issue?** Don’t wait! Have your vehicle diagnosed by a professional to avoid irreversible engine damage.

P003A Turbo / SC Boost Control Limit Exceeded

Code P003A: Turbo/Supercharger – Boost Control Limit Exceeded

The fault code P003A is a generic OBD-II code that indicates a critical problem within the boost control system of your turbocharged or supercharged engine. It signifies that the engine control module (ECM) has detected that the position of the “A” boost control arm (which actuates the turbine vanes) is outside its normal operating parameters, often triggering a limp mode to protect the engine.


Severity and Risks of Code P003A

  • Severity Level: Moderate to High
  • Ignoring this code can lead to:
    • An unbalanced air/fuel mixture (too rich or too lean).
    • Excessive boost, risking engine knock and damage to pistons or seals.
    • Insufficient boost, causing power loss and increased fuel consumption.
  • Ultimate Consequences: Severe engine damage, complete turbocharger failure, and failing emissions tests.

Symptoms of Code P003A

  • 🚨 Check Engine Light illuminated.
  • 🐢 Limp mode activated (reduced power, limited engine RPM).
  • 📉 Sudden power loss and weak acceleration.
  • 🔥 Abnormal smoke (black or blue) from the exhaust.
  • 🔧 Unusual noises (turbo whistling, metallic rattling).

Possible Causes of Fault P003A

  1. Mechanical Failures
    • Faulty, stuck, or broken wastegate or variable geometry turbo (VGT) solenoid.
    • Turbocharger vanes clogged with carbon deposits (soot).
    • Exhaust system leak (insufficient pressure to operate the turbo).
  2. Electrical Problems
    • Damaged wiring, frayed wires, short circuits, or corrosion.
    • Oxidized or loose connectors at the solenoid or ECM.
  3. Electronic Malfunctions
    • Internal failure of the boost control module.
    • Software error or incorrect ECM calibration.

Diagnosis and Repair: How to Fix P003A?

1. Preliminary Checks (Safety First!)

  • ⚠️ Allow the engine to cool completely (turbo components can exceed 600°C).
  • 🔍 Visual inspection: Look for exhaust leaks, damaged cables, corroded or loose connectors.

2. Control Solenoid Test

  • Disconnect the connector and measure the resistance with a multimeter (normal value typically between 10 and 30 Ω).
  • Check the mechanical lever: it should move freely (if allowed by the manufacturer). If stuck, cleaning or replacement is necessary.

3. Turbo Vane Cleaning (VGT)

  • Use a specific turbo cleaner (e.g., CRC Turbo Cleaner) to dissolve carbon deposits. Never use metal tools to scrape.

4. Wiring and ECM Testing

  • Check the solenoid’s supply voltage (12V with ignition on).
  • Use an advanced OBD-II scanner to analyze live data for vane position and ECM signals.

5. Replacement and Reset

  • Prefer quality OEM parts for replacing the solenoid or sensors.
  • After any repair, reset the ECM with your scanner to clear old adaptations and the fault code.

Practical Tips and Prevention

  • 🔧 Invest in a high-performance OBD-II scanner (Autel, Snap-On) for accurate diagnosis.
  • 💧 Use turbo cleaning additives preventatively during oil changes.
  • 📚 Always consult the manufacturer’s manual for resistance values and vehicle-specific procedures.
  • 🛠️ Seek professional help if basic checks are insufficient. Incorrect diagnosis can be costly.

Conclusion: Do Not Ignore P003A

Code P003A is a serious warning that should not be ignored. Prompt diagnosis and repair are essential to avoid catastrophic and very expensive engine damage. Start with simple checks (wiring, connectors) before considering costly part replacements. If you are unsure of your diagnosis, promptly consult a mechanic specialized in turbo systems.

💡 Need help diagnosing your vehicle? Share your scanner data in the comments or contact an expert for a personalized diagnosis.

P003B Turbo / SC Boost Control B Over Limit

P003B Turbo/Supercharger: Boost Control B Over Limit

The P003B trouble code is a generic OBD-II powertrain code indicating an issue with the Boost Control B system. It means the Engine Control Module (ECM) has detected that the position of the “B” boost control device is outside its expected learning limits.

Symptoms of Code P003B

When this trouble code is active, you may observe one or more of the following symptoms:

  • Weak or irregular engine power
  • Abnormal response to acceleration
  • Entry into reduced power mode (“limp mode”)
  • Excessive fuel consumption
  • Difficulty climbing hills
  • Intermittent handling issues

Possible Causes of Code P003B

Several malfunctions can cause this code:

  • Faulty or damaged boost control solenoid (stuck, broken, or bent lever)
  • Wiring problem (frayed wires, open circuit, short circuit)
  • Corrosion at connectors, pins, or ground points
  • Clogged turbocharger or compressor vanes
  • Faulty boost control module
  • Exhaust system leak
  • Internal ECM failure (less common)

Diagnosis and Troubleshooting

⚠️ Warning: Forced induction systems become extremely hot. Only work on a cold and protected engine.

Step 1: Visual Inspection

Locate the boost control solenoid (usually mounted on the turbocharger). Check its physical condition and ensure its lever moves freely without being stuck, bent, or broken.

Step 2: Check Adjustments and Corrosion

Some solenoids have adjustable levers. Consult your vehicle’s technical documentation for specifications. Inspect electrical connectors for signs of corrosion, oxidation, or water intrusion.

Step 3: Wiring Inspection

Follow the wiring harness connected to the solenoid. Carefully check that it hasn’t been burned, melted, or damaged by excessive engine or exhaust heat.

Step 4: Component Cleaning

Excessive soot buildup can clog turbocharger vanes. A thorough cleaning can sometimes resolve the issue.

Severity and Recommendation

The severity of this code is moderate to high. An unresolved issue in the boost system can lead to an unbalanced air/fuel mixture (too rich or too lean), eventually causing serious engine damage and increased fuel consumption. It is strongly recommended to proceed with diagnosis and repair as soon as the first symptoms appear.

🔧 Need help diagnosing or repairing your vehicle? Consult a professional mechanic with a diagnostic tool to interpret live data from your ECM and perform repairs safely.

P003C Cam A Profile Control Circ Perf Bank 1

What is the P003C Code?

The P003C trouble code is a generic OBD-II powertrain code that means “Camshaft Profile Control A Circuit Stuck – Bank 1.” It indicates a malfunction detected by the Powertrain Control Module (PCM) in the variable camshaft timing system, specifically on the intake camshaft (A) of engine bank 1.

Symptoms of the P003C Code

When this fault appears, you may observe one or more of the following symptoms:

  • ⛽ Reduced fuel economy
  • 🚗 Poor performance and loss of power
  • ⚡ Stalling or rough running
  • 💡 Check Engine light illuminated
  • 📉 Abnormal response to acceleration

Possible Causes of the P003C Fault

Several factors can cause this code:

  • Engine oil: Incorrect level, dirty or contaminated oil, incorrect viscosity, or sludge.
  • Electrical problems: Damaged wires, corroded or loose connectors, short circuit.
  • Control solenoid: Faulty or stuck camshaft solenoid.
  • Mechanical problem: Stuck or faulty Variable Valve Timing (VVT) control valve.
  • Control module: Possible PCM failure (less common).

How to Diagnose and Fix the P003C Code?

✅ Step 1: Check Engine Oil

Check the oil level and condition. If it is black, too old, or contaminated, perform an oil change and replace the oil filter using the viscosity recommended by the manufacturer.

✅ Step 2: Electrical Inspection

Locate the camshaft control solenoid on bank 1. Inspect the connector and wiring for wear, corrosion, or poor contact. Use a multimeter to check for continuity and the absence of short circuits.

✅ Step 3: Solenoid Test

Test the solenoid’s resistance. Compare the measured values with those specified in the service manual. If out of specification, replace the solenoid.

✅ Step 4: VVT System Cleaning

If the oil was very dirty, deposits may be blocking the mechanism. Cleaning the variable timing system may be necessary.

⚠️ Important Recommendation

This code affects performance and fuel economy. Although of moderate severity, it is advisable to have the vehicle diagnosed by a professional to avoid further damage.

Need help diagnosing this code? Consult a qualified mechanic or use an OBD2 diagnostic tool for further analysis.

P003D Camshaft Profile Control Circuit Stuck on Row 1

What is the P003D fault code?

The P003D diagnostic trouble code (DTC) is a generic powertrain code indicating an electrical or hydraulic issue in the camshaft profile control circuit on Bank 1 (cylinder #1 side). This OBD-II fault can affect various brands such as Volvo, Chevrolet, Ford, Dodge, Porsche, Land Rover, Audi, Hyundai, and Fiat. Diagnostic and repair procedures may vary depending on the model and engine configuration.

Role and Operation of the Camshaft

The camshaft plays a crucial role in managing the opening and closing of the intake and exhaust valves. It is driven by the crankshaft via a timing belt or chain.

The camshaft profile refers to the shape of the lobes, which can be dynamically modified (via switchable rocker arms or a variable system) to optimize air intake and engine efficiency at different RPMs.

The term “Bank 1” indicates that the fault is located on the engine side where cylinder #1 is located. Typically, we distinguish:

  • Bank 1: cylinder #1 side
  • Shaft A: intake camshaft
  • Shaft B: exhaust camshaft

Severity of the P003D Code

This fault is considered moderately severe. While it may not always prevent starting, it should not be ignored. Prolonged malfunction can lead to:

  • Decreased engine performance
  • Increased fuel consumption
  • Premature engine damage
  • Increased pollutant emissions

A prompt diagnosis is recommended.


Symptoms of the P003D Code

The most common signs include:

  • 📉 Reduced engine power
  • Abnormal response to acceleration
  • Increased fuel consumption
  • 🚗 Irregular idle or rough driving
  • 🔧 Illumination of the engine management light
  • 🔋 Degraded engine performance

Possible Causes of the P003D Code

Several elements can be the source of this fault:

  • 🔸 Degraded, poor quality, or incorrect viscosity engine oil
  • 🔸 Faulty camshaft profile control solenoid
  • 🔸 Blocked or clogged hydraulic valve or actuator
  • 🔸 Wiring issue (break, short circuit, corrosion)
  • 🔸 Damaged or oxidized electrical connectors
  • 🔸 Engine Control Module (ECM) failure

Diagnosis and Repair of the P003D Code

Step 1: Checking Engine Oil

Check the oil level and condition
Replace oil and filter if necessary
Use oil with the viscosity recommended by the manufacturer

⚠️ Contaminated or overly viscous oil can block hydraulic circuits and damage the system.

Step 2: Electrical and Connector Inspection

🔍 Locate the wiring harness and connectors of the variable camshaft system
🔌 Check the condition of wires and connectors (breaks, corrosion, oxidation)
🧹 Clean contacts with electrical contact cleaner spray

Step 3: Solenoid and Control Module Testing

🔋 Check solenoid resistance and power supply using a multimeter
💻 Use an OBD2 scanner to check live data and additional fault codes
🔧 Replace the solenoid or actuator if necessary

Step 4: Consulting Technical Data

📘 It is essential to consult the vehicle’s technical documentation (repair manual, wiring diagrams) for precise measurement values and a procedure adapted to the model.


Conclusion and Call to Action

The P003D code indicates a problem in the variable camshaft profile control circuit on Bank 1. Prompt intervention is recommended to prevent any worsening.

🔧 Recommended solution: Entrust the diagnosis and repair to a qualified mechanic with the appropriate equipment.

🚗 Have you encountered this fault? Share your experience or ask your questions in the comments to help the community!

💡 Tip: Regular maintenance with quality engine oil is the best prevention for this type of fault.

P003E Cam A Profile Control Circuit Performance Bank 2

Code P003E: Camshaft Profile Control Circuit Performance Problem (Bank 2)

The error code P003E indicates a performance issue or blockage in the camshaft profile control circuit on engine Bank 2. This crucial system optimizes engine efficiency by dynamically adjusting valve timing.

Meaning and Operation

  • Definition: Malfunction detected in the camshaft profile control circuit on engine Bank 2.
  • System Role: The Variable Valve Timing (VVT) system adjusts valve timing to optimize performance, fuel economy, and reduce emissions based on engine load and RPM.
  • Bank 2: In V or flat engines, Bank 2 refers to the cylinder bank that doesn’t contain cylinder number 1. A/B designations typically correspond to intake/exhaust camshafts.

Severity Level of Code P003E

⚠️ Medium Level: This code should not be ignored. If left untreated, it can lead to:

  • Significant reduction in engine performance
  • Increased fuel consumption
  • Damage to hydraulic or mechanical components
  • Premature engine wear

Tip: Prompt diagnosis is recommended to avoid more costly repairs.

Symptoms of Code P003E

  • 🔧 Check Engine Light (CEL) illuminated
  • 📉 Power loss and delayed throttle response
  • ⛽ Noticeable increase in fuel consumption
  • 🛑 Rough idle or abnormal vibrations
  • 🔌 Possible electrical issues

Possible Causes of Code P003E

  1. Engine Oil Problems:
    • Contaminated oil, incorrect viscosity, or improper oil level
    • Sludge formation due to lack of maintenance
  2. Electrical and Mechanical Failures:
    • Faulty oil control solenoid (common issue)
    • Stuck or clogged hydraulic valve
    • Damaged wiring, short circuits, or faulty connectors
  3. Engine Control Module (ECM) Problems (less common)

Diagnosing Code P003E: Step-by-Step Guide

1. Engine Oil Check

  • ✅ Check oil level and adjust if necessary
  • ✅ Inspect oil condition:
    • Black or sludgy oil → Perform immediate oil change and filter replacement
    • Use only the recommended viscosity specified by the manufacturer

2. Electrical Circuit Inspection

  • 🔍 Thoroughly examine wiring harnesses and connectors:
    • Look for damaged wires, melted insulation, or signs of corrosion
    • Check connector condition (oxidized, bent, or improperly engaged pins)
    • Clean contacts with electrical contact cleaner

3. Oil Control Solenoid Test

  1. Locate the solenoid (consult your vehicle’s technical manual)
  2. Measure resistance with a multimeter:
    • Compare obtained values with manufacturer specifications (typically 10-20 Ω)
  3. Test electrical power supply (12V) with ignition on

4. Mechanical Inspection

  • 🔧 Inspect the profile control valve:
    • Perform partial disassembly to check for possible obstructions (sludge, debris)
    • Thoroughly clean oil passages if necessary

5. Advanced ECM Diagnosis

  • 🔌 Look for related codes (P0011, P0021, etc.)
  • 🔄 Reset the ECM after repair:
    • Use an OBD-II scanner to clear the P003E code
    • Perform a complete drive cycle to confirm code disappearance

Recommended Repairs

  • 🔧 Replacement of faulty components:
    • Defective control solenoid
    • Clogged or damaged valve
    • Faulty wiring or connectors
  • 🛢️ Complete oil change: Strictly follow manufacturer recommended intervals
  • 🔄 ECM reset with professional OBD-II scanner

Important Tips and Prevention

  • Regular maintenance: Clean, quality oil prevents 80% of problems related to this code
  • Technical documentation: Always consult specific technical bulletins for your make and model
  • Professional expertise: If unsure about ECM or internal components, promptly consult a qualified mechanic

🚗 Warning: An unresolved P003E code can lead to premature wear and serious engine damage. Address immediately when first symptoms appear!

P003F Camshaft Profile Control Circuit Stuck on Row 2

P003F: Camshaft Profile Control Circuit Stuck (Bank 2)

The P003F fault code is a generic powertrain code indicating a problem with the camshaft profile control circuit on engine bank 2. This OBD-II code applies to many manufacturers such as Audi, Chevrolet, Dodge, Fiat, Ford, Hyundai, Land Rover, Porsche, and Volvo. Precise diagnostic procedures vary by brand, model, year, and engine configuration.

Understanding Code P003F and the Role of the Camshaft

The camshaft is a critical engine component responsible for precisely opening and closing the valves. It is mechanically connected to the crankshaft via a timing belt or chain. The “profile” refers to the shape of the cam lobes. Modern systems use variable profiles, dynamically adjusting valve lift and duration to optimize performance, torque, and fuel efficiency at different engine speeds.

The “Bank 2” designation is crucial. In a V or flat engine, Bank 1 contains cylinder number 1. Therefore, Bank 2 is the other one. It is essential to consult your vehicle’s technical documentation to correctly identify the affected bank and camshaft (intake or exhaust) before any intervention.

The Engine Control Module (ECM) triggers code P003F and illuminates the Malfunction Indicator Lamp (Check Engine) when it detects an electrical or hydraulic anomaly preventing profile modulation on bank 2.

Severity of Code P003F

The severity of this code is moderate to high. While it may sometimes only cause reduced performance, it often indicates a problem that can damage other engine components. It is strongly recommended to have the problem diagnosed and repaired by a professional as soon as possible.

Symptoms of Code P003F

  • Malfunction Indicator Lamp illuminated
  • Reduced performance and acceleration
  • Abnormal throttle response
  • Decreased fuel economy
  • Rough idle
  • Loss of power or “flat spots”

Possible Causes of Code P003F

  • Engine oil-related issues: Contaminated oil, incorrect level, unsuitable viscosity, or overdue oil change interval.
  • Faulty or stuck profile control solenoid.
  • Electrical problems: Broken wires, damaged or corroded connectors, short circuit.
  • Internal mechanical problem: Stuck hydraulic valve or actuator.
  • Engine Control Module (ECM) failure (less common).

Diagnostic Procedure for Code P003F

Step 1: Engine Oil Check

Check the oil level, quality, and viscosity. Black, contaminated, or poor-quality oil is a common cause. Replace the oil and filter if necessary, using only the standard and viscosity recommended by the manufacturer. Poor maintenance is the primary cause of many hydraulic malfunctions.

Step 2: Visual and Electrical Inspection

Locate the profile control solenoid on bank 2 (using a repair manual). Carefully inspect the electrical connector, wires, and harness for any signs of damage, corrosion, or looseness. Clean the connectors with a suitable product and ensure they are securely fastened.

Step 3: Advanced Diagnostics

The following steps (solenoid testing, checking electrical signals, hydraulic pressure tests) require specialized diagnostic equipment and technical expertise. It is highly recommended to entrust the remainder of the diagnosis to a qualified mechanic to avoid further damage.

🚗 Need a professional diagnosis for your vehicle? Don’t let a timing-related problem get worse. Contact a partner garage now for an accurate quote and reliable repair.

P0040 O2 Sensor Signals Swapped Bank 1 Bank 2 Sensor 1

Code P0040: O2 Sensor Signals Swapped (Bank 1 / Bank 2, Sensor 1)

The generic OBD-II trouble code P0040 indicates that the Powertrain Control Module (PCM) has detected that the signals from the first oxygen (O2) sensors on banks 1 and 2 have been swapped. This issue disrupts the air-fuel mixture management and must be resolved quickly to avoid damaging expensive components, such as the catalytic converter.

What Does Code P0040 Mean?

This code applies to vehicles equipped with a multi-bank cylinder engine (V6, V8). The PCM uses data from the O2 sensors to adjust fuel injection in real-time on each bank. Code P0040 triggers when the computer notices that the sensor on bank 1 is responding to adjustments intended for bank 2, and vice-versa. Sensor 1 refers to the first oxygen sensor, located upstream of the catalytic converter.

Symptoms and Severity Level

Common symptoms include:

  • Malfunction Indicator Lamp (MIL) illuminated or flashing
  • Reduced power and entry into limp mode
  • Increased fuel consumption
  • Unstable idle or rough engine operation

Severity Level: High. Ignoring this code can lead to overheating and destruction of the catalytic converter, a very expensive part. Immediate action is recommended.

Possible Causes of Fault P0040

The most likely causes are:

  • O2 sensor connectors swapped (most common cause, often after maintenance)
  • O2 sensor wiring crossed, damaged, chafed, or short-circuited
  • PCM failure (rare)

Diagnosis and Repair Solutions

1. Preliminary Check: Have you recently had an O2 sensor replaced or work done on the exhaust system? If so, it is very likely that the connectors were reconnected in the wrong order.

2. Visual Inspection: Carefully inspect the wiring and connectors of the first O2 sensors (located between the engine and the catalytic converter). Look for signs of damage, burns, or exposed wires.

3. Swapping Connectors (Test): If you are a DIYer, a simple first step is to turn off the engine and manually swap the connectors of the two O2 sensors on bank 1 and bank 2. Then, clear the codes with your diagnostic scanner and perform a road test to see if the fault returns.

4. Checking PCM Wiring: If the problem persists, inspect the wiring harness on the PCM side. Using a vehicle-specific repair manual, verify that each wire is correctly connected to its dedicated pin. Perform a continuity test to identify any broken wires or short circuits.

5. Advanced Diagnostic Tool: Using a tool that can monitor and graph the O2 sensor signals in real-time can help confirm the signal swap.

PCM Failure: This is a very rare cause. If all other checks prove unsuccessful, entrust the diagnosis to a qualified technician to test and, if necessary, reprogram or replace the module.

Call to Action: Code P0040 is often simple to resolve. Start with a thorough visual inspection of the connectors. If the problem is beyond your skills, consult a professional for an accurate diagnosis and to prevent any further damage.

P0041 O2 Sensor Signals Swapped, Bank 1, Bank 2, Sensor 2

What is the P0041 fault code?

The P0041 fault code is a generic OBD-II diagnostic trouble code (DTC) related to the powertrain. It indicates that the signals from the oxygen sensors (O2) located downstream of the catalytic converter, specifically sensor 2 of bank 1 and sensor 2 of bank 2, have been swapped by the vehicle’s computer (PCM). This issue disrupts the air-fuel mixture management and can affect brands such as BMW, Ford, Audi, VW, Dodge, and many others.

Operation and Causes of the Fault

The PCM uses data from the O2 sensors to regulate fuel injection. The P0041 code is triggered when it detects that the sensor from one bank is responding to adjustments intended for the other bank. This code is specific to multi-cylinder engines (V6, V8) and may appear along with a P0040 code.

Common Symptoms

  • Malfunction Indicator Lamp (MIL) illuminated or flashing
  • Reduced performance and rough idle
  • Increased fuel consumption

Probable Causes

  • Reversed O2 sensor connectors (most common cause)
  • Damaged, short-circuited, or crossed sensor wiring
  • PCM failure (rare)

Diagnosis and Solutions for the P0041 Code

Start by checking if any recent work has been done near the O2 sensors or exhaust system. Recent maintenance is often linked to reversed connectors.

Diagnostic Steps

  1. Visual Inspection: Check the wiring and connectors of the downstream O2 sensors. Look for signs of burning, wear, or incorrect connections.
  2. Reversal Test: If you are comfortable, try manually swapping the connectors of the two affected sensors. Then clear the codes and perform a road test to see if the fault returns.
  3. PCM Wiring Check: Use a repair manual to verify that the wires are correctly connected to the PCM. Perform a continuity test to identify any broken wires or short circuits.
  4. Using a Diagnostic Tool: With an advanced scanner, graph the O2 sensor readings to compare their activity and confirm the signal swap.

Repair and Recommendations

If reversing the connectors resolves the issue, no further repairs are needed. For damaged wiring, repair or replace the affected wires. PCM failure is rare; have its diagnosis and replacement handled by a qualified technician.

Need help diagnosing your vehicle? Consult a professional for an accurate diagnosis and to avoid any risk of damage.

P0042 Heated Oxygen Sensor Control Circuit B1S3

Code P0042: Definition and Explanation

The diagnostic trouble code P0042 is a generic powertrain code applicable to most vehicles equipped with the OBD-II standard (Volkswagen, Audi, Mazda, Ford, Chevrolet, etc.). It indicates a malfunction in the heater control circuit of the Heated Oxygen Sensor (HO2S) located on Bank 1, Sensor 3 (B1S3). Although generic, specific diagnostic procedures may vary depending on the vehicle’s make and model.

Role of the Heated Oxygen Sensor (HO2S)

Fuel-injected engines use oxygen sensors placed before and after the catalytic converter to measure the oxygen content in the exhaust gases. This data allows the Engine Control Module (ECM/PCM) to continuously adjust the air-fuel mixture to maintain the optimal stoichiometric ratio of 14.7:1.

The integrated heater circuit in the sensor allows for rapid temperature rise to provide reliable data from a cold start. An HO2S typically has three or four wires: two for the measurement signal sent to the ECM, and one or two others dedicated to the power and ground for the heater circuit.

The P0042 code specifically concerns the third downstream sensor on Bank 1 (the engine side containing cylinder number 1). Its heater circuit may be powered or grounded directly by the PCM/ECM.

⚠️ Warning: Always handle a cold exhaust system. After recent operation, it can reach extremely high temperatures and cause serious burns.

Symptoms of Code P0042

  • Illumination of the Malfunction Indicator Lamp (MIL) on the dashboard.
  • Likely absence of other drastic symptoms (normal driving), as the fault only affects the sensor preheating.
  • This sensor, located after the catalytic converter, is primarily used to monitor its efficiency. It does not directly influence the air-fuel mixture.

Possible Causes of the Fault

Several elements can be the cause of code P0042:

  • Open circuit inside the oxygen sensor itself.
  • Cut or corroded power or ground wires leading to the B1S3 sensor.
  • Poor exhaust system ground (corrosion or broken strap).
  • Faulty wiring between the PCM/ECM and the sensor connector.
  • Rare failure of the PCM/ECM itself.

Diagnosis and Solutions for Resolving P0042

1. Visual Inspection

Start with a thorough inspection of the wiring and connector of the B1S3 sensor. Look for any signs of damage, corrosion, loose wires, or burns.

2. Heater Resistance Test

Disconnect the sensor connector. Using a digital multimeter (DVOM) in Ohms (Ω) mode, measure the resistance between the pins of the heater circuit (refer to the repair manual or an electrical diagram to identify the pins). An infinite resistance (OL) or a reading outside specifications indicates an open internal heater circuit. In this case, replacement of the oxygen sensor is necessary.

3. Ground Check

Using the DVOM, check the continuity between the ground pin of the connector (harness side) and a known good chassis ground. A lack of continuity indicates a problem with the ground wire or connection.

4. Power Supply Check

Reconnect the sensor. With the DVOM set to DC Volts, probe the heater circuit’s power supply wire at the connector (back-probe). Turn the ignition on (or start the engine for a more reliable test during a cold start). You should measure battery voltage (approx. 12V). If the power supply is absent, the problem lies in the power circuit controlled by the PCM/ECM.

5. Conclusion

If the sensor, its power supply, and ground are good, a PCM/ECM failure, although rare, is possible. Consult live data stream data with an advanced scan tool to confirm.

🔧 Need help? Electrical diagnosis can be complex. If you are not comfortable with these procedures, it is recommended to consult a professional mechanic or a certified technician for an accurate diagnosis.