Understanding the Basics of Automotive Electrical Repair: A Complete Guide

Understanding the basics of automotive electrical repair is essential for every vehicle owner. The electrical systems in modern cars control vital functions, from starting the engine to operating electronic equipment. This article explores the fundamental principles of automotive electrical repair, common issues, and diagnostic methods.

Common Automotive Electrical Problems

  1. Dead Battery: A weak or faulty battery is one of the most widespread electrical issues. It can cause starting difficulties, intermittent power loss, and malfunctioning electrical accessories.

  2. Failing Alternator: The alternator charges the battery and powers the electrical system when the engine is running. A faulty alternator leads to a constantly drained battery and failures of electrical components.

  3. Defective Starter: The starter engages the flywheel to initiate the starting process. A failing starter manifests as difficulties starting the vehicle or characteristic clicking noises.

  4. Blown Fuses: Fuses protect the electrical circuit from power surges. A blown fuse can interrupt the operation of multiple electrical equipment simultaneously.

Diagnosing Automotive Electrical Problems

When facing an automotive electrical issue, a methodical diagnostic approach helps effectively identify and resolve the malfunction. Here are the fundamental steps:

  • Check the Battery: Visually inspect the battery for corrosion or damage. Use a multimeter to check the voltage and ensure it matches the manufacturer’s specifications.

  • Inspect the Alternator: If the battery is in good condition, check the alternator. A faulty alternator often shows signs such as a battery warning light on the dashboard or varying headlight brightness.

  • Test the Starter: A failing starter typically produces a sharp click when starting without the engine turning over. Verification requires specialized tools and safety precautions.

  • Check the Fuses: Consult the owner’s manual to locate the fuse box. Visually inspect each fuse or use a tester to identify blown ones.

Importance of Professional Expertise

Although some basic diagnostics are accessible to individuals, the increasing complexity of automotive electrical systems often requires the intervention of qualified professionals. Specialized technicians have advanced diagnostic equipment and specific training to handle complex electrical failures.

Preventive Maintenance Techniques

Adopting good maintenance practices significantly reduces the risk of electrical failures. Regular maintenance includes cleaning battery terminals, checking electrolyte levels, visual inspection of wiring, and monitoring alternator output voltage. These simple actions extend the lifespan of electrical components and improve vehicle reliability.

Evolution of Automotive Electrical Systems

Automotive electrical systems have evolved significantly, now incorporating electronic control units, multiplexed networks, and sophisticated driving aids. This growing complexity demands specialized technical skills and appropriate diagnostic equipment to ensure effective and lasting repairs.

Egr off solution renault edc16c3

EGR Solution EDC16C3

(more…)

Cutting-Edge Technologies in Renault Vehicles

Renault, one of the most iconic names in the automotive industry, has always been at the forefront of technological innovation. Over the decades, the French company has transformed the way we drive and interact with our vehicles. In this article, we will explore some of the cutting-edge technologies that have enabled Renault to remain at the forefront of the automotive industry.

Renault EASY LINK: The Intuitive Infotainment System

One of Renault’s most notable contributions to the modern driving experience is the Renault EASY LINK infotainment system. This system offers an intuitive interface that integrates navigation, entertainment, and connectivity functions. With its responsive touchscreen, advanced voice controls, and smartphone compatibility, EASY LINK ensures that drivers stay connected and informed safely while behind the wheel.

Renault E-TECH: The Electrification Revolution

As the world moves towards cleaner mobility, Renault has committed to being a leader in the field of electrification. The Renault E-TECH system is a perfect example of this commitment. E-TECH offers a range of electric and plug-in hybrid vehicles that deliver exceptional performance without compromising energy efficiency. Whether it’s the all-electric Renault ZOE or the Renault Captur E-TECH Plug-in Hybrid, these vehicles embody the future of eco-friendly driving.

Renault ADAS: Advanced Safety

Safety is a top priority at Renault, and ADAS (Advanced Driver Assistance Systems) technology plays a crucial role in this aspect. Renault’s ADAS systems include features such as lane-keeping assist, blind-spot monitoring, automatic emergency braking, and much more. These advanced technologies aim to make every journey safer and reduce the risk of accidents.

Renault EASY DRIVE: The Future of Autonomous Driving

Renault is not lagging in the race for autonomous driving. The Renault EASY DRIVE project aims to gradually introduce autonomous driving features into the brand’s vehicles. This includes automated parking technology, semi-autonomous highway driving, and even the vision of fully autonomous driving in the future. Renault strives to make driving more convenient, safer, and more relaxing.

Renault E-TECH Electric: Battery Innovation

Electric vehicles would be nothing without advanced batteries, and Renault has heavily invested in developing its own battery technology. Renault E-TECH Electric batteries are designed to offer exceptional range, fast charging, and long-term durability. This allows drivers to travel long distances with confidence without worrying about range.

Conclusion

Renault continues to push the boundaries of automotive technology to provide drivers with an exceptional driving experience. From intuitive infotainment to autonomous driving and electrification, Renault remains a pioneer in the industry. As the automotive industry rapidly evolves towards a cleaner and more connected future, Renault is ready to play a leading role in this transformation.

With its cutting-edge technologies and commitment to innovation, Renault continues to shape the future of mobility, offering drivers worldwide smarter, safer, and more environmentally friendly driving.

The Hybrid Revolution of Renault: Combining Performance and Sustainability

The automotive industry is constantly evolving, seeking innovative solutions to address growing environmental concerns while continuing to deliver high-level performance. In this quest, Renault has taken a significant step forward by developing its range of hybrid vehicles, combining the best of both worlds: energy efficiency and performance.

Renault’s E-Tech Technology: A Benchmark in Hybridization

Renault has introduced its E-Tech technology, an innovative hybrid system, in several of its flagship models. This technology is the result of many years of research and development, aimed at providing an optimal driving experience while reducing the carbon footprint of vehicles.

Performance Without Compromise

One of the main advantages of Renault’s hybrid vehicles is their impressive performance. Thanks to the combination of an electric motor and a combustion engine, these vehicles offer increased power and rapid acceleration while maintaining minimal fuel consumption. Drivers can thus enjoy the instant power of electricity during acceleration while benefiting from the extended range of the combustion engine on long journeys.

Fuel Savings and Emission Reduction

Renault’s hybrid vehicles are designed to be particularly fuel-efficient. Thanks to intelligent energy management, the electric motor is used to the maximum during city driving, thereby reducing fuel consumption and pollutant emissions. This not only saves money at the pump but also helps reduce the carbon footprint.

A Smooth Transition Towards Electrification

Renault’s hybrid vehicles are also designed to facilitate the transition to full electrification. They are equipped with rechargeable batteries, meaning drivers can charge their vehicles at home or at public charging stations. This flexibility allows drivers to choose between fully electric driving for short trips or hybrid use for longer journeys, thus offering a smooth transition to complete electrification.

The Renault Hybrid Range

The Renault hybrid range spans several models, including the Renault Clio E-Tech, the Renault Captur E-Tech, and the Renault Mégane E-Tech. Each of these vehicles offers a unique driving experience while adhering to the strictest environmental standards.

Conclusion

With its E-Tech technology and growing range of hybrid vehicles, Renault is establishing itself as a major player in the transition towards more sustainable mobility without compromising performance. The combination of power, fuel economy, and emission reduction makes Renault’s hybrid vehicles a smart choice for environmentally conscious drivers who do not want to give up the pleasure of driving. Renault is thus paving the way for a cleaner and more efficient future on the road.

Dacia DF771 Fault Codes: Everything You Need to Know for Diagnosis and Repair

What is a fault code?

A fault code is a message generated by the vehicle’s onboard diagnostic system. It indicates that a problem has been detected in one or more components of the vehicle. Fault codes are typically composed of five characters:

  • The first character is a letter that identifies the system involved.
  • The second character is a number that identifies the type of problem.
  • The last three characters are numbers that identify the specific component causing the problem.

How to read a fault code?

There are several ways to read a fault code on a Dacia DF771:

  • Use an OBD-II fault code reader.
  • Check the engine light (MIL).
  • Count the number of flashes of the injection light.

OBD-II Fault Code Reader

An OBD-II fault code reader is an inexpensive tool that can be purchased at most auto parts stores. It plugs into the vehicle’s OBD-II port, which is usually located under the dashboard. The code reader will display the fault code and a description of the problem.

Engine Light (MIL)

The engine light is an orange or red light located on the dashboard. It illuminates when a fault code is recorded. If the engine light is on, it is important to have the problem diagnosed as soon as possible.

Injection Light

The injection light is an orange light located on the dashboard. It flashes when a fault code is recorded. The number of flashes can be used to identify the fault code.

List of Common Dacia DF771 Fault Codes

Here are some of the most common fault codes for the Dacia DF771:

  • P0087: Fuel Pressure Too High
  • P0101: Mass Air Flow (MAF) Sensor – Air Intake Circuit
  • P0171: Fuel System Too Lean
  • P0299: Turbocharger/Supercharger – Underboost Condition
  • P0420: Catalyst System Efficiency Below Threshold
  • P0500: Vehicle Speed Sensor – Malfunction

How to Repair a Fault Code?

Repairing a fault code depends on the cause of the problem. In some cases, the issue can be resolved by performing a simple system reset. In other cases, it may be necessary to replace a faulty component.

Tips for Repairing Fault Codes

  • Consult a qualified mechanic.
  • Use genuine spare parts.
  • Follow the workshop manual instructions.

Conclusion

Fault codes can be a valuable tool for diagnosing and repairing problems with your Dacia DF771. By understanding what fault codes are and how to read them, you can avoid costly repairs and keep your vehicle in good working condition.

  • Dacia DF771
  • Fault Codes
  • OBD-II
  • Engine Light (MIL)
  • Injection Light
  • Diagnostic
  • Repair
  • Mechanic
  • Spare Parts
  • Workshop Manual

P0700 Transmission Control System Malfunction

What does it mean?

Many vehicles have a control module for the automatic transmission called the Transmission Control Module (TCM). The Engine Control Module (ECM) communicates with the TCM to monitor the automatic transmission for faults. If the TCM detects a fault in the automatic transmission and sets a transmission-related fault code, the ECM is also notified and sets a P0700 in the ECM memory.

This illuminates the Malfunction Indicator Light (MIL) to inform the driver that there is a problem. If this code is present and the MIL is on, it essentially means that there is at least one transmission code set in the TCM memory. P0700 is an informational code only. It does not indicate a direct fault in the engine, only a general fault in the transmission. Further diagnosis is required to identify the transmission fault. This requires a scan tool that will communicate with the transmission module.

Symptoms

Symptoms of a DTC P0700 may include:

  • Illumination of the Malfunction Indicator Light (MIL)
  • The transmission may exhibit handling issues such as slipping, etc.

Causes

More often than not, the cause of this code is that there is some kind of transmission problem. The TCM has detected the issue and set a code. P0700 means that an error code is stored in the TCM. However, this does not rule out the possibility of a faulty PCM or TCM (unlikely).

Possible Solutions

For a P0700, the only real solution is to acquire a scan tool that will communicate with the transmission control module. Retrieving this code from the TCM will be the first step in repairing the transmission fault.

If the TCM-compatible scan tool does not communicate with the transmission control module, it is a good indication that there may be a problem with the TCM itself.

OBD2 Code P1442 Oldsmobile: Diagnosis and Solutions Guide

Understanding OBD2 Code P1442 in Oldsmobile Vehicles

When your Oldsmobile’s check engine light illuminates and diagnostic scanning reveals code P1442, you’re dealing with a specific emission control system malfunction. This diagnostic trouble code indicates a problem within the Evaporative Emission Control (EVAP) system, specifically related to the detection of a small leak during non-purge conditions. The P1442 code is manufacturer-specific to General Motors vehicles, including various Oldsmobile models, and requires specialized knowledge for accurate diagnosis and repair.

What Does P1442 Code Mean?

P1442 is defined as “Evaporative Emission (EVAP) System Leak Detection Pump Switch or Mechanical Fault.” This code triggers when the vehicle’s Powertrain Control Module (PCM) detects an unexpected condition in the EVAP system’s leak detection circuit during monitoring cycles. Unlike generic EVAP codes, P1442 specifically points toward issues with the leak detection pump switch circuit or mechanical components within the leak detection system.

How the EVAP System Works in Oldsmobile Models

The EVAP system in Oldsmobile vehicles is designed to prevent fuel vapors from escaping into the atmosphere. Key components include:

  • Charcoal canister for vapor storage
  • Purge valve/solenoid for controlled vapor release
  • Leak Detection Pump (LDP) for system integrity testing
  • Fuel tank pressure sensor for monitoring
  • Various vacuum lines and connectors

The system operates by storing fuel vapors in the charcoal canister and periodically purging them into the engine intake for combustion. The leak detection system tests for integrity by creating vacuum and monitoring pressure changes.

Common Causes of P1442 Code in Oldsmobile Vehicles

Diagnosing P1442 requires systematic investigation of multiple potential failure points. Understanding these common causes will help streamline your diagnostic process and prevent unnecessary part replacements.

Primary Mechanical and Electrical Causes

  • Faulty Leak Detection Pump (LDP): The most common cause, where the pump fails to create proper vacuum or the internal switch malfunctions
  • Vacuum Switch Malfunction: Electrical failure in the vacuum switch circuit that monitors LDP operation
  • EVAP System Leaks: Small leaks in hoses, connections, or the fuel tank that prevent proper vacuum buildup
  • Wiring Issues: Damaged, corroded, or shorted wires in the LDP circuit or vacuum switch circuit
  • Poor Electrical Connections: Loose or corroded connectors at the LDP or PCM

Secondary System Components to Inspect

  • Clogged or restricted EVAP lines and hoses
  • Faulty purge valve sticking open or closed
  • Damaged charcoal canister
  • Defective fuel cap (though usually triggers different codes)
  • Problems with vacuum reservoir or related components

Diagnostic Procedure for P1442 Code

Proper diagnosis of P1442 requires a systematic approach using appropriate tools and following manufacturer-specific procedures. Always begin with visual inspection before proceeding to electrical testing.

Step-by-Step Diagnostic Process

Follow this structured approach to accurately identify the root cause of P1442:

  • Step 1: Perform comprehensive visual inspection of all EVAP system components, hoses, and electrical connections
  • Step 2: Check for technical service bulletins (TSBs) specific to your Oldsmobile model and year
  • Step 3: Test the leak detection pump operation using a scan tool capable of activating output controls
  • Step 4: Perform electrical testing of the LDP circuit, including voltage, ground, and signal tests
  • Step 5: Conduct smoke testing of the entire EVAP system to identify any vacuum leaks
  • Step 6: Verify proper operation of the vacuum switch and related sensors

Required Tools for Effective Diagnosis

  • Advanced OBD2 scanner with bidirectional controls
  • Digital multimeter for electrical testing
  • Smoke machine for leak detection
  • Vacuum gauge and hand vacuum pump
  • Vehicle-specific wiring diagrams
  • Basic hand tools for component removal

Repair Solutions and Prevention Strategies

Once you’ve identified the specific cause of P1442, implementing the correct repair is crucial for permanent resolution. Understanding the most effective repair strategies will save time and prevent recurrence.

Common Repair Procedures

Based on diagnostic findings, repairs typically involve:

  • Leak Detection Pump Replacement: The most frequent repair, requiring proper installation and calibration
  • Vacuum Switch Replacement: Addressing electrical failures in the monitoring circuit
  • EVAP Line Repair: Replacing cracked, brittle, or damaged vacuum lines and connections
  • Wiring Repair: Fixing damaged wires, connectors, or addressing corrosion issues
  • Component Cleaning: Addressing clogged lines or filters that restrict proper operation

Post-Repair Verification and Testing

After completing repairs, thorough verification is essential:

  • Clear the code and perform multiple drive cycles to ensure it doesn’t return
  • Use your scan tool to monitor EVAP system readiness monitors
  • Verify proper LDP operation through actuator tests
  • Confirm no additional codes are present
  • Check for proper fuel system operation and performance

Technical Specifications and System Operation

Understanding the technical aspects of the EVAP leak detection system provides valuable insight for accurate diagnosis and prevents misdiagnosis of P1442.

Leak Detection System Operation Principles

The leak detection system in Oldsmobile vehicles operates on precise principles:

  • The PCM activates the Leak Detection Pump during specific driving conditions
  • The LDP creates vacuum in the EVAP system and the vacuum switch monitors this action
  • System integrity is verified by maintaining vacuum for specified durations
  • The PCM compares expected vacuum patterns with actual performance
  • Deviations from expected parameters trigger P1442 when outside tolerance

Critical Technical Parameters

  • Leak detection typically tests for leaks as small as 0.020 inches
  • System vacuum specifications vary by model but generally range from 8-12 inches H2O
  • Test duration and conditions are model-specific and temperature-dependent
  • Electrical specifications for LDP and vacuum switch circuits must match factory specifications
  • Response times and switching frequencies are critical for proper operation

Successfully diagnosing and repairing P1442 requires understanding both the electrical and mechanical aspects of the EVAP system. By following systematic diagnostic procedures and using appropriate tools, this code can be permanently resolved, restoring your Oldsmobile’s emission system to proper operation and ensuring compliance with environmental standards.

P0701 Transmission Control System Range/Performance

What Does It Mean?

This diagnostic trouble code (DTC) is a generic powertrain code, meaning it applies to all vehicles from 1996 onwards (Ford, Honda, Mazda, Mercedes, VW, etc.). Although generic, specific repair steps may vary by make/model.

If your vehicle’s dashboard has displayed a malfunction indicator lamp (MIL) along with a stored code P0701, it simply means the powertrain control module (PCM) has detected a malfunction in the transmission control system. This code applies exclusively to vehicles equipped with automatic transmissions.


What Does It Mean?


This diagnostic trouble code (DTC) is a generic powertrain code, meaning it applies to all vehicles from 1996 onwards (Ford, Honda, Mazda, Mercedes, VW, etc.). Although generic, specific repair steps may vary by make/model.

If your vehicle’s dashboard has displayed a malfunction indicator lamp (MIL) along with a stored code P0701, it simply means the powertrain control module (PCM) has detected a malfunction in the transmission control system. This code applies exclusively to vehicles equipped with automatic transmissions.


While most transmission controllers (for OBD-II equipped vehicles) are integrated into the PCM, some manufacturers still choose to use a standalone transmission control module (TCM). Transmission-related codes are stored as P-codes, regardless of the system type equipped on a particular vehicle (there are no T-codes). If code P0701 is stored, it’s very likely other transmission control codes are also stored.

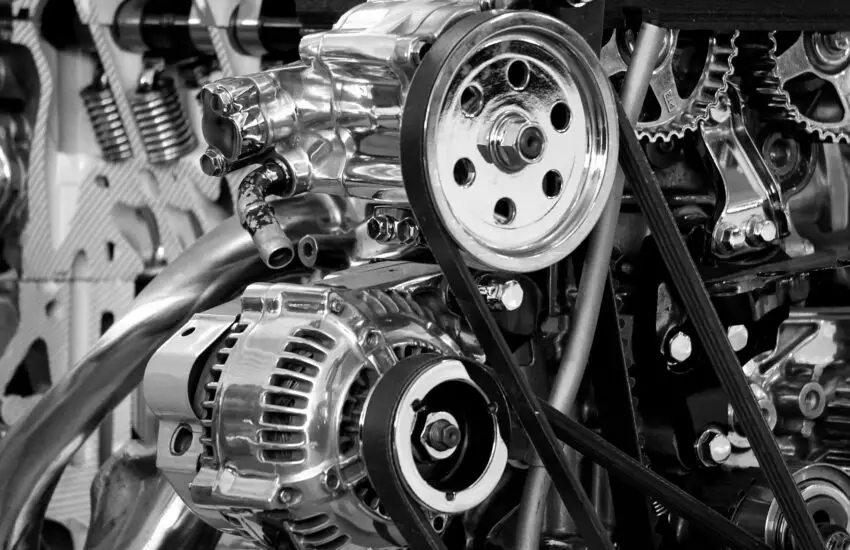
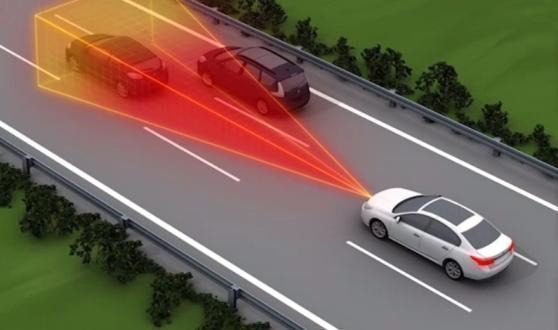
Automatic transmissions in OBD-II equipped vehicles are electronically controlled. This involves a control module, a controller area network (CAN), numerous sensors and solenoids, a powerful hydraulic pump, and a hydraulic valve body.

The transmission controller receives voltage input signals from engine and transmission sensors. Engine sensor inputs include (but aren’t limited to) throttle angle, engine RPM, load percentage, and coolant temperature. Transmission sensor inputs help monitor pump pressure, transmission input speed (RPM), transmission output speed (RPM), gear lever position, vehicle speed, torque converter lockup percentage, and transmission temperature, to name a few. The transmission controller uses these input signals to map shift strategy and electronic pump pressure settings. The electronic pressure control valve is used to regulate pump pressure and maintain smooth transmission operation. If maximum pump pressure were applied directly to the valve body, shifting would instantly become extremely harsh and transmission components could be damaged. Electronically controlled solenoids actuate spring-loaded spool valves to restrict and release high-pressure fluid through hydraulic circuits, causing upshifts and downshifts as desired. Yet another solenoid controls the torque converter lockup percentage, increasing energy efficiency and road power.

The CAN is a complex wiring and connector system used to transmit data from the TCM (if applicable) and PCM. Data (including stored codes) can also be shared with other controllers via the CAN. Transmission input and output speed (RPM), vehicle speed, and transmission temperature are all shared among various controllers. This data is used for comparison purposes in anti-lock braking systems, electronic traction control systems, and electronic stability control systems (among others).

This code is unique in that it’s typically only stored if other transmission-related codes are present. These could be codes related to mechanical or electrical issues.

Symptoms

and Severity
If this code is stored, you may have noticed your transmission shifting much harder than normal. This is because the transmission control system is placed in limp mode. In this mode, transmission pump pressure is significantly increased. This mode isn’t intended for long-term use. If your vehicle has displayed a P0701 code, it should be diagnosed immediately.

Symptoms of a P0701 code may include:

Irregular transmission shifting patterns
Transmission failure to shift
Reduced energy efficiency
Transmission slipping
Delayed transmission engagement
Other transmission-related codes

Causes


Causes

Possible causes for setting this code are as follows:

Low transmission fluid level
Inferior quality transmission fluid
Transmission sensor failure
Open or shorted circuits in the transmission control system
Mechanical transmission failure (internal)
Torque converter defects
Faulty transmission controller or PCM programming error
Diagnostic and Repair Procedures
A good starting point is always to check technical service bulletins (TSBs) for your specific vehicle. Your problem may be a known issue with a known fix published by the manufacturer and can save you time and money during diagnosis.

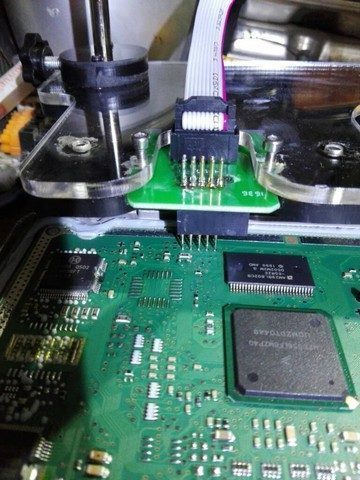
A scanner, digital volt/ohmmeter, transmission pressure gauge, and vehicle service manual (or equivalent) may be needed to diagnose a P0701.

Start with a visual inspection of transmission control wiring and connectors. Also test the battery, check battery cables and battery terminal ends at this stage.

Connect the scanner to the vehicle’s diagnostic connector and retrieve all stored codes and freeze frame data. Note this information and keep it for later.

Since the primary cause of transmission failure is due to fluid level and/or condition, the fluid should be checked now. Follow manufacturer specifications for

checking transmission fluid level.

If the fluid has a sharp burnt smell, suspect catastrophic mechanical failure that will require complete transmission rebuild and new torque converter. If fluid level is low by more than one quart, fill transmission with recommended transmission fluid and start engine. Inspect transmission, transmission cooler, and cooler lines/pipes for leaks. Repair leaks as needed. Once leaks are repaired and fluid level corrected, test drive vehicle to see if code/s reset. If they don’t, then the code was related to low fluid condition and has been corrected.

If code/s reset immediately, return to your recorded freeze frame data. Start by diagnosing the code that was stored first and diagnose/repair all other stored transmission control codes before attempting to diagnose P0701.

Additional Diagnostic Notes:

Diagnose and repair all other transmission-related codes before attempting to diagnose this code
Low transmission fluid level is a common cause of transmission failure
Transmission maintenance at recommended intervals can extend longevity

P0702 Transmission Control System Electrical

What does it mean?


This diagnostic trouble code (DTC) is a generic powertrain code, meaning it applies to all vehicles made from 1996 onward (Ford, Honda, Mazda, Mercedes, VW, etc.). Although generic, the specific repair steps may vary by make/model.

If I encounter a malfunction indicator light (MIL) and a stored code P0702, it means the powertrain control module (PCM) has detected a malfunction in the electrical portion of the transmission control system. Only vehicles equipped with an automatic transmission should have this code.

Most transmission controllers (for OBD-II equipped vehicles) are integrated into the PCM, but some manufacturers use a standalone transmission control module (TCM). Regardless of which type of system a particular vehicle is equipped with, transmission-related codes are stored as P codes. There will likely be other transmission control codes stored along with P0702.

Automatic transmissions are electronically controlled in OBD-II equipped vehicles. A control module, a controller area network (CAN), numerous sensors and solenoids, a powerful hydraulic pump, and a hydraulic valve body are all essential to the operation of the electronically controlled transmission.

Voltage input signals from the engine and transmission sensors are received by the transmission controller. Throttle angle, engine RPM, engine load percentage, and coolant temperature are among the engine sensor inputs. Monitoring pump pressure, transmission input speed (RPM), transmission output speed (RPM), gear lever position, vehicle speed, torque converter lockup percentage, and transmission temperature are the transmission sensor inputs. These input signals are used by the transmission controller to map shift strategy and electronic pump pressure settings. The electronic pressure control valve regulates pump pressure and keeps the transmission shifting efficiently. Shifting would instantly become extremely harsh and transmission components could be damaged if maximum pump pressure were applied directly to the valve body. Upshifts and downshifts are accomplished with electronically controlled solenoids that actuate spring-loaded ball valves. These valves restrict and release high-pressure fluid as desired. The torque converter clutch (TCC) solenoid controls the torque converter lockup percentage.

The CAN is a complex system of electrical wiring and connectors used to transmit data between the TCM (if applicable) and the PCM. Data (including stored codes) may also be transmitted to other controllers via the CAN. Among the information shared between controllers are transmission input and output speed (RPM), vehicle speed, and transmission temperature. Anti-lock braking systems, electronic traction control systems, and electronic stability control systems all use this data for comparison purposes. This code is usually only stored if other electrical transmission control codes are present.

Symptoms

and severity
If you have noticed that your transmission is shifting more harshly than normal after this code is stored, it may be because the transmission control system is placed in limp-in mode. Transmission pump pressure is significantly increased in this mode. Limp-in mode is not intended for long-term use. If your vehicle has stored a P0702 code, it should be addressed immediately.

Symptoms of a P0702 code may include:

Erratic transmission shifting patterns
Transmission failure to shift at all
Decreased fuel efficiency
Other transmission-related codes

Causes

Causes

for setting this code may include:

Transmission sensor failure
Open or shorted circuits in the transmission control system
Faulty transmission controller or PCM programming error
Diagnostic and repair procedures
A good starting point is always to check for technical service bulletins (TSBs) for your particular vehicle. Your problem may be a known issue with a known fix released by the manufacturer and can save you time and money when diagnosing.

A vehicle service manual (or equivalent), a scan tool, and a digital volt/ohmmeter will be helpful when diagnosing a P0702 code.

I would start with a visual inspection of the transmission control wiring and connectors. Then I would test the battery, check battery cables and battery terminal ends.

I normally proceed by connecting the scan tool to the vehicle’s diagnostic connector and retrieving all stored codes and freeze frame data. I write this information down and save it for later.

If the code(s) immediately reset, refer back to your saved freeze frame data. Begin by diagnosing the code that was stored first and diagnose/repair any other stored transmission control codes before attempting to diagnose P0702.

Additional diagnostic notes:

The internal transmission control wiring harness is often damaged by extremely sharp edges, porous surfaces, and excessive temperatures found inside the transmission case
Performing transmission maintenance at recommended intervals can increase longevity
Diagnose and repair all other transmission codes before diagnosing this code

P0703 Torque Converter Clutch Circuit / Brake Switch B Malfunction

What does it mean?


This diagnostic trouble code (DTC) is a generic powertrain code, meaning it applies to all vehicles made from 1996 onwards (Ford, Honda, Mazda, Mercedes, VW, etc.). Although generic, the specific repair steps may vary by make/model.

If you find that a P0703 code has been stored in your OBD-II vehicle, it means the Powertrain Control Module (PCM) has detected a malfunction in a specific torque converter brake switch circuit. This code only applies to vehicles equipped with automatic transmissions.

Automatic transmissions (in mass-produced vehicles) have been electronically controlled since the 1980s. Most OBD-II-equipped vehicles are managed by a transmission controller integrated into the PCM. Other vehicles use a standalone transmission control module that communicates with the PCM and other controllers via the Controller Area Network (CAN).

The torque converter is a type of hydraulic coupling that connects the engine to the transmission. When the vehicle is moving, the torque converter allows torque to be transferred to the transmission input shaft. When the vehicle stops (with the engine idling), the torque converter absorbs the engine’s torque using a complex system of wet clutches. This allows the engine to idle without stalling.

The lock-up torque converter, used in OBD-II-equipped vehicles, allows the engine to lock to the transmission input shaft under certain conditions. This typically occurs when the transmission has shifted to the highest gear, the vehicle has reached a certain speed, and the desired engine RPM level has been achieved. In lock-up mode, the Torque Converter Clutch (TCC) is gradually engaged until the transmission operates as if it were bolted directly to the engine in a 1:1 transfer ratio. These gradual clutch engagements are referred to as torque converter lock-up percentage. This system promotes energy efficiency and optimal engine performance. Torque converter lock-up is achieved using an electronic solenoid that controls a spring-loaded spool valve or rod. When the PCM recognizes that conditions are correct, the lock-up solenoid is activated, and the valve allows fluid to bypass (gradually) the torque converter and be applied directly to the valve body.

The torque converter lock-up must be disengaged before engine RPM levels drop to a certain point and definitely before the vehicle comes to a stop with the engine idling. Otherwise, the engine will undoubtedly stall. One of the specific signals the PCM looks for to disengage the torque converter lock-up is the application of the brake pedal. When the brake pedal is applied, the brake lever arm causes contacts in the brake switch to close, completing one or more circuits. When these circuits are completed, the brake lights are illuminated. A second signal is sent to the PCM. This signal tells the PCM that the brake pedal has been pressed and that the torque converter lock-up solenoid should be disengaged.

The P0703 code relates to one of these brake switch circuits. Consult your vehicle’s service manual or AllData for specific information about this particular circuit as it pertains to your vehicle.

Symptoms

and severity
This code should be treated as urgent because severe internal transmission damage could result if the TCC lock-up is inoperative for an extended period. Most models are designed so that the PCM disables the TCC lock-up and places the transmission control system in limp mode if such a code is stored.

Symptoms of a P0703 code may include:

Engine stalls when the vehicle stops
TCC lock-up may be disabled
Reduced fuel efficiency
Decreased engine performance (especially at highway speeds)
Irregular transmission shifting patterns
No brake light illumination

Causes


Possible causes for this code being set are:

Faulty brake switch
Misadjusted brake switch
Shorted or open wiring or connectors in the designated brake switch circuit B
Blown fuse or burned fuse link
PCM programming error or faulty PCM
Diagnostic and Repair Procedures
A good starting point is always to check the Technical Service Bulletins (TSBs) for your specific vehicle. Your issue may be a known problem with a known fix published by the manufacturer and can save you time and money during diagnosis.

Gather a scan tool, a digital volt/ohmmeter, and a service manual (or AllData) for your vehicle. These tools will be necessary to diagnose a P0703 code.

Start with a visual inspection of the brake light wiring and a general inspection of the wiring under the hood. Test the brake light system fuses and replace any blown fuses as needed.

Connect the scan tool to the diagnostic connector and retrieve all stored codes and freeze frame data. Take note of this information as it may be helpful for further diagnosis. Clear the codes and test-drive the vehicle to see if the code resets immediately.

If it does: Check for battery voltage at the brake switch input circuit,

Using the DVOM. Some vehicles are equipped with multiple brake switches because, when the brake pedal is pressed, the brake lights must activate and the torque converter lock-up must disengage. Consult your vehicle’s service manual to determine your brake switch configuration. If there is battery voltage at the input circuit, press the brake pedal and check for battery voltage at the output circuit. If there is no voltage on the output circuit, suspect a faulty or misadjusted brake switch.

Additional Diagnostic Notes:

Check the system fuses with the brake pedal depressed. Fuses that may seem operational during an initial test can fail when the circuit is under load
Often, a misadjusted brake switch can be misdiagnosed as faulty
To quickly test TCC operation, bring the vehicle to highway speed (at normal operating temperature), lightly press and hold the brake pedal while maintaining speed. If the RPM level increases when the brake is applied, the TCC is operational and the brake switch is disengaging it correctly
Significant transmission damage can occur if the TCC system remains inoperative