Tire Rotation and Alignment: Essential Winter Preparation

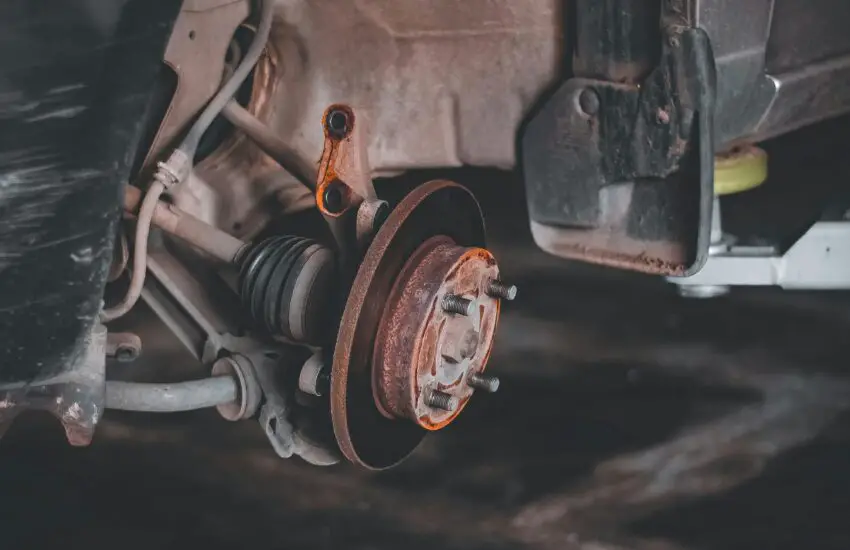
Tire rotation and wheel alignment become particularly critical car maintenance elements as winter approaches. While the cold months are coming, preparing your vehicle for winter weather challenges becomes a necessity. This article details why these mechanical interventions are essential before the cold arrives and how neglecting them can compromise your safety and your automobile’s performance.

The Crucial Importance of Tire Rotation

Uniform Tire Wear

  • Regular tire rotation promotes even wear across all four tires.
  • Front tires generally wear out faster than rear tires due to steering and braking.
  • Allowing each tire to serve in different vehicle positions ensures balanced wear.

Extended Lifespan

  • Uneven wear can significantly reduce the longevity of your tires.
  • By performing regular rotations, you maximize their lifespan and avoid premature replacements.
  • This practice represents long-term financial savings while ensuring optimal performance and safety.

Performance Improvement

  • Evenly worn tires contribute to better road holding and grip.
  • Proper rotation improves the vehicle’s overall performance, particularly on wet or icy roads.
  • Maintaining consistent tread depth on all tires is essential for optimal grip in difficult winter conditions.

The Significance of Wheel Alignment

Enhanced Safety

  • Proper alignment ensures your vehicle drives straight and offers predictable handling.
  • Misaligned wheels can lead to steering problems and difficulties maintaining control, especially on slippery winter roads.
  • Having your alignment checked before winter can prevent accidents and ensure your road safety.

Increased Energy Efficiency

  • Poor wheel alignment increases rolling resistance, which results in higher fuel consumption.
  • Correcting the alignment before the cold season allows for significant fuel savings.
  • This optimization becomes particularly valuable when temperatures drop and energy efficiency naturally decreases.

Damage Prevention

  • Prolonged misalignment prematurely wears out suspension and steering components.
  • Misaligned wheels cause irregular and premature tire wear.
  • Investing in proper alignment prevents costly repairs and preserves your vehicle’s integrity.

The Rotation-Alignment Synergy in Winter Conditions

The combination of proper rotation and good alignment creates essential synergy for facing winter. These two interventions perfectly complement each other to provide optimal road holding on snow and ice. While rotation ensures even wear, alignment maintains the ideal contact angle with the road surface.

Drivers neglecting these aspects expose themselves to significantly higher accident risks. Loss of grip on slippery surfaces, extended braking distances, and difficulty maintaining trajectory constitute as many immediate dangers. Adequate mechanical preparation therefore represents an essential safety investment.

Recommended Schedule for Pre-Winter Maintenance

Ideally, rotation and alignment checks should occur about one month before the first frosts. This timeframe allows for identifying and correcting potential problems while giving tires time to adapt to their new position. Professionals generally recommend rotation every 10,000 to 15,000 kilometers, while alignment deserves checking at least once a year or after any significant impact with an obstacle.

Winter demands maximum grip and flawless directional stability. Properly maintained tires through rotation and alignment offer the guarantee of safer driving when conditions deteriorate. This proactive mechanical preparation always proves more economical than the consequences of an accident or the premature replacement of damaged tires.

Radiator maintenance: how to keep it cool during hot months

Radiator Care: How to Keep Your Radiator Cool During the Hottest Months. With the rise in summer temperatures, it becomes essential to ensure your vehicle’s radiator is functioning properly to prevent overheating. This key component of the cooling system protects your engine and prevents costly repairs. Discover our practical tips for taking care of your radiator and keeping it efficient during periods of intense heat.

Regular Maintenance

Periodic maintenance is fundamental to maintaining your radiator’s performance. Here are the steps to follow:

  • Check the coolant level: Regularly monitor and top up if necessary with the type of fluid recommended for your model.
  • Inspect for leaks: Examine the radiator for any potential leaks or damage, which can cause overheating and engine damage.
  • Radiator flush: Perform a flush and replace the fluid at least once a year to remove deposits and impurities.

Radiator Cleaning

A clean radiator ensures optimal heat transfer. Adopt these practices:

  • Remove debris: Regularly check for dirt blocking airflow and clean it gently.
  • Clean the exterior: Use a soft brush or cloth for the outside, avoiding high-pressure water jets that could damage the fins.
  • Check the fans: Ensure the cooling fans are working correctly, especially during stops or traffic jams.

Temperature Monitoring

Keeping an eye on the engine temperature is crucial to prevent overheating. Follow these recommendations:

  • Use the thermometer: Monitor the temperature gauge while driving. An abnormal rise may indicate a problem.
  • React quickly: In case of overheating, stop the vehicle in a safe place, let the engine cool down, and check the fluid level before continuing.

Additional Tips

For enhanced protection, consider these additional measures:

  • Use a radiator additive: Some products improve cooling performance and prevent corrosion.
  • Avoid overloading: Reduce the load on the cooling system by limiting air conditioning use during extreme heat.
  • Park in the shade: Park your vehicle in a cool spot to reduce exposure to heat.

By applying these maintenance tips, you will extend the life of your radiator and ensure optimal vehicle operation, even during the hottest months.

OBD2 Code P1442 Saturn: EVAP System Leak Detection Pump Fix

Understanding OBD2 Code P1442 on Saturn Vehicles

When your Saturn’s check engine light illuminates and you retrieve diagnostic trouble code P1442, you’re dealing with a specific emission control system malfunction. This code indicates a problem within the Evaporative Emission Control (EVAP) system, specifically related to the Leak Detection Pump (LDP) circuit. The EVAP system is designed to prevent fuel vapors from escaping into the atmosphere, and the leak detection pump serves as the primary component for monitoring system integrity.

What Does P1442 Mean on a Saturn?

OBD2 code P1442 is defined as “Evaporative Emission Control System Leak Detection Pump Switching Valve or Solenoid Circuit.” This trouble code is manufacturer-specific to General Motors vehicles, including Saturn models. The code triggers when the Powertrain Control Module (PCM) detects an electrical fault in the leak detection pump’s switching valve or solenoid circuit. This could indicate an open circuit, short circuit, or performance issue within the LDP assembly.

How the Saturn EVAP System Works

The EVAP system in Saturn vehicles is a closed system that captures fuel vapors from the fuel tank and stores them in the charcoal canister. When conditions are right, the PCM activates the purge valve to allow these stored vapors to be drawn into the engine and burned. The leak detection pump plays a crucial role in monitoring this system for leaks by creating pressure or vacuum and measuring how well the system holds it.

Common Causes of P1442 Code on Saturn Vehicles

Diagnosing P1442 requires a systematic approach to identify the root cause. Several components and conditions can trigger this diagnostic trouble code, ranging from simple electrical issues to complete component failure.

Primary Causes for P1442 Saturn Code

  • Failed or malfunctioning leak detection pump (LDP)
  • Damaged wiring or connectors in the LDP circuit
  • Blown fuse affecting the EVAP system
  • Poor electrical connections at the LDP connector
  • Corroded or damaged LDP solenoid
  • PCM software issues requiring updates
  • Physical damage to the LDP assembly from road debris

Secondary Factors Contributing to P1442

  • Age and mileage of the vehicle (common in older Saturn models)
  • Exposure to road salt and moisture causing corrosion
  • Previous repairs that may have damaged wiring or components
  • Manufacturing defects in specific model years
  • Electrical system problems affecting sensor readings

Diagnosing and Testing P1442 Code on Saturn Cars

Proper diagnosis of P1442 requires specific tools and a methodical approach. Before replacing any components, thorough testing is essential to verify the actual cause of the failure.

Required Tools for P1442 Diagnosis

  • OBD2 scanner capable of reading manufacturer-specific codes
  • Digital multimeter for electrical testing
  • Smoke machine for EVAP system leak testing
  • Vehicle service manual for wiring diagrams
  • Basic hand tools for component removal and inspection

Step-by-Step Diagnostic Procedure

Begin by visually inspecting the leak detection pump and associated wiring for obvious damage, corrosion, or disconnections. Check the LDP electrical connector for proper engagement and signs of moisture intrusion. Using a digital multimeter, test the LDP circuit for proper voltage supply and ground connections. Measure the resistance of the LDP solenoid to verify it falls within manufacturer specifications (typically between 10-30 ohms). Perform functional tests using a quality scan tool to command the LDP operation while monitoring system parameters.

Advanced Testing Techniques

For persistent P1442 codes, more advanced testing may be necessary. A smoke test can help identify external leaks in the EVAP system that might be affecting LDP operation. Pressure testing the system can verify the LDP’s ability to create and maintain pressure. Using an oscilloscope to monitor the LDP control signal from the PCM can reveal intermittent electrical issues that might not show up during standard multimeter testing.

Repair Procedures for Saturn P1442 Code

Once the root cause has been identified through proper diagnosis, appropriate repairs can be undertaken. The specific repair procedure will depend on the underlying issue causing the P1442 code.

Replacing the Leak Detection Pump

The leak detection pump is typically located under the vehicle, near the fuel tank or rear suspension. Replacement involves disconnecting the electrical connector and vacuum lines, then unbolting the unit from its mounting bracket. Installation is the reverse of removal, but special attention should be paid to proper routing of vacuum lines and securing of electrical connections. After replacement, the PCM may need to be reset and the EVAP system monitor must complete a drive cycle to verify repair success.

Repairing Wiring and Connectors

If the issue is in the wiring rather than the LDP itself, repairs should focus on the affected circuit. This may involve repairing damaged wires, replacing corroded connectors, or addressing chafed wiring that’s shorting against the chassis. Always use proper automotive-grade wiring and connectors for repairs, and protect repaired areas with appropriate loom or tape to prevent future issues.

Prevention and Maintenance Tips

Preventing recurrence of P1442 involves regular maintenance and awareness of conditions that can lead to EVAP system failures.

Regular Maintenance Practices

  • Keep the undercarriage clean to prevent corrosion of EVAP components
  • Address other engine codes promptly to prevent system strain
  • Ensure proper fuel cap installation after refueling
  • Follow manufacturer-recommended service intervals
  • Have the EVAP system inspected during routine maintenance

Long-Term Reliability Considerations

The EVAP system, including the leak detection pump, is subject to environmental factors that can accelerate wear. Vehicles operated in regions with road salt or high humidity may experience earlier failures. Using quality replacement parts and ensuring proper installation can significantly extend the service life of EVAP system components. Regular system scans, even when the check engine light isn’t illuminated, can help identify developing issues before they trigger active diagnostic trouble codes.

Successfully addressing P1442 on your Saturn requires understanding the sophisticated interaction between the leak detection pump and the broader EVAP system. With proper diagnosis and quality repairs, this code can be permanently resolved, restoring your vehicle’s emission control functionality and turning off that check engine light for good.

Suspension Problems in Summer: Detecting Wear on Shock Absorbers and Cylinders in High Heat

Shocks and struts are essential for driving comfort, especially during summer heat. High temperatures put the suspension system under strain, exacerbating pre-existing issues. Discover how heat affects your shock absorbers and learn to identify signs of wear before they worsen.

Signs of Suspension Wear in Hot Weather

  • Uneven Tire Wear: Heat expands pavement and creates uneven surfaces. Asymmetric wear on your tires may reveal a suspension defect.

  • Excessive Bouncing: On bumpy roads, prolonged oscillations or a bouncy ride often indicate worn shock absorbers.

  • Suspicious Noises: Clunking or knocking sounds from the wheels signal loose or damaged suspension components.

  • Imprecise Steering: A failing suspension affects handling. If the steering wheel feels vague or less responsive, have your system checked.

  • Vehicle Sagging: One side sitting lower than the others typically indicates a faulty shock absorber or strut at that corner.

Summer Maintenance Tips

  • Regular Inspections: Periodic professional checks help detect component wear before failure occurs.

  • Proper Tire Inflation: Correct pressure preserves suspension and improves road handling.

  • Component Cleaning: Prevent buildup of dirt and debris that accelerates wear on moving parts.

  • Preventive Driving: Reduce speed on rough roads and avoid potholes to protect your suspension.

  • Reasonable Loading: Never exceed maximum load capacity to prevent premature wear.

Impact of Heat on Components

Summer heat particularly affects the suspension system. High temperatures soften rubber bushings and reduce the effectiveness of hydraulic fluids in shock absorbers. Overheated roads become more abrasive, accelerating wear on already weakened parts. These extreme conditions quickly reveal weaknesses in an aging suspension.

Preventive Diagnosis

Regularly perform the bounce test: press down with all your weight on each corner of the vehicle then release. If the car oscillates more than twice before stabilizing, your shock absorbers likely need thorough inspection. Also visually inspect struts for potential oil leaks, which are particularly critical during heatwaves.

The crucial importance of regular brake checks for automotive safety

The Crucial Importance of Regular Brake Checks

Regular brake checks are a fundamental element of automotive maintenance to ensure the safety of vehicle occupants and other road users. In this article, we will explore why these periodic inspections represent an essential measure to prevent potential accidents and maintain the effectiveness of the braking system.

Why Are Regular Brake Inspections Essential?

Optimal Road Safety

The primary reason for regular brake checks lies in safety. Brakes are a vital component of any vehicle, and their malfunction can lead to dangerous situations on the road. By performing periodic inspections, you can identify any issues early and prevent accidents before they occur.

Early Detection of Anomalies

Regular checks allow for the detection of potential braking system problems before they become critical. This proactive approach saves you time and money by addressing minor failures before they evolve into more complex and costly repairs.

Extended Lifespan

Regular inspections and maintenance help prolong the longevity of your brakes. By replacing worn brake pads and promptly addressing any other issues, you ensure optimal performance of your braking system over an extended period.

Preservation of Resale Value

Proper maintenance, including regular brake checks, contributes to maintaining your vehicle’s resale value. A well-maintained automobile with a reliable braking system holds undeniable appeal for potential buyers.

Warning Signs Requiring Brake Inspection

Abnormal Noises During Braking

Unusual noises such as squeaking or grinding when braking clearly indicate that your brake pads are likely worn and require urgent replacement.

Soft or Spongy Brake Pedal

If your brake pedal feels soft or spongy when pressed, this may signal the presence of air or moisture in the brake lines, significantly affecting braking performance.

Vibrations During Braking

Noticeable vibrations in the steering wheel or brake pedal during braking can reveal warped or unevenly worn brake discs, requiring immediate inspection.

Increased Stopping Distances

If you notice your vehicle takes longer to stop than before, or if the braking distance has significantly increased, this indicates reduced effectiveness of the braking system.

Brake Pad Wear Indicator

The appearance of the brake pad wear indicator on your dashboard signals the need for a prompt inspection by a qualified professional.

Recommended Frequency for Brake Checks

Experts generally recommend having your brakes inspected every 20,000 kilometers or at least once a year, depending on your driving style and usage conditions. Drivers who regularly cover long distances or drive in dense urban environments should consider more frequent inspections.

Components Examined During a Complete Check

A thorough brake inspection includes examining brake pads, discs, calipers, drums (if applicable), brake fluids, lines and hoses, as well as the brake assistance system. Each element plays a crucial role in the overall effectiveness of the system.

Environmental and Economic Impact

Beyond safety, well-maintained brakes help reduce fuel consumption and minimize premature wear of other vehicle components. Regular maintenance therefore represents both an ecological and economical choice for every responsible motorist.

Preparing your car’s electrical system for summer driving

Preparing your car’s electrical system for summer driving is essential when temperatures rise and days get longer. Many drivers are getting ready for road trips and summer adventures, but one crucial vehicle component is often overlooked: the electrical system, particularly the alternator. Your car’s alternator plays a vital role in maintaining battery charge and the proper functioning of electrical systems. This article discusses the importance of maintaining your alternator and electrical system to ensure a worry-free summer driving experience.

Symptoms of a Failing Alternator

Before explaining how to ensure your car’s electrical system is ready for summer driving, let’s first identify some common signs of a failing alternator:

  • Dim Headlights: If your headlights appear dimmer than usual, it could indicate that your alternator is struggling to meet the vehicle’s electrical demands.
  • Strange Noises: A grinding or whining noise from the engine compartment could signal a worn alternator belt or faulty bearings in the alternator.
  • Dead Battery: If your battery continues to die even after a jump start, it might be due to a faulty alternator not properly charging the battery.
  • Dashboard Warning Light: The battery or alternator warning light illuminating on your dashboard is a clear indicator of potential alternator issues.

Regular Maintenance Tips

To ensure your car’s electrical system is ready for summer driving, follow these maintenance tips:

  1. Inspect the Alternator Belt: Check for any signs of wear or damage on the alternator belt. If it’s cracked or frayed, replace it to prevent any interruption in battery charging.
  2. Test the Battery: Have your battery tested to ensure it’s properly holding its charge. A weak battery can put extra strain on the alternator.

The importance of gearbox oil change in spring

The importance of spring transmission fluid changes becomes evident as seasons shift and temperatures rise. This is the ideal time to ensure your vehicle is in perfect condition for the coming months. An essential aspect of car maintenance that’s often overlooked involves transmission fluid. Many drivers underestimate the importance of regular fluid changes, even though they play a crucial role in your vehicle’s proper functioning. This article examines why transmission fluid changes are particularly important during the spring season.

Why is Transmission Fluid Essential?

Transmission fluid serves as a lubricant for the moving parts of your vehicle’s transmission system. It helps reduce friction between components, prevents overheating, and ensures smooth gear shifts. Over time, the fluid can degrade due to high temperatures and constant use, leading to reduced effectiveness in lubrication and cooling.

The Impact of Spring Conditions on Transmission Fluid

During cold months, transmission fluid thickens, which can hinder its circulation through the system. With spring warming, the fluid becomes thinner again, facilitating its action. However, this viscosity change can also reveal underlying issues, such as contamination or advanced fluid degradation.

The Benefits of a Spring Transmission Fluid Change

1. Optimized Performance

Fresh transmission fluid helps maintain optimal system performance. By performing the fluid change in spring, you ensure efficient transmission operation during the warm months, whether you’re taking long trips or driving in heavy traffic.

2. Extended Transmission Lifespan

Regular fluid changes help prevent wear on transmission components. This simple maintenance represents a wise investment to avoid costly long-term repairs. In spring, replacing worn fluid helps protect internal parts and ensures their proper functioning.

3. Prevention of Costly Breakdowns

Contaminated or degraded transmission fluid can lead to serious problems, such as gear slipping or overheating. By changing it in spring, you reduce the risk of breakdown and avoid expensive repairs. This is a preventive measure that preserves your vehicle’s reliability.

4. Long-term Savings

While a fluid change represents an initial cost, it enables substantial savings by avoiding major repairs. Proactive spring maintenance helps maintain your vehicle’s value and minimize unexpected expenses.

When to Perform Transmission Fluid Change?

It’s recommended to consult your owner’s manual for specific change intervals for your vehicle. Generally, a change every 60,000 to 100,000 kilometers is advised, but driving conditions and transmission type can influence this frequency. Spring is an opportune time to check the fluid condition and plan its replacement if necessary.

Conclusion

Spring transmission fluid change is a crucial maintenance step to ensure your vehicle’s performance and longevity. By taking advantage of the season to replace worn fluid, you optimize transmission operation, prevent breakdowns, and achieve savings. Don’t neglect this essential aspect of car maintenance and prepare your vehicle to face summer roads with complete peace of mind.

Changing Filters and Fluids in Spring: Complete Guide to Car Maintenance

Changing filters and fluids in spring is a crucial step to prepare your vehicle for the new season. As temperatures rise and nature awakens, your automobile requires special attention after the harshness of winter. Many owners neglect this essential maintenance, yet it directly influences your car’s performance and longevity. Let’s discover why this spring ritual proves so beneficial for your vehicle.

Why Change Filters and Fluids in Spring?

1. Optimized Engine Performance

Replacing your spring air filter significantly improves engine performance. During winter months, the filter gradually clogs with dust, particles, and various debris, obstructing airflow to the engine. Installing a new air filter guarantees your engine the pure oxygen needed for optimal operation. Similarly, renewing the oil filter and engine oil ensures perfect lubrication of mechanical components, reducing friction and premature wear.

2. Enhanced Energy Efficiency

A clean air filter notably improves fuel consumption. When the engine breathes unpolluted air, fuel combustion occurs more efficiently, resulting in better range. Simultaneously, changing the fuel filter prevents impurities from entering the injection system, ensuring smooth and economical operation of your automobile.

3. Extended Lifespan

Regular maintenance of filters and fluids helps prolong your engine’s lifespan. Impeccable filters block the intrusion of dirt and contaminants into the engine block, reducing the risk of damage. New fluids – engine oil, transmission fluid, and coolant – maintain ideal lubrication and temperature, preventing overheating and costly repairs.

4. Preserved Interior Air Quality

Renewing the cabin air filter in spring improves the air quality inside your vehicle. A saturated filter allows allergens, pollen, and fine particles to pass through, which are particularly abundant during this season. A new filter captures these elements, providing a healthy environment for passengers, especially for those sensitive to allergies.

When to Perform These Changes?

The spring period constitutes the ideal time for this maintenance, as it follows a season often harsh for your vehicle. Consult your maintenance manual for the intervals recommended by the manufacturer, but anticipate these interventions if you’ve driven in difficult winter conditions or on salted roads.

Which Filters and Fluids to Check?

Engine Air Filter

Check its condition: a clogged filter reduces performance and increases consumption. Annual replacement or every 15,000 to 30,000 km is generally advised.

Fuel Filter

Essential for protecting the injection system, its replacement prevents starting problems and power drops.

Cabin Air Filter

Change it every spring to benefit from purified air inside the cabin, especially during allergy season.

Engine Oil and Oil Filter

A spring oil change eliminates impurities accumulated during winter and prepares the engine for summer demands.

Coolant

Check its level and condition to prevent overheating during the first heatwaves.

Brake Fluid

Check its level and color: dark or low fluid requires intervention.

Conclusion

Changing filters and fluids in spring represents a wise investment to preserve your vehicle. This maintenance routine improves performance, reduces consumption, extends component lifespan, and ensures your driving comfort. Don’t underestimate the impact of this preventive maintenance – your automobile will thank you with its reliability throughout the year.

Timing Belt Failures in Winter: Signs and Prevention

Timing Belt Failures in Winter: Discover the Warning Signs and Essential Preventive Measures to Protect Your Vehicle During the Cold Season. Extreme temperature drops and difficult road conditions increase the risk of breakage, which can lead to costly repairs and unexpected breakdowns. In this article, we detail the symptoms to watch for and the best practices to adopt to avoid any inconvenience.

Symptoms of a Faulty Timing Belt

  1. Abnormal Noises: A high-pitched squealing or rattling from the engine often signals advanced wear of the belt. These unusual sounds require immediate inspection to prevent sudden failure.

  2. Engine Stalling: A damaged belt can cause jerking, loss of power, or irregular idling. These malfunctions risk severely damaging the engine’s internal components.

  3. Visible Wear: Regularly inspect the belt for cracks, fraying, or missing teeth. Any visual abnormality requires urgent replacement to avoid a complete breakdown.

  4. Engine Overheating: A failing belt disrupts the synchronization of parts, leading to an increase in engine temperature. Monitor the temperature gauge closely to anticipate any risk of damage.

Preventive Measures for Winter

  1. Regular Checks: Schedule professional inspections to assess the condition of the belt. A qualified mechanic will identify signs of wear and recommend intervention if necessary.

  2. Follow Manufacturer Recommendations: Refer to the maintenance manual for the specific replacement intervals for your model. Manufacturers indicate precise mileage or durations that should not be overlooked.

  3. Protection Against Cold: Park your vehicle in an insulated garage when possible to reduce exposure to frost. Negative temperatures accelerate rubber degradation.

  4. Use of Quality Parts: Opt for certified belts designed to withstand winter stresses. Original components offer optimal durability and compatibility.

Impact of Winter Conditions

Intense cold stiffens the belt, reducing its flexibility and increasing the risk of cracking. Salted roads also corrode pulleys and accessories, accelerating wear. Adopt smooth driving during cold starts to minimize stress on the transmission.

Conclusion

A timing belt in good condition is crucial for your vehicle’s reliability in winter. By recognizing warning signs and applying these preventive tips, you will limit breakdowns and ensure optimal safety on the road.

Saab P1442 Code: EVAP System Vent Control Circuit Explained

Understanding the Saab P1442 Diagnostic Trouble Code

When your Saab’s check engine light illuminates and you retrieve the P1442 diagnostic trouble code, you’re dealing with a specific issue within your vehicle’s Evaporative Emission Control System (EVAP). This code indicates a malfunction in the vent control circuit, which is crucial for preventing fuel vapors from escaping into the atmosphere. The P1442 code is manufacturer-specific to Saab vehicles, meaning its exact definition and diagnostic procedures are tailored to Saab’s engineering specifications.

What Does P1442 Mean on a Saab?

The P1442 code specifically points to a problem in the EVAP system vent valve control circuit. This system is designed to capture and store fuel vapors from the fuel tank, preventing them from being released into the environment. The vent control valve, typically located near the fuel tank or vapor canister, manages the flow of air and vapors during system operation. When the powertrain control module (PCM) detects an electrical or functional issue with this valve’s control circuit, it stores the P1442 code and illuminates the check engine light.

How the EVAP System Works in Saab Vehicles

Saab’s EVAP system operates through a sophisticated process that involves multiple components working in harmony. The system captures fuel vapors in the charcoal canister, then uses engine vacuum to draw these vapors into the intake manifold for combustion during normal engine operation. The vent valve plays a critical role in this process by allowing fresh air to enter the system when needed and sealing the system during monitoring and purge cycles. Understanding this operational sequence is essential for proper diagnosis of P1442-related issues.

Common Symptoms and Causes of P1442 in Saab

Recognizing the symptoms and understanding the potential causes of P1442 is the first step toward an effective repair. This code typically manifests through specific warning signs and can result from various electrical or mechanical failures within the EVAP system.

Primary Symptoms of P1442 Code

  • Illuminated check engine light on dashboard
  • Possible fuel odor around the vehicle
  • Failed emissions test in regions requiring testing
  • Decreased fuel efficiency in some cases
  • Rough engine idle or occasional stalling
  • Difficulty refueling due to vapor lock

Electrical Causes of P1442

  • Damaged wiring harness to the vent valve solenoid
  • Corroded electrical connectors at the vent valve
  • Blown fuse in the EVAP system circuit
  • Faulty powertrain control module communication
  • Short circuit or open circuit in control wiring
  • Poor ground connection affecting circuit operation

Mechanical and Component Causes

  • Failed or stuck EVAP vent valve solenoid
  • Clogged or restricted vent valve filter
  • Damaged vapor canister or purge lines
  • Physical damage to vent valve from road debris
  • Age-related deterioration of EVAP components
  • Contaminated charcoal canister affecting valve operation

Diagnostic and Repair Procedures for P1442

Proper diagnosis of P1442 requires a systematic approach using appropriate tools and following manufacturer-recommended procedures. Rushing the diagnostic process can lead to unnecessary parts replacement and increased repair costs.

Required Tools for Diagnosis

  • OBD2 scanner capable of reading manufacturer-specific codes
  • Digital multimeter for electrical circuit testing
  • Smoke machine for EVAP system leak detection
  • Vacuum pump and gauge for component testing
  • Vehicle service manual with wiring diagrams
  • Basic hand tools for component removal and installation

Step-by-Step Diagnostic Process

Begin by verifying the code with your OBD2 scanner and checking for any additional codes that might provide context. Inspect the EVAP system visually for obvious damage, disconnected lines, or corroded connectors. Test the vent valve’s electrical circuit using a multimeter to check for proper voltage, resistance, and ground connections. Use a smoke machine to check for leaks in the system that might be affecting valve operation. Finally, test the vent valve’s mechanical function using a vacuum pump to ensure it opens and closes properly.

Repair Procedures and Replacement Guidelines

Once the faulty component is identified, proceed with the appropriate repair. For electrical issues, repair damaged wiring and clean or replace corroded connectors. If the vent valve itself is faulty, replacement is typically required. When replacing the vent valve, ensure you use OEM or high-quality aftermarket parts specifically designed for your Saab model. After repairs, clear the codes and perform a drive cycle to verify the repair was successful and the code doesn’t return.

Preventive Maintenance and Cost Considerations

Understanding preventive measures and cost factors associated with P1442 repairs can help Saab owners maintain their vehicles effectively and budget for potential repairs.

Preventing P1442 Recurrence

  • Regularly inspect EVAP system components during routine maintenance
  • Keep the area around the fuel tank and vapor canister clean
  • Avoid overfilling the fuel tank during refueling
  • Address other EVAP system codes promptly to prevent additional strain
  • Use quality fuel from reputable stations to minimize contamination
  • Follow manufacturer-recommended service intervals for emission systems

Repair Cost Estimates and Factors

The cost to repair P1442 can vary significantly based on the root cause and your Saab model. Diagnostic time typically ranges from $75 to $150. If the vent valve requires replacement, parts can cost between $100 and $300, with labor adding another $100 to $200. More complex issues involving wiring harness repairs or PCM problems can increase costs substantially. DIY repairs can reduce costs but require proper tools and technical knowledge.

When to Seek Professional Assistance

While some experienced DIYers may tackle P1442 repairs, many Saab owners should consider professional assistance when dealing with this code. Complex electrical diagnostics, PCM-related issues, or persistent problems after initial repair attempts warrant professional expertise. Certified Saab technicians have access to specialized diagnostic equipment and manufacturer technical service bulletins that can streamline the repair process and ensure proper resolution.

The P1442 code in Saab vehicles represents a specific challenge in the EVAP system that requires careful diagnosis and precise repair. By understanding the system’s operation, following proper diagnostic procedures, and addressing both symptoms and root causes, you can effectively resolve this emission-related issue and restore your Saab’s optimal performance and environmental compliance.