Common Mistakes to Avoid When Bleeding Brakes (Practical Guide)
Brake bleeding is a key step to ensure safe braking. Here are the 12 common mistakes to avoid to prevent damaging your system or leaving dangerous air bubbles.
1. Neglecting the Bleeding Order
⚠️ Mistake: Bleeding the brakes out of order (e.g., starting with the front left wheel). ✅ Solution: Follow the order recommended by the manufacturer (often rear right wheel → rear left → front right → front left).
2. Forgetting to Check the Fluid Level
⚠️ Mistake: Letting the brake fluid reservoir run dry, allowing air to enter. ✅ Solution: Refill it regularly during bleeding with new fluid (DOT 4 or DOT 5.1 as per specifications).
3. Using Contaminated Brake Fluid
⚠️ Mistake: Pouring old fluid back into the reservoir or using an expired product. ✅ Solution: Always use new fluid from a sealed container (fluid absorbs moisture, which reduces its effectiveness).
4. Overtightening the Bleed Screws
⚠️ Mistake: Forcing the bleed screws with a wrench, risking breaking them. ✅ Solution: Use a proper box-end wrench and tighten moderately (recommended torque: 8-15 Nm).
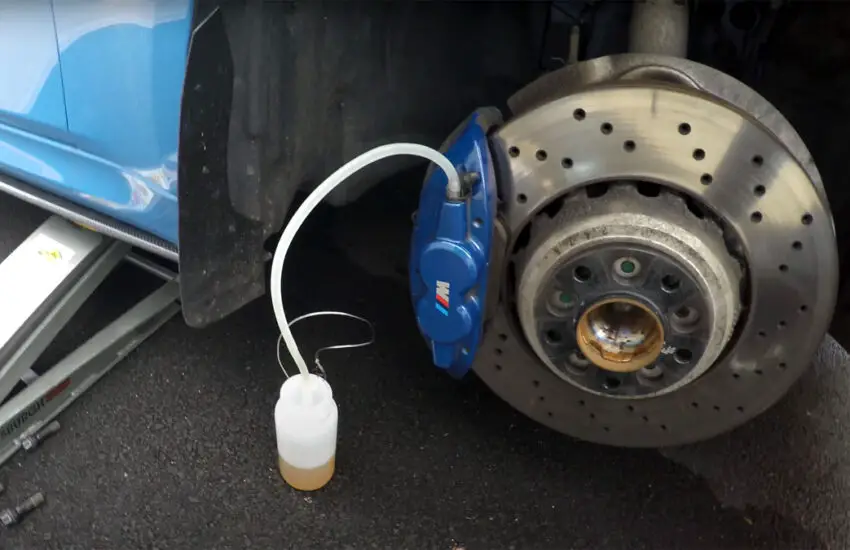
5. Letting the Bleed Hose Come Off
⚠️ Mistake: Not submerging the hose in fluid during bleeding, allowing air to return. ✅ Solution: Place the end of the hose in a container with fluid, below the level of the used fluid.
6. Ignoring the Final Test
⚠️ Mistake: Not testing the brakes after bleeding. ✅ Solution: After bleeding, start the engine and press the pedal firmly: it should be firm, without a “spongy” feel.
7. Forgetting to Protect Surfaces
⚠️ Mistake: Letting brake fluid drip onto paint or plastics (corrosive!). ✅ Solution: Cover sensitive parts with a rag and wear gloves/goggles.
8. Bleeding Alone Without Help or a Kit
⚠️ Mistake: Attempting a traditional bleed without an assistant to operate the pedal. ✅ Solution: Use a vacuum bleeding kit (e.g., Mityvac) or a pressure bleeder to work solo.
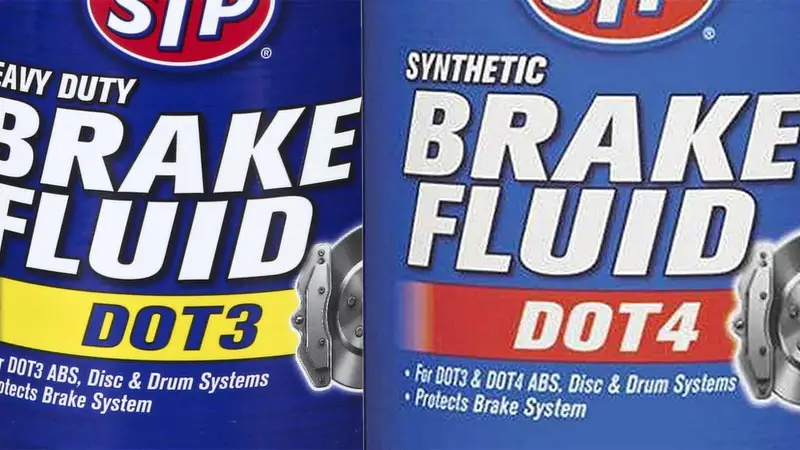
9. Confusing DOT 4 and DOT 5
⚠️ Mistake: Mixing incompatible brake fluids (e.g., DOT 5 silicone with DOT 4). ✅ Solution: Strictly adhere to the fluid type indicated in the manual (DOT 3, 4, 5.1, or DOT 5).
10. Not Checking for Leaks After Bleeding
⚠️ Mistake: Ignoring a leak at the bleed screws or hoses. ✅ Solution: Visually inspect the system and test the brakes at low speed in a safe area.
11. Reusing Used Brake Fluid
⚠️ Mistake : Transferring old fluid collected in the bleed container back to the reservoir. ✅ Solution : Used brake fluid contains moisture and impurities. Use only new fluid from a sealed container to avoid corrosion and loss of effectiveness.
12. Forgetting to Replace the Bleed Screws/Caps
⚠️ Mistake : Reusing cracked, corroded, or improperly tightened bleed screws/caps. ✅ Solution : After bleeding, check the condition of the bleed screws/caps. Replace them if damaged to prevent air or fluid leaks. Prefer original (OEM) parts.
Optimal Bleeding Procedure (Summary)
Fill the reservoir with new fluid.
Bleed in the manufacturer’s order, maintaining the fluid level.
Tighten the bleed screws without excess force.
Test the pedal and check for leaks.
Brake Bleeding FAQ
Q: What is the lifespan of brake fluid? 2 to 3 years (or 60,000 km). Change it if it’s cloudy or brownish.
Q: Cost of a bleed at a garage? Between €80 and €150 depending on the model.
Q: Soft pedal after bleeding? Repeat the bleeding: air remained in the system.
Conclusion
Avoid these 12 mistakes for optimal braking. A properly performed bleed extends the life of the calipers, wheel cylinders, and master cylinder. If in doubt, consult a professional – your safety is priceless!
Car Won’t Accelerate? Causes, Symptoms and Solutions
When your car doesn’t respond to acceleration, it could be due to mechanical, electrical, or fuel-related issues. Here are the main causes:
Lack of Power: Clogged air filter, weak fuel pump.
Engine Overheating: Check coolant level.
Turbo Issue (if applicable): Air leak or turbocharger failure.
Temporary Solution: Shift to a lower gear (manual) or avoid high RPMs (automatic).
Q3: The Car Doesn’t Accelerate After Refueling: Is It Fuel-Related?
A: Yes, several possible causes:
Poor Fuel Quality: Drain the tank if the car coughs or stalls.
Saturated Fuel Filter: Replace it after contaminated fuel.
Faulty Fuel Pressure Sensor: Diagnose with an OBD2 tool.
Q4: How Much Does It Cost to Repair an Acceleration Problem?
A: Costs vary depending on the cause:
Fuel Filter: €20 to €100.
Faulty Sensor (e.g., TPS): €80 to €300.
Clutch: €400 to €1,200.
ECU Reprogramming: €150 to €600.
Q5: Is It Dangerous to Drive a Car That Doesn’t Accelerate?
A: Yes, it can lead to:
Accident Risk: Inability to maintain speed or overtake.
Engine Damage: Overheating or component deterioration.
Damaged Transmission: Prolonged slipping in limp mode. Solution: Have the vehicle towed to a garage.
These Q&As complement the existing FAQ by covering concrete scenarios and emergency advice, enhancing the article’s practical usefulness.
Conclusion
A car that doesn’t accelerate is a serious issue that can endanger your safety. Act quickly:
Diagnose with an OBD2 tool.
Maintain Regularly: Oil changes, filters, belts.
Consult a Professional for complex repairs (ECU, transmission).
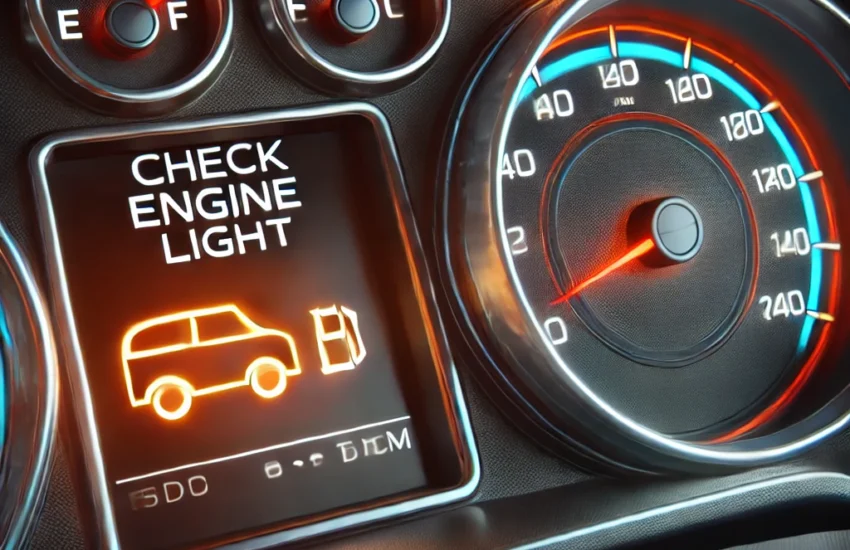
⚠️ Never ignore a lit check engine light: It can prevent costly breakdowns or accidents.
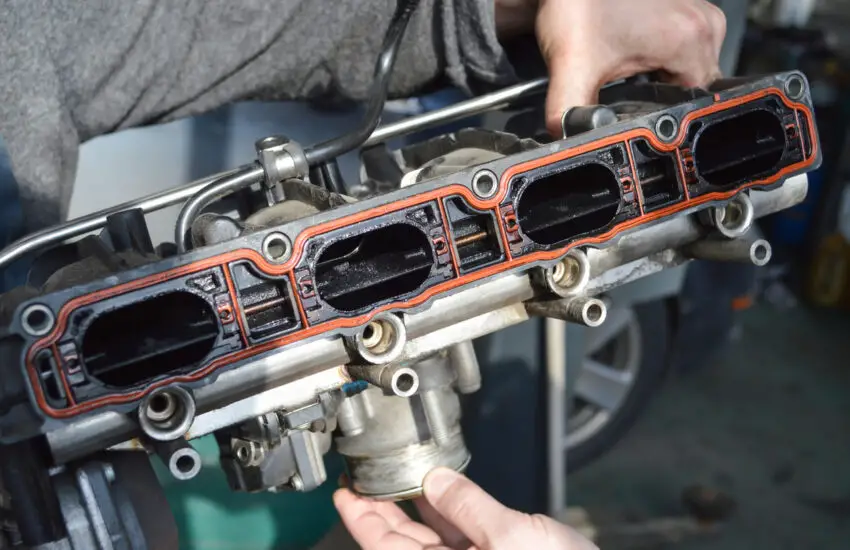
🛠️ Oil in the Intake Manifold: Causes, Repairs, and Prevention
The intake manifold distributes air to the cylinders to optimize combustion. The presence of oil in this system often indicates a mechanical or maintenance issue. Here’s how to identify and resolve the problem.
⚠️ 7 Main Causes of Oil in the Intake Manifold
1. 🌀 Faulty PCV Valve
Role: Regulates oil vapors from the crankcase.
Symptoms: Check engine light on, unstable idle.
Solution: Clean or replace the PCV valve (€20 to €80).
2. 🛢️ Clogged Oil Passage
Cause: Old oil or sludge (irregular oil changes).
Solution: Engine flush + oil change + new oil filter.
3. 🔧 Worn Piston Rings
Symptoms: Blue smoke from exhaust, loss of power.
Repair: Engine overhaul (€1,500 to €3,000).
4. 🚗 Worn Engine (Over 100,000 km)
Consequence: Increased mechanical play → oil leaks.
Solution: Compression test or overhaul.
5. 🌬️ Clogged Air Filter
Impact: Air/fuel imbalance → oil deposits.
Solution: Replace the filter (€10 to €50).
6. 🔩 Faulty Valve Seals
Symptoms: Oil leaks, black smoke.
Repair: Replace the seals (€200 to €600).
7. ⚙️ Worn Camshafts
Problem: Wear → oil leaks.
Solution: Replace the camshafts (€500 to €1,200).
🔥 Severity of the Problem
Light oil film: 🟠 No urgency, but monitor.
Oil puddle: 🔴 Risk of overheating or engine failure.
🛡️ How to Prevent Oil Leaks?
🔧 Regular maintenance:
Oil changes every 10,000 to 15,000 km.
Replacement of filters (air, oil, fuel).
🌀 PCV system cleaning: Every 50,000 km.
🧴 Cleaning additives: To dissolve deposits.
💶 Repair Costs
Repair
Cost (parts + labor)
🔄 Intake manifold gasket replacement
€200 to €550
🌀 PCV valve change
€80 to €200
🔧 Complete engine overhaul
€1,500 to €4,000
❓ FAQ
Q1: 🚗 Can I drive with oil in the intake manifold?
✅ A: Avoid driving long distances → risk of damaging the turbo or sensors.
✅ A: Use a special intake cleaner or disassemble it for manual cleaning.
✅ Conclusion
The presence of oil in the intake manifold should not be ignored. 🔍 Early diagnosis and 🔧 rigorous maintenance extend engine life.
⚠️ Pro Tip: Consult a mechanic to avoid costly repairs!
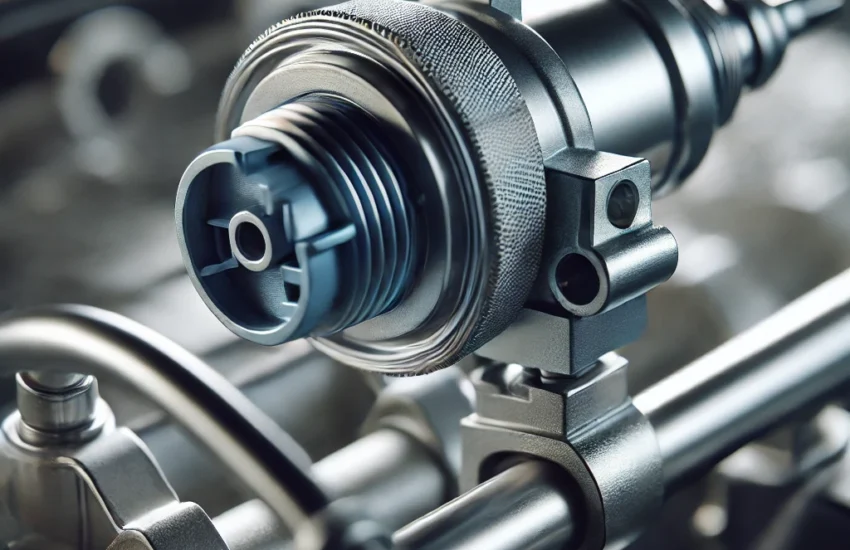
Diagnosis and Repair of a Faulty Fuel Pressure Sensor – Complete Guide
The fuel pressure sensor is a crucial component of your vehicle’s injection system. A faulty sensor can lead to various performance and fuel economy issues. Here’s how to identify and repair a failing fuel pressure sensor.
Symptoms of a Faulty Fuel Pressure Sensor
Decreased engine performance
Difficulty starting or failure to start
Excessive fuel consumption
Unstable idling or frequent stalling
Check engine light illuminated on the dashboard
Excessive fuel odor
Associated Error Codes
The following OBD-II codes may indicate a problem with the fuel pressure sensor:
P0087: Fuel pressure too low
P0191: Fuel pressure sensor circuit out of range
P0193: Fuel pressure too high
Possible Causes of Malfunction
Damaged or dirty fuel pressure sensor
Corroded or damaged electrical connectors
Leak in the fuel circuit
Faulty fuel pump
Clogged fuel filter
Tools Needed for Diagnosis
OBD-II scanner
Multimeter
Wrenches and screwdrivers
Protective gloves and safety glasses
Diagnostic Steps
Scan Fault Codes: Connect an OBD-II scanner to the vehicle’s diagnostic port and note the detected codes.
Visually Inspect the Sensor: Locate the fuel pressure sensor (usually on the injection rail) and check its condition.
Check Connectors and Wiring: Look for signs of corrosion, cuts, or loose connections.
Test the Sensor with a Multimeter: Disconnect the sensor and measure the output voltage. Compare the values with the manufacturer’s specifications.
Test Fuel Pressure: Use a fuel pressure gauge to verify that the actual pressure matches normal values.
How to Repair a Fuel Pressure Sensor
Replacing the Sensor
Disconnect the battery to prevent any short circuits.
Unplug the sensor’s electrical connector.
Unscrew the sensor with an appropriate wrench.
Install the new sensor and tighten it according to specifications.
Reconnect the electrical connector.
Post-Replacement Verification
Clear the error codes with the OBD-II scanner.
Start the engine and observe its performance.
Test drive the vehicle to confirm the issue is resolved.
Prevention Tips
Regularly replace the fuel filter.
Use high-quality fuel to avoid impurities.
Periodically inspect the fuel circuit and electrical connections.
By following these steps, you can effectively diagnose and repair a faulty fuel pressure sensor, ensuring your vehicle operates properly.
Everything You Need to Know About ECU Reprogramming: Risks and Benefits
ECU (Engine Control Unit) remapping is a technique used to optimize engine performance by modifying the original parameters of the electronic control unit. This practice, highly valued by tuning enthusiasts and automotive professionals, offers significant advantages but also carries risks that are important to understand before proceeding.
What is ECU Remapping?
The ECU is the engine’s brain: it controls fuel injection, ignition, turbo pressure, and other essential parameters for the vehicle’s proper functioning. Remapping involves adjusting the ECU settings to improve engine power, torque, and energy efficiency.
There are several types of ECU remapping:
Engine Optimization: performance improvement without compromising reliability.
Fuel Economy: parameter adjustments to reduce consumption.
Stage 1, 2, 3: progressive modifications increasing power based on the vehicle’s mechanical components.
Benefits of ECU Remapping
Increased Power and Torque By modifying injection and boost parameters, remapping can provide up to 30% additional power.
Optimized Fuel Consumption Precise adjustment of the air/fuel mixture reduces consumption, particularly on turbo diesel engines.
Improved Engine Responsiveness The vehicle gains smoothness and dynamism, with sharper acceleration.
Enhanced Driving Experience A well-optimized car provides better driving pleasure, especially during overtaking and acceleration.
Risks of ECU Remapping
Loss of Manufacturer Warranty Modifying engine parameters may void the manufacturer’s warranty.
Premature Engine and Component Wear Excessive power increase can put additional strain on the engine, clutch, turbo, and other essential parts.
Legal and Insurance Issues Remapping isn’t always legal according to local regulations and may invalidate vehicle insurance.
Risk of Breakdown and Poor Tuning Incorrect programming can lead to engine malfunctions, increased fuel consumption, or higher pollutant emissions.
How to Properly Perform ECU Remapping
To minimize risks, it’s essential to use a qualified professional. Here are some tips:
Check the tuner’s reputation and certifications.
Use a dynamometer to check performance before and after remapping.
Respect engine tolerances to avoid premature wear.
Ensure modifications comply with current legislation.
Conclusion
ECU remapping can be an excellent solution for improving vehicle performance, provided it’s done correctly. Before proceeding, it’s important to carefully weigh the benefits and risks to avoid disappointments. Always prioritize competent professionals and ensure modifications align with regulations.
Engine Light Comes On After Refueling? Causes and Solutions
The illumination of the check engine light after refueling can worry many drivers. Several reasons can explain this phenomenon, ranging from a simple fuel cap issue to a more complex malfunction in the emission system.
1. Fuel Cap Not Properly Closed or Damaged
A loose or defective fuel cap can cause fuel vapor leakage, triggering an error code in the OBD-II system. Make sure the cap is properly secured and in good condition.
2. Air in the Fuel System
When filling the tank, air can enter the fuel supply circuit, causing a temporary variation in engine parameters and activating the check engine light.
3. Poor Quality Fuel
Fuel containing impurities or an improper mixture of components can disrupt combustion and generate errors in the oxygen sensors or knock sensor.
4. Problem with the EVAP System
The EVAP (Evaporative Emission Control System) is designed to capture and recycle fuel vapors. A failure in this system, such as a leak or faulty valve, can cause the check engine light to come on.
5. Sensitive Oxygen Sensor
Some vehicles have very sensitive oxygen sensors that can detect a slight change in exhaust gas composition after refueling, temporarily activating the check engine light.
What to Do When the Check Engine Light Comes On?
Check the fuel cap: Make sure it is properly closed and in good condition.
Observe vehicle performance: If no other symptoms are present (irregular idling, loss of power, abnormal smoke), the light may turn off after a few driving cycles.
Use an OBD-II scanner: This helps identify the exact error code and guide the diagnosis.
Consult a professional: If the light remains on or flashes, it is best to have the vehicle examined by a mechanic.
In conclusion, although the check engine light coming on after refueling may seem alarming, it often results from a minor issue. A quick check can help identify and resolve the problem without difficulty.
A Squeak Under the Hood During Acceleration: Causes and Solutions
When you hear a high-pitched squeal or screech from the engine compartment during acceleration, it is crucial not to ignore this signal. This noise, often related to a worn or damaged fan belt, can reveal underlying mechanical problems. Understanding the possible causes and knowing how to react will save you from costly repairs.
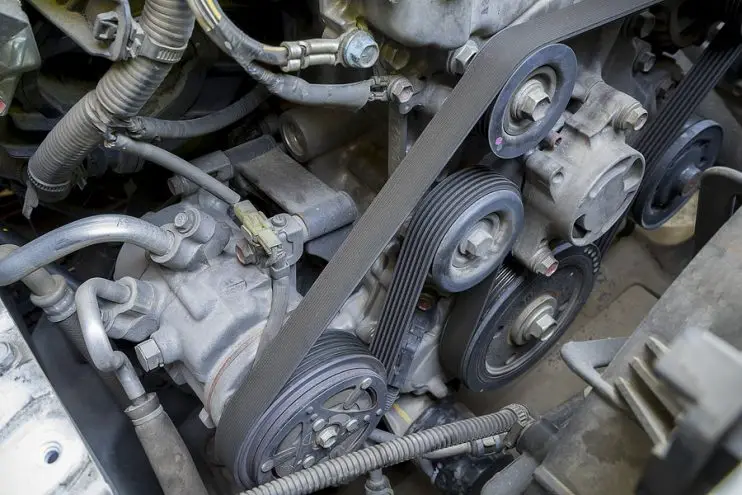
Why Does the Fan Belt Squeal?
The squeal typically occurs when the serpentine belt loses its grip on the engine pulleys. Several factors explain this phenomenon. Belt slippage is one of the main causes: a belt contaminated by oil, coolant, or simply worn out, can no longer properly grip the pulleys of the alternator, power steering pump, or air conditioning compressor. During acceleration, the load on these accessories increases, which worsens the slippage and generates a characteristic screech.
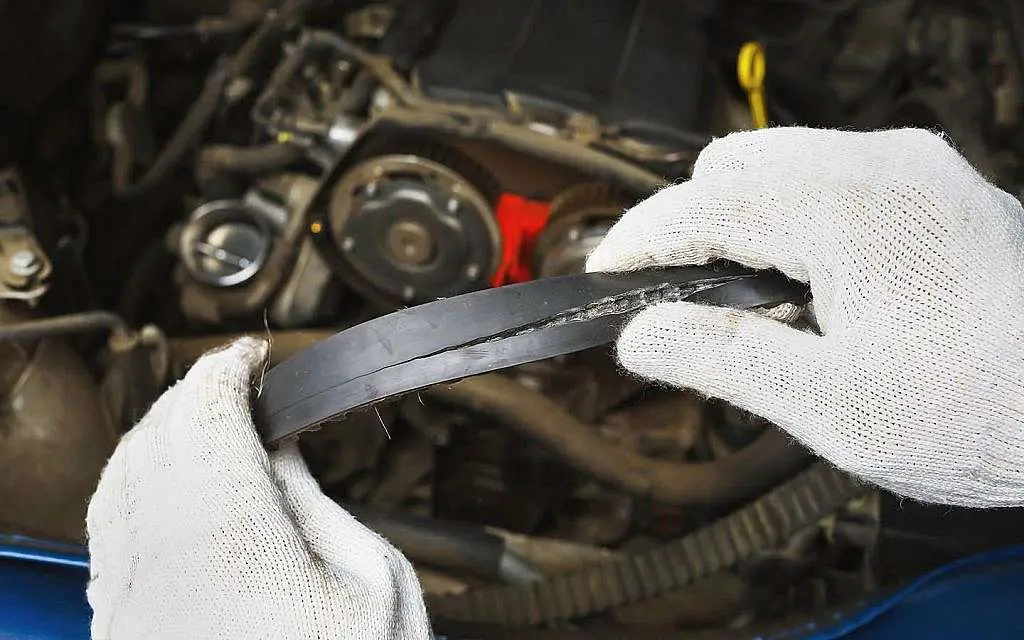
Advanced belt wear can also be the cause. Over time, cracks, fraying, or “glazing” (a smooth and shiny surface) reduce its flexibility and grip. During acceleration, these defects become more pronounced, causing squealing. Misaligned pulleys, due to faulty bearings or incorrect installation, force the belt to deviate from its path, leading to uneven wear and noise.
Finally, incorrect belt tension plays a key role. An overly tight belt prematurely wears out the accessory bearings, while a belt that is too loose slips frequently. Although the automatic tensioners in modern vehicles simplify adjustment, they can seize or break over time.
misaligned pulleys
Diagnosing the Problem: Key Steps
To identify the source of the squeal, start with a visual inspection. Examine the serpentine belt: cracks, frayed areas, or a shiny surface indicate wear. Then check the pulleys – debris, fluid traces, or damaged bearings (excessive play, wobbling) can disrupt its operation.
Check the belt tension using the tensioner. If it is adjustable, refer to the manufacturer’s manual to adjust the tension. A correctly tensioned belt should have slight play (about 1 cm) when pressed firmly. If the tensioner is faulty (stuck, corroded), replace it.
Use a straightedge or a laser alignment tool to check the parallelism of the pulleys. Misalignment, even minor, forces the belt to rub against the pulley edges, generating noise and premature wear. Clean the pulleys with a degreaser to remove oil or dirt residue.
solutions for fan belt noise
Solutions and Prevention
If the belt is worn or damaged, replace it without delay. A new belt, combined with clean and well-aligned pulleys, will usually solve the problem. For deformed pulleys or seized bearings, replacement is necessary.
Regular maintenance is key to preventing squealing. Inspect the belt every 20,000 km or during oil changes. In cold weather, be vigilant: hardened rubber may slip temporarily, but if the noise persists after a few minutes, an adjustment is needed.
Frequently Asked Questions
“What does a faulty belt sound like?” It produces a high-pitched squeal, especially at startup or under load. The noise may evolve into a screech or slapping sound if the wear worsens.
“When should it be replaced?” At the first signs of wear (cracks, noises), or every 100,000 km. Do not delay replacement: a broken belt can damage the engine.
“Does weather affect the noise?” Yes. Cold stiffens the belt, increasing initial slippage. Excessive heat makes it more flexible, which can also cause squealing.
Conclusion
A belt squeal during acceleration should never be ignored. By quickly identifying the cause – wear, incorrect tension, or faulty pulleys – you will avoid costly breakdowns. Preventive maintenance, including pulley cleaning and regular inspections, will extend the belt’s lifespan and ensure your vehicle’s proper operation.
How to Install a Spark Plug Anti-Fouling Kit – Complete Guide
Every month, 80% of car owners spend half of their budget on car repairs and maintenance. However, some tasks can be done yourself, such as installing a spark plug anti-fouling device. Discover here the most effective method to install this equipment and improve your engine’s performance.
What is a Spark Plug Anti-Fouling Device?
Before any installation, it is essential to understand what an anti-fouling device is and its purpose. This device helps prevent spark plug fouling and avoids premature deterioration. It is particularly useful when the engine runs with a rich mixture or has oil-related issues. Its installation thus helps optimize engine performance.
Steps to Install a Spark Plug Anti-Fouling Device
1. Preparation
Before starting, make sure you have the necessary tools:
Electric drill
Spark plug of at least 18 mm
Appropriate socket wrench
Anti-seize compound
Paper towel or cleaner
Disconnect the negative terminal of the battery to reset the engine control unit (ECU) and ensure a safe installation.
2. Sensor Mounting
Your car can accommodate one or more anti-fouling devices. If you need to install several, use an electric drill to drill into the center of the device halfway. This will allow easy insertion of the sensor.
3. Spark Plug Installation and Sensor Removal
Tighten the spark plug firmly onto the anti-fouling device.
Unscrew the original sensor and insert the cell rod.
Apply anti-seize compound to the threads to facilitate installation and future removal.
Clean the cell with a paper towel to avoid any residue that could affect the engine.
4. Reinstallation and System Connection
Reinstall the sensor by applying anti-seize compound to the threads.
Reconnect the battery and the entire ECU system.
Check that the installation is secure and test the engine.
Frequently Asked Questions
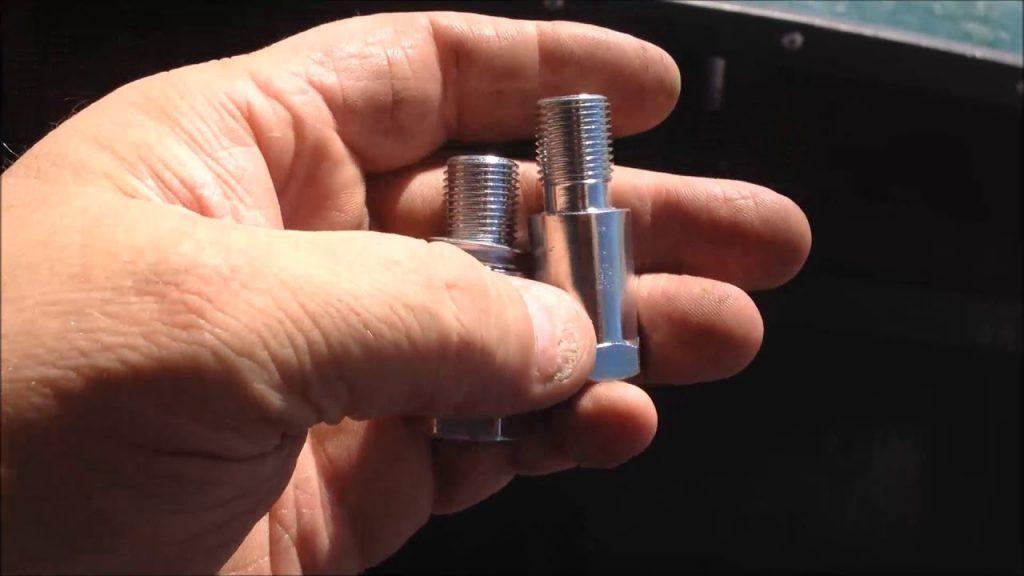
What is the purpose of a spark plug adapter?
A spark plug adapter facilitates the connection between the spark plug and the engine, optimizing its proper functioning.
Can an engine run without a spark plug?
No, because the spark plug is essential to initiate fuel combustion.
What are the symptoms of a faulty spark plug?
Increased fuel consumption
Difficulty starting the vehicle
Engine misfires
Slow acceleration
What socket size is needed for a spark plug?
Standard sizes are 13/16 inches and ⅝ inches. Make sure to have a rubber insert to hold the spark plug in place.
Can I drive with a faulty spark plug?
It is possible but not recommended, as it can damage the engine and lead to costly repairs.
What happens if I don’t change my spark plugs?
Excessive wear leads to incomplete combustion, reducing engine power and increasing fuel consumption.
Conclusion
With this simple method, you can save time and money while optimizing your engine’s performance. However, if in doubt, it is best to consult a professional to avoid any mechanical issues.
Symptoms of low engine compression
Engine compression is the heart of your vehicle… when it’s low, everything suffers. Low compression can turn a reliable vehicle into a frustrating wheel problem overnight.
For many car owners, recognizing the signs of low engine compression early on can make the difference between a simple repair and a major repair bill.
Understanding Engine Compression
Engine compression is the pressure created when the piston moves up in the cylinder, compressing the air-fuel mixture into a confined space. This pressure is measured in pounds per square inch (PSI) and is typically between 125 and 175 PSI in a healthy gasoline engine.
Good compression is essential for your engine’s performance. When air and fuel are compressed, they become more volatile, causing a stronger explosion when ignited by the spark plug. This explosion forces the piston downward, generating the power needed to propel your vehicle.
Compression occurs during one of the four stages of the combustion cycle:
Intake Stroke: The piston moves down while the intake valve opens, drawing air and fuel into the cylinder.
Compression Stroke: Both valves close as the piston moves upward, compressing the air-fuel mixture.
Power Stroke: The spark plug ignites the compressed mixture, creating an explosion that forces the piston downward.
Exhaust Stroke: The exhaust valve opens as the piston moves back up, pushing the spent gases out.
For this process to work correctly, the cylinder must be properly sealed by the piston rings, valves, and head gasket. Any leak in this sealed system will result in a loss of compression, leading to various noticeable symptoms.
Signs of Low Compression in an Engine
When engine compression drops below normal, your vehicle tries to tell you in different ways. Here are the most common symptoms, starting with the most frequent.
1) Check Engine Light
The check engine light is often one of the first indicators of low compression problems. When your engine’s compression drops below normal, oxygen sensors detect abnormal exhaust gas compositions and misfire detection systems recognize incomplete combustion. These signals trigger specific diagnostic trouble codes (DTCs).
Common codes related to compression issues include P0300-P0308 (cylinder misfires), P0171/P0174 (system too lean), or P0401-P0408 (EGR system problems).
Although the check engine light doesn’t specifically indicate low compression, these codes, combined with other symptoms on this list, strongly suggest compression problems. Unfortunately, many drivers choose to ignore this light initially, but it’s your vehicle’s first attempt to alert you to issues before performance noticeably degrades.
2) Starting Problems
If your engine cranks but doesn’t start, or takes much longer than usual to start, low compression could be the cause. When starting, your engine needs adequate compression to generate enough heat and ignite the air-fuel mixture.
With low compression, the spark plug may still fire, but there isn’t enough pressure to create the explosion needed for combustion.
You might notice the engine cranking normally but refusing to start, or requiring several attempts before starting. In more severe cases, the engine won’t start at all, despite having a good battery and starter. These starting problems often worsen in cold weather, when the engine already faces more challenging starting conditions.
3) Poor Engine Performance
Once your car is running, low compression will result in poor performance. You might accelerate and notice a significant delay before the vehicle responds, or struggle to maintain highway speed on inclines you never had trouble with before.
Acceleration becomes sluggish, and your engine may feel like it’s working harder than usual to keep up with traffic. This happens because the low-compression cylinders aren’t generating their share of power.
Even if only one cylinder has compression issues, you’ll feel the difference (your engine runs with fewer cylinders than it has). The problem becomes more evident in situations requiring more power, like passing another vehicle or towing.
4) Rough Idle and Misfires
An engine that idles smoothly and at a steady RPM is a sign of good health. When compression is low, the engine often idles roughly, with RPM fluctuations instead of maintaining a constant level. Vibrations may be felt in the steering wheel or seat, or the vehicle might shake slightly when stopped at a red light.
This rough idle occurs when low-compression cylinders misfire or fire irregularly. The onboard computer may try to compensate by adjusting fuel delivery or timing, but it cannot fix the underlying compression problem.
If you check for error codes with an OBD2 scanner, you’ll likely find misfire codes for specific cylinders (usually those with low compression). These misfires not only make driving uncomfortable but can also damage your catalytic converter if ignored.
5) Engine Noise
Low compression often manifests through distinctive noises from the engine. You might hear knocking, ticking, or rattling that wasn’t there before, especially during acceleration or under load. These noises occur when combustion is compromised, causing ignition irregularities and mechanical stress.
A backfire through the exhaust can indicate unburned fuel passing through the system due to incomplete combustion in low-compression cylinders. Some drivers also report a hissing sound during compression, which may indicate pressure leakage from worn piston rings or valves.
These noises generally worsen as the engine warms up and parts expand. While many engine noises are hard to diagnose, combined with other symptoms on this list, they provide strong evidence of compression problems.
6) Poor Fuel Economy
If you find yourself visiting the gas station more often lately, low compression could be the cause. While poor fuel economy can have many causes, when it appears alongside others in this article, it can be related to compression.
When your engine doesn’t properly compress the air-fuel mixture, much of that fuel is wasted, incompletely burned, or not burned at all. The onboard computer often tries to compensate for this poor performance by injecting more fuel, further reducing your fuel economy.
This drop in fuel economy can occur gradually, as compression slowly decreases, or suddenly if there’s a rapid loss of compression in one or more cylinders. In either case, you’ll pay more at the pump while getting worse performance (a losing situation).
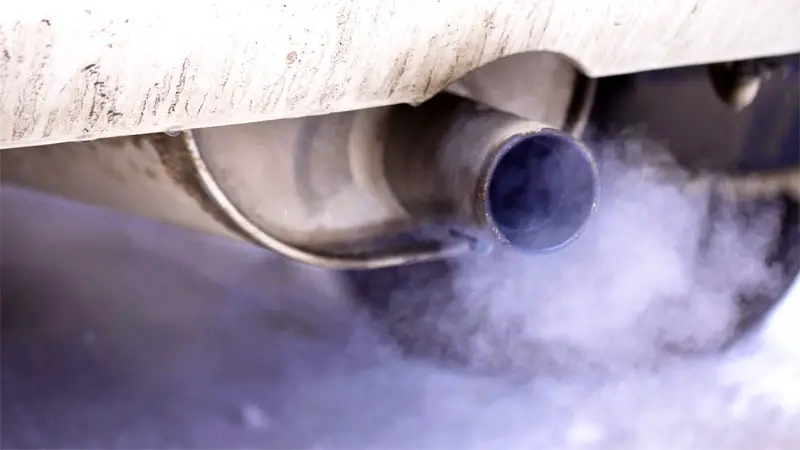
7) Excessive Exhaust Smoke
Your exhaust can often reveal what’s happening inside your engine. When compression is low, you’ll often see abnormal smoke coming from your tailpipe. The color provides important clues:
Blue or gray smoke typically indicates oil burning in the combustion chamber, often due to worn piston rings with poor sealing. This is the most common type of smoke with compression problems.
White smoke (beyond normal condensation) can indicate coolant entering the combustion chamber through a blown head gasket or cracked cylinder head (both of which can cause compression loss).
Black smoke usually signals excessive fuel consumption, which occurs when the computer tries to compensate for power loss due to low compression. This smoke is particularly noticeable during acceleration, when the engine is under load and compression problems are most apparent.
8) Failed Emissions Test
If your vehicle fails an emissions test, low compression could be the cause. In most cases, compression problems trigger the check engine light mentioned earlier well before the emissions test, automatically resulting in failure in many states.
However, even if you manage to temporarily clear the codes, the emissions equipment will still detect high hydrocarbon (HC) readings resulting from incomplete fuel combustion.
When compression is insufficient, fuel doesn’t burn completely, causing unburned hydrocarbons to exit through the exhaust. Your catalytic converter tries to clean up these emissions but can become overwhelmed when compression problems are significant.
High carbon monoxide (CO) levels may also be observed for similar reasons. Emissions testing equipment can detect these issues even if they’re not yet severe enough to affect driving, unlike what you might notice during normal driving.
How to Test an Oxygen Sensor with a Multimeter?
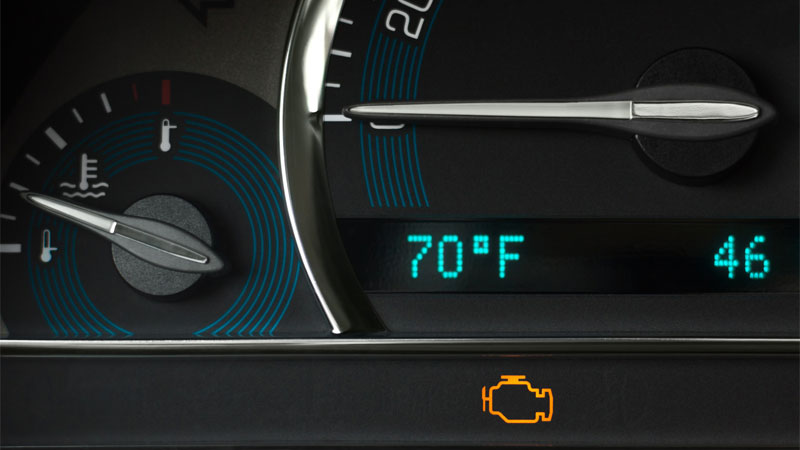
The oxygen sensor (or lambda sensor) is a key component of the engine management system. It measures the amount of oxygen in the exhaust gases and sends this information to the PCM (Powertrain Control Module) to adjust the air/fuel mixture. A faulty sensor can cause excessive fuel consumption, loss of power, and activation of the engine warning light.
🛠️ Necessary Equipment
Digital multimeter
Protective gloves (optional)
OBD-II scanner (optional but useful for reading error codes)
Vehicle repair manual (to identify the correct wires)
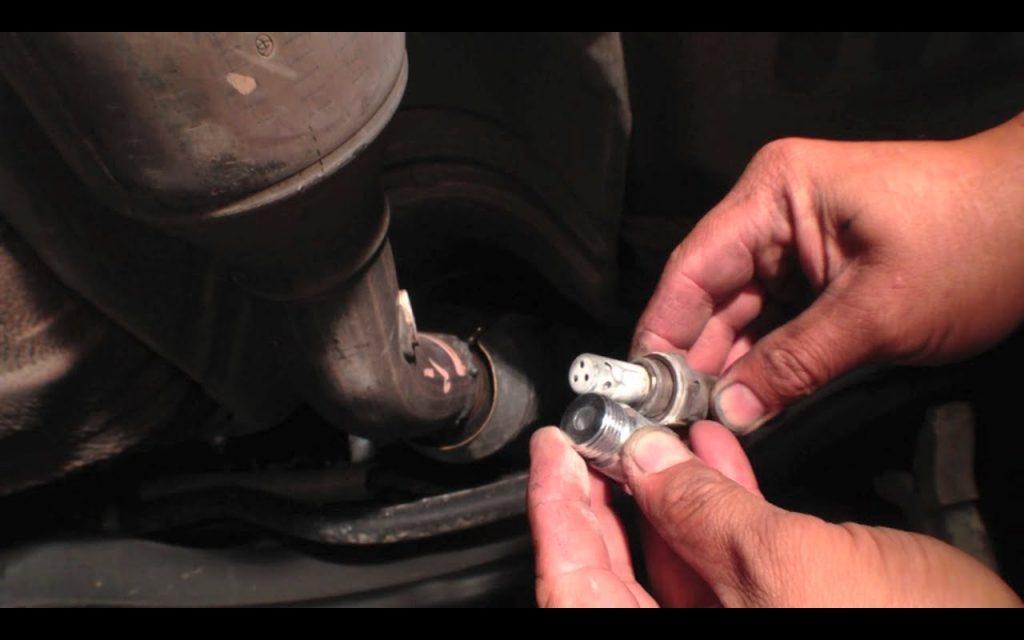
✅ Step 1: Locate the Oxygen Sensor
Vehicles typically have one or more oxygen sensors, located:
Before the catalytic converter (upstream sensor, O2 sensor 1)
After the catalytic converter (downstream sensor, O2 sensor 2)
🔎 Check your car’s manual to identify their exact location.
✅ Step 2: Checking the Sensor Heater
Some oxygen sensors are heated (3, 4, or 5-wire sensors). The heater is powered by 12V and helps the sensor reach its operating temperature quickly.
Turn the ignition on (without starting the engine)
Set the multimeter to the DC Volts position (20V)
Place the red probe on the heater power wire (often red/white)
Place the black probe on a ground (chassis or negative battery terminal)
You should read between 12V and 14V.
📌 If no voltage is present, check the sensor fuses and wiring.
✅ Step 3: Testing the Heater Resistance
Disconnect the oxygen sensor
Set the multimeter to the Ohms (Ω) position
Place the probes on the two heater wires (often white and white)
The normal value is between 5Ω and 20Ω (depending on the manufacturer)
📌 If the resistance is infinite (OL on the multimeter), the heater is broken and the sensor is faulty.
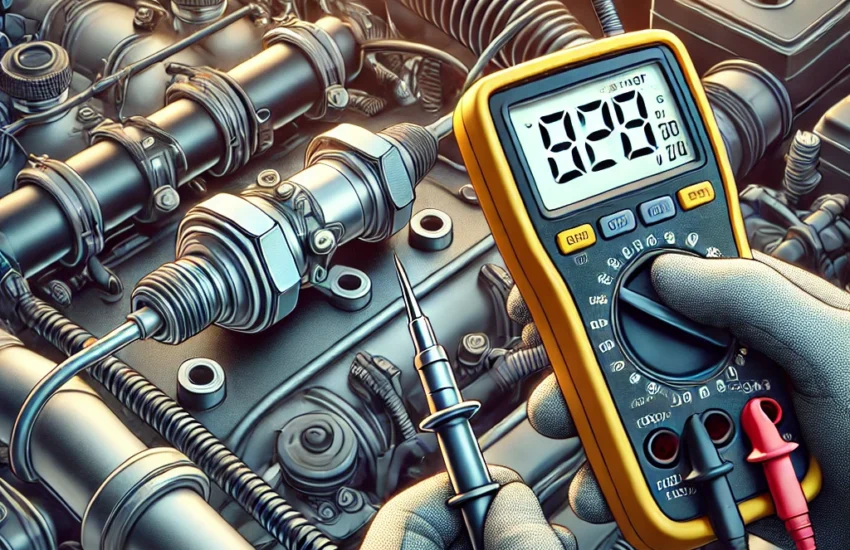
✅ Step 4: Testing the Oxygen Sensor Signal
Start the engine and let it warm up for 5 minutes
Set the multimeter to DC Volts (2V or 2000mV)
Place the red probe on the sensor signal wire (usually black or gray)
Place the black probe on a ground
Expected values for a sensor in good condition:
Engine idling: The voltage should oscillate between 0.1V and 0.9V
Rapid acceleration: The voltage should rise towards 0.9V
Deceleration: The voltage should drop towards 0.1V
📌 If the voltage is fixed or does not vary rapidly, the sensor is likely faulty.
✅ Step 5: Verification with an OBD-II Scanner (Optional)
If you have an OBD-II scanner, you can check the error codes and real-time values of the O2 sensor.
P0131 to P0139: Problems related to O2 sensors
P0420 / P0430: Catalyst system efficiency below threshold (related to oxygen sensors)
📌 Conclusion
🔹 If the sensor does not respond or shows abnormal values, it is likely faulty and must be replaced. 🔹 If the heater resistance is infinite, the sensor heater is broken and it needs to be changed. 🔹 A faulty oxygen sensor leads to poor combustion, excessive fuel consumption, and reduced performance.