Why is the fuel consumption of rotary engines poor?

The rotary engine is a version of the internal combustion engine that is highly valued for its smooth operation and cooling efficiency. However, in an era where fuel economy has become essential, rotary engines struggle to meet the requirements. Manufacturers were already aware that this type of engine would not be suitable for a future where reducing consumption is paramount, thus paving the way for static engines. But then, why do rotary engines consume more fuel? Let’s examine the causes with some maintenance tips!

Key Points About Rotary Engines

Also known as the Wankel engine, the rotary engine was conceived and developed by Felix Wankel, who obtained his first patent for this type of engine in 1929. However, it was Hans Dieter Paschke who developed the commonly used version, incorporating significant improvements over the original model.

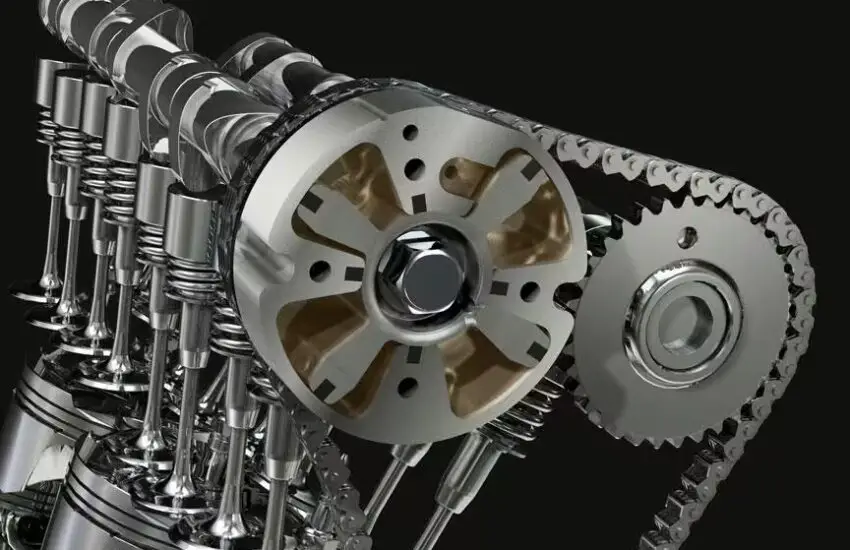
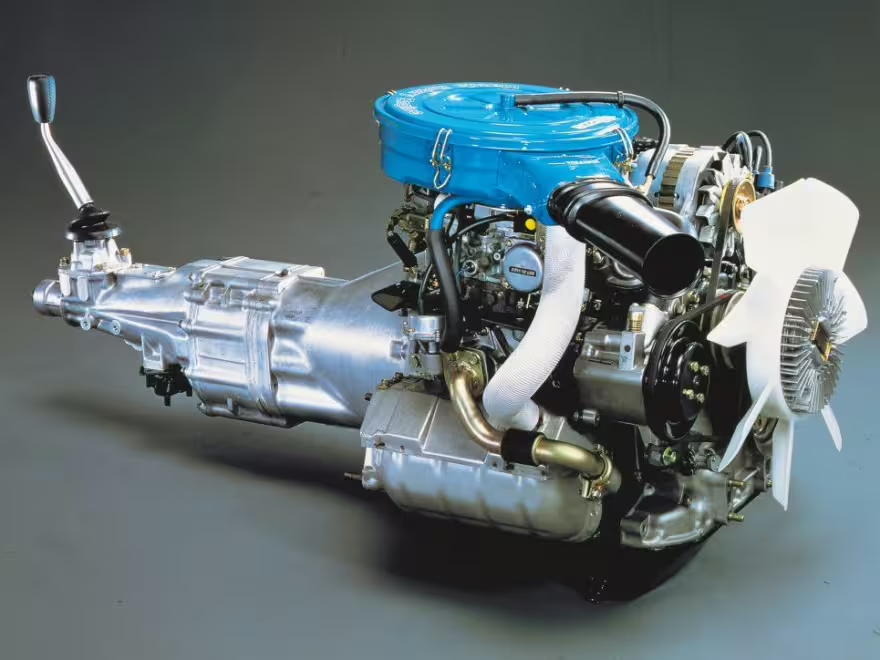
This type of engine became famous thanks to the Mazda RX-8. Unlike traditional engines that use cylindrical pistons in linear motion, the Wankel engine operates with a triangular piston in continuous rotation. With each rotation, the intake, compression, and exhaust phases continuously follow one another in the cylinder. This particular mechanism gives rotary engines advantages such as their lightness, reduced manufacturing cost, and high capacity.

Why Do Rotary Engines Consume More Fuel?

The rotary engine is designed with a fixed crankshaft around which the rotor rotates. Although this design brings strengths, low energy efficiency remains a notable weakness.

  1. A Fuel-Hungry Engine

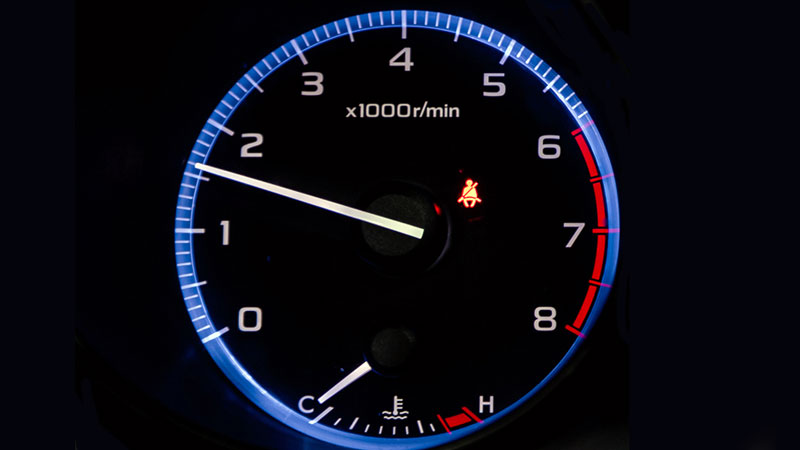
The main problem is that rotary engines often generate more power than they can efficiently handle. This extra power results in increased fuel combustion, especially at high RPM. Thus, the rotary engine has lower energy efficiency compared to other types of engines, which explains its poor mileage range.

Rotary engines in cars
Rotary engines are not designed to be economical

2.Sealing Issues

The different chambers of a rotary engine operate at varying temperatures, which creates sealing challenges. Due to different coefficients of expansion between materials, leaks can occur at the seals, leading to a loss of combustion gases between the chambers. This waste of gases directly reduces the engine’s energy efficiency, resulting in increased fuel consumption.

  1. Low Compression Ratio

The compression ratio, which compares the maximum and minimum volume of the combustion chamber, is a key efficiency factor in internal combustion engines. In rotary engines, the optimal compression ratio generally reaches 11:1, lower than the higher ratios offered by modern gasoline engines. A higher ratio, around 10:1 or more for conventional engines, ensures better energy performance, which is not the case for rotary engines.

  1. Elongated Combustion Chamber

The combustion chamber design of rotary engines is relatively long and has a high surface-to-volume ratio. This factor complicates the cooling of gases, prolonging their cooling time and thus affecting fuel consumption. Inefficient cooling of gases in the combustion chamber therefore leads to increased fuel consumption.

  1. Fixed Ports and Valve Timing

Unlike traditional engines, rotary engines have no valves or camshafts, which limits the flexibility of valve timing. Without the ability to adjust the timing of the intake and exhaust ports, engine performance deteriorates. This lack of control contributes to the low energy efficiency of rotary engines, which require more fuel to operate.

In conclusion, although the rotary engine offers certain advantages, its weaknesses in fuel consumption are marked by a combination of structural and mechanical factors.

Rotary engines and their operation
Rotary engines have poor timing for valve opening and closing

Why Is the Rotary Engine Not Commonly Used in Vehicles?

Despite its advantages, the rotary engine is rarely adopted by modern car manufacturers due to several notable limitations:

  1. Reduced Thermal Efficiency
    Combustion in a rotary engine takes place in an elongated oval-shaped chamber, which limits thermal efficiency. This design often leads to unburned fuel being ejected into the exhaust system, thereby increasing fuel consumption and reducing the engine’s overall efficiency.
  2. Longer Combustion Cycle
    The rotary engine requires a long and continuous combustion cycle, which prolongs the rotor’s rotation time to complete a cycle. Moreover, the temperature variation between different parts of the rotor can cause uneven thermal expansions, reducing the lifespan of the rotary engine compared to conventional piston engines.
  3. High Environmental Impact
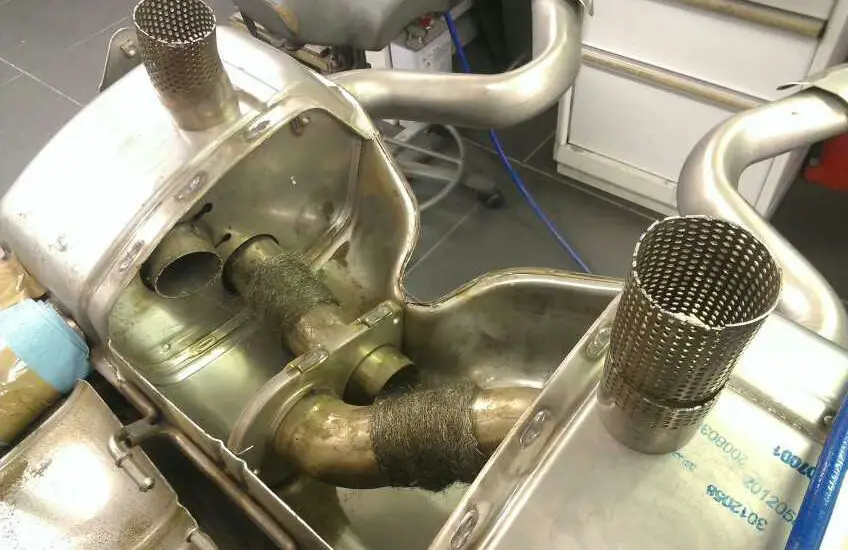
    Rotary engines struggle to meet emission standards, particularly in Europe. The engine’s simple structure can cause oil leaks, and fuel often escapes before being fully burned, leading to high pollutant emissions. This makes it difficult to comply with current environmental regulations.

In Conclusion

These characteristics explain why the rotary engine is not competitive in terms of fuel economy and durability. These engines are gradually being replaced by more environmentally friendly alternatives, as they no longer meet current requirements for reducing carbon footprint.

When should you change your timing belt

If your engine’s timing belt breaks, repairs can be very costly. But how do you know when it’s time to replace it? This guide provides all the necessary information to understand the role of the timing belt and know when to proceed with its replacement.

Key Points:

  • It is one of the most crucial parts of the engine.
  • It ensures the synchronization between the valves and pistons to guarantee proper ignition operation.
  • A break or damage to the belt can cause serious mechanical problems.
  • Replacement intervals generally range between 80,000 and 160,000 kilometers.

The timing belt, often hidden in the engine, is essential for the proper functioning of the vehicle. Although it may seem insignificant due to its discretion, it is actually one of the key components of the engine. A timing belt in poor condition, or likely to break at any moment, can lead to severe damage, up to a complete engine failure. Indeed, the timing belt synchronizes the movements of the valves and pistons, opening and closing at the right time for the engine to function correctly.

What does it do?

Timing belt

The timing belt is a toothed rubber belt that connects the crankshaft to the camshaft, allowing control of the ignition timing and cams in the engine. It ensures the opening and closing of the valves at the right time during the ignition cycle, thus ensuring optimal combustion. Without a functional belt, the engine simply will not start.

Potential problems with the timing belt

Like any rubber component, the timing belt is subject to wear over time. It can stretch, thin out, crack, or even break completely. The teeth of the belt can also wear out or detach, creating smooth areas that cause the drive sprocket to slip.

If this happens in an interference engine, the loss of synchronization between the valves and pistons can cause a collision, often leading to extremely costly repairs, sometimes even higher than the value of the vehicle in older models.

What makes the situation even more delicate is the few warning signs that the timing belt might fail, making it essential to adhere to the inspection and replacement intervals.

Signs of a damaged timing belt

  • Unusual noises: If your engine makes noises like squealing, whistling, rattling, or rumbling, especially at startup or when cold, this may indicate a problem. A continuous squealing noise can signal that the belt is loose, worn, and that a replacement is necessary.
What are the tell-tale signs of a damaged timing belt

Smoke from the engine

In winter, it is normal to see some steam or condensation escaping from the exhaust pipe due to the cold. However, if thick, persistent smoke is emitted, it may indicate a problem related to the timing belt. The synchronization of the valve opening – which allows the evacuation of gases and the intake of air – depends on the timing belt. A worn belt can lead to openings at the wrong time, generating a significant amount of smoke at the exhaust.

Starting problems

The timing belt plays an essential role in combustion, and a broken belt will prevent the engine from starting. Without the belt, the camshaft does not rotate at the same time as the crankshaft. By observing the camshaft while the crankshaft is rotating, you will see that if the belt is broken, the camshaft will remain stationary.

Visual signs of wear

Although it is sometimes difficult to access the timing belt, a visual inspection can reveal signs of wear. If the inner surface of the belt appears smooth, shiny, or glazed, this indicates hardening of the rubber and a lack of flexibility, signaling that it is worn. More obvious signs like cracks, frayed sections, or missing teeth require immediate replacement.

Can timing belt breakage be avoided?

The timing belt will always wear out eventually. The best prevention is to adhere to the recommended replacement intervals and have the belt checked regularly by a mechanic, especially during services. Rigorous maintenance is the only way to avoid an unexpected belt breakage.

How often should it be changed?

How often should the timing belt be changed

The frequency of timing belt replacement varies depending on the vehicle brand and mileage. Each manufacturer recommends an interval based either on mileage or duration of use, whichever comes first. These recommendations vary considerably: some advise replacement starting from 50,000 km, while others set the limit at 100,000 km. As for duration, it can range from 4-5 years to 10 years.

If in doubt, it is essential to consult the vehicle’s manual, where you will find the specific recommendations for your model. Although the manufacturer’s recommended interval is a maximum, it is prudent to replace the belt earlier to avoid costly repairs in case of breakage. For added safety, you can have the belt inspected at a garage to determine its wear condition and estimate its remaining lifespan.

How does variable valve timing work?

Modern cars are equipped with numerous sensors and gadgets, and their operation is managed by a central computer system. Under the hood, a lot is happening, even without you needing to know about half of these components.

However, if you are passionate about cars, it is essential to understand some key elements, including variable valve timing (VVT).

What is variable valve timing?

Variable valve timing systems are located in the internal combustion chamber of an engine. Their role is to adjust the timing of valve opening and closing, in coordination with the valve lift system.

This component is crucial, as optimal use of VVT can improve engine performance, increase energy efficiency, and reduce emissions.

variable valve timing systems
A variable valve timing system. (Photo source: Picasa)

Two-stroke engines do not use VVT, but they rely on power valve systems to achieve similar performance.

Essential VVT Components

The proper functioning of the VVT system and its components depends on the circulation of engine oil. If there is an issue with oil flow, all parts risk permanent failure.

The two main elements of this system are:

Solenoids

Each camshaft is equipped with a solenoid that controls oil pressure. This component adjusts the pressure based on engine load and speed, contributing to performance by improving or blocking the cam position.

Two main causes can lead to solenoid failure: irregular maintenance of filters and the engine, as well as low oil levels.

Gears

Also known as cam phasers, these devices maximize torque curves and enhance engine power. They ensure optimal performance while reducing emissions.

How Variable Valve Timing Works

In an engine’s combustion chamber, several valves regulate the intake and exhaust of gases in the cylinder.

Without VVT, valve timing remains constant regardless of engine speed, which limits performance. For optimal efficiency, timing must adapt to speed and load.

A variable valve timing system allows this adjustment based on the engine’s condition. There are mainly two types of VVT systems. Let’s take a closer look.

How variable valve timing works
A VVT in action. (Photo source: philipus/123RF)

Cam Phasing

Cam phasing allows the camshaft to rotate over a range of 60 degrees, influencing valve lift timing. For example, a valve might open at 5 degrees and close at 185 degrees of the crankshaft, before and after top dead center. If the timing limits lift events by 10 degrees, the valve will open and close 10 degrees later.

This improves engine power at high speeds, while advancing the timing enhances power at low speeds.

Cam Changing

Cam changing adjusts the camshaft’s phase angle relative to the crankshaft as well as the shape of the camshaft lobes. These modifications affect the timing and duration of valve opening, allowing the engine to achieve maximum efficiency.

FAQ

Do VVT systems differ between manufacturers? Although all VVT systems operate on the same principle, manufacturers may use different mechanisms, such as hydraulic or electric actuators, influencing system responsiveness and efficiency.

Can variable valve timing improve fuel efficiency? Yes, VVT optimizes valve opening and closing times based on engine speed and load, enabling better fuel consumption and emission management without compromising performance.

How does VVT affect engine noise and vibration? By adjusting valve timing, VVT helps the engine run more smoothly, reducing noise and vibration, providing a more comfortable ride, especially at high speeds.

Does the complexity of VVT affect engine reliability? Although complex, regular maintenance ensures the VVT system remains reliable. Modern engines are designed to support this technology without compromising durability.

Is it possible to add VVT to an older engine? Adapting VVT to an engine not originally equipped with it is complex and costly. VVT systems are integrated into the engine design and electronically controlled, requiring significant modifications.

How does VVT work with turbocharged engines? VVT optimizes valve timing in turbocharged engines to better manage exhaust gas flow, improving turbo responsiveness and low-end torque.

What happens if a VVT system fails? VVT failure can cause performance issues, such as increased fuel consumption and rough idling. In some cases, the engine enters “limp mode” to prevent damage.

Glow plug is on: causes and solutions

Has an orange coil-shaped warning light appeared on your dashboard? This symbol represents the glow plug warning light. It can indicate a potential problem with your car’s preheating system, especially if you drive a diesel vehicle.

What is the purpose of a glow plug?

Glow plugs are specific to diesel engines and serve to increase the cylinder temperature to facilitate fuel ignition, particularly in low temperatures. Unlike gasoline engines that use spark plugs to create a spark, diesel engines rely on compression to ignite the fuel. However, when cold, compression alone may be insufficient for auto-ignition, hence the crucial role of glow plugs.

Why is this warning light on?

The glow plug light typically comes on when the glow plugs are not functioning correctly, preventing the engine from heating up enough for a smooth start. Ignoring this signal could lead to starting difficulties, or even complete engine failure in cold weather.

Good to know: Each cylinder in a diesel engine has its own glow plug. Upon starting, these plugs quickly heat up, increasing the combustion chamber temperature to allow for fuel auto-ignition.

glow plug warning light flashing while driving
The glow plug warning light flashing while driving (pinterest.com)

When the glow plug warning light illuminates on your dashboard, it often signals a malfunction in the preheating system, which is essential for diesel engines. Here are the main possible causes for this light:

1. Faulty Glow Plug

A worn or defective glow plug is the most common reason. When a plug no longer functions correctly, the Engine Control Module (ECM) sends a signal to the dashboard to alert the driver. In some vehicles, this may activate a limp mode to prevent further damage.

2. Glow Plug Control Module Malfunction

The control module is responsible for managing the operating duration and timing of the glow plugs. If it fails, it will not be able to turn off the glow plug light, also causing engine starting difficulties.

3. Faulty Temperature Sensor

Modern engines use a temperature sensor to adjust the operation of the glow plugs. A faulty sensor can transmit incorrect information to the Engine Control Unit (ECU), which may then keep the glow plug light on even when the engine is already warm.

4. Wiring Problems

Damaged connections or faulty wires can interrupt the electrical circuit between the glow plug and the ECU. This often results in a glow plug light that stays on due to an incorrect signal. A short circuit or wiring issue can also cause an overload, damage the glow plug relay, or lead to other electrical malfunctions.

glow plug indicator symbol
Glow Plug Indicator Symbol (Photo: my-cardidictionary.com)

5. Glow Plug Relay Failure: Another Common Problem

The glow plug relay plays a crucial role in the proper functioning of the glow plugs, acting as a switch to provide the necessary power. If this relay fails, the glow plugs will not receive the required power supply, causing the glow plug light to illuminate. This type of failure can be caused by a faulty control circuit at the starter switch, relay coil connectors, an issue with the timer controller, or even a damaged wire.

Solutions for a Glow Plug Light On or Flashing

If the light stays on or flashes, several solutions can help diagnose and resolve the issue:

1. Check the Glow Plugs

Start with a visual inspection of the glow plugs to detect signs of wear, such as cracks or burns. Glow plugs are designed to be durable, but they wear out over time, typically after 100,000 miles. Here are some signs of glow plug wear:

  • Hard Starting
  • Misfires
  • Rough Idling
  • White or Black Smoke
  • Decreased Fuel Efficiency

Replacing a glow plug is relatively inexpensive.

2. Inspect the Wiring

If replacing the glow plug isn’t enough, examine the wiring connecting the plugs to the ECU. Look for signs of corrosion, loose connections, or damage, and clean or replace the faulty components.

3. Look for Error Codes

Use an OBD-II scanner to read the error codes from the ECU. This can reveal precise information about the source of the problem. These codes can help determine if the issue stems from the control module, the glow plugs, or other components.

4. Test the Temperature Sensor

Use a multimeter to check the resistance of the temperature sensor. If the sensor is faulty, replace it to ensure accurate readings and optimal glow plug operation.

Conclusion

If the glow plug light remains on, it is advisable to have the system diagnosed by a mechanic. Using high-quality glow plugs is also essential to avoid serious problems, such as a glow plug exploding or breaking, which could cause engine damage.

Escape Modifications: Advantages and Disadvantages of Escape Modifications

Your car is designed with an exhaust system that controls noise, directs exhaust gases away from passengers, to improve engine performance and fuel consumption.

Somehow, the exhaust system is no longer working as well as before. It’s time to modify the exhaust. But did you know that replacing exhaust systems will have both benefits and drawbacks?

exhaust modifications
Did you know that replacing exhaust systems has both advantages and disadvantages? Source: m3post.com

Let us introduce you to the advantages and disadvantages of exhaust mods!

What is the Exhaust System

Before knowing the advantages and disadvantages of dual exhaust, you need to understand the exhaust system well. So, what is the exhaust system?

An exhaust system is generally a pipe used to guide reaction exhaust gases away from a controlled combustion inside an engine or stove. The entire system transports burned gases from the engine and includes one or more exhaust pipes.

Depending on the overall system design, the construction of the exhaust system can be slightly different. But generally, an exhaust system includes:

Exhaust Manifold

The first point of contact for exhaust gases after they exit the cylinder head. It connects to each exhaust port on the engine’s cylinder head and channels the hot exhaust gases into the exhaust pipe.

Thanks to the exhaust manifold gaskets, it also prevents toxic exhaust gases from leaking into the vehicle and harming the occupants.

Catalytic Converter

An exhaust emission control device that reduces toxic gases and pollutants in the exhaust gas of an internal combustion engine into less toxic pollutants by catalyzing a redox reaction. In another way, it helps you continue to breathe the air while you drive.

Turbocharger

A turbine-driven forced induction device that increases the efficiency and power output of an internal combustion engine by forcing additional compressed air into the combustion chamber.

This improvement over an atmospheric engine’s power output is due to the compressor being able to force more air (and proportionally more fuel) into the combustion chamber than atmospheric pressure alone.

Muffler

A noise suppression device that eliminates noise by redirecting airflow. Throughout the journey, the exhaust passes through porous pipes that allow the exhaust gases to expand into sound-deadening material, thus minimizing the noise that ultimately exits the tailpipe.

Why You Need to Modify the Exhaust System

Since the exhaust system doesn’t just vent fumes from the car, it works really hard and, over time, it needs to be modified.

An old exhaust system can cause many problems for your engine, your car’s performance, and the environment. Some symptoms indicate that you really need a new exhaust system.

Engine Noise

The signal is that the engine noise is louder than usual. As a function of the exhaust, it helps suppress noise. But when the noise starts to get louder, you know your exhaust system is in trouble.

Rust

Take a look at the exhaust itself and look for signs of rust or cracks. Some exhaust corrosion is normal on older cars, but if you see excessive damage, it might be time to replace it.

lower exhaust advantages and disadvantages
If you see rust on the exhaust system, it’s time to replace it with a new one. Cre: Kiteman / Instructables

Energy Inefficiency

If your car is consuming more fuel than before, it could be a symptom of many car problems, including a leak in your exhaust system.

A leak will affect the system’s ability to transport fumes, leaving your engine running at a higher temperature and reducing your energy efficiency.

If your car exhibits one or more of these symptoms, it is definitely time for you to think about exhaust modifications.

Regular maintenance at the garage can prevent damage to the exhaust system. However, if you find that there is already a problem, don’t wait to have it checked by a qualified technician.

Ignoring the warning signs can cause additional damage to the exhaust and other important car parts, which will cost much more to repair in the long run.

Advantages and Disadvantages of Exhaust Modifications

You already know what an exhaust system is and how it works. So let’s talk about the advantages and disadvantages of the exhaust system.

The Advantages of Exhaust Modifications

1. Better Engine Performance

The exhaust system is an essential system for the engine. Exhaust mods can improve your car’s exhaust by customizing the performance of the exhaust system, which allows the entire engine to function better.

This can be explained by the relationship between the exhaust and the engine. Changing the exhaust allows exhaust gases to escape faster and more efficiently.

Your engine will breathe better and thus produce more power. The car’s operation in turn improves all engine performance: its torque, power, and sound.

When air can easily enter and exit, the engine’s power can be directed to other functions.

Dual Exhaust Advantages and Disadvantages
Exhaust mods can improve your car’s exhaust by customizing the performance of the exhaust system. Source: Internet

2. Fuel Economy

When your exhaust system is faulty, especially if it has a leak, it consumes much more fuel than usual. Replacing it with a new exhaust will help you save fuel.

The new exhaust can increase backpressure which accumulates gases and can force the engine to work harder, affecting its performance and increasing energy output. Mileage has also increased.

3. Reduction of Climate Change

The fluid from the outdated exhaust system is one of the main contributors to atmospheric gases involved in climate change.

Exhaust modifications will certainly reduce emissions and preserve the climate. So, replacing your old vehicle’s system with a new fuel-efficient system will help save the planet.

4. Increased Car Value

We cannot deny that changing to a new exhaust system will make your car look better, produce a better sound, and ultimately increase your car’s value.

By equipping it with a high-performance muffler and new headers, the engine practically purrs with sensual performance.

Your car can be recognized on the street as a high-performance, high-end, well-maintained vehicle, regardless of its age.

For someone looking to resell the car, it’s a good investment as it will increase your car’s price.

For someone who owns an old car, a new exhaust system will make your car last longer since the new exhaust system is usually built from stainless steel that will never rust over time, unlike older systems that often need regular replacement due to rust.

The lifespan of the exhaust system will be improved.

The Disadvantages of Exhaust Modifications

1. High Price

One of the biggest drawbacks of any major purchase is the price that comes with it. The same goes for the exhaust system, which is quite expensive to replace compared to other car parts.

The change also requires a skilled repairer, which is expensive at the garage. But, considering the huge gains in power and style that a performance exhaust offers, most people agree that it’s money well spent.

2. Long Installation Time

The second disadvantage is the installation time of the exhaust system. As we mentioned above, replacing a new exhaust system requires a professional repairman because the installation is not simple and one mistake can lead to the failure of the entire car.

Exhaust Modifications Advantages and Disadvantages
Replacing a new exhaust system requires a professional repairman because the installation is not simple. Source: MotorTrend

Should You Modify the Exhaust System or Not?

When comparing, it is clear that the advantages of exhaust mods outweigh the disadvantages.

Therefore, we recommend replacing the new exhaust system when you need it to minimize the risks that can happen to your car by keeping a car with a bad exhaust system.

Furthermore, a trusted mechanic is necessary for a better lifespan of the exhaust system. So, send your car to a good garage to avoid any serious damage and help maintain your car.

Replacing the new exhaust system brings you many benefits, so don’t hesitate to take your car to the mechanic for a new installation.

Final Value

What we mentioned above is about the advantages and disadvantages of exhaust modifications. There is no doubt that exhaust modifications are necessary and help your car perform better and also increase its value.

Maintaining your car is also a good choice to help the exhaust last longer!

Common Vehicle Repair Problems

Here is an improved and SEO-optimized version of your article, with added sections and a more engaging structure:


Common Car Repair Problems: Complete Guide to Preventive Maintenance

Despite regular maintenance, vehicles can encounter problems over time. In this expert guide, we explore 5 categories of common breakdowns with practical solutions, pro tips, and DIY diagnostic tools.


1. Engine Problems: Diagnose Like a Mechanic

Common Symptoms

  • Abnormal overheating
  • Unstable idle (vibrations/jerking)
  • Sudden loss of power

Step-by-Step Solutions

🚩 Case 1: Engine Overheating

  • Quick Checklist:
  • Check the coolant (level/murky color)
  • Inspect the thermostat with a heat test (opens at 80-90°C)
  • Clean the radiator fins with an Air Compressor Pro kit

🚨 Case 2: Unstable Idle

  • Procedure:
  1. Replace the air filter (embedded video tutorial)
  2. Clean the throttle body with CRC Throttle Cleaner
  3. Test the MAF sensor with a multimeter (values: 2-7 g/s at idle)

→ Required Tool: Auto-ranging multimeter (e.g., Fluke 115)


2. Electrical Malfunctions: Decode the Signals

3 Warning Signs

  1. Recurring dead battery
  2. Intermittent headlights/turn signals
  3. Unexplained ECU errors

🔧 Focus: The Forgotten Ground Strap

  • Role: Ensures the electrical system is grounded (battery return flow)
  • DIY Test:
  • Measure engine-chassis resistance: < 0.5Ω
  • Check for corrosion with a 10X magnifying loupe

Concrete example: 2017 Renault Clio IV – Unstable idle resolved by replacing an oxidized strap (cost: €45)


3. Transmission: Avoid Costly Repairs

Emergency Symptoms

  • Grinding when shifting gears
  • Bright red fluid leaks
  • Gear “slipping” on hills

🔎 Preventive Check-up

  • Fluid check: Translucent red color (if brown/black → urgent drain)
  • Leak detection kit: UV Dye Kit for Transmissions (leaks visible under UV light)

4. Fluid Leaks: The Secret Language of Stains

Identification Guide

Fluid Color Odor Risk
Engine oil Black, viscous Burnt Engine seizure
Coolant Green/Pink Sweet Critical overheating
Brake fluid Clear yellow None Braking system failure

Practical Case: Leak on Volkswagen Golf

  • Problem: Oily stain under engine
  • Solution: Cylinder head gasket replacement + Liqui Moly MoS2 Additive

5. Expert FAQ: Answers to Your Frequent Questions

❓ “Can I use water in an emergency for the radiator?”

Answer: Yes, but max 50km. Then add 50% Prestone antifreeze to prevent corrosion.

❓ “My car consumes more after the oil change: normal?”

Warning: No! Check for injector leaks with a diesel rail pressure tester.


Recommended Tools for Self-Diagnosis

  • OBD2 Scanner: BlueDriver (reads codes + live data)
  • Leak Repair Kit: Permatex Liquid Metal Filler
  • Visual Guide: Haynes Manual (specific model)

The reasons why your brakes are smoking

The sight of smoke coming from your wheel along with a burning smell are things that make most drivers nervous. But is it really serious?

Smoking brakes can mean anything, from a minor issue that often resolves itself to a major safety problem requiring immediate attention. Let’s look at what causes your brakes to smoke and how much it will cost to fix.

1) Stuck Brake Caliper

A stuck brake caliper occurs when the caliper piston does not release properly after you remove your foot from the brake pedal. Instead of allowing the brake pad to move away from the rotor, the caliper maintains the applied pressure, creating constant friction and heat (causing smoke).

Several issues can lead to a caliper sticking. Corrosion inside the caliper piston housing often prevents smooth movement. Road debris and rust can block the caliper slide pins. A stretched or damaged brake hose can trap pressure in the caliper, preventing it from releasing.

brake caliper slide pins

Possible symptoms:

  • The car pulls to one side while driving
  • One wheel is obviously hotter than the others when standing next to it
  • Reduced fuel consumption due to constant brake drag

A stuck caliper creates a dangerous situation. The constant friction generates excessive heat that can damage the rotor, brake pad, wheel bearing, and even ignite the brake fluid, literally causing a fire in your car. Furthermore, a stuck caliper will lead to unpredictable handling when one side of your car is constantly braking.

2) Overheated Brakes

red hot brake rotor
Glowing brake disc due to excessive heat

Prolonged and intense braking creates excessive friction between the pads and brake discs, causing them to overheat and smoke. This typically happens during mountain driving, when towing heavy loads, or if you practice autocross, HPDE, or other racing hobbies.

The intense heat can actually boil your brake fluid, leading to a spongy brake pedal and reduced braking power.

Possible symptoms:

  • The brake pedal is soft or sinks to the floor
  • Strong burning smell coming from the wheels
  • Loss of braking efficiency (poor brake performance)

Overheated brakes significantly increase stopping distance and can permanently damage brake components. Extreme temperatures can warp rotors, crack brake pads, or damage wheel bearings. In the most severe cases, the brake fluid can boil and cause complete brake failure.

3) New Brake Components

best brake pads and rotors

It is normal for new brake pads and rotors to smoke a little during their initial break-in period, as protective coatings burn off and the parts wear into each other.

This slight smoke usually persists for the first 20 to 50 miles of driving, accompanied by a distinct smell, different from the acrid smell of overheated brakes.

Possible symptoms:

  • Slight smoke after the first few brake uses
  • Slight burning smell during the first few drives
  • Slight squeaking until the parts are properly seated

If smoke persists beyond 50 miles or you notice decreased braking power, the break-in procedure may have been performed incorrectly. Improper break-in can glaze the pads, requiring their replacement to restore adequate braking performance.

4) Contaminated Brake Components

brake fluid leak symptoms

Oil, grease, brake fluid, or improperly applied brake compounds can create smoke during braking. This contamination can come from leaking wheel bearings, torn CV joint boots, brake line failures, or incorrect installation.

Common installation mistakes include applying anti-squeal compound to the friction surface instead of the backing plate, or applying grease to brake components during assembly.

Possible symptoms:

  • Smoke after light braking
  • Visibly wet or shiny brake components
  • Decreased braking power, especially in wet weather

Contaminated brakes are more dangerous than one might think, as any lubricant reduces the friction between the pad and the rotor. This contamination can spread across the rotor surface during braking, further reducing braking efficiency. The risk is even greater in wet conditions when water mixes with the contamination.

Is It Safe to Drive?

burning smell

The safety of driving with smoking brakes depends entirely on the cause. If you just had your brakes serviced and you are within 50 miles (80 km), slight smoke during the first few stops is normal. In all other situations, continuing to drive risks complete brake failure or costly damage.

Most common indications to stop immediately:

  • Continuous smoke after a brief cooling period
  • The car pulls to one side while driving
  • Soft or spongy brake pedal

Find a safe place to park and let the brakes cool for at least 30 minutes. If the smoke returns shortly after resuming driving, have the vehicle towed to a repair shop to avoid endangering your safety and potentially much more expensive repairs.

Diagnostic Steps

Step 1: Visual Inspection

Park on level ground once the brakes have completely cooled (usually 30 to 60 minutes). Examine each wheel area methodically, starting from the brake lines going to each caliper. Look for wet spots, drips, or accumulated dirt that could indicate leaks.

Carefully inspect the rotor surfaces through the wheel spokes (if possible) or by removing the wheels (if necessary). Deep grooves, ridge formation on the edges, or blue/purple discoloration indicate overheating. Check for uneven pad wear (inner and outer pads should have similar thickness).

Carefully inspect the brake calipers for torn boots, rust buildup, or signs of sticking. The caliper should be clean and dry, without caked brake dust on one side. Check that mounting brackets and hardware are not loose or excessively corroded.

measuring brake pad material
Checking pad thickness

Step 2: Physical Tests

Lift your vehicle following proper jack and stand placement. Once the wheels are removed, grab each rotor and try to move it (excessive movement suggests worn wheel bearings). Spin each brake rotor by hand. It should spin freely with just a slight drag from the pads.

After a short drive, use an infrared thermometer to check the temperature at the same spot on each wheel. Compare measurements between the left and right sides (not front to rear). Temperature differences greater than 20 degrees Fahrenheit indicate a problem. A significantly hotter wheel usually means the caliper is stuck.

Inspect the brake fluid in the master cylinder reservoir. The fluid should be light amber or light brown in color, not dark or cloudy. Low fluid level can mean the pads are worn or there is a leak. Look for bubbles in the fluid which could indicate air in the system.

Step 3: Road Test

Begin testing in a large empty parking lot or quiet street only if initial inspections reveal no major safety issues. Start with light braking at low speeds. The pedal should be firm and maintain a constant height.

Gradually increase speed and braking force while listening for grinding, squealing, or rattling noises. Pay attention to steering wheel feedback. If there are pulls or vibrations, uneven braking is occurring. Be alert if the brake pedal slowly sinks while maintaining pressure at a stop.

In a safe location, test emergency braking (press the brake pedal hard). The vehicle should stop in a straight line without pulling to one side. If you notice unusual noises or smells during this test, immediate investigation will be necessary.

Symptoms of a Throttle Position Sensor

Although small and relatively simple, the throttle position sensor (TPS) is an essential component that tells your car’s computer how far you’re pressing the accelerator pedal, thus helping to control your engine’s fuel supply.

If your TPS fails, you risk encountering annoying driving problems or downright dangerous driving conditions. Although the symptoms of a faulty throttle position sensor can often mimic those of other issues, when taken as a whole, they allow for easier diagnosis.

What is a Throttle Position Sensor For?

The throttle position sensor monitors the exact position of your throttle (a valve that controls the amount of air entering your engine). When you press the accelerator pedal, the TPS sends precise signals to your car’s Engine Control Module (ECM), which then calculates how much fuel to inject into the engine.

Modern cars use an electronic throttle control system, called “drive-by-wire.” Instead of a mechanical cable connecting your accelerator pedal to the throttle, sensors and electric motors handle this task. When you press the accelerator pedal, the TPS helps the ECM determine exactly how far the throttle should open based on various factors (e.g., vehicle speed, engine load, driving conditions, etc.).

Most recent vehicles use multiple throttle position sensors for safety. If one sensor fails or sends incorrect data, the backup sensor helps prevent potential problems. This redundancy helps avoid disastrous scenarios in case of malfunction.

Common Signs of a Faulty Throttle Position Sensor

1) Check Engine Light

check engine light

The most reliable indicator of a TPS problem is the check engine light accompanied by specific fault codes. When your TPS starts to fail, it sends incorrect signals to your car’s computer, causing the warning light to come on.

Using a code reader (OBD2 scan tool), you will typically see codes P0120 to P0124, all related to TPS circuit problems. Even if your car seems to be running normally now, don’t ignore this warning. If you don’t have access to a scan tool, check if a local auto parts store can scan it for you (many do it for free).

2) Poor Acceleration Response

When your TPS fails, your car’s onboard computer receives incorrect information about the accelerator pedal position, leading to unpredictable acceleration. You may notice hesitation when you press the accelerator, a delay before the car accelerates, or sudden surges.

Some drivers describe this as the car feeling sluggish or requiring more pedal pressure than usual to accelerate. This symptom can be particularly noticeable when attempting to pass other vehicles or merge onto the highway.

In some cases, the vehicle will enter “limp mode” to prevent engine damage.

3) Random Engine Stalling

Engine stalling can occur without warning at any speed when your TPS is malfunctioning. Since your car’s onboard computer receives false information about the throttle position, it may cut off the fuel supply at the worst possible times.

At best, your car stalls in your own driveway. At worst, it stalls while idling at a red light at a very busy intersection or even on the highway. The unpredictability of this can create dangerous driving situations. Some drivers may experience repeated stalling episodes, while others experience rare and random occurrences.

4) Irregular Idle Speed

engine idle speed

A faulty TPS can cause unpredictable fluctuations in your engine’s idle speed. You might notice the RPM rising and falling at a stop, or the engine may seem rough and unstable at idle. This symptom can make the car feel like it’s jerking or lurching, even when you’re not touching the accelerator pedal.

Pay attention to your tachometer; it should be at a steady speed at idle. If it’s going up and down on its own, it’s very likely that your TPS is sending incorrect signals to the engine computer.

5) Transmission Shifting Problems

Since your transmission relies on accurate throttle position data to determine shift points, a bad TPS can cause irregular shifting. Delayed, harsh shifts, or shifts occurring at incorrect speeds are all possibilities.

The transmission may also be confused about which gear to select, leading to unnecessary gear hunting or a refusal to downshift when needed for passing or climbing hills.

If this is the only symptom you’re experiencing, your problem is likely transmission-related. But when combined with a mix of other symptoms listed here, the throttle position sensor is a definite possibility.

6) Jerking or Random Surges

no power steering

Your vehicle may experience unexpected surging or jerking, especially during constant-speed driving or light acceleration. Unlike transmission-related jerking, TPS-induced surges can occur even when your car isn’t shifting gears.

The jerking often feels as if someone is repeatedly tapping your brakes or altering your engine’s fuel supply. This symptom almost always appears alongside acceleration issues and can vary in intensity, from a slight bump to violent jerking that makes the car difficult to control.

7) Reduced Fuel Economy

Although a drop in MPG is common in most engine problems, it applies here too. When your TPS sends incorrect data, your engine’s fuel management system cannot optimize the air-fuel mixture and may therefore send more fuel than necessary into the combustion chamber.

You might notice a significant drop in your fuel economy, sometimes up to 10 to 20% below normal. Try monitoring your fuel consumption. If you’re filling up more frequently without a major change in your driving habits, in addition to other symptoms on this list, your TPS could be to blame.

8) Engine Misfires

A misfire can be hard to detect, but many describe it as a stumble or a momentary loss of power. Some drivers will say it feels like the engine “skips a beat” or temporarily loses power before recovering.

These misfires occur because the incorrect throttle position data leads to improper fuel delivery. You might notice the engine running unevenly, particularly during constant-speed cruising or light acceleration.

FAQ

Can You Repair a Faulty Throttle Position Sensor?

No, a faulty throttle position sensor cannot be repaired. If testing shows the TPS is failing, replacement is your only option. The sensor is a sealed electronic unit that cannot be repaired or rebuilt.

Is It Safe to Drive with a Bad TPS?

No, it is not safe. Driving with a failing throttle position sensor is risky and potentially dangerous. When the sensor fails, your car’s onboard computer activates a safety mode (limp mode) that limits engine RPM and speed to protect it. While this might allow you to get to a nearby repair shop, it is not suitable or safe for normal driving.

If you notice TPS symptoms, have the sensor tested and replaced promptly. Continuing to drive with a failing sensor can lead to unpredictable behavior like sudden stalling or loss of power, which is especially dangerous in traffic or on highways. Although TPS failure is usually the result of normal wear and tear over time, ignoring the symptoms can lead to additional engine and transmission problems.

What Causes a TPS to Fail?

Although normal wear from years of driving is common, several specific issues can accelerate sensor failure or cause premature problems.

Common causes of TPS failure include:

  • Electrical Issues – Corroded connections, damaged wiring harnesses, or short circuits can disrupt sensor signals.
  • Physical Contamination – Dirt, carbon buildup, or oil leaking into the sensor housing can interfere with its operation.
  • Water Damage – Exposure to moisture (e.g., improper engine compartment cleaning) or environmental conditions can short-circuit the sensor.
  • Thermal Stress – Constant exposure to extreme engine temperatures can degrade internal components over time.
  • Mechanical Damage – Vibrations and impacts from road debris or careless work in the engine compartment can damage the sensor.
  • Circuit Board Failure – Internal electronic components can fail due to aging or thermal cycling. This is particularly common with cheap aftermarket sensors.
  • Poor Connections – Loose mounting or incorrect installation can lead to erratic sensor readings.

While you can’t prevent normal wear, regular engine compartment cleaning (done correctly) and promptly addressing any engine oil leaks near the sensor can help extend the TPS’s lifespan. Taking care during engine maintenance to avoid disturbing or damaging the sensor and its wiring can also prevent premature failure.

Car with the lock indicator light on

Have you ever noticed what looks like a “car symbol with a lock” lit up on your dashboard and now your car won’t start? You’re certainly not alone. But what exactly is the problem?

In this article, we will break down 5 common reasons why you might see this symbol and suggest some potential solutions you can try before taking it to the mechanic.

What does the car with a padlock symbol mean?

There are several variants of lock symbols you might see on the dashboard. Generally, the light is related to the immobilizer system.

Before the advent of immobilizers, vehicles were susceptible to theft if someone wanted your car. This could happen when the thief powered up your car. Sometimes, simply inserting a screwdriver into the ignition would do the trick. The immobilizer system is designed to prevent both of these scenarios.

car with lock symbol

Reasons why you see the car with the lock symbol

Not all causes of the car lock symbol are bad. For those that are, we have included some potential solutions you can try yourself before taking your vehicle to the garage.

1) You locked the car

car alarm won't stop going off

When you lock your vehicle, you will see a small red light flashing intermittently. This light resembles a car with a padlock or a car with a key. This light indicates that the vehicle is locked and the security system is activated. In this state, it should not be possible to start the vehicle without a valid key.

If you unlock the vehicle from the inside while this light is flashing, it’s likely that your car alarm will trigger. It’s important to remember that you can trigger your car alarm if you rolled down the window, locked the vehicle from the outside, and then unlocked the vehicle from the inside by reaching your hand through the window.

2) Problem with the immobilizer

engine immobilizer

The immobilizer system consists of a computer, the ignition cylinder or lock, the key or keys, and the transponder. If any of these systems are not working correctly, you might see a warning light such as “key not detected,” a car and lock symbol, or a car with a key icon. The warning light is usually orange or red in color.

If you have a problem with the immobilizer system, chances are you won’t be able to start the vehicle, even if it is otherwise perfectly functional. This is a security measure that prevents the vehicle from being stolen when an unauthorized person attempts to start it.

3) Key not detected

A key that is not detected by the car will not be able to start the vehicle. The most common reason a key is not detected is a weak battery. Try replacing your key fob battery and see if that solves the problem. Key fob batteries typically last about a year, but can last even longer in some cases.

Some key fobs have a spare physical key in case the battery is dead. Some keys are designed so that you can touch the back or side of the key to the ignition button to start the vehicle. This is a feature offered on some push-button start models.

Look online for an example of how to start your specific car with a dead key fob battery, as the process will be different for each make and model. YouTube is an excellent source for this type of video.

4) Problem with the ignition

car starting problem

On some vehicles, the transponder can be located inside the ignition switch. If the ignition switch is faulty, your key might not be detected correctly, even if the key fob battery is new.

On vehicles with an old-style key that you have to turn in a lock cylinder, the mechanical components inside the ignition can wear out over time. This is more likely if your key is old and worn, or if you have a heavy keychain hanging from the ignition while you drive.

If your key is stuck in the ignition, try jiggling the key and the steering wheel at the same time to see if that allows you to turn the key in the ignition. If this trick works, consider replacing your ignition before the problem gets worse.

5) The key is not programmed

unlock doors with key fob

If you recently purchased a new key, that key will not work with your vehicle until it has been programmed.

Each key must be programmed to the vehicle to be able to start it, and this is not an easy process for the consumer to perform themselves. A specialized professional scan tool may have the necessary features to reprogram keys, but cheap consumer-grade scan tools generally do not have this functionality.

Symptoms of Glazed Brake Pads

If you’ve seen the recent Gran Turismo movie, you might recall a scene where Jann speeds into a corner and crashes because his brakes were glazed. Upon further inspection, the mechanic confirmed that the young driver was right, which explains why he overcooked the turn.

Simply put, glazed brake pads are brake pads that have overheated and no longer function properly. The surface of the brake pad becomes smooth and can no longer bite the rotor as it should.

Glazed brakes can significantly increase your stopping distance, making them quite dangerous to use (especially if you’re trying to set a fast lap time on the track).

Are you worried that your brake pads are glazed? Here are some symptoms that suggest your brakes are glazed and how you can fix them yourself.

Symptoms of Glazed Brake Pads

Most symptoms of glazed brake pads involve significantly reduced braking performance. Here are some specific examples to watch for.

1) Increased Stopping Distance

One of the easiest ways to tell if your brakes are glazed is if your stopping distances are considerably longer. This is obviously quite dangerous, as you expect your car to stop within a certain distance with a certain amount of pressure.

2) Inability to Activate ABS or Lock the Brakes

If your brakes are glazed, you might not have enough braking power to lock the tires or activate the ABS. This means your vehicle is no longer able to fully utilize its braking potential.

3) New Braking Noise

Glazed brakes sometimes produce a different noise than what you’re used to hearing. This is because the surface of the brake pad has changed. If you notice a change in brake noise, it’s worth taking a closer look to see if something is wrong.

4) Brakes Don’t Bite

When you first apply the brakes, you should feel the initial pressure of the brake pad on the rotor, which immediately slows the vehicle down. If you have to press hard on the brake pedal before successfully slowing the vehicle, your brake pads might be glazed.

5) Excessively Smooth and Shiny Brake Pads or Rotors

glazed brakes

When you glaze your brakes, your brake pads will look very smooth and shiny. Generally, brake pads have a black, asphalt-like appearance. Brake pads have some texture if you look closely.

Brake rotors should also have texture and not be completely smooth. New brake rotors have a cross-hatched pattern that looks like a machined grid on the surface.

When you use the brakes, the cross-hatched pattern is replaced by a ring of brake pad material, usually dark blue in color. If your rotors are really shiny without any bluing from the brake pad material, you may have glazed your brakes.

Causes of Glazed Brakes

1) Too Much Braking (Without Cooling Time)

The primary cause of glazed brakes is simply overusing your brakes or using them incorrectly without allowing them to cool sufficiently between braking events.

Your brakes heat up when you use them and need time to cool down between applications. If you brake too hard or too often, you risk ending up with overheated brakes.

You can easily overheat your brakes by riding them. This is equivalent to braking gently over a long period, as some people do when going down a mountain pass. The brakes never get a chance to cool while you’re riding them, even if you’re braking gently.

canyon hills

A better strategy for braking downhill is to brake a bit more than needed, then coast for a while until you start going too fast, and then brake again. This brief moment of rest during braking will allow the brakes to cool while you’re coasting.

If you’re descending a very steep grade, like that of Pike’s Peak, you should engage a lower gear. The transmission will help slow the vehicle and prevent excessive braking. Some steep grades might even require first gear for this.

2) Stuck Caliper Piston

If one of your brake calipers is stuck, you might notice glazing on only one corner of the vehicle. A stuck caliper often comes with other symptoms. One corner might be smoking, and you might smell brakes near the stuck caliper.

That rotor will also be very hot. If you have an infrared thermometer, you can see that the temperature of the rotor under the stuck caliper is significantly higher than the other three.

3) Stuck Caliper Pin

Caliper pins allow a floating caliper to slide back and forth when you apply and release the brakes. A stuck pin can cause constant contact of one side of the brake pad with the rotor, risking glazed brakes on one corner of the vehicle.

A stuck caliper pin can exhibit symptoms similar to a stuck caliper piston. When a pin is stuck, it’s common for one pad or one side of a pad to be excessively worn, while the other pad looks relatively good.

How to Fix Glazed Brake Pads

1) Address the Underlying Issue

The first step is to figure out how you glazed your brakes. Otherwise, if you perform brake work, you risk glazing them again.

If it’s simply due to over-braking, try adjusting your driving style to allow the brakes time to cool. If you have a mechanical issue like a stuck caliper, replace the faulty component(s) before attempting to service the pads and rotors.

2) Sand the Brake Rotors and Pads

Sanding the brake pads and rotors is a simple way to remove surface glazing without completely replacing the brakes. This method is particularly useful if your brake pads and rotors are relatively new.

A good rule of thumb is to replace brake pads once they are thinner than the backing plate (ignoring any wear indicators that may be present).

If you sand the pads and find they are a bit thin, just replace them. There’s no need to extend the life of brake components and risk an accident. Brake pads are quite inexpensive.

3) Re-bed the Brakes

After sanding or replacing the brake pads and rotors, you will need to bed the brakes to ensure there is an even layer of pad material on the brake rotors. Follow the brake pad manufacturer’s instructions to properly bed the brakes.

4) Replace the Brake Pads and Rotors

Sometimes, your brakes are still damaged even after sanding. If you still experience poor braking performance after trying to remove the glaze yourself, replace the brake pads and rotors.