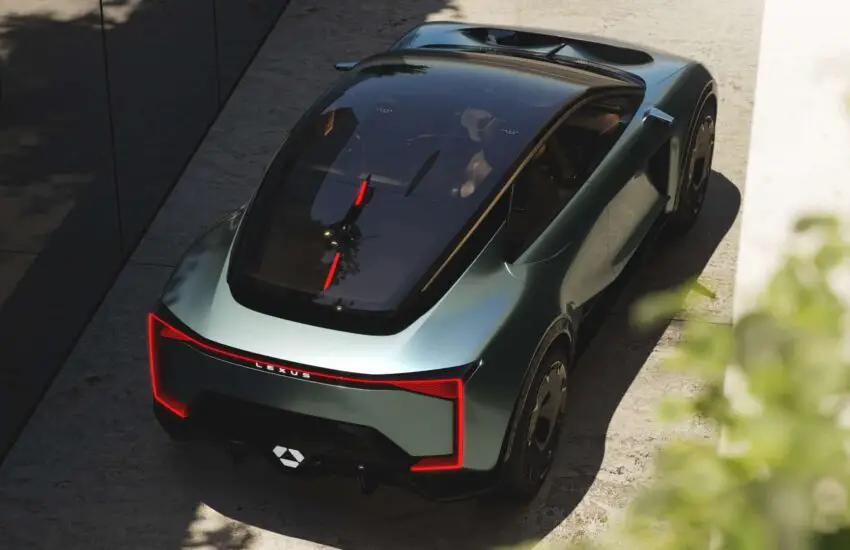
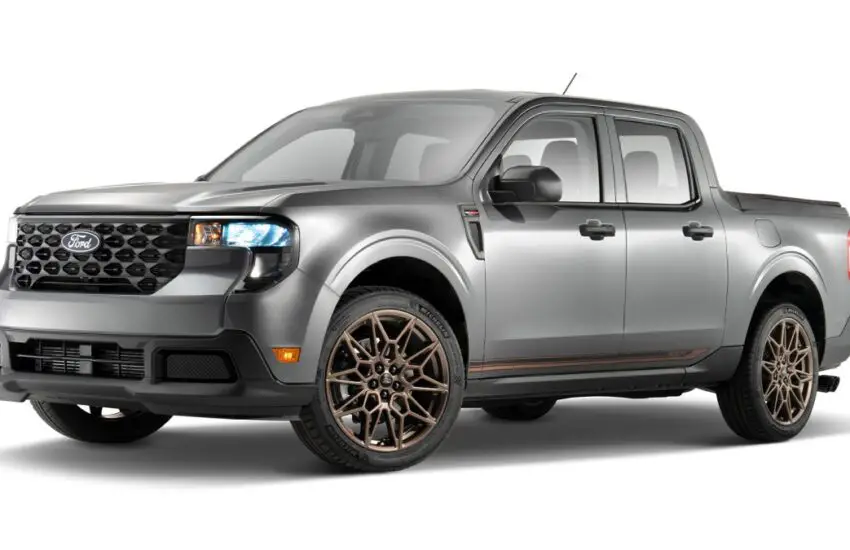
OBD2 Code P1434: Complete Diagnosis and Technical Solutions

Understanding OBD2 Trouble Code P1434

Trouble code P1434 is a generic OBD2 code that indicates a specific problem within the fuel vapor recovery system or the EGR (Exhaust Gas Recirculation) system, depending on the vehicle manufacturer. This code is particularly important because it directly affects engine performance, fuel consumption, and pollutant emissions.

Technical Definition of Code P1434

Code P1434 generally means “Tank Pressure Control Valve Circuit – Open Circuit” or, according to manufacturer interpretations, “Circuit Problem in the Exhaust Gas Recirculation System.” It is an electrical or pneumatic fault that prevents the system from functioning correctly.

Operation of the Affected System

The system targeted by P1434 has the main objective of:

  • Reducing pollutant emissions (NOx)
  • Recycling fuel vapors or exhaust gases
  • Improving combustion efficiency
  • Contributing to optimal engine performance

Main Causes of Fault P1434

Accurate identification of potential causes is crucial for effective diagnosis. Code P1434 can stem from several distinct failures requiring systematic checks.

Electrical and Wiring Problems

Electrical failures represent the majority of P1434 cases:

  • Open or short circuit in the valve wiring
  • Oxidized or damaged connectors
  • Electrical supply problem to the actuator
  • Poor ground in the control circuit
  • Abnormal resistance in the control circuit

Mechanical Component Failures

Defective mechanical components can also trigger this code:

  • EGR valve stuck or clogged
  • Faulty pressure control valve
  • Carbon deposits obstructing the ducts
  • Punctured diaphragm in pneumatic systems
  • Worn or broken return spring

Problems Associated with the Engine Control Unit

Although rarer, these problems can occur:

  • Internal failure of the control module
  • Incorrect programming of the computer
  • Communication problems between modules

Symptoms and Consequences of P1434

The presence of code P1434 is usually accompanied by symptoms noticeable to the driver and can lead to harmful consequences for the vehicle if left untreated.

Immediate Symptoms for the Driver

The most commonly observed signs include:

  • Illumination of the engine light or fault indicator
  • Noticeable increase in fuel consumption
  • Loss of power and difficult restarting
  • Unstable or irregular idle
  • Jerks and hesitation during acceleration

Long-Term Consequences

If the fault persists, it can cause:

  • Premature degradation of the catalytic converter
  • Accelerated clogging of the injectors
  • Chronic overconsumption of fuel
  • Problems passing technical inspection
  • Damage to other engine components

Technical Diagnostic Procedure for P1434

A methodical diagnosis is essential to identify the root cause of the problem and avoid unnecessary repairs.

Step 1: Preliminary Check

Start with these basic checks:

  • Reading fault codes with a professional diagnostic tool
  • Visual inspection of wiring and connectors
  • Checking relevant fuses
  • Checking the general condition of hoses and ducts

Step 2: Complete Electrical Tests

Proceed with the following electrical measurements:

  • Measuring the valve supply voltage
  • Checking circuit continuity
  • Measuring actuator resistance
  • Testing the circuit ground
  • Checking the control signal with an oscilloscope

Step 3: Functional Component Tests

Evaluate mechanical operation:

  • Valve activation test with diagnostic tool
  • Checking freedom of movement
  • Checking the tightness of pneumatic systems
  • Vacuum test if applicable

Repair Solutions and Estimated Costs

Depending on the identified cause, different repair solutions are available with varying costs.

Most Common Repairs

The most frequent interventions include:

  • Replacement of the EGR valve or pressure control valve
  • Repair or replacement of faulty wiring
  • Thorough cleaning of ducts and the valve
  • Replacement of cracked or porous hoses

Repair Cost Estimation

Costs can vary considerably:

  • EGR valve cleaning: €100-€250
  • EGR valve replacement: €300-€800 depending on the vehicle
  • Wiring repair: €150-€300
  • Computer replacement (rare case): €800-€2000

Prevention and Maintenance Tips

To prevent the reappearance of code P1434, certain maintenance practices are recommended.

Good Usage Practices

Adopt these habits to preserve your system:

  • Use of quality fuel
  • Respecting recommended maintenance intervals
  • Regular driving on the road to avoid clogging
  • Periodic checks of the exhaust system

Preventive Maintenance

Schedule these preventive interventions:

  • Preventive cleaning of the EGR system every 80,000 km
  • Annual inspection of wiring and connectors
  • Regular check with a diagnostic tool
  • Checking the condition of hoses and ducts

Code P1434 requires a systematic diagnostic approach to precisely identify the cause of the problem. Although often related to simple electrical issues, it can sometimes reveal more complex failures requiring the intervention of a qualified professional. A correctly performed diagnosis ensures a lasting repair and avoids unnecessary expenses.

OBD2 Code P1434 Chevrolet: Technical Diagnosis and Solutions

Understanding Chevrolet Fault Code P1434

The OBD2 code P1434 is a specific code for Chevrolet vehicles indicating a problem with the Exhaust Gas Recirculation (EGR) valve circuit or its temperature control system. This code falls under the category of emissions system faults and requires precise technical intervention to ensure proper engine operation and compliance with environmental standards.

Technical Definition of Code P1434

The Chevrolet P1434 code specifically refers to a problem detected in the EGR gas temperature control circuit or in the EGR valve control circuit itself. The EGR system functions to reduce nitrogen oxide (NOx) emissions by recirculating a portion of exhaust gases into the cylinders, which lowers combustion temperature.

Operation of the Chevrolet EGR System

The modern EGR system in Chevrolet vehicles is electronically controlled by the engine control unit (ECU). This system includes several essential components:

  • Electric or pneumatic EGR valve
  • EGR gas temperature sensor
  • Valve position sensor
  • Electronic control circuit
  • EGR gas cooling system

Symptoms and Consequences of P1434 Fault

When the P1434 code appears, several characteristic symptoms may alert the driver. Recognizing these signs enables faster diagnosis and more effective intervention.

Visible Symptoms for the Driver

  • Illumination of the check engine light on the dashboard
  • Noticeable decrease in engine performance
  • Increased fuel consumption
  • Unstable or irregular idle
  • Activation of limp mode
  • Excessive pollutant emissions

Long-Term Engine Consequences

Ignoring a P1434 code can lead to more serious damage to the Chevrolet engine:

  • Accelerated injector fouling
  • Deterioration of intake valves
  • Increased pollutant emissions
  • Reduced catalyst lifespan
  • Degradation of overall vehicle performance

Technical Diagnosis of Code P1434

Diagnosing the P1434 code requires a methodical approach and specialized tools. Here is the procedure recommended by automotive experts.

Equipment Needed for Diagnosis

  • Professional OBD2 scanner compatible with Chevrolet
  • Precision digital multimeter
  • Model-specific repair manual
  • Standard mechanical tools
  • Vehicle electrical diagrams

Step-by-Step Diagnostic Procedure

Start by checking real-time parameters with your OBD2 scanner:

  • Check recorded EGR gas temperature
  • Monitor EGR valve position
  • Analyze circuit voltages and resistances
  • Look for any associated fault codes

Repair Solutions for Code P1434

Depending on the cause identified during diagnosis, several repair solutions can be applied. It’s essential to proceed in logical order to avoid unnecessary interventions.

Repairing Electrical Problems

Electrical circuit issues represent the majority of P1434 code cases:

  • Cleaning oxidized electrical connectors
  • Repairing damaged electrical wires
  • Replacing defective fuses
  • Checking circuit ground
  • Verifying supply voltage

Replacing Faulty Components

If electrical tests indicate a faulty component:

  • Replacement of complete EGR valve
  • Changing EGR temperature sensor
  • Replacing engine control unit (rare cases)
  • Installing new connectors if necessary

EGR System Prevention and Maintenance

Prevention remains the best approach to avoid recurring P1434 code problems on Chevrolet vehicles.

Good Maintenance Practices

  • Using quality fuel
  • Regular air and fuel filter changes
  • Periodic intake system cleaning
  • Checking coolant levels
  • Regular OBD2 scanner checks

Specific Chevrolet Recommendations

For Chevrolet owners, certain specific precautions apply:

  • Strict adherence to maintenance intervals
  • Using original or equivalent quality parts
  • Professional diagnosis when in doubt
  • ECU software updates when available

The Chevrolet P1434 code, although specific, can be effectively resolved with a rigorous technical approach. Understanding the EGR system and methodical diagnosis are the keys to successful repair that will restore your vehicle’s optimal performance while preserving the environment.

P1434 GMC Code: Complete Diagnosis of NOx Sensor Heater Circuit Fault

Understanding the OBD2 Code P1434 on Your GMC Vehicle

The appearance of the P1434 trouble code in your GMC’s engine control unit memory signals a specific and critical problem within the emissions control system. This code is directly related to the proper functioning of the Selective Catalytic Reduction (SCR) system, an essential technology for meeting Euro 5 and Euro 6 anti-pollution standards on diesel engines. When the check engine light comes on and this code is present, it indicates that the heater circuit integrated into the nitrogen oxide (NOx) sensor is not within its normal operating parameters. A thorough understanding of this system is essential for accurate diagnosis and effective repair.

Role and Operation of the NOx Sensor in the SCR System

The NOx sensor is a high-precision electronic component located downstream of the SCR catalyst. Its mission is to measure in real-time the concentration of nitrogen oxides (NOx) in the exhaust gases after treatment. This data is transmitted to the engine control unit (ECU), which uses it to regulate with extreme precision the injection of AdBlue® fluid (or Diesel Exhaust Fluid) into the exhaust system. This liquid, when vaporized, generates ammonia which transforms harmful NOx into harmless water vapor and nitrogen. To guarantee accurate measurements from engine start-up and in cold weather, the NOx sensor is equipped with an integrated heating element. It is precisely this heater circuit that is implicated by the P1434 code.

Technical Meaning of Code P1434

The DTC (Diagnostic Trouble Code) P1434 is a manufacturer-specific code for General Motors. Its official definition is “Nitrogen Oxide Sensor Heater Circuit – Bank 1, Sensor 1“. When the ECU performs its self-test, it monitors the electrical resistance and current consumption of the NOx sensor heater. If the measured value deviates significantly from the reference value range stored in its memory (usually a resistance too high indicating an open circuit, or too low indicating a short circuit), it records the P1434 code, illuminates the malfunction indicator lamp, and may, in some cases, activate a limp mode to protect the engine and the emissions system.

Symptoms, Causes, and Diagnosis of the P1434 Fault

Ignoring a P1434 code can have detrimental consequences on the performance, fuel consumption, and integrity of your GMC’s emissions system. It is therefore crucial to recognize the symptoms and proceed with a methodical diagnosis.

Observable Symptoms of Code P1434

The manifestations of this fault can vary in intensity, but they are generally noticeable to the driver.

  • Illumination of the check engine light: This is the most immediate and common sign.
  • Noticeable increase in fuel consumption: The ECU, not receiving reliable data from the NOx sensor, often adopts a rich safety calibration.
  • Reduction in engine power or activation of “limp mode”.
  • SCR system malfunction: Risk of excessive pollutant emissions and failure of emissions tests.
  • Poor functioning of the DPF regeneration system (Diesel Particulate Filter), as the two systems are closely linked.

Main Causes of the P1434 Fault

The diagnosis should focus on several possible causes, from the simplest to the most complex.

  • Faulty NOx sensor: The most frequent cause. The internal heating element of the sensor is open or short-circuited.
  • Wiring or connector problem: Cut wires, chafing, oxidized connectors, corroded by road salt, or loose.
  • Blown fuse: The NOx sensor heater circuit is protected by a dedicated fuse, often located in the engine compartment fuse box.
  • Failure of the heater control relay (if present on the vehicle).
  • Problem with the engine control unit (ECU): Rarer, but an internal failure of the ECU can prevent the correct control of the heater.

Step-by-Step Diagnostic Procedure

A structured approach allows for identifying the root cause without replacing parts unnecessarily.

  • Step 1: Reading codes and live data: Use a capable OBD2 scanner to confirm the P1434 code and read the resistance value or the command status of the NOx sensor heater in real-time.
  • Step 2: Visual inspection: Carefully inspect the wiring between the ECU and the NOx sensor, as well as the connectors, looking for damage, burns, or corrosion.
  • Step 3: Electrical verification: Using a multimeter, check the continuity and resistance of the NOx sensor’s heating element (with power off). An infinite resistance (open circuit) or zero resistance (short circuit) confirms sensor failure. Consult manufacturer data for the nominal resistance value.
  • Step 4: Power supply check: Reconnect the connector and, with the ignition on, check for the presence of supply voltage (usually 12V) at the dedicated terminal of the sensor connector.

Repair, Costs, and Best Practices for P1434

Once the cause is identified, the repair can be undertaken. Costs and complexity vary considerably.

Repair and Replacement Procedures

The repair depends entirely on the diagnostic result.

  • Replacement of the NOx sensor: If the sensor is faulty, its replacement is the only solution. Always use an OE (Original Equipment) quality part or one from a reputable manufacturer. After replacement, clearing the fault codes is necessary, and an adaptation/learning procedure via the diagnostic tool may be required to calibrate the new sensor.
  • Wiring repair: For damaged wires, repair them with proper solder and use heat-shrink tubing to ensure lasting protection.
  • Connector cleaning: Use an electrical contact cleaner to remove any oxidation.
  • Fuse replacement: Identify and replace the blown fuse with a new one of the same amperage.

Repair Cost Estimation

The total cost is mainly dictated by the part price and labor.

  • New NOx sensor: Expect between €300 and €800 for the part alone, depending on the GMC model.
  • Labor: Approximately 1 to 2 hours of work for a professional, i.e., between €80 and €160 (variable hourly rate).
  • Wiring repair: Negligible cost if you do it yourself, or about 30 minutes to 1 hour of labor at a repair shop.

The total cost can therefore easily exceed €500 for a complete sensor replacement by a professional.

Best Practices to Prevent Recurrence

To maximize the lifespan of the new sensor and the SCR system, adopt these practices.

  • Use exclusively high-quality AdBlue® fluid from reputable sources.
  • Strictly adhere to the maintenance intervals recommended by the manufacturer.
  • Avoid exclusively urban and very short trips that prevent the SCR system from reaching its optimal operating temperature.
  • When replacing, handle the new sensor carefully to avoid any physical damage.

OBD2 Code P1434 Audi: Technical Diagnosis and Solutions

Understanding Fault Code P1434 on Audi

What is OBD2 Code P1434?

Fault code P1434 is a generic OBD2 code specific to Audi vehicles equipped with SCR (Selective Catalytic Reduction) systems. This code indicates a problem with the additive system—typically AdBlue—with an abnormal reading of the tank level. When this fault appears, the onboard diagnostic system detects an inconsistency between the measured level and the expected level of the anti-pollution additive.

Operation of the AdBlue System on Audi

The AdBlue system on modern Audi diesel vehicles consists of several key components:

  • AdBlue additive tank with integrated level sensor
  • AdBlue system management computer
  • AdBlue pump and injector
  • Temperature and quality sensors
  • Heating system for winter conditions

This system precisely injects AdBlue into the exhaust gases to convert NOx into nitrogen and water vapor via the SCR catalyst.

Main Causes of Fault P1434

Electrical and Electronic Problems

Electronic failures account for about 40% of P1434 cases on Audi:

  • AdBlue level sensor fault or open circuit
  • Communication problem between the AdBlue computer and the engine ECU
  • Short circuit in the level sensor wiring
  • Faulty AdBlue computer requiring reprogramming
  • Corrosion of electrical connectors due to environmental conditions

Mechanical Failures of the AdBlue System

Physical problems with the system are common and include:

  • AdBlue level sensor stuck or clogged
  • Damaged or leaking AdBlue tank
  • Intermittent operation of the AdBlue pump
  • Partially clogged AdBlue injection valve
  • Defective AdBlue quality sensor giving erroneous readings

Problems Related to the AdBlue Fluid Itself

The quality and condition of the AdBlue can generate code P1434:

  • Poor quality or contaminated AdBlue
  • Crystallization of AdBlue in the tank or lines
  • Actual AdBlue level too low despite dashboard indication
  • Aged AdBlue that has lost its chemical properties
  • AdBlue mistakenly mixed with other fluids

Technical Diagnosis of Code P1434

Step-by-Step Diagnostic Procedure

To properly diagnose a P1434 on Audi, follow this methodology:

  • Scan the ECU with a professional diagnostic tool compatible with Audi
  • Check real-time AdBlue level data
  • Visually inspect the tank and electrical connections
  • Test the level sensor resistance according to manufacturer specifications
  • Inspect wiring and connectors for corrosion or damage
  • Check AdBlue pump pressure and flow rate

Required Diagnostic Tools

Diagnosing P1434 requires specialized tools:

  • Professional OBD2 scanner with specific Audi software (VCDS, ODIS)
  • Digital multimeter for electrical tests
  • Oscilloscope for sensor signal analysis
  • Vacuum pump for leak tests
  • Specific tools for AdBlue tank removal/installation

Interpretation of Technical Data

Analyzing parameters requires understanding normal values:

  • AdBlue level: must match the actual volume in the tank
  • Sensor resistance: typically between 50 and 300 ohms depending on temperature
  • Sensor supply voltage: 5V ± 0.5V
  • AdBlue temperature: follow the resistance/temperature curve
  • System status: check status bits in the computer

Solutions and Repair Procedures

Most Common Repairs

According to technical statistics, the following interventions resolve the majority of cases:

  • Replacement of AdBlue level sensor (35% of cases)
  • Cleaning connectors and reprogramming the computer (25%)
  • Replacement of complete AdBlue tank (15%)
  • Repair of damaged wiring (12%)
  • Replacement of AdBlue computer (8%)
  • Draining and refilling with new AdBlue (5%)

Level Sensor Replacement Procedure

Replacing the sensor requires a precise procedure:

  • Completely drain the AdBlue tank
  • Remove the tank according to manufacturer procedure
  • Replace the sensor following specified torque settings
  • Reinstall the tank and fill with new AdBlue
  • Reset adaptations with the diagnostic tool
  • Perform a complete operational test

Consequences of Non-Repair

Ignoring a P1434 code can lead to serious problems:

  • Activation of degraded mode with power limitation
  • Significant increase in polluting emissions
  • Risk of SCR system clogging
  • Complete failure of the anti-pollution system
  • Technical inspection refusal in some countries
  • Potential damage to other exhaust system components

Prevention and Maintenance of the AdBlue System

Good Maintenance Practices

To avoid P1434 code, adopt these maintenance practices:

  • Use only ISO 22241 certified AdBlue
  • Refill the tank before the level becomes critical
  • Avoid tank contamination during refilling
  • Have the AdBlue system checked during each scheduled maintenance
  • Store AdBlue in appropriate conditions (protected from heat and freezing)

Specific Audi Technical Recommendations

Audi issues specific recommendations for its AdBlue systems:

  • Perform system regeneration according to prescribed intervals
  • Use official diagnostic tools for any intervention
  • Strictly follow reprogramming procedures
  • Prefer original parts for critical components
  • Train personnel on specifics of Audi SCR systems

The P1434 code on Audi, although complex, can be effectively resolved with a methodical approach and appropriate tools. Thorough understanding of the AdBlue system and adherence to manufacturer procedures are essential for lasting repair.

OBD2 Code P1434 BMW: Diagnosis and Technical Solutions

Understanding BMW Fault Code P1434

Technical Definition of Code P1434

The OBD2 fault code P1434 on BMW vehicles specifically corresponds to a problem with the heating valve circuit. This code indicates that the engine control module (ECU) has detected an electrical or functional anomaly in the heating valve regulation system. Unlike other generic codes, P1434 is often specific to vehicles in the BMW group, requiring a particular diagnostic approach.

Operation of the BMW Heating Valve

The heating valve in BMWs plays a crucial role in the thermal regulation of the engine and the cabin heating system. It controls the flow of coolant to the cabin heater core based on the temperature requested by the vehicle occupants. This valve is typically electrically controlled and can be of the servo-motor or solenoid valve type, depending on the model and production year.

Main Causes of BMW Fault P1434

Common Electrical Problems

  • Short circuit in the heating valve wiring
  • Oxidized or damaged connectors at the valve
  • Ground fault in the control circuit
  • Faulty internal resistance of the valve
  • Intermittent or cut-off electrical supply

Mechanical Failures of the Valve

  • Mechanical blockage of the valve in the open or closed position
  • Wear of internal actuator components
  • Regulating servo-motor calibration issue
  • Corrosion of moving parts due to coolant

Problems Related to the Cooling System

  • Insufficient coolant level
  • Air presence in the cooling circuit
  • Coolant contamination
  • Faulty water pump affecting circulation

Technical Diagnosis of Code P1434

Preliminary Verification Steps

Before proceeding with in-depth diagnosis, it is essential to perform basic checks. Start by visually inspecting the wiring and connectors associated with the heating valve. Check the level and condition of the coolant, as well as the absence of air bubbles in the circuit. Use an advanced OBD2 diagnostic tool to confirm the code and check real-time system data.

Electrical Tests of the Heating Valve

The electrical testing procedure must be methodical. First, measure the resistance of the heating valve with a digital multimeter. Typical values are generally between 10 and 50 ohms, depending on the BMW model. Then test the electrical supply (usually 12V) and the circuit ground. Check the wire continuity between the valve and the engine control unit to identify possible breaks.

Functional System Test

For a complete diagnosis, perform a functional test of the valve. Activate the valve via the diagnostic tool and check its mechanical operation. Listen for characteristic servo-motor noises and check the temperature of the inlet and outlet pipes. On some BMW models, it is possible to test the valve by changing the requested temperature on the climate control panel and observing the system’s response.

P1434 Repair Solutions

Repairing Electrical Problems

If the diagnosis reveals an electrical problem, the repair can vary depending on the nature of the fault. For oxidized connectors, thorough cleaning with a specific contact cleaner may suffice. In case of damaged wiring, replacement of the affected harness is necessary. It is crucial to use terminals and connectors of equivalent quality to the original to ensure the durability of the repair.

Replacing the Heating Valve

When the heating valve is faulty, its replacement is the recommended solution. The procedure varies depending on BMW models but generally follows these steps: partial draining of coolant, disconnecting electrical connectors, removing cooling pipes, and installing the new valve. It is imperative to properly bleed the cooling system after the intervention to avoid air bubbles.

Reset Procedures and Final Tests

After repair, several steps are essential. First, clear the fault codes with the OBD2 diagnostic tool. Perform a valve learning procedure if necessary (this function is available on professional diagnostic tools for BMW). Test the full operation of the heating system at different temperatures and verify the absence of P1434 code recurrence after several driving cycles.

Consequences and Prevention of Fault P1434

Impact on Vehicle Operation

Fault P1434 can have several consequences on the operation of your BMW. The cabin heating system may operate incorrectly, with uncontrollable temperature or lack of heat. In some cases, it can affect the engine’s thermal regulation, particularly on models where the valve participates in cooling. The check engine light illuminates, and the vehicle may enter limp mode.

Recommended Preventive Measures

  • Regular checks of coolant level and quality
  • Exclusive use of BMW-approved coolants
  • Annual visual inspection of associated wiring and connectors
  • Professional bleeding of the cooling system according to recommended intervals
  • Early diagnosis at the first signs of malfunction

Average Repair Costs

The repair cost for fault P1434 varies considerably depending on the BMW model and the exact nature of the problem. For a simple wiring repair, the cost can be less than €200. Replacing the heating valve, including labor and parts, can cost between €400 and €800 depending on access complexity. High-end models and recent vehicles often require more expensive interventions.

OBD2 Code P1434 Buick: Technical Diagnosis and Solutions

Understanding the P1434 Code on Buick

What Exactly is the P1434 Code?

The OBD2 trouble code P1434 is a manufacturer-specific code that indicates a problem with the fuel heater valve circuit. This system is crucial for the proper functioning of the engine, especially in cold weather conditions. The main function of the fuel heater valve is to preheat the fuel before it is injected into the engine, ensuring optimal combustion and reducing pollutant emissions.

Operation of the Fuel Heating System

The fuel heating system on Buick vehicles operates based on a precise thermal principle:

  • The valve activates automatically when the fuel temperature drops below a predefined threshold
  • An integrated heating element warms the fuel to maintain its fluidity
  • The Powertrain Control Module (PCM) continuously monitors the electrical circuit
  • The system deactivates once the optimal temperature is reached

Symptoms and Causes of the P1434 Fault

Visible Symptoms of the P1434 Code

When the P1434 code appears on your OBD2 diagnostic tool, several characteristic symptoms may occur:

  • Illumination of the check engine light on the dashboard
  • Difficult starting in cold or humid weather
  • Unstable and irregular idle
  • Noticeable loss of engine power
  • Significant increase in fuel consumption
  • Excessive pollutant emissions during technical inspection

Main Causes of the P1434 Fault

Diagnosing the P1434 code requires a methodical investigation. Potential causes include:

  • Complete failure of the fuel heater valve
  • Electrical circuit problem (damaged or corroded wiring)
  • Defective or oxidized connector at the valve
  • Blown fuse in the power circuit
  • Failure of the valve control relay
  • Problem with the PCM control module

Detailed Technical Diagnostic Procedure

Equipment Needed for Diagnosis

To properly diagnose the P1434 code on your Buick, you will need:

  • A professional OBD2 scanner compatible with Buick systems
  • A quality digital multimeter to measure voltage and resistance
  • A circuit test light or oscilloscope as needed
  • Basic tools to disassemble necessary components
  • The specific repair manual for your Buick model

Electrical Diagnostic Steps

The diagnostic procedure should follow a precise logic:

  • Start by checking the condition of the relevant fuses in the fuse box
  • Visually inspect the wiring and connectors for any damage
  • Measure the supply voltage at the valve connector
  • Check the resistance of the heating valve with a multimeter
  • Test the integrity of the ground circuit associated with the system
  • Verify the continuity of wires between the PCM and the valve

Fuel Heater Valve Test

The specific heating valve test involves precise measurements:

  • Disconnect the electrical connector from the valve
  • Measure the resistance between the valve terminals
  • The resistance value must match the manufacturer’s specifications
  • Infinite resistance indicates an open valve
  • Zero resistance indicates an internal short circuit
  • Always compare measurements with reference values from the technical manual

Definitive Repair Solutions

Repairing Electrical Problems

If the diagnosis reveals an electrical problem, appropriate solutions include:

  • Replace defective fuses with fuses of the same amperage
  • Repair or replace damaged or corroded cables
  • Clean oxidized connectors with a specific contact cleaner
  • Tighten loose connections in the circuit
  • Replace the defective relay if necessary

Replacing the Heating Valve

When the heating valve is defective, its replacement follows a strict procedure:

  • Precisely locate the heating valve on your Buick model
  • Disconnect the battery for safety reasons
  • Partially drain the fuel system if necessary
  • Remove obstructive components to access the valve
  • Remove the old valve and install the new part
  • Reassemble all components in reverse order
  • Perform a complete operational test after repair

Prevention and Expert Advice

Recommended Preventive Maintenance

To prevent the P1434 code from reappearing, adopt these maintenance practices:

  • Regularly inspect the condition of the vehicle’s electrical system
  • Protect electrical connectors from corrosive elements
  • Always use quality OEM replacement parts
  • Perform comprehensive diagnostics at the first sign of symptoms
  • Regularly consult the manufacturer’s technical bulletins

Importance of Professional Diagnosis

Although the P1434 code may seem simple to resolve, professional diagnosis is often necessary because:

  • Modern automotive systems are increasingly complex
  • Incorrect diagnosis can lead to unnecessary costly repairs
  • Only a professional has advanced diagnostic tools
  • Vehicle warranty may be affected by unauthorized repairs
  • The safety of the vehicle and its occupants is paramount

The Buick P1434 code, although specific, generally responds well to methodical diagnosis and appropriate repairs. By rigorously following the described procedures and using the right tools, you can definitively resolve this issue and restore your vehicle’s optimal performance.

OBD2 Code P1434 Cadillac: Technical Diagnosis and Solutions

Understanding the P1434 Code on Cadillac

The OBD2 code P1434 is a manufacturer-specific code for General Motors, particularly encountered on Cadillac vehicles. This code indicates a problem with the auxiliary heater circuit, a system designed to improve thermal comfort in the cabin and optimize engine performance under certain conditions.

Technical Definition of Code P1434

The P1434 code specifically corresponds to a malfunction in the auxiliary heater circuit. This system operates independently of the main heating system and typically uses an additional electric heating element to provide heat more quickly to the climate control system.

Operation of the Auxiliary Heating System

  • Automatic activation by the climate control module
  • Use of a high-power heating resistor
  • Electronic control of the output temperature
  • Integrated thermal and electrical protections
  • Communication with the vehicle’s CAN network

Main Causes of the P1434 Fault

The appearance of the P1434 code can result from several technical failures requiring a methodical investigation to identify the root cause of the problem.

Common Electrical Problems

  • Faulty heating resistor: Normal wear or overheating
  • Blown fuse: Protection of an overloaded circuit
  • Defective relay: Unable to activate the heater
  • Damaged wires: Breaks or short circuits in the wiring
  • Oxidized connectors: Poor electrical connection

Electronic Component Failures

  • Faulty control module: Damaged processor or printed circuits
  • Defective temperature sensors: Incorrect information to the module
  • Electrical ground problems: Faulty ground connection
  • Unstable supply voltage: Variations affecting operation

Technical Diagnostic Procedure

Diagnosing the P1434 code requires a systematic approach using professional tools and following logical steps to precisely identify the source of the problem.

Equipment Needed for Diagnosis

  • Professional OBD2 scanner compatible with GM/Cadillac
  • Digital multimeter with ohmmeter and voltmeter functions
  • Automotive oscilloscope for signal analysis
  • Technical documentation: Cadillac wiring diagrams
  • Manufacturer-specific diagnostic tools

Sequential Diagnostic Steps

Start with a complete visual inspection of the system: check the condition of cables, connectors, fuses, and relays. Then use your multimeter to measure the resistance of the heating element and compare it with the manufacturer’s specifications.

In-Depth Electrical Tests

  • Measurement of the supply voltage at the auxiliary heater
  • Continuity check of the control circuits
  • Resistance test hot and cold
  • Verification of the control module signals
  • Real-time data analysis via OBD2 scanner

Repair Solutions and Costs

Once the diagnosis is complete, the repair can range from simple interventions to complex replacements depending on the identified cause.

Common Repairs and Procedures

  • Replacement of the heating resistor: 1-2 hours of labor
  • Changing the defective relay: Quick intervention (30 minutes)
  • Repair of damaged wiring: Requires professional soldering and insulation
  • Cleaning of connectors: Use of electrical contact cleaner
  • Replacement of the control module: Often requires reprogramming

Repair Cost Estimate

The total cost depends on the Cadillac model and labor. A heating resistor typically costs between €150 and €400 for the part, while labor varies from €80 to €150 per hour depending on the workshop.

Consequences and Precautions

Although the P1434 code does not directly affect vehicle safety, ignoring it can lead to inconveniences and additional complications.

Risks Associated with the P1434 Fault

  • Reduced comfort in the cabin during cold weather
  • Excessive strain on the main heating system
  • Increased electrical consumption from the battery
  • Risk of overheating other electrical components
  • Possible appearance of secondary fault codes

Preventive Maintenance Recommendations

  • Annual inspection of the heating system before winter
  • Regular cleaning of the HVAC system air intakes
  • Checking the coolant level
  • Visual inspection of wiring during scheduled maintenance
  • Regular use of the system to prevent clogging

The Cadillac P1434 code, although specific, responds to standardized diagnostic procedures. A methodical approach using the appropriate tools generally allows for effective identification and resolution of the problem, thereby restoring the optimal thermal comfort expected from a premium vehicle like Cadillac.

Ford Code P1434: Complete Diagnosis and Technical Solutions

Understanding Ford P1434 Trouble Code

The OBD2 trouble code P1434 is a manufacturer-specific code, particularly encountered in Ford, Lincoln, and Mercury vehicles. This code indicates a malfunction in the Evaporative Emission Control (EVAP) system or more specifically in the Exhaust Gas Recirculation (EGR) system depending on the model. Accurate understanding of this code requires in-depth technical analysis of modern emission systems.

Technical Definition of P1434 Code

The P1434 code is defined as “EGR System Temperature Control Valve Circuit – Range/Performance”. It signals that the Powertrain Control Module (PCM) has detected an anomaly in the EGR system temperature control valve circuit, typically a resistance value outside specifications or an inconsistent electrical signal.

Systems Involved in P1434 Triggering

  • Exhaust Gas Recirculation (EGR) system
  • Engine Control Unit (PCM/ECU)
  • EGR gas temperature sensor
  • Associated wiring harness and connectors
  • Engine thermal management system

Symptoms and Consequences of P1434 Code

The appearance of P1434 code is typically accompanied by symptoms noticeable to the driver and may affect vehicle performance. Recognizing these signs enables faster diagnosis and prevents collateral damage.

Common Symptoms Associated with P1434

  • Illuminated check engine light on dashboard
  • Noticeable increase in fuel consumption
  • Reduced engine power, especially during acceleration
  • Unstable or irregular idle
  • Excessive pollutant emissions during technical inspection
  • Possible activation of limp mode

Long-Term Consequences

Ignoring a P1434 code can lead to progressive damage to other engine components. A faulty EGR valve can cause carbon deposit buildup in intake manifolds, degrade combustion quality, and increase wear on emission components.

Technical Diagnostic Procedure for P1434 Code

Diagnosing P1434 code requires a methodical approach and specialized tools. This detailed procedure guides the technician through successive steps of identifying the root cause.

Required Diagnostic Equipment

  • Ford-compatible professional OBD2 scanner
  • Precision digital multimeter
  • Automotive oscilloscope (optional but recommended)
  • Model-specific repair manual
  • Standard and specific removal/installation tools

Electrical Diagnostic Steps

Begin by verifying the integrity of the EGR valve electrical circuit. Measure resistance at the EGR temperature sensor terminals and compare with manufacturer specifications (typically between 200-300 ohms at room temperature). Check cable continuity between the connector and PCM.

EGR Valve Functional Tests

Perform an EGR valve operational test using the diagnostic scanner. Activate the valve and observe real-time temperature parameters. A functional valve should show progressive temperature variation during activation. Absence of variation indicates a faulty component.

Repair Solutions and Corrective Procedures

Once the cause of P1434 code is identified, several repair solutions can be applied depending on the nature of the detected fault.

Electrical Fault Repairs

  • Replacement of faulty EGR temperature sensor
  • Repair of damaged or corroded electrical wiring
  • Cleaning or replacement of oxidized connectors
  • Grounding of associated ground circuit

EGR Valve Cleaning and Replacement

For clogged EGR valves, thorough cleaning with specific products can resolve the issue. In cases of confirmed mechanical wear, complete EGR unit replacement is necessary. Always use original or equivalent quality parts to ensure repair durability.

Reset and Post-Repair Testing

After any intervention, clear trouble codes with the OBD2 scanner and perform a complete drive cycle to verify that P1434 code doesn’t reappear. Monitor real-time parameters to confirm proper EGR system operation under all driving conditions.

Preventive Measures and Maintenance Tips

Prevention remains the best approach to avoid P1434 code recurrence. Regular EGR system maintenance extends its lifespan and maintains optimal engine performance.

Maintenance Best Practices

  • Use of quality fuels with detergent additives
  • Regular cooling system inspection
  • Preventive EGR system cleaning every 80,000-100,000 km
  • Annual visual inspection of emission components
  • Complete diagnostic at first abnormal symptom

Ford-Specific Recommendations

Ford vehicles are particularly sensitive to EGR issues on certain engines. Consult manufacturer technical bulletins for potential PCM software updates that might resolve recurring P1434 code problems.

The Ford P1434 code, although specific, responds well to a structured diagnostic approach. Thorough understanding of involved systems and rigorous application of testing procedures guarantee durable repairs and restoration of original vehicle performance.

Honda Code P1434: Complete Diagnosis and Technical Solutions

Understanding Honda Fault Code P1434

The OBD2 fault code P1434 is a manufacturer-specific code, primarily encountered in Honda and Acura vehicles. This code indicates a problem in the fuel vapor emission control system, specifically in the EVAP system’s vent valve circuit.

What is the EVAP System?

The main function of the EVAP system is to capture and store fuel vapors from the tank to prevent their release into the atmosphere. This eco-friendly system includes several essential components:

  • The fuel tank and its cap
  • The activated carbon canister
  • The EVAP purge valve
  • The vent valve (related to P1434)
  • Pressure sensors
  • The EVAP system control module

Technical Meaning of Code P1434

Code P1434 specifically indicates a problem in the EVAP system’s vent valve circuit. This valve, also called the “vent solenoid valve” or “vent valve,” is responsible for opening and closing the EVAP system to the atmosphere during test and purge cycles.

Symptoms and Consequences of Fault P1434

When code P1434 appears, several symptoms can alert the driver. Understanding these signs allows for faster and more accurate diagnosis.

Visible Symptoms for the Driver

  • Illumination of the check engine light (intermittent or permanent)
  • Slight increase in fuel consumption
  • Persistent gasoline odor around the vehicle
  • Difficulty starting in hot weather
  • Potential decrease in engine performance

Long-Term Technical Consequences

Although the vehicle generally remains usable with a P1434 code, ignoring it can lead to additional complications:

  • Accelerated degradation of the activated carbon canister
  • Excessive pressure in the fuel tank
  • Risk of tank deformation
  • Failure in emissions inspection
  • Appearance of additional fault codes

Technical Diagnosis of Code P1434

Diagnosing code P1434 requires a methodical approach and the use of appropriate tools to identify the root cause of the problem.

Tools Needed for Diagnosis

  • Honda/Acura compatible OBD2 scanner
  • Digital multimeter
  • Manual vacuum pump
  • Basic mechanical tools
  • Vehicle technical documentation

Step-by-Step Diagnostic Procedure

Start by checking the simplest elements before proceeding to more complex tests:

  • Check the fuel tank cap (tightening and seal condition)
  • Visually inspect EVAP lines for cracks or disconnections
  • Check the electrical status of the vent valve (power and ground)
  • Test the valve coil resistance (usually between 20-30 ohms)
  • Check the mechanical operation of the valve with a vacuum pump
  • Test the complete EVAP system for leaks

In-Depth Electrical Tests

For the vent valve itself, perform the following measurements:

  • Measure the supply voltage with ignition on (should be 12V)
  • Check ground circuit continuity
  • Verify absence of short circuits or open circuits in the wiring
  • Test valve control from the control module

Repair Solutions for P1434

Once the cause is identified, several solutions are available depending on the nature of the detected problem.

Most Common Repairs

The most frequent interventions to resolve a P1434 code include:

  • Replacement of the faulty EVAP vent valve
  • Repair or replacement of damaged EVAP lines
  • Cleaning or replacement of clogged activated carbon canister
  • Repair of faulty wiring or connectors
  • Replacement of the EVAP control module (rare cases)

Vent Valve Replacement Procedure

Replacing the vent valve generally follows this sequence:

  • Locate the valve (usually near the tank or canister)
  • Disconnect the electrical connector
  • Disconnect EVAP lines
  • Remove valve mounting
  • Install the new valve respecting the mounting direction
  • Reconnect all elements
  • Reset the fault code and test operation

EVAP System Prevention and Maintenance

Prevention remains the best approach to avoid problems related to code P1434 and ensure the longevity of the EVAP system.

Good Usage Practices

  • Never force the fuel tank cap beyond the click
  • Avoid refueling after the pump clicks
  • Follow recommended maintenance intervals
  • Have the EVAP system checked during regular maintenance
  • Address any check engine light promptly

Recommended Preventive Maintenance

To keep the EVAP system in good working order:

  • Annual visual inspection of lines and connectors
  • Periodic cleaning of ventilation orifices
  • Replacement of carbon canister according to manufacturer recommendations
  • System leak check every 2 years
  • Update engine control software if available

Code P1434, although specific to Honda and Acura vehicles, represents an accessible diagnostic challenge with the right methodology. A systematic approach combined with a thorough understanding of the EVAP system will effectively resolve this problem and restore your vehicle’s optimal performance while preserving the environment.

P1434 MINI Code: Complete AdBlue SCR Fault Diagnosis

Understanding MINI Code P1434: Definition and Context

The OBD2 fault code P1434 is specific to BMW group vehicles, including MINI models equipped with the Selective Catalytic Reduction (SCR) system. This code indicates a malfunction in the AdBlue reduction system, specifically in the circuit of the reduction valve located in the SCR module. When this fault appears, the engine management system detects an anomaly in the urea injection process, which can lead to increased pollutant emissions and the illumination of the check engine light.

What is the AdBlue SCR System?

The SCR (Selective Catalytic Reduction) system is an advanced exhaust gas treatment technology used on diesel vehicles to reduce nitrogen oxide (NOx) emissions. It works by injecting a reducing fluid, AdBlue (an aqueous urea solution), into the exhaust gases. This injection occurs in the SCR catalyst where a chemical reaction transforms harmful NOx into harmless water vapor and nitrogen.

Location and Function of the Reduction Valve

The reduction valve, often called the AdBlue dosing valve, is located in or near the SCR module. Its main role is to precisely control the dosing and injection of AdBlue into the exhaust system. It operates in coordination with the AdBlue pump, the SCR control module, and various sensors to ensure optimal NOx reduction.

Main Causes of MINI Code P1434

Diagnosing code P1434 requires a methodical approach, as several components can be the source of the problem. A thorough understanding of possible causes helps optimize the troubleshooting process and avoid unnecessary repairs.

Mechanical and Electrical Problems

  • Faulty reduction valve: The most common cause, which can include burnt electrical coils, blocked or worn internal mechanisms
  • Defective electrical circuit: Cut wires, oxidized or corroded connectors, poor contacts in the wiring harness
  • Failing AdBlue pump: Insufficient injection system pressure can trigger code P1434
  • Empty or poor-quality AdBlue tank: Level too low or use of contaminated AdBlue

Control System Malfunctions

  • Faulty AdBlue level sensor: Incorrect data sent to the engine computer
  • CAN communication problems: Faults in data exchange between the SCR module and the ECU
  • Defective SCR computer: Failure of the control module dedicated to the AdBlue system
  • Outdated software programming: Need for ECU firmware update

Symptoms and Consequences of Fault P1434

The appearance of code P1434 is usually accompanied by visible symptoms for the driver, as well as potential consequences for the vehicle’s operation and the environment.

Symptoms Visible to the Driver

  • Check engine light illumination: Main warning signal on the dashboard
  • AdBlue warning message: Specific notification from the catalytic reduction system
  • Possible performance reduction: Limp mode to protect the engine and exhaust system
  • Increased fuel consumption: Indirect consequence of SCR system malfunction
  • Ammonia smell: In case of overdosing or poor AdBlue treatment

Technical and Environmental Consequences

If fault P1434 is not treated quickly, several important consequences can occur:

  • Significant increase in NOx emissions: Non-compliance with anti-pollution standards
  • Risk of SCR system clogging: Accumulation of deposits in the catalyst
  • Possible activation of emergency mode: Engine speed and power limitations
  • Secondary exhaust system failures: Potential damage to other components
  • Failure at technical inspection: In case of excessive emission levels

Diagnostic Procedure for Code P1434

Diagnosing code P1434 requires a structured approach and the use of specialized tools to accurately identify the root cause of the problem.

Preliminary Verification Steps

  • Complete fault code reading: Use a professional diagnostic tool compatible with BMW/MINI
  • Checking AdBlue level and quality: Inspect the tank and possibly test the fluid
  • Visual inspection of components: Look for physical damage, leaks, or corrosion
  • Checking electrical connectors: Ensure they are in good condition and securely connected

Advanced Electrical and Functional Tests

For an in-depth diagnosis, several technical tests must be performed:

  • Valve resistance measurement: Comparison with manufacturer specifications
  • Power supply voltage test: Verification of current reaching the valve
  • Control signal check: Use of an oscilloscope to analyze PWM signals
  • AdBlue system pressure test: Measurement with specialized pressure gauge adapted to the system
  • Real-time data analysis: Monitoring SCR parameters via the diagnostic tool

Solutions and Repair Procedures

Once the cause of fault P1434 is identified, several repair solutions can be considered, ranging from simple intervention to complex repair.

Common and Preventive Repairs

  • Refilling the AdBlue tank: Simple solution if the level is insufficient
  • Replacing the reduction valve: Frequent intervention often requiring programming of the new part
  • Cleaning AdBlue injectors: In case of partial system clogging
  • Repairing electrical wiring: Replace or repair defective wires and connectors
  • ECU software update: Reprogramming at a dealer or equipped garage

Complex and Costly Interventions

In the most severe cases, more significant repairs may be necessary:

  • Replacing the AdBlue pump: Operation often requiring complete system purging
  • Changing the complete SCR module: Costly solution in case of extensive catalyst damage
  • Replacing the SCR computer: Requires specific programming and pairing with the main ECU
  • Professional SCR system cleaning: Specialized procedure to unclog the catalyst and lines

Repair Costs and Maintenance Advice

The cost of repairing fault P1434 varies considerably depending on the identified cause and the specific MINI model.

Repair Cost Estimates

  • Replacing the reduction valve: €300 to €600 (part and labor)
  • Changing the AdBlue pump: €600 to €1,200 depending on access complexity
  • Replacing the complete SCR module: €1,500 to €3,000 (expensive part and significant labor)
  • ECU reprogramming: €100 to €300 at an equipped professional
  • Preliminary diagnosis: €80 to €150 depending on the garage

Recommendations to Avoid Fault P1434

Several good practices can help prevent the appearance of code P1434:

  • Use only certified quality AdBlue: Avoid non-approved products
  • Respect refill intervals: Don’t wait for the warning light to come on
  • Perform regular maintenance with a professional: Preventive checks of the SCR system
  • Avoid constantly driving with an almost empty tank: Prevent pump problems
  • Perform recommended software updates: Keep the system updated according to manufacturer recommendations

The MINI code P1434 represents a serious fault in the AdBlue pollution control system that requires immediate attention. Accurate professional diagnosis is essential to identify the exact cause and apply the appropriate repair solution, thus preserving vehicle performance and compliance with environmental standards.