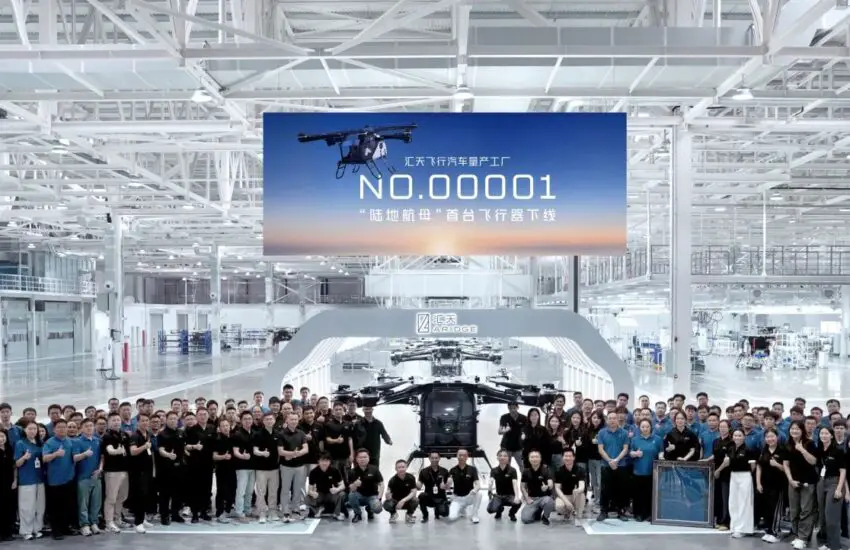
China’s Flying Vehicle Breakthrough
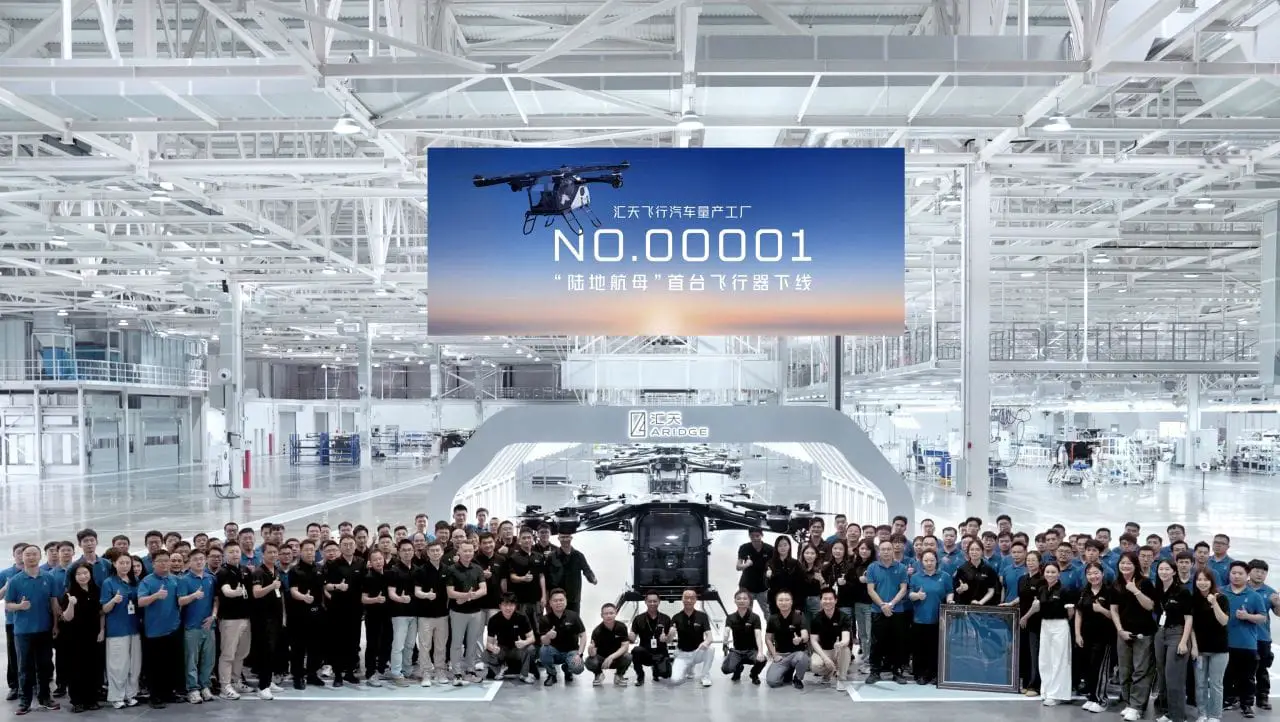
While industry leaders like Elon Musk have been projecting flying car timelines, Chinese manufacturer Xpeng has achieved a significant milestone by announcing the start of production for its own flying vehicle. This timely development highlights the accelerating race in aerial mobility and demonstrates China’s growing capability to transform futuristic concepts into manufacturing reality.
From Prototype to Production Line
Xpeng’s achievement marks one of the first instances where a flying vehicle has transitioned from experimental prototype to actual production. The company has successfully addressed numerous engineering challenges, including battery efficiency for vertical take-off and landing (VTOL), flight stability systems, and noise reduction technologies. This production milestone suggests that flying vehicles may become commercially viable sooner than many industry observers predicted.
Global Competition Intensifies
The simultaneous timing of Xpeng’s production announcement alongside continued promises from Western companies creates a fascinating competitive landscape. Where other manufacturers have presented concepts and projections, Xpeng has demonstrated tangible progress in manufacturing capability. This development positions China as a serious contender in the emerging urban air mobility market, potentially reshaping global transportation dynamics.
Regulatory Hurdles and Infrastructure
Despite the manufacturing breakthrough, significant challenges remain before flying vehicles become commonplace. Aviation authorities worldwide are still developing certification frameworks for personal aerial vehicles, and cities must adapt their infrastructure to accommodate this new form of transportation. Xpeng’s production achievement nevertheless represents a crucial step toward overcoming these barriers by providing regulators with concrete vehicles to evaluate.
The successful transition to production suggests that the era of flying vehicles may be closer than previously imagined, with Xpeng establishing an important benchmark for the entire industry.