Common mistakes to avoid with OBD2 diagnostics

OBD2 tools are now essential for diagnosing mechanical and electronic issues in modern vehicles. They save time and money by quickly identifying faults through specific codes. However, improper use can lead to costly or ineffective errors. Here are the most common mistakes to avoid and how to work around them to get the most out of your OBD2 scanner.


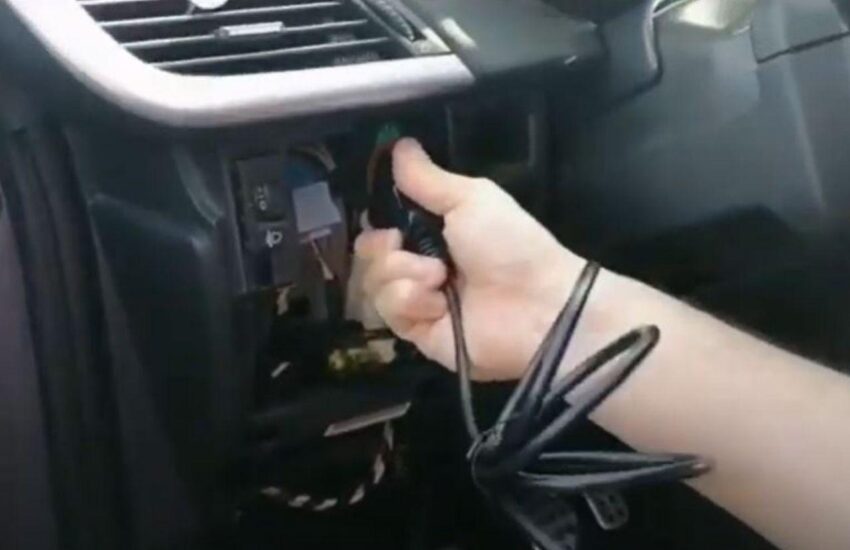
1. Not checking scanner compatibility

Problem: Not all scanners work with all vehicles. Some OBD2 tools are designed for specific brands or newer models, while others only support basic functions.

Solution: Before purchasing a scanner, ensure it is compatible with your car. Check the technical specifications and look for online reviews to avoid unpleasant surprises.


2. Ignoring software updates

Problem: OBD codes evolve with new vehicle technologies. A scanner with outdated software may miss critical diagnostics or display incorrect errors.

Solution: Regularly update your scanner’s software. Most manufacturers offer free or paid updates through their official websites.


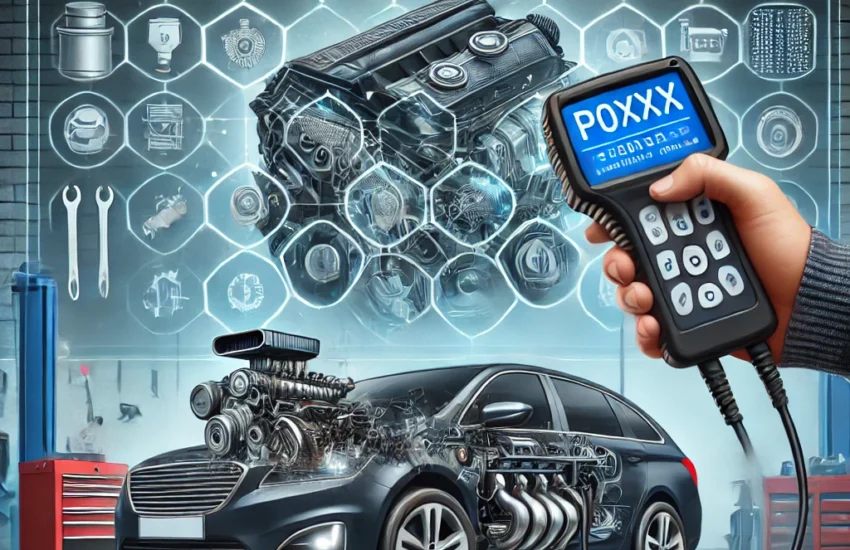
3. Misinterpreting an OBD code

Problem: Many people think an OBD code directly indicates which part to replace. For example, a code related to the oxygen sensor doesn’t necessarily mean the sensor is faulty—it could be triggered by other issues like a clogged catalytic converter.

Solution: Use the code as a starting point. Consult manuals or online resources to correctly interpret the codes and their potential causes.


4. Clearing codes without solving the problem

Problem: Clearing error codes before fixing the issue can mask the problem and delay necessary repairs. It can also complicate future diagnostics.

Solution: Never delete an error code without identifying and resolving the underlying cause. The code may reappear if the problem persists.


5. Using a low-end or counterfeit scanner

Problem: Cheap or counterfeit scanners can provide inaccurate or incomplete information, leading to unnecessary repairs.

Solution: Invest in a quality diagnostic tool. Reliable scanners offer greater accuracy, advanced features (like real-time data), and better durability.


6. Forgetting to read real-time data

Problem: Focusing only on error codes without examining real-time data can give an incomplete picture of the situation.

Solution: Use your scanner’s live data features to monitor vehicle performance. This helps identify potential problems before they trigger an error code.


7. Neglecting regular sensor maintenance

Problem: Sensors like the mass airflow sensor (MAF) or oxygen sensors can get dirty or age, affecting diagnostic results.

Solution: Regularly clean sensors or replace them if necessary to ensure accurate diagnostics.


8. Not reading the user manual

Problem: Many users overlook their scanner’s manual, which can lead to misuse or underutilization of its advanced features.

Solution: Take the time to read the manual to understand all the options offered by your scanner. This may include tools like emission cycle tracking, sensor tests, etc.


9. Thinking a scanner detects everything

Problem: An OBD2 scanner is a powerful tool, but it cannot diagnose everything. For example, it won’t detect mechanical issues like an oil leak or failing brake system.

Solution: Use the scanner as a complement to a thorough visual and mechanical inspection of your vehicle.


10. Ignoring code history

Problem: Clearing codes too quickly can cause you to lose useful information about past faults, complicating diagnosis.

Solution: Always note the codes before clearing them. This can help you track recurring issues.


Tips for successful OBD2 diagnostics

  • Work in a safe environment: Avoid scanning a vehicle in unstable conditions or with the engine running unnecessarily.
  • Keep track of diagnostics: Take screenshots or note results for future reference.
  • Use reliable resources: Look for specific solutions in manuals, forums, or online guides.

Why invest in a good diagnostic tool?

A quality OBD2 scanner can transform how you maintain your vehicle. It helps you:

  • Identify problems quickly.
  • Reduce costs by avoiding unnecessary repairs.
  • Monitor performance in real time.

Discover our selection of OBD2 scanners at eobdcode.com for reliable and accurate diagnostics.


Conclusion

OBD2 diagnostics are a powerful tool, but they require correct use to avoid costly mistakes. By following these tips, you’ll maximize your scanner’s efficiency and extend your vehicle’s lifespan.

Ready to diagnose your car like a pro? Explore our OBD2 tools at eobdcode.com today!

OBD2 Scanner: Practical Guide for Professional Car Diagnostics

An OBD2 scanner is an essential tool for diagnosing your vehicle’s issues, but many only use it to half its potential. Did you know that beyond simply reading fault codes, it can reveal real-time data on engine operation, emissions, and even predict costly breakdowns? Discover how to fully utilize this tool and avoid common pitfalls.


1. OBD2 Scanner Basics: What You Need to Know

What is an OBD2 Scanner?

  • Overview of the OBD2 system (universal standard since 1996).
  • Types of scanners: basic (code reading/clearing) vs. advanced (data streams, live tests).

Preparation Before Use

  • Locate the OBD2 port (under the steering wheel, near the glove box).
  • Check ignition: engine off or running? (Depending on the operations).

2. Tips for Using an OBD2 Scanner Like a Pro

Tip 1: Don’t Rely Solely on Codes

  • Read live data (e.g., RPM, coolant temperature, O2 sensor voltage).
  • Example: A P0171 code (system too lean) + abnormal MAF sensor data = faulty MAF sensor.

Tip 2: Use Mode 6 for Intermittent Issues

  • Mode 6 provides access to manufacturer-specific tests (e.g., circuit tests, compression ratios).
  • How to interpret “TEST-ID” and “Result” values to identify subtle problems.

Tip 3: Save Data Before Clearing Codes

  • Why you should always note the codes and freeze frame data before clearing them.

Tip 4: Compare Pre-Cat and Post-Cat Data

  • Analyze oxygen sensors before and after the catalyst to detect a failing catalytic converter (e.g., code P0420).

3. The 5 Common Mistakes to Absolutely Avoid

Mistake 1: Clearing Codes Without Prior Diagnosis

  • Clearing a code without understanding its cause = risk of quick recurrence.

Mistake 2: Ignoring “Pending” Codes

  • These codes don’t trigger the check engine light but signal emerging problems.

Mistake 3: Using a Scanner Incompatible With Your Vehicle

  • Check supported protocols (e.g., CAN, KWP2000) based on make and year.

Mistake 4: Neglecting Scanner Updates

  • Software updates add functions and fix bugs.

Mistake 5: Confusing Generic and Specific Codes

  • Example: A P0300 code (generic misfire) vs. a P0304 code (misfire on cylinder 4).

4. Recommended Tools to Go Further

  • Beginner scanners: Foseal Foseal-Scan Pro (budget) – Basic reading and clearing.
  • Pro scanners: Autel MaxiCOM MK808 (advanced analysis, reprogramming).
  • Free software: Torque Pro (with a Bluetooth adapter) for smartphones.

5. FAQ: Common Questions About OBD2 Scanners

Q: Can an OBD2 scanner damage my vehicle?
A: No, if used correctly. Avoid unplugging the scanner during an update.

Q: Why won’t my scanner connect to the vehicle?
A: Check the OBD2 port (blown fuse?), compatible protocol, or wiring.

Q: Do I need to buy an expensive scanner for occasional use?
A: No, an entry-level model is sufficient for most basic diagnostics.


Conclusion

An OBD2 scanner is much more than a simple code reader: it’s a window into your vehicle’s health. By avoiding common mistakes and utilizing its advanced functions, you’ll save time and money. Share your experiences in the comments or ask your questions to learn more!

How to interpret OBD codes for electric vehicles?

The on-board diagnostic system (OBD, On-Board Diagnostics) is an essential tool for monitoring the proper functioning of a vehicle. Initially designed for internal combustion engine vehicles (ICEVs), it detects anomalies related to pollutant emissions. However, with the rise of electric vehicles (EVs), OBD has evolved to adapt to specific components such as batteries, electric motors, and charging systems.

OBD for Electric Vehicles: Major Differences
Unlike ICEVs, EVs have no emissions to monitor, but their OBD system focuses on:

  • The high-voltage battery (state of health, temperature, insulation).
  • The electric motor and inverter (overheating, failures).
  • The charging system (connection, compatibility).
  • Thermal management (cooling of critical components).

Although the standard OBD-II port is often present, the generated codes are specific to electric technologies. Standards such as ISO 14229 (UDS) complement OBD-II for more advanced diagnostics.

Structure of OBD Codes for EVs
A typical OBD code consists of a letter followed by four digits:

  • Letter: indicates the system concerned (e.g., P for Powertrain, B for Body, U for Network).
  • First digit: 0 (generic code) or 1 (manufacturer code).
  • Subsequent digits: identify the anomaly (e.g., P0AC7 = Battery deterioration).

Examples of Common Codes in EVs

  1. P0A7F: Electric motor temperature issue.
  2. P1E00: High-voltage battery insulation fault.
  3. BMS-C132 (manufacturer): Battery cell imbalance.
  4. U0401: Invalid data from the battery controller.

Tools for Reading and Interpreting Codes

  • Generic OBD-II readers: Useful for standard codes but limited with manufacturer codes.
  • Specialized tools (e.g., Launch X431, Autel MaxiSYS): Decrypt proprietary codes and offer detailed analyses.
  • Manufacturer applications/software (e.g., Tesla Toolbox): Essential for advanced diagnostics.

Steps to Interpret a Code

  1. Connect a diagnostic tool to the OBD-II port (often under the steering wheel).
  2. Retrieve the code (e.g., P0AC7).
  3. Consult a database or manufacturer manual to decipher its meaning.
  4. Analyze the context: Check if the fault is temporary (e.g., faulty sensor) or critical (e.g., battery overheating).

Why OBD Remains Crucial for EVs?

  • Preventive maintenance: Anticipate battery or component wear.
  • Safety: Detect risks of fire or electrical failure.
  • Performance: Optimize range and energy efficiency.

Limitations and Best Practices

  • Manufacturer codes often require professional intervention.
  • Do not ignore recurring codes, even if the vehicle appears to function normally.
  • Use reliable resources (e.g., technical manuals, specialized forums) to avoid misinterpretations.

Conclusion
Interpreting OBD codes for an electric vehicle requires an understanding of its technical specificities. Although generic tools offer a preliminary approach, complex faults require expertise and appropriate equipment. In case of doubt, consulting a garage trained in EVs ensures an accurate and safe diagnosis.

How Does the VVT System Work? Everything to Know About Variable Valve Timing Technology

The VVT system (Variable Valve Timing) is a key innovation in the automotive industry for optimizing the performance, fuel consumption, and pollutant emissions of internal combustion engines. But how exactly does it work? Let’s dive into the mechanisms of this technology.


What is the VVT System?

Variable Valve Timing (VVT) allows for the dynamic adjustment of the opening and closing of engine valves based on engine speed and driving conditions. Unlike traditional fixed timing systems, VVT adapts valve timing to provide an ideal balance between power, efficiency, and environmental friendliness.


Key Components of the VVT System

1. The Phaser (Camshaft Phaser)

A mechanical device located on the camshaft, it modifies the valve timing angle using oil pressure.

2. Solenoid Valves

Control the oil flow to the phaser, following commands from the engine control unit (ECU).

3. Sensors

  • Crankshaft Sensor: Measures engine position and speed.
  • Camshaft Sensor: Monitors valve timing.
  • Oil Pressure Sensor: Ensures optimal lubrication.

4. Engine Control Unit (ECU)

Analyzes sensor data and controls the solenoids to adjust timing in real time.


How the VVT System Works: Key Steps

  1. Data Collection
    The ECU receives real-time information (engine speed, load, temperature, etc.).
  2. Phaser Adjustment
    As needed, the ECU activates the solenoids to direct oil to the phaser, shifting the camshaft.
  3. Valve Timing Modification
    • At Low RPM: Valves open later to stabilize combustion.
    • At High RPM: Earlier opening to maximize air intake and power.
    • Under Partial Load: Optimal adjustment to reduce fuel consumption.

Advantages of the VVT System

  • Increased Performance: Better cylinder filling, especially at high RPM.
  • Fuel Economy (up to 10% in city driving).
  • Reduced Pollutant Emissions (NOx, CO2).
  • Smoother Driving: Elimination of low-RPM jerks.

Different Types of VVT Systems

Several manufacturers have developed their own technologies:

  • Toyota VVT-i: Continuous timing variation.
  • BMW VANOS: Dual phaser (intake/exhaust camshaft).
  • Honda VTEC: Combines VVT with variable valve lift.

VVT System Maintenance: Essential Tips

  1. Quality Engine Oil
    Clean oil prevents solenoid clogging. Replace it as recommended.
  2. Monitor for Unusual Noises
    A metallic rattling may indicate a faulty phaser.
  3. Electronic Diagnostics
    If the engine light is on, consult a professional to analyze ECU errors.

Conclusion: VVT, a Pillar of Modern Engines

The VVT system revolutionizes engine efficiency by intelligently adjusting valve timing. Understanding its operation and maintenance helps extend its lifespan and fully benefit from its advantages. Whether for a city car or a sports car, this technology remains essential!

OBD-II for Dummies: How to Read an Error Code Without Being a Mechanic

You see an orange “Check Engine” light on your dashboard? Don’t panic! Thanks to OBD-II, even without being a mechanic, you can decipher what your car is trying to tell you. Here is a simplified guide to understanding and reading error codes like a pro.

1. What is OBD-II?

OBD-II (On-Board Diagnostics II) is a system integrated into your vehicle since the 1990s. It continuously monitors engine performance, transmission, pollutant emissions, and other components. In case of an anomaly, it generates an error code stored in its memory, like a doctor noting symptoms.

2. Why Use OBD-II When You’re Not a Mechanic?

  • Save money: Avoid diagnostic fees at the garage.
  • Act quickly: Identify minor problems before they become serious.
  • Understand your car: Better communicate with your mechanic.

3. Necessary Equipment

No need for complex tools! An OBD-II reader is enough:

  • Basic reader (€20-50)
  • Bluetooth/Wi-Fi adapter (e.g., ELM327) + smartphone app
  • Professional reader (for advanced enthusiasts)

Tip: The OBD-II port is usually located under the steering wheel or in the glove box.

4. Steps to Read an Error Code (in 4 Minutes)

  1. Turn off the engine and plug in the reader.
  2. Turn the ignition on (without starting).
  3. Start the reading via the device or application.
  4. Note the displayed codes (e.g., P0300).

5. Decoding an OBD-II Code: Simple Explanations

A code consists of 5 characters:

  • P = Engine problem
  • 0 = Generic code
  • 30 = Misfires
  • 0 = Multiple cylinders affected

Free resources: eobdcode.com or Google (e.g., “P0455 meaning”).

6. What to Do After Reading the Code?

  • Simple problems: Check the gas cap (P0455) or clean the mass airflow sensor (P0171).
  • Complex problems: Consult a mechanic for codes like P0300 or P0420.

Warning: Never clear codes without solving the problem!

7. 3 Mistakes to Absolutely Avoid

  • Panicking as soon as the light appears.
  • Ignoring recurring codes.
  • Using a basic reader for complex diagnostics.

Conclusion: Become Your Car’s Expert

With minimal investment (€20 for a Bluetooth adapter), OBD-II allows you to avoid costly repairs. Some applications like FIXD even explain the severity of the problem and its estimated cost. So, ready to play mechanic? 🛠️

Also read: How to Reset a Check Engine Light

The 5 Essential OBD-II Tools for a Home Garage

Dreaming of diagnosing your car’s problems yourself without relying on a garage? With the right OBD-II tools, it’s possible! Here is our selection of the 5 essential tools to create an efficient and economical DIY workshop.

1. Basic OBD-II Reader: The Fundamental

  • Why you need it: Displays error codes in real time, ideal for beginners.
  • Recommended model: ANCEL AD310 (€30-40). Compact, built-in screen, clears codes.
  • Bonus: Perfect for checking the “Check Engine” light before a long trip.

2. ELM327 Bluetooth Adapter: The Smart Connection

  • Why you need it: Turns your smartphone into a professional tool via apps like Torque Pro or Car Scanner.
  • Recommended model: Veepeak OBDCheck (€20). Compatible with Android/iOS, stable and reliable.
  • Bonus: View live graphs (RPM, temperature, turbo pressure).

3. High-End Scanner: For Car Enthusiasts

  • Why you need it: Deciphers manufacturer codes, tests sensors and electronic modules.
  • Recommended model: Autel MaxiCOM MK808 (€250-300). Bidirectional, free updates, compatible with 90% of vehicles.
  • Bonus: Resets ESP or Airbag systems after a repair.

4. OBD-II to USB Cable: For Software Pros

  • Why you need it: Use advanced software like FORScan (Ford) or VCDS (Volkswagen).
  • Recommended model: OBDLink EX (€100). J2534 compatible, ideal for coding.
  • Bonus: Customize your car’s options (turn signal clicks, auto-locking).

5. Mobile Diagnostic Station: The Versatility

  • Why you need it: Combines an OBD-II scanner, multimeter, and oscilloscope.
  • Recommended model: BlueDriver Bluetooth Pro Scan Tool (€100). Generates detailed reports with repair solutions.
  • Bonus: Identifies even intermittent problems thanks to data logging.

How to Choose Your Tool?

  • Tight budget: Start with a Bluetooth adapter + free app.
  • Recent vehicles: Prefer a scanner compatible with CAN Bus (2010+).
  • Specific brands: Opt for dedicated cables/software (e.g., BMW, Mercedes).

In Summary: Why Invest in OBD-II?

With these tools, you will be able to:

  • Diagnose 80% of common failures (emission system, injection, ignition).
  • Save up to €150 per year on garage diagnostics.
  • Understand your car’s operation in real time.

Smart tip: Some tools like the Autel MaxiCOM are easy to resell used. Perfect for amortizing the investment!

Ready to turn your garage into a high-tech workshop? 🔧🚗

How to Diagnose a Problem Without an Error Code (Example: Vibrations, Abnormal Noises)

Your car vibrates, squeaks, or makes a worrying clunking sound… but no warning light comes on and the OBD-II shows no error codes? Don’t panic! Here is a step-by-step method to identify the source of the problem without professional tools.

1. Symptoms Not to Ignore

  • 🔧 Vibrations (steering wheel, seats, pedals)
  • 🔧 Abnormal noises: clunking (suspension), squeaking (brakes), whistling (belt)
  • 🔧 Strange behavior: pulling steering, burning smell, smoke

2. DIY Method: Diagnosis in 5 Steps

Step 1: Locate the Problem (Where? When?)

  • Where: Front/rear/left/right of the vehicle?
  • When: When braking? When accelerating? When cold?
  • 🛠️ Test: Drive in an empty parking lot and reproduce the noise/vibration.

Step 2: Visual Inspection (10 Minutes Max!)

  • Tires: Uneven wear, inflation, bulges.
  • Brakes: Scored discs, worn pads.
  • Belts: Cracks, loose tension.
  • Bushings: Torn rubber (suspension).

Tip: Use your smartphone’s flashlight!

Step 3: Test While Driving (Safety First!)

  • Steering wheel vibrations → Wheel balancing or worn ball joints.
  • Noise when turning → Wheel bearings or failed CV joints.
  • Squeaking when braking → Worn-out brake pads.

Step 4: Use Simple Tools

  • 📏 Pressure gauge (tires): €5 at a service station.
  • 🔩 Ratchet wrench: Tighten wheel nuts (recommended torque: 110 Nm).
  • 🎥 Smartphone camera: Film moving components (e.g., CV joint).

Step 5: When to Consult a Pro?

  • ⚠️ Vibrations + burning rubber smell → Seized brakes.
  • ⚠️ Metallic clunking under the chassis → Broken suspension.
  • ⚠️ Fluid leak (oil, coolant).

3. Practical Case: Diagnosing a Squeak During Acceleration

  1. Location: Noise comes from the front right.
  2. Inspection: Cracked accessory belt.
  3. Test: Spray water on the belt → Noise temporarily disappears?
  4. Solution: Belt replacement (€30-150 depending on model).

4. Common Mistakes to Avoid

  • Ignoring intermittent noises: A minor problem can worsen.
  • Overtightening nuts → Risk of breaking studs.
  • Using WD-40 on brakes: Danger of slipping!

5. Useful Tools (Under €50)

  • 🎧 Mechanical stethoscope (€15): Locates precise noises.
  • 🔊 Ultrasonic leak detector (€40): For air whistles.
  • 📱 “Spectroid” app (Android): Analyzes noise frequencies.

In Summary: Become a Car Detective!

With observation and a bit of logic, 50% of mechanical problems can be identified without expensive equipment. And if you’re unsure, share a video of the noise on a specialized forum – the community will help you!

Table of Typical Noises + Probable Causes

Noise Type When? Probable Causes Urgency Quick Check
High-pitched squeak 🎶 When braking Worn pads, warped discs 🔴 High Check pad thickness
Dry clunk 📌 When turning Failed CV joint, steering ball joint 🟠 Medium Shake the wheel (engine off)
Dull rumbling 🔊 At constant speed Wheel bearing, worn tires 🟠 Medium Change speed: does noise persist?
Whistling 💨 At idle Exhaust leak, belt 🔴 High (if smoke) Pass hand near joints (engine cold!)
Metallic knocking 🔨 Over bumps Shock absorbers, bushings 🟢 Low (except loss of control) Press on hood: does car oscillate > 2 times?
Buzzing 🐝 During acceleration Transmission, differential 🟠 Medium Check gearbox oil level

Important Notes:

  • ⚠️ Immediate stop required if: Burning smell, smoke, fluid leak.
  • 🔧 Additional tools: A mechanical stethoscope (€15) identifies 80% of noises.

The 5 OBD-II Tools for Home Garage

OBD-II (On-Board Diagnostics) is a standardized system that allows you to diagnose mechanical and electronic problems in your vehicle. For a home garage, having the right OBD-II tools is essential for identifying faults, optimizing performance, and avoiding costly workshop fees. Here are the 5 essential tools to have in your arsenal:


1. Basic OBD-II Scanner (Code Reader)

Why have it?
It’s the basic tool for reading and clearing error codes (e.g., P0171, P0300). Ideal for beginners, it allows you to quickly understand the source of an illuminated engine light.
Key features:

  • Compatibility with all vehicles post-1996 (OBD-II standard).
  • Display of codes and their meanings via a screen or smartphone app.
  • Affordable price (starting from €30).
    Examples:
  • BlueDriver (paired with an app for advanced analysis).
  • ANCEL AD310 (built-in screen, compact).

2. Advanced Diagnostic Tool with Live Data

Why have it?
To go beyond error codes: visualize real-time data (RPM, temperature, injector pressure, etc.) and diagnose complex faults.
Key features:

  • Live graphs to monitor vehicle parameters.
  • Access to specific modules (ABS, airbag, air conditioning).
  • Regular database updates.
    Examples:
  • Autel MaxiCOM MK808 (bidirectional, compatible with 90+ brands).
  • Launch CRP129X (touchscreen, coding functions).

3. OBD-II Cable + Professional Software (e.g., FORScan)

Why have it?
For car enthusiasts, a cable paired with software like FORScan (for Ford) or Torque Pro (multi-brand) allows for in-depth control of electronic systems.
Key features:

  • Module programming (e.g., resetting a control unit).
  • Active tests (actuating components to check their operation).
  • Compatibility with PC/tablet.
    Examples:
  • Vgate vLinker FS Cable (CAN FD security, reliable for FORScan).
  • OBDLink MX+ (paired with Torque Pro for Android/iOS).

4. OBD-II Data Logger

Why have it?
Ideal for analyzing intermittent problems (e.g., misfires during acceleration), it records data while driving for later diagnosis.
Key features:

  • Data storage on SD card or cloud.
  • Comparison of parameters before/after repair.
  • GPS integration (speed tracking, route).
    Examples:
  • RaceChrono Pro (for sports performance).
  • OBDLink CX (Bluetooth 4.0, BLE compatible).

5. Digital Multimeter with OBD-II Function

Why have it?
Combines code reading and electrical measurement (voltage, resistance, current) to check sensors, circuits, and fuses.
Key features:

  • Continuity and diode testing.
  • High accuracy (0.5% for voltage).
  • Support for CAN Bus protocols.
    Examples:
  • Fluke 88V (automotive specialized, industrial robustness).
  • Autel AL539 (multimeter + OBD-II scanner).

How to Choose?

  • Compatibility: Ensure the tool works with your vehicle (make, year).
  • Connectivity: Wireless (Bluetooth/Wi-Fi) for more flexibility.
  • Budget: From €30 for a basic tool to €500 for a professional one.

With these tools, your home garage becomes a mini-workshop equipped to solve the majority of common problems. Investing in OBD-II means gaining autonomy, savings, and a better understanding of your vehicle.

Using Real-Time Data (PID): Interpreting MAP Sensor, Mass Air Flow Sensor Values, etc.

On-board diagnostic systems (OBD-II) have revolutionized automotive maintenance by providing access to real-time data through Parameter Identifiers (PIDs). This data, sourced from sensors like the Manifold Absolute Pressure (MAP) sensor, Mass Air Flow (MAF) sensor, or oxygen sensors (O2), offers a window into the engine’s internal operations. This article explores how to interpret these values to optimize performance, diagnose faults, or improve energy efficiency.


1. Understanding PIDs and OBD-II

PIDs are standardized codes that allow reading sensor information via an OBD-II interface. Each PID corresponds to specific data (e.g., RPM, coolant temperature). OBD-II, mandatory since 1996, standardizes this communication, making diagnostic tools accessible to both professionals and DIY enthusiasts.

Required Tools:

  • An OBD-II scanner (e.g., ELM327).
  • Dedicated software (Torque Pro, FORScan, or manufacturer-specific tools).

2. Key Sensors and Data Interpretation

A. MAP Sensor (Manifold Absolute Pressure)

  • Role: Measures pressure in the intake manifold, reflecting engine load.
  • Typical Values:
    • Engine Off: ~100 kPa (atmospheric pressure).
    • Idle: 20–40 kPa (reduced pressure = vacuum).
    • Full Load: 80–100 kPa (turbocharged: up to 200 kPa).
  • Diagnosis:
    • Too low pressure may indicate an air leak.
    • Inconsistent values with engine speed signal a faulty sensor.

B. MAF Sensor (Mass Air Flow)

  • Role: Measures the mass of air entering the engine (in grams/second).
  • Typical Values:
    • Idle: 2–7 g/s.
    • Acceleration: up to 200 g/s (depending on the engine).
  • Diagnosis:
    • High values may reveal a clogged air filter.
    • Unstable values often indicate a dirty or failing MAF.

C. Oxygen Sensor (O2)

  • Role: Monitors oxygen content in exhaust gases to adjust the air-fuel mixture.
  • Typical Values:
    • Oscillates between 0.1 V (lean mixture) and 0.9 V (rich mixture).
  • Diagnosis:
    • A flat line indicates a dead sensor.
    • Constantly rich mixture (0.9 V) may reveal a leaking injector.

D. Throttle Position Sensor (TPS)

  • Role: Measures throttle plate opening angle (in %).
  • Typical Values:
    • Idle: 0–5%.
    • Full acceleration: 80–100%.
  • Diagnosis:
    • Sudden jumps indicate a worn sensor.

3. Practical Interpretation Examples

Example 1: Detecting an Air Leak

  • Symptoms: Unstable idle, code P0171 (system too lean).
  • Data to Cross-reference:
    • MAF: Low value despite normal throttle opening.
    • MAP: Abnormally high pressure at idle.

Example 2: Ignition Failure

  • Symptoms: Misfires (code P0300).
  • Useful Data:
    • RPM: Sudden variations.
    • O2: Reduced oscillations on the affected cylinder.

4. Best Practices for Analysis

  • Log Data: Capture data during a drive to identify intermittent anomalies.
  • Cross-reference PIDs: Compare MAF and MAP to validate consistency (e.g., low MAF + high MAP = air leak).
  • Know Reference Values: Consult manufacturer specifications for each sensor.

5. Advanced Tools and Future Trends

  • AI and Predictive Analytics: Software like AutoML analyzes historical data to predict failures.
  • Cloud Connectivity: Remote monitoring via systems like Tesla’s Telematics.

PID Values Table by Manufacturer

Manufacturer MAP Sensor (kPa) MAF (g/s) O2 Sensor (Volts) TPS (%)
General Motors Idle: 25–35 kPa
Full Load: 90–105 kPa
Idle: 3–6 g/s
Full Load: 120–180 g/s
Oscillation: 0.1–0.9 V
Rich: >0.7 V
Idle: 0–5%
Full Load: 85–95%
Ford Idle: 20–30 kPa
Full Load: 95–110 kPa
Idle: 4–8 g/s
Full Load: 130–200 g/s
Oscillation: 0.2–0.8 V
Rich: >0.75 V
Idle: 0–5%
Full Load: 90–100%
Toyota Idle: 25–40 kPa
Full Load: 90–100 kPa
Idle: 2–5 g/s
Full Load: 100–150 g/s
Oscillation: 0.1–0.85 V
Rich: >0.65 V
Idle: 0–4%
Full Load: 80–95%
Volkswagen Idle: 30–45 kPa
Full Load: 95–105 kPa (Turbo: up to 250 kPa)
Idle: 3–7 g/s
Full Load: 150–220 g/s
Oscillation: 0.15–0.9 V
Rich: >0.8 V
Idle: 0–5%
Full Load: 90–100%
Honda Idle: 20–35 kPa
Full Load: 90–100 kPa
Idle: 2–6 g/s
Full Load: 110–160 g/s
Oscillation: 0.1–0.85 V
Rich: >0.7 V
Idle: 0–5%
Full Load: 85–95%
BMW Idle: 35–50 kPa
Full Load: 100–120 kPa (Turbo: up to 300 kPa)
Idle: 5–10 g/s
Full Load: 200–300 g/s
Oscillation: 0.2–0.9 V
Rich: >0.85 V
Idle: 0–5%
Full Load: 95–100%

Important Notes

  1. Turbo/Supercharging: MAP values can exceed 100 kPa (up to 300 kPa for high-performance engines).
  2. Diesel Engines: MAF is often replaced by a differential pressure sensor (e.g., DPF).
  3. Climate Variations: MAF values may increase at high altitudes or in hot weather.
  4. Hybrid Vehicles: PIDs may include specific data for the battery or electric motor.

Example Manufacturer-Specific Issues

  • Ford: A low MAF can trigger code P0171 (system too lean) on EcoBoost models.
  • Volkswagen: A faulty MAP on TDI engines often causes codes P0299 (turbo underboost).
  • Toyota: Irregular O2 oscillations are linked to EGR valve issues on 2.4L engines.

⚠️ Warning: This data is indicative. For reliable diagnosis, use a tool compatible with the manufacturer (e.g., FORScan for Ford, VCDS for Volkswagen).

Conclusion
Mastering PID interpretation transforms any user into an informed diagnostician. Whether optimizing a turbo engine, solving a complex fault, or simply reducing fuel consumption, real-time data offers unmatched precision. With the evolution towards increasingly connected vehicles, this skill will become essential for any automotive enthusiast or professional.

Oil Control Valve (OCV): Role, Functions and Failure Symptoms

1. What is an Oil Control Valve (OCV)?

The oil control valve is an electro-hydraulic actuator, typically controlled by the engine control unit (ECU). It regulates the flow and pressure of oil sent to the variable valve timing (VVT) phasers located on the camshafts. Its role is crucial for optimizing engine performance, fuel consumption, and emissions.

2. Main Functions

  • VVT (Variable Valve Timing) Control:
    • Modulates the supply of pressurized oil to the VVT phasers.
    • Allows advancing or retarding the opening/closing of the intake and/or exhaust valves.
  • Real-Time Optimization:
    • Adapts valve timing to engine speed and load.
    • Improves low-end torque, high-end power, and reduces fuel consumption.
  • Emission Management:
    • Helps optimize combustion (notably through internal exhaust gas recirculation – internal EGR).
  • Engine Protection:
    • Ensures proper lubrication of VVT components.

3. Symptoms of a Faulty OCV

A faulty or clogged OCV disrupts the VVT system and causes noticeable problems:

  1. Check Engine Light On:
    • Common error codes: P0010 (Intake OCV circuit fault), P0011/P0014 (Intake VVT timing problem), P0020/P0021/P0024 (Exhaust side problems).
  2. Unstable or Rough Idle:
    • The engine may stall or misfire at idle due to improper valve timing.
  3. Decreased Engine Performance:
    • Noticeable loss of power, especially at low and medium RPMs.
    • Sluggish acceleration, difficulty on inclines.
  4. Abnormal Overboost:
    • The ECU may overboost the engine (via the turbo or by increasing fuel flow) to compensate for the loss of efficiency.
  5. Increased Fuel Consumption:
    • The engine operates less efficiently.
  6. Engine Knocking (“VVT Rattling”):
    • Characteristic Symptom: A dry metallic rattle during cold start (often due to an OCV stuck in maximum “retard” or “advance” position).
  7. Starting Problems:
    • Repeated stalling or hard starting (especially when cold) if the timing is incorrectly positioned.
  8. Excessive Pollutant Emissions:
    • Increased CO/HC emissions during inspection.

4. Common Causes of Failure

  • Clogging/Obstruction: Accumulation of sludge or carbon deposits in the valve (degraded oil, extended oil change intervals).
  • Electrical Failure: Short circuit, solenoid coil break, oxidized connector.
  • Mechanical Problem: Broken spring, seized or worn piston.
  • Faulty Oil Filter or Oil Pump: Insufficient or contaminated oil pressure.
  • Unsuitable or Degraded Engine Oil: Incorrect viscosity or loss of properties.

5. Consequences of a Faulty OCV

  • Premature wear of VVT phasers, timing gears, or chains/belts.
  • Damage to rocker arms or camshafts.
  • Localized overheating or engine knocking in extreme cases.
  • Performance degradation and persistent overconsumption.

6. Diagnosis and Solutions

  • Reading Error Codes: OBD2 scanner essential to identify VVT/OCV related codes.
  • Electrical Check: Measure solenoid resistance (DVOM) and test power supply/control.
  • Cleaning: Often effective if the OCV is simply clogged (use a specific carburetor/fuel system cleaner). Never use compressed air!
  • Replacement: Recommended solution for electrical or mechanical failure. Always use quality parts (OEM or equivalent).
  • Oil Change and Filter Replacement: Mandatory after cleaning or replacement. Use oil that meets manufacturer specifications (viscosity and standards).

Conclusion

The oil control valve (OCV) is a small component with a strategic role in the efficiency of modern engines. Its failures, often caused by lack of maintenance (degraded oil), manifest as idle problems, power loss, overconsumption, and a characteristic noise. Quick diagnosis (reading error codes and electrical/mechanical verification) and appropriate action (cleaning or replacement) are essential to avoid more serious and costly engine damage. Regular oil changes with quality oil remain the best prevention.