P065F Intake Manifold Tuning Valve, Bank 2

What Does It Mean?

This is a generic powertrain diagnostic trouble code (DTC) and generally applies to OBD-II vehicles. Vehicle makes may include, but are not limited to, Saturn, Land Rover, Porsche, Vauxhall, Dodge, Chrysler, Mazda, Mitsubishi, Chevy, Honda, Acura, Isuzu, Ford, etc.

The ECM (Engine Control Module) is responsible for monitoring, controlling, and adjusting many sensors and systems involved in your vehicle’s operation, not to mention detecting faults within said systems and circuits. One of the systems your ECM is responsible for monitoring and correlating with desired values is the intake manifold tuning valve.

I’ve heard many names for this component, but a “flapper” valve often comes up in the repair world. The intake manifold tuning valve has several possible purposes to aid your engine’s performance and operation. One is to regulate pressures between the intake plenums. Another can be to redirect intake air to a separate set of intake runners (or a combination) to change your engine’s airflow and potentially its performance. From my experience, the valve itself is mostly made of plastic, so you can imagine possible malfunctions combined with notoriously high temperatures in the engine compartment.

P065F is the fault code identified as “Intake Manifold Tuning Valve Performance, Bank 2” and it is a performance fault that has been identified by the ECM on bank #2. Bank #2 is the side of the engine that does not contain cylinder #1.

This code can be triggered by a mechanical or electrical fault with the intake manifold tuning valve. If you are in an area prone to extreme cold, it can cause the valve to malfunction and not turn properly according to the ECM’s commands.

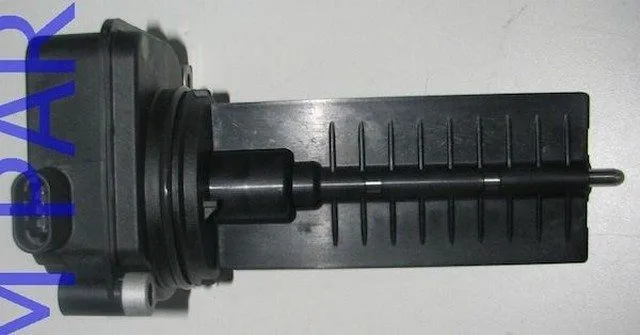
A GM Intake Manifold Tuning Valve:


P065F Intake Manifold Tuning Valve
How Severe Is This DTC?

Depending on the actual issue related to your case, it can range from nothing to worry about to something quite serious and potentially damaging to your engine’s internal components. It would be a good idea to err on the side of caution when dealing with mechanical parts like the intake manifold tuning valve. The possibility of unwanted parts entering the engine’s combustion chamber is there, so keep that in mind if you are considering postponing this to another day.
What Are Some of the Symptoms of the Code?

Symptoms of a P065F diagnostic trouble code may include:

Poor engine performance
Rattling noise from the engine compartment
Reduced fuel economy
Possible misfires on startup
Reduced engine power
Altered power band
Cold start issues

What Are Some of the Common Causes of the Code?

Causes

of this P065F engine code may include:

Faulty intake manifold tuning valve (runner)
Broken valve parts
Stuck valve
Extreme cold
Wiring issue (e.g., chafed, cracked, corroded, etc.)
Damaged electrical connector
ECM problem
Valve contamination

What Are the Diagnostic and Troubleshooting Steps for P065F?

The first step in the troubleshooting process for any malfunction is to check the Technical Service Bulletins (TSBs) for known issues with the specific vehicle.

Advanced diagnostic steps become very vehicle-specific and may require the appropriate advanced equipment and knowledge to perform accurately. We include the basic steps below but refer to a repair guide specific to the year/make/model/powertrain for steps specific to your vehicle.
Basic Step #1

Whenever a DTC (Diagnostic Trouble Code) is triggered by the ECM, as a DIYer, it’s a good idea to clear all codes to see if it returns immediately. If not, take the vehicle on long and numerous test drives to see if it becomes active again after a few drive cycles. If it reactivates, proceed with diagnosing the active code(s).
Basic Step #2

First, you will need to locate the intake manifold tuning valve. This can be tricky as most often they are mounted inside the intake manifold itself. That said, the valve’s connector should be fairly accessible, so visually inspect it, look for broken tabs, melted plastic, etc., to ensure it is making a proper electrical connection.
Basic Step #3

Depending on the capabilities of your OBD2 code reader/scan tool, you may be able to operate the valve electronically with it. If you find this option, it can be a good way to determine if the valve is operating through its full range. Additionally, if you are experiencing rattling noises from your intake, this would be a good way to determine if the intake manifold tuning valve is responsible. If you hear an abnormal rattling from the intake while you are adjusting the sensor with your scanner, chances are there is an obstruction or the valve itself is stuck for some reason.

At this point, it would be a good idea to remove the valve and physically inspect it and the inside of the intake manifold for obstructions. If there are no obstructions and the rattling is present, you can try replacing the valve; it’s likely the issue. Keep in mind that, in some cases, this is not an easy task, so do your research beforehand to avoid ending up without the right parts, tools, etc.

NOTE: Always consult the manufacturer’s technical data before performing any repairs or diagnostics on your vehicle.
Basic Step #4

Make sure not to forget to inspect the wiring harness involved with the tuning valve. These wiring harnesses can be routed through engine parts and other high-heat areas, not to mention potential chafing/cracking related to engine vibrations.
Basic Step #5

If you have tried everything, take a look at your ECM (Engine Control Module), especially if multiple unrelated codes are currently active or activating and deactivating intermittently.

This article is strictly for informational purposes only, and the technical data and service bulletins for your specific vehicle should always take precedence.

P0660 Intake Manifold Runner Control Valve Circuit / Open Bank 1

The P0660 code is a generic OBD-II code related to a malfunction in the intake manifold tuning valve control circuit (Bank 1). This issue affects brands like Honda, Ford, Chevrolet, or Porsche and can impact engine performance. Learn how to identify, diagnose, and fix this fault.


What is the P0660 Code?

The P0660 code indicates an electrical or mechanical problem in the intake manifold tuning valve (IMTV) circuit on the engine’s bank 1. This valve regulates airflow in the intake passages to optimize engine power and efficiency. An “open” circuit or a communication fault with the ECM (Engine Control Module) triggers this code.


Severity of the P0660 Code: Should You Be Concerned?

  • Moderate to high risk:
    • 🚨 A stuck or broken valve can disrupt the air-fuel balance, leading to overheating or misfires.
    • 💡 An electrical issue (damaged wires) can worsen and cause other error codes.
    • ⚠️ Loose metal or plastic parts risk damaging the cylinders.

Common Symptoms of the P0660 Code

  • 🔧 Reduced performance: Loss of power, especially at high RPM.
  • ⚡️ Hard starting: Combustion problems when cold.
  • 📉 Increased fuel consumption (up to 15% in city driving).
  • 🔊 Abnormal clicking from the intake manifold.
  • 🚨 Check Engine light on.

Possible Causes of the P0660 Code

1. Mechanical valve failure

  • Stuck valve (dirt, carbonized oil).
  • Broken plastic parts (thermal fragility).

2. Electrical problems

  • Damaged wiring (chafing, corrosion).
  • Faulty connector (oxidation, bent pins).

3. ECM malfunction

  • Rare, but possible due to power surges or software errors.

4. Extreme conditions

  • Severe cold (freezing of residue in the valve).

Diagnostic and Troubleshooting Steps

🔍 Step 1: Clearing Codes and Road Test

  • Use an OBD-II scanner to clear the code.
  • Drive the vehicle through several cycles (hot/cold) to check for reappearance.

🔌 Step 2: Visual Inspection of the Circuit

  • Locate the valve (often integrated into the intake manifold).
  • Check the connector: broken tabs, exposed wires, corrosion.

🛠️ Step 3: Functional Valve Test

  • Activate the valve via the scanner (using the Actuator Activation function).
  • Listen for a click confirming operation. No sound = stuck valve.

🔧 Step 4: Cleaning or Replacing the Valve

  • Remove the valve and clean it with an automotive degreaser.
  • If damaged, replace it (average cost: €80 to €200 depending on model).

🔋 Step 5: ECM Check

  • Measure the valve’s supply voltage (refer to manufacturer’s manual).
  • Consult a professional if multiple codes appear.

Preventive Maintenance Tips

  • Regular cleaning: Use an intake cleaning additive every 20,000 km.
  • Connector check: Inspect cables during oil changes.
  • Quality engine oil: Prevents clogging of passages.

FAQ: Common Questions about P0660

❓ Can you drive with a P0660 code?

Avoid long distances. A stuck valve can overload the engine.

❓ How much does the repair cost?

Between €150 (cleaning) and €500 (valve replacement + labor).

❓ How to prevent the code from reappearing?

Choose original parts and monitor the intake manifold’s condition.


Conclusion: Act Quickly to Avoid Major Damage

The P0660 code should not be ignored. A faulty intake manifold valve can drastically degrade performance and damage the engine. Follow the diagnostic steps or consult a certified mechanic for a lasting repair.

P0661 Intake Manifold Tuning Valve Control Circuit, Bank 1

Diagnostic code P0661 is related to a problem with the intake manifold tuning valve control circuit, specifically for bank 1 of the engine. This code indicates that the ECM (Engine Control Module) has detected an electrical reading that is too low from the intake manifold tuning valve on the engine side where cylinder #1 is located (bank 1, typically the left side in a V6 or V8 engine).

Problem Explanation

The intake manifold tuning valve is responsible for regulating the airflow entering the engine cylinders. It can adjust pressures between different parts of the intake manifold or redirect air to another path to optimize engine performance. However, a malfunction of this valve can disrupt engine performance.

Code P0661 is triggered when an anomaly in the control circuit of this valve is detected, which can be caused by mechanical or electrical issues.

Possible Symptoms

Symptoms of code P0661 can vary but generally include:

  • Poor engine performance, including a loss of power.
  • Rattling noise coming from the engine compartment.
  • Reduced fuel economy.
  • Misfires during startup.
  • Cold start problems.
  • Reduced engine power and an altered power range.

Common Causes of Code P0661

Code P0661 can be caused by several factors:

  1. Faulty intake manifold tuning valve or broken parts.
  2. Stuck valve or contaminated by dirt or carbon.
  3. Wiring issues, such as chafed, cracked, or corroded wires.
  4. Damaged electrical connector or poor connection.
  5. Problem with the ECM.
  6. Extreme cold conditions, which can affect the proper functioning of the valve.

Diagnostic and Repair Steps

Here are the steps to diagnose and repair code P0661:

  1. Clear the code and test the vehicle: Clear the error codes and check if code P0661 returns after several driving cycles. If the code reappears, continue with the diagnosis.
  2. Inspect the intake manifold tuning valve: Locate the valve (usually found in the intake manifold) and check if the connector is in good condition (no broken tabs, no melted plastic).
  3. Test the valve electronically: If your OBD2 diagnostic tool can command the valve, try activating it electronically and listen for normal operation. If you hear a rattling noise or notice it’s stuck, this indicates a problem with the valve.
  4. Inspect the valve physically: If you identify a noise or issue during testing, it may be necessary to remove the valve to check for obstructions or signs of mechanical failure.
  5. Check wiring and connectors: Examine the wiring harnesses for signs of damage, corrosion, or cracks. Ensure the connectors are clean and securely attached.
  6. Check the ECM: If none of the above steps resolve the issue, check the ECM. If multiple error codes appear or the problem persists intermittently, an issue with the ECM could be the cause.

Conclusion

Code P0661 can have significant impacts on engine performance if not corrected. It is recommended to follow the diagnostic steps carefully and, if necessary, seek professional help for a more in-depth diagnosis. Delaying repairs could lead to more serious issues, including damage to internal engine components.

P0662 Intake Manifold Tuning Valve Control Circuit, Bank 1 High

What Does It Mean?

This is a generic powertrain diagnostic trouble code (DTC) and generally applies to OBD-II vehicles. Vehicle makes may include, but are not limited to, Saturn, Land Rover, Porsche, Vauxhall, Dodge, Chrysler, Mazda, Mitsubishi, Chevy, Honda, Acura, Isuzu, Ford, etc.

The ECM (Engine Control Module) is responsible for monitoring, controlling, and adjusting many sensors and systems involved in your vehicle’s operation, not to mention detecting faults within said systems and circuits. One of the systems your ECM is responsible for monitoring and correlating with desired values is the intake manifold tuning valve.

I’ve heard many names for this, but a “flapper” valve often comes up in the repair world. The intake manifold tuning valve has several possible purposes to aid your engine’s performance and operation. One is to regulate pressures between intake plenums. Another may be to redirect intake air to a separate set of intake runners (or combination) to change your engine’s airflow and potentially its performance. From my experience, the valve itself is mostly made of plastic, so you can imagine possible malfunctions combined with notoriously high temperatures in the engine compartment.

P0662 is the fault code identified as “Intake Manifold Tuning Valve Control Circuit, Bank 1 High” and it indicates that the ECM has detected an electrical reading that is too high from the valve on bank #1. On multi-bank engines (e.g., V6, V8), bank #1 is the side of the engine that contains cylinder #1.

This code can be triggered by a mechanical or electrical fault with the intake manifold tuning valve. If you are in an area prone to extreme cold, it can cause the valve to malfunction and not turn properly as per the ECM’s commands.

A GM intake manifold tuning valve:

How Severe Is This DTC?

Depending on the actual issue related to your case, it can range from nothing to worry about to something quite serious and potentially damaging to your engine’s internal components. It would be a good idea to err on the side of caution when it comes to mechanical parts like the intake manifold tuning valve. The possibility of unwanted parts entering the engine’s combustion chamber is there, so keep that in mind if you’re considering postponing this to another day.
What Are Some of the Symptoms of the Code?

Symptoms of a P0662 diagnostic trouble code may include:

Poor engine performance
Rattling noise from the engine compartment
Reduced fuel economy
Possible misfires on startup
Reduced engine power
Altered power band
Cold start issues

What Are Some of the Common Causes of the Code?

Causes

of this P0662 engine code may include:

Faulty intake manifold tuning valve (runner)
Broken valve parts
Stuck valve
Extreme cold
Wiring issue (e.g., chafed, cracked, corroded, etc.)
Broken electrical connector
ECM problem
Valve contamination

What Are the Diagnostic and Troubleshooting Steps for P0662?

The first step in the troubleshooting process for any malfunction is to check the Technical Service Bulletins (TSBs) for known issues with the specific vehicle.

Advanced diagnostic steps become very vehicle-specific and may require the appropriate advanced equipment and knowledge to perform accurately. We include the basic steps below but refer to a repair guide specific to the year/make/model/powertrain for steps specific to your vehicle.
Basic Step #1

Whenever a DTC (Diagnostic Trouble Code) is triggered by the ECM, as a DIYer, it’s a good idea to clear all codes to see if it returns immediately. If not, take the vehicle on long and numerous test drives to see if it becomes active again after a few drive cycles. If it reactivates, proceed with diagnosing the active code(s).
Basic Step #2

First, you will need to locate the intake manifold tuning valve. This can be tricky as most often, they are mounted inside the intake manifold itself. That said, the valve’s connector should be fairly accessible, so visually inspect it, look for broken tabs, melted plastic, etc., to ensure it is making a proper electrical connection.
Basic Step #3

Depending on the capabilities of your OBD2 code reader/scan tool, you may be able to operate the valve electronically with it. If you find this option, it can be a good way to determine if the valve is operating through its full range. Additionally, if you are experiencing rattling noises from your intake, this would be a good way to determine if the intake manifold tuning valve is responsible. If you hear an abnormal rattle from the intake while you are adjusting the sensor with your scanner, chances are there is an obstruction or the valve itself is stuck for some reason.

At this point, it would be a good idea to remove the valve and physically inspect it and the inside of the intake manifold for any obstructions. If there are no obstructions and the rattle is present, you can try replacing the valve; it’s likely the issue. Keep in mind that, in some cases, this is not an easy task, so do your research beforehand to avoid ending up without the right parts, tools, etc.

NOTE: Always consult the manufacturer’s technical data before performing any repairs or diagnostics on your vehicle.
Basic Step #4

Make sure not to forget to inspect the wiring harness involved with the tuning valve. These wiring harnesses can be routed through engine parts and other high-heat areas, not to mention potential chafing/cracking related to engine vibrations.
Basic Step #5

If you have tried everything, take a look at your ECM (Engine Control Module), especially if multiple unrelated codes are currently active or activating and deactivating intermittently.

This article is strictly for informational purposes only, and the technical data and service bulletins for your specific vehicle should always take precedence.

P0663 Intake Manifold Runner Control Valve Circuit / Bank Open 2

  • What does the P0663 code mean? (Initial definition)
  • It is a generic diagnostic trouble code (DTC) from the powertrain group applicable to OBD-II vehicles.
  • Mention of common vehicle brands affected.
  • Essential role of the engine control module (ECM) in monitoring and detecting faults, including the intake manifold tuning valve system.

What is the Intake Manifold Tuning Valve?

  • Explanation of the term “flap” often used.
  • Possible objectives of the valve:
    • Regulating pressures between the intake plenums.
    • Redirecting intake air via runners to alter airflow and performance.
  • Typical construction material (plastic) and vulnerability to high temperatures.

The P0663 Error Code in Detail

  • Specific definition of the P0663 code: “Intake Manifold Tuning Valve Control Circuit/Open Bank 2”.
  • Indication of a general electrical fault or an open circuit situation detected by the ECM on bank 2.
  • Identification of bank 2: the side of the engine that does not contain cylinder number 1.
  • Possible causes for the code being triggered: mechanical or electrical failure of the valve, or malfunction due to extreme cold.
  • Presentation of an illustrative image of a GM intake manifold tuning valve.

Severity of DTC P0663

  • The importance of caution regarding this code due to the potential risk to internal engine components.
  • The severity level varies depending on the actual problem.
  • Warning against delaying repair due to the risk of introducing unwanted parts into the combustion chamber.

Possible Symptoms of Code P0663

  • Clear and concise list of associated symptoms:
    • Poor engine performance
    • Rattling noise from the engine compartment
    • Reduced fuel economy
    • Possible misfires on startup
    • Reduced engine power
    • Altered power band
    • Cold start problems

Common Causes of Code P0663

  • List of potential causes:
    • Faulty intake manifold tuning valve (runner)
    • Broken valve parts
    • Stuck valve
    • Extreme cold
    • Wiring issue (chafed, cracked, corroded, etc.)
    • Damaged electrical connector
    • ECM problem
    • Valve contamination

Diagnostic and Troubleshooting Steps for P0663

  • Basic Step #1: Clearing the codes and observing if they return.
  • Basic Step #2: Locating and visually inspecting the valve connector.
  • Basic Step #3: Using a scan tool to actuate the valve electronically and detect any noise or blockage. Physical inspection of the valve and manifold after removal.
  • IMPORTANT NOTE: Always consult the manufacturer’s technical data before any repair.
  • Basic Step #4: Inspecting the wiring harness associated with the valve.
  • Basic Step #5: Checking the ECM as a last resort, especially in the case of multiple unrelated codes.

P0664 Low Control Circuit for Intake Manifold Runner Control Valve, Bank 2

What does it mean?

This is a generic powertrain diagnostic trouble code (DTC) and generally applies to OBD-II vehicles. Vehicle brands may include, but are not limited to, Saturn, Land Rover, Porsche, Vauxhall, Dodge, Chrysler, Mazda, Mitsubishi, Chevy, Honda, Acura, Isuzu, Ford, etc.


The ECM (Engine Control Module) is responsible for monitoring, controlling, and adjusting many sensors and systems involved in your vehicle’s operation, as well as detecting faults within those systems and circuits. One of the systems your ECM monitors and correlates with desired values is the intake manifold tuning valve.

I’ve heard many names for this component, but a “flapper” valve often comes up in the repair world. The intake manifold tuning valve has several possible purposes to aid your engine’s performance and operation. One is to regulate pressures between intake plenums. Another may be to redirect intake air to a separate set of intake runners (or combination) to change your engine’s airflow and potentially its performance. In my experience, the valve itself is mostly made of plastic, so you can imagine possible malfunctions given the notoriously high temperatures in the engine compartment.

P0664 is the fault code identified as “Intake Manifold Tuning Valve Control Circuit Low, Bank 2” and indicates that the ECM has detected an electrical reading that is too low from the valve on bank #2. Bank #2 is the side of the engine that does not contain cylinder #1.

This code can be triggered by a mechanical or electrical fault with the intake manifold tuning valve. If you are in an area prone to extreme cold, it may cause the valve to malfunction and not rotate properly as the ECM intends.

A GM intake manifold tuning valve


P0664 Intake Manifold Tuning Valve
How severe is this DTC?

Depending on the actual issue related to your case, it can range from nothing to worry about to something quite serious and potentially damaging to your engine’s internal components. It would be a good idea to err on the side of caution when dealing with mechanical parts like the intake manifold tuning valve. The possibility of unwanted parts entering the engine combustion chamber exists, so keep that in mind if you’re considering postponing this to another day.
What are some of the symptoms of the code?

Symptoms of a P0664 diagnostic trouble code may include:

Poor engine performance
Rattling noise from the engine compartment
Reduced fuel economy
Possible misfires on startup
Reduced engine power
Altered power range
Cold start issues

What are some common causes of the code?

Causes

of this P0664 engine code may include:

Faulty intake manifold tuning valve (runner)
Broken valve parts
Stuck valve
Extreme cold
Wiring issue (e.g., chafed, cracked, corroded, etc.)
Damaged electrical connector
ECM problem
Valve contamination

What are the diagnostic and troubleshooting steps for P0664?

The first step in the troubleshooting process for any malfunction is to check Technical Service Bulletins (TSBs) for known issues with the specific vehicle.

Advanced diagnostic steps become very vehicle-specific and may require the appropriate advanced equipment and knowledge to perform accurately. We include the basic steps below but refer to a repair guide specific to the year/make/model/powertrain for steps tailored to your vehicle.
Basic Step #1

Whenever a DTC (Diagnostic Trouble Code) is triggered by the ECM, as a DIYer, it’s a good idea to clear all codes to see if it returns immediately. If not, take the vehicle on long and multiple test drives to see if it becomes active again after a few drive cycles. If it reactivates, proceed with diagnosing the active code(s).
Basic Step #2

First, you’ll need to locate the intake manifold tuning valve. This can be tricky because they are often mounted inside the intake manifold itself. That said, the valve’s connector should be fairly accessible, so inspect it visually, look for broken tabs, melted plastic, etc., to ensure it’s making a proper electrical connection.
Basic Step #3

Depending on your OBD2 code reader/scan tool’s capabilities, you may be able to operate the valve electronically with it. If you find this option, it can be a good way to determine if the valve is functioning through its full range. Additionally, if you’re experiencing rattling noises from your intake, this would be a good way to determine if the intake manifold tuning valve is responsible. If you hear abnormal rattling from the intake while adjusting the sensor with your scanner, it’s likely there’s an obstruction or the valve itself is stuck for some reason.

At this point, it would be a good idea to remove the valve and inspect it physically, as well as inside the intake manifold for any obstructions. If there are no obstructions and the clicking is present, you might try replacing the valve—it’s probably the issue. Keep in mind that in some cases, this isn’t an easy task, so do your research beforehand to avoid ending up without the right parts, tools, etc.

NOTE: Always consult the manufacturer’s technical data before performing any repairs or diagnostics on your vehicle.
Basic Step #4

Make sure not to forget to inspect the wiring harness involved with the tuning valve. These wiring harnesses can be routed through engine parts and other high-heat areas, not to mention potential chafing/cracking related to engine vibrations.
Basic Step #5

If you’ve tried everything, take a look at your ECM (Engine Control Module), especially if multiple unrelated codes are currently active or activating and deactivating intermittently.

This article is strictly for informational purposes only, and technical data and service bulletins for your specific vehicle should always take precedence.

P0665 Intake Manifold Tuning Valve Control Circuit, Bank 2 High

Code P0665: Explanations, Severity, and Solutions


Meaning of Code P0665

Code P0665 is a generic OBD-II code related to the Intake Manifold Tuning Valve (IMTV) control circuit on Bank 2. This code indicates that the ECM (Engine Control Module) has detected an abnormally high voltage in the valve circuit, typically on the engine side that does not contain cylinder number 1.

Role of the Intake Manifold Tuning Valve:

  • Regulate pressures between the intake plenums.
  • Redirect air to specific passages to optimize airflow and engine performance.
  • Improve engine efficiency at different RPMs (e.g., low RPM vs. high RPM).

Severity of Code P0665

Severity Level Potential Risks
Moderate to High Risk of:
  • 🛑 Loss of power and misfires.
  • ⚠️ Internal engine damage if debris from a broken valve enters the cylinders.
  • 🔥 Increased fuel consumption and higher pollutant emissions.

Recommended Action:
Do not ignore this code. Diagnose it quickly to avoid costly damage.


Common Symptoms

  • 🚨 Illuminated check engine light.
  • 📉 Decreased performance: Sluggish acceleration, reduced power.
  • 🔧 Abnormal noises: Rattling or knocking from the intake manifold.
  • ❄️ Cold start problems.
  • Poor fuel economy.

Possible Causes

  1. Mechanical valve failure:
  • Stuck, broken valve, or deformed plastic parts (due to heat exposure).
  • Contamination by deposits (oil, carbon).
  1. Electrical problems:
  • Short circuit or open circuit in the wiring harness.
  • Corroded connector, bent or oxidized pins.
  1. External factors:
  • ❄️ Extreme cold (temporary valve blockage).
  • ECM failure (rare).

Diagnostic and Repair Steps

Step 1: Consult Technical Service Bulletins (TSB)

  • Check the manufacturer’s technical service bulletins for known issues related to the IMTV valve on your model.

Step 2: Visual Inspection and Initial Test

  • Locate the valve (often integrated into the intake manifold).
  • Inspect the electrical connector:
  • Look for damage (melted plastic, corrosion, exposed wires).
  • Clear the code with an OBD2 tool:
  • If the code returns immediately, continue diagnostics.

Step 3: Valve Test

  • Use an advanced diagnostic tool to electronically activate the valve and check its response.
  • Listen for abnormal rattling during the test, indicating a stuck valve or debris.

Step 4: Disassembly and Physical Inspection

  • Remove the valve and inspect it for:
  • Broken parts (vanes, rods).
  • Obstructions (carbon, dirt).
  • Clean or replace the valve if necessary.

Step 5: Wiring Harness Check

  • Test the electrical circuit with a multimeter:
  • Check continuity, voltage, and resistance.
  • Look for chafing or cracks in the harness (due to heat/vibration exposure).

Step 6: ECM Diagnosis (Last Resort)

  • If all other components are functional, suspect an ECM failure (rare case).

Good to Know

  • 🛠️ Fragile materials: Plastic valves are vulnerable to engine heat. Regular inspection is recommended.
  • 🔄 Intermittent codes: A P0665 code that comes and goes may indicate a connection issue or a cold-related malfunction.
  • 📚 Mandatory reference: Always follow the procedures in the repair manual specific to your vehicle.

Conclusion

Code P0665 requires prompt attention to prevent symptoms from worsening. If you are not comfortable with the technical steps, consult a certified mechanic. Accurate diagnosis with a professional OBD2 tool (e.g., Snap-On, Autel) is often essential to identify the root cause.

🔧 Recommended tools: Multimeter, OBD2 scan tool with component control function, specific repair manual.

P0666 Internal Temperature Sensor Circuit PCM / ECM / TCM

What Does It Mean?

This is a generic powertrain diagnostic trouble code (DTC) that applies to many OBD-II vehicles (1996-newer). This may include, but is not limited to, vehicles from Mazda, Honda, Dodge, Ford, BMW, VW, etc. Although generic, the exact repair steps may vary depending on the year, make, model, and powertrain configuration.

OBD-II trouble codes P0666, P0667, P0668, and P0669 are associated with the internal temperature sensor circuit of various modules. This circuit includes the Powertrain Control Module (PCM), Engine Control Module (ECM), and/or Transmission Control Module (TCM).

The purpose of the PCM/ECM/TCM internal temperature sensor circuit is to monitor the temperature of various sensors housed within the control modules. Malfunctions are identified by the control module’s self-test failure process. On some automobiles, all three modules are integrated into a single consolidated unit, typically referred to as the PCM.

When the PCM, ECM, or TCM detects incorrect signals in the internal temperature sensor circuit, code P0666 is set, and the check engine light or transmission warning light illuminates.

An example of a Transmission Control Module (TCM):


P0666 TCM
How Severe Is This DTC?

The severity of this code can vary greatly, from a simple check engine light or transmission warning light on a vehicle that starts and runs, to a vehicle that may stall or not start at all. The code can be serious depending on the specific nature of the problem.
What Are Some of the Symptoms of the Code?

Symptoms of a P0666 trouble code may include:

Engine does not start
Engine may stall
Incorrect shifting
Transmission warning light illuminated
Check engine light illuminated

What Are Some Common Causes of the Code?

Causes

of this P0666 code may include:

Corroded or damaged connector
Loose or faulty control module ground strap
Faulty or damaged wiring
Faulty PCM, ECM, or TCM

What Are the P0666 Troubleshooting Steps?

The first step in the troubleshooting process for any malfunction is to search for Technical Service Bulletins (TSBs) for the specific vehicle by year, model, and powertrain. In some circumstances, this can save a significant amount of time in the long run by pointing you in the right direction.

The second step is to locate all control modules within this circuit and perform a thorough visual inspection of the associated wiring, looking for obvious defects such as chafing, rubbing, bare wires, or burn marks. This process should also include ground straps and wires. Next, check the connectors for security, corrosion, and damaged pins. This process should include the PCM, ECM, and TCM, depending on the specific vehicle and control module configuration. Vehicle-specific technical data will help you locate components and understand the control module configuration.
Advanced Steps

Advanced steps become very vehicle-specific and require appropriate advanced equipment to perform accurately. These procedures require a digital multimeter and vehicle-specific technical references. The specific technical data will include troubleshooting charts and the proper sequence to follow to help you make an accurate diagnosis.
Voltage Checks

Specific troubleshooting guidelines must be referenced to determine the required voltage ranges for the different control modules. These references will include pin numbers and voltage requirements associated with the PCM/ECM/TCM internal temperature sensor/circuit. Most, but not all, control modules require a reference voltage of approximately 9 volts. Voltage requirements vary depending on the specific year and model of the vehicle.

If this process identifies a missing power source or ground, continuity tests may be required to check the integrity of the wiring, connectors, and other components. Continuity tests should always be performed with the power disconnected from the circuit, and normal readings for wiring and connections should be 0 ohms of resistance. Resistance or lack of continuity indicates faulty wiring that is open or shorted and must be repaired or replaced. A continuity test between the different control modules and the chassis will confirm the serviceability of the ground straps and wires. The presence of resistance indicates a loose connection or possible corrosion.
What Are the Common Repairs for This Code?

Cleaning corrosion from connectors
Repairing or replacing faulty wiring
Repairing or replacing faulty ground straps
Flashing or replacing the PCM, ECM, or TCM

Misdiagnosis can lead to the PCM, ECM, or TCM being replaced unnecessarily, which is often done in error when faulty wiring or poor connections are the actual cause of this code. Furthermore, on vehicles equipped with two or more control modules, the wrong module may be replaced by mistake.

I hope the information in this article has been helpful in pointing you in the right direction to fix the issue with your PCM/ECM/TCM internal temperature sensor/circuit fault code. This article is strictly informational, and the specific technical data and service bulletins for your vehicle should always take priority.

P0667 Range / Performance of Internal Temperature Sensor PCM / ECM / TCM

What Does It Mean?

This is a generic powertrain diagnostic trouble code (DTC) that applies to many OBD-II vehicles (1996-newer). This may include, but is not limited to, vehicles from Mazda, Honda, Dodge, Ford, BMW, VW, etc. Although generic, the exact repair steps may vary depending on the year, make, model, and powertrain configuration.

OBD-II trouble codes P0666, P0667, P0668, and P0669 are associated with the internal temperature sensor circuit of various modules. This circuit includes the Powertrain Control Module (PCM), Engine Control Module (ECM), and/or Transmission Control Module (TCM).

The purpose of the PCM/ECM/TCM internal temperature sensor circuit is to monitor the temperature of various sensors housed within the control modules. Malfunctions are identified by the control module’s self-test failure process. On some automobiles, all three modules are integrated into a single consolidated unit, typically referred to as the PCM.

When the PCM, ECM, or TCM detects electrical signals outside the normal range in the internal temperature sensor circuit, code P0667 is set, and the check engine light or transmission warning light illuminates.

An example of a Transmission Control Module (TCM):


P0667 TCM
How Severe Is This DTC?

The severity of this code can vary greatly, from a simple check engine light or transmission warning light on a vehicle that starts and runs, to an automobile that may stall or not start at all. The code can be serious depending on the specific nature of the problem.
What Are Some of the Symptoms of the Code?

Symptoms of a P0667 trouble code may include:

Engine does not start
Engine may stall
Incorrect shifting
Transmission warning light illuminated
Check engine light illuminated

What Are Some Common Causes of the Code?

Causes

of this P0667 code may include:

Corroded or damaged connector
Loose or faulty control module ground strap
Faulty or damaged wiring
Faulty PCM, ECM, or TCM

What Are the P0667 Troubleshooting Steps?

The first step in the troubleshooting process for any malfunction is to search for Technical Service Bulletins (TSBs) for the specific vehicle by year, model, and powertrain. In some circumstances, this can save a lot of time in the long run by pointing you in the right direction.

The second step is to locate all control modules within this circuit and perform a thorough visual inspection of the associated wiring, looking for obvious faults such as chafing, rubbing, bare wires, or burn marks. This process should also include ground straps and wires. Next, check the connectors for security, corrosion, and damaged pins. This process should include the PCM, ECM, and TCM depending on the specific vehicle and control module configuration. Vehicle-specific technical data will help you locate components and the control module configuration.
Advanced Steps

Advanced steps become very vehicle-specific and require appropriate advanced equipment to perform accurately. These procedures require a digital multimeter and vehicle-specific technical references. The specific technical data will include troubleshooting charts and the proper sequence to follow to help you make an accurate diagnosis.
Voltage Checks

Specific troubleshooting guidelines must be referenced to determine the required voltage ranges for the different control modules. These references will include pin numbers and voltage requirements associated with the PCM/ECM/TCM internal temperature sensor/circuit. Most, but not all, control modules require a reference voltage of approximately 9 volts. Voltage requirements vary depending on the specific year and model of the vehicle.

If this process identifies a missing power source or ground, continuity tests may be required to check the integrity of the wiring, connectors, and other components. Continuity tests should always be performed with the power disconnected from the circuit, and normal readings for wiring and connections should be 0 ohms of resistance. Resistance or lack of continuity indicates faulty wiring that is open or shorted and must be repaired or replaced. A continuity test between the different control modules and the chassis will confirm the serviceability of the ground straps and wires. The presence of resistance indicates a loose connection or possible corrosion.
What Are the Common Repairs for This Code?

Cleaning corrosion from connectors
Repairing or replacing faulty wiring
Repairing or replacing faulty ground straps
Flashing or replacing the PCM, ECM, or TCM

Misdiagnosis can lead to the PCM, ECM, or TCM being replaced unnecessarily, which is often done in error when faulty wiring connections are the actual cause of this code. Furthermore, on vehicles equipped with two or more control modules, the wrong module may be replaced by mistake.

Hopefully, the information contained in this article has been helpful in pointing you in the right direction to correct the issue with your PCM/ECM/TCM internal temperature sensor/circuit fault code. This article is strictly informational, and the technical data and service bulletins specific to your vehicle should always take priority.

P0668 Internal Temperature Sensor Circuit Low PCM / ECM / TCM

What does it mean?

This is a generic powertrain diagnostic trouble code (DTC) that applies to many OBD-II vehicles (1996-newer). This may include, but is not limited to, vehicles from Mazda, Honda, Dodge, Ford, BMW, VW, etc. Although generic, the exact repair steps may vary depending on the year, make, model, and powertrain configuration.

OBD-II trouble codes P0666, P0667, P0668, and P0669 are associated with the internal temperature sensor circuit of various modules. This circuit includes the powertrain control module (PCM), engine control module (ECM), and/or transmission control module (TCM).

The purpose of the PCM/ECM/TCM internal temperature sensor circuit is to monitor the temperature of various sensors housed within the control modules. Malfunctions are identified through the control module’s self-test failure process. In some automobiles, all three modules are integrated into a consolidated unit, typically referred to as the PCM.

When the PCM, ECM, or TCM detects an electrical signal lower than expected (outside the normal operating range) in the internal temperature sensor circuit, code P0668 is set, and the check engine light or transmission warning light illuminates.

An example of a Transmission Control Module TCM:


P0668 TCM
How severe is this DTC?

The severity of this code can vary greatly, from a simple check engine light or transmission warning light on a vehicle that starts and runs, to a vehicle that may stall or not start at all. The code can be serious depending on the specific nature of the issue.
What are some of the symptoms of the code?

Symptoms of a P0668 trouble code may include:

Engine does not start
Engine may stall
Incorrect shifting
Transmission warning light on
Check engine light on

What are some common causes of the code?

Causes

of this P0668 code may include:

Corroded or damaged connector
Loose or faulty control module ground strap
Faulty or damaged wiring
Faulty PCM, ECM, or TCM

What are the troubleshooting steps for P0668?

The first step in the troubleshooting process for any malfunction is to search for Technical Service Bulletins (TSBs) for the specific vehicle by year, model, and powertrain. In some cases, this can save significant time in the long run by pointing you in the right direction.

The second step is to locate all control modules within this circuit and perform a thorough visual inspection of the associated wiring to check for obvious defects such as chafing, rubbing, exposed wires, or burn marks. This process should also include ground straps and wires. Next, check the connectors for security, corrosion, and damaged pins. This process should include the PCM, ECM, and TCM, depending on the specific vehicle and control module configuration. Vehicle-specific technical data will help you locate components and configure the control module.
Advanced Steps

Advanced steps become very vehicle-specific and require appropriate advanced equipment to perform accurately. These procedures require a digital multimeter and vehicle-specific technical references. The specific technical data will include troubleshooting charts and the proper sequence to follow to help you make an accurate diagnosis.
Voltage Checks

Specific troubleshooting guidelines must be referenced to determine the required voltage ranges for the different control modules. These references will include pin numbers and voltage requirements associated with the PCM/ECM/TCM internal temperature sensor/circuit. Most, but not all, control modules require a reference voltage of around 9 volts. Voltage requirements vary depending on the specific year and model of the vehicle.

If this process identifies a missing power source or ground, continuity tests may be required to verify the integrity of the wiring, connectors, and other components. Continuity tests should always be performed with the power disconnected from the circuit, and normal readings for wiring and connections should be 0 ohms of resistance. Resistance or lack of continuity indicates faulty wiring that is open or shorted and must be repaired or replaced. A continuity test between the different control modules and the chassis will confirm the serviceability of the ground straps and wires. The presence of resistance indicates a loose connection or possible corrosion.
What are the common repairs for this code?

Cleaning corrosion from connectors
Repairing or replacing faulty wiring
Repairing or replacing faulty ground straps
Flashing or replacing the PCM, ECM, or TCM

Misdiagnosis can lead to the PCM, ECM, or TCM being replaced unnecessarily, often done in error when faulty wiring connections are the actual cause of this code. Additionally, on vehicles equipped with two or more control modules, the wrong module may be mistakenly replaced.

I hope the information in this article has helped point you in the right direction to fix the issue with your PCM/ECM/TCM internal temperature sensor/circuit fault code. This article is strictly for informational purposes, and the specific technical data and service bulletins for your vehicle should always take priority.