P0655 Engine Hot Lamp Output Control Circuit Malfunction

What does it mean?

This is a generic diagnostic trouble code (DTC) and applies to many OBD-II vehicles (1996-newer). This may include, but is not limited to, vehicles from Alfa Romeo, Peugeot, MG, Dodge, Buick, Cadillac, Chevrolet, Ford, GMC, Opel, etc. Although generic, the exact repair steps may vary depending on the year, make, model, and powertrain configuration.

A stored P0655 code means that the powertrain control module (PCM), or one of the other associated controllers, has detected an anomaly in the engine hot lamp output control circuit.

The engine hot lamp is designed to provide the driver with a visual warning light when the engine overheats. The engine hot lamp is an integral part of the dashboard. The PCM receives a signal from the engine coolant temperature sensor. This signal allows the PCM to monitor the engine coolant temperature whenever the engine is running or the ignition switch is in the ON position. This data is primarily used for calculating engine fuel distribution and ignition timing strategy, and is then transmitted to the engine hot lamp and/or the dashboard controller. It may also be sent to other controllers. For example, the engine hot lamp control circuit can be sent to the climate control module so that the air conditioning compressor can be deactivated in case of engine overheating.

If a problem is detected while monitoring the engine hot lamp output control circuit, a P0655 code will be stored and a malfunction indicator lamp (MIL) may be illuminated.

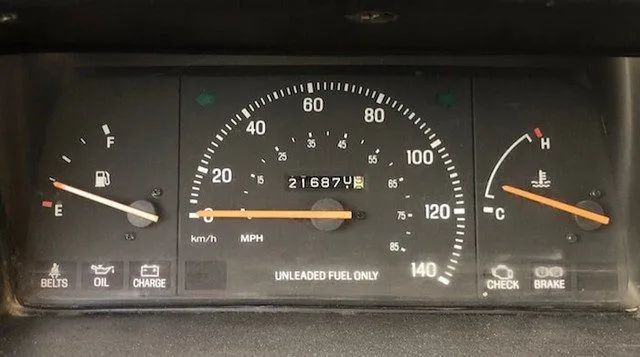
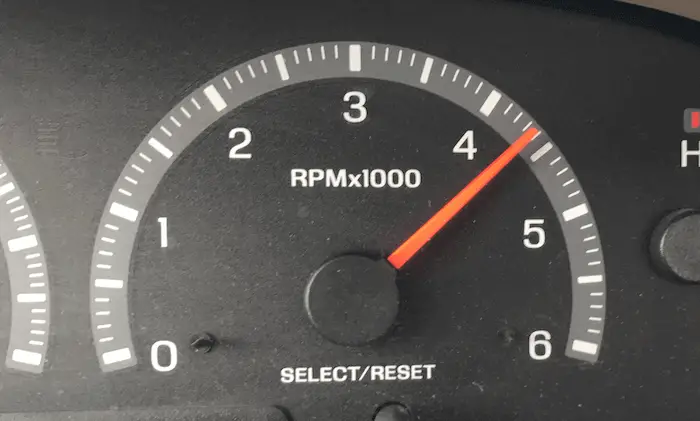
Typical simple gauges:


P0655 Simple Gauges
How severe is this DTC?

A P0655 should be classified as severe because it could lead to many driving issues and not warn the driver in case of engine overheating.
What are some of the symptoms of the code?

Symptoms of a P0655 trouble code may include:

Engine driving problems
Inoperative engine hot lamp
Engine hot lamp constantly illuminated

What are some common causes of the code?

Causes

of this code may include:

Open or shorted circuit between the PCM and the dashboard or other controllers
PCM programming error
Faulty controller or PCM

What are the troubleshooting steps for P0655?

If there are engine overheating codes or engine temperature sensor codes; diagnose and repair those before attempting to diagnose a stored P0655.

Ensure the engine is filled with appropriate coolant and is not overheating.

Consult your vehicle’s information source for technical service bulletins (TSBs) that reproduce the stored code, the vehicle (year, make, model, and engine), and the presented symptoms. If you find the appropriate TSB, it may provide useful diagnostic information.

A diagnostic scanner and a digital volt/ohmmeter will be needed to accurately diagnose a P0655 code. A reliable source of vehicle information will also be required.

Start by connecting the scanner to the vehicle’s diagnostic port and retrieve all stored codes and freeze frame data. You’ll want to note this information, just in case the code proves to be intermittent.

After recording all relevant information, clear the codes and test the vehicle (if possible) until the code is reset or the PCM enters readiness mode.

If the PCM enters readiness mode, the code is intermittent and will be even more difficult to diagnose. The condition that caused the P0655 to be stored may need to worsen before an accurate diagnosis can be reached. On the other hand, if the code does not reset and no driving symptoms manifest, the vehicle may be operating normally.

If the P0655 is immediately reset, proceed with a visual inspection of the wiring and connectors related to the system. Harnesses that have been broken or disconnected should be repaired or replaced as needed.

If the wiring and connectors appear functional, use your vehicle information source to obtain the appropriate wiring diagrams, connector face views, connector pinout diagrams, and diagnostic flowcharts.

Once you have the correct information, use your DVOM to test the engine output circuit at the appropriate PCM connector pin. If no engine hot lamp output signal is found, suspect that the PCM is faulty or there is a PCM programming error.

If an engine hot lamp output signal is found at the PCM connector, test the corresponding circuit (as presented) at the engine hot lamp pin of the dashboard connector. If the engine hot lamp signal is not found, you have an open circuit between the PCM and the engine hot lamp in the dashboard. Repair or replace the circuit and retest.

If a P0655 code is stored and the engine hot lamp is operational, suspect a faulty PCM or a PCM programming error

P0656 Fuel Level Output Circuit Malfunction

What Does It Mean?

This is a generic diagnostic trouble code (DTC) and applies to many OBD-II vehicles (1996-newer). This may include, but is not limited to, vehicles from Saturn, Ford, GMC, Mercedes Benz, Holden, etc. Although generic, the specific repair steps may vary depending on the year, make, model, and powertrain configuration.

A stored P0656 code means that the Powertrain Control Module (PCM), or one of the other associated controllers, has detected an anomaly in the fuel level output circuit.

The fuel level gauge is an integral part of the dashboard. With it, the driver can monitor the vehicle’s fuel level while using the vehicle. Typically, the PCM receives a signal from the fuel level sensor (in the fuel storage tank). This signal allows the PCM to calculate fuel consumption and monitor fuel tank pressure as well as fuel temperature. This data is used to calculate the engine’s fuel delivery strategy, and then the fuel level output signal is provided to the fuel gauge and/or the dashboard controller. It may also be sent to the low fuel warning light and other onboard controllers.

If a problem is detected while monitoring the fuel level output circuit, a P0656 code will be stored, and a Malfunction Indicator Lamp (MIL) may be illuminated.

Typical Simple Gauges:


P0656 Simple Gauges
How Severe Is This DTC?

A P0656 should be classified as moderate because it could result in an inoperative fuel gauge and/or driving issues, and you might potentially run out of gas.
What are some of the symptoms of the code?

Symptoms of a P0656 trouble code may include:

Inoperative fuel level gauge
Low fuel warning light is inoperative
Low fuel warning light stays on
Engine driving issues
Fuel temperature codes
Evaporative emission system codes

What are some common causes of the code?

Causes

of this code may include:

Open or shorted circuit between the PCM and the dashboard or other controllers
PCM programming error
Faulty controller or PCM

What are the troubleshooting steps for P0656?

Consult your vehicle’s information source for Technical Service Bulletins (TSBs) that match the stored code, the vehicle (year, make, model, and engine), and the symptoms presented. If you find the appropriate TSB, it may provide helpful diagnostic information.

A diagnostic scanner and a digital volt/ohmmeter will be necessary to accurately diagnose a P0656 code. A reliable source of vehicle information will also be required.

Start by connecting the scanner to the vehicle’s diagnostic port and retrieve all stored codes and freeze frame data. You’ll want to note this information, just in case the code turns out to be intermittent.

After recording all relevant information, clear the codes and test the vehicle (if possible) until the code is reset or the PCM enters readiness mode.

If the PCM enters readiness mode, the code is intermittent and will be even more difficult to diagnose. The condition that caused the P0656 to be stored may need to worsen before an accurate diagnosis can be made. On the other hand, if the code does not reset and no driving symptoms occur, the vehicle may be operating normally.

If the P0656 is immediately reset, proceed with a visual inspection of the wiring and connectors related to the system. Harnesses that are broken or disconnected should be repaired or replaced as needed.

If the wiring and connectors appear functional, use your vehicle information source to obtain the appropriate wiring diagrams, connector face views, connector pinout diagrams, and diagnostic flowcharts.

Once you have the correct information, use your DVOM to test the fuel level output circuit at the appropriate PCM connector pin. If no fuel level output signal is found, suspect that the PCM is faulty or that there is a PCM programming error.

If a fuel level output signal is found at the PCM connector, test the corresponding circuit (as presented) at the fuel level gauge pin of the dashboard connector. If the fuel level output signal is not found, you have an open circuit between the PCM and the fuel gauge in the dashboard. Repair or replace the circuit and retest.

If a P0656 code is stored and the fuel gauge (and low fuel warning light) is operational, suspect a faulty PCM or a PCM programming error

P0657 Actuator A Control Circuit / Open

What Does It Mean?

This is a generic diagnostic trouble code (DTC) for the powertrain and generally applies to OBD-II vehicles. Vehicle brands may include, but are not limited to, Dodge, Chrysler, Ford, Chevrolet, Toyota, Honda, Nissan, etc.

The ECM (Engine Control Module) is not only responsible for monitoring and adjusting many sensors, solenoids, actuators, valves, etc., but also for ensuring that all these components work seamlessly and together to meet desired values. All this to ensure you get the most out of your vehicle’s fuel economy and performance. In this case, if you get a P0657 or a related code, depending on your make and model, you may experience transmission handling issues.

It is important to note that, in my experience with European models, I have also seen this code as an EVAP diagnostic code. After highlighting the potential differences, it goes without saying that you should refer to your service manual to ensure proper diagnostic direction. Most of the time, your symptoms will be a strong indicator of the systems/components you will be working with to correct the fault.

Regarding P0657 and related codes, the ECM has detected an abnormal value in the actuator supply voltage circuit. It recognizes the anomaly by comparing actual values to desired ones. If they fall outside the desired range, it illuminates the MIL (Malfunction Indicator Lamp) on your dashboard. It must monitor this fault for several drive cycles before turning on the MIL. Be sure to look for the “A” designation in the circuit. Depending on your make and model, this could designate a specific wire, harness, location, etc. That said, always use OEM (Original Equipment Manufacturer) technical service information for this.

This could also be detected by the TCM (Transmission Control Module) depending on the description your particular make and model have for this code.

P0657 (Actuator Supply Voltage Circuit A / Open) is active when the ECM or TCM has detected an open (or general malfunction) in the actuator “A” supply voltage circuit

P0657
How Severe Is This DTC?

The severity here is moderate, generally speaking. Since there are multiple code descriptions, you must exercise caution during diagnosis. Proper service data will be necessary. If this happens to be a transmission code in your case, you certainly want to repair it as soon as possible. Daily use of a vehicle with an active transmission code is a risk we do not want to take.
What Are Some of the Symptoms of the Code?

Symptoms of a P0657 diagnostic code may include:

Poor shifting
Lack of torque
Stuck in gear
CEL (Check Engine Light) illuminated
Overall poor driving
Limited output power
Poor fuel consumption
Abnormal engine speed/RPM

What Are Some Common Causes of the Code?

Causes

of this P0657 fault code may include:

Open/chafed wire
Water intrusion
Melted/broken connector(s)
Short to power
General electrical issue (e.g., charging system problem, bad battery, etc.)

What Are the Diagnostic and Troubleshooting Steps for P0657?

The first step in the troubleshooting process for any malfunction is to search Technical Service Bulletins (TSBs) for known issues with the specific vehicle.

Advanced diagnostic steps become very vehicle-specific and may require the appropriate advanced equipment and knowledge to operate accurately. We include the basic steps below but refer to a repair guide specific to the year/make/model/powertrain for steps tailored to your vehicle.
Basic Step #1

How you approach your diagnosis will depend on your make and model and the symptoms you are experiencing. But generally speaking, the first thing to do is clear the codes with your scanner and drive the vehicle until it becomes active again. If so, after locating the correct circuit/harness we are working with, inspect it for any damage. It might be routed under the vehicle where road debris, dirt, ice, etc., can damage the underlying circuits. Repair any open and/or chafed wires, if present. Additionally, it would be a good idea to inspect the involved connectors. You can disconnect them to inspect the pins for any that are bent or damaged and could cause electrical issues. Sometimes, high resistance in a circuit can cause excessive heat. To the point that it can burn through the insulation! That would be a good sign you have found your problem.

NOTE: Always solder and wrap damaged wires. Especially when they are exposed to the elements. Replace connectors with OEM ones to ensure proper electrical connections.
Basic Step #2

Locate your actuator using your service information. Sometimes these can be accessed from the outside. If that is the case for you, you can check the integrity of the actuator itself. The desired values involved in this test vary widely, but be sure to have your mu

P0658 Actuator A Supply Voltage, Low Circuit

What Does It Mean?

This is a generic powertrain diagnostic trouble code (DTC) and generally applies to OBD-II vehicles. Vehicle makes may include, but are not limited to, Dodge, Chrysler, Ford, Chevrolet, Toyota, Honda, Nissan, etc.

The ECM (Engine Control Module) is not only responsible for monitoring and adjusting many sensors, solenoids, actuators, valves, etc., but also for ensuring all these components work seamlessly and together to meet desired values. All this to ensure you get the most out of your vehicle’s fuel economy and performance. In this case, if you get a P0658 or a related code, depending on your make and model, you may experience transmission handling issues.

It’s important to note that, in my experience with European models, I have also seen this code as an EVAP diagnostic code. After highlighting the potential differences, it goes without saying that you should refer to your service manual to ensure proper diagnostic direction. Most of the time, your symptoms will be a strong indicator of the systems/components you’ll be working with to correct the fault.

Regarding P0658 and related codes, the ECM has detected an abnormal value in the actuator supply voltage circuit. It recognizes the anomaly by comparing actual values to desired ones. If they fall outside the desired range, it illuminates the MIL (Malfunction Indicator Lamp) on your dashboard. It must monitor this fault for several drive cycles before illuminating the MIL. Be sure to look for the “A” designation in the circuit. Depending on your make and model, this could designate a specific wire, harness, location, etc. That said, always use OEM (Original Equipment Manufacturer) service information for this.

This could also be detected by the TCM (Transmission Control Module) depending on the description your particular make and model has for this code.

P0658 (Actuator Supply Voltage Circuit A Low) is active when the ECM or TCM has detected a low voltage situation in the actuator “A” supply voltage circuit.

P0658
How Severe Is This DTC?

The severity here is moderate, generally speaking. Since there are multiple code descriptions, you must exercise caution during diagnosis. Proper service data will be necessary. If this happens to be a transmission code in your case, you certainly want to repair it as soon as possible. Daily use of a vehicle with an active transmission code is a risk we do not want to take.
What Are Some of the Symptoms of the Code?

Symptoms of a P0658 diagnostic trouble code may include:

Poor shifting
Lack of torque
Stuck in gear
CEL (Check Engine Light) illuminated
Overall poor driveability
Limited power output
Poor fuel consumption
Abnormal engine RPM/speed

What Are Some of the Common Causes of the Code?

Causes

of this P0658 fault code may include:

Corroded wire causing high resistance
Water intrusion
Melted/broken connector(s)
Short to power
General electrical issue (e.g., charging system problem, bad battery, etc.)

What Are the Diagnostic and Troubleshooting Steps for P0658?

The first step in the troubleshooting process for any malfunction is to search Technical Service Bulletins (TSBs) for known issues with the specific vehicle.

Advanced diagnostic steps become very vehicle-specific and may require the appropriate advanced equipment and knowledge to perform accurately. We include the basic steps below but refer to a year/make/model/powertrain-specific repair guide for steps specific to your vehicle.
Basic Step #1

How you approach your diagnosis will depend on your make and model and the symptoms you are experiencing. But generally speaking, the first thing to do is clear the codes with your scanner and drive the vehicle until it becomes active again. If it does, after locating the correct circuit/harness we are working with, inspect it for any damage. It might be routed under the vehicle where road debris, dirt, ice, etc., can damage the underlying circuits. Repair any open and/or chafed wires, if present. Additionally, it would be a good idea to inspect the involved connectors. You can disconnect them to inspect the pins for any that are bent or damaged, which could cause electrical issues. Sometimes, high resistance in a circuit can cause excessive heat. To the point that it can burn through the insulation! That would be a good sign you’ve found your problem.

NOTE: Always solder and wrap damaged wires. Especially when they are exposed to the elements. Replace connectors with OEM ones to ensure proper electrical connections.
Basic Step #2

Locate your actuator using your service information. Sometimes these can be accessed from the outside. If that’s the case for you, you can check the integrity of the actuator itself. The desired values involved in this test vary widely, but make sure to have your multimeter and service manual on hand. Always use proper test pin connectors to avoid unnecessary damage to the connections. If the recorded values are outside the desired ones, the sensor may be considered faulty and should be replaced with a new one.
Basic Step #3

Take a look at your ECM (Engine Control Module) and TCM (Transmission Control Module) for any obvious damage. Sometimes they are located in a spot prone to trapping water and causing corrosion. Any green powder present should be considered a red flag. A licensed technician should take it from here given the complexity of ECM diagnosis.

This article is strictly for informational purposes only, and technical data and service bulletins for your specific vehicle should always take precedence.

P0659 Actuator A Supply Voltage, Circuit High

What Does It Mean?

This is a generic powertrain diagnostic trouble code (DTC) and generally applies to OBD-II vehicles. Vehicle makes may include, but are not limited to, Dodge, Chrysler, Ford, Chevrolet, Toyota, Honda, Nissan, etc.

The ECM (Engine Control Module) is not only responsible for monitoring and adjusting many sensors, solenoids, actuators, valves, etc., but also for ensuring all these components work seamlessly and together to meet desired values. All this to ensure you get the most out of your vehicle’s fuel economy and performance. In this case, if you get a P0659 or a related code, depending on your make and model, you may experience transmission handling issues.

It’s important to note that, in my experience with European models, I have also seen this code as an EVAP diagnostic code. After highlighting the potential differences, it goes without saying that you should refer to your service manual to ensure proper diagnostic direction. Most of the time, your symptoms will be a strong indicator of the systems/components you’ll be working with to correct the fault.

Regarding P0659 and related codes, the ECM has detected an abnormal value in the actuator supply voltage circuit. It recognizes the anomaly by comparing actual values to desired ones. If they fall outside the desired range, it illuminates the MIL (Malfunction Indicator Lamp) on your dashboard. It must monitor this fault for several drive cycles before turning on the MIL. Be sure to look for the “A” designation in the circuit. Depending on your make and model, this could designate a specific wire, harness, location, etc. That said, always use OEM (Original Equipment Manufacturer) service information for this.

This could also be detected by the TCM (Transmission Control Module) depending on the description your particular make and model has for this code.

P0659 (Actuator Supply Voltage Circuit A, High Circuit) is active when the ECM or TCM has detected a high voltage condition in the actuator “A” supply voltage circuit.

P0659
How Severe Is This DTC?

The severity here is moderate, generally speaking. Since there are multiple code descriptions, you must exercise caution during diagnosis. Proper service data will be necessary. If this happens to be a transmission code in your case, you certainly want to repair it as soon as possible. Daily use of a vehicle with an active transmission code is a risk we do not want to take.
What Are Some of the Symptoms of the Code?

Symptoms of a P0659 diagnostic trouble code may include:

Poor shifting
Lack of torque
Stuck in gear
CEL (Check Engine Light) illuminated
Overall poor driveability
Limited power output
Poor fuel consumption
Abnormal engine RPM/speed

What Are Some of the Common Causes of the Code?

Causes

of this P0659 fault code may include:

Water intrusion
Melted/broken connector(s)
General electrical issue (e.g., charging system problem, bad battery, etc.)

What Are the Diagnostic and Troubleshooting Steps for P0659?

The first step in the troubleshooting process for any malfunction is to check the Technical Service Bulletins (TSBs) for known issues with the specific vehicle.

Advanced diagnostic steps become very vehicle-specific and may require the proper equipment and advanced knowledge to perform accurately. We include the basic steps below but refer to a year/make/model/powertrain-specific repair guide for steps specific to your vehicle.
Basic Step #1

How you approach your diagnosis will depend on your make and model and the symptoms you are experiencing. But generally speaking, the first thing to do is clear the codes with your scanner and drive the vehicle until it becomes active again. If it does, after locating the correct circuit/harness we are working with, inspect it for any damage. It might be routed under the vehicle where road debris, dirt, ice, etc., can damage the underlying circuits. Repair any open and/or chafed wires if found. Additionally, it would be a good idea to inspect the involved connectors. You can disconnect them to inspect the pins for any that are bent or damaged, which could cause electrical issues. Sometimes, high resistance in a circuit can cause excessive heat. To the point that it can burn through the insulation! This would be a good sign that you have found your problem.

NOTE: Always solder and heat-shrink damaged wires. Especially when they are exposed to the elements. Replace connectors with OEM ones to ensure proper electrical connections.
Basic Step #2

Locate your actuator using your service information. Sometimes these can be accessed from the outside. If that’s the case for you, you can check the integrity of the actuator itself. The desired values involved in this test vary widely, but be sure to have your multimeter and service manual on hand. Always use proper test pin connectors to avoid unnecessary damage to the connections. If the recorded values are outside the desired ones, the sensor may be considered faulty and should be replaced with a new one.
Basic Step #3

Take a look at your ECM (Engine Control Module) and TCM (Transmission Control Module) for any obvious damage. Sometimes they are located in a spot prone to trapping water and causing corrosion. Any green powder present should be considered a red flag. A licensed technician should take it from here given the complexity of ECM diagnosis.

This article is strictly for informational purposes only, and the technical data and service bulletins for your specific vehicle should always take precedence.

P065A Alternator System Performance

What Does It Mean?

This is a generic diagnostic trouble code (DTC) and applies to many OBD-II vehicles (1996-newer). This may include, but is not limited to, vehicles from Land Rover, Honda, Jeep, Subaru, VW, Ford, Chrysler, etc. Although generic, the specific repair steps may vary depending on the year, make, model, and powertrain configuration.

A stored P065A code means that the powertrain control module (PCM), or one of the other related controllers, has detected a low output condition in the generator system.

In some cases, the alternator is referred to as a generator, but most often this type of code is used in a hybrid or electric vehicle that generates electrical power from a generator. The generator may be driven by the engine or one of the drive wheels.

The PCM monitors the generator’s output voltage and current at different RPM levels and load degrees and calculates voltage requirements accordingly. In addition to monitoring the generator’s output (performance), the PCM is also responsible for providing a signal that activates the generator warning light in case of low power.

If a problem is detected in monitoring the generator’s performance, a P065A code will be stored, and a malfunction indicator lamp (MIL) may illuminate.

Example of an alternator (generator):


P065A Example of an alternator (generator)
How Severe Is This DTC?

A P065A should be classified as severe because it can lead to low battery charge and/or a no-start condition.
What Are Some of the Symptoms of the Code?

Symptoms of a P065A trouble code may include:

Delayed or no start
Electrical accessories may not work
Engine driveability issues

What Are Some Common Causes of the Code?

Causes

of this code may include:

Faulty generator
Bad fuse, relay, or fusible link
Open or shorted circuit between the PCM and the generator
PCM programming error
Faulty controller or PCM

What Are the P065A Troubleshooting Steps?

The battery must be fully charged, and the generator must be operating at an acceptable level before attempting to diagnose a P065A.

Consult your vehicle’s information source for technical service bulletins (TSBs) that match the stored code, vehicle (year, make, model, and engine), and the symptoms presented. If you find the appropriate TSB, it may provide useful diagnostic information.

A diagnostic scanner and a digital volt/ohmmeter will be needed to accurately diagnose a P065A code. A reliable source of vehicle information will also be required.

Start by connecting the scanner to the vehicle’s diagnostic port and retrieving all stored codes and freeze frame data. You’ll want to note this information, just in case the code proves to be intermittent.

After recording all relevant information, clear the codes and test the vehicle (if possible) until the code resets or the PCM enters readiness mode.

If the PCM enters readiness mode, the code is intermittent and will be even more difficult to diagnose. The condition that caused the P065A to be stored may need to worsen before an accurate diagnosis can be made. On the other hand, if the code does not reset and no driveability symptoms appear, the vehicle may be operating normally.

If the P065A resets immediately, proceed with a visual inspection of the wiring and connectors related to the system. Harnesses that are broken or disconnected should be repaired or replaced as needed.

If the wiring and connectors appear functional, use your vehicle information source to obtain the appropriate wiring diagrams, connector face views, connector pinout diagrams, and diagnostic flowcharts.

Once you have the correct information, test all fuses and relays in the system to ensure the generator is receiving voltage.

If the generator’s supply voltage is not present, trace the appropriate circuit back to the fuse or relay it originates from. Repair or replace faulty fuses, relays, or fusible links as needed. In some cases, the generator’s supply voltage is routed through the PCM. You can use wiring diagrams and other vehicle-specific information to help diagnose generator voltage supply malfunctions.

If the generator’s supply voltage is present, use your DVOM to test the generator’s output performance at the appropriate pin of the generator connector. If the proper generator output voltage level is not found, suspect that the generator is faulty.

If the generator is charging to specifications, check the voltage level at the appropriate pin of the PCM connector. If the voltage is the same at the PCM connector as at the generator, suspect that the PCM is faulty or there is a programming error.

If the voltage level at the PCM connector differs (by more than 10%) from what is detected at the generator connector, suspect a short circuit or open circuit between the two.

Generator fuses should be tested with the circuit loaded to avoid misdiagnosis

P065B Generator-Alternator Control Circuit Range/Performance

🔍 What Does It Mean?

The P065B code is a generic diagnostic trouble code (DTC) that applies to OBD-II vehicles (1996 and newer). This includes, but is not limited to, brands such as Ford, Land Rover, Chevrolet, Dodge, GMC, Ram, etc. Although the code is generic, the exact repair steps may vary depending on the year, make, model, and powertrain configuration.

In summary, P065B indicates that the Powertrain Control Module (PCM) — or another related controller — has detected an anomaly in the generator control circuit. In some vehicles, the alternator is referred to as a generator. This situation is frequently encountered in hybrid or electric vehicles where the generator can be driven by the engine or even by one or more drive wheels.


⚡ Operation of the Generator Control System

In these vehicles, the PCM not only controls the generator but also manages the voltage supply needed to power the generator’s field coil. The process works as follows:

  • Controlled Activation: The PCM sends a signal (via a relay or auxiliary control module) to supply battery voltage to the field coil, allowing the generator to produce amperage.
  • Constant Monitoring: The PCM monitors the generator’s output voltage and current at different speeds and load levels, and it calculates voltage requirements accordingly.
  • Malfunction Indication: If the generator output does not meet expectations, the PCM may activate a warning light (MIL) to indicate low charging power.

If an anomaly is detected in this circuit, the P065B code is stored, and the malfunction indicator light may illuminate.


🚨 Severity and Symptoms of Code P065B

Severity:
The P065B code should be considered serious, as it can lead to low battery charge and/or a no-start condition.

Possible Symptoms:

  • Delayed or No Start
  • Insufficient Operation of Electrical Accessories (lighting, radio, etc.)
  • Engine Driveability Issues (engine running poorly or lacking power)

⚙️ Common Causes of Code P065B

Possible causes of this code may include:

  • Faulty Generator
    The generator may not produce the required amperage.

  • Faulty Fuse, Relay, or Fusible Link
    A damaged protective component can interrupt the generator’s power supply.

  • Open or Shorted Circuit
    A problem in the wiring between the PCM and the generator (faulty wiring, damaged connectors, etc.).

  • PCM Programming Error
    A software malfunction may cause incorrect signal interpretation.

  • Faulty Controller or PCM
    The PCM itself, or an associated control module, may be faulty.


🔧 Troubleshooting Steps for Code P065B

  1. Preparation

    • Check the Battery: Ensure it is fully charged.
    • Test the Generator: Verify that it is operating at an acceptable level before starting diagnostics.
  2. Data Retrieval

    • Connect a diagnostic scanner to the OBD-II port to retrieve all stored codes and freeze frame data.
    • Note this information, especially if the code is intermittent.
  3. Visual Inspection

    • Inspect the wiring and connectors related to the generator circuit.
    • Repair or replace any damaged harnesses, broken, or corroded connectors.
  4. Checking Fuses and Relays

    • Test all fuses and relays in the generator power circuit.
    • If supply voltage is not present, trace the circuit back to the faulty component and perform necessary repairs.
  5. Measuring Output Voltage

    • Use a digital volt/ohmmeter (DVOM) to measure the generator’s output voltage at the appropriate connector.
    • If the voltage is abnormal, the generator is likely faulty.
  6. Analysis at the PCM Level

    • Compare the voltage measured at the generator connector with that at the PCM connector.
    • A difference greater than 10% may indicate an open circuit or short circuit between the two.
    • If the voltages are the same and the generator output is compliant, consider a programming error or PCM fault.

🛠️ Additional Tips

  • Technical Documentation:
    Consult your vehicle’s Technical Service Bulletins (TSBs) for specific information on the code and recommended procedures.

  • Necessary Tools:
    A diagnostic scanner, a digital volt/ohmmeter, and vehicle-specific wiring diagrams are essential for accurate diagnosis.

  • Testing Under Load:
    Generator fuses should be tested with the circuit loaded to avoid misdiagnosis.


Conclusion

The P065B code indicates a serious problem in the generator control circuit, which can lead to poor battery charging or a no-start condition. Rigorous diagnostics, based on visual inspection, electrical measurements, and component verification, are necessary to identify and correct the underlying cause. For safe and accurate intervention, it is recommended to consult an automotive repair professional.

P065C Mechanical Performance of the Generator

What does it mean?

This is a generic diagnostic trouble code (DTC) and applies to many OBD-II vehicles (1996-newer). This may include, but is not limited to, vehicles from Mazda, Nissan, Land Rover, Chrysler, Ford, Dodge, GMC, etc. Although generic, the exact repair steps may vary depending on the year, make, model, and powertrain configuration.

A stored P065C code means that the powertrain control module (PCM), or one of the other associated controllers, has detected a low output condition in the generator system.

In some cases, the alternator is referred to as a generator, but most often this type of code is used in a hybrid or electric vehicle that produces sustained electrical power from a generator. The generator can be driven by the engine or one of the drive wheels.

The PCM monitors the generator’s output voltage and current at different RPM levels and load degrees and calculates voltage requirements accordingly. In addition to monitoring the generator’s output (performance), the PCM is also responsible for providing a signal that activates the generator warning light in case of low power.

If a problem is detected in the generator performance monitoring, a P065C code will be stored and a malfunction indicator lamp (MIL) may be illuminated.

Example of an alternator (generator):


P065C Example of an alternator (generator)
How severe is this DTC?

A P065C should be classified as severe because it can lead to low battery charge and/or a no-start condition.
What are some of the symptoms of the code?

Symptoms of a P065C trouble code may include:

  • Delayed or no start
  • Electrical accessories may not work
  • Engine driveability issues

What are some of the common causes of the code?

Causes of this code may include:

  • Faulty generator
  • Bad fuse, relay, or fusible link
  • Open or shorted circuit between the PCM and the generator
  • PCM programming error
  • Faulty controller or PCM

What are the troubleshooting steps for P065C?

The battery must be fully charged and the generator operating at an acceptable level before attempting to diagnose a P065C.

Consult your vehicle’s information source for technical service bulletins (TSBs) that match the stored code, the vehicle (year, make, model, and engine), and the symptoms presented. If you find the appropriate TSB, it may provide helpful diagnostic information.

A diagnostic scanner and a digital volt/ohmmeter will be needed to accurately diagnose a P065C code. A reliable source of vehicle information will also be required.

Start by connecting the scanner to the vehicle’s diagnostic port and retrieving all stored codes and freeze frame data. You’ll want to note this information, just in case the code proves to be intermittent.

After recording all relevant information, clear the codes and test drive the vehicle (if possible) until the code resets or the PCM enters readiness mode.

If the PCM enters readiness mode, the code is intermittent and will be even more difficult to diagnose. The condition that caused the P065C to be stored may need to worsen before an accurate diagnosis can be made. On the other hand, if the code does not reset and no driveability symptoms are present, the vehicle may be operating normally.

If the P065C is immediately reset, proceed with a visual inspection of the wiring and connectors related to the system. Harnesses that are broken or disconnected should be repaired or replaced as necessary.

If the wiring and connectors appear functional, use your vehicle information source to obtain the appropriate wiring diagrams, connector face views, connector pinout diagrams, and diagnostic flowcharts.

Once you have the correct information, test all fuses and relays in the system to ensure the generator is receiving supply voltage.

If the generator supply voltage is not present, trace the appropriate circuit back to the fuse or relay it originates from. Repair or replace faulty fuses, relays, or fusible links as needed. In some cases, the generator supply voltage is routed through the PCM. You can use wiring diagrams and other vehicle-specific information to help diagnose generator voltage supply malfunctions.

If the generator supply voltage is present, use your DVOM to test the generator’s output performance at the appropriate pin of the generator connector. If the proper level of generator output voltage is not found, suspect that the generator is faulty.

If the generator is charging to specifications, check the voltage level at the appropriate pin of the PCM connector. If the voltage is the same at the PCM connector as it is at the generator, suspect that the PCM is faulty or that there is a programming error.

If the voltage level at the PCM connector differs (by more than 10%) from what is detected at the generator connector, suspect a short circuit or open circuit between the two.

Generator fuses should be tested with the circuit loaded to avoid misdiagnosis.

P065D Reducing System Malfunction Lamp Control Circuit

What does it mean?

This is a generic diagnostic trouble code (DTC) and applies to many OBD-II vehicles (1996-newer). This may include, but is not limited to, vehicles from VW, Audi, Chevrolet, Chrysler, Ford, Dodge, GMC, Ram, Volkswagen, etc. Although generic, the exact repair steps may vary depending on the year, make, model, and powertrain configuration.

A stored P065D code means that the Powertrain Control Module (PCM), or one of the other related controllers, has detected an anomaly in the reductant system malfunction indicator lamp control circuit.

The reductant system malfunction indicator lamp is an integral part of the instrument cluster. It is designed to warn the driver of a reductant system failure. Typically, the PCM receives a signal from one of the reductant system sensors. The reductant system sensors allow the PCM to monitor the reductant system for any malfunction. When reductant system data is calculated by the PCM and a problem is detected, the PCM sends a voltage signal to the reductant system malfunction warning lamp via the lamp control circuit. When the reductant system malfunction indicator lamp circuit is activated, the reductant system malfunction lamp should illuminate.

When the key is turned to the ON position (engine off), a self-test is initiated for all instrument cluster warning lamps. If a problem is detected in the monitoring of the reductant system malfunction indicator lamp control circuit, a P065D code will be stored and a Malfunction Indicator Lamp (MIL) may illuminate.

A reductant DEF tank:


P065D Reductant DEF Tank
How severe is this DTC?

A P065D should be classified as severe because it could lead to an inoperative reductant system, damage to the catalytic converter, and/or driving issues.
What are some of the symptoms of the code?

Symptoms of a P065D trouble code may include:

Inoperative reductant system
The reductant system malfunction lamp is inoperative
The reductant system malfunction indicator remains illuminated
Engine driving issues
Catalytic converter codes

What are some common causes of the code?

Causes

of this code may include:

Faulty reductant system malfunction lamp bulb
Open or shorted circuit between the PCM and the instrument cluster or other controllers
PCM programming error
Faulty controller or PCM

What are the troubleshooting steps for P065D?

If other reductant system codes are stored, these should be diagnosed and repaired before attempting to diagnose a P065D.

Consult your vehicle’s information source for Technical Service Bulletins (TSBs) that match the stored code, the vehicle (year, make, model, and engine), and the symptoms presented. If you find the appropriate TSB, it may provide helpful diagnostic information.

A diagnostic scanner and a digital volt/ohmmeter will be needed to accurately diagnose a P065D code. A reliable source of vehicle information will also be required.

Start by connecting the scanner to the vehicle’s diagnostic port and retrieve all stored codes and freeze frame data. You will want to note this information, just in case the code proves to be intermittent.

After recording all relevant information, clear the codes and test drive the vehicle (if possible) until the code resets or the PCM enters readiness mode.

If the PCM enters readiness mode, the code is intermittent and will be even more difficult to diagnose. The condition that caused the P065D to be stored may need to worsen before an accurate diagnosis can be made. On the other hand, if the code does not reset and no driving symptoms manifest, the vehicle may be operating normally.

If the P065D resets immediately, proceed with a visual inspection of the wiring and connectors related to the system. Harnesses that are broken or disconnected should be repaired or replaced as necessary.

If the wiring and connectors appear functional, use your vehicle information source to obtain the appropriate wiring diagrams, connector face views, connector pinout diagrams, and diagnostic flowcharts.

Once you have the correct information, use your DVOM to test the reductant system malfunction indicator lamp control circuit at the appropriate PCM connector pin. If no reductant system malfunction lamp control output signal is found, suspect a faulty PCM or a PCM programming error.

If a reductant system malfunction lamp control output signal is found at the PCM connector, test the corresponding circuit (as presented) at the instrument cluster connector’s reductant system malfunction indicator lamp control circuit pin. If the reductant system malfunction lamp control output signal is not found, you have an open circuit between the PCM and the reductant system malfunction lamp in the instrument cluster. Repair or replace the circuit and retest.

If the reductant system malfunction indicator does not illuminate with the key on and engine off, suspect a faulty reductant system malfunction indicator bulb
If the P065D code is stored and the reductant system malfunction lamp is operational, suspect a faulty PCM or a PCM programming error

Intake Manifold Tuning Valve, Bank 1

Code P065E: Intake Manifold Tuning Valve Performance Malfunction (Bank 1)


Meaning of Code P065E

Code P065E is a generic OBD-II code related to the powertrain, indicating a performance issue with the intake manifold tuning valve (bank 1). This code affects various brands (Saturn, Land Rover, Porsche, Vauxhall, Dodge, Chrysler, Mazda, etc.) and occurs when the ECM detects a discrepancy between the valve’s actual operation and the expected values.

Role of the tuning valve:

  • Regulate pressure between the intake plenums.
  • Redirect air to specific passages to optimize airflow and performance.
  • Often made of plastic, it is sensitive to high temperatures and extreme conditions (e.g., severe cold).

Severity of Code P065E

  • Moderate to high risk:
  • Prolonged malfunction can damage internal engine components (e.g., ingestion of broken parts into the combustion chamber).
  • Should not be ignored: Prompt intervention is recommended to avoid costly repairs.

Common Symptoms

  • 🚗 Poor engine performance (sluggish acceleration, reduced power).
  • 🔧 Rattling noises from the intake manifold.
  • Increased fuel consumption.
  • 🔌 Misfires during startup or at steady RPM.
  • 🌡️ Cold start problems.

Possible Causes

  1. Mechanical valve failure:
  • Valve stuck, broken, or with detached parts (related to fragile plastic).
  • Contamination by deposits (oil, dust).
  1. Electrical issues:
  • Damaged wiring (chafed wires, corrosion).
  • Faulty connector (broken tabs, overheating).
  1. External malfunctions:
  • Extreme cold causing the valve to stick.
  • ECM failure (rare).

Diagnostic Procedure

Step 1: Consult Technical Service Bulletins (TSB)

  • Look for known issues related to the valve or intake manifold for your model (e.g., Chevrolet, Ford).

Step 2: Clear Codes and Road Test

  • Use an OBD-II scanner to clear the code and perform a road test.
  • If the code returns after a few drive cycles, continue diagnostics.

Step 3: Visual and Electrical Inspection

  1. Locate the valve:
  • Typically integrated into the intake manifold (access can be complex).
  1. Check the connector:
  • Look for damage (melted plastic, corroded pins).
  1. Test the wiring:
  • Use a multimeter to check for short circuits or abnormal resistance.

Step 4: Functional Valve Test

  • With an advanced scanner:
  • Activate the valve electronically and check its range of motion.
  • Listen for abnormal rattling during the test (indicating obstruction).

Step 5: Physical Valve Inspection

  • Disassemble the valve if necessary:
  • Look for broken parts, dirt, or signs of overheating.
  • Clean or replace the valve if it is stuck or contaminated.

Repair Solutions

  • 🔄 Valve replacement: Opt for an OEM-certified part (approximately €50 to €200 depending on the model).
  • 🔌 Electrical circuit repair: Repair damaged wires or replace the connector.
  • 🛠️ Intake manifold cleaning: Remove deposits to prevent contamination.

Key Tips

  • ⚠️ Avoid makeshift repairs: An improperly installed valve can worsen problems.
  • 📚 Consult a specific guide: Follow your vehicle’s repair manual instructions for disassembly and torque specifications.
  • 🧊 Cold weather prevention: Ensure proper engine warm-up in winter.

In Summary: Code P065E points to a malfunction of the intake manifold tuning valve, often related to mechanical or electrical causes. Methodical diagnosis and quality parts are essential to restore engine performance.