A Cracked Cylinder Head Gasket: Common Symptoms and Repair

Due to a cracked head gasket, an engine may consume more oil or coolant. Therefore, it is extremely vital to troubleshoot the symptoms of a cracked head gasket.

What is a Head Gasket?

First, if you are still wondering what a head gasket is, we have an answer for you now!

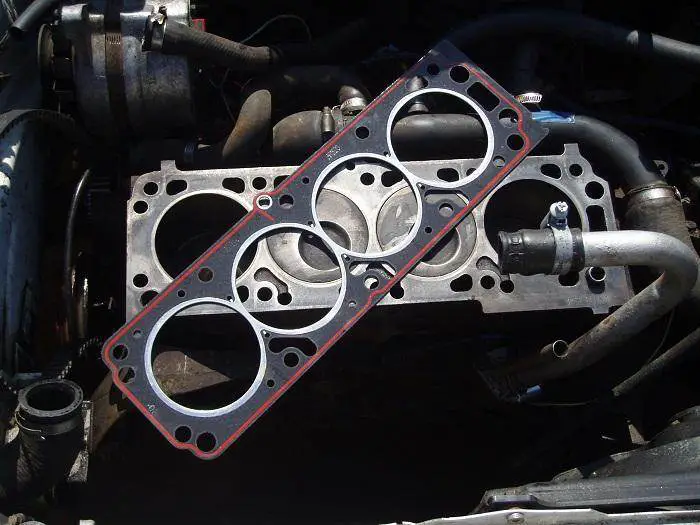
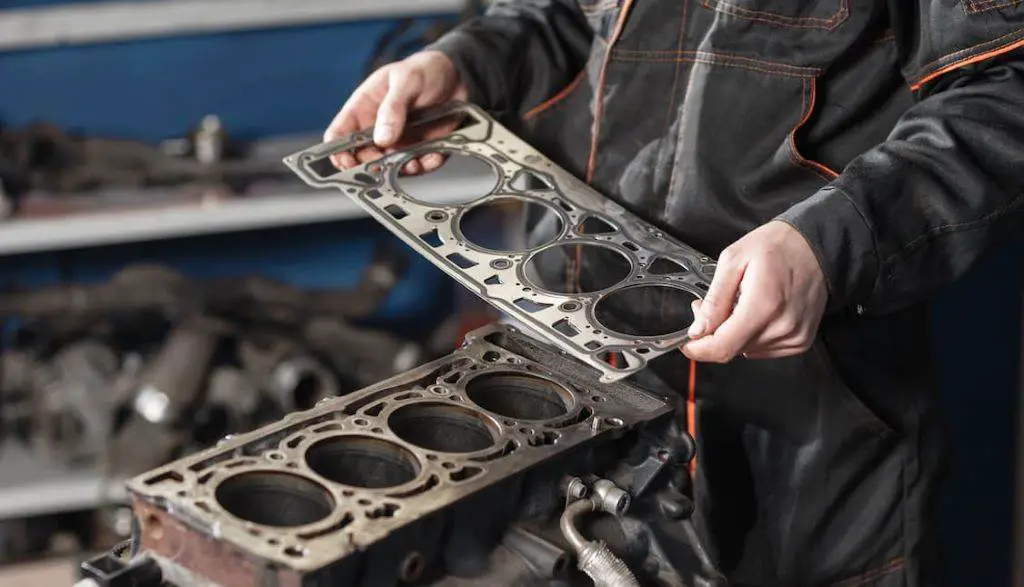
The head gasket is an essential component of a vehicle’s engine system, nestled between the engine block and the cylinder head.

The main function of a head gasket is to seal the internal combustion process so that the two highly flammable fluids—coolant and oil—do not mix.

Now that we understand what a head gasket is, it is necessary to know the symptoms of a cracked head gasket to avoid higher costs due to additional engine damage caused by driving with a cracked head gasket.

In fact, this issue even occurs frequently in Subaru and has become a stain on the company’s impressive record of manufacturing first-class vehicles. To understand the symptoms, it may be helpful to understand why a head gasket can fail.

Symptoms of a Cracked Head Gasket

The symptoms of a bad head gasket are sometimes difficult to diagnose and cost a great deal of money in repair or replacement. The problem with a head gasket starts with a simple leak in the cooling system.

Keep an eye out for some symptoms of a cracked head gasket below. (Photo: Cloverdale Auto Service)

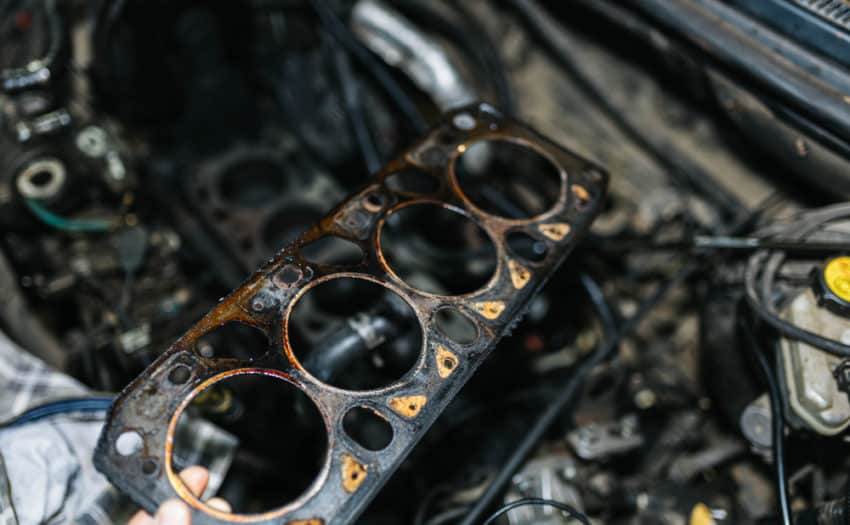
However, it will become a more serious problem if it goes unnoticed due to irregular maintenance. Let’s now look at the symptoms of a cracked head gasket with Car From Japan!
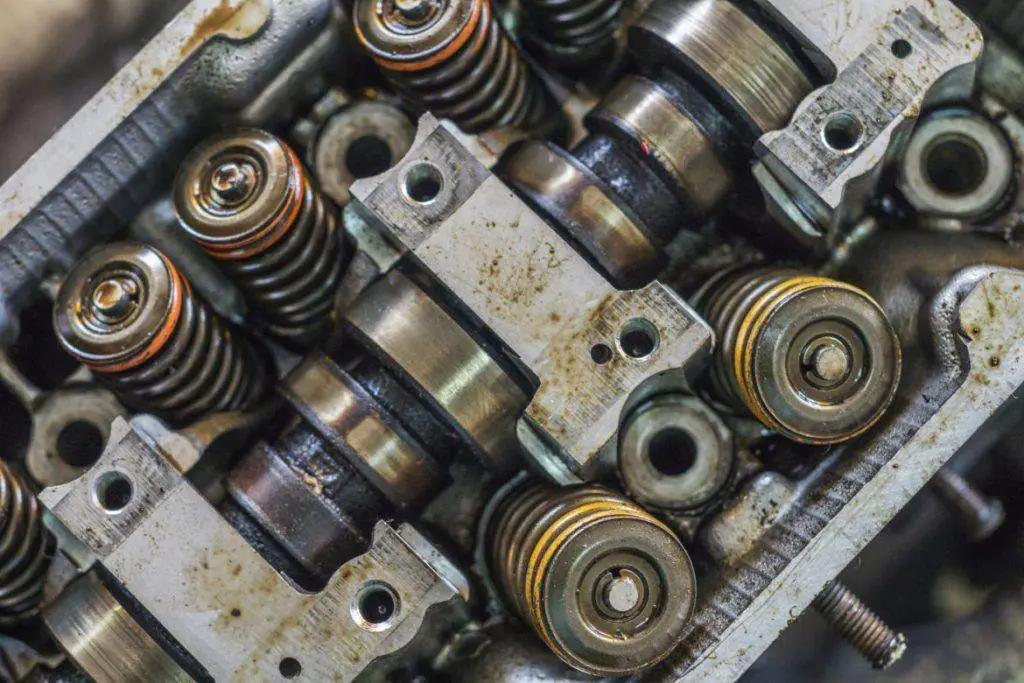
Engine Overheating

The reason may be a lack of coolant or the combustion process. Of course, this can lead to many other problems. For example, metal components may expand, which will cause cracks or deformations.

Engine overheating is one of the most common signs, but not the only one, of a cracked head gasket. So, a simple overheating engine does not mean the head gasket needs to be repaired.

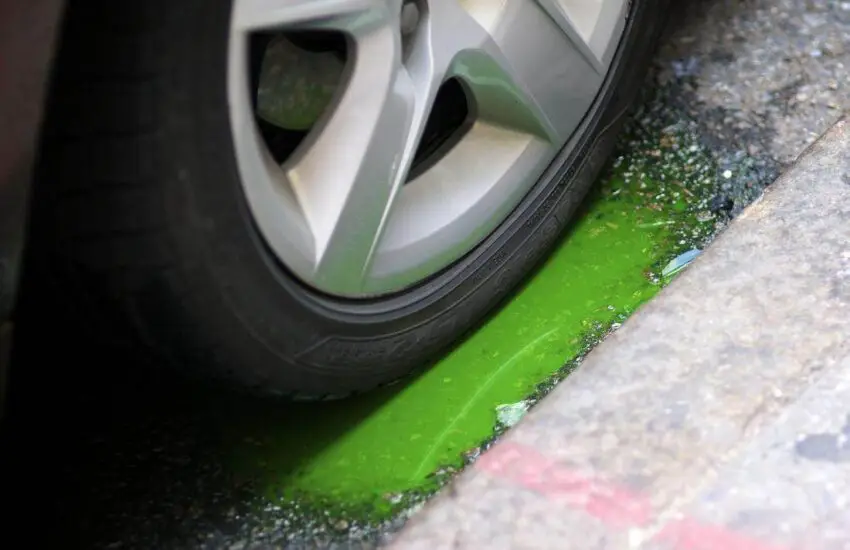
Drop in Coolant Levels

If the coolant level drops more quickly than normal, your car likely has a problem with the head gasket. A cracked head gasket can cause a leak, which will be tested by pressurizing your cooling system and monitoring the pressure loss.

Engine Misfires

When coolant leaks into an engine cylinder, it misfires. Thus, a misfiring engine can be a possible symptom of a faulty head gasket.

When coolant leaks into an engine cylinder, it misfires. (Photo: wikihow)

Excessive Smoke from the Exhaust

When a large amount of coolant leaks into the cylinders, the smoke from the combustion process comes out of the exhaust system. This usually happens when the initial leak is not addressed in time.

Milky Engine Oil

Another symptom of a cracked head leak is milky white oil. Because coolant leaks into your combustion chamber, it will seep past your piston rings and end up in your oil.

Over time, the oil will mix with this fluid to take on a milky white color. On your dipstick and around the engine oil cap are where you can easily notice this symptom.

How to Avoid a Cracked Head Gasket?

We all know that prevention is better than cure. So you should perform regular car maintenance to avoid all symptoms of a cracked head gasket.

Otherwise, the repair work will drain your wallet very quickly. There are three methods you can use to reduce the risk of head gasket cracking.

  • Your combustion chamber should be kept under as low pressure as possible
  • Avoid overly advanced timing or carbon buildup in the engine
  • Do not downshift to slow your car and restart at any time if your car is equipped with a manual transmission.

Cracked Head Gasket Repair

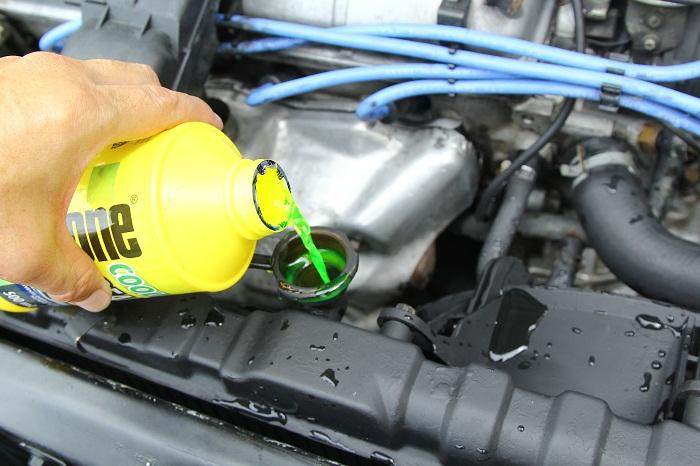
A cracked head gasket is easy to repair if you can detect the leak early on. There are many sealing products available in auto repair shops. You just need to add the sealant to the radiator, and the leak will be sealed while you drive.

The type of sealant will depend on the number of engine cylinders and the extent of the leak. Normally, sealants will work for small leaks.

However, your car will need a head gasket replacement if the problem is not detected early. You may need to repair the engine block and cylinder head or completely replace the engine only.

A gasket replacement requires the removal of a number of engine components. Reassembling all these parts requires specific torque settings to ensure proper installation.

A cracked head gasket is easy to repair if you can detect the leak early on. (Photo: BlueDevil Products)

FAQ on Cracked Head Gasket

  1. How long does a blown head gasket last?

When a gasket blows, it can cause significant damage to your vehicle, so it is essential to understand the warning signs and what you need to do to fix it.

A car with a blown head gasket normally does not last more than a month, depending on the severity of the leak or hole.

  1. Is it hard to fix a blown head gasket?

It is not easy to replace the head gasket. It requires a superior understanding of the engine and how its components work together.

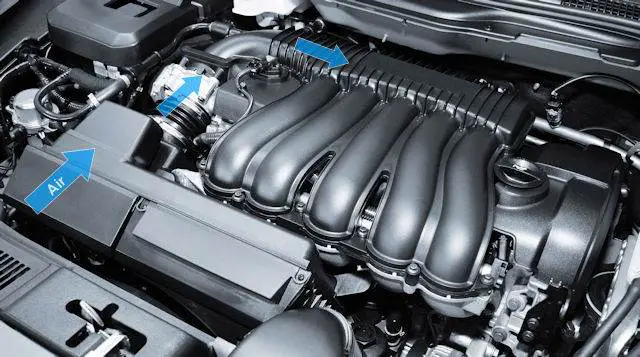
Due to the depth of today’s engines, the exhaust manifold, cylinder head, and intake valves must be removed to access the head gasket.

  1. How much to replace a head gasket?

The head gasket replacement itself is not expensive, but the labor involved in the job requires a large sum of money. In fact, repairing a head gasket is one of the most expensive engine repair jobs.

The typical cost of repairing a head gasket is about $1,000 to $2,000, but this is not due to high material costs but to labor, as we mentioned.

The typical cost of head gasket replacement is about $1,000 to $2,000. (Photo: Smith Repair)
  1. What temperature damages the head gasket?

If the engine temperature exceeds 115°C, the head gasket and cooling system can be pushed beyond their usual limits.

The impact is virtually certain if the engine temperature exceeds 126°C. Poor-quality gasoline, which is often responsible for excessive pressure on the cylinder head, is another reason that can contribute to gasket failure.

  1. Does a blown head gasket make noises?

Since the combustion chamber is not sufficiently sealed, the combustion of fuel and air will be limited. You may notice that your car’s performance has decreased, and you may even hear an exhaust leak or dull idle noises, which is a clear indicator of a blown head gasket.

  1. Is it safe to drive with a cracked head gasket?

Most problems with your vehicle’s head gasket start with a minor crack before being fully blown.

If these cracks are not properly addressed, they will enlarge over time, leading to additional damage and more expensive repairs. That is why you should never drive with a damaged head gasket!

  1. Will a car start with a blown head gasket?

When your engine does not start due to a faulty head gasket, you will notice the following symptoms: The engine cranks but does not turn over. The battery drains more quickly with each engine rotation. Even if the starter is engaged, the engine does not start.

Watch this video from 2CarPros for a tutorial of 6 easy tests to detect a blown head gasket in a car engine!

https://youtube.com/watch?v=5zpNjYmmiYY%3Ffeature%3Doembed

China’s EV Market Hits 50% Sales Milestone

Electric Vehicle Adoption Accelerates in China

Electric vehicle charging at a modern station

The Chinese automotive market has reached a pivotal moment as electrified vehicles captured nearly half of all new car sales in September 2025. This remarkable achievement demonstrates the rapid transformation of the world’s largest automobile market toward sustainable transportation solutions.

Unprecedented Market Penetration

Industry data reveals that battery electric vehicles and plug-in hybrids collectively achieved approximately 50% market share during the reported period. This represents the highest monthly penetration rate ever recorded for electrified vehicles in any major global market. The acceleration comes despite the overall automotive market experiencing moderate growth, indicating a fundamental shift in consumer preferences and manufacturing strategies.

Government Policies and Infrastructure Expansion

Several factors contributed to this historic milestone. Continuous government support through extended purchase subsidies and tax incentives has made electric vehicles increasingly affordable. Simultaneously, China has built the world’s most extensive charging network, with over 8 million public and private charging points installed nationwide. Major cities have implemented preferential policies including dedicated license plates and reduced parking fees for electric vehicle owners.

Competitive Landscape and Consumer Choice

The market offers an unprecedented variety of electric models across all price segments. Domestic manufacturers have launched numerous compelling options featuring advanced battery technology and competitive pricing. International brands have similarly accelerated their electric vehicle offerings specifically tailored for Chinese consumers. This intense competition has driven innovation while making electric vehicles accessible to a broader demographic.

Environmental Impact and Future Outlook

This transition toward electrified transportation significantly contributes to urban air quality improvement and carbon emission reduction targets. Industry analysts project that electric vehicles could surpass 60% market share within the next two years as battery technology continues to improve and production costs decrease further. The September 2025 figures establish China as the undeniable global leader in electric mobility adoption.

Is it safe to drive with a red fluid leak from the car

If you notice any red or pink liquid leaking from the car, it is necessary to immediately understand what is wrong with your vehicle. A pink or red fluid leak from the car primarily indicates a problem with the transmission.

A fluid leak from a car is generally not a good sign and in most cases, it can cause a lot of panic for the owner.

The fluid used in the transmission is a distinctive red or green color. Therefore, it is easy to determine if the leaking fluid is from the transmission or from elsewhere.

Any expert mechanic will advise immediate solutions if there is a problem in the transmission. But can you drive the car with a leak in the fuel line or in some other transmission components?

Why does transmission fluid leak?

The most common reason is a broken, loose, or worn transmission seal. A transmission has various types of seals, including the input shaft seal, output shaft seal, axle seal, and many more in its mechanism. Damage or a hole in any of these will result in a red fluid leak from the car.

red fluid in car
Fluid can leak for several reasons. (Photo: Gold Eagle Co)

A gap in the transmission could be another potential issue. Fluid could escape if there is a breach or crack in the torque converter, pan gasket, transmission pan, or other areas. It is indeed rare to have a leaking seal or a cracked housing, but not entirely impossible.

A leak in the fluid lines could also be the cause of this problem. This type of damage could result from road debris hitting the fluid lines. Heat could be another culprit for this issue. Remember that a hole in the lines drains the fluid quite quickly.

Is it safe to drive when red fluid is leaking from a car?

Safety depends on the severity of the leak. You can drive for years if it’s just a small drip. There is no need to worry as long as the transmission fluid remains at the proper level. However, it is recommended to fix the leak as soon as possible. It could affect the vehicle’s performance and lead to complete transmission damage.

A low transmission fluid level will warn you through various signs such as slipping, increased RPM, gear hunting, car speed being out of sync with gear shifting and acceleration.

In this case, you should no longer drive the car and call a service center to have it towed to the repair shop.

Ignoring the symptoms will only worsen the problem over time. Eventually, it will end in transmission failure.

Remember that repairing a small leak will not cost much, but it will cost thousands of dollars if the hole enlarges or the transmission stops working.

car leaking red fluid
Driving with a small leak is comparatively safer. (Photo: Neo Drive)

How to stop the red fluid leak from the car?

There is nothing else to do but take care of the car and bring it to a repair shop for regular maintenance. All transmission seals are made of rubber and wear out with regular driving.

Just like other components such as brake pads and tires, seals also wear out over time. Furthermore, it is not uncommon to have cracks, holes, or damage in various transmission components.

So, when you see a red fluid leak on a car, check the fluid level and take the necessary measures.

Other possible causes behind a red fluid leak from the car

Besides transmission fluid leaks, engine coolant leaks and power steering leaks are two potential culprits responsible for pink or red fluid leaks from the car. Below, we will give you more information about them.

1. Engine Coolant Leak

Engine coolant functions to keep the car engine’s temperature stable by circulating around different parts of the engine, and its color is pink or red.

If you notice that the red or pinkish fluid leaking from the car has a sweet smell and resembles water, it is very likely engine coolant. The place where you are likely to see an engine coolant leak is usually under the engine or the radiator.

To confirm the issue, you need to check the reservoir (it’s a semi-transparent bottle with “low” and “high” markings under the hood) and if you see that the coolant is insufficient, inspect the radiator (it’s located right behind the grille at the front of the car) – that’s what you need to do.

Remember not to open the radiator cap right after turning off the car, as you could get burned by the hot steam.

After removing the radiator cap, you can easily see the coolant level in the radiator, and if it’s impossible to see, it seems there is a leak in your cooling system and you should need a mechanic’s help.

engine coolant

2. Power Steering Leak

Power steering fluid is designed to help the driver turn the steering wheel more easily. So, if this fluid is leaking, you will notice it during low-speed turns and encounter more resistance from the power steering than usual.

If your car’s power steering fluid is leaking, you will typically detect a pink car fluid leak or red fluid leaking from the front of the car (near the front bumper). This fluid has a slight smell of burnt oil and resembles water.

The power steering system should be sealed and protected, so if there is a leak in your car’s system, you should have your car inspected by a specialist.

What is Antilock Braking System and How Does It Work

The traction control system (TCS) is an active vehicle safety device. It prevents loss of traction on the driven wheels on the road. It becomes active when the engine torque and throttle input do not match the surface you are driving on.

But what does traction control mean? Well, it’s a method that limits the power delivered to the wheel to apply traction to the car’s wheels, causing them to stop slipping. It uses all the available traction on the road when the vehicle accelerates on low-friction surfaces.

What is the Traction Control System?

TCS is an active vehicle safety feature that is standard in modern automobiles. A secondary function of a vehicle’s Electronic Stability Control (ESC)*, the onboard system kicks in when acceleration speeds up. This prevents the tires from slipping when the car accelerates.

Traction control proves useful in bad weather conditions (rain, ice, or snow) and on slippery surfaces offering little to no grip. Drivers had to press the accelerator pedal in old cars without a TCS system to prevent the wheels from slipping excessively on difficult roads. This allowed them to gain speed without losing grip. But modern vehicles equipped with this technology allow drivers to accelerate in a controlled manner by limiting the power delivered to stop wheel slip.

A car can slide off the track without TCS.

The system allows the driver to have better control of their car. It reduces the risk of losing rear control during acceleration and oversteer when driving in a corner. When the TC light flashes during operation, the driver knows that the traction control technology is active and trying to prevent one or more wheels from spinning faster and causing instability. This often happens when the vehicle accelerates rapidly in corners, forcing the wheels to slip horizontally and potentially creating an accident risk.

* ESC is a computer-driven function in modern vehicles. It adds to stability by detecting loss of traction and then reducing it.

How Does Traction Control Work?

Unless you are driving a very old car, it is likely equipped with a traction control system. It is in operation and helps you drive safely without you realizing how it works.

Well, the mechanism is quite simple if you pay attention to it. Its operation is quite similar to the Anti-lock Braking System (ABS) and the components of both systems are also similar. The TCS has a wheel speed sensor that monitors the rotational speed of the front wheels or all four wheels. The hydraulic modulator drives the brakes while the ECU (Electronic Control Unit) monitors the data from the wheel speed sensors and intervenes to command the hydraulic modulator if necessary.

In modern vehicles, ABS and TCS are considered a single unit, as the latter is an addition to the ABS setup. The ECU monitors wheel activity. It checks if any one is spinning faster than the others, indicating that the wheel in question is losing grip. On such an occasion, the ECU intervenes to slow down the rotation of the problematic wheel. It commands the hydraulic modulator to pump the brake in rapid succession to that specific wheel.

Some TCS control wheel slip by reducing engine power to the wheels that are about to lose traction. Once the condition returns to normal, the system resumes its normal operation – monitoring the wheel and its rotational speed.

When the system cuts engine power to control wheel slip, you might feel a pulsating sensation through the accelerator pedal. This is the impact of the TCS forcing the engine to adjust the wheel rotation speed. So don’t worry if you feel a vibration when driving on a slippery road.

Understanding how the traction control system works in the video:

https://youtube.com/watch?v=WpOfDI4zoS8%3Ffeature%3Doembed

The Right Time to Use Traction Control in Cars

TCS is a standard safety device in modern vehicles. It becomes active when the engine starts. The system intervenes when there is a discrepancy between the wheel rotation speed and the vehicle speed.

The system is beneficial for any type of vehicle, regardless of the powertrain it has. But it does more harm than good in some situations. For example, when you drive the car from a standstill in snow or sand, all wheels slip, causing the TCS to reduce engine power too much. As a result, moving forward on such surfaces becomes very difficult.

Use TCS on slippery roads.

Most models have an option to disable TCS in such difficult conditions. Some cars do not allow it to be completely disabled. But they offer a setting for snowy or icy conditions or an option to increase wheel slip if necessary. You need to turn off the system or apply the additional settings depending on the weather or the type of surface you are driving on.

Thus, to avoid loss of control, ensure body stability, and optimize tire traction, the traction control system should be enabled in most everyday driving situations. However, car owners can temporarily disable this system to increase traction when traveling on snowy or muddy roads.

Symptoms of a Traction Control Problem

Knowing the symptoms will help you identify if the system is experiencing problems. The system rarely encounters issues, and you can always drive even if something is wrong. However, you must be cautious when driving on slippery surfaces with a malfunctioning TCS.

If there is a problem with the system, the traction control light will illuminate briefly after starting the engine. This can happen due to a faulty wheel speed sensor, a faulty ABS, low air pressure, and driving with a mini spare wheel.

In Conclusion

Along with ESC, the TCS traction control system is widely used in most vehicles. Traction control helps provide a safe driving experience throughout the driving process. Difficult terrain conditions such as muddy and slippery… are some of the factors affecting car performance and safety. The traction control system was developed to solve this problem. We hope this topic provides you with useful information.

Greatwall Revamps European SUV Strategy

Greatwall’s Renewed European Ambition

GWM Haval Xiaolong Max

After two initial attempts that fell short of expectations, Chinese automaker Greatwall is launching a revitalized strategy to establish a lasting presence in the European automotive market. The company is focusing its efforts on the Haval SUV lineup, aiming to capture consumer interest with updated models and enhanced features tailored to European preferences.

Strategic Shift Towards SUVs

Greatwall’s renewed approach centers on leveraging the popularity of SUVs in Europe. The Haval brand, known for its robust and versatile vehicles, is being positioned to compete with established European and Asian manufacturers. This shift includes introducing models with advanced technology, improved safety standards, and eco-friendly options to meet stringent EU regulations.

Overcoming Past Challenges

Previous entries into the European market faced hurdles related to brand recognition and consumer trust. This time, Greatwall is investing in localized marketing campaigns and partnerships to build credibility. By addressing feedback from earlier launches, the company aims to demonstrate reliability and quality, key factors for success in this competitive region.

Future Prospects and Market Impact

If successful, Greatwall’s strategy could reshape the landscape for Chinese automakers in Europe. The emphasis on SUVs aligns with current market trends, potentially opening doors for increased market share. However, the company must navigate economic uncertainties and evolving consumer demands to achieve long-term growth.

Is coolant leaking from the bottom of the car

A coolant leak is an undesirable situation that can haunt you. Maintaining a proper coolant level becomes essential when it comes to keeping your engine cool. That’s why it becomes crucial to detect and repair a coolant leak as quickly as possible.

If a coolant leak from the bottom of the car is a situation you are currently facing, a complete read would be beneficial.

Coolant Leak from the Bottom of the Car: The 3 Main Locations to Check

When your coolant level starts to drop, you initially won’t notice any change. As soon as the coolant levels become too low, the engine gradually begins to overheat.

It’s the car components that then start to be prone to damage. That’s why repairing an antifreeze leak is a task you cannot ignore.

1. Hoses

A car’s cooling system has at least four hoses, or rightfully, the fluid hoses. The hoses are installed in such a way that they carry the coolant back and forth to the radiator.

Over time or due to immense heat, it can happen that these hoses crack. Cracks can further lead to the development of leak points.

When coolant is leaking from the bottom of the car, it could be due to worn hoses. Visit a mechanic for hose and fitting replacement so that proper coolant levels can be maintained.

2. The Radiator Cap

A bad radiator cap is another thing to look for when you notice a coolant leak from the bottom of the car.

Whenever the coolant heated up, it would overflow from the radiator end. The radiator operates on the principle of pressure, and this pressure is stabilized using a cap.

When the cap is not properly fitted, pressure will not build up, leading to a loss of coolant.

Detecting the reason why coolant is leaking from the bottom of the car (Photo: bukalapak)

Pressure needs to be checked when diagnosing the reason for the leak. You can do this either by going through the car’s user manual or by visiting an automotive expert. You can also refer to the maintenance tips, to know the symptoms of a faulty radiator cap.

3. The Blown Head Gasket

The head gasket is part of the internal combustion engine. One of the functions the head gasket is equipped with is to resist any coolant leakage.

Due to the large surface area of head gaskets and their exposure to temperature variations, they can develop leaks. If the car’s coolant is leaking from the exhaust or intake manifold, a blown head gasket could be the cause.

It’s important to know that addressing head gasket leaks should be a priority because they can enlarge over time. You should check your car’s engine temperature gauge to verify the issue. If you notice the temperature rising abnormally, a blown head gasket could be the cause of a car coolant leak.

Fixing the Coolant Leak from the Bottom of the Car Problem (Photo: anpadeh)

How to Fix a Coolant Leak: A Detailed Guide

We’ve just discovered several major reasons why coolant is leaking from the bottom of the car. To effectively solve and prevent such things from happening, you can follow our following guides detailing each step.

Here is everything you will need to ensure you won’t injure yourself, lose a finger while working on your car, and keep your skin, pants, and shirt clean.

  • Mechanic gloves
  • Safety glasses

Thus, the supplies you will need to fix a coolant or antifreeze leak are listed below.

Tools

  • Screwdriver
  • Wrenches
  • Tin snips
  • Container/bucket for used antifreeze/coolant

Car Parts

  • Coolant/Antifreeze
  • Hose clamp
  • Heater hoses
  • Radiator
  • Duct tape
  • Updated thermostat

By arranging your equipment and supplies so that everything is within reach, you might avoid wasting time waiting for your handy child or four-legged assistant to bring you the sandpaper or blowtorch.

Repairing or Replacing Hose Clamps

Hose clamps, tiny metal rings equipped with a screw or another mechanism to tighten them firmly, are used to secure hoses on an automobile.

Furthermore, hose clamps can break as the automobile ages or is used in an area where rust is practically guaranteed by the annual application of de-icing salt. When they do, follow these steps to replace them.

  • Let the car cool down for about 10 minutes
  • For five to ten minutes, let the automobile sit and cool.
  • Open the hood, then remove the radiator cap.
  • If the worn or damaged hose clamp is still present, look for it.
Replacing hose clamps to solve your antifreeze leak problem. (Photo: YourMechanic)
  • You may need to remove some coolant or antifreeze depending on the location of the hose clamp. Drain as much fluid as necessary to reach the hose and clamp by placing the bucket under the hose.
  • If you can, unscrew the broken or obsolete hose clamp; you may also need to cut it.
  • Attach the new hose clamp to the freed hose.
  • Reduce the tension of the hose clamp.
  • Tighten the radiator cap after adding fresh fluid to the radiator.
  • The automobile must be started and allowed to reach operating temperature. You can now check for leaks in the new clamp. You’re done if everything seems fine!

Replacing the Radiator Hose

The rubber and plastic tubes that supply the engine with essential fluids can crack, break, and burst as the car ages.

You will likely see a few drops of coolant hitting the ground, but they could quickly turn into a deluge. When that happens, you will need to swap them out.

  • For 5 to 10 minutes, let the car sit and cool.
  • Open the hood, then remove the radiator cap.
  • Find the hose that is broken.
  • You may need to drain some coolant or antifreeze depending on where the hose is located. Drain any necessary fluid to reach the hose into the bucket, which should be placed under the hose.
  • The hose clamps on each side of the hose must be unscrewed. Examine the clamps to see if they need to be replaced.
  • Both hose clamps must be slid onto the new hose and placed on each side at their proper location.
  • Both hose clamps must be tightened.
  • Tighten the radiator cap after adding fresh fluid to the radiator.
  • The automobile must be started and allowed to reach operating temperature. The new hose can now be checked for leaks. You’re done if everything seems fine!
The rubber and plastic tubes that supply the engine with essential fluids can crack. (Photo: Holt Lloyd)

Replacing a Radiator

You will need to consult your handy and probably dusty owner’s manual to know exactly how to repair your particular radiator, as different vehicle manufacturers have different radiator mounts and mounting positions.

  • Let the car sit and cool for 5 to 10 minutes
  • Locate your radiator by lifting the hood.
  • Disconnect the battery
  • By loosening the hose clamp near the base of the radiator or removing the drain plug, you can drain the remaining coolant from the radiator into a bucket.
  • Once the radiator is drained, cut the hoses connecting it to the rest of the engine.
  • Remove the obsolete thermostat.
  • Cover the openings with duct tape to cover the holes.
  • You will need to detach any fans attached to the radiator in some cars.
  • Remove the lower nuts and bolts of the bracket holding the blown radiator in place after locating it.
  • Remove the upper nuts and bolts that hold the top of the radiator in place while supporting it in place.
  • From the old radiator, remove the fan bracket.
  • On the new radiator, attach the fan bracket.
  • Reinstall the bolts after installing the new radiator.
  • Reinstall the fans.
  • The old thermostat was stuck to the hose, so remove it and install the new one.
  • Each hose must be reconnected to the new radiator.
  • Add fluid to the new radiator.
  • Reconnect the battery.
  • While the radiator cap is still removed, start the vehicle. As the car circulates the fresh fluid through the engine and radiator, you will likely need to squeeze and release the hoses to remove trapped air bubbles.
  • Once the bubbles are gone, check for any potential leaks and take the vehicle for a test drive. Since the fluid can become very hot to the touch, be careful.

You succeed if everything seems to be in order and your car’s temperature remains stable.

Watch this video by Scotty Kilmer for a more visual guide on how to replace a radiator in cars!

https://youtube.com/watch?v=dV4iNwjLav4%3Ffeature%3Doembed

Antifreeze Leak FAQ

  1. How dangerous is a car coolant leak?

While you are driving, coolant (also called antifreeze) is pumped into your car’s engine, absorbing extra heat and exchanging it with the ambient air. Therefore, an antifreeze leak could lead to engine overheating, which could severely damage the engine.

  1. Can a coolant leak prevent a car from running?

You might be able to drive for a limited time with a radiator leak, depending on the source of the leak.

Your car will eventually overheat due to the lack of coolant, which could damage many components in the engine bay.

So it’s a good idea to pull over and assess the problem as soon as you become aware of it.

  1. Is fixing a coolant leak expensive?

Radiator leak repairs typically cost between $125 and $600, with an average cost of $340. The type of repair needed, the type of radiator you have, and the materials required will all affect your final cost.

Conclusion

Whenever you notice a coolant leak from the bottom of the car, do not ignore the problem. Always stay aware of what is happening to your car. The way you maintain your car today determines its long-term lifespan.

Omoda 4: Chery’s Dual-Power Crossover for Europe

Omoda 4: Chery’s European Game Changer

The automotive landscape is witnessing a significant shift with the introduction of the Omoda 4, Chery’s strategic entry into the European market. This compact crossover arrives with a unique dual-power approach, offering both hybrid and fully electric variants to cater to diverse consumer preferences and regional infrastructure differences.

Design and Styling

Sporting a bold and contemporary design, the Omoda 4 features a large, imposing grille and sleek LED lighting signatures. Its coupe-like roofline and muscular wheel arches give it a dynamic stance that aligns with current European tastes. The overall aesthetic is clean and modern, aiming to compete directly with established compact SUVs in the region.

Powertrain Options

A key strength of the Omoda 4 is its flexible propulsion strategy. The electric version promises a competitive range suitable for daily commuting and longer journeys, addressing range anxiety concerns. Simultaneously, the hybrid model combines an internal combustion engine with electric assistance to optimize fuel efficiency and reduce emissions, providing a practical solution for areas with developing charging networks.

Technology and Interior

Inside, the cabin is expected to feature a driver-centric layout with a large digital instrument cluster and a central touchscreen infotainment system. Advanced driver-assistance systems are anticipated to be standard, focusing on safety and convenience. The use of quality materials and thoughtful ergonomics aims to deliver a premium feel that challenges segment norms.

Market Positioning and Impact

The Omoda 4 represents more than just a new model; it’s a statement of intent from Chery. By launching with two powertrains, the brand demonstrates a deep understanding of the transitional phase in the European auto industry. This vehicle is positioned to attract environmentally conscious buyers and those seeking modern, tech-laden transportation without compromising on style or practicality.

How to clean the intake manifold without removing it

Over time, grime and other carbon deposits cover various car components. One such part in this category includes an intake manifold. If the name makes you think, get clear answers from experts indicating the purpose and procedure for cleaning the intake manifold.

What is the purpose of the intake manifold?

The main function of the intake manifold is to evenly distribute the air and fuel combustion mixture to all cylinder intake ports of the engine.

Indeed, it acts as a combustion area for fuel and air, to optimize engine performance and efficiency.

In the event that carbon builds up inside this intake manifold, the fuel/air ratio will become unbalanced, leading to increased fuel consumption, air pollution, and power loss.

Therefore, if the intake manifold is not functioning correctly, it must be cleaned immediately.

Systematic procedure for cleaning the intake manifold

To your great surprise, the intake manifold can be cleaned without the help of a professional (only if the person is comfortable and confident, just do it).

And, in this regard, here are some simple steps, explaining how to clean an intake manifold without removing it from the car.

Tips and Warnings

Park the vehicle in a ventilated space to avoid suffocation caused by exhaust gases.

1. Prepare the necessary tools

Powerful Foaming Cleaner – This intake manifold cleaner is specially designed to safely remove grime, gum, varnish, and other carbon deposits in the throttle body and intake manifold.

There are certain intake manifold cleaning techniques you need to know. (Photo: Cleaner)

Clean Microfiber Cloth – Necessary to remove excess liquid from the car engine.

(Household) Gloves – To protect your hands from engine heat and harmful chemicals.

Basic Mechanical Tools – Such as wrenches and screwdrivers for removing hoses/tubes.

2. Detach the throttle body and air intake duct

Here, disconnecting the throttle body does not mean removing it from the car engine. Rather, it is the separation of the throttle body from the air intake tube.

Point to remember: During this action, keep the engine off.

3. Clean the throttle body

Next, spray the powerful foam onto the throttle body and then wipe off the excess liquid on its plate using the cotton cloth. Finally, reattach the air intake tube to the throttle body.

4. Wipe the dirt from the intake manifold

Like the throttle body, the vacuum hose is also first detached from the intake manifold. This step in today’s how to clean an intake manifold tutorial is necessary for spraying powerful foam into the intake line.

Then, let the sprayed foam settle inside the line for five minutes. Then, reconnect the intake manifold to the vacuum hose.

During this process, spray the foam when the engine is at high idle and let the engine be off when the sprayed foam stabilizes.

Spray the foam when the engine is at high idle and let the engine be off. (Photo: Worm Bait)

Overall, this systematic process of cleaning an intake manifold, if performed successfully, will surely make the engine run at its peak performance.

FAQ on Intake Manifold Cleaning

  1. Is it safe to clean the intake manifold?

The most crucial reason to regularly clean your intake manifold is to avoid damaging the engine.

Even the smallest particles can cause damage to your components, making repair difficult. The simplest method to avoid this is to keep your intake manifold and filters clean at all times.

  1. How to clean aluminum intake manifolds?

Aluminum intake manifolds were particularly popular on earlier automobiles because they were much lighter than cast iron manifolds and performed significantly better in terms of heat dissipation.

Cast aluminum, on the other hand, attracts oil and dirt like no other metal, and cleaning it can be a headache if you want it to shine like before.

To clean an aluminum intake manifold, you must first remove it, then choose your degreaser and brush. Once everything is in place, all that’s left is to soak, scrub, rinse, and repeat until the manifold is clean enough.

Here is a more detailed tutorial for cleaning aluminum intake manifolds:

  • Soak the intake manifold with water

We have already explained how to remove an intake manifold and prepare it for cleaning, so now it’s time to soak it.

Spray the manifold with the degreaser of your choice from our selection and let it sit for about five minutes. If you are using brake cleaner or oven cleaner, increase the time to one to two minutes.

  • Brush the intake manifold

After the manifold has sat for a while, brush it to remove hard particles or oil stains that have risen to the surface. Be careful to get into all the ridges and wrinkles and use small brushes or Scotch Brite pads, depending on what you are using.

  • Clean the manifold

After properly brushing the entire intake manifold, rinse it with water to see what it looks like. If you still see stains, repeat this step as many times as necessary.

It’s also a good idea to experiment with new brushes and cleaning solutions if the tools you are currently using are not working.

Aluminum intake manifolds were particularly popular on earlier automobiles. (Photo: Thecraig909)
  1. Is cleaning the intake manifold beneficial for car performance?

Removing carbon deposits, oil, and debris during intake manifold cleaning can help your engine receive the correct amount of air and fuel, resulting in increased power and acceleration and making it easier to handle difficult terrain.

  1. Can carburetor cleaner be sprayed into the intake manifold?

Spraying carburetor cleaner into the air intake can cause irreversible damage, so only use it in areas where inhalation is safe.

Your car will appreciate you taking the time to ensure you use these tools appropriately. Avoid shortcuts and let your automobile breathe freely again.

  1. What is the best cleaner for an aluminum intake manifold?

The best cleaners, degreasers, and solvents we discussed include brake cleaner, oven cleaner, and Purple Power, with Purple Power beating the others only because it is inexpensive and specially designed.

However, there are other excellent cleaners, such as OxiSolv.

  1. Is it possible to polish an intake manifold?

You can use successively finer polishing cones to polish the inside of the intake manifold. Finish with a 120 to 180 grit flap wheel to polish. Consider the benefits of using a longer rod to reach deeper into the manifold.

  1. How often should you perform intake cleaning?

It is recommended to clean your intake valves every 30,000 to 40,000 miles. If you detect signs such as poor acceleration, black smoke from the exhaust, or rough idle, you should inspect the valves.

You should also regularly inspect your intake manifold; if it is dusty, the valves are probably dirty too.

Watch this video by Adorian E Bismarck to learn more about a simple way to clean dirty objects or carbon buildup on the intake manifold (not for plastic ones).

https://youtube.com/watch?v=xIijYgvxW0g%3Ffeature%3Doembed

Conclusion

All engines lose some of their power over time, and dirty internal components and carbon buildup are two of the main culprits. One of the first things to do if you want your car to run as well as when it was new is to clean and maintain it properly.

Fortunately, assuming there are no significant carbon deposits, it is a rather simple task. In this situation, your only option is to remove the intake manifold along with possibly additional components such as the exhaust manifold and EGR valve.

The servo brake: how it works in the braking system

In terms of functionality, a brake booster does the same thing for a braking mechanism as power steering does for steering. The recent addition to automotive braking systems is designed to improve braking performance and safety.

With a brake booster, the driver does not need to apply excessive force to the brake pedal when stopping the car.

Definition of Brake Booster

Crucial for vehicle functionality and passenger safety, a brake booster resembles a circular black canister.

It works with the master cylinder to provide higher pressure to the brakes, thereby reducing the amount of pedal pressure required for braking.

The device is located at the rear of the engine block, specifically between the pedal and the master cylinder. It uses vacuum to balance the high fluid pressure in a vehicle’s braking system, thus facilitating effective braking.

A brake booster resembles a circular black canister. (Photo: Brake Booster)

Brake Booster: How It Works

Brake boosters are available with two different diaphragms: single (for small vehicles) and tandem (for larger cars and trucks). They work by multiplying the force applied to the brake pedal.

When the driver presses the brake pedal, a fluid transmits this pressure to the brakes. However, even this force is not sufficient to stop the car. Thus, the brake booster multiplies this force to 2 to 4 times the size of the diaphragm.

When the brake pedal receives pressure from the driver, a shaft attached to the brake booster moves forward, pushing a piston towards the master brake cylinder. As a result, the brake fluid flows through the braking system.

The brake booster, on the contrary, imparts increased force to the pedal by using engine vacuum, thereby counterbalancing the high pressure of the braking system.

Brake boosters are available with two different diaphragms. (Photo: Autovantage Service Center)

When the fluid reaches the wheels after passing through the brake cylinder, it squeezes the brake disc pads, thereby slowing the vehicle. The friction force involves transferring energy from the brakes to the tires, and then to the road.

The Advantages of Using Brake Boosters

The main function of brake boosters is to increase the power applied to the pedal. You would need to apply enormous pressure to slow down and stop your car if there is no brake booster.

Therefore, it is a blessing for people who are not physically strong or who have to drive a lot because they no longer need to struggle with the brake pedal.

Furthermore, easy braking with just a small pressure on the pedal reduces the risk of an accident.

Signs of a Bad Brake Booster

Installing a booster improves your vehicle’s safety; but, like any other vehicle component, it can wear out and deteriorate over time.

Therefore, it is essential to be aware of the indications and symptoms of a failing brake booster to ensure prompt diagnosis and repair.

Installing a booster improves your vehicle’s safety, but be aware of its issues. (Photo: Cash Car Buyers)

Here are some frequent indications that something is wrong with your brakes. Remember that driving with a defective brake booster system can cause your car to accelerate uncontrollably and cause an accident.

  • The brake pedal is hard to press. This frequently occurs when the vacuum decreases over time. Schedule an appointment for maintenance as soon as you notice this problem, as it can reduce your vehicle’s braking capability.
  • You notice that the braking distance has increased. This could be due to the suction of air bubbles entering through the master cylinder. Again, this reduces your booster’s braking capability.
  • You notice that the brake pedal is a bit higher than normal. This could imply that it has been pushed out by the vacuum. This could cause problems while driving.
  • The engine stalls and emits a hissing sound. This is when the vacuum starts to “leak” or escape.

How Much Does It Cost to Replace a Brake Booster

You may now be wondering how much it costs to exchange or replace brake boosters when they fail. Brake booster replacement typically costs between $300 and $750. Given that parts prices range from $160 to $550, labor costs vary from $140 to $170.

Other factors that influence the cost include the make and model of your automobile, as well as the type of damage to your system.

Modern cars are often equipped with complex braking systems. It is quite difficult to detect faulty brake boosters with these systems. Furthermore, if you have faulty brake boosters on a modern car, the repair costs are sometimes significantly higher.

Brake booster replacement typically costs between $300 and $750. (Photo: Vintage Mustang Forums)

Before choosing a mechanic to go with, you should always evaluate multiple alternatives. This gives you the opportunity to select the one that best suits your scenario.

You want to find someone who will do a good job while respecting your budget. Pricing all your alternatives can help you assess the pros and cons of each shop.

Brake Booster FAQ

  1. Why are brake boosters installed in contemporary vehicles?

Most current automobiles are equipped with disc brakes, especially on the front wheels, which requires power brakes and, consequently, a brake booster to amplify the braking force.

Brake boosters are used in vehicles equipped with drum brake systems as well as in cars equipped with disc brakes to provide uncompromising safety.

  1. What are the different types of brake boosters?

There are different types of brake boosters today. The most common are the dual-piston master cylinder, vacuum brakes, dual-diaphragm vacuum brakes, hydro-boost brakes, and electric hydro-boost brakes.

  1. What is the most popular type of brake booster?

Engine vacuum is the most widespread form of brake booster. Hydraulic boosters, on the other hand, are available. They utilize the fluid pressure generated by the power steering pump. Some cars also use an electric brake booster.

  1. Is a larger brake booster better?

Remember that if you have a disc brake system, use the largest brake booster with the most diaphragms possible to provide maximum assistance.

If you own a car with drum brakes, be very particular with your options and opt for the smaller side so that the car remains comfortable to drive.

If you own a car with drum brakes, be very particular with your booster options. (Photo: Race Junky)
  1. How long does it take for a brake booster to wear out?

Generally, the hydraulic brake booster will last longer than your vehicle. Several factors can damage the booster and require replacement.

  1. Is it possible for a brake booster to cause a spongy pedal?

Your brake booster gives your braking system the power it needs to activate your brakes. When your booster fails, your brakes may not activate even when you press the pedal, making the pedal soft or spongy.

Tesla Model Y Battery Preconditioning Efficiency

How Tesla Model Y Battery Preconditioning Works

Tesla Model Y’s intelligent battery preconditioning system automatically prepares the battery pack for optimal charging sessions. When a driver inputs a Supercharger destination into the navigation system, the vehicle begins strategically warming the battery to its ideal temperature range. This thermal management process occurs during the drive to the charging station, using waste heat from the powertrain when possible to maximize energy efficiency.

The Science Behind Optimal Charging Temperatures

Lithium-ion batteries operate most efficiently within specific temperature parameters. Cold batteries exhibit higher internal resistance, which significantly slows charging speeds and can reduce overall battery longevity. By pre-warming the battery to approximately 20-40°C before DC fast charging, Tesla’s system reduces internal resistance, allowing electrons to flow more freely and enabling the battery to accept higher charging rates immediately upon connection.

Real-World Performance Benefits

The practical advantages of proper battery preconditioning are substantial. Tesla Model Y owners typically experience charging sessions that begin at peak power levels rather than gradually ramping up. This translates to significantly reduced charging times, particularly in colder climates where temperature differentials are more pronounced. The system’s predictive nature means drivers don’t need to manually activate preconditioning – it seamlessly integrates with the navigation route planning.

Long-Term Battery Health Implications

Beyond immediate charging speed improvements, proper thermal management contributes to sustained battery health over the vehicle’s lifetime. By maintaining optimal temperature conditions during high-power charging events, the system minimizes stress on battery cells. This careful thermal regulation helps preserve capacity and extends the overall service life of the battery pack, protecting one of the vehicle’s most valuable components.

Energy Efficiency Considerations

While preconditioning consumes additional energy, Tesla’s system is designed to minimize this impact. The vehicle primarily utilizes waste heat from operational systems and times the warming process to complete just as the vehicle arrives at the charger. This intelligent approach ensures that the energy invested in preconditioning delivers substantial returns through dramatically improved charging efficiency.