
So you want to get rid of your old R12 AC system and be able to fill it with R134A?
Due to R12 gas regulations, this is a fairly common change.
But is it possible to convert it directly and do you need to replace parts?
In this article, we will go through the conversion from R12 to R134A and learn a bit more about the specific systems. First, we will review some standard information.
R12 Information
R12 to R134A Conversion
R12 was the most commonly used refrigerant of all time and it was used for many applications. The technical or chemical name for R12 is dichlorodifluoromethane. CCl2F2 is its formula, which contains the chemicals that make it up. According to its technical data, the weight per molecule of R12 is about 121 with a boiling point of -21.6 degrees Fahrenheit.
The molecules inside R12 are made of fluorine and chlorine, which is why it is called chlorofluorocarbon, or CFC, a very common abbreviation in the 1990s and before.
Due to the versatile nature of R12, it quickly became a refrigerant used in air conditioners, refrigerators, and freezers. This refrigerant is used in household appliances because its properties are relatively safe.
This refrigerant was neither flammable nor toxic. There was also no risk of the refrigerant exploding, which is why it was widely used in refrigeration-related appliances without posing a risk to the environment or people. Additionally, R12 is an extremely stable compound and remains intact even under extreme pressures and operating situations. The only problem with R12 was that it would break down upon contact with a flame or fire and become toxic to inhale. People were advised to quickly turn off all stoves and flame sources in case of a leak and open all windows so that all toxic gas could spread into the atmosphere.
Shortly after research and studies, scientists concluded that R12, a CFC gas, was harmful to the ozone layer and thus damaging it, which is why alternatives to R12 were chosen. One alternative to R12 refrigerant is R134A.
R134A as a Replacement for R12
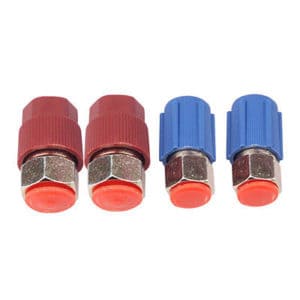
R12 to R134 Adapters
Soon, R12 was banned in many places. As a result, they were replaced by other refrigerant gases, including R134A. Unlike R12, R134A contains hydrogen and fluorine molecules, which is why it is also called HFC and not CFC. The use of R134A avoided damaging the ozone layer. The R134A refrigerant is called tetrafluoroethane and is classified as one of the HFC gases among other refrigerant variants.
Today, R134A is commonly used in vehicle air conditioning systems, but it can also be used in refrigerators, freezers, and other refrigeration equipment similar to R12. R134A is sometimes also used to cool overloaded computer systems. Although R134A does not damage the Earth’s ozone layer like its predecessor R12, it is still not considered the safest refrigerant. Many organizations believe that R134A contributes to global warming. Vehicles manufactured before 1994 used R12 for air conditioning. Vehicles prior to 1994 began using R134A instead of R12.
What if you have a car made in 1994 or even before? Well, if you have such an old car, you have two options. Buy R12 gas from an online supplier or in a store, or modify your car’s air conditioning system to use R134A refrigerant. If you choose to keep the original and decide to buy R12, it will cost you more than expected.
Fortunately, we are here to show you how a successful renovation can be done without spending too much money, to equip your car with the safer R134A.
R12 to R134A Conversion
AC Compressor
There are two ways to convert your vehicle’s air conditioning to R134A gas. One is the factory method, where you would need to replace the AC parts, and the other is to modify the existing components to use R134A. The second option may be cheaper, but it is better to opt for the first one, because as your car is already aging, most of the existing parts are probably about to be out of service.
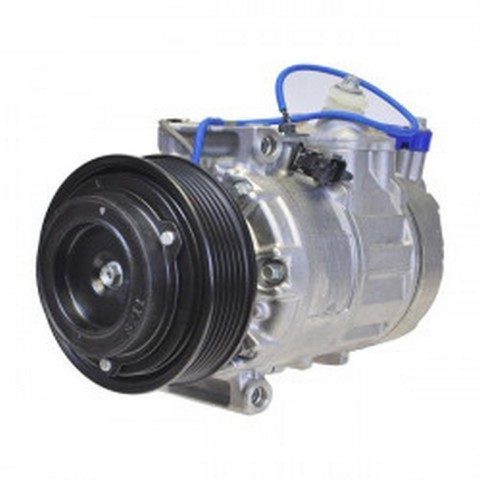
Now, with the conversion, you have two options, and which one you choose is entirely up to you. You can either replace your old compressor and get a new one, or use your old compressor and fill it with R134A. But it’s not that simple, because R134A operates at a higher pressure because its molecules are smaller than R12. Simply filling your compressor with R134A would make your compressor work harder due to the higher pressure and eventually create a leak to seal. But that’s the second thing to worry about. The first thing is to know if your factory compressor is powerful enough to work properly with the new R134A.
If you think your factory compressor is no longer working properly, you should buy a new compressor. However, if your compressor still has the capacity, you will need new parts such as hoses and switches compatible with R134A refrigerant.
Check your compressor model and you will find some characters on the compressor label. If you own one of the following compressors, you will need to replace your compressor:
Replace Harrison DA6 with an HR-6, HD-6, or HR-6HE compressor.
Replace Ford FX-15 with an FS-10 compressor.
Parts needed for the conversion:
- Compatible AC compressor
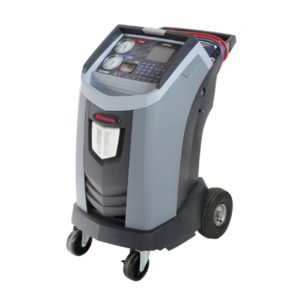
- AC flush kit / AC service unit
- Green O-rings for R134A
- R134A port adapters
- R134a high and low pressure switches
- R134A compatible accumulator drier
- Orifice tube
- New R134A compatible hoses (if the vehicle is older than 1990)
- R134A retrofit label
R12 to R134a Conversion Steps
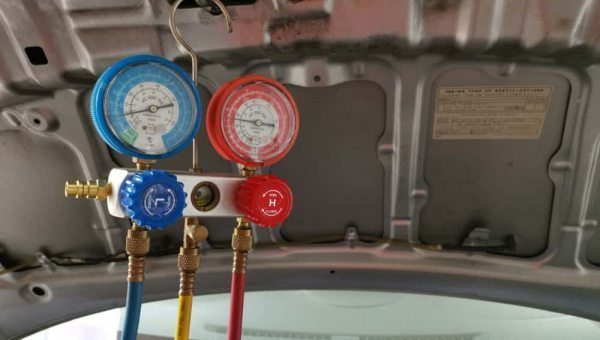
The first step is to first ensure that the AC system is empty. Discharge it and make sure to recycle it properly.
Ensure your AC compressor is in good condition, otherwise replace it.
Flush your current system completely of R12 without leaving any trace of R12. Instead of simply letting the gas out into the atmosphere, flush and recover the R12 for recycling purposes with a machine. Let a workshop do this for you if you don’t have one.
- Next, flush the condenser for traces of R12 with the flush kit.
- Flush the AC lines and hoses.
- Flush and replace the compressor oil according to the compressor specifications.
- Replace the factory pressure switches (low and high pressure switches)
- Replace the accumulator drier
- Replace the orifice tube and hoses.
- Replace the old O-rings with new ones.
- Fill the compressor with R134A and oil
- Attach the R134A retrofit label
And that’s it. If there is no leak in your system, you are ready to go. But it is better to check for leaks during and immediately after filling the system to save time and money.