Brake lights use a switch to indicate whether the lights are on or off. This brake light switch is connected to the brake pedal. It completes the circuit when you press the brake. Sometimes, brake lights do not turn off due to a circuit error or other reasons.
The reasons can range from a circuit failure to a malfunctioning brake pedal. There is a piston-style button that completes the circuit. Pressing the brake switch causes the circuit to open and the lights to turn on.
Learn more about the topic below.
How Do Car Brake Lights Work?
Your braking system, which includes your brake lights, consists of the brake pedal, the striker, the brake light switch, the lights, fuses, and wiring. When you press the brake pedal, it makes contact with the associated brake light switch, allowing the brake lights to illuminate.
The electrical components use this switch to alert your brake lights when the pedal is depressed. When you release the brake pedal, the striker disengages the brake light switch, which turns off the brake lights.
While this is a simple explanation of how brake lights work, damage to the striker or the brake light switch can lead to brake light issues.
Why Don’t Car Brake Lights Turn Off After Turning Off the Ignition?
It is necessary to diagnose the brake switch or pedal issue to fix it properly. You can check the brake pedal rod to find the switch. Or entrusting the car to an expert mechanic would also be a wise decision.
Pressing and depressing the brake pedal several times can help connect the switch and the tail lights. There is a rubber plug that pushes the piston-style button. You may need to replace the rubber plug if it is not functioning correctly.
Here are the reasons why brake lights do not turn off even when the car is off.
The Brake Switch Is Not Working
Brake lights do not turn off if the switch is stuck or not working properly. You may need to adjust or replace the brake switch to resolve the issue.
The automobile’s battery begins to drain if the brake lights remain on for a long time. Professionals suggest disconnecting the car battery when facing this problem. Make sure to save the battery’s energy to start the car until the issue is resolved.

According to expert maintenance advice, a stuck brake switch is the most common reason why the lights stay on. You can replace the brake pedal switch to identify the problem.
Diagnosing the brake switch would help discover the main issue. Opt for replacement if the brake switch is faulty.
Stuck Brake Pedal
A stuck brake pedal can be another reason why the brake lights remain on. Brake lights will not turn off if the brake pedal does not properly disengage the switch.
The lights stay on until the connection between the switch and the pedal is active. The rubber plug also has a lot of work to do in this process. It helps to adjust the brake pedal appropriately.
Debris or corrosion between the switch and the pedal can also affect the process. Consulting experts would be great to solve the problem in no time.
Make sure to have your car repaired and maintained by a professional if the problem does not resolve.

Brake Light Switch or Sensor Failure
This is the most obvious cause of your brake lights malfunctioning. When the switch inside the braking system fails, your lights do not turn off. The switches and sensors in a braking system indicate to the lights whether the pedal is up or down.
If one of them is broken, the lights will receive a wrong message. The brake pedal switch is placed near your brake pedal and can be adjusted frequently.
Faulty Brake Pedal Spring
The brake pedal has a spring that allows it to return to its initial position once you release it. This spring could weaken as it ages.
With the pedal not returning to its normal position, the brake lights stay on. Furthermore, your brake pads might remain engaged, leading to increased wear on the pads and rotor.
Electrical System Malfunction
A problem in the electrical system can affect various components, including the brake lights. These faults can cause the lights to stay on, not turn on, or only work intermittently.
This might be the most difficult problem to solve and should not be considered until all other possibilities have been exhausted.
Incorrect Bulbs Installed
This is rare, but it can happen if you have just updated your tail lights or brake lights. There are two types of bulbs, each with one or two circuits.
Installing a single-circuit bulb in a dual-circuit socket can short-circuit the system and cause the brake lights to stay on.
How to Fix Car Brake Lights That Don’t Turn Off
Check Your Previous Projects
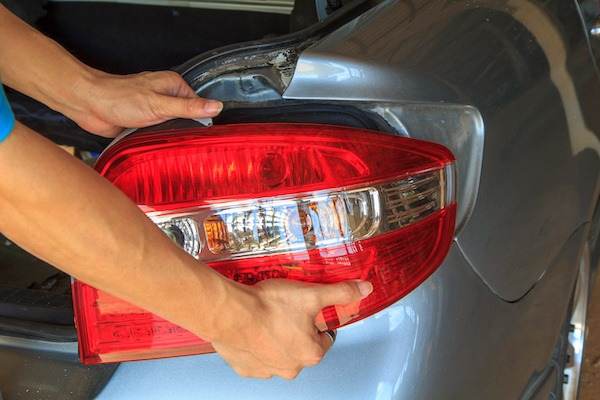
If you have just installed an aftermarket system that requires removing or replacing the tail light assembly, you should go back and recheck your work.
If you have modified any of the wiring, check that it is properly connected according to the aftermarket manufacturer’s instructions.
Check Brake Wiring
Examine the wiring under the tail light and under the dashboard, near the brake light switch. Even if the wire and insulation appear to be in good condition, you might have a wiring issue.
It is also a good idea to check the fuses under the hood and in the cabin. If a fuse is blown, the brake light switch may not function correctly.
You can also consult the manufacturer’s maintenance manual to see which grounds the braking system uses. Check that the grounds are clean, secure, and in working order.
Test a Brake Light Switch
A brake light switch is a very basic mechanism that you can most likely test yourself with a multimeter.
When you press the switch, the circuit should be open, and there should be no continuity. This turns off the brake lights. When the switch is released, there should be no interruption. This activates the brake lights.
After confirming continuity, ensure that the resistance transferred via the switch is correct.
A faulty switch might pass a continuity test but not be able to transmit enough electricity to activate the brake lights. The exact switch specifications should be specified in the OEM maintenance manual.
The wiring diagram is helpful when checking the brake light switch connector. It will tell you which pins to connect to illuminate your brake lights. The manual may offer additional diagnostic advice and information on the system’s expected behavior.

How to Check Brake Light Functionality Properly
There are several techniques to test brake light functionality. Although you might prefer to rely on your sophisticated dashboard to do the job for you, nothing beats experiencing the brake light behavior yourself. Here are some simple methods:
Ask for Help
To test your brake lights, simply ask a friend, family member, neighbor, or passenger to press the brake pedal while you watch or to check the lights while you operate the pedal.
Reflection in a Store Window
When you are not at home, look for a commercial area with parking right in front of a store. The store window can be used as a mirror. Back your automobile into a parking space in front of a store window if traffic and pedestrian flow allow.
Now, check your rearview mirror and apply the brakes. If everything is in order, all brake lights should illuminate. You should also check your rear turn signals and hazard lights.
Repeat with the engine off and the ignition turned off. Note any lights that do not function for later measures. The turn signals will not work if the ignition is off.
Try It with a Garage Door
If you are at home, park your car in the garage and lock the door behind you. If your brake lights reflect on the garage door when you press the brake pedal in a dark garage, you will be able to see through your rearview mirror or side mirrors.
This strategy can also be used in a covered parking lot away from home. Simply back into your parking space and check in your rearview mirror for brake light activation while applying the brakes.
This is also an excellent technique for testing other lighting issues, such as when your tail lights do not turn on.
DIY Tools
If you are at home and do not have access to a garage or assistance, you can build a tool to push and hold down the brake pedal. Here’s how to create one:
- Open the driver’s side door. Press the brake pedal about one inch with your left hand. Measure the distance from the pedal to the front of the driver’s seat. Depending on the seat position, it will be between 18 and 22 inches.
- To achieve this length, cut a 1″ x 2″ finishing board or an old broom handle.
- With this tool, press the pedal and wedge the rear end of the tool against the driver’s seat. The brake lights will now be available for you to inspect. Surprisingly, a basic snow brush is about the right length for this purpose.
Final Thoughts
Your automobile’s brake pedals may require special treatment to stay in good condition. If the brake lights do not turn off even when the ignition is off, make sure to check the brakes as soon as possible.