

Our guide below will show you how to wire a car stereo without a harness in a few clear and easy steps. Roll up your sleeves, you only need the appropriate tools or connectors, and you’re ready to perform.
How to Wire a Car Stereo Without a Harness
If you’re looking for an efficient and persuasive way to wire a car stereo without using a harness, there are several reasons why you might consider doing it this way. Perhaps you’re installing a refreshed stereo in an older car that didn’t come with a factory stereo, or you’re upgrading your audio system and want to add amplifiers or other enhanced accessories. Just like installation knowledge on different parts of the car, knowing how to wire a stereo device quickly and effectively is vital for whatever reason.
Overall, wiring harnesses make installation much simpler, providing all the necessary wires and connectors for the new car stereo. However, if you don’t have a wiring harness, don’t worry, as you can install the new stereo with the necessary instructions.
In general, there are different ways to connect your speakers to your car stereo without using a harness adapter.
Assuming you don’t have an external amplifier in your car audio system and the speakers will be powered by your radio. We will also assume that you haven’t connected a harness to your radio for some reason. Here are several ways to connect your car speakers to the stereo without using a harness.
Get a Spare Harness for Your Car Stereo
Radio harnesses are very affordable and take little time to create. There is a wide variety of radio antenna options available, so you’re sure to find one that fits your needs. In most cases, they are affordable, so there’s no need to worry about spending too much money on them. Additionally, it would greatly facilitate the entire wiring procedure if you decided to upgrade your car stereo in the short term.
In case of upgrading using an existing detached cable, you would need to reconnect all your cables. This would be a problem, and it would be even more difficult if your speakers are from different brands. You can use the methods below to attach a spare harness to your system.
First, you can connect your speakers to your radio using a soldering method. The simple technique is to connect the radio wire to the terminals of each speaker, then use heat shrink tubing to protect the connection. Moreover, this approach is preferred because once the wires are soldered and connected, there will be less room for error and the wiring connections will last longer. With superior quality, you can be sure that the equipment won’t break or fail as quickly as others.
Simply strip one end of each wire, place the heat shrink tubing around the wires, and solder them together. To keep the heat shrink tubing firmly attached to the soldered wire connection, you can use a heating device like a hairdryer.
For a secure connection between your speakers and your radio, you can also use a crimping tool. This simple tool will help you keep your speakers warm or cool, depending on your preference. If you’re looking for a way to join two cables together, terminal connectors are ideal. They are specifically designed to connect two cables, meaning you’ll have a connection that will be durable.
Furthermore, the technique for crimp terminals is the same as for soldering with a soldering iron. With these small clamps and a crimping tool, you can tighten the wire ends very tightly. To avoid potential interference, you will need to cut the speaker wire at both ends and bring them closer together. The cables will be securely fastened with a crimp on both sides.
Wire the Head Unit Harness for a Car Stereo
Assembling a wiring harness for your car stereo is not as complicated as it seems, provided you have the right tools and follow the instructions carefully. With the right tools and materials, it’s easy to accomplish the task. But you must be patient when working with wires and be very careful when handling them.
Getting started is essential if you want to produce the best results. Here are the supplies you need to help you succeed. You will need a wire stripper, a cutter, a soldering iron, and electrical tape to complete this project. You will also need a car stereo in a ventilated enclosure and a high-quality electrical circuit or wiring diagram.
With all the tools and materials you need, you can start assembling the harness. To properly enjoy your stereo later, carefully find the positive and negative wires. These color-coded wires are usually easy to find. After locating the wires, use the wire stripper to remove a small section of the insulation.
Next, you need to solder the wires to the stereo. This will ensure a strong connection and improve sound quality. Make sure to use a strong solder connection so that your project remains secure. When the wires are soldered to the stereo, insulate them with electrical tape.
Finally, to ensure your wiring harness is functioning properly, you will need to test it. To test if the stereo is producing sound, turn it on and listen. If you don’t hear any sound, it may be because the connections between your device and the speakers are not secure. Make sure they are connected and working well. And if the harness is behaving as it should, you can install it in the dashboard area.
Wiring a Car Stereo Without Using a Harness
To effectively wire a car stereo without a harness adapter, you may need a few necessary items:
- Wire stripper
- Electrical tape
- Screwdriver
- Slotted screwdriver
- Torx key
- Pliers
- Knife (optional)
There are a variety of stereo wiring processes depending on the make and model of your car. However, the steps are largely the same, regardless of the vehicle you own.
Step 1. Disconnect the Car Battery
Before working on an electrical system, make sure to disconnect the battery to ensure your safety. This safety act prevents you from damaging the wires and causing a spark.
Step 2. Disconnect the Old Car Stereo
To begin, you need to remove any obstructions that might interfere with the removal process in the form of small panels. If you need to remove a car stereo from your vehicle, first remove the Phillips screws or clips with a screwdriver.
Additionally, if there are other electrical connections connected to the car stereo, make sure to pay close attention to how they are connected and their wiring so you can reconnect them properly later.
Once the trim details and other barriers have temporarily disappeared, you will see 4 bolts holding the car stereo fixed in a designed location. In most cases, the metric bolts that sometimes appear will need a matching wrench or socket to be removed. Then, after removing them, you can easily remove the stereo from the dashboard.
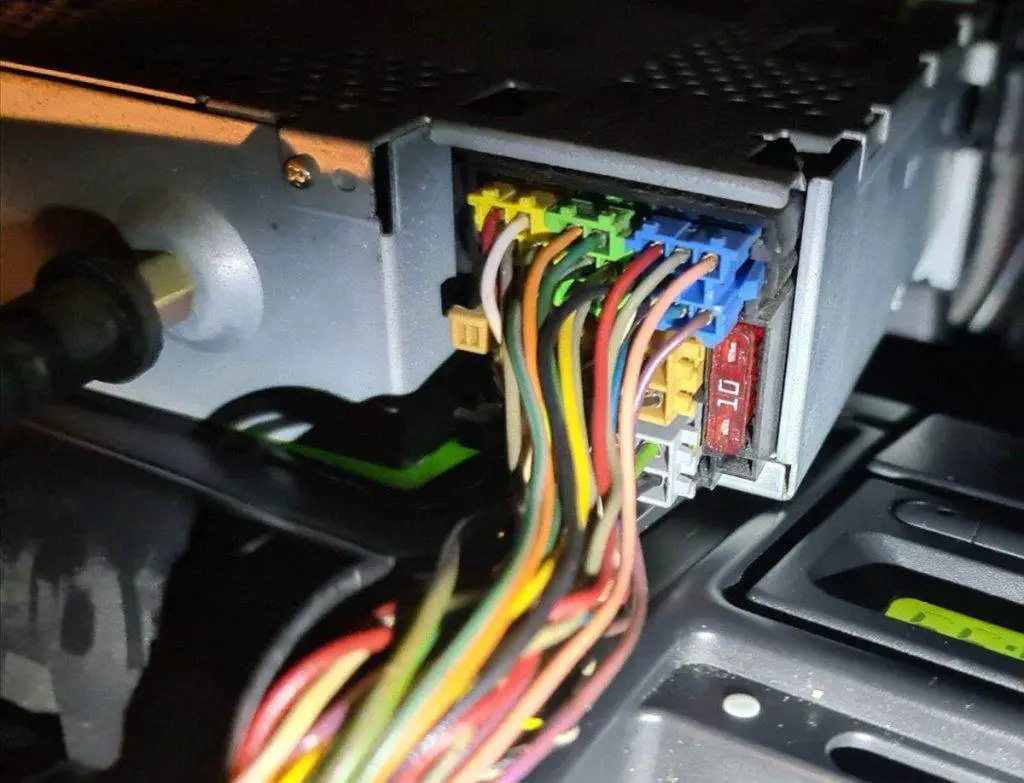
Step 3. Check and Identify the Appropriate Wire Connections
With the old stereo gone, you can now identify the wires that can be connected to your upcoming stereo.
Choosing by matching the correct wire colors for your new car stereo is essential for a quick and efficient installation. Each wire will have specific purposes, and you’ll want to know where each one goes. So it’s best to check the wire color and polarity for a safe and better wiring procedure. We will mention these connections later in this article, so stay tuned.
Step 4. Connect the Appropriate Wires to Your New Stereo
To attach your new stereo to your car, identify the wire colors that match your vehicle. Then, connect these wires to the corresponding wires on your stereo.
When you’re unsure which wires to connect, refer to the original installation guide provided with your new stereo or consult an experienced stereo installer. On the other hand, if you can’t find detailed instructions online or elsewhere, you can probably find them in the vehicle’s user manual.
Step 5. Attach the Power Wire to the Electrical System
Connecting your new corresponding stereo wires to your vehicle’s electrical system will provide better sound quality. Additionally, make sure your cords are well connected. Because if your new stereo is not wired correctly, you risk causing a short circuit or damaging the entire device.
To complete your DIY car stereo installation or any other project requiring the same wiring methods as the speaker and ground, you can always repeat the same steps without worrying about safety and time-consuming issues. Ensure that every wiring connection in the system is secure and won’t deteriorate over time with a simple double-checking step.
Step 6. Establish and Install the New Stereo
Once each wire is connected, you can easily install your new stereo. The manufacturer may know how important it is to have a good stereo in your car, which is why they made it easy for you. Simply push the stereo deep into the dashboard until it clicks, and it will be firmly fixed. Then, make sure the trim and obstacles removed earlier are all attached.
Step 7. Check the New Stereo Again
Before putting everything back in order, test the new stereo to see if it works. Starting the car and turning on the stereo are simple steps to check and quickly enjoy your music. You can see the display lit up while controlling the radio volume and additional functions if everything is working as it should.
If you encounter problems, carefully check your wiring to ensure everything is wired and connected correctly. If you still have issues with your stereo, we recommend testing it again. And once you’re sure your new stereo is working properly, you can put everything back in place in reverse order and enjoy the sound of your new stereo.
Things to Consider When Wiring Your Car Stereo Without a Harness
There are several ways to connect your car speakers to the radio without a harness. The best one for you will be based on your needs. Before starting the installation process, there are a few points you should note.
The Amplifier in the Head Unit
Regardless of the type of audio system you own or the location of the car amplifier, every audio system is based on the same principles. You can find a sound/music source, such as a radio, CD player, or streaming service, to listen to that recording. After that, your prepared equipment must be connected to an amplifier that transforms the low-level signal into a line.
All car stereos come with a preamp, so you won’t have to worry about anything. The signal from it will be amplified and sent through the speakers via an amplifier.
Is a Built-in Amplifier Available?
Your vehicle’s original equipment manufacturer (OEM) radio may include a built-in amplifier, depending on the audio system configuration. This is not uncommon. Thus, you can connect your speakers to the car stereo at any time with convenience. But ultimately, if you’re installing a brand new car stereo, make sure it has an amplifier. Otherwise, you’ll need to get a separate amplifier.
Is There an External Amplifier?
If your audio system has an external amplifier, you will not connect the speakers to the radio. In this situation, using a harness to connect the speakers to the amplifier would be a waste since the speakers can be wired directly to the amplifier terminals.
The factory car audio system may not be up to date, and that’s why an external amplifier is more offered. With ongoing technological advancements, car manufacturers are increasingly integrating external amplifiers into their original systems.
Overall, aftermarket car amplifiers follow a similar process. You can easily connect the RCA outputs of your replacement radio to your amplifier, then plug the speakers into an external amplifier with speaker wires.
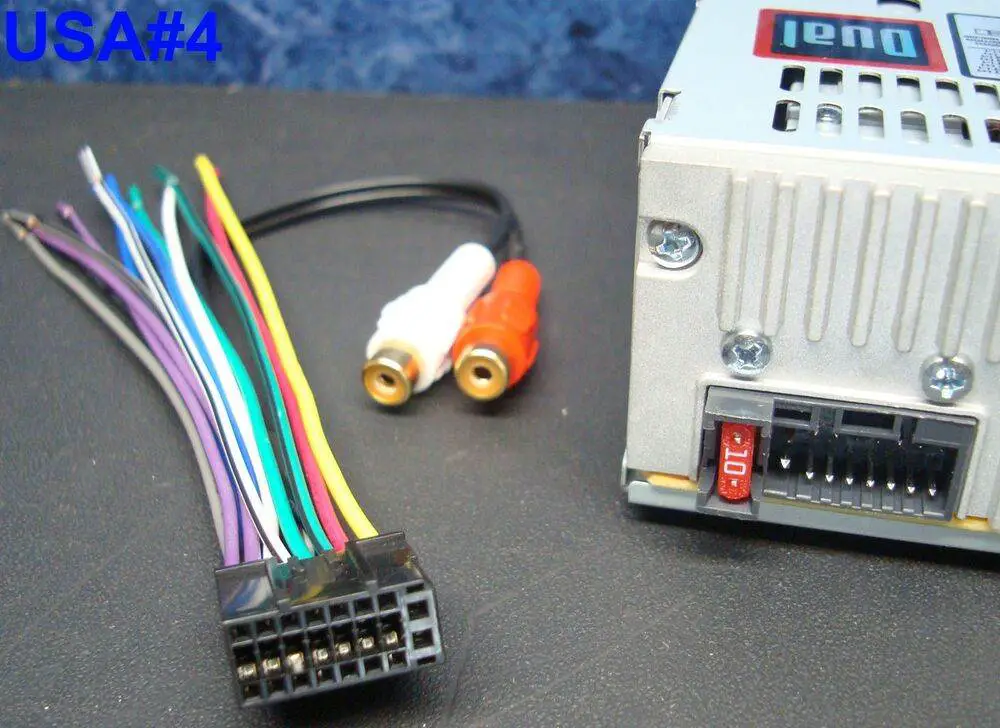
Identify Your Wiring Colors and Connections
A key element of installing a new car stereo is ensuring that the wire colors and characteristics match. Many wires will be in your sight, and it can be a bit complicated to know what each one does, where each one goes, and what its function is.
But don’t worry, the guide below will give you an overall idea of what aftermarket stereo wires mean and their daily functions.
- Red – Right rear speaker anode (+)
- White – Right front speaker +
- Green – Left rear speaker +
- Purple – Left front speaker +
- Gray – Negative ground (-) (cathode ground)
- Yellow – Lighting control/illuminated accessory (I/IIAC or I2ACC or 11 ACC)), constant battery power wire
- Blue – Lighting ground (Light accessory control, Constant battery power)
- Black – Chassis ground, negative audio ground (-)
- Orange – Electric antenna (powers remote amplifier or ANT1 connector)
- Tan or brown – Left rear speaker negative (-), rear speaker negative ground (-), and subwoofer negative ground (-).
- Pink – Left front speaker (+), reverse lights, and brake lights.
Wiring a Car Stereo Without a Harness Troubleshooting Tips
If you’re having trouble getting your car stereo to start after wiring it without a harness, here are some wiring tips, you can take notes today.
- Make sure all your audio components are wired and connected. After all, you can consult the stereo wiring diagram for help with this fluid issue and complete the task more easily.
- If you’re using a replacement car stereo, carefully check that it is compatible with the car’s electrical system. Remember that some car stereos require specialized harness adapters to install them properly.
- Ensure all your connections are secure. Because poorly connected or loose wiring cords can lead to serious unexpected problems.
Recap on How to Wire a Car Stereo Without a Harness
We’ve just gone through the detailed steps on how to wire a car stereo without a harness and a few notes before and during your process. We hope this article gives you an insight to help you a bit with upcoming wiring projects.