Can a faulty ignition switch cause electrical problems

The electrical architecture is the indispensable lifeline of any vehicle. Indeed, all vehicles are essentially electronic in design. Compared to any electronic machine, the quality of its functional installations in its primary compartments, such as the body, chassis, communication protocol, and powertrain, depends solely on electrical parts like cables, sensors, relays, the battery, fuses, to name just a few.

However, the efficiency of the ignition switch is undoubtedly vital in the vehicle because it is responsible for controlling and primarily activating all your car’s electrical systems.

Thus, a malfunction or potential failure of the ignition switch would cause 95% of most electrical problems, or even all of them, in any case. Furthermore, a faulty ignition switch could also stop your engine or cause a complete breakdown while you are driving, thus putting you in a dangerous situation.

Nevertheless, this informative guide will help you with answers and solutions to these specific questions; can you start a car with a faulty ignition switch, what are the common ignition system problems, what are the symptoms of a bad ignition, and more.

Be patient; let’s get started right away!

Can You Start a Car with a Faulty Ignition Switch?

Yes, of course, you can! You would need a jumper cable to restart your vehicle since you have discovered that the ignition switch is faulty. So far, this is done effortlessly if you follow the tips below.

Here is the procedure for you!

  • Open your vehicle’s hood.
  • Locate the ignition coil and the battery.
  • Attach the jumper wire to the positive terminal of your battery, on the positive side of the coil. This process will supply electrical power to the dashboard that would be needed to start the engine.
  • Connect the starter solenoid to the battery’s positive terminal.
  • Disconnect the ignition switch cable from the solenoid.
  • Using a screwdriver, short-circuit the solenoid’s positive terminal to where the ignition switch connects.

Invariably, activating the solenoid will start the car. Furthermore, the steps above are also applied: how to start a car with a bad ignition switch.

What are the Common Ignition System Problems?

Ignition system problems are very annoying and could cause the craziest electrical issues in your vehicle. This device part must be constantly improved, updated, and maintained to ensure your vehicle’s safety. However, I will elaborate below on some common ignition system problems, if things go very wrong.

1. The Car Stalls While Driving

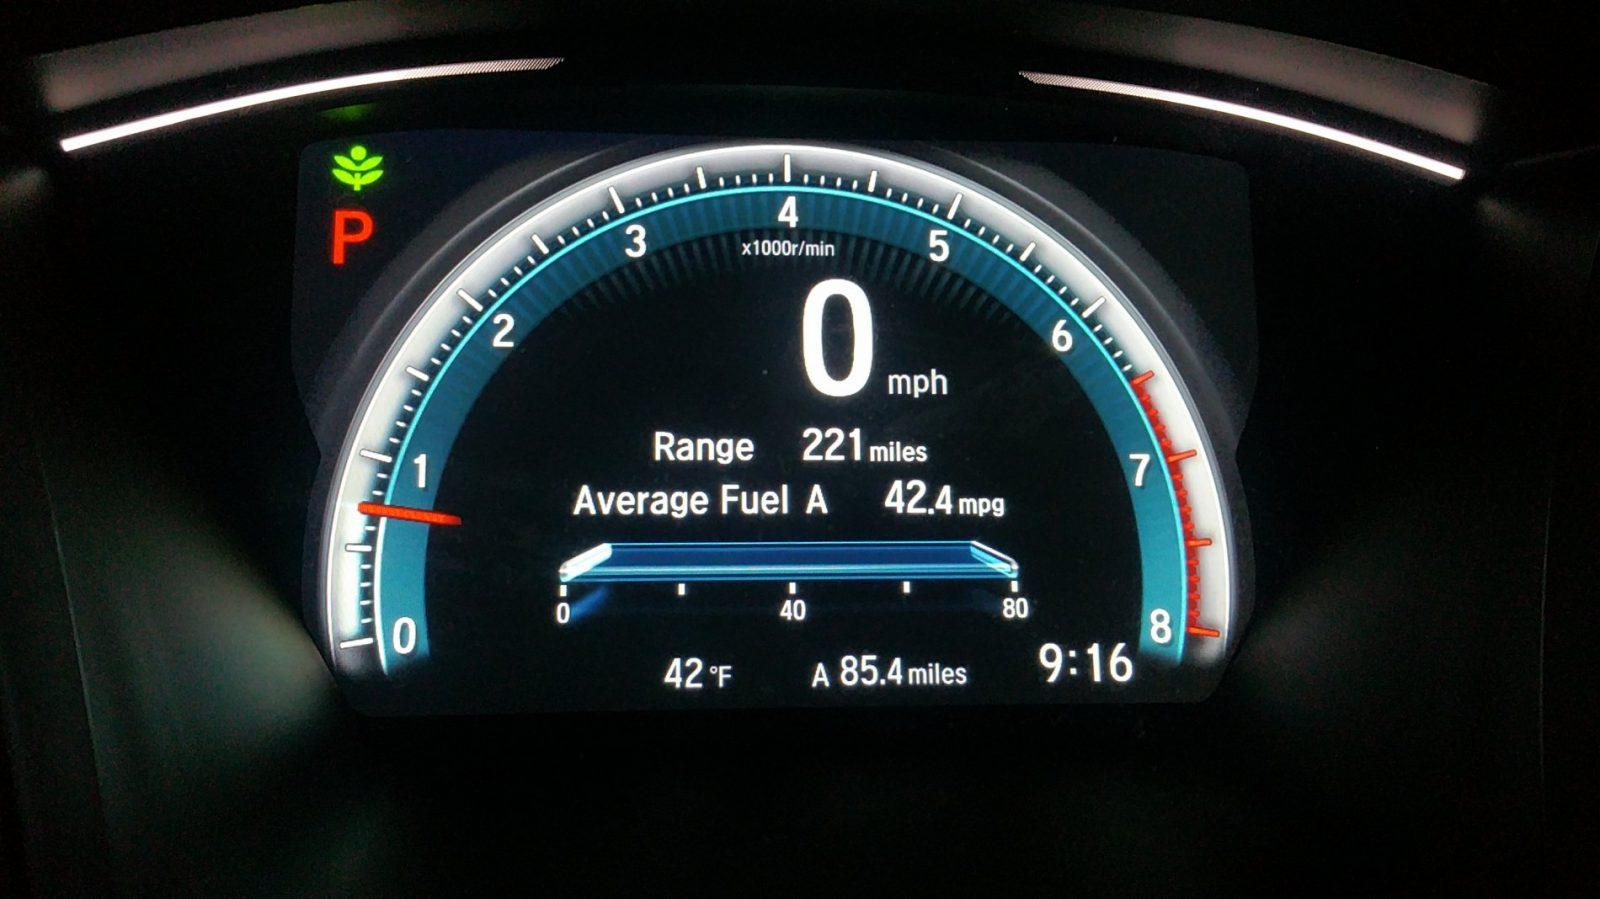
Perhaps if your vehicle stalls or shuts off when it shouldn’t, the cause is a faulty ignition system (switch). At that moment, the dashboard lights go out along with the vehicle’s engine; indeed, there is no doubt that your ignition switch is faulty.

2. Flickering or Flashing Dashboard

Suppose you observe the dashboard lights or other accessories flickering or turning on and off sporadically. You wouldn’t need a mechanic to tell you that your ignition system is terrible, particularly the ignition switch’s connection plate.

3. The Key Doesn’t Engage the Ignition

In a situation where you insert the key and turn the cylinder with the intention of getting to your destination, unfortunately for you, the ignition doesn’t engage. Perhaps you have charged the battery; then it’s the ignition that is at fault.

4. The Car Doesn’t Start

Placing the key in the ignition should make it turn as if it’s always on. So far, it signals the starter to turn the ignition switch.

Ultimately, if the electrical part connecting the circuit when you turned the key is struggling, there is no signal to the starter because it is faulty. The lack of connection at the starter and ignition will not start your vehicle.

Can a Bad Ignition Switch Cause Electrical Problems?

Of course, yes! A bad ignition switch causes electrical problems such as: shortening the vehicle battery’s lifespan (or even completely draining the battery), which could lead to the malfunction of other electrical components like the radio and windshield wipers.

Similarly, a bad ignition switch also causes stumbling situations even at low speed, the engine mastering the brakes because it would cause your vehicle to jerk during hard acceleration, and many others.

How Do I Know If I Need a New Ignition Switch?

As a driver, you must be very sensitive to reacting to changes that have occurred in your vehicle when seeking to know the cause and the solution you would propose. That said, if your car starts having difficulty starting or doesn’t start, a decrease in power at high speed, poor engine performance, reduced acceleration, increased fuel consumption, complex freewheeling to stop, etc. Ultimately, you observe these telltale signs that your ignition switch is about to go bad.

Always have your vehicle inspected to avoid tampering with your vehicle’s electronic components, as they are expensive.

What are the Symptoms of a Bad Ignition?

Invariably, the problems of a bad ignition are apparent and can range from: Flickering interior lights, the vehicle starting and stalling suddenly, the engine not starting, a silent starter, a complex situation turning the key, the key stuck in the lock hole, and much more. Nevertheless, I have explored these symptoms in this same guide. Be patient to get all the necessary information.

What Happens When Your Electronic Ignition Fails?

However, the failure of an electronic ignition would be anything but something you might prefer. But in case of a problem, the electrical systems and their components will also fail since the electronic ignition switch is the main activator of all other electrical compartments, such as the ECU, ignition coil, regulation and operation of the spark plugs, and its correct firing. So far, if things go wrong, your vehicle’s engine will stop completely and other problems could also arise.

Can a Faulty Ignition Switch Drain Your Battery?

Yes, it can drain your battery! A faulty ignition switch can drain your vehicle’s battery if that vehicle is not in use. Similarly, when your car is not running, idle electrical systems such as temperature gauges, throttle markers, and computer-controlled airflow fans (ECM) work hard to maintain as low a voltage as possible for these sensitive devices.

To the extent that the alternator keeps all electrical devices charged even when you don’t need them. Thus, this constant task consumes more than 10% even when you are not driving, as idle power consumption uses higher levels than operating systems.

How Do I Test My Ignition Switch?

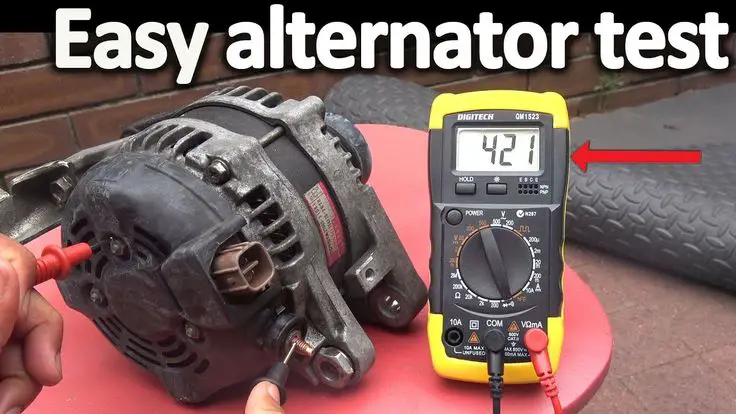
In today’s automotive world, diagnosing or testing electrical components is never as complex as it was over 30 years ago. Therefore, you would test your ignition switch using the multimeter. All thanks to technological progress. Discover the tips for using the multimeter below.

  • Put the ignition in the off position.
  • Attach the multimeter’s positive cable to the negative power wire of an unpainted vehicle part.
  • Start the vehicle and monitor the reading on the multimeter precisely.
  • If the reading is below 90%, your ignition switch is bad, but if the opposite is the case, your ignition switch is healthy and functional.

Simple, right?

Conclusion

To summarize this article, the ignition switch, the most functional electrical part of your vehicle, must always be checked to be in good condition for the effective and efficient starting of your car. However, it causes almost all electrical problems in vehicles in our contemporary era when it becomes faulty.

It is possible that ignition switch problems stem from factors such as broken springs, worn ignition switch contacts, and temperature issues, which could prevent you, as the driver or vehicle owner, from even getting your car out of the garage or in a dangerous spot.

However, you can get out of this annoying situation by effectively studying and digesting the work above. Ensure to perform regular maintenance and diagnostics of suspected electrical components when seeking the help of a professional mechanic or your owner’s manual.

Common Problems of the 2007 Toyota Corolla

The Toyota Corolla is one of the prominent vehicles for sale in this Toyota universe. However, many 2007 Toyota Corolla problems were still there to complicate the choice.

There are several issues related to power steering, engine failure, or the airbag. A number of engine circuit problems also came into play!

Common 2007 Toyota Corolla Problems to Know Now

Corolla owners have experienced major problems while driving this most reliable car in the world. There is no doubt that the Corolla’s design and appearance are remarkable to the highest degree.

Furthermore, the performance and power of this vehicle are also incredible. But, from time to time, one can easily encounter issues that cause problems while driving.

Let’s highlight here the terrible Toyota Corolla problems:

1. Engine Heaviness When Stopped

After stopping the car once, one might feel a lot of heaviness when restarting the vehicle. This could be due to greater force and combustion inside the engine.

This is one of the most common 2007 Toyota Corolla problems that people face. It may be the most reliable vehicle of all time, but the engine heaviness issue is present.

Don’t you feel the engine heaviness? (Photo: Yelp)

2. Ultra-Sensitive Airbags

The Corolla’s passenger side airbags are ultra-sensitive to heat and humidity inside the car. If the car has an accident, there is a 90% chance the airbag will burst into small pieces.

And this extra sensitivity in an airbag is also one of the biggest safety issues in an automobile. In other words, airbag failure was one of the major 2007 Toyota Corolla problems.

3. Excessive Fuel Consumption

According to expert studies, the problem of excessive fuel consumption in the Toyota Corolla has emerged. Damaged piston rings are the main reason for this car’s extreme oil consumption.

Dust and dirt inside the piston rings can cause it to consume more fuel than necessary. A growing number of Toyota Corollas faced this problem initially. Expert maintenance tips can help reduce the fuel consumption issue.

4. Transmission Malfunction

Many cases of transmission malfunction or failure are there to increase the list of 2007 Toyota Corolla problems. The entire transmission system under the Corolla’s hood is the cause of this issue.

Whether it’s a cracking transmission system, gearbox failure, or other serious problems. This results in unresponsive gear shifting or engine start failure. Furthermore, it also leads to engine stalling problems.

This is why manufacturers replaced the entire transmission system without charging the owner a single penny.

2007 Toyota Corolla problems include the transmission. (Photo: Cars.info)

FAQ on 2007 Toyota Corolla Problems

  1. What is the Engine Control Module (ECM) problem in the 2007 Toyota Corolla?

The 2007 Toyota Corolla ECM problem involves a known issue where the ECM can fail, causing handling problems and sometimes stalling. Toyota issued a warranty extension to address this issue for affected vehicles.

  1. Are there transmission problems in the 2007 Corolla?

Yes, some 2007 Toyota Corolla owners have reported transmission problems, including shifting issues and erratic behavior. Regular maintenance and proper fluid levels can help mitigate these problems.

  1. How common is excessive oil consumption in the 2007 Corolla?

Excessive oil consumption has been reported by some 2007 Corolla owners. This issue may require frequent oil top-ups between oil changes. Toyota released a Technical Service Bulletin (TSB) to address this issue on certain vehicles.

  1. Are there any recalls related to these issues for the 2007 Corolla?

Recalls may vary by region, so it’s essential to check with your local Toyota dealer or the National Highway Traffic Safety Administration (NHTSA) for any open recalls related to these issues in the 2007 Corolla.

  1. What steps can I take to prevent or resolve these common issues?

To prevent or resolve common 2007 Toyota Corolla problems, follow a regular maintenance schedule, including oil changes and transmission fluid checks.

If you experience issues, consult a qualified mechanic and check for available recalls or technical service bulletins.

  1. Are these issues covered by warranty or extended coverage?

Some of these issues may be covered by warranty or extended coverage, depending on your specific vehicle and its history.

Contact a Toyota dealer or Toyota customer service for information on warranties and extended coverage related to your 2007 Corolla.

  1. Is the 2007 Corolla still a reliable choice despite these common problems?

Despite these common problems, the 2007 Toyota Corolla is generally considered a reliable and fuel-efficient choice. Proper maintenance and addressing known issues can help ensure its continued reliability.

  1. Where can I find more information on resolving these issues in my 2007 Corolla?

For more information on resolving these issues specific to your 2007 Toyota Corolla, consult your vehicle’s owner’s manual, contact a Toyota dealer, or visit the official Toyota website.

Additionally, online forums and owner communities can offer insights and solutions based on other Corolla owners’ experiences.

  1. Are there any safety concerns associated with the common 2007 Toyota Corolla problems?

While some of the common 2007 Corolla problems may impact handling and reliability, it’s essential to address them promptly to ensure vehicle safety.

Issues such as stalling or erratic transmission behavior can pose safety risks, so regular maintenance and timely repairs are crucial.

  1. Can I still buy parts and find mechanics to fix these issues in my 2007 Corolla?

Parts for the 2007 Toyota Corolla are generally readily available, and there are many qualified mechanics experienced in maintaining these vehicles.

Toyota dealerships and authorized service centers are reliable sources for genuine parts and qualified technicians capable of addressing common issues.

Additionally, aftermarket parts and independent repair shops are often viable options for repairs and maintenance.

The Bottom Line

Overall, these are terrible 2007 Toyota Corolla problems that have marred this reliable and incredible car. Therefore, make sure to keep these points in mind the next time you wish to buy a Toyota Corolla.

Mercedes Steering Angle Sensor Reset

The steering angle sensor (SAS) plays a crucial role in the safety and steering system of your Mercedes. It determines the position of the steering wheel and transmits this information to the ESP (Electronic Stability Program) control unit. This allows the ESP to correct oversteer or understeer and improve vehicle stability.

Symptoms of a faulty steering angle sensor:

  • ESP warning light on
  • ABS warning light on
  • Difficulty turning the steering wheel
  • Vehicle pulling to one side
  • Power steering errors
  • “Steering angle sensor” error message

Steering angle sensor reset:

Method 1: Diagnostic tool

  1. Connect the diagnostic tool to your Mercedes’ OBD-II port.
  2. Select the “Steering angle sensor reset” option.
  3. Follow the on-screen instructions to complete the reset.

Method 2: Manual procedure

Important: This method may vary depending on your Mercedes model. Please consult the owner’s manual for specific instructions.

  1. Turn off the ignition and wait 30 seconds.
  2. Turn on the ignition without starting the engine.
  3. Turn the steering wheel fully to the right, then fully to the left.
  4. Return the steering wheel to the center position.
  5. Start the engine and let it idle for 5 minutes.

Notes:

  • If the reset fails, the steering angle sensor may be faulty and need replacement.
  • It is recommended to have the reset performed by a qualified mechanic.

Additional information:

  • You can find more detailed instructions for resetting the steering angle sensor for your specific Mercedes model on online forums or in workshop manuals.
  • It’s important to note that the steering angle sensor reset can only be performed if your Mercedes’ battery is in good condition.

Conclusion:

Resetting the steering angle sensor is a relatively simple procedure that can be performed using a diagnostic tool or manually. If you encounter difficulties, it’s recommended to consult a qualified mechanic.

The 30 Suggested Automotive Maintenance Interval Tasks

Owning a car involves much more than just the initial purchase; it includes insurance, registration, potential property taxes, and perhaps most importantly, maintenance.

Maintenance encompasses various elements, such as oil changes, tire rotation, brake checks, and filter replacements. Following your owner’s manual can help you manage about 30 different car maintenance items with suggested intervals, but remember that these can vary depending on your vehicle and driving conditions.

While our list doesn’t cover all maintenance tasks, it certainly covers the majority of them that car owners are likely to encounter throughout their vehicle’s lifespan.

Most Common Car Maintenance Tasks

1) Oil Change

best oil drain pan

Recommendation: Every 3,000 to 7,500 miles or as advised by the manufacturer.

If your vehicle is new, conventional motor oil is usually fine unless your vehicle manufacturer specifically recommends a certain type of oil. As your vehicle ages, special blends will help extend the engine’s lifespan, including full synthetics.

2) Tire Pressure

Recommendation: Check monthly (when tires are cold).

Remember to check the pressure so it’s ready to use when you need it. The correct PSI will be indicated in your owner’s manual or on a sticker inside the driver’s door jamb.

3) Tire Rotation

tire rotation

Recommendation: Every 6,000 to 8,000 miles.

Extend tire life by rotating according to the scheduled plan to distribute wear evenly. Unusual wear patterns may indicate a need for front alignment or other suspension adjustments.

4) Tires (Tread Depth)

Recommendation: Check monthly or before long trips.

Adequate tread depth helps maintain traction on the road, especially in wet or slippery conditions, while worn tread can lead to reduced handling, longer stopping distances, and an increased risk of hydroplaning or skidding.

If you need new tires, check out our tire brand recommendations.

5) Brake Pads

installing brake pads

Recommendation: Check every 10,000 miles and replace if necessary.

Signs of worn brake pads include grinding, squealing, vibrations during braking, and longer stopping distances.

6) Battery

Recommendation: Inspect every 15,000 miles and replace every 3 to 5 years.

Be aware that extreme weather conditions can shorten this lifespan. Most car batteries today do not require adding water, as they are maintenance-free. However, cleaning corrosion from battery posts and terminals and securing connections can prevent unexpected breakdowns.

To assess battery health, use a multimeter. A reading between 12.2 and 12.6 volts indicates a full charge.

7) Engine Air Filter

clogged air filter

Recommendation: Replace every 15,000 to 30,000 miles or as needed.

A dirty or clogged filter will restrict airflow and can impact performance and reduce fuel efficiency. The replacement process is usually very easy to do as a DIY task for almost anyone.

8) Cabin Air Filter

Recommendation: Replace every 15,000 to 25,000 miles or once a year, whichever comes first.

Ensure clean cabin air by changing this filter regularly. In some cases, you can simply clean it if larger debris is clogging it. The cabin air filter is typically located behind the glove box in most vehicles.

Those with severe allergies may benefit from replacing the filter sooner than the recommended interval.

9) Spark Plugs

DIY spark plug replacement

Recommendation: Replace every 30,000 to 100,000 miles, or as per your car manufacturer’s instructions.

It’s worth considering Iridium spark plugs due to their robust metal composition compared to copper or platinum variants, leading to a slower wear rate.

10) Brake Fluid

Recommendation: Check every 20,000 miles and replace every 1 to 2 years.

Noisy brakes, including vibrations, and fluid discoloration are signs that your brake fluid needs to be changed.

11) Power Steering Fluid

low power steering fluid

Recommendation: Check every 30,000 miles and replace as needed.

If you have difficulty turning the steering wheel, you may be low on power steering fluid, possibly due to a leak.

12) Coolant

Recommendation: Check every 30,000 miles; replace every 2 or 3 years.

Strange odors from under the hood indicate coolant issues. Additionally, if the car overheats or the heater doesn’t work, check the coolant level and condition.

13) Transmission Fluid

adding transmission fluid

Recommendation: Change every 60,000 to 100,000 miles or as advised by the manufacturer.

Typically, the correct transmission fluid is clear or bright red. Once it becomes dark red or brown, it should be changed.

14) Serpentine Belt

Recommendation: Check every 50,000 miles; replace every 60,000 to 100,000 miles.

Fraying, cracks, looseness, and squealing are signs that the serpentine belt needs to be replaced.

15) Timing Belt

replace timing belt

Recommendation: Check every 60,000 miles; replace every 60,000 to 100,000 miles or as advised by the manufacturer.

If your vehicle uses a timing belt (some use a timing chain), it is imperative that it is in good working condition. Timing belt failure is often due to age and risks causing catastrophic engine damage. Always have your timing belt replaced at the recommended interval or if you notice it is worn, loose, or damaged.

16) Windshield Washer Reservoir

Recommendation: Check monthly; top up if necessary.

For extreme cold, consider a special de-icer mixture to keep it flowing all season.

17) Windshield Wipers

squeaky windshield wipers

Recommendation: Replace every 6 to 12 months or as needed (i.e., when they are squeaky or skipping).

A good rule of thumb is to change windshield wiper blades in the spring and again in the fall, between extreme weather conditions when the blades undergo a lot of wear.

18) Lights (Headlights, Taillights, Turn Signals)

Recommendation: Check monthly; replace as needed.

Replace bulbs in pairs, even if only one has burned out. You’ll be glad you did.

19) Exhaust System

Exhaust System

Recommendation: Check annually for leaks, damage, or malfunctions.

May require placing the vehicle on a lift for a close inspection.

20) Struts and Shocks

Recommendation: Check every 50,000 miles; replace if necessary.

If the nose dips during braking, the vehicle sways in turns, or you experience uneven tire wear, the struts or shocks may be worn.

21) CV Joints/Boots

types of CV joints

Recommendation: Check every 30,000 miles; replace if damaged.

Commonly found in front-wheel drive cars and all-wheel drive vehicles. Found in some rear-wheel drive models. You’ll notice certain symptoms with CV joint failure.

22) Fuel Filter

Recommendation: Replace every 20,000 to 40,000 miles or as advised by the manufacturer.

Hard starting, stalling, occasional misfiring, rough idling, and poor engine performance indicate a bad fuel filter.

23) Brake Rotors/Disks

rusty brake rotor

Recommendation: Check every 10,000 miles; replace if necessary.

Noisy brakes, vibrations, groove marks on the rotors, and extended stopping distances are all signs of problems with your brakes.

24) Wheel Alignment

Recommendation: Check every 10,000 to 20,000 miles or if steering issues are noticed.

You can do this at the same time as tire rotation, but expect to pay a bit more for the alignment.

25) Suspension

suspension fluid leak

Recommendation: Check annually or if ride quality decreases.

Look for leaks around the shocks and struts for signs of trouble. Additionally, excessive tire wear, a shaky steering wheel, clunking noises, and a bouncy car are additional concerning signs.

26) Differential Fluid

Recommendation: Change every 30,000 to 60,000 miles or as advised by the manufacturer.

Also known as gear oil, differential oil is in the axle housing. It is therefore an easily overlooked maintenance item.

27) HVAC System

car air conditioner not cooling

Recommendation: Check annually, especially before summer and winter seasons.

For summer months, replenishing refrigerant (R-134a or R-1234yf) and inspecting for leaks should ensure months of cool cabin driving. During colder months, a lack of heat in the cabin could be due to low refrigerant, a thermostat stuck open, or a blocked heater core.

28) Radiator

Recommendation: Inspect annually; clean/flush every 30,000 to 50,000 miles.

This is a job you can handle with premixed coolant and a used radiator cleaner. Keep in mind, however, you’ll need to recycle the old coolant.

29) Radiator Hoses

upper radiator hose

Recommendation: Check every 30,000 miles possible and replace every 4 to 5 years.

Neglecting this task can lead to engine overheating. Warning signs such as bulging, cracking, a pool of fluid under your parked car, moisture spots on the outside of the hose, or minor coolant drips in the engine compartment indicate a potential problem and should not be ignored.

30) Undercarriage Wash

If you regularly wash your vehicle, the underside may not receive proper attention. At least once a year or more often if you live near the ocean, in an area that uses road salt, or if you take your vehicle off-road, use a pressure washer to wash and unclog the drains underneath. This prevents rust and can extend the vehicle’s lifespan.

Car Maintenance Considerations

Being proactive with these 30 essential car care maintenance checks can significantly extend your vehicle’s lifespan and improve its performance.

Your owner’s manual is indeed an excellent guide, but keep in mind that individual maintenance requirements may vary depending on the specific car and the driving conditions it is exposed to. Therefore, staying informed and alert is essential to maintaining your vehicle’s reliability and value.

How to Repair Cigarette Burns in a Car

Do you want to know how to fix cigarette burns in cars? You can try the three most common and popular methods to repair burns. The three popular methods are:

Methods Illustrating How to Repair Cigarette Burns in Cars

1. Weaving the Seat Fabric

There is no comparison to the reweaving method for repairing burns in car seats. The method is quite simple to execute and extremely affordable.

One of the main advantages of this method is that owners do not need to replace all the seat covers to repair the burns.

They can use the original seat covers to get rid of cigarette burns. This method is generally preferred for the old fabrics of vintage cars.

Here are the simple items needed to implement this method that targets how to repair cigarette burns in cars.

  • Thread
  • Needles
  • Scissors
thread for fixing cigarette burnt in car
Reweaving the seat fabric. (Photo Source: Soyouz)

Here are the simple steps you can follow for this method:

  • Make the burnt area neat and smooth by cutting the melted edges using sharp scissors. This will allow the owner to easily weave the burnt part.
  • In the second step, the owner must use identical thread and start weaving the burnt area about half an inch from the actual burnt area.
  • Finally, the owner must remember to tie the threads at both ends to achieve a clean finish on the burnt area.

The entire process is repeated until the entire burnt area is covered using the identical thread and weaving.

2. Gluing the Seat Fabric

Another method you can use to repair cigarette burns on car seats is gluing the fabric.

This alternative method, which concerns repairing cigarette burns in cars, is used for delicate fabrics like velvet that cannot be woven.

You will need the following tools to proceed with this method:

  • A pencil
  • Glue
  • Scissors
Gluing the seat fabric.
How to fix cigarette burns in cars. (Photo Source: greencoin)

Here are the steps to follow for this method:

  • Cut a small part of your car seat that can serve as stuffing. Ensure the cut part is unnoticeable.
  • Put a drop of glue directly into the burnt part.
  • Use the pencil and try to insert the stuffing inside the burnt part.
  • You can use as much stuffing as needed so that the burnt part on the seat is not detected.

When using this method, make sure to touch only the seat fabric and not the glue to avoid any kind of problem.

3. Using the Cigarette Burn Repair Kit

These kits are the best solutions when looking to repair cigarette burns in cars.

These kits contain all the necessary parts and accessories that will simplify the method. You can choose one of the cigarette burn repair kits that offer the best value for money.

Cigarette Burn Repair Kit
Cigarette burn repair kit. (Photo Source: amazon)

Required tools:

  • Cigarette burn repair kit

Steps to follow:

  • Use a sharp tool like scissors or a razor to cut the affected part. Try to avoid cutting the unaffected part.
  • Use a foam cushion to form a small plug that can easily fit into the hole created by a cigarette burn.
  • Take a fabric identical to the car seat and sew the fabric with the foam cushion. Ensure the foam cushion and fabric are woven correctly and neatly.
  • In the next step, use these foam cushions to fill the burnt holes as a treatment to repair cigarette burns in cars.
  • Sew both ends together to avoid any messy appearance of the car seat.
  • Once the burnt hole is completely filled, you can use the remaining fabric from the car seat to cover the hole.
  • Use super glue to fix the fabric in the right place and in a simple manner.
  • Let the glue dry completely, then finally clean the burnt area as well as the surrounding areas to achieve a neat and tidy finish.

FAQ

  1. What materials do I need to repair a cigarette burn inside my car?

To repair a cigarette burn, you will generally need a repair kit including putty, adhesive, color matching compounds, a heat source (like a heat gun), sandpaper, and possibly a piece of matching upholstery fabric.

  1. Can I use household items to repair a cigarette burn in my car’s upholstery?

While it is possible to use household items like super glue or clear nail polish as a temporary solution, it is not recommended for a durable and aesthetic repair. Specialized repair kits are designed for a more lasting and visually appealing result.

  1. How do I match the repair color to my car’s upholstery?

Most repair kits come with guides or color matching charts that help you identify the closest match to your car’s upholstery.

You can also contact your car manufacturer or an upholstery specialist for advice on color matching.

  1. Is it possible to completely remove the burn mark from my car’s upholstery?

Completely removing a burn mark can be difficult, especially if the damage is severe.

However, using a high-quality repair kit and carefully following the instructions can significantly improve the appearance and functionality of the affected area.

  1. Are there any safety precautions I should take when repairing a cigarette burn in my car?

When using repair kits, make sure to follow all the safety instructions provided. This may include proper ventilation and using protective equipment, especially if you are working with adhesives or other chemicals.

  1. What happens if I have multiple burns or significant damage to my car’s upholstery?

If you have multiple burns or significant damage, it is advisable to consult a professional upholstery repair service. They can assess the damage and suggest the best course of action, which may include reupholstering the affected area.

  1. How can I prevent future cigarette burns in my car?

To prevent future burns, establish a strict no-smoking policy in your car. You can also use seat covers or designated smoking areas outside the vehicle to minimize the risk of burns and damage to the upholstery.

  1. What should I do if the burn has caused a hole in my car’s upholstery?

If the burn has created a hole, you may need to use a piece of matching upholstery fabric to cover it. Consult a professional if you are unsure of the best approach to repair holes in your car’s upholstery.

Wrap Up

Smoking is not only dangerous to health but can also damage your car seat.

Make sure you know the exact treatments regarding how to fix cigarette burns in cars so you never face embarrassment.

Use the methods mentioned above and make your car seats as smooth as before.

Code P1358 – Ignition Diagnostic Monitor Signal Out of Self-Test Range

Possible Causes

NOTE: The listed causes may not be a complete list of all potential problems and there may be other causes.

  • Faulty sensor coil or crankshaft position sensor
  • Faulty ignition control module

Description

The ignition diagnostic monitor signal out of self-test range is the generic description for code P1358, but the manufacturer may have a different description for your vehicle model and year. Currently, we do not have additional information about OBDII code P1358.

How to Repair

Check the “Possible Causes” listed above. Visually inspect the related wiring harness and connectors. Check for damaged components and look for broken, bent, pushed out, or corroded connector pins.

Possible Symptoms

  • Engine light on (or service engine soon warning light on)

What Can Drain a Car Battery? Here Are 6 Common Reasons You Should Know

A dead battery means your car won’t start, resulting in dim headlights and an unresponsive engine. This can be a real problem if the battery fails in the middle of nowhere or in the morning when you’re already late for work. What drains a car battery? Are you curious about what the reasons might be?

What Can Drain a Car Battery?

Many of us wonder what causes your car battery to drain. Contrary to popular belief, many things can happen and lead to a dead battery, even if you are already equipped with top-rated car batteries. Read on and discover the 6 most common reasons that can drain your car’s battery.

What can drain a car battery when the car is off?
What can drain a car battery when the vehicle is off (Photo: mechanicbase.com)

1. Leaving Lights On

Leaving the headlights on is one of the reasons why a car battery dies. It’s a mistake every driver has made at least once in their life, as they wonder more than once, “what could be draining my car battery?“. You’ve come home from work very tired and rushed into the house leaving the headlights on or the trunk open, causing the battery to drain overnight.

Even small dome lights can significantly drain the car battery. Or, after parking your car at home, you forget to turn off the light and the car battery drains overnight. So, make sure you haven’t left any lights on before closing the door behind you.

2. Electrical Problems

If someone asks you, “What drains a car battery when the vehicle is off?“, electrical problems are the answer you should keep in mind. Even when you turn off the ignition, some functions continue to operate. It’s normal for the security alarm, clock, and radio presets to be operational at all times. However, other components can be powered on in case of an electrical issue. For example, parasitic drain can extend to the trunk and glove compartment lights, which normally stay off.

3. Weak Battery

Poor maintenance can weaken a battery, which may not hold its charge for long, and this is what makes a car battery die quickly. It will be vulnerable to all conditions. Even small drains like the clock or the radio’s memory function can kill it. Furthermore, such a battery does not withstand extremely hot or cold temperatures well. So, take care of it if you don’t want to end up with a dead car in the morning.

Note: A battery maintainer is an effective solution for battery maintenance. A maintainer charges a battery slowly and avoids overcharging. Therefore, if you need to buy one, here is the list of recommended top battery maintainer products to buy for you.

4. Corroded or Loose Battery Connections

This is another consequence of irregular maintenance. Loose or corroded connections prevent the charging system from working properly. This can drain the car battery even while you are driving. Many car models use the alternator to charge radios, clocks, lights, and other small components. In this case, a charging problem can worsen the drain. If the battery is not charging correctly, you should have it diagnosed by a professional mechanic.

5. Faulty Alternator Diode

Faulty Alternator
If its diode is corroded, the circuit will consume power (Photo: pinterest.com)

Another answer to the question of what drains a car battery is a faulty alternator diode. The alternator’s function is to power several electrical systems and recharge the battery. If its diode is corroded, the circuit will consume power even when the engine is not running.

6. Old Battery

If the car consistently has trouble starting, the problem could be a worn-out battery. An old battery is the final reason that drains a car battery. Typically, car batteries have a lifespan of 4 to 5 years. So, if you often face the problem of a dead car battery, it’s probably time to buy a quality battery. Changing to a new battery is the right choice for you by going to a trusted garage.

What Drains a New Car Battery?

The normal lifespan of a car battery is about 3 to 4 years. After that, the battery may start to wear out and need to be replaced with a new one. You have a new battery for your car but find that your battery keeps dying? Here are 3 reasons for this:

1. Driving Too Many Short Trips

If you often drive your car on short trips, this can be a reason why your car battery drains. It’s not surprising that your battery tends to die too early. The main function of the car battery is to power the vehicle’s ignition. Driving too many short distances means your alternator doesn’t have enough time to recharge between your vehicle starting and stopping. Little by little, this drains your battery and it doesn’t last as long as it should.

2. Extremely Hot and Cold Weather

If the temperature rises too high (above 100 degrees) or drops too low (below 10 degrees Fahrenheit), it will negatively impact your car battery. Leaving your car in these bad temperatures for a long period will lead to a buildup of lead sulfate crystals. Sulfate buildup is one of the main reasons that reduces your battery’s lifespan and increases the recharge time it needs.

3. Faulty Charging System

What drains a car battery can be a faulty charging system. To recharge your car battery, your vehicle’s alternator needs to supply it with power. If some parts of the system fail, it’s not surprising that your car battery dies too early.

What Happens If Your Battery Drains?

If you have a dead battery and you don’t address it, it will discharge to 0% and be dead. Most of the time, you therefore won’t be able to start the engine. Imagine you’re driving on the highway and you have a dead battery. You’ll be in trouble since everything will be delayed and it will also affect other drivers. Or you’re about to go to work or an appointment but your engine won’t start? What a bad day. So, consider checking your car or going to the garage to ensure your car is always running.

How to Detect a Battery Drain

It’s frustrating to have a battery that doesn’t hold a charge, and it can be difficult to determine the cause of the problem. Since the cause of the battery drain is not human error, you will need the help of a qualified mechanic who can diagnose your car’s electrical problems and determine if it’s a dead battery or another issue in the electrical system. Otherwise, you can also learn these tricks to do at home.

1. New Battery

If your battery is still new (car batteries have a lifespan of about six years), a jump start should be enough to get you going. This solution is provided with jumper cables or a standalone jump starter stored in the truck. Since the battery is in good condition, it will receive electricity from the other battery and then recharge properly.

  1. Park and turn off the car with a jumper cable next to the dead one. You need to open the hoods of both cars and take out the jumper cables. You should also protect your hands and eyes in case of a problem.
  2. Connect one end of the red (positive) jumper cable to the red terminal of the dead battery.
  3. Connect the other end of the red cable to the red terminal of the charged battery.
  4. Connect one end of the black (negative) jumper cable to the black terminal of the charged battery. And the other end to an unpainted metal part in the dead car, away from the battery. This safety measure grounds the circuit to prevent sparks.
  5. Start the car with the charged battery. Let the engine run for 5 to 10 minutes.
  6. Try to start the car with the previously dead battery. If it starts, let it idle for at least 20 minutes if you don’t plan to drive immediately. If you need to start right away, drive for at least 5 to 10 miles to fully recharge the battery.

Before taking off, remove the battery cables in the reverse order of how they were attached. This means the black cable attached first to the metal ground, and so on.

2. Old Battery

A new battery is all you need here. However, it’s best to determine if it is indeed your battery and not something else before spending over $80 on a new one.

There are a few common signs of a faulty battery. An obvious sign would be a complete absence of lights or cranking when you try to start the car. Another sign would be the engine cranking furiously without actually starting. This one is less obvious but happens more often than not, it’s the battery.

It’s easy to jump straight to towing the car to a garage if it won’t start, but you’ll spend less time and money by doing a little self-diagnosis.

Note that you will probably be able to jump-start a dead battery to go somewhere, but chances are it won’t start on its own if you try again with the same faulty battery (i.e., don’t strand yourself somewhere).

Sometimes the battery can be so damaged that it can no longer recharge enough for a jump start. The best way to know for sure is to take your battery to a store that performs free battery tests. Auto parts stores like O’Reilly, Autozone, and Advance Auto Parts all offer this service. You can then buy a new one on the spot if needed.

What Should You Do to Avoid Draining Your Battery?

  1. First, make sure to turn off all interior lights and not leave anything on before leaving the car. Similarly for the radio, you should turn it off if you’re not driving. Interior lights and radios left on can drain the battery.
  2. Second, keep the battery clean. This is very important and you should do it frequently. Use a dry cloth to wipe away any dirt or residue near the terminals and connection areas. A dirty battery can sometimes be the cause of its damage.
  3. Third, remember to check the cable connections to the battery. The connection should be tight and clean. A loose or dirty connection between the cable and the battery can cause the battery to drain.
  4. Fourth, use a portable car battery charger or a jump starter and charge the battery if it’s below the performance level. The charger can be found in an auto shop where you can find other things besides just the charger. Remember to use the charger’s jumper cable to test the battery’s power.
  5. Finally, taking your car to the garage for annual maintenance will help you avoid what drains your car battery. The specialist will check and, if necessary, replace the battery for you.

Summary

As you can see, both new and old car batteries can drain if you don’t take proper care of them. We hope that after reading this article, you have an in-depth understanding of most of the reasons why your car battery keeps dying and know how to handle them. If you have any questions about “what drains a car battery” or about cars, feel free to leave us a comment in the box below.

What is the ideal fuel consumption for your vehicle?

Good fuel economy simply means lower fuel consumption for a greater distance per kilometer. Suppose your vehicle shows 30 MPG, that clearly means your vehicle travels a distance of 30 kilometers per gallon of fuel. However, to know what truly constitutes good fuel economy, you must take into account a myriad of important factors, including the type of vehicle in question. Let’s explore in more detail what good fuel economy is for your type of vehicle.

What is Good Fuel Economy?

Fuel economy is typically measured in MPG, that is, miles per gallon. This means the number of kilometers a vehicle can generally travel per gallon of fuel. MPG is usually higher on highways than in city driving. Previously, the range of fuel economy for vehicles on the road was from less than 20 MPG (which is 14.0 liters per 100 kilometers) to more than 40 MPG (which is 7.0 liters per 100 kilometers).

Fuel economy can also be measured in terms of GPM, which is the number of gallons a car needs to travel 100 miles. GPM is more useful for calculating a vehicle’s good energy efficiency relative to other considerations.

Discover what affects what constitutes good fuel economy
What is the ideal fuel consumption for your car? Source: Honda

Methods to Determine a Vehicle’s Fuel Economy

Various factors determine your automobile’s fuel economy. Among the most important are:

1. Vehicle Type

The type of car is the first factor in determining whether it has good fuel economy or not. Essentially, smaller engines offer better fuel economy than larger ones. This is due to the vehicle’s weight relative to the engine size. Therefore, the smaller the car’s engine, the less weight it will carry. Consequently, less fuel will be needed to operate.

2. Type of Fuel Used

what is good fuel economy
Discover the points that define good fuel economy. Source: Everypixel

Another factor that affects fuel economy is the type of fuel your vehicle uses. Indeed, different types of fuels are required to operate different vehicles. A good fuel helps reduce friction in your car’s engine and can make a big difference in fuel economy. To find out what type of fuel you should use for your vehicle, read some car maintenance tips provided by automotive experts.

3. Fuel Octane Rating

The fuel’s octane rating affects your vehicle’s fuel economy. The octane rating determines how quickly the fuel burns in the engine based on the fuel’s reduction/additive ratio. The higher the octane rating, the slower the fuel burns, meaning more efficient operation of your car.

4. Type of Driving Conditions

Another factor that affects your vehicle’s fuel economy is the road condition. You drive either on city roads or on highways. Generally, our cars consume less fuel on highways than on city roads. Typically, highway fuel economy is 3 to 5 miles higher than city fuel economy.

Conclusion

You may already know what good fuel economy is. You can expect higher fuel economy with a well-maintained car compared to a car of the same make and model. So, try to maintain your car well to achieve good fuel economy.

How to Unlock a Car with a Tennis Ball – Rare Feats

Accidents happen all the time. One of the most common mistakes made by drivers is leaving the keys in the vehicle and locking the door. It’s only when they need to go somewhere that they realize their foolish mistake.

If you’ve faced such a scenario, we have good news for you. One of the known methods to help you get into the car is the tennis ball car unlocking technique.

How to Unlock a Car with a Tennis Ball – A Rare Feat

One method used by car owners is to look for an open window to be able to put their hands inside the car. A second option is to hire a locksmith to make a second key for the car.

The most common technique used by car owners is to use a screwdriver or a jimmy, but they don’t realize that this could damage the locking mechanism in the end.

Life hacks are trendy these days, and the majority of car lock opening tricks are not that practical.

We will provide you with a hack to open your car’s locked door even with the keys inside.

As a hint, this hack has something to do with the air pressure released by squeezing a modified tennis ball.

However, if you don’t want to wait for the locksmith, damage the locking system, or risk injuring your hand trying to reach the door through a half-open window, we can help you learn how to unlock a car with the tennis ball technique.

1. What is the Tennis Ball Technique?

A technique that’s going around these days and has become a famous life hack is learning how to unlock a car with the tennis ball technique.

There’s no need to know the car’s locking mechanism; a simple tennis ball with a hole pierced in it would help unlock the car door.

The key to using car unlock with a tennis ball
Close-up of a carjacker trying to open a car with a hook. (Photo: Mechanic)

2. The First Step

First, you’ll need a tennis ball and you’ll need to find a way to make a small opening in the ball. However, never forget that the opening must be equal to that of a screwdriver or a car key. This is an essential tip if you want to learn how to open a car lock without damaging the locking mechanism.

3. Positioning the Tennis Ball

Next, you’ll need to place the modified tennis ball on the car’s entry lock. To be precise, you’ll need to place it on the car key opening. We recommend browsing online for the best maintenance tips to keep your car running at its peak performance.

4. Releasing the Pressure

Now that you’ve placed the tennis ball on the car’s keyhole, you need to push the ball with all your strength to release the air pressure against the lock. This would push the lock out and release it.

Take a look to unlock the car with a tennis ball
You need two strong enough hands to squeeze the ball

FAQ

1. Where does the myth that you can unlock a car with a tennis ball come from?

This myth likely originated from a misunderstanding of how modern car locking systems work. While some older vehicles with manual locks might have been susceptible to unconventional methods, this does not apply to most modern cars.

2. Can using a tennis ball to unlock a car damage the vehicle or the locking mechanism?

Using a tennis ball to unlock a car can damage the door or the locking mechanism. It is not a recommended or effective method for accessing a locked car.

3. What are the appropriate methods to unlock a car if you are locked out?

If you find yourself locked out of your car, it’s best to contact a professional locksmith or your vehicle manufacturer’s roadside assistance for help. They have the expertise and tools to unlock your car without damaging it.

4. Are there legal consequences if one attempts to unlock a car with a tennis ball or similar methods?

Attempting to unlock a car using unauthorized methods can be illegal and lead to criminal charges. It is important to respect the law and use appropriate means to access your vehicle.

5. What are effective ways to prevent car theft and unauthorized access?

To prevent car theft and unauthorized access, consider using car alarms, steering wheel locks, and parking in well-lit areas. Always lock your car and keep valuables out of sight.

6. Are there legitimate uses for a tennis ball related to cars?

Tennis balls are generally not used for automotive purposes. They are designed for recreational sports and have no practical application for unlocking cars.

Watch this video from Roadside Rescue to see if a tennis ball can unlock your car door!

https://youtube.com/watch?v=o1FG5e5dH7A%3Ffeature%3Doembed

Summary

So, if you want to know how to unlock a car with a tennis ball, the guidelines mentioned above will help you understand the process.

Car Engine Parts 101: A Beginner’s Guide

Car Engine Parts 101: A Beginner’s Guide

If you’re new to the world of automobiles, understanding the different engine parts can be challenging. However, it’s essential to grasp the basics of car engine parts to maintain your vehicle and keep it in good working condition. In this article, we’ll provide you with a beginner’s guide to car engine parts, covering the most essential components and their functions.

  1. Cylinder: The cylinder is the most important part of a car engine. This is where the combustion process takes place, and fuel and air are mixed and compressed before being ignited by the spark plug. A typical car engine has four, six, or eight cylinders, depending on the engine size.
  2. Piston: Pistons are located inside the cylinders and move up and down to compress the air-fuel mixture. They are connected to the crankshaft, which converts the up-and-down motion of the pistons into rotational motion to drive the wheels.
  3. Crankshaft: The crankshaft is a rod that runs through the center of the engine, connecting the pistons to the transmission. It converts the up-and-down motion of the pistons into rotational motion, which is then used to power the wheels.
  4. Camshaft: The camshaft is located in the cylinder head and controls the opening and closing of the valves through cam lobes. The camshaft is driven by a belt or chain connected to the crankshaft.
  5. Valves: The intake and exhaust valves are located in the cylinder head and control the flow of fuel and air into the cylinder and exhaust gases out of the cylinder. They are opened and closed by the camshaft through the use of rocker arms.
  6. Spark Plug: The spark plug is located in the cylinder head and is responsible for igniting the air-fuel mixture in the cylinder. It is connected to the ignition system and receives a spark from the distributor or ignition coil.
  7. Fuel System: The fuel system is responsible for delivering fuel from the gas tank to the engine. It consists of the fuel pump, fuel filter, fuel injectors, and carburetor (if the engine is not fuel-injected). The fuel pump is usually located in the gas tank and supplies fuel to the engine via the fuel filter and injectors or carburetor. 8 Exhaust System: The exhaust system is responsible for removing exhaust gases from the engine. It consists of the exhaust manifold, catalytic converter, and muffler. The exhaust manifold is usually located on the cylinder head and collects exhaust gases from the cylinders. The catalytic converter is located in the exhaust pipe and converts harmful pollutants into less harmful emissions. The muffler is located at the end of the exhaust pipe and reduces the noise of the exhaust gases.
  8. Timing Belt or Chain: The timing belt or chain is responsible for synchronizing the camshaft and crankshaft, which is essential for the engine’s proper operation. A worn or damaged timing belt or chain can cause serious engine damage.
  9. Water Pump: The water pump is responsible for circulating coolant throughout the engine, which helps keep the engine cool and prevent overheating. A worn or damaged water pump can cause the engine to overheat.
  10. Alternator: The alternator is responsible for generating electricity to power the car’s electrical system, including the lights, radio, and air conditioning.
  11. Starter: The starter is responsible for starting the engine when the key is turned.
  12. Power Steering Pump: The power steering pump helps make steering the car easier by providing electrical assistance to the steering system.
  13. Oil Pump: The oil pump is responsible for circulating oil throughout the engine, which helps lubricate moving parts and prevent wear.

In conclusion, it’s essential to understand the basic parts of your car’s engine and their functions to maintain your vehicle and ensure its proper operation. Regular maintenance and timely replacements can prevent costly repairs and breakdowns in the future. Remember to keep an eye out for warning signs that may indicate a problem with your car’s engine, so you can take action before it becomes a major issue. If you’re unsure about a specific part or its function, don’t hesitate to consult a professional mechanic or the vehicle owner’s manual.