Common Symptoms of a Faulty Ignition Coil

How to know if the car ignition coil is faulty? When it exhibits erratic behavior and does not function properly. The coil powers the spark plugs from the generator. It ignites the fuel and provides the engine with enough power to operate the vehicle. If it fails, your car will have difficulty starting. Therefore, you need to know the symptoms of a bad ignition coil to identify the problem and take necessary measures.

What is the purpose of an ignition coil in your car?

The ignition coil, an essential component of the car’s engine system, is a key element of the vehicle’s ignition system. Its main function is to provide high-voltage electrical pulses to the spark plugs, which in turn ignite the air-fuel mixture in the engine’s combustion chambers.

By converting the approximately 12 V voltage from the car’s electrical system into a significantly higher voltage range of 15,000 to 20,000 V, and sometimes even reaching 50,000 to 75,000 V through electromagnetic induction, the ignition coil generates powerful sparks capable of crossing the gap inside the spark plug.

These sparks, in conjunction with the ignition system, trigger the ignition of fuel in the combustion chamber. Therefore, its efficient operation is crucial for engine performance, fuel efficiency, and the overall drivability of the vehicle.

7 Symptoms of a Bad Ignition Coil

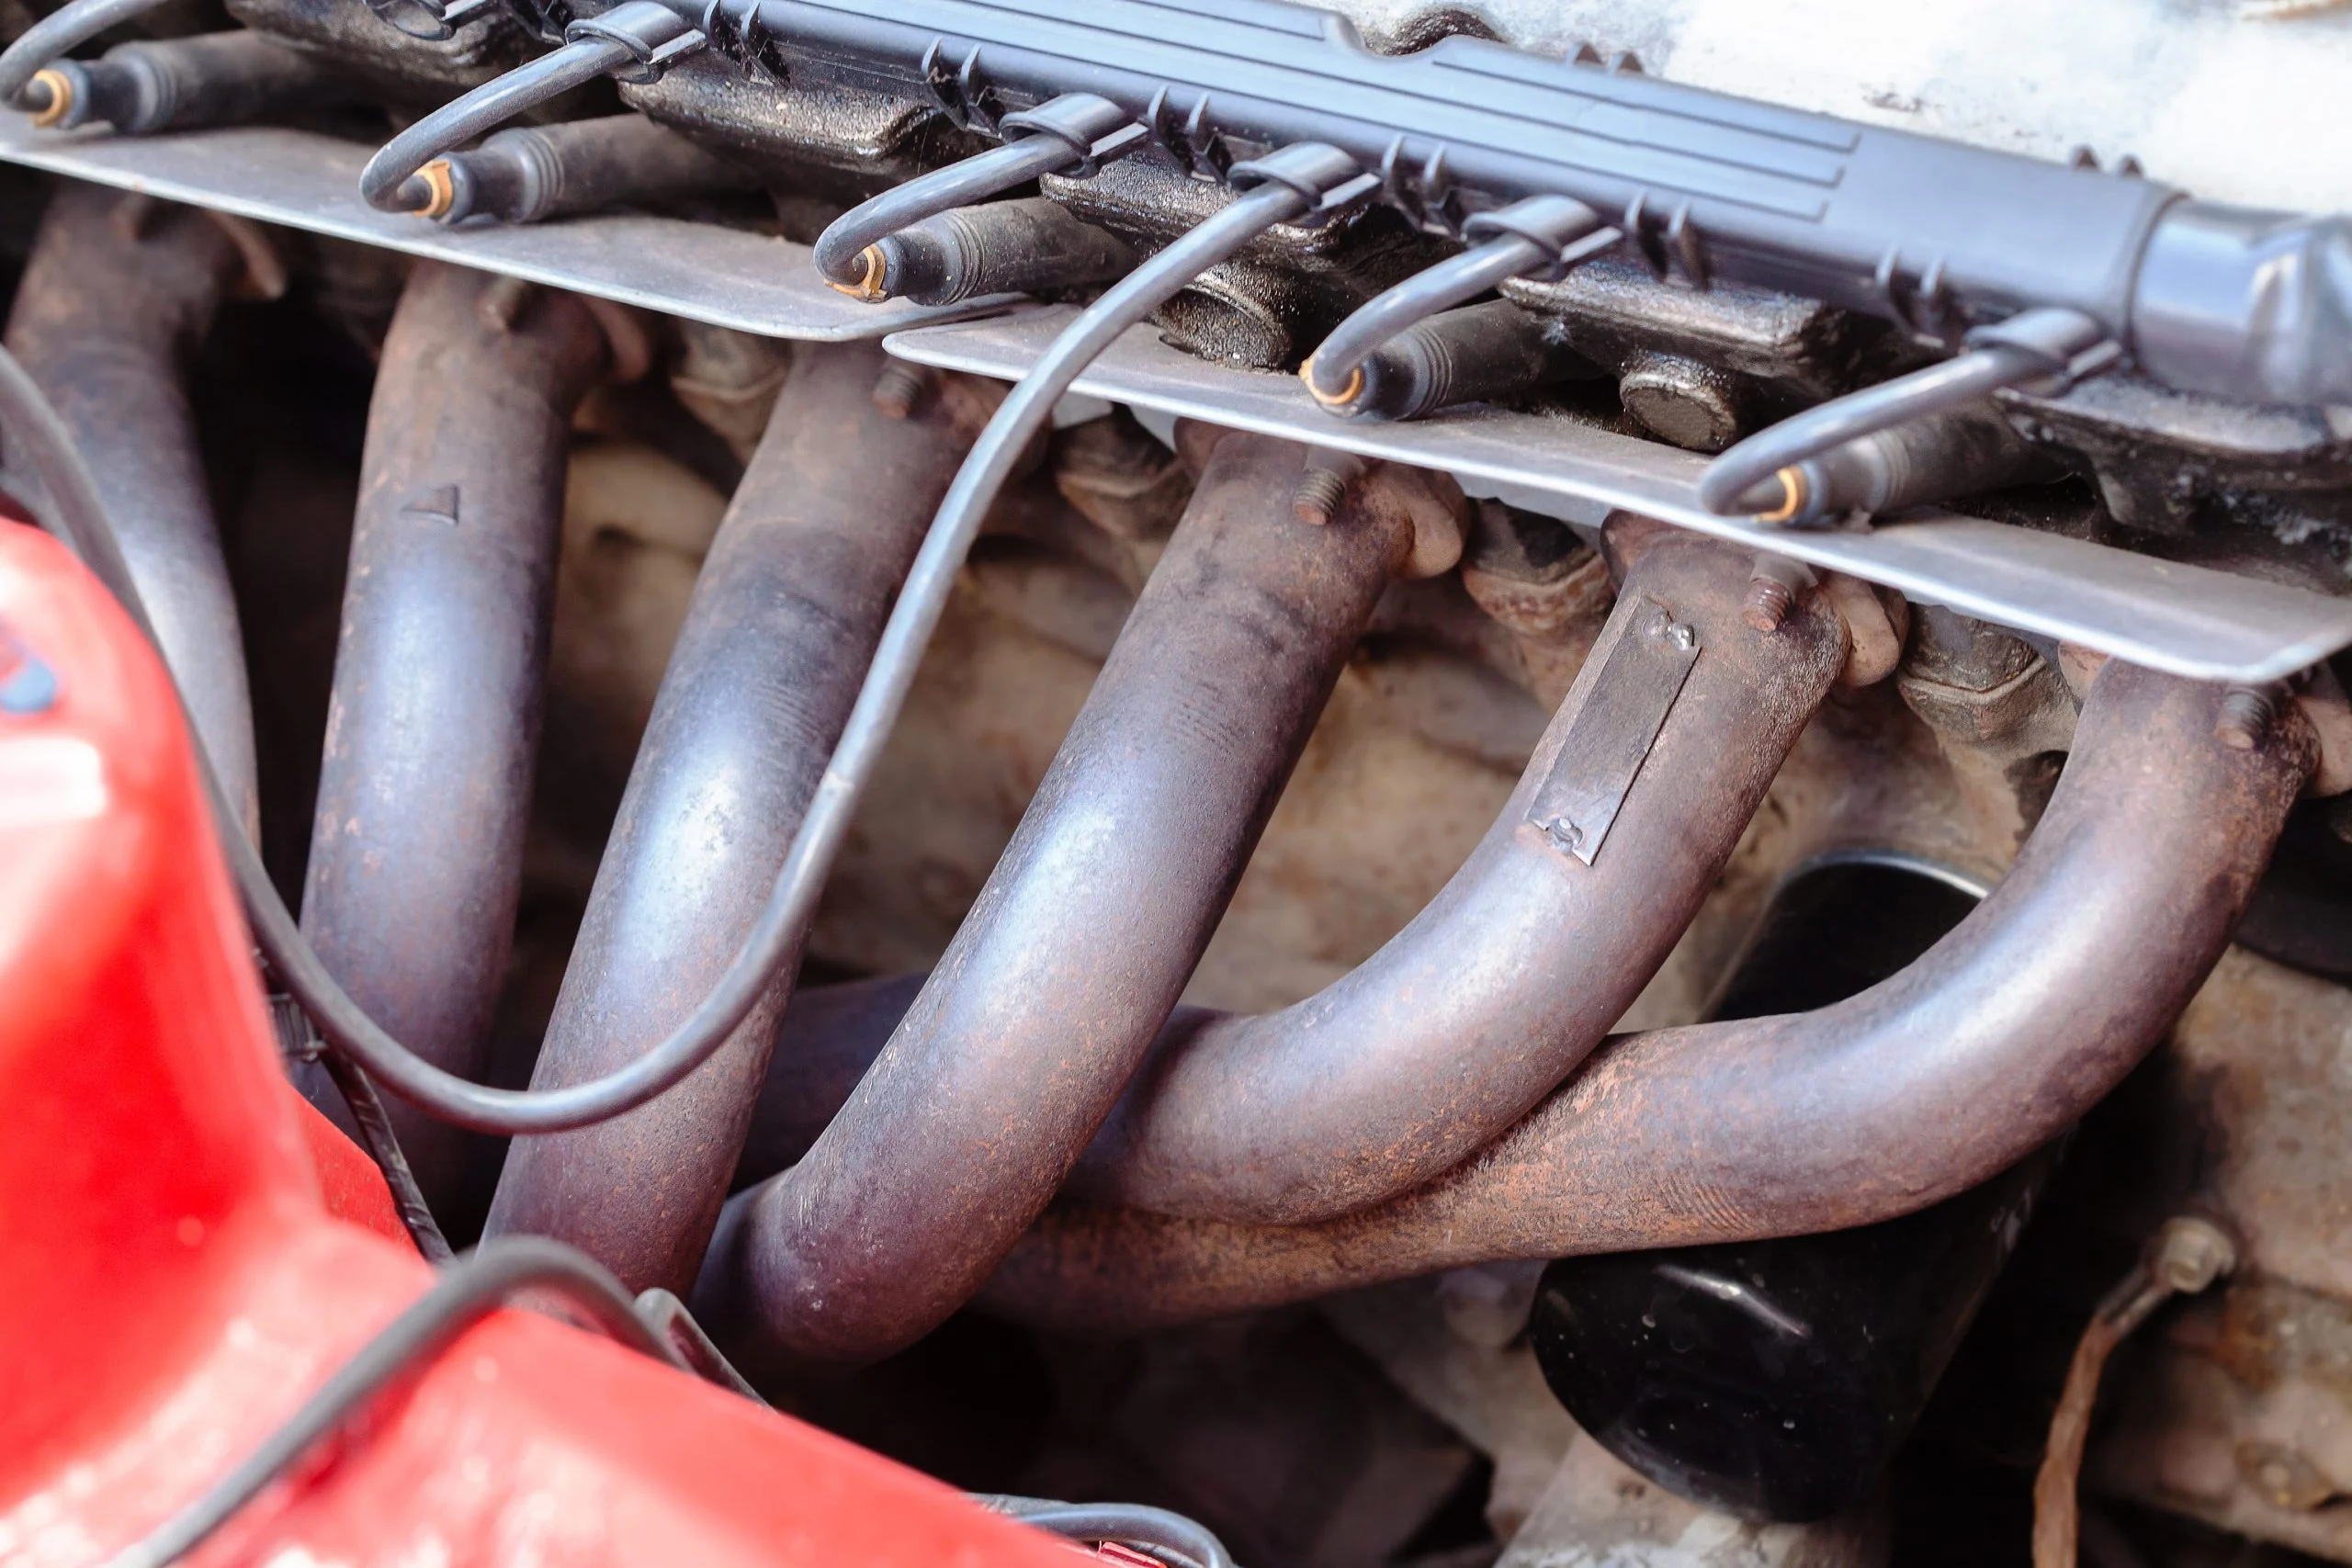
There is a dedicated ignition coil for each of the spark plugs. They are connected either directly or via wires. The spark plugs require about 15,000 to 20,000 volts of electricity to create the necessary spark to ignite the fuel.

However, over time, the ignition coil can suffer from deterioration, burning out, or complete failure, which compromises its performance. And you should note that even a slight problem can lead to major issues.

When the coil begins to show signs such as weak sparks, ignition failure, or incorrect ignition timing, it can result in decreased engine performance or even engine stalling. At this point, it becomes necessary to replace the faulty ignition coil.

Let’s learn the symptoms of a bad ignition coil to keep your car healthy and trouble-free:

1. Backfiring

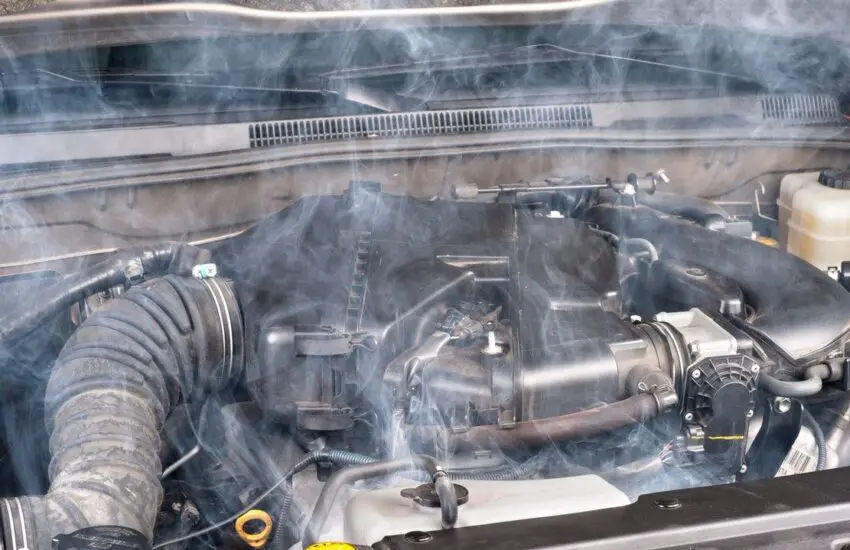
This is one of the first symptoms, and acting during this period will help you avoid costly repairs later. Watch for the emission of black smoke and the smell of gasoline when starting the engine. Ignoring it can eventually damage the exhaust system.

Backfiring occurs in the shortest time. (Photo: Mercedes-Benz)

2. Engine Misfires

This happens when the coils are failing. The engine will make coughing noises and cause rough driving at high speed due to shaking and sputtering. Your car will not have enough power when driving. Failing coils will also cause vibrations at idle.

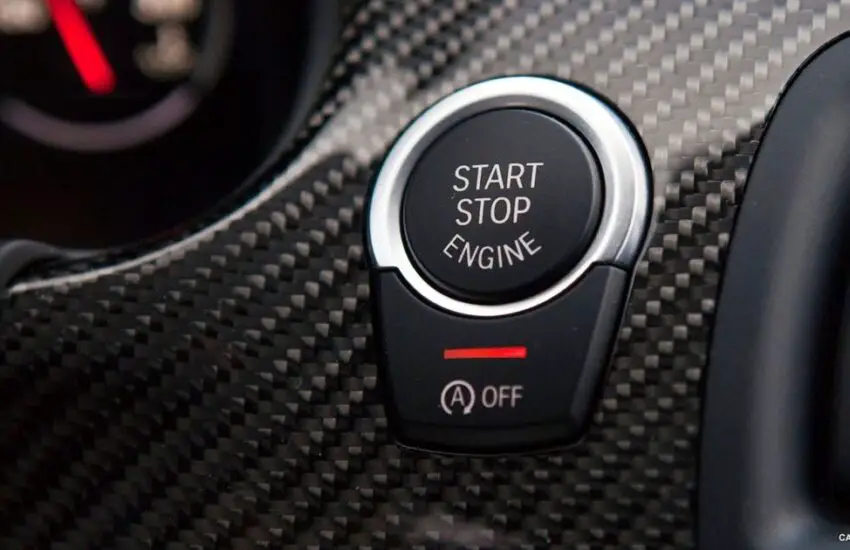
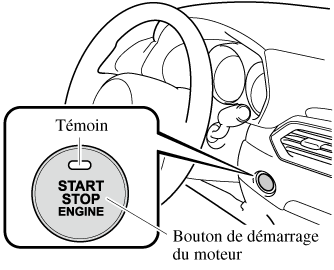
3. Engine Starting Problem

This is obvious because ignition coils help the engine start. So, any problem with them will affect this function. You can be certain that the problem is with the coils when the car has difficulty starting in cold weather.

4. Hard Engine Starting

Some models use a single coil to create the ignition spark. Thus, all cylinders will be affected if the coil malfunctions. The engine cranks but there is no spark and the car does not start.

5. Check Engine Light Code On

Symptoms of a bad ignition coil also include the illumination of the check engine light code located in the instrument cluster. The common code is P0351, which indicates a malfunction in the primary or secondary level circuit in the ignition coil. When this happens, you need to check the problem using a diagnostic tool.

It will be a DTC light that comes on if you are driving a BMW model.

Use a scanner when the light code is on.

6. The Vehicle Stalls

This trouble is another consequence of driving with a failing ignition coil. It leads to the creation of irregular sparks in the spark plugs, preventing the vehicle from getting enough power. Thus, the car may stall frequently and stop at some point. In this case, you need to restart it.

7. Poor Fuel Economy

A faulty ignition coil cannot provide the required power to the spark plugs. As a result, the car struggles to start the engine and consumes more fuel to compensate for the lost power. The consequence? Losing mileage per gallon.

To learn more about the symptoms of a bad ignition coil, check out this article:

https://youtube.com/watch?v=IMuyqtFXIPU%3Ffeature%3Doembed

Should all ignition coils be replaced at the same time?

Each cylinder has its own ignition coil, and if one coil fails, it will not affect the operation of the other coils or cylinders. Moreover, the coils originally supplied with the engine have often been thoroughly tested and determined to be compatible with the engine.

If you replace another coil whose quality has not been tested or is incompatible, it will reduce engine performance. Therefore, if checking the ignition coils reveals that only a few coils are malfunctioning or damaged, drivers should not replace all coils but simply replace the faulty ones.

Our conclusion is “It is not always necessary to replace all ignition coils at the same time. Generally, it is recommended to replace only the faulty or failing ignition coil.

Additionally, it is important to know that ignition coils have a limited lifespan. Therefore, as the vehicle approaches the manufacturer’s recommended operating period, as indicated in the technical specifications, the car owner should consider replacing the coils. This ensures optimal engine performance and safety.

Generally, the appropriate time for replacement is between approximately 193,000 and 240,000 km. During routine vehicle maintenance, car owners can consult technicians to assess the functionality of the coils and determine the most accurate timing for replacement.

Wrap Up

In conclusion, recognizing the symptoms of a faulty ignition coil in a car is crucial. Regular maintenance and periodic checks of the ignition system can help quickly identify and resolve any ignition coil issues, thereby promoting the vehicle’s longevity and reliability.

How to protect car paint

If you don’t know how to protect car paint, we will show you 5 useful ways to follow. You just need to pay attention and follow these tips to keep the shine intact.

So many little things can happen in a day that can damage your car’s paint.

You may not even know that those tiny splattered bugs or cheeky writings with fingers on a vehicle’s body can ruin the painted surface. Fortunately, the ways to protect car paint are not rocket science.

How to Protect Car Paint in 5 Simple Ways

The cosmetic appearance is the biggest draw of an automobile. You can drive a latest Lexus model or an Alpha Romeo from the ’80s, but people will only admire it when its paint shines like a mirror. Let’s check a few ways to keep it new forever.

1. Don’t Write on the Car with Your Finger

Perhaps you think that not writing on the car with your finger is a new car paint protection method. This method seems weird but it is very effective for protecting your car’s paint.

Many of us already agree that it’s fun to have the chance to put a hand on a dirty car. In fact, it’s a big thing you shouldn’t do, because dragging fingers over dirt can leave deep scratch marks on the body.

Your finger will act like sandpaper grinding the dirt remnants and push them through the paint.

Using a synthetic coating is one of the best ways to protect car paint (Photo: Carzspa)

2. Wash Regularly

Washing your car regularly is the best way to protect car paint and of course it’s not a new car paint protection because most of us already know it. But there is one thing you should notice.

According to automotive experts, when washing cars, you must stay away from dish detergent!

Dish detergent will really harm the paint. In this case, you need to use a high-quality car wash chemical and apply it with a foam pad applicator.

Then, scrub the body with a fine quality car wash mitt, and then rinse thoroughly with clean water. A microfiber towel would be the best option for wiping the body.

Furthermore, you can spray a detailing lubricant and run another mitt in a circular motion to apply it all over the car. Finally, wipe with another towel.

If regular washing is not possible, at least wipe the car daily with a duster to prevent unexpected sanding.

Regular car washing will take care of the paint. (Photo: Shutterstock)

3. Apply Paint Sealant

You should only use it once or twice a year. It will protect the car paint by creating a protective layer on it. Mix a bonding agent with the sealant, and the measure is normally 1 tablespoon of the agent in a ½ cup of sealant.

Increase or decrease the amount depending on your vehicle’s size, but it’s important to keep this 4:1 ratio. Apply the mixture in a circular motion on one section at a time. When it changes texture, rub with a towel in the same circular motion.

4. Wax to Keep the Shine

You must use wax the day after applying the paint sealant. Furthermore, you can use it every month or week, especially if you use the spray or liquid versions. Paste wax lasts longer and doesn’t need frequent applications.

There are many toxic and corrosive ingredients such as bird droppings, road grime, tree sap, etc. that stick to the paint and cut into it. Wax will prevent these things from causing damage.

Waxing keeps corrosive materials away. (Photo: Shutterstock)

5. Synthetic Coating

Using synthetic coating is a new car paint protection way you need to know. If you don’t know how to protect car paint this way, here is a guide for you.

Simply apply a ceramic or polymer coating once and it will protect the car paint for over 6 months!

Although it cannot produce the mirror-like shine of a high-quality wax coating, it proves more effective at preventing things from sticking to the paint.

FAQ

  1. What are the common environmental threats to car paint?

Common environmental threats to car paint include UV sunlight, bird droppings, tree sap, road salt, acid rain, and air pollution. These elements can cause fading, staining, and corrosion.

  1. How can I protect my car’s paint from UV damage?

To protect your car’s paint from UV damage, park in shaded areas or use a car cover. Applying a UV-resistant wax or paint sealant can also provide a protective barrier.

  1. What should I do if bird droppings or tree sap land on my car’s paint?

Quickly remove bird droppings or tree sap to prevent paint damage. Gently wipe with a damp microfiber cloth or use a specialized bird dropping remover or sap remover.

  1. Can waxing my car help protect the paint?

Yes, waxing your car provides a protective layer that shields the paint from contaminants and UV rays. Regular waxing helps maintain a glossy finish and prevents oxidation.

  1. Is washing my car regularly important for paint protection?

Yes, regular car washing is essential for paint protection. It removes dirt, road salt, and contaminants that can erode the paint surface over time.

  1. Are there specific washing techniques that protect car paint?

Using a two-bucket wash method with a grit guard, using a pH-balanced car wash soap, and washing in straight lines (not in circles) can minimize the risk of scratching the paint.

  1. How can I protect my car’s paint during the winter months?

During winter, protect your car’s paint by applying a winter-specific wax or sealant, promptly removing road salt, and avoiding abrasive snow removal techniques.

  1. Are there products or coatings that offer long-term paint protection?

Yes, paint protection films (PPF) and ceramic coatings are long-term solutions for paint protection. PPF provides a physical barrier, while ceramic coatings create a durable, hydrophobic layer.

  1. Can I apply paint protection products myself or should I seek professional help?

Many paint protection products can be applied by car owners. However, for advanced solutions like PPF and ceramic coatings, professional installation is often recommended for best results.

  1. How often should I reapply wax or sealant for paint protection?

The frequency of reapplying wax or sealant depends on the product used. Follow the manufacturer’s recommendations, but a general guideline is to apply a new coat every 3 to 6 months.

We hope the 5 useful ways mentioned above will give you detailed information on how to protect car paint.

Summer tires vs all-season tires: what are the differences

Car tires are classified in different ways. Based on weather conditions, car tires are categorized into 3 types: winter tires, summer tires, and all-season tires. When it comes to buying new tires, many drivers are unsure whether to purchase all-season tires or summer tires. Tires are one of the most important components and directly affect a vehicle’s safety. Understanding tires also helps drivers grasp their own safety when participating in traffic. What is the difference between summer tires and all-season tires? Drivers, please find out here.

What are summer tires?

If you want to drive a higher-performance car and spend a lot of time on the road in summer, you might wonder if it’s a good idea to buy summer tires for your car. Summer tires have the characteristic property of remaining inelastic even under high-temperature conditions. The tire surface has shallow grooves and small studs to create just enough friction to keep the car moving steadily.

Furthermore, the compounds and design of summer tires allow the vehicle to grip the road and increase handling on dry or wet surfaces. Summer tires must guarantee maximum performance at temperatures above 7 degrees Celsius. Additionally, summer tires have a long lifespan and save more fuel than winter tires. Let’s take a look at some of the features of this tire:

Rubber compound: Contains less natural rubber and softens at milder temperatures, allowing the rubber to adapt to dry and wet roads.

Structure: Fewer sipes, but a tread specifically designed to resist water absorption and allow for better grip on wet and dry surfaces.

Tread pattern: A simpler tread pattern contributes to excellent handling and a longer braking distance.

Note: You should not use summer tires in conditions where the temperature is below 44.6°F. In summer, temperatures can rise, so drivers should regularly monitor the tire pressure sensor to reduce the PSI, thus helping the car maintain the correct pressure.

Summer tires must guarantee maximum performance at temperatures above 7 degrees Celsius (Photo: pinterest.com)

What are all-season tires?

For those looking for a flexible, all-weather tire, the all-season tire is the perfect option. These tires can perform stably in all road conditions, a choice drivers can fully trust. All-season tires are made from synthetic rubber and offer good performance in various weather and thermal conditions. They typically have a tread size and shape allowing for perfect handling in snowy conditions and also provide excellent grip on wet and dry roads.

All-season tires have narrow sipes running across the tread – for better grip on wet or icy roads. The unique tread surface design of all-season tires also produces less noise, thus providing a smooth ride for vans, SUVs, and multi-purpose vehicles. Basically, when searching for all-season tires, each person will have different requirements, depending on the driving experience they desire.

Advantages:

  • Generally, an all-season tire usually lasts longer than a summer tire. Simply because they are made to withstand all weather elements.
  • You don’t have to go and change your tires with every season change. They provide adequate performance in all seasonal conditions, but they are not as optimized as summer tires.

Disadvantages:

All-season tires are not very grippy. These won’t stick to the road like a truly sticky summer tire. Because they are designed to be versatile and to withstand the elements very well, they have to be versatile, so they won’t be particularly high-performing in snow and in summer.

What are the differences between summer and all-season tires?

Structure

  • In summer tires, you’ll see there will be a large contact area on the outside of the tire, so when you take a corner, it will have a lot of contact area to grip the road. Sometimes you’ll notice that summer tires have a lower tread depth than all-season tires, which is really good for dry surface grip. Summer tires also have stiffer sidewalls, which can reduce the comfort provided by the tire, but it can allow for better steering response and feedback.
  • All-season tires are a combination of features between summer tires and winter tires. So, in the center of the tires, you can see the sipes on the outside. There are fewer features to allow for good cornering grip. These tires also have grooves that expand as you go deeper into the tread, so as the tire wears, the groove widens, and you still have plenty of space for water to evacuate. Compared to the summer tire, you can see it’s actually the opposite. It becomes narrower as you get closer to the wear bars.

Temperature

The biggest difference really concerns the temperatures at which these tires perform best. The summer tire has a compound intended for temperatures generally above about 40°F. For all-season tires, they can still remain somewhat flexible at freezing temperatures but also perform at these higher temperatures.

Fuel Economy

Summer tires always have better fuel efficiency at high temperatures due to their ability to have a stiffer construction and less friction. And all-season tires? Because they have more rolling resistance in hot weather and fewer miles per gallon.

Structure, temperature, and fuel economy are the factors that make the difference between all-season and summer tires (Photo: pinterest.com)

FAQ

Are summer tires good in the rain?

The answer is that summer tires are excellent in the rain or during rainy weather. The compounds that make up summer tires tend to be more flexible than regular tires, which helps ensure that the tires actually grip the road in wet and rainy conditions, as well as on hot summer days. Tread depth will also be an important factor in helping summer tires perform well on rainy days. Newer tires with greater tread depth tend to perform effectively, and older tires with less tread depth tend to have poorer performance in the rain.

Summer tires have specially designed treads that prevent water from accumulating in the treads and grooves, so when you encounter a sudden downpour, the tires release water more quickly to avoid dangerous situations. This is the reason why summer tires are considered the best tires for rain.

What happens if I use summer tires in winter?

Even on dry roads, free of ice and snow, winter brings colder temperatures. Summer tires are not designed for use in cold weather. The tire will harden. Summer tires have lower rolling resistance, and the rubber compound used softens and performs better at warmer temperatures as they heat up and become more resistant.

But as the weather cools and temperatures drop, the rubber on summer tires hardens and provides much less traction. In this case, all-season tires are the perfect solution for you. They will offer good handling and braking performance on dry and wet surfaces.

How to store summer tires in winter?

Regardless of hot or cold weather, tires should not be stored outdoors, even with a protective cover. When the season changes, you’ll want to use other tires: winter tires or all-season tires, you need to think about storing summer tires when they are not in use. Here’s how to do it:

Step 1: Clean the tire.

Remove stones from the tread, wash the tires with water, and let them dry. Treat them with a special compound to protect the rubber from drying out. Do not use inappropriate compounds. Because this will lead to premature tire wear.

Step 2: Find a suitable storage location.

Tires should be stored in a clean, dry, and well-ventilated place. The temperature should be between 10°C and 20°C. Ensure your tires are not exposed to sunlight: ultraviolet rays. Because this can destroy the rubber. The air humidity should be between 50% and 60%.

Step 3: Position the tires correctly

If you plan to store the tires without removing them from the rims, then place them horizontally; you can stack the tires on top of each other. If storing tires without rims, do not place them horizontally and do not hang them, as this could lead to reduced grip and accelerated tread wear.

Step 4: Use special storage bags

Bags will help protect the tires from dust and moisture. Use only bags specifically designed for this purpose, as condensation can build up inside ordinary plastic bags or trash bags, which could damage the tires.

Step 5: Protect your tires from freezing

If you cannot store the tires in a heated room in winter, treat them with a special protective agent. This will prevent them from cracking due to low temperatures.

Conclusion

Which tires to choose for your car? If you want the best tire for the conditions you drive in. In summer, you should use dedicated summer tires. And in winter or during light snow, you should need tires to ensure they still have good grip. Hopefully, the article has provided you with some guidance for your next tire purchase decision.

Where to find the Mini Cooper spare wheel

Where to Find the Mini Cooper Spare Wheel, The Mini Cooper is a compact sports car that has a large number of fans worldwide. Indeed, the car has a sporty look combined with excellent performance. It looks good, right? But there’s just one thing new drivers might find difficult at first. It’s finding the location of the Mini Cooper spare wheel. Yes, that’s true. So, in this article, we will guide you to find where the Mini Cooper spare wheel is located. Check it out!

Spare Wheel on a Mini Cooper

Mini Cooper vehicles are typically equipped with a spare wheel as a backup option in case of a flat tire or puncture. The spare wheel is a smaller temporary tire designed to get you to a nearby repair shop or service station. It is not intended for prolonged use or high speeds.

The spare wheel on a Mini Cooper is usually a compact temporary spare, often referred to as a “donut” spare wheel. This type of spare tire is smaller and narrower than the vehicle’s regular tires. It is designed to take up less space and reduce weight, making it easier to store in the trunk or under the vehicle.

In some cases, Mini Cooper models may be equipped with a full-size spare wheel, which is a standard-sized tire that matches the specifications of the other tires on the vehicle. Full-size spares offer a better fit in terms of performance and handling, but they also take up more space and are heavier than compact temporary spares.

Where is the Mini Cooper Spare Wheel?

Mini Cooper has a spare tire, called the Micro Space Saver Tire, which is placed under the rear of the car. Only the sport version known as the Mini Cooper S does not come with a spare wheel, but it is equipped with run-flat tires. This is because the battery was moved to the rear to make room for the compressor under the hood. So, in case of a tire problem, the run-flat tires allow the car to travel up to about 50 miles to get one repaired at some garages. Another thing, run-flat tires are made in an unusual size, meaning not all garages stock them. So, to get better tread wear and a more comfortable ride, many people often purchased a set of non-runflat tires.

Now back to the Mini Cooper spare wheel. According to expert maintenance advice, Mini Coopers have small dimensions, so it’s important that the spare wheel is placed under the rear of the car. To access the spare wheel, you need to follow these steps:

It takes some effort to find a spare wheel (Photo: e-drivers)

Now back to the Mini Cooper spare wheel. According to expert maintenance advice, Mini Coopers have small dimensions, so it’s important that the spare wheel is placed under the rear of the car. To access the spare wheel, you need to follow these steps:

Step 1: Park your car in a safe, flat, and traffic-free area

Step 2: Remove the trim panel from the trunk floor

Step 3: Remove the lowering handle and socket tool from the tool tray

Step 4: Remove the tool tray to access the spare wheel carrier securing the assembly

Step 5: Remove the retaining nut from the cover using the socket tool

Step 6: Remove the cover. Note the support stud and locking clip

Step 7: Screw the lowering handle onto the support stud

Step 8: Pull up the lowering tool and squeeze the locking clip.

Step 9: Lower the spare wheel carrier using the lowering handle.

Step 10: Remove the transport tray and the spare wheel from underneath the vehicle

Conclusion

So now you know “where is a spare wheel on a Mini Cooper?”. It is located under the rear of the car and you need to follow a few steps to remove it. In the sport versions of the Mini Cooper, they use run-flat tires, which can help you travel up to 50 miles to find a place to get one repaired. But run-flat tires are not available at many garages, so you need to consider other solutions to ensure your safety in the area where you often drive.

What happens if you press the start button while driving

What happens if you press the start button while driving? Most drivers have had this thought from time to time: what happens if we press the Start button while we’re driving? Indeed, some drivers might have tried it, but those who are unaware of its repercussions are not required to try it on their car. Here is an expert’s experience providing comprehensive information on the aspect.

Pressing the start button while driving: what would happen?

In the past, the car would start once the keys were inserted into the ignition point. However, today’s modern car uses the start button for the same function.

Usually, in modern cars, the start button is primarily pressed to start the engine. When the car is already moving, pressing the start button may not have an immediate effect, as the engine is likely already running. But what happens if this button is pressed accidentally while the engine is running? Let’s find out and put an end to your fear here!

The test of pressing the car’s start button while driving on a traffic-free road draws different conclusions at various speeds.

1. Press the start button at low speed

For keyless ignition, when the car is moving at a speed of 5 mph, it can be expected to stop without causing an accident. The reason the car stops is mainly the speed. Because some cars are programmed so that they stop at a certain defined threshold value.

2. Press the start button at highway speed

Now, when trying the same thing, i.e., pressing the start button while driving at a highway speed of at least 55 mph, it is observed that nothing happens. In other words, the car’s program does not obey the instructions or considers them invalid. This feature is mainly designed to avoid damaging your car or any nearby cars. Additionally, a warning message appears in most vehicles, indicating that they do not comply with instructions while in motion.

Nevertheless, one should not play with this feature when the car is moving. In some cases, it can be dangerous, as it may lead to a sudden loss of power steering, power brakes, and other essential systems. This can result in a loss of vehicle control and increase the risk of an accident.

Note: The experiment was conducted by experts in a traffic-free zone.

Other important things to do before playing with the Start button

If, while driving on a busy road, you need to stop the car due to some mechanical problem, first follow the instructions below before immediately jumping to press the start/stop button.

1. Put the car in neutral

To solve the problem of uncontrollable acceleration in manual and automatic cars, put the car in neutral (the letter N) as this will allow the wheels to disengage from the engine. This applies, of course, to both manual and automatic transmissions. This is by far the simplest and quickest way to resolve any issue of uncontrollable and unwanted acceleration.

2. Apply the brakes gently

Without panicking, once the car is in neutral, press the brakes slowly and gently. If you have already put your vehicle in Neutral, you can now brake. So go gently.

3. Inspect the accelerator pedal

Following the two actions above, now try to return the accelerator pedal to its normal position by lifting the tip of your foot. This action is mainly required on older cars where the accelerator is stuck. Remember to always keep your eyes on the road.

If it still doesn’t work, press the start/stop button for 5 seconds. This will surely stop the car immediately.

4. Use your hazard lights

Another thing we must remember is to signal to other car owners that you are having problems. Hazard lights are excellent tools in these scenarios. Remember that the most important priority is to warn them; don’t be afraid to bother them. To be more precise, honk, flash, do whatever you can to tell them.

5. Try to stop the engine at very low speed

If you have already tried all the steps, you have a high chance of stopping the vehicle in a safe place, or at least slowing it down. Now, the engine is the last problem car owners need to deal with. If your car is automatic and you have an automatic transmission, keep it in N mode. Do not switch it to P. In some cases, car owners have a key; just turn it to off. And if you have a Start or Stop button, simply press it or hold it down for three seconds and see what happens.

Final thoughts

In conclusion, pressing the start button while driving can have unexpected consequences and is generally not recommended. To ensure your safety and that of others on the road, it is best to use the start button only as intended, typically when the vehicle is stationary or during the initial startup sequence before driving.

Solve Apple CarPlay Operation Problems for an Uninterrupted Driving Experience

Fix Apple CarPlay operation issues and enjoy an uninterrupted driving experience.

Discover how to resolve Apple CarPlay issues for a seamless driving experience. Apple CarPlay allows drivers to easily access their favorite apps, messages, and music while staying focused on the road. However, you may occasionally encounter problems with CarPlay, which can be frustrating and disrupt your driving experience.

In this article, we will provide helpful tips to troubleshoot common Apple CarPlay issues. We’ll explain how to check your iPhone settings, reset CarPlay, fix USB connection problems, and more. You’ll also learn how to update your car’s software to optimize compatibility with CarPlay.

By following our simple tips, you can quickly resolve Apple CarPlay issues and enjoy all its features without interruption. Don’t let technical problems ruin your driving experience; learn how to fix Apple CarPlay issues now and regain control of your drive.

Common Apple CarPlay Issues

Frequent problems with Apple CarPlay Apple CarPlay is generally reliable, but there may be situations where you encounter issues. Here are some common problems you might face with Apple CarPlay:

Troubleshooting Steps for Apple CarPlay Issues

Another common difficulty with Apple CarPlay involves USB connection issues. If your iPhone isn’t recognized by CarPlay when you plug it into your car, try the following steps:

– Check that the USB cable you’re using is in good condition and working properly.

– Try plugging your iPhone into another USB port in your car.

– If possible, test with another USB cable to see if the problem persists.

Updating Your iPhone and CarPlay Software

If you’re experiencing issues with Apple CarPlay, here are some troubleshooting steps you can follow to resolve the problems:

Checking CarPlay Settings

It’s important to check the CarPlay settings on your iPhone and in your car to ensure they’re properly configured. Here’s how to do it:

– On your iPhone, go to “Settings” > “General” > “CarPlay” to check compatible cars and enabled apps.

– In your car’s settings, look for options related to CarPlay and make sure they’re set up correctly.

Restarting the iPhone and Car Infotainment System

Restarting your iPhone and your car’s infotainment system can often resolve CarPlay issues. Here’s how to proceed:

– On your iPhone, hold the power button until the “Slide to Power Off” slider appears. Slide to turn off your iPhone, then turn it back on.

– Turn off your car, wait a few minutes, then restart it.

Resetting Your CarPlay Connection

If the previous steps haven’t resolved the issue, you can try resetting the CarPlay connection between your iPhone and your car. Here’s how to do it:

– On your iPhone, go to “Settings” > “General” > “CarPlay” and select your car from the list of available cars.

– Tap “Forget This Car” to remove the existing CarPlay connection.

– Restart your iPhone and try connecting your iPhone to your car again.

Checking the USB Cable and Connection

A faulty cable or poor USB connection can cause issues with Apple CarPlay. Here’s what you can do:

– Check that the USB cable you’re using is in good condition and working properly. Try using another cable if possible.

– Make sure the USB port in your car is clean and undamaged.

– Plug your iPhone into another USB port in your car to see if that resolves the issue.

Contacting Apple Support for Help

If none of the previous tips resolve your Apple CarPlay issue, it may be necessary to contact Apple Support for additional assistance. They can guide you through the troubleshooting process and provide solutions specific to your situation.

Conclusion and Final Tips for a Seamless Apple CarPlay Experience

By following the troubleshooting steps mentioned above, you should be able to resolve most common Apple CarPlay issues. However, here are some additional tips for a seamless experience:

– Keep your iPhone and CarPlay software updated by installing the latest updates.

– Use a high-quality USB cable to avoid connection problems.

– Avoid using resource-intensive apps while using CarPlay.

– If you experience recurring issues with CarPlay, consider consulting a professional for additional assistance.

Don’t let technical problems prevent you from fully enjoying Apple CarPlay. Follow our troubleshooting tips and enjoy an uninterrupted driving experience with all CarPlay features at your fingertips.

Troubleshoot Apple CarPlay operation issues and enjoy an uninterrupted driving experience.

Discover how to resolve Apple CarPlay issues and enjoy a seamless driving experience. Apple CarPlay is an innovative technology that allows drivers to easily access their favorite apps, messages, and music while staying focused on the road. However, you may occasionally encounter problems with CarPlay, which can be frustrating and affect your driving experience.

In this article, we’ll provide helpful tips to troubleshoot common Apple CarPlay issues. We’ll explain how to check your iPhone settings, reset CarPlay, fix USB connection problems, and more. You’ll also learn how to update your car’s software to optimize compatibility with CarPlay.

By following our simple tips, you can quickly resolve Apple CarPlay issues and enjoy all its features without interruption. Don’t let technical problems ruin your driving experience; learn how to fix Apple CarPlay issues now and regain control of your drive.

The advantages and disadvantages of nitrogen tire inflation

The use of nitrogen tire inflation is becoming more common every day. Nitrogen-filled tires are an alternative to regular air-filled tires.

The idea has been gaining traction lately among average consumers, even though the U.S. military, NASCAR, and the aviation industry have been using nitrogen tires for years.

Like other things, using nitrogen in tires has unique advantages and disadvantages. Let’s take a look at the pros and cons of nitrogen in tires to make your own decision:

Advantages of Nitrogen Tire Inflation

Most car owners wonder what fills their tires? Some of them think it’s air, but it’s something else. Since nitrogen is much more stable than oxygen, it is the ideal candidate for tire filling.

To be more precise, race cars, airplanes, spacecraft, and industrial machinery require tires that can withstand precise settings. So, what does nitrogen actually do for us?

Stable Tire Pressure

Nitrogen-filled tires remain stable in the long term because nitrogen barely passes through the tire rubber. Underinflated tires also show fewer pressure fluctuations with temperature changes.

As a result, they are popular in racing because conventional air-inflated tires display fairly inconsistent pressure when they heat up and require the TPMS to regularly check tire pressure during trips to ensure driver safety.

However, drivers must understand that nitrogen does not have the power to improve your handling, especially during daily commuting.

Nitrogen offers minor benefits for daily driving by optimizing and stabilizing tire pressure, which is surprisingly suitable for race cars.

Nitrogen offers minor benefits for daily driving. (Photo: Action Tires)

Fewer Tire Leaks

When we discuss the pros and cons of nitrogen in tires, we are talking about the air escaping from tires. When the car is moving, the rubber flexes and stretches while rolling, which slowly deflates the air.

According to chemistry, an oxygen atom is structurally smaller than a nitrogen atom. For this reason, nitrogen is less likely to escape from a tire and penetrate the rubber.

And it’s not just a theory: nitrogen has actually been proven to escape from a tire 1.6 times slower than air.

Fuel Efficient

Correct and constant tire pressure has improved the energy efficiency of nitrogen tires. It is believed that having correct air pressure significantly increases fuel economy.

Since higher tire pressure leads to much better energy efficiency, it is very useful for drivers. To be more precise, higher tire pressure decreases the car’s rolling resistance, as well as inflation.

A single tire can save you 3 to 6% in fuel over its lifetime, which is not huge but still counts in the discussion of the pros and cons of nitrogen-filled tires.

Nitrogen filling can improve tire operating stability. (Photo: Douglas Infiniti)

Environmentally Friendly

Without a doubt, nitrogen is a green alternative in discussions about the pros and cons of tires. Over 300 million tires are discarded every year.

However, using nitrogen in tires can reduce this number by 30%. To be more precise, nitrogen-filled tires maintain good pressure, offer better fuel consumption, and reduce emissions.

Not to mention that they extend the tire’s lifespan, reduce the demand for tires from car owners as well as natural resources.

As a result, nitrogen is the key to making the world greener. Moreover, nitrogen tires reduce the carbon footprint by reducing fuel combustion.

Durability

Durability is by far the biggest advantage when talking about the pros and cons of nitrogen in tires. Nitrogen tires have a longer lifespan because they do not have the corrosive properties of standard air-inflated tires.

Drivers typically fill tires with nitrogen to reduce wear and tear on the wheels, as well as other car parts. Nitrogen is dry, so it does not form rust that would degrade the tires and metal wheels.

Compared to air containing water vapor, while nitrogen does not, nitrogen will decrease tire pressure as it heats up.

Not to mention that water vapor will corrode sensitive sensors and rust the inside of the valve stem and wheel.

Safety

Nitrogen is not combustible, which makes safety an advantage of nitrogen in tires. For this reason, nitrogen tire inflation will not worsen a fire, unlike air-inflated tires.

Disadvantages of Nitrogen Tire Inflation

Expensive

Here is the biggest disadvantage of nitrogen in the pros and cons of tires. Nitrogen is expensive, that’s for sure.

Nitrogen tires are certainly expensive. (Photo: 3 Bay Auto Sales)

For this reason, nitrogen tire inflation is more expensive than conventional air inflation, as well as free air compressors at local gas stations.

You may have to spend more than $5 to inflate a single tire, not to mention the time it takes for staff to operate. Ten years ago, car owners cost about $30 per nitrogen-filled tire.

Unavailability

Unavailability is also one of the disadvantages in the discussion of the pros and cons of nitrogen in tires. Not only is it much more expensive than air, but nitrogen is actually harder to find.

To be more precise, the services are not found everywhere. Nitrogen tire inflation is only available at certain professional service stations or selected tire shops.

Sometimes you have to fill your tires with regular air, because nitrogen inflation may not be available where you are. And this action will dilute the remaining nitrogen that already fills your tires.

Maintenance is Still Required

Inflating tires with nitrogen does not mean you fill the tires once and then forget about them. On the contrary, maintenance is actually more essential in the discussion of the pros and cons of nitrogen in tires.

They need maintenance and pressure checks from time to time because the inflation level and tire pressure will not always be the same. Not doing so leads to loss of tire wear as well as fuel consumption.

Thus, if car owners cannot perform routine maintenance on their tires, they certainly will not wear evenly. This applies to tires with or without nitrogen.

Time-Consuming

Last but not least, one of the disadvantages of nitrogen in tires is that it is time-consuming. Car owners indeed need skills to perform nitrogen refills due to its complexity.

To maximize the benefits of nitrogen filling, drivers want to purge and fill the tires several times in order to remove as much air as possible.

If the tire shops you have chosen have a filtering machine capable of removing oxygen from nitrogen, it can help speed up the process even though it is costly.

Conclusion

As you have now seen the pros and cons of nitrogen in tires, you can decide for yourself which type of tire will best meet your needs.

However, nitrogen tire inflation should be your first choice if you enjoy racing, motorsports, or simply love enjoying speed on the highway! Remember that maintenance is a crucial aspect if you choose to use a nitrogen tire.

Advantages:

  • Better road holding
  • Limited risk of bursting
  • Reduced tire wear
  • Fuel savings
  • Protection of rims and tires
  • More stable pressure
  • Less sensitive to temperature variations
  • Reduces internal corrosion

Disadvantages:

  • Higher cost than compressed air
  • Less accessible than compressed air
  • Requires specific equipment
  • May not be compatible with all tire types
  • Potential benefits unproven for all drivers

Other keywords:

  • Tire inflation
  • Nitrogen
  • Compressed air
  • Tires
  • Safety
  • Performance
  • Economy
  • Environment

Questions:

  • Should you inflate your tires with nitrogen?
  • What are the advantages and disadvantages of nitrogen tire inflation?
  • Is nitrogen better than compressed air for tires?
  • How much does nitrogen tire inflation cost?
  • Where can I get my tires inflated with nitrogen?

Brand names:

  • Michelin
  • Continental
  • Pirelli
  • Goodyear
  • Bridgestone

Websites:

  • https://www.continental-tires.com/fr/fr/b2c/tire-knowledge/nitrogen-in-tires/

Hashtags:

  • #tires
  • #nitrogen
  • #inflation
  • #car
  • #safety
  • #performance
  • #economy
  • #environment

Excessive Exhaust Manifold Temperature: Causes, Consequences, and Solutions

The exhaust manifold is a crucial component of a vehicle’s exhaust system. It is responsible for collecting hot exhaust gases from the engine and directing them to the exhaust pipe. Due to its role, the exhaust manifold is subjected to extremely high temperatures.

1. How the Exhaust Manifold Works

The exhaust manifold is typically made of cast iron or stainless steel. It consists of several tubes, each connected to an engine cylinder. The hot exhaust gases escape from the cylinders and flow through the manifold tubes. As they merge, the exhaust gases lose heat and pressure before being expelled through the exhaust pipe.

2. Exhaust Gas Temperature

The temperature of the exhaust gases at the engine outlet can reach 800°C. This temperature can vary depending on several factors, such as the type of engine, engine speed, and engine load.

3. Exhaust Manifold Temperature

The temperature of the exhaust manifold is generally slightly lower than that of the exhaust gases at the engine outlet. It typically ranges between 600°C and 700°C.

4. Factors Influencing Exhaust Manifold Temperature

Several factors can influence the exhaust manifold temperature, including:

  • Engine type: Gasoline engines typically have hotter exhaust manifolds than diesel engines.
  • Engine speed: The exhaust manifold temperature increases with engine speed.
  • Engine load: The exhaust manifold temperature rises when the engine is under heavy load.
  • Type of exhaust manifold: Stainless steel exhaust manifolds tend to be hotter than cast iron ones.

5. Consequences of Excessive Exhaust Manifold Temperature

Excessive exhaust manifold temperature can have several adverse effects, such as:

  • Deterioration of the exhaust manifold: Excessive heat can weaken the exhaust manifold, making it more prone to cracking or corroding.
  • Loss of engine performance: Too high a temperature can disrupt the flow of exhaust gases and reduce engine efficiency.
  • Fire risk: The heat from the exhaust manifold can ignite nearby combustible materials.

6. Measures to Limit Exhaust Manifold Temperature

There are several measures to limit the exhaust manifold temperature, such as:

  • Using a high-quality exhaust manifold: An exhaust manifold made from heat-resistant materials will be less likely to deteriorate at high temperatures.
  • Installing an efficient exhaust system: An efficient exhaust system will expel exhaust gases more quickly and reduce the manifold temperature.
  • Performing regular engine maintenance: A well-maintained engine will run more efficiently and produce less heat.

Conclusion

The exhaust manifold temperature is an important factor to monitor to ensure the vehicle’s proper functioning and prevent potential damage. By taking the necessary steps to limit the exhaust manifold temperature, you can extend the life of your exhaust system and improve your engine’s performance.

Renault Austral: spearheading the French automaker’s revival

Renault Austral: Spearheading the French Manufacturer’s Revival

  • The Austral SUV symbolizes Renault’s renewal, combining attractive design and innovative hybrid technology.
  • Its commercial success contributes to the manufacturer’s strategy of refocusing on more profitable vehicles.
  • The Austral stands out with its bold design, high-performing and efficient E-Tech hybrid powertrain, and intuitive, advanced onboard technology.

Design and Success

  • The Austral targets the mid-size SUV segment, a lucrative market.
  • Its elegant and modern design attracts attention and symbolizes Renault’s new strategy.
  • The model’s commercial success is a key element of the brand’s financial revival.

E-Tech Hybrid Powertrain

  • The Austral features a self-charging E-Tech hybrid powertrain, combining a 3-cylinder gasoline engine and an electric motor.
  • This technology offers robust performance and reduced fuel consumption (starting from 6.2 liters/100 km).
  • The E-Tech hybridization aligns with Renault’s commitment to more eco-friendly mobility.

Onboard Technology

  • The Austral stands out with its advanced interactive interface featuring two 12-inch digital screens.
  • The system provides intuitive control of various vehicle functions.
  • Comfort is also present with electric front seats and modular rear benches.
  • USB-C ports and an induction charger facilitate charging of mobile devices.

Strengths

  • Bold and modern design
  • High-performing and efficient E-Tech hybrid powertrain
  • Intuitive and advanced onboard technology
  • Comfort and modularity
  • Environmental commitment

Opportunities

  • Expand the range of hybrid and electric powertrains
  • Strengthen Renault’s presence in the SUV segment
  • Leverage the Austral’s success to launch new models

Threats

  • Increased competition in the SUV segment
  • Evolving technologies and environmental standards
  • Risks related to the global economic situation

Challenges

  • Maintain Renault’s renewal momentum
  • Ensure the profitability of the new strategy
  • Adapt production to market fluctuations

A Bold and Elegant Design

The Renault Austral stands out with a bold and elegant design. The front is marked by a wide grille and stretched LED headlights. The profile is fluid and dynamic, while the rear is highlighted by C-shaped LED taillights.

A Modern and Technological Interior

The Renault Austral’s interior is modern and technological. It features a customizable digital dashboard and a 12-inch central touchscreen. The overall finish is good, and the materials are of high quality.

An Efficient Hybrid Powertrain

The Renault Austral is available with a 200-horsepower E-Tech hybrid powertrain. This powertrain is highly efficient and helps reduce fuel consumption and CO2 emissions.

A Wide Range of Equipment

The Renault Austral comes with a wide range of equipment, such as a panoramic sunroof, leather upholstery, a navigation system, and driving aids.

An Attractive Price

The Renault Austral is offered at an attractive price, starting from €32,900. It therefore offers excellent value for money.

The Renault Austral is a compact SUV with all the assets to succeed. It is elegant, modern, technological, efficient, and affordable. It should enable Renault to regain market share in the compact SUV segment.

In summary, the Renault Austral’s strengths are:

  • A bold and elegant design
  • A modern and technological interior
  • An efficient hybrid powertrain
  • A wide range of equipment
  • An attractive price

The Renault Austral is a true spearhead for Renault. It proves that the French manufacturer is capable of offering competitive and attractive SUVs.

Tire Pressure Warning: An Alert Not to Be Ignored

The tire pressure warning light, often symbolized by an exclamation point inside a circle or a tire with waves, illuminates on your dashboard to alert you to a drop in air pressure in one or more of your tires. It is crucial not to ignore this warning, as driving with underinflated tires can pose serious dangers.

What does the illuminated warning light mean?

When the tire pressure warning light comes on, it means that the pressure in at least one of your tires is 25% below the manufacturer’s recommended pressure. This can be caused by several factors, such as:

  • A slow puncture
  • An air leak due to a faulty valve
  • A natural pressure drop due to ambient temperature
  • A tire that was underinflated from the start

Risks associated with driving on underinflated tires

Driving with underinflated tires can have serious consequences for your vehicle’s safety and performance:

  • Increased risk of hydroplaning: Underinflated tires have poorer grip on wet roads, increasing the risk of losing control of the vehicle.
  • Premature tire wear: Underinflated tires wear out more quickly, representing an additional cost for you.
  • Reduced vehicle performance: Underinflated tires can reduce your vehicle’s energy efficiency and affect its handling.
  • Risk of blowout: In extreme cases, an underinflated tire can burst, which can lead to a serious accident.

What to do if the tire pressure warning light comes on?

Here are the steps to follow if the tire pressure warning light illuminates:

  1. Stop as soon as possible and check the pressure of all your tires using a pressure gauge.
  2. Inflate the tires to the recommended pressure by the manufacturer. You can find this information in your vehicle’s owner’s manual or on the tire pressure information label, usually located on the driver’s side door jamb.
  3. If the light remains on after reinflating the tires, there may be a more serious problem. In this case, it is important to have your vehicle inspected by a professional.

Tips for maintaining tire pressure

To avoid the dangers associated with underinflated tires, it is important to check your tire pressure regularly, at least once a month. You can also install a Tire Pressure Monitoring System (TPMS) that will automatically alert you in case of a pressure drop.

By following these simple tips, you can help ensure your safety and that of your passengers on the road.

In summary

The tire pressure warning light is an important safety feature. Never ignore it and take the necessary steps to correct the situation as soon as it comes on. By maintaining your tire pressure at an adequate level, you can improve your vehicle’s safety, performance, and longevity.

Tire Pressure Warning Light: How to Reset It?

The tire pressure warning light comes on when one or more of your vehicle’s tires are underinflated. It is important to reset it after you have reinflated your tires to the proper pressure.

Reset Methods

The method for resetting the tire pressure warning light depends on the make and model of your vehicle. Here are the three most common methods:

1. Reset Button

  • Most modern vehicles have a specific reset button for the tire pressure warning light. This button is usually located under the dashboard, near the steering wheel.
  • To reset the light, press and hold the button for about 3 seconds.
  • The light will flash several times to indicate that it has been reset.

2. On-Board Computer Menu

  • Some vehicles allow you to reset the tire pressure warning light via the on-board computer menu.
  • Consult your vehicle’s owner’s manual to learn how to access the on-board computer menu and find the tire pressure warning light reset option.

3. Diagnostic Tool

  • If the two methods above do not work, you can use a diagnostic tool to reset the tire pressure warning light.
  • These tools are available at auto repair shops and auto parts stores.

Tips

  • Make sure to reinflate your tires to the proper pressure before resetting the light. The proper pressure is indicated in your vehicle’s owner’s manual.
  • If the tire pressure warning light comes on again after you have reset it, there may be a problem with one or more of your tires. Have them checked by a professional.