P1441 Code MINI: Complete Diagnosis of the Depollution System

Understanding the P1441 Code on Your MINI

What Exactly is the P1441 Code?

The P1441 trouble code is a generic OBD2 code specific to MINI vehicles, particularly concerning models equipped with diesel engines. This code indicates a problem with the secondary emissions system, more specifically in the anti-pollution valve control circuit. When the onboard computer detects an anomaly in the operation of this system, it records the P1441 code and illuminates the check engine light.

Operation of the Related Anti-Pollution System

The system targeted by P1441 is an integral part of the emissions control system in MINI diesel engines. It mainly includes:

  • An electro-pneumatic or electric valve controlling gas flows
  • Pressure and temperature sensors
  • The engine control module (ECU)
  • The Exhaust Gas Recirculation (EGR) system

This system works in synergy to reduce pollutant emissions and optimize fuel combustion.

Main Causes of the MINI P1441 Code

Electrical and Electronic Problems

Electrical failures account for nearly 40% of P1441 cases:

  • Damaged or cut electrical wires in the control circuit
  • Oxidized or loose connectors at the anti-pollution valve
  • Electrical supply problem to the valve
  • Failure of the relay controlling the system
  • Problem with the engine control module (ECU)

Mechanical Failures of the Valve

The anti-pollution valve itself can present various problems:

  • Mechanical blockage due to carbon deposits
  • Wear of internal valve components
  • Failure of the electric or pneumatic actuator
  • Leaks at the valve connections
  • Corrosion of moving elements

Problems Associated with the EGR System

Given the interconnection of systems, the P1441 code can be triggered by:

  • Clogged or defective EGR valve
  • Problems in the EGR gas cooling circuit
  • Faulty EGR sensors sending incorrect information

Step-by-Step Diagnosis of the P1441 Code

Equipment Needed for Diagnosis

To properly diagnose a P1441, you will need:

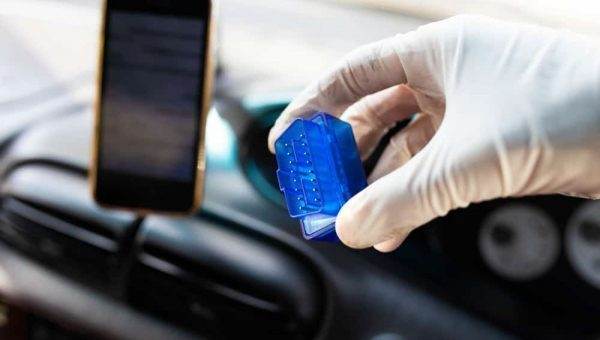
  • A professional MINI-compatible OBD2 scanner
  • A digital multimeter for electrical tests
  • A vacuum source for testing pneumatic components
  • Specific MINI disassembly tools
  • The vehicle’s technical documentation

Step-by-Step Diagnostic Procedure

Start with a methodical approach:

  • Reading and recording all present trouble codes
  • Clearing codes and performing a drive test to check for reappearance
  • Complete visual inspection of wiring and connectors
  • Electrical tests of the anti-pollution valve (resistance, power supply)
  • Checking pneumatic operation if applicable
  • Monitoring real-time data via the OBD2 scanner

Specific Electrical Tests

Electrical tests should include:

  • Measuring the supply voltage to the valve (ignition ON)
  • Checking the circuit ground
  • Measuring the valve coil resistance
  • Testing the control signal from the ECU
  • Verifying cable insulation

P1441 Repair Solutions

Common Repairs and Their Costs

Depending on the identified cause, repairs can vary:

  • Cleaning the anti-pollution valve: €50-€150
  • Replacing the anti-pollution valve: €200-€500
  • Repairing wiring: €100-€300
  • Cleaning the EGR system: €150-€350
  • Replacing associated sensors: €100-€400

Recommended Repair Procedures

For replacing an anti-pollution valve:

  • Disconnect the battery before any intervention
  • Locate and remove the old valve
  • Thoroughly clean the mounting seat
  • Install the new valve with appropriate seals
  • Perform an adaptation procedure via diagnostic scanner
  • Carry out a complete operational test

Consequences and Prevention

Risks if Not Repaired

Ignoring a P1441 code can lead to:

  • Significant increase in pollutant emissions
  • Reduced engine performance
  • Increased fuel consumption
  • Potential damage to other emissions components
  • Problems during technical inspection

Recommended Preventive Measures

To prevent the reappearance of P1441:

  • Use quality fuels
  • Perform regular maintenance of the emissions system
  • Regularly drive at high engine RPM for decarbonization
  • Have the emissions system checked during each service
  • Use preventive cleaning additives if recommended

The P1441 code on a MINI requires a rigorous diagnostic approach but is perfectly repairable by a properly equipped professional. Prompt intervention preserves your vehicle’s performance and respects the environment.

P1441 Nissan Code: Complete Emission Control System Diagnosis

Understanding the P1441 Code on Nissan Vehicles

The OBD2 P1441 code is a manufacturer-specific code related to the Evaporative Emission Control (EVAP) system on Nissan vehicles. This code indicates a problem with the canister vent valve control circuit, a crucial component of the pollution control system that prevents gasoline vapors from escaping into the atmosphere.

Operation of the Nissan EVAP System

The EVAP (Evaporative Emission Control System) is designed to capture and store fuel vapors from the gasoline tank. These vapors are directed to the canister (activated charcoal) where they are temporarily stored before being sent back to the engine to be burned during combustion.

Role of the Canister Vent Valve

The canister vent valve, also known as the ventilation valve or vent solenoid, has a crucial function: it controls the intake of fresh air into the EVAP system during the purge cycle. This ventilation allows the stored vapors in the canister to be effectively drawn into the engine.

Consequences of the P1441 Fault

When the engine control unit detects an anomaly in the control circuit of this valve, it records the P1441 code and illuminates the check engine light. An untreated P1441 fault can lead to:

  • Increased pollutant emissions
  • Abnormal fuel consumption
  • Unstable idle problems
  • Failure in pollution control inspections

Technical Diagnosis of the Nissan P1441 Code

Diagnosing the P1441 code requires a methodical approach and the use of appropriate tools to precisely identify the source of the problem.

Required Diagnostic Tools

To properly diagnose a P1441 fault, you will need:

  • A professional OBD2 scanner compatible with Nissan
  • A digital multimeter for electrical measurements
  • A vacuum pump to test system tightness
  • Technical documentation specific to the model

Step-by-Step Diagnostic Procedure

Start by visually inspecting the condition of the vent valve wiring and connectors. Look for signs of corrosion, damaged wires, or loose connectors. Then use your multimeter to measure the valve’s resistance: a value outside specifications (usually between 20 and 30 ohms) indicates a faulty valve.

Electrical Tests of the Vent Valve

Perform the following electrical measurements:

  • Coil resistance: must match manufacturer specifications
  • Supply voltage: must be present when off and during the diagnostic cycle
  • Ground circuit check: verify continuity between the valve ground and chassis ground

Common Causes of the P1441 Code on Nissan

Several elements can trigger the P1441 code. Here are the most commonly encountered causes on Nissan vehicles.

Electrical and Wiring Problems

Electrical failures represent the majority of P1441 cases:

  • Cut or damaged electrical wires between the control unit and the valve
  • Oxidized or poorly engaged connectors
  • Ground problem in the control circuit
  • Short circuit in the electrical harness

Mechanical Failures of the Valve

The vent valve itself can have mechanical defects:

  • Burnt or defective electromagnetic coil
  • Internal mechanism blocked by deposits or dirt
  • Punctured or torn diaphragm
  • Weakened or broken return spring

Repair Solutions for the P1441 Code

Once the complete diagnosis is performed, several solutions are available depending on the identified cause.

Repair of Electrical Circuits

If the problem is electrical in origin:

  • Repair or replace damaged wiring sections
  • Clean oxidized connectors with a specific product
  • Check and restore faulty ground connections
  • Replace blown fuses if necessary

Replacement of the Vent Valve

If the valve is defective, proceed with its replacement:

  • Locate the vent valve (usually near the canister or in the engine compartment)
  • Disconnect the electrical connector and EVAP lines
  • Remove the valve and install the replacement part
  • Reassemble all components and perform an operational test

Reset Procedure and Final Test

After repair, clear the fault codes with your OBD2 scanner. Perform a complete driving cycle to allow the system to conduct self-tests. Verify that the check engine light does not come back on and confirm the absence of residual fault codes.

Prevention and Maintenance of the EVAP System

To prevent the reappearance of the P1441 code, certain maintenance practices are recommended.

Regular Preventive Checks

Include in your regular maintenance:

  • Visual inspection of the EVAP system every 20,000 km
  • Checking the condition of lines and connectors
  • Periodic cleaning of accessible components
  • Inspection of the fuel cap condition

Good Fueling Practices

Certain habits can extend the lifespan of the EVAP system:

  • Avoid overfilling the gasoline tank
  • Do not “click” the nozzle multiple times after filling
  • Always use a proper and tightly sealed fuel cap
  • Perform repairs promptly to avoid damaging other components

The Nissan P1441 code, although specific, can be effectively diagnosed and repaired with a methodical approach. Understanding the operation of the EVAP system and having the right diagnostic tools are the keys to permanently resolving this problem and keeping your vehicle compliant with pollution standards.

P1441 Pontiac Code: Complete Evaporation Control System Diagnosis

Understanding the P1441 Code on Pontiac

The OBD2 P1441 code is specific to Pontiac vehicles and indicates a problem in the Evaporative Emission Control (EVAP) system. This crucial system captures and recycles fuel vapors from the tank to the engine, preventing their release into the atmosphere. When the Engine Control Module (ECM) detects an anomaly in the canister purge valve control circuit, it logs the P1441 code and illuminates the check engine light.

Operation of the Pontiac EVAP System

The EVAP system in Pontiac vehicles operates on a specific principle:

  • Fuel vapors are stored in the activated carbon canister
  • The purge valve opens under specific conditions (engine speed, temperature)
  • Vapors are drawn into the intake manifold to be burned
  • The system maintains tightness to prevent any polluting emissions

Implications of the P1441 Code

When the P1441 code appears, it means the ECM has detected an electrical or mechanical malfunction in the purge valve control circuit. This problem can affect vehicle performance and increase polluting emissions, making the vehicle non-compliant with anti-pollution standards.

Main Causes of the Pontiac P1441 Code

Several elements can trigger the P1441 code. A methodical analysis helps quickly identify the source of the problem.

Common Electrical Problems

  • Open circuit or short circuit in the purge valve wiring
  • Oxidized or damaged connectors at the valve
  • Power supply or ground issue in the control circuit
  • Failure of the relay associated with the EVAP system

Mechanical Failures of the Purge Valve

  • Purge valve stuck in open or closed position
  • Damaged diaphragm or internal leak
  • Defective valve electrical coil
  • Obstruction in the evaporation lines

Other Possible Causes

  • Problem with the Engine Control Module (ECM)
  • Defective or improperly tightened fuel tank cap
  • Leak in the evaporation system
  • Saturated or damaged activated carbon canister

Diagnostic Procedure for P1441 Code

Diagnosing the P1441 code requires a structured approach and appropriate tools to precisely identify the cause of the fault.

Equipment Needed for Diagnosis

  • OBD2 scanner compatible with Pontiac systems
  • Digital multimeter for electrical measurements
  • Vacuum pump for leak testing
  • Vehicle technical documentation (electrical diagrams)
  • Basic tools for disassembly/reassembly

Preliminary Verification Steps

Before proceeding with in-depth diagnosis, perform these basic checks:

  • Check the fuel tank cap (tightness and condition)
  • Visually inspect wiring and connectors
  • Look for damaged or disconnected evaporation lines
  • Check the general condition of the carbon canister

Electrical Testing of the Purge Valve

The electrical testing procedure includes:

  • Measuring coil resistance (typically between 20-30 ohms)
  • Verifying circuit power supply and ground
  • Testing ECM control with oscilloscope or test light
  • Checking insulation and absence of short circuits

Repair Solutions for P1441 Code

Once diagnosis is complete, several solutions are available depending on the identified cause.

Electrical Repairs

  • Repair or replacement of damaged wiring
  • Cleaning or replacement of oxidized connectors
  • Replacement of defective relay if necessary
  • Reset of fault codes after repair

Replacement of Mechanical Components

If the purge valve is defective:

  • Disconnect the battery before any intervention
  • Locate the purge valve (usually near the intake manifold)
  • Disconnect lines and electrical connector
  • Remove the valve and install the new part
  • Reassemble while checking connection tightness

Final Checks and Reset

  • Reset the fault code with an OBD2 scanner
  • Perform a road test to verify fault disappearance
  • Check that the check engine light doesn’t come back on
  • Verify absence of leaks in the EVAP system

Consequences and Prevention

Ignoring a P1441 code can have consequences for your Pontiac’s operation and the environment.

Risks Associated with P1441 Code

  • Increased polluting emissions
  • Potentially increased fuel consumption
  • Idle or starting problems
  • Possible inspection failure
  • Potential long-term catalyst damage

Preventive Measures

  • Perform regular EVAP system inspections
  • Systematically check fuel tank cap tightness
  • Use only quality replacement parts
  • Quickly consult a professional if check engine light appears
  • Follow manufacturer recommended maintenance intervals

The P1441 code on Pontiac, although specific, can be effectively resolved with proper diagnostic methods. Prompt intervention helps preserve your vehicle’s performance while complying with environmental standards. If you’re not familiar with automotive diagnostic procedures, it’s recommended to consult a qualified professional.

P1441 Saturn Code: EVAP System Diagnosis and Solutions

Understanding Saturn Code P1441: Technical Definition

The P1441 fault code is a manufacturer-specific code for Saturn that indicates a problem in the Evaporative Emission Control (EVAP) system. This system’s function is to capture and store fuel vapors from the tank to prevent their release into the atmosphere.

Operation of the Saturn EVAP System

The EVAP system in Saturn vehicles consists of several key components: the activated carbon canister, the purge valve, the sealed fuel cap, and various pressure sensors. When the engine is running, the Engine Control Module (ECM) controls the opening of the purge valve to allow stored vapors to be routed to the intake manifold and burned in the combustion process.

Specific Meaning of Code P1441

The Saturn P1441 code specifically indicates a problem in the EVAP system’s purge valve control circuit. The ECM has detected an electrical anomaly in the valve’s control circuit, typically in the form of an open circuit, short to ground, or short to battery voltage.

Main Causes of Saturn Code P1441

Several failures can trigger the P1441 code on Saturn vehicles. A thorough understanding of these causes facilitates diagnosis and repair.

Purge Valve Electrical Problems

  • Open circuit in the purge valve wiring
  • Short to ground or to power
  • Loose or corroded connector
  • Faulty internal valve resistance
  • Problem with the relay or fuses

Mechanical Valve Failures

  • Purge valve stuck in open or closed position
  • Defective diaphragm inside the valve
  • Obstruction in the evaporation lines
  • Mechanical wear due to aging

Control Module Related Issues

  • Internal ECM failure
  • Communication problem between modules
  • Software requiring an update

Symptoms and Diagnosis of Code P1441

The P1441 code is usually accompanied by specific symptoms that any driver or technician can identify.

Common Observable Symptoms

  • Illumination of the check engine light
  • Noticeable increase in fuel consumption
  • Unstable or irregular idle
  • Persistent gasoline odor around the vehicle
  • Possible failure in emissions test
  • Slight loss of engine power

Step-by-Step Diagnostic Procedure

Diagnosing the P1441 code requires a methodical approach to accurately identify the root cause of the problem.

Preliminary Checks

  • Visual inspection of wiring and connectors
  • Check the condition of the fuel cap
  • Inspect EVAP lines for cracks or detachments
  • Purge valve resistance test
  • Voltage measurement at the valve connector

Solutions and Repair Procedures

Once the diagnosis is complete, several solutions are available depending on the identified cause.

Repairing Electrical Problems

For wiring issues, repair typically involves replacing damaged sections, cleaning corroded connectors, or resolving short circuits. It is essential to use a digital multimeter to check continuity and absence of short circuits before replacement.

Purge Valve Replacement

If the purge valve is faulty, its replacement is necessary. The typical procedure includes: disconnecting the battery, locating the valve (usually near the intake manifold or tank), removing the lines, disconnecting the electrical connector, loosening the fasteners, and installing the new valve by following the reverse process.

Reset and Post-Repair Tests

  • Clearing fault codes with an OBD2 scanner
  • Road test to verify the code does not reappear
  • Monitoring real-time EVAP parameters
  • Checking system integrity with a smoke tester
  • Final emissions check if necessary

EVAP System Prevention and Maintenance

Regular maintenance can prevent the recurrence of the P1441 code and ensure the proper functioning of the EVAP system.

Good Maintenance Practices

  • Regularly replace the fuel cap
  • Periodically inspect EVAP lines
  • Avoid topping off the tank after the pump clicks
  • Regularly clean electrical connectors
  • Perform preventive diagnostics with an OBD2 scanner

Specific Saturn Recommendations

Saturn vehicles have certain specificities in their EVAP system. It is recommended to consult the manufacturer’s technical bulletins and use replacement parts of equivalent quality to original to ensure a durable repair.

The Saturn P1441 code, although specific, is among the common EVAP faults that can be effectively resolved with a systematic diagnostic approach. A thorough understanding of the system and appropriate procedures allows for restoring the vehicle’s optimal performance and maintaining its compliance with emission standards.

OBD2 Code P1441 Scion: Technical Diagnosis and Solutions

n

ELM327 Bluetooth Pin/Key Code – Information and Instructions

Have you ever tried to start your car’s engine, only to find that mysterious “check engine” light?

Your first instinct would be to try to connect the ECU (Engine Control Unit), only to have it fail – and the manual tells you to take the car for servicing. No, not the most reassuring statement you’ve ever seen.

This raises the question of how you can start reading your engine’s error codes, without the cost of taking it for servicing and having someone else do it for you. That’s where the ELM327 Bluetooth PIN code comes in, so read on to learn more about it.

A Few Points to Note

When you are researching a great adapter for your car system, the information can confuse you. However, with sufficient knowledge of how your car system works, you will be able to avoid costly mistakes.

The car must register and inform you of any problems encountered in the system, and it does this via OBD or Onboard Diagnostics. These problems can include high emissions, low fuel consumption, and poor fuel economy.

First introduced in 1987 as OBD-I, it aimed to standardize diagnostics in cars. OBD-II came after 1996.

OBD-II uses a complex system to connect a wide range of systems in your engine and operates at an average of 500 kbps. It can thus access a wide range of information, such as oil temperature, vehicle speed, and engine RPM, as well as many others.

If any of these have issues, it sends you a warning via the “check engine” light. A professional mechanic will use a handheld scanner to see where the problem lies, but it’s something you can do too.

What Is the ELM327 Bluetooth Code About?

OBD Connector

It is a method that allows you to more easily scan the OBD-II (Onboard Diagnostics II) system, easily monitor problems, and read PIDs, as well as other codes. You don’t need to pay high fees when you take your car for servicing, as this method proves useful for that purpose as well as if you are an expert who doesn’t have your dedicated scanning tools at the moment.

Even though this is helpful for solving your problems, there are still some things you need to know about the system before purchasing it.

Any Issues to Note?

There aren’t many, but it’s important to note that some of the cheaper ones are likely to have unauthorized ELM327 microcontroller clones. These can sometimes have inexplicable behaviors and prevent the entire system from working with certain devices.

The devices most affected by this are iOS devices, so if you have one, it’s important to select the right device for the job.

What About Compatible Hardware?

Any scanning tool with Bluetooth chips and an ELM327 controller will have a wide variety of devices it can pair with comfortably. However, there are limits, as with everything else.

The devices you can use include laptops, smartphones, and tablets. The phone is the best way to use the connectivity advantage – however, it may not work well with Apple products, such as the iPad, iPhone, and iPod Touch, due to how Apple handles Bluetooth in general.

If you are an Apple user, it’s better to use ELM327 Wi-Fi scanners and USB connections.

Additionally, if you have a single unit that can serve as both a reader and an adapter, that’s an even better option.

Can You Tell if Your Car Is Compatible With the System?

If your car was manufactured after 1996, the answer to the question is probably yes. If you are unsure of the port’s location itself, you can check via Google, using the car’s model, its make, and the year of manufacture.

How to Pair the Device to the System

It is generally easy to pair your device with the ELM327 system unless of course you have an Apple device. In terms of a basic summary of the general steps, you can:

  • Plug the Bluetooth device into the OBD-II port
  • Allow the device to search for possible connections (as you would for a normal Bluetooth connection)
  • Choose the scanning tool (ELM327)
  • Enter the pairing code

In many cases, when you purchase the Bluetooth scanner, you will receive documentation containing the pairing code, as well as any other unique directions different from the standard. However, if you don’t have access to the documentation, there are a few common codes that are useful, namely:

PIN Codes:

  1. 0000
  2. 9999
  3. 1234
  4. 6789

If they don’t work, try other sequences of four numbers (consecutive order).

What if It Does Not Work Completely?

If you have tried all these things and the device fails to pair with the system, it could be due to several reasons. In this case, try the following solutions:

  • Try other pairing codes
  • Try pairing the scanner with another device and see if it works. This is because some poor-quality microcontrollers have connection issues with certain devices.

One of the reasons why failure can occur is the limited time window. Bluetooth can detect devices, but when you try it again, you notice the device is not detectable. Consider doing the pairing within a minute of plugging the scanner into the OBD-II port, and there will likely be no connectivity issue.

If you own an Android device, you can use the system with apps on the Google Play Store, such as Torque Pro. The advantage of these apps is that they allow you to monitor changes to the engine in real time, even when the car is running, and you can also easily read pending or stored error codes.

Final Thoughts

Although the process of interpreting and reading codes is excellent for diagnosing engine problems, you must be careful about the issues you choose to disregard – do not compromise on safety by ignoring serious problems.

In-depth Analysis: 2008 Ford Escape Ignition Switch

Let’s dive into the fascinating world of automobiles, where every part, every system is essential for optimal performance. Our topic of interest today is the ignition switch of the 2008 Ford Escape, a key component in starting and operating every Ford Escape vehicle. We will familiarize ourselves with the operation of this switch, exploring its key components, their role, and their importance. Additionally, we will address the common problems encountered by owners of these vehicles and the existing technological solutions to remedy these issues.

Operation of the 2008 Ford Escape Ignition Switch

Understanding our technological and mechanical environment is a fundamental building block of evolution. Today, let’s take a closer look at a central element in our daily routines – the ignition switch in a 2008 Ford Escape. How exactly does it work? That’s what we are going to discover.

To begin, it is necessary to establish what an ignition switch does. It is the interface between the car key and the car’s electrical system. When an appropriate key is inserted into the switch and turned, it activates the electrical circuits that start the car’s engine.

In a 2008 Ford Escape, the entire ignition switch and lock cylinder are mounted on the left side of the steering wheel. When the key is turned, the ignition switch activates the starter circuit, thereby starting the engine.

The inserted key rotates the lock cylinder, which in turn rotates a plastic gear connected to a connector with several electrical contacts. While turning, the gear moves this connector to activate or deactivate different combinations of these electrical contacts. The different key positions – accessory, ignition, and start – activate different combinations of these contacts to supply power to the appropriate systems.

In the ‘accessory’ position, the radio and other accessories are powered. In the ‘ignition’ position, the fuel and ignition system are activated. And finally, in the ‘start’ position, the starter circuit is activated to start the engine.

The ignition switch is also equipped with a safety feature: a steering column lock that prevents the steering wheel from turning without the key.

In essence, the ignition switch is a delicate blend of mechanism and electricity for the successful starting of the 2008 Ford Escape. It is a well-optimized technology that we use every day without being aware of it. Sometimes, the extraordinary truly lies in the details.

Picture of a Ford Escape 2008 showing the ignition switch mechanism

Types of Problems Commonly Encountered with the 2008 Ford Escape Ignition Switch

In order to understand the problems that a 2008 Ford Escape owner might encounter with the ignition switch, it is first necessary to look at the potential symptoms.

One of the first signs of a faulty ignition switch is difficulty starting or a failure to start the car.

In some cases, the engine may not start or may stop abruptly, leaving the driver and passengers in a difficult situation.

Another indicator of an ignition switch problem can be malfunctioning electrical accessories.

If, when the ignition switch is in the “on” position, certain accessories such as the headlights, audio system, air conditioning, or defroster do not work properly, it is very likely that the problem originates from the ignition switch.

As a mechanical technology that is often underestimated, the ignition switch is constantly used and subject to wear over time.

Due to its complexity and the precision of its mechanism, poor maintenance or improper use can cause it to malfunction.

It is also important to note that ignition switch problems can sometimes be confused with battery or starter problems.

Several tests are therefore required to establish an accurate diagnosis.

These ignition switch problems can often be resolved through a series of technological solutions.

Replacing the switch, installing new wires, or repairing the lock cylinder are all solutions to consider.

However, for technology enthusiasts, it might be interesting to explore more radical solutions, such as modernizing the starting system.

For example, incorporating technology like Keyless Go, which offers a keyless system, could be a thunderous evolution for a 2008 Ford Escape.

Before concluding, let’s remember that despite their complexity, technology and mechanical systems are both formidable and fascinating.

The problems encountered are often an opportunity to learn and innovate.

Undoubtedly, every 2008 Ford Escape owner who has encountered an ignition switch problem could attest to this.

Image of a Ford Escape 2008

Technological Solutions for Resolving 2008 Ford Escape Ignition Switch Problems

Faced with ignition switch problems on a 2008 Ford Escape, several contemporary technological solutions exist. At the first signs of trouble, such as complications during starting or malfunctions of electrical accessories, it is essential to closely examine this ignition switch, often confused with other mechanical problems such as battery or starter issues.

It is important to know that resolving ignition switch issues first requires an accurate diagnosis. A few tests and checks can be performed – the goal is to verify all components associated with the ignition switch, including the lock cylinder. These tests might justify the need for a switch replacement, a lock cylinder repair, or even the installation of new wires.

It would also be interesting to consider modernizing the starting system with “Keyless Go” technology. This technology allows starting the car without a physical key, thereby eliminating wear on the ignition switch caused by the insertion and rotation of a key.

To maximize the efficiency of the ignition switch and minimize the risk of future problems, adapting one’s driving habits is also an option. For example, avoiding overloading the car keychain can truly extend the life of the switch.

Finally, it is particularly necessary to note the importance of regular car maintenance. Waiting too long to resolve an ignition switch problem could lead to more significant damage that would render the car unusable.

In summary, faced with challenges related to ignition switch problems on the 2008 Ford Escape, technology offers many solutions. These problems should not be seen as constraints, but rather as an opportunity to move towards innovative and effective solutions, allowing for the optimization of the vehicle’s performance and longevity. The technical challenges we find are stepping stones to even more advanced and optimized technologies.

A Ford Escape 2008 with a highlighted ignition switch.

Throughout the previous sections, we have gained an in-depth understanding of the operation of the 2008 Ford Escape ignition switch, the common challenges associated with it, and the technological solutions to address them. Armed with this information, we are in a better position not only to maintain our 2008 Ford Escape in the best possible way but also to anticipate and quickly diagnose potential ignition switch problems we might encounter in the future. This knowledge and these skills will be invaluable for any 2008 Ford Escape owner wishing to keep their vehicle in perfect working order.

2010 Honda Civic Oil

Embarking on routine maintenance tasks for your 2010 Honda Civic is a practical way to ensure its longevity and optimal performance. One such task is understanding and managing the Maintenance Minder System, an advanced tool that keeps track of your engine’s oil life and signals when it’s time for a change. The system’s accuracy and sophistication cast aside the old-school method of fixed-interval oil changes, propelling you into a more efficient era of vehicle management. This invaluable guide aims to demystify the process of monitoring and resetting the oil life indicator, ensuring you can stay on top of your Civic’s maintenance needs with ease and confidence. Moreover, it will equip you with fundamental knowledge on performing an oil change from start to finish, highlighting the importance of selecting appropriate materials, employing the necessary tools, and observing crucial safety measures.

Understanding the Maintenance Minder System

Unlock Smarter Vehicle Maintenance: Decoding the Honda Maintenance Minder System

Attention tech aficionados and automotive enthusiasts! It’s time to dive into the intelligent world of car care with the Honda Maintenance Minder system. Gone are the days of old-school maintenance schedules and the guesswork of when to service your vehicle. Honda has engineered a solution that utilizes cutting-edge technology to keep your prized ride in peak condition.

The Honda Maintenance Minder System: A Brief Overview

The Maintenance Minder system is an on-board, algorithm-driven technology that monitors your Honda’s critical engine components and driving conditions. Instead of working off a traditional time or mileage-based schedule, the system calculates when service is due by analyzing your driving habits, climate conditions, and engine performance.

The Intelligence Behind the System

How does it work, you ask? The secret sauce is in the sophisticated software that assesses various input factors. These include engine temperature, oil life, and revolutions per minute (RPMs), along with many others. This tech doesn’t just track mileage—it reads your driving behavior. Aggressive starts or prolonged idling? The system adapts and adjusts service alerts accordingly.

The Maintenance Minder system gives a whole new meaning to the term “smart car.” It’s like having a savvy mechanic embedded in your dashboard, constantly reviewing the vehicle’s performance and suggesting precise maintenance needs.

Deciphering the Codes

When your Honda reckons it’s time for service, it flashes a code on your dashboard, simplifying your life with its direct approach. These alphanumeric codes are the language of your car’s health, indicating various types of routine maintenance or inspections.

For instance, if you see a code “A,” it’s time to get the engine oil swapped out. A code “B” signals that, in addition to an oil change, your vehicle needs a more comprehensive check involving brake inspections or perhaps a fuel-filter replacement.

Sub-codes, like “1” or “2,” take precision a step further by recommending tire rotations or replacing engine air filters, among other services. This detail-oriented approach ensures that every facet of vehicle care is addressed at the appropriate time.

Acting on the Advice

Once the Maintenance Minder illuminates a service code, arrange an appointment with your Honda dealer or trusted service center. The sophistication of the Maintenance Minder system ensures you’re only dealing with maintenance that’s necessary, saving time and avoiding unnecessary services.

In an age where everything is becoming more interconnected and efficient, the Honda Maintenance Minder system represents a leap forward for vehicle care. It reassures you that your car is maintained exactly when needed, using data and digital intelligence.

The Maintenance Minder system reflects the future of automotive upkeep—logical, streamlined, and tailored to individual use. For all of us who would rather let algorithms optimize our lives, vehicles equipped with Honda’s Maintenance Minder are a technological triumph, ensuring we remain ahead of the curve in both vehicle performance and maintenance efficiency.

A diagram illustrating the Honda Maintenance Minder system, showing the algorithm-driven technology monitoring critical engine components and driving conditions in a Honda vehicle.

Resetting the Oil Life Indicator

Resetting the Oil Life Indicator on a 2010 Honda Civic: A Clear-Cut Guide

For tech-savvy individuals who relish the finesse of optimizing every facet of their lives, maintaining their vehicle’s performance is no exception. Here’s how to reset the oil life indicator on a 2010 Honda Civic, an action that is essential after an oil change and crucial for accurate maintenance tracking. This process ensures that oil change intervals are adhered to meticulously, reflecting an up-to-date engine maintenance routine.

Firstly, turn the ignition to the ON position. Ensure that the engine is off and the vehicle is in park. This enables the vehicle’s electrical system, including the dashboard display, without starting the engine, preventing any undue engagement of the vehicle systems during the reset process.

Next, navigate to the oil life indicator on the instrument panel. In a 2010 Honda Civic, the oil life percentage is usually shown on the multi-information display. Access this by toggling through the information with the Sel/Reset button, typically located on the steering wheel’s interface. This user-centric design is a testament to Honda’s forward-thinking approach, providing immediate access without complexity.

Once the oil life percentage is displayed, press and hold the Sel/Reset button for roughly 10 seconds or until the oil life indicator blinks. This acts as an input command, signaling the Civic’s onboard computer system to initiate the reset sequence—a nod to the interactive nature of contemporary vehicle interfaces.

Following the blinking, release the Sel/Reset button for a moment, then press and hold it again for an additional 5 seconds. The indicator should reset to 100 percent, signifying a full oil life cycle. This feedback loop confirms a successful reset. It’s a visual cue for the driver, showcasing the user-oriented design philosophy that modern tech connoisseurs appreciate.

It’s important to perform this reset accurately and in a timely manner after each oil change. An accurate oil life indicator supports the integrity of the vehicle’s maintenance schedule, contributing to the longevity and performance of the engine. Modern technology has infiltrated automotive maintenance, offering precision where it was once a matter of guesswork.

Remember, maintaining adherence to the manufacturer’s recommended oil change intervals is critical for the health of the vehicle. With the reset complete, continue to monitor the Maintenance Minder system for other service codes as they arise. This is the harmony of tech and automotive efficacy—simplifying routine tasks for a more efficient and controlled driving experience.

Illustration of a person resetting the oil life indicator on a 2010 Honda Civic

Oil Change Procedure

DIY Oil Change for a 2010 Honda Civic: Essential Steps for Peak Performance

Performing an oil change on a 2010 Honda Civic is a straightforward process that, when done accurately, ensures the vehicle runs efficiently and cleanly. Below is a succinct guide to changing your oil, keeping your Civic in top condition.

Preparation:

  1. Assemble all necessary tools: a wrench set, oil filter wrench, drain pan, funnel, new oil filter, and the recommended amount and type of oil.
  2. Ensure the engine is warm to help the oil flow more easily, but not too hot to avoid burns.
  3. Secure the car – park on a level surface, engage the parking brake, and use wheel chocks if available.

Draining the Old Oil:

  1. Locate the oil drain plug underneath the Civic. It’s at the bottom of the engine oil pan.
  2. Position the drain pan under the drain plug.
  3. Using the correct-sized wrench, loosen and remove the drain plug. Watch for a swift flow of oil, and let it drain completely.
  4. Clean and reinstall the drain plug. Tighten it, but be careful not to over-tighten and strip the threads.

Replacing the Oil Filter:

  1. Find the oil filter; it should be visible from the top or side of the engine.
  2. Place the drain pan underneath the filter to catch any drips.
  3. Use an oil filter wrench to loosen the filter. Finish unscrewing by hand.
  4. Prep the new oil filter by lubricating the rubber seal with fresh oil.
  5. Install the new filter, screwing it in by hand. Tighten to the filter manufacturer’s specifications – usually, it’s just a good hand tightening.

Adding New Oil:

  1. Open the hood and locate the oil filler cap on top of the engine. Remove the cap.
  2. Insert a funnel into the oil filler hole to avoid spillage.
  3. Pour in the correct amount and type of oil recommended for the Civic. The typical capacity is around 3.9 quarts, but always verify with your owner’s manual.
  4. Replace the oil filler cap securely.

Final Checks:

  1. Start the engine and let it run for a few minutes. This allows the new oil to circulate and the filter to fill.
  2. Turn off the engine and, after a brief period, check the oil level with the dipstick. Ensure it’s between the ‘min’ and ‘max’ marks. Add more oil if necessary.
  3. Check underneath the car for any signs of leaks from the drain plug or filter. Tighten further if needed.
  4. Dispose of the old oil and filter correctly – many auto parts stores accept used oil.

Your Civic’s oil change is now complete. Regular oil changes are paramount for engine health, and by performing the service yourself, you’ve taken a proactive step in vehicle maintenance that’s both rewarding and cost-effective. Embrace this DIY task and incorporate it into your maintenance routine for a Honda Civic that continues to run seamlessly on the technological roadways of modern driving.

A person performing an oil change on a Honda Civic

Mastering the procedure to reset the oil life indicator on your Honda Civic and performing oil changes are uncomplicated yet essential skills that not only contribute to the preservation of your vehicle but also offer a sense of accomplishment and self-reliance. With the Maintenance Minder System’s intelligent analysis at your disposal, you’re now well-informed to ensure your vehicle receives timely maintenance. Remember to adhere to the recommended oil specifications and change intervals to maintain your Civic’s engine in peak condition. By taking these proactive steps in vehicle maintenance, you keep your Civic running smoothly, secure in the knowledge that you’ve invested in its health and your safety on the road.

The Top 10 New Cars of 2021

From luxury electric cars to family-friendly SUVs, here is our list of the best new cars for 2021.

As 2020 draws to a close, people around the world need something to look forward to once everything is back to normal. Fortunately, the coming year promises beautiful new cars. Whether you’re considering dipping a toe into the electric car waters, looking for an upgrade to help you make all the trips that COVID-19 put on ice, or simply wanting to see the best new supercars, 2021 offers an impressive range of options.

It’s no surprise to see electric vehicles making headlines in terms of new releases, with SEAT, Skoda, Dacia, and BMW all making bold strides into the world of electric cars. These range from the BMW i4, intended to compete with the highly popular Tesla Model 3 supercar, to the Dacia Spring, which aims to take turns in the most affordable end of the market.

Another trend for newly launched vehicles is that the SUV boom of recent years continues! Alfa Romeo will launch the Tonale and Hyundai the Kona N, which don’t quite make this list. What we do include, however, are an updated Kia Sorento, a new Peugeot, an electric SUV from VW, and a unique SUV-type crossover from Yaris.

WHAT ARE WE LOOKING FOR IN THESE NEW CAR REVIEWS?

The cars on this list are all what we consider the “best in their category” of new cars launched in 2021. But how do we decide which is the best? We’ve broken it down into four categories that signal an excellent all-around vehicle, and all the cars on our list excel in each of these categories. Whether it’s new 4×4 cars, roadsters, or family sedans, here’s what we look for in each vehicle.

POWER AND ECONOMY

Fuel consumption: how to calculate it, control it, and save money

Even when buying a family engine that will never do anything more arduous than the school run, people still want to know the power statistics. What is the horsepower? How much torque does it have? Of course, these questions are often asked without really understanding what they mean. Nevertheless, it’s important to know that any new car you get in 2021 has the means to take you where you need to go, which is why we’ve considered the type of engine and transmission, speed and acceleration, and the fuel economy the engine will offer you.

COMFORT

Comfort comes down to a few key elements, including size, space, and materials used. For these cars, we’ll consider how spacious they are in the cabin, the size of the rear and front seats, loading space, the materials used for the seats and interiors, as well as the driving comfort. The latter will be related to the suspension system, steering response, and handling.

Comfort of new cars

For electric and hybrid vehicles, we’ve also considered the range as part of comfort; it wouldn’t be very comfortable to know that suddenly you only have 15 minutes of juice left when you’re 2 hours from home. It’s not easy to get all this exactly right when a new car is released, but it’s easy to spot when a car has gotten it wrong.

LUXURIES AND EXTRAS

Luxury and extras in the new car

For a car to be truly considered better than all the others, it must have features that set it apart and offer high-end technology. These will obviously vary from vehicle to vehicle, but you can probably expect these top 10 new cars to have some of the following: USB connection points, touchscreen infotainment systems, voice recognition identification systems, Apple CarPlay or Android Auto, a rotary selector, built-in satellite navigation, and heated seats. This is certainly not an exhaustive list of the gadgets cars can come with, but hopefully it has whetted your appetite.

VALUE FOR THE FUTURE

What is a hybrid car

This category may seem self-explanatory since a car’s future value is its resale value. However, what we mean here is not only the share of its value that the car will retain in the future but also the extent to which it will fit into a rapidly and constantly evolving landscape of automotive legislation. If you’re considering buying a diesel or petrol car in 2021, not only will the resale value likely decrease in a few years, but the cost will skyrocket due to new legislation. It also won’t do the environment any favors. So here, value for the future doesn’t just mean the value of your car, but what it will cost you in the future, whether it’s a financial cost or a cost to the planet’s ecosystems. You can expect electric vehicles and new hybrid cars as well as conventional vehicles on our list.

1. DACIA SPRING

The Dacia Spring will be launched, you guessed it, in spring 2021 and will be the cheapest European electric vehicle at under £20,000. Stealing the SUV style with wheel arch cladding, a range of 140 miles, and a top speed of 78 mph, it definitely has a spring in its step. When it comes to new cars, electric cars like this are a great way to prepare for the future.

2. BMW I4

The Tesla Model 3 has dominated the electric supercar market and is often considered the best electric vehicle on the market. However, BMW has long been the gold standard for conventional vehicles, and they now want a piece of the electric pie. 523 hp electric motor. Top speed: 124 mph. Range: 373 miles. Move over, Tesla.

3. VOLKSWAGEN ID.4

The Volkswagen ID.4 is an electric SUV that can travel up to 323 miles on a single charge and follows the ID.3 sedan, which has been a huge success. The tactile icons or the central touchscreen infotainment system all contribute to making it a luxury family vehicle.

4. PEUGEOT 3008

Another future family favorite, the 3008 is fantastic. Its massive grille and LED front and rear headlights set it apart from the crowd, and the technology is enough to impress people once inside. Night vision safety technology, lane positioning assist, automatic emergency braking. The list goes on and on.

5. KIA SORENTO

The 2021 Kia Sorento version brings all the usual Sorento features and more: FWD and AWD versions, a superb new “tiger nose” body shape, more off-road capabilities than ever before, and a hybrid engine with a pure electric range of 30 miles. It will certainly be one of the best new 4×4 cars.

6. TOYOTA YARIS CROSS

A true SUV that combines Toyota’s expertise in small cars and SUV heritage, the Yaris Cross offers distinctive design and dynamic performance. It features an intelligent all-wheel-drive system and Toyota’s fourth-generation hybrid system. The main 1.5 L full hybrid powertrain elevates energy efficiency, low emissions, and fully electric driving to new heights.

7. CUPRA EL-BORN

SEAT’s performance brand, Cupra, unveiled the el-Born for 2021. It has a claimed electric range of 310 miles and can reach 30 mph in 2.9 seconds, if upgrading in the city is that important to you. Still need convincing that it’s something special? Four words: augmented reality head-up display.

8. SKODA ENYAQ IV

Skoda’s Enyaq iV is the Czech brand’s first purpose-built electric car. The most expensive model offers 125 kW that will charge the battery from 10% to 80% in 40 minutes and has a range of 260 miles. In terms of luxury, this sharp-looking sedan is equipped with dual-zone air conditioning and keyless operation.

9. ASTON MARTIN VANTAGE ROADSTER

The new James Bond film may be delayed, but you can feel like him in the Aston Martin Vantage Roadster. With a 0-60 time of 3.7 seconds, a roaring AMG V8 engine that sounds fierce, and 20-inch wheels, there’s no better way to feel the wind in your hair.

10. MERCEDES-BENZ S CLASS

As Mercedes’ marketing manager Bettina Fetzer said, “the S-Class is the centerpiece of our brand.” It has a long-standing reputation for excellence, and the 2021 model is no different. It comes with rear-wheel and all-wheel drive systems, a V-8 engine, and there will be a plug-in hybrid version with over 60 miles of electric range.

Top 9 Best Family Cars 2020

There is a car for every stage of life. Whether it’s the used car in which you learn to drive or the hard-earned upgrade after landing that new job, every car plays a different role. So, when it’s time to start or expand a family, you’d better make sure you have the right car for the job. This will be the car in which you’ll make countless school runs, watch your children grow out of their booster seats, and probably have to endure many repetitions of “are we there yet” on family holidays. No ordinary car can handle that, and that’s why we’ve compiled a list of the best family cars in the UK.

Many types of cars have been included, including SUVs, saloons, and estates. Whether you’re looking for the best family cars for camping or the best budget family cars to save money for a family holiday test, we have something for you.

MAIN CHARACTERISTICS OF A FAMILY CAR

As we mentioned earlier, not just any car can make a good family car. In addition to the usual expectations you’d have from a car, such as its performance, durability, reliability, and appearance, family cars need to have that little something extra to meet the challenge of being the faithful steed of your family unit.

When considering what we think are the best family cars for 2020, we took 4 main qualities into account.

  1. Rear Seat Space
    One of the most important factors is the amount of space in the back of a family car. Cramped rear seats will always lead to school squabbles and make holiday drives feel endless. Not to mention the space needed for baby or booster seats, or the irritation that can arise when there’s no middle seat, family cars are going to need plenty of space in the back and in the boot for the weekly shop, inflated bags, pushchairs, and everything else that comes with a family.
  2. Good Child Safety
    Efficient performance and practicality aren’t enough for a family car. It must also be safe. Fortunately, most cars come standard with excellent safety features, and many on this list have the latest means of protecting your children. These features go far beyond the simple child locks and adequate space for child seats that were expected in older vehicles. Some of the features you should look for are active stability systems and brake assist to help limit passenger jolts, power window switches and electric windows with an anti-pinch or auto-reverse system to protect children’s hands, and the ISOFIX or LATCH system to help child safety seats be installed quickly and securely.
    Main characteristics of a family car
  3. Fuel Economy
    As with any car these days, good fuel economy can make the difference between a used vehicle and the best in its class. For a family car, it’s doubly important to reduce costs and not have to refuel as often, saving you time. A good target when considering fuel economy is to try to find a car that does around 40 miles per gallon. 40 miles per gallon will give you a decent range and won’t break the bank. Even better, most of the 40 mpg cars on our list are surprisingly affordable, so you won’t have to spend a fortune on your new fuel-efficient family carrier.
  4. Inexpensive to Maintain
    Having a family is a bit like signing a phone contract – they always come with a host of costs you had no idea about before signing up. So it’s extremely important that when choosing a car, you try to pick one that won’t add to the expenses. This means the cars on our list are reliable and unlikely to break down, will have parts that can be replaced cheaply, and their maintenance (the type of oil needed, for example) won’t eat into your family budget more than necessary.

BEST FAMILY CARS IN THE UK

1. KIA CEED ESTATE

Kia Ceed Estate: best family cars 2020

Kia has a reputation for being as good as anything out there, and the Ceed is no exception. This affordable saloon is one of the best family cars for 5 people, with impressive technical features fitted as standard with a 1.0 or 1.4 litre petrol engine or a 1.6 litre diesel engine. These will achieve between 52 and 74mpg respectively.

2. DACIA DUSTER

Spare parts for the best family car for Dacia Duster

Finding some of the best cheap family cars is a real challenge, but the Dacia Duster is hard to beat for space and functionality, especially given its extremely affordable price. It may lack some technology, but the sacrifices are worth it, and it will certainly get you, your family, and all your gear where you need to go.

3. TOYOTA COROLLA

Toyota Corolla: best family car in the UK

This incredibly modern and attractive hatchback might seem a bit pricey, starting from £24,140, but that gets you a hybrid powertrain and a powerful 2.0 litre engine, with 16-inch alloys, adaptive cruise control, a 4.2-inch TFT screen between the dials, and heated front seats with lumbar support as standard, offering great comfort for the whole family.

4. FORD GALAXY

Car parts for the best family car for Ford Galaxy

The Galaxy has long been a staple for families, and that doesn’t look set to change. On the latest model, they’ve increased the interior space to make it even more spacious and packed it with tons of luxury features. If you’re looking for one of the best 7-seater family cars with comfort and style, look no further.

5. SUBARU OUTBACK

Subaru Outback: best family car 2020

The Subaru Outback offers a practical and reliable alternative to SUVs and saloons, providing excellent load space, good ground clearance, and even off-road capabilities, making it a great car for family adventures. The 2.5 litre or turbocharged 2.4 litre engines offer plenty of power, but only 33 mpg.

6. VOLKSWAGEN TOURAN

Volkswagen Touran: best family car in the UK

The Touran is made for family life and comes with seven seats as standard. The second and third rows can be folded down to create a flat floor. With five seats in place, up to 917 litres of boot space is offered. You can also fit three Isofix child seats in the second row and two more in the back.

7. VAUXHALL ZAFIRA TOURER

Vauxhall Zafira Tourer: best family car in the UK

The Zafira Tourer is a more upmarket compact MPV with three rows of cleverly folding seats and is probably the most handsome MPV on the market. Starting from the relatively affordable £21,000, the diesel ecoFlex stop-start version now averages nearly 69 mpg, resulting in decidedly tax-friendly CO2 levels. Even the 1.4 litre will do around 45 mpg.

8. VOLKSWAGEN MULTIVAN

Car parts for the best family car for Volkswagen Multivan

The VW Multivan is less of a big car and more of a small room. You can actually stand up and walk around in it, as the middle section is huge and perfect for a large or growing family. The seats also swivel, and you can move them back and forth on rails. It’s a truly versatile family car.

9. RENAULT TRAFIC

Renault Trafic: best family car in the UK

The Renault Trafic is an excellent all-round vehicle that is popular in Europe and has generous equipment levels to make it a comfortable drive for the whole family. It has an efficient engine and a very responsive automatic gearbox that will reduce driving stress, even if the children don’t.