P006B MAP – Exhaust Pressure Correlation

Code P006B: MAP Sensor / Exhaust Pressure Sensor Divergence

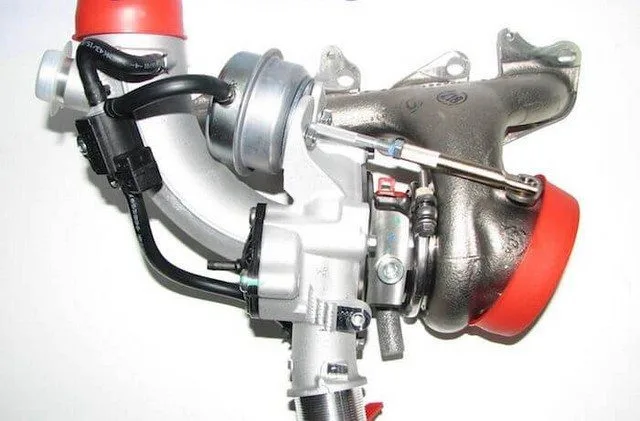
The generic diagnostic trouble code P006B indicates that the Powertrain Control Module (PCM) has detected an inconsistency between the data from the Manifold Absolute Pressure (MAP) sensor and the Exhaust Pressure Sensor (EPS). This code is primarily found on diesel vehicles (Ford Powerstroke, GMC, Chevrolet, Dodge) and directly impacts performance, fuel consumption, and the emissions control system.


Sensor Roles and Symptoms

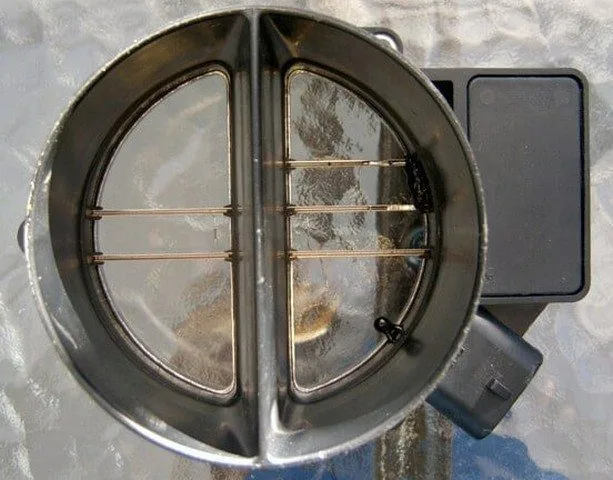
  • MAP Sensor: Measures the air pressure in the intake manifold (in kPa or Hg) to help the PCM calculate the optimal air-fuel mixture.
  • Exhaust Pressure Sensor (EPS): Monitors the backpressure of the exhaust gases to ensure the efficiency of the DPF (Diesel Particulate Filter), the catalytic converter, and the overall engine performance.

⚠️ Common Symptoms:

  • Excessive exhaust smoke (black or blue)
  • Noticeable increase in fuel consumption
  • Loss of power and decreased engine performance
  • Unstable engine idle and unbalanced air-fuel mixture
  • Malfunction Indicator Lamp (MIL) illuminated

Possible Causes of Code P006B

  1. Hardware Failures
    • Faulty or dirty MAP or EPS sensor
    • Damaged wiring (cut wires, short circuits, corroded or loose connectors)
    • Presence of vacuum leaks in the intake system
  2. Software or PCM Issues
    • PCM programming error or internal timing issue
    • Software failure requiring an update

Step-by-Step Diagnostic Method

1. Visual Inspection

  • Visually inspect the wiring and connectors of both sensors, especially near the exhaust (heat source).
  • Look for signs of burning, corrosion, physical damage, or poor connections.

2. Using an OBD2 Scanner

  • Read the trouble codes and freeze frame data.
  • Clear the codes and perform a road test to see if P006B reappears.

3. Electrical Tests (Multimeter)

  • Check the sensor supply voltage (expected 5V) and ground.
  • Measure the signal from each sensor and compare it to the manufacturer’s specified ranges.
  • Test the circuit continuity between the sensors and the PCM.

4. Advanced Verification

  • If everything seems normal, consult Technical Service Bulletins (TSBs) for known issues.
  • As a last resort, consider reprogramming or replacing the PCM.

Best Practices and Recommendations

  • Prioritize other codes: Address any associated codes first (e.g., P0106, P0470).
  • Use a repair manual for precise reference values (e.g., AllData, Mitchell1).
  • On diesel vehicles, a DPF cleaning may be necessary.

🔧 Need Help? If the diagnosis is beyond your expertise, consult a mechanic specialized in diesel systems to avoid damaging other components.


Conclusion

Code P006B is a serious fault that requires a thorough check of the sensors, wiring, and PCM. A structured approach with the right tools is essential to identify the root cause and restore your vehicle’s optimal performance.

P006C MAP – Turbocharger/Compressor Inlet Pressure Correlation

Code P006C: Definition and Explanation

The diagnostic trouble code P006C is a generic powertrain code (DTC) indicating that the Powertrain Control Module (PCM) has detected an inconsistency between the signals from the Manifold Absolute Pressure (MAP) sensor and the turbocharger inlet pressure sensor. This code primarily affects vehicles equipped with forced induction (turbocharger or supercharger).

Symptoms of Code P006C

When this trouble code is stored, you may observe one or more of the following symptoms:

  • ➤ Reduced engine performance
  • ➤ Noticeable decrease in boost efficiency
  • ➤ Hesitation during acceleration
  • ➤ Air-fuel mixture too rich or too lean
  • ➤ Abnormal whistling sounds from the intake system

Possible Causes of P006C Fault

Several factors can cause this code:

  • Faulty MAP sensor
  • Malfunctioning turbo pressure sensor
  • ➤ Damaged wiring or connector (short circuit or open circuit)
  • ➤ Vacuum leak or restriction in the air intake
  • ➤ Clogged air filter
  • ➤ PCM failure or need for update

Diagnosis and Troubleshooting of Code P006C

1. Preliminary Visual Inspection:

  • Check the condition and connection of the MAP and turbo pressure sensors.
  • Inspect intake hoses and ducts for possible disconnections or leaks.
  • Check the air filter and replace if necessary.

2. Required Tools:

  • OBD2 scanner, digital multimeter (DVOM), vacuum gauge, technical information source (e.g., AllData, Mitchell1).

3. Diagnostic Steps:

  • Start by measuring engine vacuum using a vacuum gauge.
  • Use a scanner to read trouble codes and freeze frame data.
  • Test the power supply (5V) and ground of the sensor connectors with a multimeter.
  • Measure sensor resistance (with power off) and compare to manufacturer specifications.
  • Check each sensor’s signal (with power on) by referring to pressure/voltage curves.
  • Verify continuity and absence of short circuits in the wiring up to the PCM.

4. Special Cases:

  • If all tests are conclusive, PCM reprogramming or replacement may be necessary.
  • Check Technical Service Bulletins (TSB) for recurring issues with your vehicle model.

Conclusion and Call to Action

Code P006C directly affects your engine’s performance and efficiency. Prompt intervention is recommended.

💡 Tip: If you’re not comfortable with these procedures, consult a professional mechanic equipped with advanced diagnostic tools.

Need help interpreting your sensor values? Use our interactive guide or contact an online expert for a personalized diagnosis.

P006D Barometric Pressure – Turbocharger/Compressor Inlet Pressure Correlation

Code P006D: Definition and Explanation

The error code P006D is a generic powertrain diagnostic trouble code (DTC) indicating that the Powertrain Control Module (PCM) has detected an inconsistency between the signals from the Barometric Pressure Sensor (BARO) and the Turbocharger/Compressor Inlet Pressure Sensor. This code specifically applies to vehicles equipped with a forced induction system (turbo or supercharger).

Symptoms of Code P006D

When this code is stored, the following symptoms may appear:

  • ➤ Reduced engine performance
  • ➤ Decreased fuel efficiency (increased consumption)
  • ➤ Delayed or hesitant acceleration
  • ➤ Rich or lean air-fuel mixture
  • ➤ Whistling or abnormal intake noises during acceleration
  • ➤ Malfunction Indicator Lamp (MIL) illuminated on the dashboard

Possible Causes of the Fault

Several factors can cause the P006D code:

  • Faulty Sensor: Defective BARO sensor or turbo/compressor inlet pressure sensor.
  • Electrical Issues: Damaged wiring, corroded, loose, or short-circuited connectors.
  • Air Induction Problems: Obstructed air intake, dirty air filter, leaks in the intake ducts.
  • Mechanical Fault: Insufficient engine vacuum due to an internal issue.
  • PCM Failure: Programming error or failure of the control module.

How to Diagnose Code P006D?

Diagnosis requires an OBD2 scanner, a digital multimeter (DVOM), a vacuum gauge, and access to vehicle technical data (wiring diagrams, reference values).

Diagnostic Steps:

  1. Visual Inspection: Check the condition of cables, connectors, and intake ducts. Ensure the air filter is clean and the turbo pressure sensor connector was not forgotten after maintenance.
  2. Engine Vacuum Test: Using the vacuum gauge, measure engine vacuum and compare it to manufacturer specifications. Insufficient vacuum indicates a mechanical issue that should be addressed first.
  3. Reading Codes and Freeze Frame Data: Use the scanner to read all fault codes and freeze frame data recorded at the time of the malfunction. Note this information and clear the codes to see if P006D returns.
  4. Sensor Electrical Testing:
    • Check for reference voltage (5V) and ground at the connectors of both sensors with the multimeter.
    • Test the resistance of the sensors (disconnected) and compare to manufacturer-specific values.
    • With the engine running (KOER), measure the voltage signal of each sensor and verify it changes correctly with pressure (refer to voltage/pressure curves in technical data).
  5. Wiring Test: If the sensors are functional, check continuity and absence of short circuits in the wires between the sensors and the PCM using wiring diagrams.
  6. PCM: If everything else is correct, reprogramming or replacing the PCM may be necessary.

Conclusion and Call to Action

Code P006D directly affects performance and fuel economy. Its diagnosis can be complex and often requires specialized tools and precise technical documentation.

💡 Tip: Always consult your vehicle’s Technical Service Bulletins (TSBs) to check for known issues and manufacturer-recommended solutions.

If you are not comfortable with these procedures, consult a professional mechanic for an accurate diagnosis and reliable repair.

P006E Turbo / Supercharger Boost Control A Voltage Low

What is the P006E Code?

The diagnostic trouble code P006E is a generic powertrain code related to OBD-II vehicles. It indicates that the Engine Control Module (ECM) has detected an abnormally low voltage in the “A” boost control circuit. This code affects many manufacturers, including Chevrolet, GMC (Duramax), Dodge, Ram (Cummins), Ford, VW, and others.

Role of the Boost System

Forced induction systems, such as turbochargers or superchargers, increase the amount of air entering the combustion chambers to enhance engine performance. To regulate boost pressure, the ECM uses a wastegate or a control solenoid. A problem in this circuit (such as low voltage) prevents the ECM from properly controlling the pressure, which can lead to a non-optimal air-fuel mixture and activate a limp mode to protect the engine.

Severity of the P006E Code

The severity of this code is moderate to high. Ignoring this fault can damage the engine due to an overly rich or lean air-fuel mixture, cause overheating, excessive fuel consumption, or significant power loss. It is recommended to diagnose the issue promptly.

Symptoms of the P006E Code

  • Reduced or irregular engine power
  • Sluggish acceleration response
  • Limp mode activated
  • Abnormally high fuel consumption
  • Intermittent driving issues
  • Difficulty climbing hills or accelerating

Possible Causes of the Fault

  • Faulty or stuck boost control solenoid
  • Wiring issues (short circuit, broken wire, corrosion)
  • Oxidized or loose connectors
  • Problem with the boost control module
  • Internal ECM fault
  • Clogged turbocharger vanes
  • Exhaust or intake system leak

Diagnostic Steps

Step 1: Visual Inspection

Locate the boost control solenoid (often mounted on the turbocharger). Check its physical condition, electrical connections, and ensure there is no corrosion or heat damage.

Step 2: Mechanical Check

Ensure the solenoid or wastegate lever is not stuck or damaged. Some systems allow limited manual movement.

Step 3: Electrical Check

Using a multimeter, check the voltage and continuity of the circuits connected to the solenoid. Look for signs of short circuits, high resistance, or poor ground connections.

Step 4: Advanced Diagnostics

If the previous steps reveal nothing, consult the ECM’s live data with a specialized diagnostic tool. Compare voltage and pressure values with the manufacturer’s specifications.

Conclusion and Call to Action

The P006E code should not be ignored, as it can cause costly engine damage. If you are not comfortable performing these checks, consult a qualified mechanic for an accurate diagnosis. Professional tools and technical documentation specific to your vehicle are often necessary to resolve this issue effectively.

P006F Turbo / Supercharger Boost Control A Voltage High

What is the P006F Code?

The P006F trouble code is a generic OBD-II powertrain code that indicates a problem with excessively high voltage in the “A” boost control circuit. It applies to many vehicles (Chevrolet, GMC Duramax, Dodge, Ram Cummins, Ford, VW, etc.). The exact diagnostic procedure may vary depending on the make, model, and engine configuration.

Role of the Boost System

Forced induction systems (turbocharger, supercharger) use exhaust gas energy or engine power to compress the intake air, thereby increasing engine power (volumetric efficiency).

To regulate boost pressure, a control module (ECM) activates a solenoid or wastegate that adjusts the turbocharger vanes. This helps maintain an optimal stoichiometric air-fuel mixture. A malfunction can lead to power loss and activation of a fail-safe mode (“limp mode”) to protect the engine.

Severity of the P006F Code

The severity is moderate to high. Ignoring this code can cause:

  • Engine damage due to an overly rich or lean air-fuel mixture
  • Excessive fuel consumption
  • Premature wear of components

Symptoms of the P006F Code

  • Loss of power and irregular performance
  • Abnormal response during acceleration
  • Difficulty on inclines or under high load
  • Activation of safety mode (“limp mode”)
  • Unstable idle or intermittent symptoms

Possible Causes of the P006F Code

  • Faulty boost control solenoid (stuck or broken lever)
  • Wiring problem (short circuit, open circuit, frayed wires)
  • Corrosion of connectors, pins, or grounds
  • Exhaust leak or turbocharger vane fouling
  • Boost control module failure
  • Internal ECM problem (rare)

Diagnosis and Troubleshooting of the P006F Code

⚠️ Warning: Boost system components can be very hot. Work on a cold engine and wear protective equipment.

Step 1: Visual Inspection

Locate the boost control solenoid (often mounted on the turbocharger). Check its physical condition and electrical connector. Look for signs of corrosion, damage, or burning.

Step 2: Mechanical Check

If possible, verify that the solenoid or wastegate lever moves freely without sticking. Note: On some models, manual movement is not possible.

Step 3: Wiring Check

Inspect the wiring harness going to the solenoid. Wires are often exposed to high temperatures and may be melted, cut, or short-circuited.

Step 4: Leak Check

An exhaust or intake leak can distort boost pressure and trigger this code. Check the tightness of the ducts.

Conclusion and Call to Action

The P006F code is serious and should not be ignored. Accurate diagnosis with an OBD-II tool and a multimeter is essential. If you are not comfortable with these steps, consult a professional mechanic to avoid further damage.

Do you have questions about the diagnosis or need replacement parts? Use our online configurator to find the wastegate solenoid compatible with your vehicle.

Ambient Air Temperature Sensor Circuit P0070

What is the P0070 code?

The P0070 error code is a generic powertrain code indicating a malfunction in the Ambient Air Temperature (AAT) sensor circuit. This sensor, found in most OBDII-equipped vehicles (including Audi, BMW, Chrysler, Dodge, Ford, Jeep, Mazda, Mitsubishi, and VW), converts outside air temperature into an electrical signal sent to the Powertrain Control Module (PCM).

This data is crucial for the proper operation of the air conditioning system and displaying the outside temperature on the dashboard. The PCM compares the AAT sensor signal with those from the Intake Air Temperature (IAT) and Engine Coolant Temperature (ECT) sensors at startup. The P0070 code triggers when these values show an abnormal discrepancy.

Symptoms of the P0070 code

Several signs can alert you to a problem with the AAT sensor:

  • The Malfunction Indicator Lamp (MIL) is illuminated on your dashboard.
  • Issues with air conditioning operation (irregular or ineffective cooling).
  • An incorrect reading of the outside temperature on the dashboard or center console display.

Possible causes of the P0070 error

The main causes of this fault code are typically electrical:

  • An open or short circuit (to ground or voltage) in the wiring to the sensor.
  • A faulty AAT sensor (the most common cause after connection issues).
  • A PCM failure (rare, but possible).

How to diagnose and fix the P0070 code?

1. Check Technical Service Bulletins (TSBs)
First, consult your manufacturer’s TSBs. A known fix may exist for your model, saving you from a lengthy and costly diagnosis.

2. Visual inspection
Locate the AAT sensor, usually positioned behind the grille or front bumper. Inspect the connector and wiring for any signs of wear, corrosion (greenish tint), burning, or exposed wires. Clean the terminals with contact cleaner and apply dielectric grease.

3. Testing the AAT sensor
Using a multimeter (DVOM), measure the sensor’s resistance (disconnected) and compare it to reference values based on ambient temperature. A resistance of 0 Ω or infinite (OL) indicates a faulty sensor.

4. Testing the electrical circuit
With a scan tool, read the AAT sensor signal voltage (ignition on). It should be around 5V. By shorting the two terminals of the harness connector (ignition off then on), the reading should drop to near 0V. If these values are not met, the circuit to the PCM is faulty.

5. Replacement and reset
If all wiring is correct, replace the AAT sensor. Then clear the fault codes with your diagnostic tool. If the code does not return, the problem is solved. If the code persists, a PCM failure, although rare, is possible.

🔧 Need help?

Electrical diagnosis can be complex. If you’re not comfortable with these steps, consult a professional mechanic for an accurate diagnosis. Replacing a PCM requires specific vehicle programming.

Performance of the ambient air temperature sensor P0071

What is the P0071 code?

The P0071 error code is a generic powertrain-related code that indicates a performance issue with the Ambient Air Temperature (AAT) sensor. This sensor, found on most OBDII-equipped vehicles (including Audi, BMW, Chrysler, Dodge, Ford, Jeep, Mazda, Mitsubishi, and VW), is responsible for converting the outside air temperature into an electrical signal sent to the Powertrain Control Module (PCM).

This data is crucial for regulating the air conditioning system and displaying the outside temperature on the dashboard. The PCM compares the AAT sensor signal with those from the Intake Air Temperature (IAT) sensor and the Engine Coolant Temperature (ECT) sensor upon startup, after a cooldown period. An abnormal discrepancy between these values triggers the P0071 code.

Symptoms of the P0071 code

Several signs can alert you to a malfunction of the AAT sensor:

  • The malfunction indicator lamp (check engine) is illuminated.
  • Poor operation or inefficiency of the air conditioning system.
  • Incorrect or missing display of the outside temperature on the dashboard or console.

Possible causes of the P0071 error

The origins of this code are primarily electrical, but mechanical faults are also possible:

  • Open or shorted signal circuit (to ground or to voltage).
  • Faulty AAT sensor (the most common cause after connection issues).
  • Incorrect mounting location or sensor left hanging (mechanical defect).
  • PCM failure (rare).

How to diagnose and fix a P0071 code?

Always start by consulting your manufacturer’s Technical Service Bulletins (TSBs) to check for any known issues.

1. Visual Inspection

Locate the AAT sensor, usually positioned in front of the radiator. Inspect the connector and wiring for any signs of wear, corrosion (greenish tint), or burning. Clean the terminals with contact cleaner and a non-abrasive brush if necessary, then apply dielectric grease.

2. Sensor Testing

Using a multimeter (DVOM) in ohmmeter mode, measure the resistance of the (disconnected) sensor and compare it to the reference values for the ambient temperature. A reading of 0 Ω or infinite resistance (OL) indicates a faulty sensor.

3. Circuit Testing

Reconnect the sensor and use a diagnostic tool to read the voltage or temperature reported by the sensor to the PCM. With the ignition on, the voltage should be around 5V. By shorting the two terminals of the harness connector (ignition off), the reading should drop close to 0V. If these values are not observed, the electrical circuit or the PCM is at fault.

4. Replacement and Conclusion

If the previous tests point to the sensor, replace it. Then, clear the codes with your diagnostic tool and perform a road test to verify that the code does not return. If the problem persists, the PCM might be faulty, but this is rare. If in doubt, consult an automotive professional.

Need help diagnosing your vehicle? Consult a partner garage or invest in a reliable OBD2 diagnostic tool to perform these checks yourself.

Low Ambient Air Temperature Sensor Circuit

What is the P0072 code?

The P0072 error code indicates a problem with the Ambient Air Temperature (AAT) sensor circuit low. This generic powertrain diagnostic code applies to most OBDII-equipped vehicles but is more common in Audi, BMW, Chrysler, Dodge, Ford, Jeep, Mazda, Mitsubishi, VW, and Volvo.

Role of the Ambient Air Temperature (AAT) Sensor

The AAT sensor converts the outside air temperature into an electrical signal sent to the Powertrain Control Module (PCM). This data is essential for:

  • Regulating the operation of the automatic climate control system.
  • Displaying the outside temperature on the dashboard or console.

The PCM compares the AAT sensor signal with those from the Intake Air Temperature (IAT) sensor and the Engine Coolant Temperature (ECT) sensor at startup, after a period of inactivity. The P0072 code is triggered if an abnormal discrepancy is detected between these values.

Symptoms of the P0072 Code

  • Malfunction Indicator Lamp (MIL) illuminated
  • Poor air conditioning performance
  • Inaccurate outside temperature display on the dashboard
  • Incorrect display on the overhead console

Possible Causes

  • Connection issue or exposed wire in the signal circuit
  • Ground problem at the AAT sensor
  • Faulty AAT sensor
  • PCM failure (rare)

Diagnosis and Solutions

1. Check Technical Service Bulletins (TSBs)
First, consult your manufacturer’s TSBs. A known fix may exist for your model, saving you time and money.

2. Visual Inspection
Locate the AAT sensor, usually positioned in front of the radiator. Inspect the connectors and wiring for any signs of wear, corrosion, or burning. Clean the terminals with electrical contact cleaner and apply dielectric grease.

3. Sensor Testing
Using a digital multimeter (DVOM), measure the sensor’s resistance (ohms) and compare it to reference values for the ambient temperature. A resistance of 0 Ω or infinite (OL) indicates a faulty sensor.

4. Circuit Testing
Using a scan tool, check the AAT sensor’s signal voltage. It should be around 5 volts. Jumpering the connector terminals should drop the voltage to near 0 volts. No change indicates a wiring issue or faulty PCM.

5. Replacement
If all previous tests are conclusive, replace the AAT sensor. If the problem persists, consult a professional for a thorough diagnosis, as the PCM may require reprogramming.

Conclusion

The P0072 code is often related to faulty connections or a malfunctioning AAT sensor. A visual inspection and simple tests can often resolve the issue. For an accurate diagnosis or if you are not comfortable performing these procedures, consult a qualified mechanic.

Need help? Equip yourself with a reliable scan tool to diagnose your vehicle yourself or find a professional near you.

P0073 High Ambient Air Temperature Sensor Circuit

What is the P0073 Code?

The P0073 error code is a generic powertrain-related code that indicates a problem in the Ambient Air Temperature (AAT) sensor circuit. This sensor, found on most OBD2-equipped vehicles, functions to convert the outside air temperature into an electrical signal. This signal is primarily used by the Powertrain Control Module (PCM) to regulate the air conditioning system and display the outside temperature on the dashboard.

Operation and Causes of the Fault

At startup, after a period of inactivity, the PCM compares the AAT sensor reading with those of the Intake Air Temperature (IAT) and Engine Coolant Temperature (ECT) sensors. The P0073 code is triggered when these values show an abnormal discrepancy. It can also activate if the electrical signal is incorrect once the engine is warm.

This fault is generally caused by an electrical issue, such as an open circuit, a short circuit, or a faulty AAT sensor. A PCM failure is rare but possible.

Symptoms of the P0073 Code

  • ⚠️ Malfunction Indicator Lamp (MIL) illuminated on the dashboard.
  • ❌ Poor operation or deactivation of the automatic climate control system.
  • 🌡️ Incorrect display of the outside temperature on the instrument cluster or center console.

Potential Causes

  • Cut wires or an open circuit in the AAT sensor wiring.
  • Short circuit to ground or voltage in the circuit.
  • Faulty Ambient Air Temperature (AAT) sensor.
  • PCM failure (rare).

Diagnosis and Solutions

Start by consulting your manufacturer’s Technical Service Bulletins (TSBs) (Audi, BMW, Ford, VW, etc.) to check for any known issues.

Step 1: Visual Inspection

Locate the AAT sensor, typically situated behind the front grille. Inspect the connector and wiring for any signs of wear, corrosion (greenish tint), or burning. Clean the terminals with an appropriate product and apply dielectric grease.

Step 2: Sensor Testing

Using a multimeter (DVOM), measure the sensor’s resistance (ohms) and compare it to the ambient temperature using a reference chart. A reading of 0 Ω or OL (open circuit) indicates a faulty sensor.

Step 3: Circuit Testing

With a diagnostic tool, read the AAT sensor’s voltage or temperature. It should be around 5 V (ignition on) or display a very low temperature. By shorting the two terminals of the connector with a jumper wire, the reading should drop to near 0 V or show a very high temperature. If not, the circuit or the PCM is at fault.

Step 4: Replacement

If all tests point to the sensor, replace it. Clear the codes and perform a road test to confirm the repair. If the code reappears, a PCM failure is possible, requiring reprogramming or replacement by a professional.

Need help? Electrical diagnosis can be complex. If you are unsure, consult a qualified mechanic to avoid damaging other electronic components in your vehicle.

P0074 Intermittent Ambient Air Temperature Sensor Circuit

Meaning of Code P0074

The error code P0074 is a generic OBD-II code that indicates an intermittent electrical inconsistency in the Ambient Air Temperature (AAT) sensor circuit. The Powertrain Control Module (PCM) continuously compares the AAT sensor values with those from other temperature sensors (such as IAT or ECT). When these values show an abnormal and inconsistent discrepancy, the PCM logs the P0074 code and illuminates the malfunction indicator lamp.


Severity and Symptoms of Code P0074

Severity Level: Moderate. Although the vehicle generally remains operational, this fault can disrupt the automatic climate control system and the outside temperature display. Prompt inspection is recommended.

Common Symptoms

  • Check Engine Light illuminated (or warning message)
  • Automatic climate control system malfunction (incorrect interior temperature)
  • Incorrect display of outside temperature on the dashboard
  • Intermittent symptom behavior

Possible Causes of P0074 Fault

  1. Electrical Problems:
    • Intermittent open or short circuit (damaged, chafed, or corroded wires)
    • Loose, oxidized, or corroded connections at the AAT sensor connector or PCM
    • Poor electrical ground
  2. AAT Sensor Failure:
    • Dirty, physically damaged sensor, or one exceeding its electrical tolerances
    • Slow or intermittent response to temperature changes
  3. PCM Failure (rare):
    • Internal problem processing the signal from the AAT sensor
    • Requires thorough diagnosis before replacement

Diagnosing Code P0074

Step 1: Check Technical Service Bulletins (TSB)

Consult the manufacturer’s technical service bulletins to check for known issues, revised diagnostic procedures, or specific software updates related to this code for your vehicle model.

Step 2: Visual and Mechanical Inspection

  1. Locate the AAT sensor, typically behind the grille or integrated into the front bumper.
  2. Carefully inspect the sensor, its connector, and the wiring harness along its entire length. Look for obvious signs of damage: pinched or chafed wires, melted insulation, corrosion (green/white oxidation) on the terminals, or a poorly seated connector.
  3. Clean the connector terminals with electrical contact cleaner spray and apply a small amount of dielectric grease to protect against future oxidation.

Step 3: Electrical Testing of the AAT Sensor

  1. Resistance Measurement (Ohmmeter):
    • With the engine off, disconnect the electrical connector from the sensor.
    • Using a multimeter in Ohmmeter (Ω) mode, measure the resistance between the sensor terminals.
    • Compare the reading with the manufacturer’s reference table for the current ambient temperature. A value of 0 Ω (short circuit) or infinite resistance (open circuit) indicates a faulty sensor.
  2. Live Data Test (Oscilloscope/Scan Tool):
    • Reconnect the sensor and use a diagnostic tool to observe the real-time AAT temperature value.
    • Jiggle the wiring harness and gently tap the sensor to reproduce the intermittent fault. Jumps or drops in the value indicate an intermittent problem.

Step 4: Circuit and Power Supply Check

  1. Power Supply Voltage Test:
    • Ignition on, engine off, disconnect the sensor connector.
    • Using the multimeter in Voltmeter (VDC) mode, measure the voltage between the power supply wire (+5V reference) and ground.
    • No voltage (~0V) indicates a problem in the power circuit (cut wire, poor connection to PCM) or PCM failure.
  2. Ground Test:
    • Check continuity between the ground terminal of the connector (harness side) and a good chassis ground. High resistance indicates a poor ground.

Solutions and Repairs

  • Replace the AAT sensor if electrical tests confirm its failure. Average cost: €20 to €80. Ensure you install an OEM quality or equivalent part.
  • Repair the electrical circuit: Solder and protect with heat-shrink tubing any cut or exposed wires. Replace any damaged cable section. Clean and secure all connections and grounds.
  • Replace or reprogram the PCM: This costly solution should only be considered after eliminating all other possible causes and confirming module failure through advanced diagnostics.

Precautions and Tips After Repair

  • Handle the new sensor carefully to avoid any damage.
  • After any repair, clear the error codes with your diagnostic tool.
  • Perform a road test cycle to verify that the fault does not reappear after several start cycles and under different driving conditions.

Need Help Diagnosing Your P0074 Code?

If the diagnostic steps seem complex or you lack the necessary equipment, consult a professional mechanic. Equipped with advanced diagnostic tools and technical databases, they can identify and resolve the problem quickly and effectively.

Contact a partner garage today for an accurate diagnosis!