P0293 Cylinder 11 – Fuel Quantity Injected – Imbalance Fault

What is the P0293 code?

The OBD-II trouble code P0293 is a generic powertrain code. It indicates that the Powertrain Control Module (PCM) has detected an imbalance or an abnormal amount of fuel being injected into cylinder number 11. Specifically, this cylinder is producing less power than the others, which disrupts the engine’s balance.

The PCM continuously monitors the contribution of each cylinder by analyzing the crankshaft acceleration during its power stroke. If cylinder 11 shows abnormally low performance, the P0293 code is stored and the Malfunction Indicator Lamp (check engine light) illuminates.

Although it is a generic code, the causes and repair procedures can vary depending on the make and model. It is always recommended to consult the specific Technical Service Bulletins (TSBs) for your vehicle.

Symptoms of the P0293 Code

When this fault is present, you may observe one or more of the following symptoms:

  • 🔧 Check Engine Light illuminated with code P0293
  • 🚗 Loss of power and acceleration
  • 🔁 Rough or unstable idle
  • Noticeable decrease in fuel consumption

Possible Causes of the Fault

The problem usually stems from insufficient or poor-quality fuel delivery to cylinder 11. The main causes include:

  • 🔌 Electrical problem: Corroded injector connector, pushed back pins, or a faulty filter.
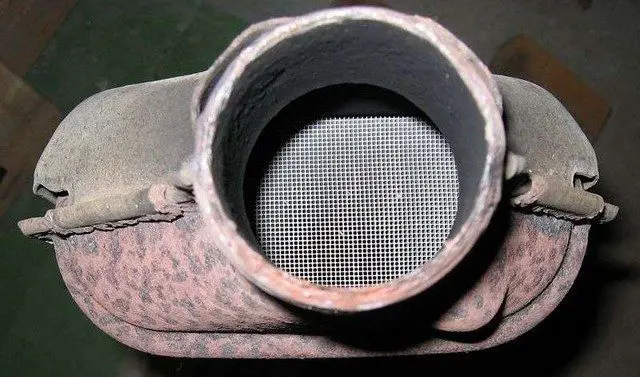
  • ⚠️ Dirty or clogged injector: Dirt can clog the injector’s filter, preventing it from spraying fuel correctly.
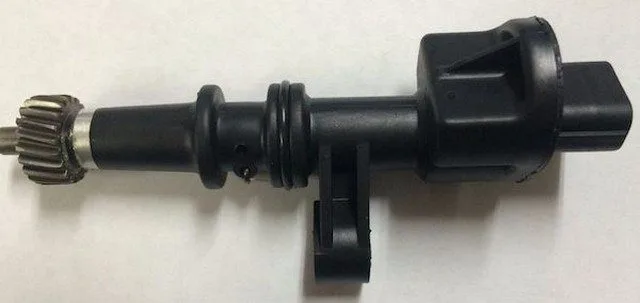
  • Faulty fuel injector: The injector may be completely inoperative.
  • 🔩 Wiring problem: A break or short circuit in the wiring harness serving the injector.

How to Diagnose and Repair the P0293 Code?

Here is a step-by-step diagnostic procedure to identify and resolve the problem.

Step 1: Visual Inspection and Acoustic Test

  • Inspect the electrical connector of the cylinder 11 injector. Check for corrosion, pushed back, or bent pins. Clean if necessary and apply dielectric grease.
  • Start the engine. Using a screwdriver or a mechanical stethoscope, listen for the characteristic “click” of the injector. A lack of noise indicates an electrical problem or a dead injector.

Step 2: Electrical Test

  • Using a multimeter, check the voltage at the injector’s power terminal. You should get battery voltage (approximately 12V). If no voltage is present, there is a wiring problem or an issue with the fuel pump relay.

Step 3: Injector Cleaning

  • If the injector is powered but seems clogged, proceed with cleaning. Use an injector cleaning kit available at auto parts stores.
  • Remove the fuel pump fuse and let the engine run until it stalls to purge the pressure.
  • Connect the kit to the fuel rail via the Schrader valve and run the engine with the cleaning product.

Step 4: Clearing Codes and Final Test

  • After cleaning, reinstall everything, put the fuse back in, and clear the codes using a diagnostic scanner.
  • Restart the engine. If the code reappears and the symptoms persist, replacing the cylinder 11 injector is most likely necessary.

⚠️ Important Tip: This problem should not be ignored. A misfiring cylinder can damage the catalytic converter and lead to more expensive repairs.

When Should You Consult a Professional?

If the diagnostic steps above seem complex or if you do not have the necessary equipment, it is highly recommended to seek help from a professional mechanic. A qualified technician will have advanced diagnostic tools and the expertise needed to confirm the fault and perform the repair safely and effectively.

💡 Need help interpreting other trouble codes? Browse our complete OBD2 code guide to become an auto diagnostic expert!

Cylinder 12 Injector Circuit Low

What is the P0294 Code?

The P0294 error code is a generic powertrain (OBD-II) code that indicates a low voltage circuit problem at cylinder 12’s fuel injector. The engine control module (PCM) detected an abnormally low voltage in this injector’s electrical circuit.

A faulty injector can cause a cascade of problems: it creates a lean air-fuel mixture in its cylinder, which the oxygen sensor detects. The PCM then compensates by enriching the mixture for all cylinders, causing fuel economy to drop. Cylinder 12, operating with a lean mixture, can overheat and lead to engine knocking (detonation). The PCM responds by retarding the ignition timing, resulting in poor performance, power loss, and premature engine wear.

Symptoms of the P0294 Code

  • 📈 Check Engine Light illuminated
  • ⚡ Rough running or shaking engine
  • 🔻 Noticeable power loss during acceleration
  • ⛽ Significant increase in fuel consumption
  • 💥 Knocking or detonation noises from the engine

Possible Causes of the Fault

  • 🔌 Loose, corroded, or damaged electrical connector on injector #12
  • 🛠️ Clogged, blocked, or defective fuel injector
  • 🔋 Electrical circuit problem: cut wire, short circuit, or poor connection
  • 💥 Malfunctioning injector driver in the PCM (less common)

Diagnosis and Repair Procedure

Step 1: Visual Inspection
Locate cylinder 12’s injector. Inspect its electrical connector. Ensure it is properly seated, and check for any signs of corrosion, damage, or pushed-back pins.

Step 2: Basic Electrical Test
– Disconnect the injector connector.
– Using a multimeter, check for power supply current (typically 12V) at the corresponding terminal when the ignition is on. No voltage? Check the fuel pump fuse and relay.
– If the power supply is good, test the ground circuit controlled by the PCM. The multimeter should display rapid pulses when the engine is idling.

Step 3: Injector Test
– Use a mechanical stethoscope to listen for the characteristic “click” of the injector while the engine is running. Its absence indicates a problem.
– You can also measure the injector’s (coil) resistance using a multimeter and compare the value with other injectors or manufacturer specifications.

Step 4: Cleaning or Replacement
– If the injector is dirty, use a direct injector cleaning kit. This simple and inexpensive operation may solve the problem.
– If the injector is electrically defective or severely clogged, replacement is necessary. It is often recommended to replace injectors in batches to avoid imbalances.

⚠️ Safety Tip

Before any work, turn off the ignition and disconnect the battery. Injector circuits are live. If you are not comfortable with these procedures, consult a professional mechanic for an accurate diagnosis.

Need help diagnosing or finding the right part? Consult our complete fault code guide or contact our community of mechanical experts for personalized advice.

P0295 Cylinder 12 Injector Circuit High

What is the P0295 Code?

The P0295 trouble code is a generic OBD-II code (common to all manufacturers) that indicates an abnormally high current consumption in the fuel injector circuit for cylinder 12. This means the Powertrain Control Module (PCM) has detected electrical resistance that is too low or a short circuit in this injector’s circuit.

Although generic, the diagnostic procedure and specific causes can vary depending on the vehicle’s make and model. Therefore, it is crucial to consult the Technical Service Bulletins (TSBs) issued by the manufacturer for your specific vehicle.

Symptoms of the P0295 Code

When this fault is present, several symptoms can alert the driver:

  • 📈 The Malfunction Indicator Lamp (MIL) illuminates on the dashboard.
  • 🔊 The engine runs poorly or has an irregular idle.
  • ⛽ Fuel consumption increases significantly.
  • ⚡ A loss of power and poor acceleration are noticeable.
  • 💥 Misfires or engine hesitation may occur.

Possible Causes of the Fault

Several components can be the cause of the P0295 code:

  • Faulty Injector: An internal short circuit in the injector coil is the most common cause.
  • Connection Issue: Oxidized, corroded pins, or a loose connector on the injector.
  • Damaged Wiring Harness: A frayed, shorted, or damaged wire between the PCM and the injector.
  • Clogged or Dirty Injector: Carbon deposits can, over time, affect electrical performance.

How to Diagnose and Repair the P0295 Code?

Here is a step-by-step diagnostic procedure to identify and resolve the problem.

Step 1: Visual Inspection

Start by inspecting the electrical connector for cylinder 12. Check for the absence of corrosion, damage, or loose wires. Clean the terminals and apply dielectric grease to ensure good contact.

Step 2: Injector Test

With the engine running, use a mechanic’s stethoscope (tip on the injector, handle against your ear) to listen for the characteristic “click” of its operation. Its absence indicates a problem.

Step 3: Resistance Measurement

Disconnect the injector and measure its internal resistance using a multimeter. A value between 0.5 and 2.0 Ohms is normal. A value outside this range confirms that the injector is faulty and must be replaced.

Step 4: Injector Cleaning (Optional)

If the resistance is correct but performance is poor, cleaning can be attempted using an on-car cleaning kit. This operation removes deposits that could hinder proper operation.

Step 5: Replacement

If all previous tests point to a faulty injector, replacement is the solution. After installation, clear the codes with an OBD2 scanner and perform a road test to ensure the fault does not return.

⚠️ Warning: Ignoring this code can damage other expensive components like the catalytic converter or oxygen sensors. Prompt diagnosis and repair are recommended.

💡 Pro Tip: Not comfortable performing these tasks yourself? Consult a certified mechanic for an accurate diagnosis and guaranteed repair.

P0296 Cylinder 12 – Fuel Quantity Injector C Imbalance Fault

“`json
{
“content”: “

OBD-II Fault Code P0296: Definition, Symptoms, Causes and Repair Procedure

\n\n


\n\n

What is Fault Code P0296?

\n\n

The fault code P0296 is a generic OBD-II code related to the powertrain. It indicates a fault in the balance of the injected fuel quantity in cylinder number 12 (according to the engine firing order).

\n\n

    \n
  • PCM Operation: The Powertrain Control Module (PCM) monitors the contribution of each cylinder by analyzing micro-variations in crankshaft speed. If cylinder 12 produces significantly less power than the others (typically a deviation greater than 5%), code P0296 is stored in the computer’s memory.
  • \n

  • Importance: This fault must not be ignored. A misfiring cylinder leads to overloading the others, premature engine wear, increased fuel consumption, and can damage the catalytic converter.
  • \n

\n\n


\n\n

Symptoms of Code P0296

\n\n

The most common signs accompanying code P0296 are:

\n\n

    \n
  • 🔴 Check Engine Light illuminated (malfunction indicator lamp) with code P0296 stored.
  • \n

  • ⚠️ Noticeable loss of power and poor acceleration response.
  • \n

  • 🔧 Rough idle and abnormal vibrations, especially at idle.
  • \n

  • Abnormally high fuel consumption.
  • \n

  • 🚗 In some cases, perceptible engine misfires.
  • \n

\n\n


\n\n

Possible Causes of Fault P0296

\n\n

The problem usually stems from an imbalance between the requested fuel quantity and the amount actually injected into cylinder 12. The main causes are:

\n\n

    \n
  • ⛽ Faulty fuel injector: The most common cause. The injector may be clogged with deposits, partially blocked, leaking, or electrically faulty.
  • \n

  • 🔌 Electrical problem: Loose, corroded injector connector, or damaged pins. Faulty wiring (short circuit, break) between the PCM and the injector.
  • \n

  • 🛠️ Fuel supply problem: Faulty fuel pump wiring or relay leading to insufficient fuel pressure.
  • \n

  • 🔩 Mechanical problem (less common): Low compression in cylinder 12 (worn piston rings, faulty valve).
  • \n

\n\n


\n\n

Diagnosis and Repair Procedure for Code P0296

\n\n

⚠️ Safety first: Work on a cold engine, disconnect the battery, and follow safety instructions to avoid any risk of fire.

\n\n

Step 1: Visual Inspection and Simple Test

\n\n

    \n
  • Connector Inspection: Locate the injector for cylinder 12. Carefully inspect its electrical connector for any signs of corrosion, bent, or pushed back pins. Clean if necessary and apply dielectric grease.
  • \n

  • Auditory Test: Using a mechanic’s stethoscope (handle against the ear), listen for the characteristic \”click\” of each injector at idle. A lack of noise from cylinder 12 indicates an electrical problem or a faulty injector.
  • \n

\n\n

Step 2: Electrical Checks

\n\n

    \n
  • Voltage Test: With a multimeter, check for battery voltage at the injector’s supply terminal (usually a colored wire) when the ignition is on. Its absence points to a wiring or relay problem.
  • \n

  • Coil Test: Measure the resistance of the (disconnected) injector and compare it to the manufacturer’s specifications and the resistance of the other injectors. A significant difference indicates a faulty injector.
  • \n

\n\n

Step 3: Injector Cleaning (if suspected)

\n\n

    \n
  1. Obtain a common rail injector cleaning kit.
  2. \n

  3. Preparation: Remove the fuel pump fuse. Start the engine and let it stall to release pressure in the fuel system.
  4. \n

  5. Flushing: Connect the kit to the Schrader valve on the fuel rail. Follow the product instructions to run the engine solely on the cleaning solution.
  6. \n

\n\n

Step 4: Validation and Replacement

\n\n

    \n
  • Reset: Clear the fault codes with your diagnostic tool and reset the PCM adaptations.
  • \n

  • Road Test: Perform a road test to allow the PCM to perform new balance tests.
  • \n

  • Conclusion: If code P0296 reappears specifically for cylinder 12 after cleaning, replacing the injector is most likely necessary. It is often recommended to replace the injector seal (O-ring) as well.
  • \n

\n\n


\n\n

Important Recommendations and Precautions

\n\n

    \n
  • 🔧 Consult Technical Service Bulletins (TSB) from your manufacturer. Some models have known issues regarding injectors or their calibration.
  • \n

  • Use advanced diagnostic tools (oscilloscope) to analyze the injector control signal waveform and confirm its proper operation.
  • \n

  • Always use quality OEM or high-quality aftermarket injectors. Poor quality parts can cause recurring problems.
  • \n

  • 📖 Always refer to the specific vehicle repair manual for torque specifications, exact procedures, and wiring diagrams.
  • \n

\n\n

Need help diagnosing or replacing your injector? Consult a professional mechanic equipped with the right tools for an accurate diagnosis and guaranteed repair.

\n\n


\n\n

⚠️ Note: Procedures and specification values can vary significantly between manufacturers and vehicle models. This guide is generic and must be adapted accordingly.

“,
“keywords”: [“code P0296”, “cylinder 12 fault”, “faulty fuel injector”, “injector diagnosis”, “injector cleaning”, “OBD2 fault code”, “check engine light on”, “rough idle”, “engine power loss”, “injector replacement”],
“description”: “Complete guide on fault code P0296: symptoms (power loss, check engine light), causes (faulty injector, electrical problem) and step-by-step diagnostic and repair procedure to fix the cylinder 12 balance fault.”
}
“`

P0297 Vehicle Overspeed Condition

What is the P0297 fault code?

The P0297 code is a generic OBD-II powertrain code that indicates a vehicle overspeed condition. It applies to most brands (Ford, Nissan, Suzuki, Dodge, Chevrolet, Jeep, Subaru, etc.), although specific repair procedures may vary.

This code is triggered when the Powertrain Control Module (PCM) detects, via the Vehicle Speed Sensor (VSS), that the actual speed has exceeded the programmed maximum limit, often set at 100 mph (approximately 160 km/h) on North American vehicles.

System Operation and Symptoms

When the speed limit is reached, the PCM cuts the fuel injector signal to reduce engine power and lower the speed. Normal operation resumes once an acceptable speed is restored.

The Vehicle Speed Sensor (VSS) is typically an electromagnetic sensor mounted on the transmission. It reads the rotation of a reluctor ring attached to the output shaft. The notches on the ring interrupt the sensor’s magnetic field, generating a signal that the PCM interprets as the vehicle’s speed.

Vehicle Speed Sensor (VSS)

Symptoms of the P0297 Code

The severity of this code can vary. It is often accompanied by:

  • No visible symptoms (most common case)
  • Abnormal transmission shifting
  • Presence of other fault codes related to the transmission or ABS
  • Illumination of the Malfunction Indicator Lamp (MIL)

Warning: If the code is accompanied by transmission problems, urgent intervention is recommended.

Possible Causes of the P0297 Fault

Several elements can be the cause of this code:

  • The vehicle was actually driven beyond its maximum speed limit.
  • Faulty or failing Vehicle Speed Sensor (VSS).
  • Damaged or dirty reluctor ring.
  • Mechanical problem with the transmission.
  • Short-circuited VSS electrical circuit (causing an erroneous signal).
  • Poor connection or corroded connector.

Diagnosis and Repair Procedures

To diagnose a P0297 code, you will need an OBD2 scanner, a digital multimeter (DVOM), and access to your vehicle’s technical data.

Step 1: Initial Check and Code Clearing

Start by checking if the vehicle actually traveled at an excessive speed. Connect your scanner, retrieve all fault codes and freeze frame data, then clear the codes. Test the vehicle to see if the P0297 code reappears. If it does not return, the problem was likely temporary.

Step 2: Inspection and Testing of the VSS Sensor

If the code persists, inspect the VSS sensor and its connector for any visible damage. Disconnect the connector and test the sensor’s resistance with a multimeter. Compare the measured value with the manufacturer’s specifications. A sensor outside the specifications must be replaced.

Step 3: Checking Electrical Circuits

If the sensor is good, check for the presence of reference voltage (usually 5V) and a good ground at the VSS connector (engine off, ignition on).

  • No reference voltage? Check the corresponding circuit back to the PCM for a possible broken wire or faulty connector.
  • No ground? Consult the wiring diagrams to locate and inspect the system ground.
  • A short to power is a common cause of an erroneous overspeed signal.

Step 4: Advanced Diagnosis and Conclusion

If the power and ground are correct, test the continuity of all circuits in the VSS system with the relevant control modules disconnected. If all circuits are intact and the problem persists, a faulty PCM is possible, although rare.

Reminder: The most frequent cause of the P0297 code remains an actual exceeding of the speed limit. A PCM failure is extremely rare.

Need Help?

Electrical diagnosis can be complex. If you are not comfortable with these procedures, consult a professional mechanic for an accurate diagnosis and safe repair.

P0298 Engine oil overheating condition

What is the P0298 code?

The P0298 diagnostic trouble code is a generic powertrain code applicable to most OBD-II equipped vehicles (Ford, Nissan, Suzuki, Dodge, Chevrolet, Jeep, Subaru, etc.). It indicates that the Powertrain Control Module (PCM) has detected an abnormally high engine oil temperature, exceeding acceptable safety thresholds. The causes can be electrical or mechanical.

Monitoring System Operation

The engine oil temperature sensor, often a negative temperature coefficient thermistor, sees its resistance decrease as the temperature increases. The PCM sends a reference voltage (usually 5V) to the sensor. Cold oil provides high resistance, maintaining a low voltage (~0.5V). Hot oil reduces the resistance, causing the voltage to increase. The PCM interprets these voltage variations as temperature changes. If the voltage falls outside the programmed parameters, the P0298 code is stored and a warning light may illuminate.

Engine oil temperature sensor
Example of an engine oil temperature sensor

Severity and Symptoms of Code P0298

This code is urgent. It is imperative not to use the vehicle and to perform an immediate diagnosis to avoid serious engine damage (piston seizure, engine failure).

Common symptoms:

  • Abnormal noises (knocking, pinging) or burning smell from the engine
  • Noticeable decrease in performance and engine power
  • Presence of coolant leaks
  • Appearance of other codes related to the cooling system
  • Temperature warning light or check engine light illuminated

Possible Causes of Code P0298

Several malfunctions can trigger this code:

  • Engine Overheating: Due to a coolant leak, faulty thermostat, head gasket failure, or air circulation problem (fan).
  • Oil Level Too Low: An insufficient amount of oil reduces its ability to dissipate heat.
  • Faulty Engine Oil Temperature Sensor: Provides an incorrect reading to the PCM.
  • Electrical Problem: Open or short circuit, damaged wiring, or oxidized/corroded connectors.
  • PCM Failure (less common): A programming error or internal module problem.

Diagnosis and Repair Procedures

Required Tools: OBD2 scanner, digital multimeter (DVOM), vehicle technical documentation.

Crucial Preliminary Steps:

  1. Check Fluid Levels: Ensure the engine contains the recommended quantity and type of oil and coolant specified by the manufacturer. A low level is a frequent cause.
  2. Visual Inspection: Examine the sensor wiring and connectors for any signs of damage, corrosion, or looseness.
  3. Check for Engine Overheating: Diagnosing a P0298 code on an overheating engine is pointless. The cause of the overheating (cooling system) must be resolved first.

Electrical Diagnostic Procedure (if the engine is not overheating):

  1. Connect the scanner, note the freeze frame data and codes, then clear the codes. Test drive the vehicle to see if the P0298 code returns.
  2. If the code returns, disconnect the connector of the oil temperature sensor.
  3. With the ignition on (engine not running), use the multimeter to check for the presence of the reference voltage (5V) and a good ground at the connector.
  4. If voltage and ground are OK: Test the sensor’s resistance out of circuit with the multimeter. Compare the measured value to the manufacturer’s specifications (it decreases with temperature). Replace the sensor if out of specification.
  5. If the 5V voltage is absent: Check the corresponding circuit back to the PCM. A broken wire or short circuit is suspected.
  6. If ground is absent: Check the integrity of the ground circuit and the ground connection point.
  7. If the PCM is not sending the reference voltage: A PCM failure or programming error is possible (rare case).

⚠️ Warning: It is highly recommended to entrust the complex diagnosis of a P0298 code to a professional mechanic. Working on a hot engine and handling its wiring requires expertise and proper equipment to avoid any risks.

P0299 Turbocharger/Supercharger

What is the P0299 code?

The OBD-II trouble code P0299 is a generic powertrain code that indicates a turbocharger or supercharger underboost problem. The engine control module (PCM/ECM) detected that the boost pressure is lower than the expected value by at least 4 psi for 5 seconds.

Symptoms of the P0299 code

  • 📛 Check engine light illuminated (MIL)
  • Significant loss of engine power (“limp mode”)
  • 🌫️ Black smoke from the exhaust (on diesel engines)
  • 🔊 Whistling or abnormal noise coming from the turbocharger
  • Increased fuel consumption
  • 🚗 Poor acceleration and sluggish response

Possible causes of the P0299 fault

The causes of a P0299 code are numerous and mainly concern the boost system:

  • Air leaks in the intake circuit (pipes, connections, intercooler)
  • Faulty turbocharger (seized blades, bearing wear, excessive axial play)
  • Faulty MAP sensor (boost pressure sensor)
  • Defective or stuck wastegate valve or dump valve
  • Wastegate control solenoid out of service
  • Clogged or obstructed air filter
  • Seized variable geometry turbo (VGT) actuator (on some turbos)
  • EGR system problem or insufficient engine oil pressure

Diagnosis and solutions for the P0299 code

🔧 Recommended diagnostic steps

  1. Check for other present trouble codes and address them first.
  2. Visually inspect the intake circuit to identify any air leaks (cracked pipes, loose clamps).
  3. Check the condition of the air filter and replace it if necessary.
  4. Using an OBD-II diagnostic tool, check the MAP sensor data in real time.
  5. Test the operation of the wastegate and its control solenoid.
  6. Inspect the turbocharger for any abnormal play or damage.

🛠️ Common repairs

  • Tighten or replace faulty intake pipes.
  • Clean or replace the air filter.
  • Replace the faulty MAP sensor.
  • Unstick, clean, or replace the wastegate or dump valve.
  • Replace the turbocharger if it is damaged.

Affected models and specificities

This code is common on many brands:

  • Ford (EcoBoost, Powerstroke on F-150, Explorer, Escape): Check the wastegate solenoid and VGT actuator.
  • VW / Audi (A4, Golf, Passat, Q5): Often related to the dump valve (N75) or leaks in the circuit.
  • Chevrolet / GMC (Cruze, Sonic, Duramax): Check the turbo resonator (common failure).
  • BMW, Mercedes, Dodge, Ram, Hyundai are also frequently affected.

💡 Tip: Always consult the Technical Service Bulletins (TSBs) specific to your vehicle to identify known manufacturer issues.

Conclusion and call to action

The P0299 code should not be ignored. A loss of boost pressure puts abnormal strain on the engine and can lead to more serious and costly damage. Although some simple checks can be done yourself, accurate diagnosis often requires the expertise of a professional and the use of specific tools.

🧰 Need help diagnosing or repairing your P0299?

Join our automotive support community on our forums! Ask your questions for free and benefit from advice from mechanics and enthusiasts to solve your turbocharger problem.

Share your experience or ask your question now!

P029A Fuel Trim, Cylinder 1 – Maximum Control Limit Reached

What is the P029A Code?

The generic diagnostic trouble code P029A, “Cylinder 1 Fuel Trim – Maximum Limit Reached,” indicates that the engine computer (PCM) has detected an extremely lean air-fuel mixture specifically in cylinder #1. To compensate, the PCM had to increase the fuel flow to its maximum capacity without being able to restore a balanced ratio.

Symptoms of the P029A Code

The signs that often accompany this code are:

  • ➤ Noticeable drop in performance and loss of power
  • ➤ Engine hard to start
  • ➤ Unstable or rough idle
  • ➤ Possible presence of other codes (misfires, lean mixture)
  • ➤ Potentially increased fuel consumption

Possible Causes of the Fault

A P029A code on cylinder 1 is generally caused by:

  • Faulty Injector: Cylinder 1 injector clogged, obstructed, or malfunctioning.
  • Vacuum Leaks: An unmetered air leak at the intake manifold, often due to a faulty gasket, detached hose, or failing EGR valve.
  • Insufficient Fuel Pressure: A weak fuel pump or a clogged fuel filter.
  • Faulty Sensors: A MAF (Mass Air Flow) sensor or MAP (Manifold Absolute Pressure) sensor providing an incorrect reading to the PCM.
  • Oxygen Sensor (Lambda Sensor): Incorrect data sent by the downstream oxygen sensor for the affected cylinder.

How to Diagnose and Repair the P029A Code?

WARNING: This code is considered severe. Driving with a mixture that is too lean can cause overheating and seriously damage the engine. It is recommended to proceed with diagnosis quickly.

1. Visual Inspection and Pre-Diagnosis

  • Carefully inspect the engine compartment to identify any obvious air leaks: listen for whistling sounds, check the condition of hoses, the intake connection, and the PCV system.
  • Check the cylinder 1 injector to see if it is wet with fuel or shows signs of an external leak.
  • Using an OBD2 scanner, read all fault codes and observe the live data, especially the Fuel Trim values (short-term and long-term). Confirm that cylinder 1 is indeed the one affected.

2. Fuel Pressure Check

Connect a pressure gauge to the fuel rail and compare the reading with the manufacturer’s specifications.

  • If the pressure is good: Proceed to the next step.
  • If the pressure is low: Test the fuel pump relay and power supply voltage. Check and replace the fuel filter if necessary. If everything is good, the fuel pump is likely faulty.

3. Injector and Circuit Test

Use a multimeter (DVOM) to test the cylinder 1 injector:

  • Electrical Test: Check the injector’s resistance (ohmmeter) and ensure it is receiving a command pulse from the PCM (using a Noid light or an oscilloscope).
  • Acoustic Test: Using a mechanical stethoscope, listen for the characteristic “click” of the injector during operation. Its absence indicates a dead injector or a circuit problem.

4. Air Leak Search and Sensor Testing

If the previous steps yielded no results:

  • Perform a smoke test on the intake system to locate any invisible micro air leaks.
  • Inspect and clean the MAF sensor with an appropriate product.
  • Using the scanner, check the MAP sensor and oxygen sensor data at idle and at steady RPM to detect any inconsistency.

Conclusion and Call to Action

The P029A code often points to a mechanical or electrical problem localized on cylinder 1. Although the diagnosis can be performed by a skilled DIYer with the right tools, the complexity of modern systems often makes professional intervention necessary for an accurate diagnosis and reliable repair.

💡 Tip: Do not ignore this code. If you do not feel comfortable performing the diagnosis yourself, consult a professional mechanic to avoid any risk of engine damage.

How to Repair a Catalytic Converter (Without Replacing It)

The catalytic converter is part of the exhaust system and processes all exhaust gases leaving the engine before they can escape into the atmosphere. A faulty or clogged catalytic converter can eventually lead to engine failure, so it’s important to address the issue quickly. However, having catalytic converter problems does not necessarily mean the converter needs to be replaced. You may be able to repair your catalytic converter without replacing it by using one of the following methods.

(more…)

Operation of the air intake system

Every internal combustion engine, from tiny scooter engines to colossal ship engines, requires two basic things to operate – oxygen and fuel – but simply throwing oxygen and fuel into a container doesn’t make an engine. Tubes and valves guide the oxygen and fuel into the cylinder, where a piston compresses the mixture to ignite. The explosive force pushes the piston down, forcing the crankshaft to turn, giving the user mechanical force to move the vehicle, operate generators, and pump water, to name just a few of an automotive engine’s functions.

(more…)