A concerning click or rattle under the hood could signal bent engine valves, an internal issue that requires repair. While not extremely common, bent intake or exhaust valves still occur.
Early identification of symptoms from slightly damaged valves allows for assessing the best solution, whether replacement or repair is needed. Continue reading to discover the common signs of bent valves and how much it will cost to repair them.
Symptoms of a Bent Valve
The presence of one or more bent valves in an engine is usually accompanied by a number of secondary symptoms. Recognizing these symptoms often proves beneficial when attempting to diagnose the problem in question.
Here are some of the most common symptoms associated with a bent valve.
#1 – Misfires
A bent valve often leads to engine misfires, largely due to the fact that a particular cylinder is unable to intake or exhaust as designed. When attempting to diagnose this issue, the observed misfires will be confined to the affected cylinder.
#2 – Backfire
Backfiring is another common symptom attributed to valve damage. This condition most often presents itself when the exhaust valve of a particular cylinder is unable to seat as intended.
#3 – Power Loss
You might also notice that your vehicle seems to lack power if its engine has one or more bent valves.
This is because the affected cylinder will typically exhibit some degree of compression loss, thereby hindering the combustion process as a whole.
#4 – Abnormal Noises
If a valve is bent enough to remain in an open position, some noise or metallic rattling can often be heard. This is the result of continuous piston/valve contact.
Vehicle use should be stopped immediately if such noises become evident.
#5 – Oil Consumption
Excessive oil consumption can also signify valve damage, due to associated valve seat/guide issues.
In many cases, this excessive oil consumption will be accompanied by the appearance of thick, blue-colored exhaust smoke, which often carries a noticeable burnt smell.
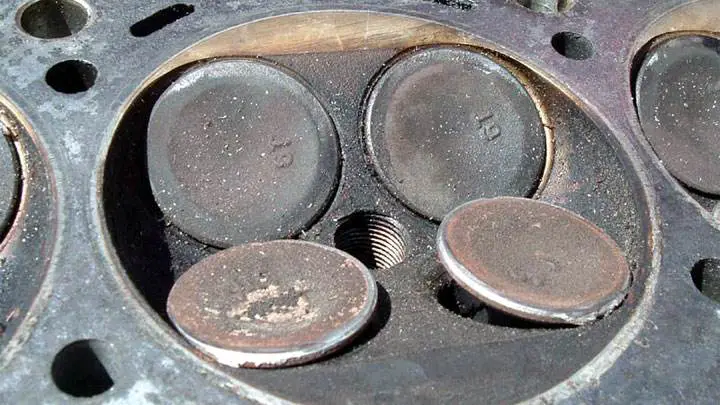
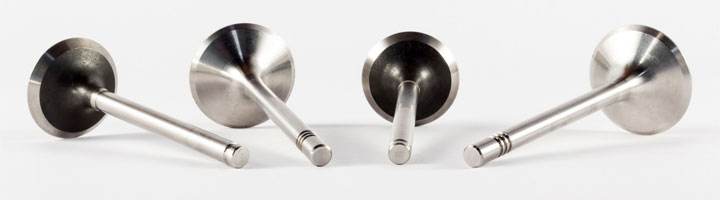
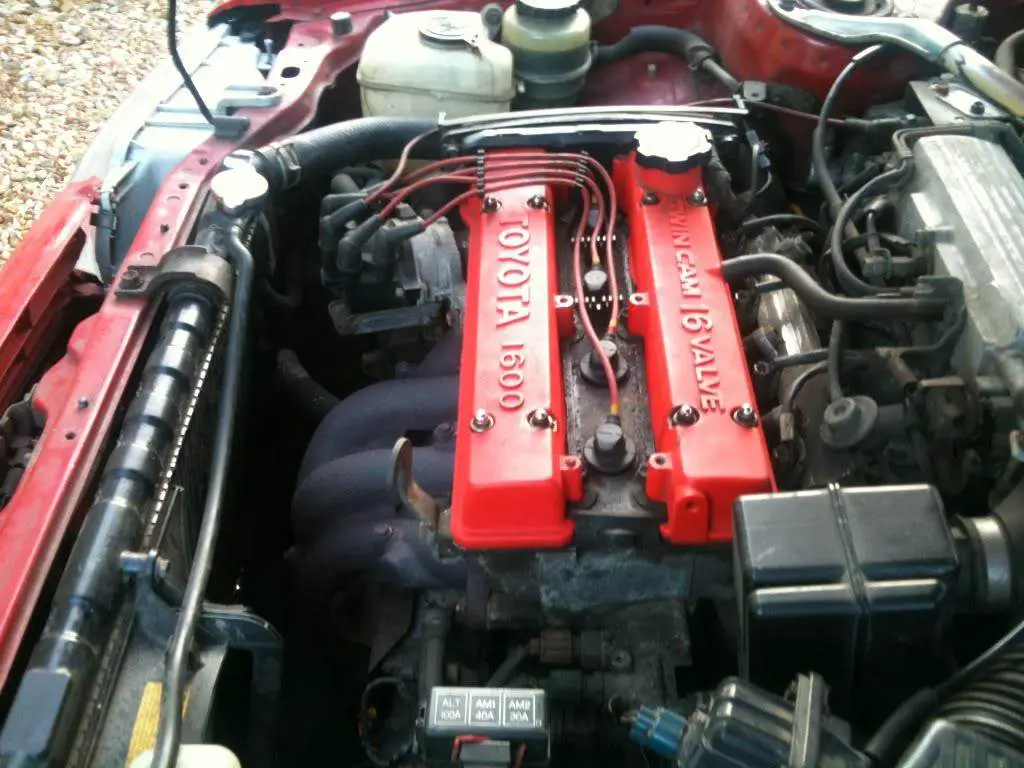
What Are Engine Valves?
The modern four-stroke internal combustion engine features intake and exhaust valves in each particular combustion chamber. These valves allow fresh intake air to be introduced into each respective cylinder before combustion, while also allowing spent combustion gases to be expelled into an engine’s exhaust tract.
In their static position, an engine’s valves are held in the closed position by special springs mounted on the valves (valve springs). These valves are then forced open via mechanical force imparted by the rotation of an engine’s camshaft, either directly in the case of OHC engines, or indirectly in OHV engines.
In either case, valve actuation is a direct product of cam timing, which itself is a product of overall engine timing. An engine’s crankshaft and camshaft are synchronized with one another via a timing chain or timing belt, thereby ensuring that valve actuation is properly timed relative to a piston’s stroke.
What Causes an Engine Valve to Bend?
#1 – Timing Belt/Chain Failure
The most common cause of a bent valve is the failure of a timing chain or timing belt. This, of course, relies on the fact that the engine in question is of an interference design, which describes any engine in which incorrect timing can lead to piston/valve contact.
In contrast, non-interference engines are not prone to this type of damage.
#2 – Engine Over-Revving
Over-revving an engine is another potential cause of valve damage. When an engine is over-revved, even for a brief period, a condition known as “valve float” can occur.
The term valve float describes a situation where an engine’s valves fail to complete a full cycle (opening/closing) as they should, potentially leading to valve/piston contact.
#3 – Insufficient Lubrication
In extreme cases, a lack of sufficient lubrication can cause an engine’s valves to stick in their guides, ultimately creating a scenario where valve/piston contact is possible. This can also occur when an engine’s oil breaks down due to repeated neglect of specified maintenance.
#4 – Overheated Engine
Valve damage can also occur in the event of severe or prolonged engine overheating. This overheating can lead to the warping of an engine’s internal components, including intake and exhaust valves.
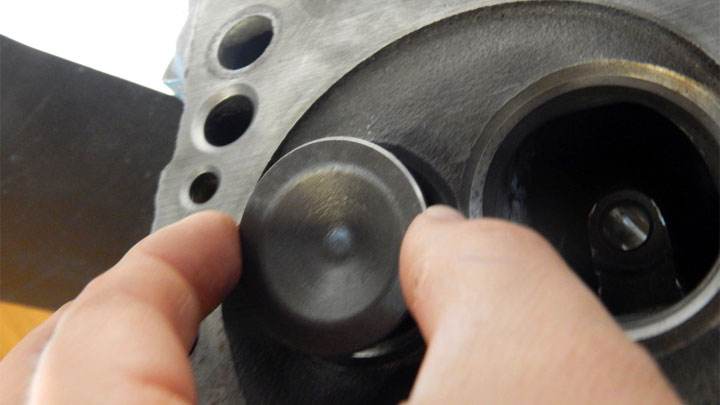
How to Confirm Valves Are Bent
Valve damage can be confirmed in several ways, including through careful physical examination. An engine’s valve cover can be removed before starting the engine in question and checking for proper valve operation.
Alternatively, an engine’s intake manifold and exhaust manifold can be removed, in which case an examination through the exposed intake/exhaust ports will be possible.
Valve damage can also be identified through the use of specialized equipment, intended to isolate compression loss. With this equipment, a leak-down test can be performed, allowing for determining whether an engine’s intake and exhaust valves are sealing as they otherwise should.
How Much Will the Repair Cost?
The only “correct” way to remedy bent or otherwise damaged valves is to replace them. This is a rather complex repair, as it requires the removal of an engine’s cylinder head.
For this reason, labor costs tend to be quite high. In most cases, the proper replacement of a damaged valve will cost between $800 and $1,500.
However, this price can be significantly reduced by removing and reinstalling the cylinder head in question yourself. Under these circumstances, the cost of replacing a valve would likely be between $400 and $600.
There are also a number of valve repair methods that do not involve removing the cylinder head in question. Most involve pressurizing a cylinder with compressed air, before attempting to manually straighten a bent valve with hand force.
Even though such a repair would cost much less, attempts of this nature are not advised, as it would likely lead to the “repaired” valve being weakened. The corresponding valve guides and valve seats can also be damaged in the process.
Symptoms of a faulty IAT sensor
Sensors are essential for computer-controlled engines, such as the IAT measuring the intake air temperature. Faulty intake air temperature sensors affect a vehicle’s air-fuel ratio, which can lead to handling and performance issues.
But what are the specific symptoms of a faulty IAT sensor? Can you continue driving? And how much will it cost to replace the sensor?
What is an IAT Sensor?
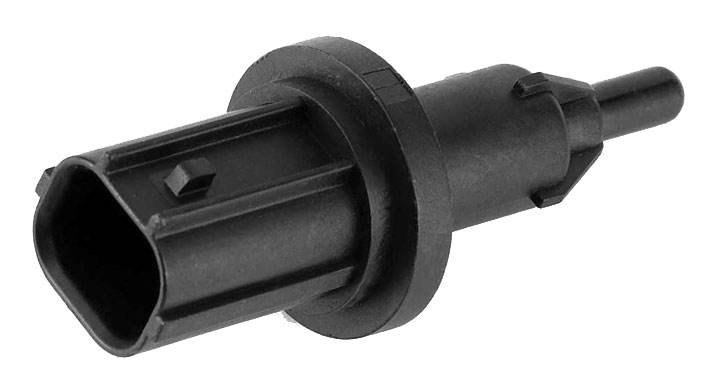
As its name suggests, an intake air temperature sensor monitors the temperature of the air introduced into an engine’s intake manifold. Simply put, an engine’s IAT sensor functions like a thermometer, concerning the air ultimately delivered to each cylinder for combustion.
However, instead of displaying a mercury reading, the IAT sensor provides feedback to the ECM/PCM in a voltage configuration.
The engine’s control software then interprets this voltage value and converts it into a logical temperature feedback. This feedback is used as a key figure to determine the necessary air/fuel ratio for efficient combustion.
This point relies on the fact that colder air is much denser in oxygen than hot air, thus proving more volatile at the ignition point.
Symptoms of a Bad IAT Sensor
The failure of a vehicle’s intake air temperature sensor is often accompanied by a number of secondary symptoms, some of which tend to be more noticeable than others. When attempting to address the issue in question, it is essential to recognize these individual symptoms.
Here are some of the most common symptoms associated with a faulty IAT sensor.
#1 – Check Engine Light
In almost all cases, the presence of a faulty IAT sensor will cause a vehicle’s check engine light to illuminate. This occurs when a vehicle’s ECM or PCM stores one or more fault codes assigned to such a failure.
#2 – Rough or Irregular Idle
A faulty IAT sensor often results in a vehicle’s engine idling roughly or visibly stumbling at a stop. This is due to the engine’s inability to accurately determine the air/fuel ratio needed for efficient combustion.
#3 – Starting Difficulties
Another significant sign of IAT sensor failure is starting difficulties. Due to the inability of a vehicle’s ECM/PCM to determine the correct fuel trim values, an engine’s ability to start smoothly is compromised.
#4 – Engine Misfires
When an intake air temperature sensor begins to fail, it often results in random engine misfires. Again, this is due to the lack of accurate temperature readings, as a vehicle’s ECM/PCM attempts to determine the correct fuel supply.
#5 – Poor Fuel Economy
You might also notice a little extra pain at the pump if your engine’s IAT sensor is about to fail. Increased fuel consumption is often the result of excess fuel, due to out-of-spec intake air temperature values.
Where is the Sensor Located?
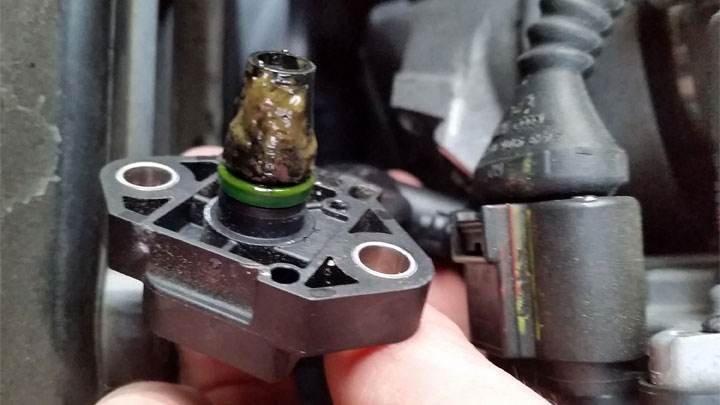
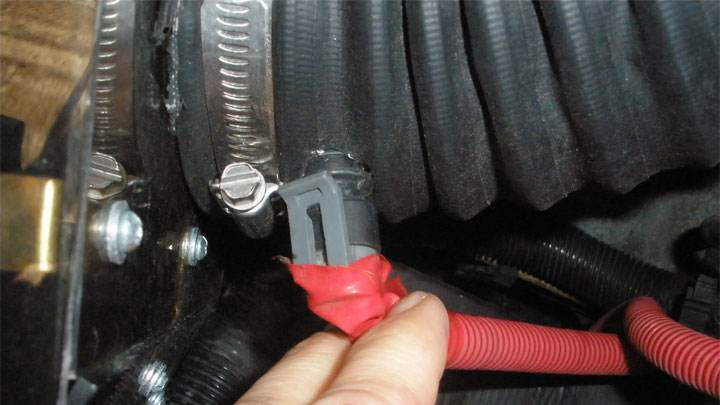
An engine’s intake air temperature sensor is most often located in the intake duct that connects an engine’s air filter housing and the throttle body. In the vast majority of applications, the IAT sensor probe will be mounted flush in the intake duct, with only the end of the sensor receptacle protruding into the engine compartment itself.
In some cases, a vehicle’s IAT sensor may also be located in other places, such as in the intake manifold or within the air filter housing itself. While this solution is far from the standard, it has become more widespread over the last decade.
What Causes the Sensor to Deteriorate?
The most common cause of intake air temperature sensor failure is a buildup of contamination on the sensor probe.
This contamination often appears in the form of oil traces, although any type of airborne debris in an engine’s intake duct can cause similar problems. If significant enough, fouling of this nature causes an engine’s IAT sensor to “short-circuit.”
In other cases, an intake air temperature sensor can fail simply due to its age or standard wear and tear. This is particularly prevalent in older vehicles or in vehicles that have traveled a significant number of miles. Unlike the case of debris fouling, a simple cleaning will rarely remedy an intake air temperature sensor failing in this particular manner.
In rare cases, a vehicle’s IAT sensor may also be damaged at any time it was disturbed during other maintenance or repair of an engine’s intake duct. This can even occur if excessive force was applied to the ducts leading to an engine’s air filter housing during routine air filter replacement.
How Long Do IAT Sensors Last?
Generally speaking, an engine’s intake air temperature sensor is considered a consumable part, meaning it will likely need to be replaced at some point during a vehicle’s lifespan. This is largely due to the sensitive nature of the IAT sensor itself, as well as its tendency to become fouled by oil and other particles in an engine’s intake duct.
In most cases, one can expect their vehicle’s intake air temperature sensor to last an average of 5 to 10 years, although this number can vary significantly on a case-by-case basis.
However, this is not to say that your vehicle’s IAT sensor will definitely fail during this period, as it is not uncommon for this type of sensor to last much longer under ideal circumstances.
Fortunately, the cost associated with replacing the intake air temperature sensor is not as high as that associated with many other forms of automotive repair. This is due to the relatively inexpensive nature of the IAT sensor itself, as well as the ease of its replacement.
On average, replacing an engine’s intake air temperature sensor costs approximately $50 to $300. The price of the replacement IAT sensor itself accounts for only a small portion of this cost (between $20 and $125), while labor and shop costs account for a much larger share (between $30 and $175).
Can You Drive with a Faulty Intake Air Temperature Sensor?
Although you can drive with a faulty intake air temperature sensor if necessary, it is not advisable to do so for extended periods. This is due to the many effects such a fault can have on an engine’s performance.
A compromised IAT sensor can lead to difficulties when attempting to start a vehicle and is also known to cause excessively rough idling, which can worsen over time.
In any case, it is crucial to diagnose and repair issues related to IAT sensor defects as soon as possible. This often prevents a motorist from becoming stranded or facing other forms of difficulties.
If you do not feel comfortable performing such repairs yourself, schedule an appointment with a trusted automotive service center as soon as possible.
When and How to Replace a Serpentine Belt
If you make a list of the most frequently replaced components in a modern vehicle, serpentine belts will certainly be near the top. Compared to the lifespan of V-belts in older vehicles, these last longer but eventually wear out. If you enjoy fixing things in your garage, it will be useful to know how to change a serpentine belt.
When should a serpentine belt be replaced?
There is no recommended replacement interval for a serpentine belt. The general rule is to inspect it at every oil change, which is every 30,000 to 50,000 miles or once a year. Replacement is only required when the belt’s condition is poor.
Additionally, you can replace the belt during cooling system maintenance. In some engines, the belt also operates the radiator fan, water pump, heater core, and compressor. You should change it when replacing or repairing any of these components.
There are a few signs to watch for with a bad serpentine belt. The symptoms are mostly noises coming from various components. The belt will slip and create noise when the V-ribs on its underside wear out.
A new belt.
Pulley misalignment is another reason for noise. Several types of pulleys, including an automatic belt tensioner pulley, an idler pulley, a power steering pump pulley, and a water pump pulley, can create belt noise. A loose or worn harmonic balancer can also create a similar sound.
Worn bearings in idler pulleys can also create such noises. In this case, you must replace the pulleys as it is not possible to lubricate the bearings or reseal them.
How to change a serpentine belt?
The serpentine belt runs through all engine-driven accessories, including the water pump, power steering pump, air conditioning compressor, and alternator. The long belt simplifies the operation of all pumps and pulleys under the hood.
You will need these tools and follow the steps to replace it.
1. Tools for replacement
A serpentine belt
Basic hand tools
Removal tools
Rags
The belt wraps around several pumps and pulleys. (Photo source: familyhandyman)
2. How to change a serpentine belt: the steps
Check the belt routing diagram before starting the process. If you can’t find the owner’s manual, get the diagram online. Carefully observe how the old belt wraps around the pulleys.
Place the wrench or a removal tool with enough space to move on the tensioner before releasing it. Carefully release the self-adjusting belt tensioner.
Remove the old serpentine belt. You should also check the tensioner pulley at this time for any signs of wear. You will need to replace it if it is damaged or has extremely tight or loose connections.
Check all the pumps and pulleys for the water pump, AC compressor, smog pump, and alternator. Don’t forget to inspect the idler pulleys as well. Make sure each of them moves freely without being loose or tight.
Place the new belt in its path. Ensure the belt’s ribs fit into the pulley grooves.
Tighten the tensioner. That’s how to change a serpentine belt.
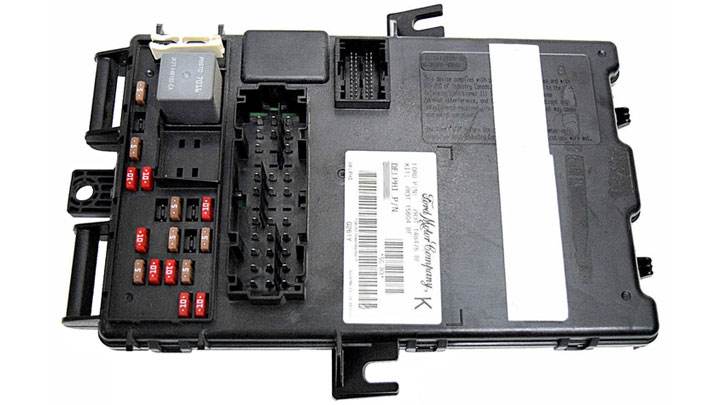
Symptoms of a faulty BCM control module
Today’s vehicles rely on complex networks of terminals, wires, and sensors powering the electronic modules that control vital systems. One such module is the Body Control Module (BCM), which is the brain for various comfort and safety features.
Although rare, a vehicle’s body control module can experience serious operational issues, potentially leading to complete failure. Here are the most common symptoms of a faulty BCM and its replacement cost.
What is a Body Control Module?
A body control module is an electronic driver responsible for overseeing and operating a number of functions related to a vehicle’s body.
The exact functions a vehicle’s body control module is tasked with overseeing vary from one particular vehicle model to another. However, in most cases, a vehicle’s BCM facilitates wiper, lighting, heating, air conditioning, and anti-theft system functions.
The body control module is also responsible for communicating with a vehicle’s other control modules. This communication further streamlines the integration of a vehicle’s vital systems for more efficient and trouble-free operation.
Where is a Body Control Module Located?
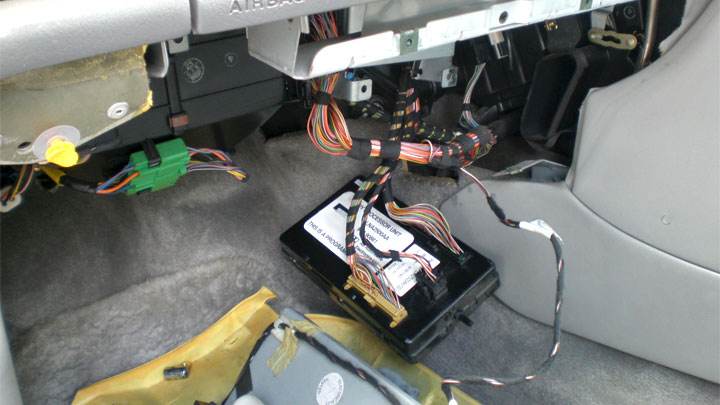
In the vast majority of vehicles, the body control module is located beneath the dashboard. This is generally a fairly standardized location, with most modules of this type being situated in the immediate vicinity of this area.
However, the exact side on which the BCM is located (driver/passenger) varies from one vehicle model to another.
In some cases, accessing the BCM might require partial disassembly of the dashboard and surrounding trim. Fortunately, this can often be done with minimal difficulty, as many dashboard-related components are assembled with little more than push-type clips.
Symptoms of a Faulty Body Control Module
There are a number of signs associated with body control module failure. However, some of these symptoms tend to be much more common than others, although it is important to familiarize yourself with each in case you face such a fault in the future.
Here are some of the most common symptoms associated with body control module failure.
#1 – Repeated Battery Drain
One of the most common symptoms associated with body control module failure is repeated, excessive battery drain, also known as parasitic draw.
While a certain amount of parasitic draw is permissible, excessive draw allowed by a BCM fault can drain a battery within hours. This draw occurs when a BCM continues to power a particular accessory at incorrect times.
#2 – Erratic Electrical Function
A faulty body control module can also cause intermittent operation of various electrical functions, such as the horn, headlights, power windows and mirrors, and windshield wipers.
Widespread instrument cluster gauge failure is also a telltale sign of body control module failure, as is erratic door locking and radio operation. The risk of such issues being BCM-related increases when several of these symptoms are present at one time.
#3 – Security System Issues
In almost all cases, a vehicle’s security system is driven by the body control module. Therefore, it is easy to assume that persistent, yet puzzling, issues associated with a vehicle’s security system are the byproduct of a failing or faulty body control module.
This can also include issues with a vehicle’s keyless entry or passive entry functions.
#4 – Dashboard Warning Lights
A faulty body control module can wreak havoc on a vehicle’s instrument cluster. An otherwise mundane dashboard display can suddenly be lit up to the point of resembling a Christmas tree.
This occurs when a BCM is unable to communicate with another of a vehicle’s supplementary control modules, such as the transmission control module, powertrain control module, or airbag control module.
#5 – Failure to Start
A malfunctioning or faulty body control module can also prevent a vehicle from starting, in some cases.
Although somewhat rare, a bad BCM might fail to identify the key’s transponder chip, or might simply fail to deliver a “start” signal originating from a vehicle’s ignition switch, thereby preventing starter engagement.
A lack of BCM communication with other corresponding control modules can also lead to starting difficulties.
Can You Drive With a Bad BCM?
While it is theoretically possible to drive a vehicle with a faulty body control module in most cases, it is not advisable. This stems from the unpredictable nature of a failing computer module.
It is simply impossible to predict which of a faulty computer’s functions will operate as intended, on any given basis. The problem is that there is no way to determine whether or not a safety-sensitive issue will arise as a result of BCM failure.
Even if no such issue has occurred in the past, there is no guarantee that a faulty BCM will operate a vehicle’s headlights at the intended time. This presents a reasonable risk to a vehicle’s occupants.
The exact price for body control module replacement differs from one vehicle make and model to another. This stems from the fact that the cost associated with particular body control modules varies, as do the labor times associated with their replacement.
However, the following is an account of the average expenses associated with body control module replacement.
The average cost for body control module replacement ranges from $300 to $600. The most significant variable in this price is the actual cost of the faulty module itself.
At present, the shipping fees associated with locating and purchasing these modules can also affect the bottom line of such repairs, as module availability has become an issue.
What Causes BCM Failure?
Heat and Mechanical Wear
Your vehicle’s body control module is sensitive to heat and high temperatures. When your car’s engine is running, it generates heat, affecting the BCM’s electronic components. Over time, this can lead to mechanical wear and ultimately module failure.
Water and Fluid Damage
In some situations, your BCM can be exposed to water and other fluids. Although reasonably protected against water damage, severe leaks or exposure to moisture can lead to corrosion of connections or short circuits, potentially causing failure.
Shocks and Collisions
A car accident or sudden impact can cause severe shock to the BCM. Although typically located in a protected place, high shock levels from collisions can damage the module’s circuits, wiring, or electronic components, thereby leading to failure.
Short Circuits and Faulty Wires
The module relies on a network of wires and electrical circuits to function properly. However, faulty wiring or short circuits can damage the BCM. Be sure to address any issues related to your vehicle’s wiring (easier said than done) to avoid placing unnecessary strain on the BCM.
Overused and Worn Relays
Your body control module uses relays to control various functions in your car, such as headlights or windshield wipers. Over time, these relays can become overused and worn, forcing the BCM to work harder and potentially leading to its failure.
It’s a good idea to periodically check and replace body control module functionalities related to worn relays.
How a Faulty BCM Affects Other Modules
Powertrain Control Module
When you have a faulty body control module, it can disrupt communication with the Powertrain Control Module (PCM), which is considered a vehicle’s main computer. This can lead to several issues, such as reduced engine performance, stalling, and even failure to start.
A faulty BCM can also cause warning lights to appear on your dashboard, affecting the efficiency of systems managed by the PCM.
Airbag Control Module
A faulty BCM can also impact the airbag control module, potentially compromising your safety.
If the BCM does not communicate properly with the airbag module, it could result in airbag warning lights illuminating or even prevent the system from deploying airbags during a collision. ALWAYS take any airbag-related issues seriously and have them checked.
Transmission Control Module
The Transmission Control Module (TCM) manages your vehicle’s transmission, providing smooth gear shifts and optimal performance. When the BCM experiences issues, it can even affect the TCM’s ability to function as it should. This can manifest as transmission-related problems, such as erratic shifting, reduced fuel economy, and compromised vehicle performance.
A faulty BCM can create a sort of chain reaction, causing failures of multiple modules and systems in your vehicle. If you or your mechanic suspect a bad BCM, you will need to take it seriously before larger problems arise.
FAQ
Does a New Body Control Module Require Programming?
Yes, when you get a new BCM, it typically requires programming. Once installed, it must be programmed to match your car’s specific settings. This way, the new BCM can properly manage all the different electronic systems and functions in your vehicle.
You will almost certainly need the professional assistance of a mechanic or authorized dealer, as specialized tools or software are usually necessary.
Can a BCM Be Reset?
In some cases, a vehicle’s BCM can be reset to restore all its functions. Of course, this depends on the proper functioning of a module’s internal circuits, as no reset will remedy compromised internal electrical circuits.
If a “glitch” has caused BCM issues in your vehicle, a reset might be the exact repair needed. The procedure for performing a body control module reset generally differs from one vehicle make and model to another.
Ford, Dodge, and Chevy/GMC all have their own procedure for performing these procedures, although most involve cutting power to a vehicle’s BCM for a specified period of time.
In many cases, this is done simply by disconnecting a vehicle’s battery, while other vehicles require the removal of a specialized fuse.
In any case, you should always consult factory-specific service documentation for your specific vehicle before attempting to reset your car, truck, or SUV’s body control module. Failure to do so can result in irreversible damage to the unit.
Symptoms of a Faulty Wheel Speed Sensor
Today’s vehicles use many types of sensors, including those that measure engine speed (crankshaft/camshaft position), transmission speed, and wheel speed. Wheel speed sensors in particular are quite reliable but can still fail due to their location.
Let’s look at some of the most common symptoms of a faulty wheel speed sensor, whether it’s safe to continue driving, and how much it will cost to replace the speed sensor.
What is a Wheel Speed Sensor?
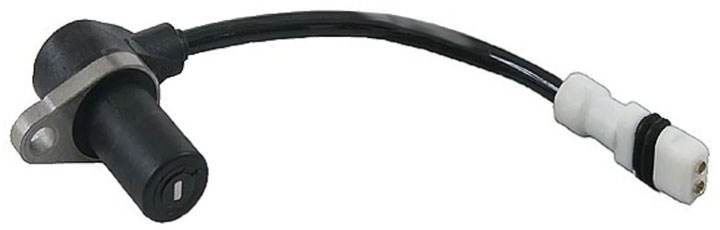
Whether you call it a wheel speed sensor (WSS) or an ABS sensor, this electrical device provides information about the rotational speed of a single wheel of a vehicle. These sensors should not be confused with a vehicle’s transmission speed sensor, which performs a totally different task.
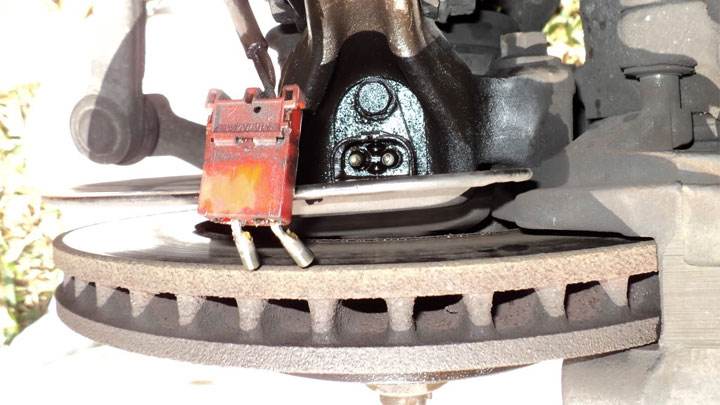
Wheel speed sensors are typically magnetic in nature, which allows them to create measurable “pulses” when a tone ring mounted on the hub rotates past their probes.
The rate at which these pulses are created directly affects the detected speed of the wheel in question, as interpreted by the vehicle’s management software. The more pulses created in a specific time frame, the faster the recorded rotational speed of the wheel.
Wheel speed sensors are available in two individual configurations.
The first is a passive sensor, analog in nature, which does not require a reference voltage to facilitate its operation.
The second wheel speed sensor configuration is that of an active design. These sensors require an input voltage to operate and use an encoder-type tone ring.
Most recent vehicles use the latter of these two sensors, due to its inherent reliability.
A vehicle’s management software uses the feedback from a speed sensor to compare the feedback transmitted by all the other wheel speed sensors present on the same vehicle.
Through these means, this software can determine if any of a vehicle’s wheels are spinning faster than the others, indicating possible slipping or imminent brake lockup.
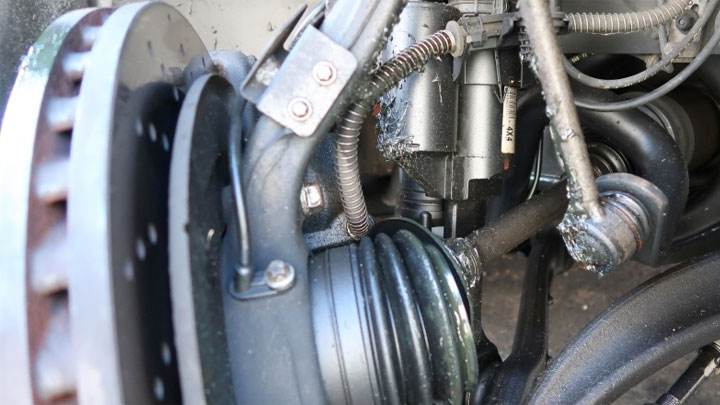
Where is it located?
Wheel speed sensors can be found mounted in each of a vehicle’s four hubs. The exact location of such a sensor can be easily identified by tracing the electrical pigtail that terminates at its mounting point.
This wiring typically runs down along a vehicle’s chassis rail, before anchoring to the brake hoses or hub assembly of an individual wheel end.
The wheel speed sensor itself is embedded in its corresponding hub assembly, its outer face residing in immediate proximity to a hub-mounted tone ring. This positioning is essential, as a speed sensor would not function without being mounted in a way that allows it to interface with this embedded tone ring as intended.
Symptoms of a Faulty Wheel Speed Sensor
The presence of a faulty wheel speed sensor is often accompanied by several secondary symptoms, some of which tend to be more noticeable than others. Early recognition of these symptoms can prove invaluable when attempting to expedite the repair of the issue in question.
Here are some of the most common symptoms associated with a faulty wheel speed sensor.
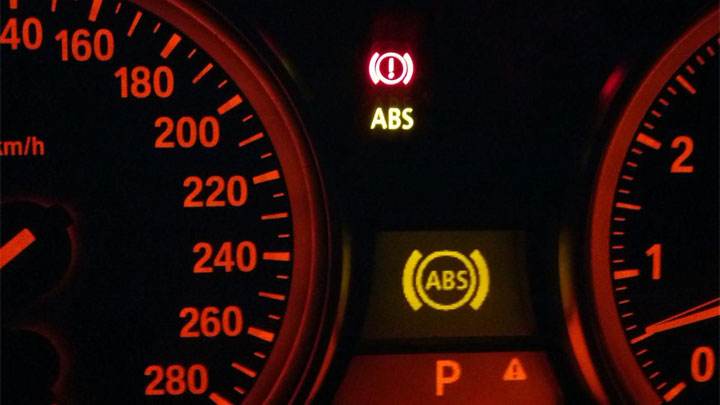
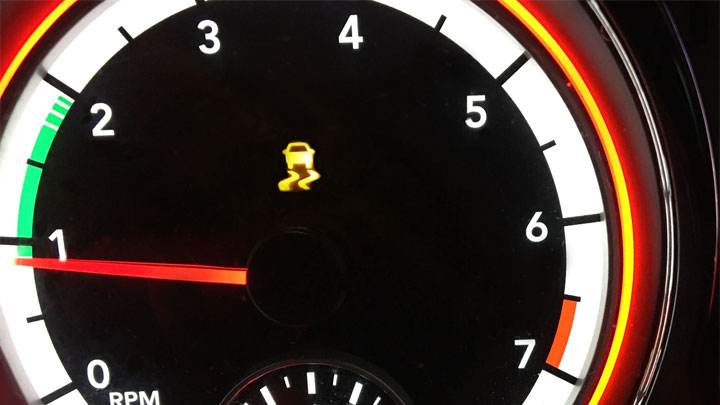
Most often, the detection of a faulty wheel speed sensor (ABS sensor) by a vehicle’s control software will result in the illumination of an ABS light. This is due to the storage of an ABS-related fault code.
In some cases, manufacturer-specific traction or stability control warnings (i.e., Service StabiliTrak or Service AdvanceTrac) will also signal their presence.
#2 – Lack of Active Safety System Functionality
A vehicle’s anti-lock brakes, stability control, and traction control all rely on feedback from each of a vehicle’s wheel speed sensors. In most cases, these systems are locked out as soon as a wheel speed sensor malfunction is detected.
#3 – Brake Pedal Pulsation
In rare cases, a vehicle’s brake pedal may actively vibrate, as if ABS-modulated braking was being performed during simple on-road driving.
As mentioned, this is a rather rare symptom that is more likely to affect older vehicles than those of a more recent vintage.
#4 – Increased Stopping Distances
You may also notice that it takes longer to stop your vehicle after one or more wheel speed sensors fail, especially during an emergency stop or panic stop. This is largely due to the absence of ABS function resulting from the aforementioned automatic lockout.
What Causes a Wheel Speed Sensor to Fail?
A wheel speed sensor can fail for a number of reasons, some of which tend to be more common than others. For example, the sensor can be irreparably damaged by an impact with debris resulting from hitting solid material deposited on the roadway.
Alternatively, the signal from a wheel speed sensor can be hampered by the collection of metallic debris in or around its magnetic element.
In addition to this, a wheel speed sensor can also be compromised when its wiring is damaged or due to an excessive buildup of corrosion on its connector. Either of these conditions can cause excessive resistance in the speed sensor circuit itself, or even result in an open connection in the most severe cases.
The exact cost of replacing a wheel speed sensor can vary from one vehicle make and model to another. In many cases, one manufacturer will charge significantly more for a speed sensor than others.
Alternatively, labor rates for replacing a particular speed sensor can be much higher on one vehicle model than on another.
On average, you can expect to pay between $150 and $300 to replace one of your vehicle’s wheel speed sensors.
Generally speaking, about 1/3 of this cost will be attributed to the purchase of the sensor itself, while about 2/3 will be related to the labor required for such a repair.
Is It Safe to Continue Driving?
Although you can continue driving with a compromised wheel speed sensor, it is not advisable. A number of active safety systems, such as anti-lock braking, stability control, and traction control, rely on the use of a vehicle’s speed sensors to facilitate their proper operation.
In most cases, these systems will be automatically disabled upon the failure of an individual sensor.
Knowingly operating a vehicle for an extended period with one or more safety systems disabled due to a mechanical failure poses multiple issues. The first of these issues concerns your safety, that of your passengers, and that of all other road users.
Furthermore, you could be forced to accept additional liability in the event that such negligence were to cause a collision.
In any case, the root cause of a vehicle’s wheel speed sensor fault should be carefully diagnosed and repaired as soon as possible. This simply constitutes best practice when seeking to maximize your safety.
If you are unsure of your ability to perform these repairs yourself, it is recommended to schedule an appointment with a reputable service center as soon as possible.
How a Mechanic Diagnoses a Faulty ABS Sensor
In most cases, a scan tool is used to identify the offending wheel speed sensor, including its individual location at the wheel end. From this point, an oscilloscope or a high-quality digital multimeter is used to analyze the return signal from the sensor in question, or the lack thereof.
Alternatively, a comprehensive bidirectional scan tool can often be used to monitor wheel speed sensor feedback in real-time.
Beyond these diagnostic practices, a mechanic is also likely to perform a thorough visual inspection of a suspected wheel speed sensor and all associated wiring. Sometimes, especially when debris impact occurs, the damage to the sensor in question is rather obvious and easy to spot.
It is also important for them to check the air gap between a speed sensor and its corresponding tone ring as well.
Excessive Fuel Consumption: Causes and Remedies
Did you know that without regular and proper maintenance, a vehicle can consume up to 30% more fuel? Many factors can lead to poor fuel economy, including worn and defective parts as well as your driving habits. Remember that low mileage also means an inefficient engine. Discover the most common causes of excessive fuel consumption today and how to fix these issues to achieve optimal energy efficiency and maximize your engine’s performance and lifespan.
In the first section, you will discover the bad driving habits that contribute to poor fuel economy. This is followed by a list of common causes resulting from poor maintenance and/or defective parts of your vehicle, as well as how to diagnose and repair them.
Causes of Excessive Fuel Consumption: Your Driving Style
Before moving on to potentially worn or defective parts of your vehicle that lead to poor fuel economy, you should do a quick check to see if you have any of the following bad driving habits. Your precious vehicle deserves good handling, so start changing your driving habits today to maximize its lifespan and enjoy many smoother, trouble-free journeys.
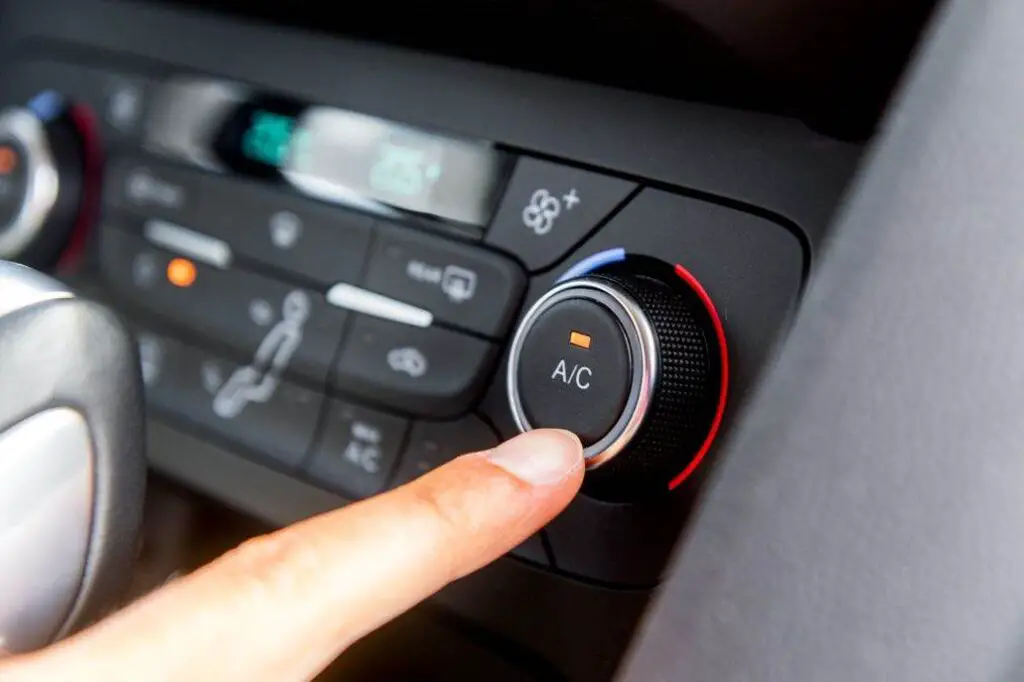
Driving with the Air Conditioning “ON”
If you are in the habit of driving with the air conditioning on, fuel consumption will peak. Check how often you use the car’s air conditioning system.
The AC is known to amplify the load on the engine, making it one of the most common causes of high fuel consumption. The same goes for a car heater! Read the maintenance tips to learn more about car heaters and fuel consumption concepts.
Sometimes, using the AC can be better in terms of fuel consumption. This is the case when you are driving at a speed of 80 km/h or more, as open windows are likely to produce aerodynamic drag.
The right thing to do is to open the windows for a few minutes after starting to drive, before turning on the air conditioning. Such a step would cool the car down a bit, allowing for better fuel economy. Another tip is to use the air vents to circulate air instead of the air conditioning.
Heavy Load in the Trunk
Sometimes the fault lies not with the mechanical unit, but with the load your car is carrying. If you like traveling long distances, you must have a lot of things in your car. This may seem convenient, but you are indirectly increasing fuel consumption. When looking for fuel economy, reducing extra weight is a recommended option.
You can also remove the roof rack or, rightly, the luggage carrier if you don’t use it much. Empty your vehicle by removing unnecessary items so that the load can be reduced to some extent. Once this is done, you will magically notice a change in the amount of fuel consumption.
Empty your trunk to enjoy better mileage. (Photo: which car)
When You Use the Wrong Gear
If you own a manual transmission car, it’s possible you are using too much fuel. This happens more often when you are an amateur driver. Suppose you are in 2nd gear and moving at a speed of 50 km/h. This, in turn, would require more power to perform movement, hence more fuel consumption.
Simply put, if you are driving in a lower gear and the required speed is higher, fuel will be overused. The key to reducing fuel consumption is to match the speed with gear changes and accelerate up to a limit.
Bad Driving Habits
Cars consume the most fuel during initial acceleration; Thus, if your trip is short or involves many stops, you will inevitably consume more fuel. Furthermore, aggressive driving where you accelerate hard and brake late leads you to flood the engine with extra fuel and thus consume more.
Excessive Idling
Idling consumes fuel. Turn off your engine if you expect to be stopped in traffic for 15 seconds or more.
Speed
Gasoline consumption decreases rapidly above 60 miles per hour, so stick to the speed limit and unless it is safe and necessary, such as when you are on a highway, there is no need to drive too fast.
Causes of Excessive Fuel Consumption: Defective Parts and Improper Maintenance
Fuel is needed to make the car run. A vehicle that consumes little fuel is ideal. Unlike the situation, cars sometimes tend to consume too much fuel, making them “fuel-guzzling.” Continue reading to find out why this happens.
Defective Engine Block
The first thing to check is the engine. This unit could be improperly tuned, or if you have ignored a pending service, fuel economy is likely to suffer. Speaking specifically of gasoline engines, when neglecting to replace spark plugs, air filter equipment, or worn fuel filters; fuel consumption would increase.
If the engine is a diesel engine and the fuel injectors or air filters are clogged, fuel consumption would increase exponentially. Both components are essential elements that contribute to fuel combustion, and if they become clogged, excessive fuel consumption would be observed.
Underinflated Tires
Regular tire inspection and proper inflation seem simple enough, yet it is a maintenance job that many car owners neglect. Underinflated or soft tires are one of the most common causes of excessive fuel consumption, and your tire pressure should be the second thing to inspect when you notice poor fuel economy.
By maintaining proper inflation, your car won’t need to work very hard to compensate for underinflated tires, which would prevent your vehicle from reaching the speed it should.
Keeping your car’s tires properly inflated is an easy and vital maintenance task for your safety. Underinflated tires accumulate excessive heat while you drive, which can lead to premature tire failure. With too low air pressure, tires can also wear out more quickly and unevenly, negatively impacting the vehicle’s braking and handling.
To help keep tires in perfect condition, use a pressure gauge to check your tire pressure at least once a month and before starting a long trip. For an accurate reading, make sure the car has been parked for three hours or more before checking the tire pressure. This handy device is something you will have many uses for, and besides, it is inexpensive, so invest in one.
Dragging Brakes
You may wonder what the connection is between brakes and energy efficiency. Brakes are important not only for stopping but also for the overall efficiency of your vehicle.
Braking issues can increase your vehicle’s rolling resistance, and increased rolling resistance results in a harder-working engine. Anything that makes your engine work harder will consume fuel. If something causes your brakes to only partially apply or not release completely, it harms your mileage by making your engine work harder.
You have dragging brakes or brakes that do not fully release if you notice excessive gray dust on the wheels and tires, or if the accelerator must be pressed further than usual to reach normal driving speeds. That’s why you should periodically check your brakes to ensure everything is properly lubricated to maximize energy efficiency and, of course, safety.
Low Coolant Level
Driving with a low coolant level could cause your engine to overheat (Photo: pinterest.com)
As with all machines, overheating can lead to efficiency issues or, worse, permanent damage. To ensure the engine remains at an optimal operating temperature, your car needs antifreeze or engine coolant. Driving with a low coolant level could cause your engine to overheat and thus run less efficiently, reduce fuel economy, and even cause serious damage.
So be sure to regularly check the coolant level and top it up if necessary. Also check the condition and operation of the cooling fans if you have electric fans to ensure the cooling system is working properly.
Wrong Oil Viscosity
Insufficient oil levels and/or incorrect oil are common causes of excessive fuel consumption. If you find it is low, top it up to the appropriate level and recheck your MPG.
Another thing to consider is changing your oil. Fresh oil lubricates better than old oil. As a result, your engine won’t have to work as hard to do its job.
Another thing to consider is the type of oil you use, which can also affect your gasoline consumption by up to 12%. You want to use engine oils that greatly reduce friction. Use either a synthetic oil or the oil recommended by the car manual.
Synthetic oil has better flow characteristics and better lubrication capacity than conventional oil and, as a result, your engine will run with less resistance when using synthetic oil. However, be aware that synthetic oil can worsen a worn engine: you might see more leaks and perhaps even more engine noise. However, if your engine is in good condition and not leaking, you might consider switching to synthetic for better fuel economy.
Bad Oxygen Sensors
Having bad oxygen sensors can reduce your gasoline consumption by up to 10%. Oxygen sensors help maintain the correct air and fuel mixture, strictly necessary for optimal engine performance. A bad oxygen sensor means a deviation in the air-to-fuel ratio, and this imbalance will cause the engine to run inefficiently, thus reducing fuel economy.
Dirty Air Filter
Air filters hold contaminants in a medium made of paper and synthetic fibers. Over time, this filter fills with dirt and debris, thus reducing airflow and preventing the engine from “breathing” properly.
If your engine does not get the amount of air it needs for combustion, it will not be very efficient and will have to work harder. Anything that makes your engine work harder compromises fuel economy. Professionals state that a very dirty and clogged air filter can reduce fuel economy by up to 10% in the worst cases.
Although dirty air filters are one of the most common causes of excessive fuel economy, fortunately, the remedy is simple, so remember to perform this maintenance job regularly. Air filters must be cleaned and unclogged so the engine can operate at its optimal performance.
Bad Fuel Injectors
As the name implies, fuel injectors are responsible for introducing fuel into the engine. Having bad fuel injectors or a leak can lead to poor mileage because the engine will not receive enough fuel needed for optimal combustion and will therefore run less efficiently.
Worn or Fouled Spark Plugs
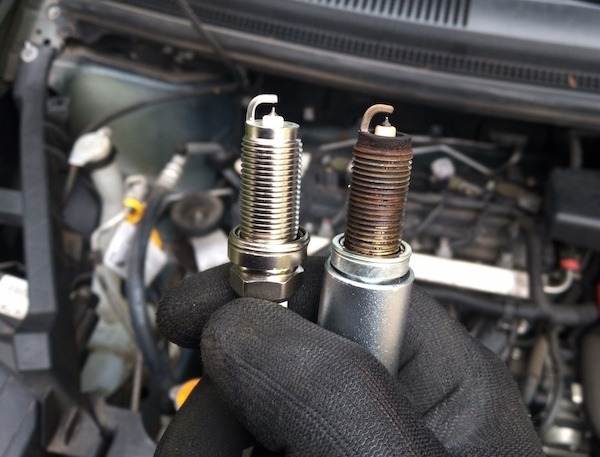
These small but simple plugs create an electric arc between two wires (Photo: kamsauto.com)
Your engine produces the energy needed to run your car by creating combustion, or an explosion, inside the combustion chamber, hence the name “internal combustion engine.” To generate such combustion, your spark plugs provide the electrical spark that ignites the air and fuel mixture introduced into the combustion chamber.
These small but simple plugs create an electric arc between two wires that do not touch, but are close enough to each other that electricity can jump the gap between them. The electricity is created by the alternator and transmitted through the spark plug, jumping the gap in the firing end of the plug if the voltage supplied to the plug is high enough.
When a spark plug is functioning correctly, it helps burn fuel efficiently during the combustion cycle. It will use the optimal amount of fuel to generate combustion to create the energy needed to run your car. With a functional spark plug and given that everything else is working efficiently in harmony, your car can achieve above-average fuel economy.
If you notice a reduction in fuel consumption associated with one or more of the issues below, it can most likely be attributed to a worn spark plug. Like most other components of your engine, spark plugs wear out over time. The main type of wear here concerns the electrode.
If you look at a spark plug, you will notice that one end is narrow and tapered: that’s where the wire connects to it. The other end is bulbous, with a small metal rod coming out of the center and a metal hook on one side. This central rod is the electrode, from where the electricity travels from it to the hook.
During normal use, the electrode of each spark plug wears out. Eventually, the wear is such that the gap between the two tracks begins to widen. As a result, it does not create as much electric arc, if any, which has a direct and immediate effect on your engine’s operation, including a higher risk of misfires.
If your plug corrodes to the point of breaking, it could cause serious damage inside your engine’s cylinder, leading to an extremely expensive repair to fix it.
When the plug is not operating optimally, it is often because the gap between the plug’s electrodes is either too close or too far apart. Regarding the remedy, many mechanics will remove the spark plugs, inspect them, and adjust the gap to factory settings instead of replacing the spark plug entirely.
Additionally, you should also replace the spark plug wires when you get new plugs. It’s always a good idea to regularly inspect the wires for any fraying, cracking, and even bite marks, as some wires are made from a soy-based material that is a favorite snack for rodents.
Engine Misfire
Are you experiencing engine stalling, rough rides, loss of engine power, and unusual smells and noises from your engine? These are common symptoms of engine misfire, which occur when one or more of the components necessary for engine combustion deviate from their precise and designated operation. Engine misfires are also one of the common causes of excessive fuel consumption.
If the engine is misfiring, it is usually due to a problem in the ignition system. A misfire is what happens when one of the three components – fuel, oxygen, or spark – does not function at the right time. For example, if the air-fuel ratio is incorrect, the mixture may not burn at all or explode prematurely. Besides this incorrect timing, the problem can also come from the mechanical components of the system, such as the cylinder itself.
Engine misfire symptoms should not be ignored, as a misfiring engine will underperform and could be damaged over time. Your car will also experience reduced fuel economy and increased emissions, as the engine is forced to work harder to compensate for the cylinder(s) that are not functioning properly. If the combustion process is interrupted, even for a brief moment, your engine’s performance can suffer.
If you notice your engine misfiring, it is recommended to have a professional inspection done immediately. Usually, the vehicle can continue to run with a misfire in one cylinder, since the others will keep the car moving. However, it will not run normally and it could get worse over time.
Ignoring the problem for too long can damage engine parts such as the catalytic converter and oxygen sensor. Furthermore, the car may lose power and stall in the middle of a very busy road.
Many factors can cause engine misfires. Inspect the following systems and components to find
Common symptoms of a bad ECM you should not ignore
The ECM (Engine Control Module) is an integral part of every vehicle to ensure that the car’s engine operates at optimal performance. There are many cases where your car has problems and cannot start due to a faulty ECM. Therefore, it is important for car owners to know the symptoms of a bad ECM and find solutions to address them in a timely manner. Let’s roll up our sleeves and find out:
What is the ECM in a car and how does it work?
The ECM is an electronic control unit that manages only the engine. What is the purpose of an ECM? Encompassing the actuators, sensors, and associated fuel injection… The ECM manages all engine requirements, prioritizes them, and then implements them. Examples of requirements include the accelerator pedal position and exhaust system requirements for mixture composition. Torques are a key criterion for the implementation of all requirements.
The ECM manages all engine requirements, prioritizes them, and then implements them (Photo: pinterest.com)
Generally speaking, the ECM is considered “the brain” behind your car’s muscles and it is an onboard computer that literally controls everything your engine does and optimizes the air/fuel ratio. Receiving information from various sensors on the vehicle, then analyzing and adjusting engine operation and fuel consumption, ensuring optimal efficiency and power. Typically, the ECM operates in 3 specific steps as follows:
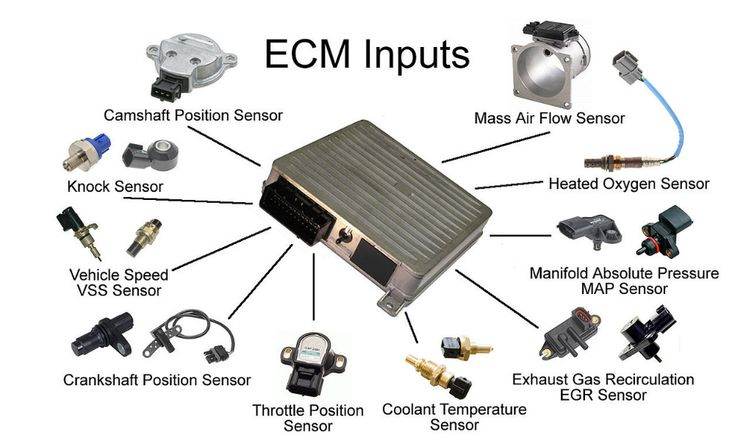
Input: The ECM updates information from sensors, including the intake air flow sensor, speed sensor, temperature sensor… and on/off signals, as well as modules.
Processing: After collecting data, the ECM will determine technical parameters, calculate, and make decisions to direct in detail the specific activities for each part.
Output: The ECM controls and manages all engine operations
After understanding the concept of the ECM, you might ask the question “Are the ECM and PCM different in a car? Our answer is “Yes.” The PCM (Powertrain Control Module) is a powertrain system that includes: the engine, clutch, and transmission. So PCM controls the engine and gearbox. Whereas the ECM, as we mentioned above, is designed to control and optimize the engine.
Simply put, the (PCM) includes an engine (ECM) + transmission (TCM) +… so: PCM = ECM + TCM. Now that you have the basic knowledge related to the ECM, let’s move on to the next part to learn more about the symptoms of ECM failure.
4 Symptoms of a Bad ECM You Need to Be Aware Of
The ECM plays an essential role in modern vehicles. Thus, when the ECM encounters problems, it can cause all sorts of issues with the vehicle and, in some cases, even prevent your car from running. A bad ECM can produce one of the following 5 symptoms to alert the driver of a potential problem:
1. Check Engine Light
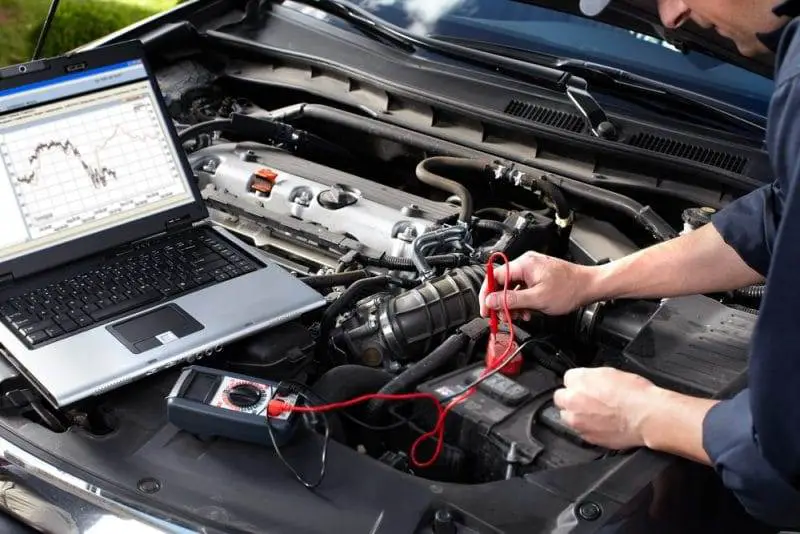
If there are problems with the circuit or sensors, the Check Engine light will come on. However, sometimes there is no error but the light stays on due to confusion at the ECM level. Therefore, to determine the exact cause, the driver should entrust the car to a repair center to help scan the fault code according to the manufacturer’s instructions.
How to test if your ECM is bad (Photo: istockphoto.com)
2. Having Engine Problems
Unusual engine operation indicates that the engine control module is faulty. The consequences are that your engine may not run or shut off abruptly. Over time, if not corrected in time, the symptoms will become more severe and could eventually lead to electronic system malfunction.
3. Having Difficulty Starting
When the ECM fails completely, the vehicle will be difficult to start, or even unable to operate. You should immediately contact repair and maintenance centers for prompt assistance.
4. Consumes a Lot of Fuel
The ECM performs the task of circulating the exact level of fuel to ensure the combustion process by monitoring movement conditions such as throttle position, current engine load, etc. Therefore, if the engine control module fails, the vehicle will consume more fuel. To reduce fuel consumption during operation, drivers should regularly check the above parts.
To fix this issue, technicians will perform repairs according to the following steps:
Step 1 – Check whether the crankshaft (camshaft) sensor is working properly or not.
Step 2 – Check if the sensor connector and wire are in good condition or damaged.
Step 3 – Check the condition of the crankshaft signal disc. Good, dirty, or broken.
Step 4 – Check if the wires of the crankshaft sensor and phase sensor are in good condition.
Step 5 – After checking, if a part is found to be faulty. Technicians will disassemble, repair, and reassemble them to their original condition.
To know the exact causes of a faulty ECM, you need experienced technicians and engineers, with the help of modern equipment, it is possible to accurately determine the cause of damage to the ECM. However, according to statistics, the ECM is often due to the following common causes:
– Voltage overload – This is due to a short circuit of the actuator or solenoid.
– Environmental factors such as air humidity, oxidation… cause the jack pins to rot and become damp.
The vehicle often has to travel on bad roads, causing strong vibrations to the ECM. The details of this part undergo many physical impacts leading to damage.
Wrap Up
The car’s ECM is an important component that directly affects engine performance. Parts such as the camshaft, braking force, fuel pump, ignition,… all must comply with the engine control module’s decision. Therefore, drivers should regularly take their vehicles to maintenance centers to receive assistance for periodic inspections, early detection, and treatment of damage to ensure safety when driving the vehicle and to resolve ECM issues in a timely manner.
How to make the car air conditioning colder in summer
Does your car’s air conditioner not keep you cool enough or provide much comfort during hot summers, and do you need the temperature in your car to be colder? Don’t worry! We will show you some simple tricks you can apply to make your car’s air conditioning much cooler. Let’s take an in-depth look at how to make car air conditioning colder in the summer.
How to Make the Car Air Conditioning Colder?
Some drivers worry about why their car’s air conditioner isn’t cooling enough. You need to understand that on a sunny day, the car’s air conditioner often works under overload, especially when starting the car after it has been parked in the sun for a long time. Sometimes, the air conditioner’s capacity is still not enough to satisfy the driver in heavy weather, so you still feel sweaty even with the car’s air conditioning on because the amount of cool air isn’t sufficient inside the car.
Normally, when starting your car after it has been parked outside for a long time, drivers often turn the cold mode to the maximum to quickly cool the interior. This is partly true but not necessarily correct because it will affect the lifespan of other devices in your car. You might have thought that using the car’s air conditioner was simply about turning it on and off. However, if used incorrectly, the car’s air conditioner won’t be cold and will consume a lot of fuel.
The air conditioning system’s function is to cool your car’s space during the summer heat, and everyone can adjust the temperature to suit the cockpit. However, we will share some tips with you to help your car air conditioner cooler and burn less fuel. Discover how to make your car’s air conditioning colder?
Why isn’t my car’s air conditioning cooling in summer? (Photo: pinterest.com)
Don’t Turn on the Air Conditioning Before Getting in Your Car
The car’s air conditioning will work much better when you are actually driving; the faster the engine runs, the faster the air conditioning compressor operates, allowing for a more efficient cooling system. Don’t waste time or fuel by turning on the air conditioner first to cool the car before driving. If the car’s interior is very hot, turn on the fan when you start driving and only open the rear windows for 10 to 20 seconds. This will push all the hot air out of the cabin. Don’t open the front windows because that will only move the hot air to the front of the interior, while the hot air in the back remains stagnant and the interior stays hot.
Note: Do not turn on the air conditioner at the same time as starting your vehicle. Because if you simply get in the car and turn on the air conditioner, the car will start at a low idle already under a heavy load, and the battery can be easily damaged.
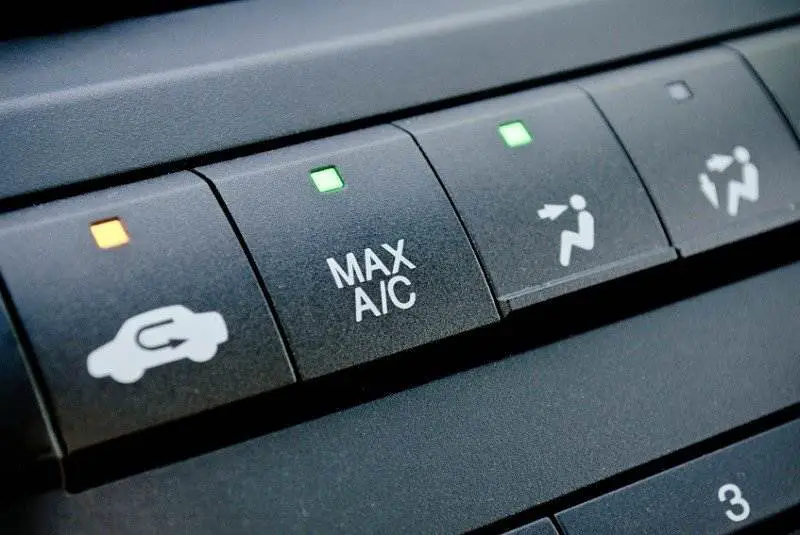
Set the Air Conditioning to the Coldest Setting
This is a simple method to apply. When the air conditioner is on, set the mode to MAX or REC at the highest level to quickly cool the car. After feeling cool enough, start switching to NORM, OUTSIDE, or COOL mode, and lower the fan level. At that point, the airflow will recirculate inside your car and bring you a lot of relief. Do not switch to the coldest setting when you just start the car.
Ensure the Filter is Clean
Please check the air filter and make sure it is clean. Dirty cabin filters will prevent optimal airflow. In newer cars, these filters are relatively easy to check; if you see a lot of dirt accumulating on them, it means it’s time to change the filter. You can save money by replacing the filter yourself in many modern cars. Of course, if that doesn’t work, you need to go to a car dealership.
Apply Car Insulation Film
In fact, this is considered an effective solution and also one of the pieces of equipment that should be available after buying a car. Note that you should choose a reflective windshield that limits heat absorption during prolonged parking in the sun. Keep in mind, the insulation film is only effective when the car is moving, and parking in one spot only partially limits heat but allows for faster cooling.
Park Your Car in the Shade
Did you know that when a car is parked in direct sunlight, the temperature inside your car can reach 131-172°F while the actual outside temperature is only 80-100°F? Therefore, parking in the shade is the most active and effective way: drivers can park their car in the shade of trees, under roofs, or on the side of a building,… or use sunshades to cover the windows. Limit direct sunlight inside the interior compartment, and this will reduce the heat inside your car.
Correctly Turn On/Off the Air Conditioner
Before starting the car, you should turn on the extraction fan and open the window to let out the hot air. Then, once the hot air is blown out, you close the window and turn on the air conditioner. This prevents the air conditioning system from being overloaded and allows your vehicle to cool more optimally. If you want to stop the car or turn off the engine, you can first turn off the air conditioning, turn off the fan, then open the door and get out.
Periodic Air Conditioning Maintenance
Many drivers often do not pay attention to the periodic maintenance of their car’s air conditioning. This easily leads to the air conditioner taking a long time to cool or the car’s air conditioning not being cold when turned on. You should go to a specialized air conditioning repair center to maintain this system. Because the air conditioning system’s structure includes many details such as the outdoor unit, indoor unit, air filter, fan, and refrigerant gas,… Timely and correct air conditioning maintenance will provide deep cooling performance and help you feel comfortable when traveling in the car.
Using the Outside Air Mode
How to make your car’s air conditioning colder (Photo: istockphoto.com)
In cases where you don’t have time to start your car, use the fan and use the outside air mode to create convection to suck out the hot air and draw in air. This helps the vehicle dissipate heat faster and at the same time, pushes the carcinogenic toxins generated by the reaction of heated plastic at high temperature to the outside environment. Even when the car has been driven, this can be combined with opening the window for a faster effect.
In fact, many drivers often think that turning on the strongest fan in combination with the air conditioner will cool faster. But actually, some tests show that the air conditioner reaches the coldest temperature when the fan mode has a medium level and is generally optimized when using the automatic air conditioning function, although this mode may take longer than a manual setting.
Add Additives to Your Car
In the middle of the summer heat, it seems that your car’s air conditioner is also busier or overworked. To solve this problem, many drivers have used additives like Ice Cold to support the air conditioning system and cool the space in their car. These additives will make functional air conditioners more efficient. There are many types of additives on the market, so make sure to choose the right type for the air conditioning system.
Final Thoughts
It’s not difficult and doesn’t cost too much for drivers to follow all the above methods. Summer is coming, let’s make sure you experience the best driving in a cool place in your own car.
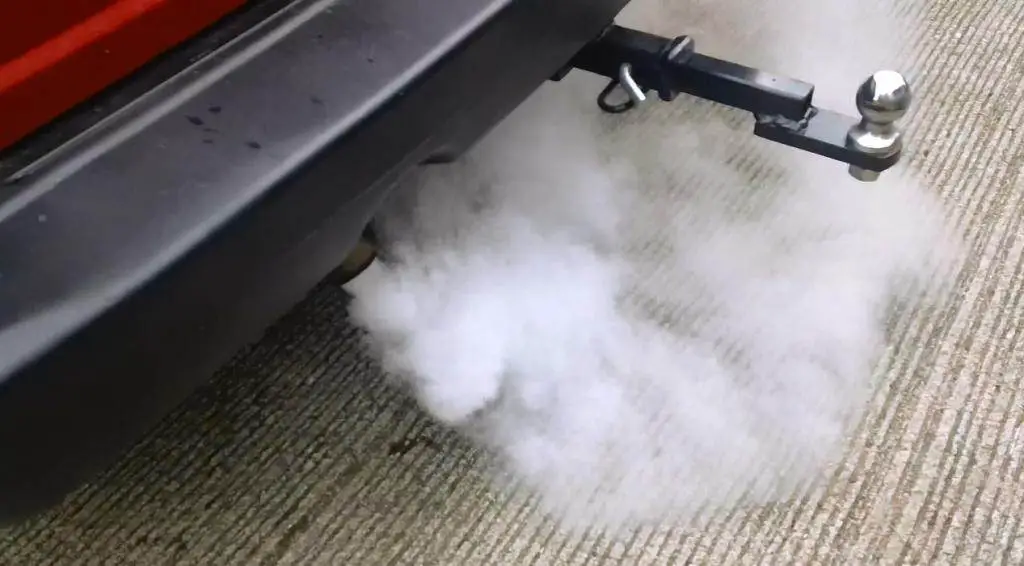
Less than 3 hours to fix white smoke from the exhaust pipe
It’s time to pay attention to your car if it emits smoke from the exhaust pipe. The smoke can be different colors and may not be dangerous at all. However, you should not ignore white smoke coming from the exhaust pipe as it could be a sign of major problems.
What Does White Smoke from the Exhaust Pipe Mean?
Sometimes, normal condensation buildup inside the exhaust system causes a very fine white vapor. There’s no need to worry in this case because it disappears very quickly. Sometimes, white smoke can be due to condensation.
When starting your car, you will see smoke escaping from the exhaust pipe. White smoke that dissipates quickly, especially in cold weather, is likely due to condensation in the exhaust system. This is a normal phenomenon and usually not a concern. It often happens when the engine starts after idling for some time.
On the other hand, thick white smoke could be a warning sign of many serious problems such as a cracked cylinder head, a blown head gasket, or a cracked engine block – all of which are expensive repairs.
Smoke can be different colors which may not be dangerous at all
Coolant burning is another reason for white smoke. Even a small leak poses a risk of overheating and thus serious engine damage. Coolant could mix with oil and damage important engine parts. When the coolant reservoir leaks, the fluid inside flows out, causing engine oil contamination and the exhaust smoke becomes milky.
Furthermore, low coolant level is also a cause of white smoke coming from the exhaust pipe. This causes the head gasket to fail, leading to wear of internal components and possible coolant leakage. At this point, the car owner must perform a thorough inspection of the crack in the head gasket to decide whether to reseal or replace it accordingly.
White smoke from the exhaust system, if not addressed promptly, will cause too much damage and reduce the engine’s lifespan. Even in the long term, this incident can cause fire and explosion when using the vehicle.
How to Stop Smoking in Car Exhaust?
When the vehicle starts emitting white smoke, drivers should check the vehicle parts and quickly remedy this situation to ensure safety and minimize subsequent repair costs. Follow these steps if your vehicle emits an excessive amount of white vapor:
Inspect the Intake Gasket
An intake manifold evenly distributes coolant or the combustion mixture to each intake port of the cylinder heads. There is a gasket that seals this manifold to the head. If it fails or is damaged, coolant will enter the port and then into the combustion chamber. Your job is to remove the intake manifold and examine the gasket to see if there is a leak or rust. If everything went well, proceed to the next step.
Examine in More Detail to Check the Head Gasket
When the intake gasket is in good condition, probe further to discover the reason for the smoke. There is a head gasket that seals the cylinder head to a block through which coolant flows to the cylinder. Any leak or damage in this part will allow coolant to enter the combustion chamber and create a jet of white vapor coming out of the exhaust pipe.
Look for Any Crack in the Cylinder Head
This part is made of aluminum which tends to break in case of overheating. You must change it if it appears broken or damaged in another way. It is important to ensure that it seals evenly with the engine block and the head gasket.
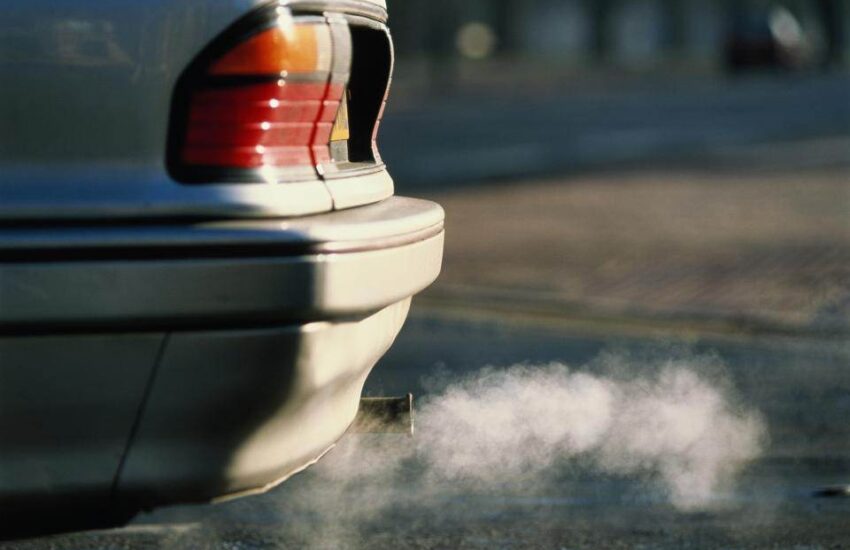
Car emissions not only affect human health but also harm the environment.
Solving such a problem is easy if you are an experienced mechanic. However, it will be wise to take the vehicle to a repair shop because changing any car part is a complicated job for an amateur.
Coolant is an antifreeze ingredient that keeps the engine cool when everything is normal. However, white smoke escapes from the exhaust pipe when this element leaks into the engine’s combustion compartment.
A pungent smell accompanies the vapor, which is a simple way to detect the problem. Other symptoms are engine overheating and loss of coolant without any visible leak.
Car emissions not only affect human health but also the environment, especially in high-traffic areas.
White smoke from car exhaust is due to many different causes, but if the car emits white smoke at times other than winter, drivers must handle it quickly to avoid damaging the engine and reducing the vehicle’s power on long trips. Therefore, vehicle owners must understand the causes and ways to repair white smoke in their car and plan periodic maintenance and regular vehicle inspection for quick solutions.
The advantages and disadvantages of drilled and slotted rotors
So, what are the advantages and disadvantages of drilled and slotted rotors?
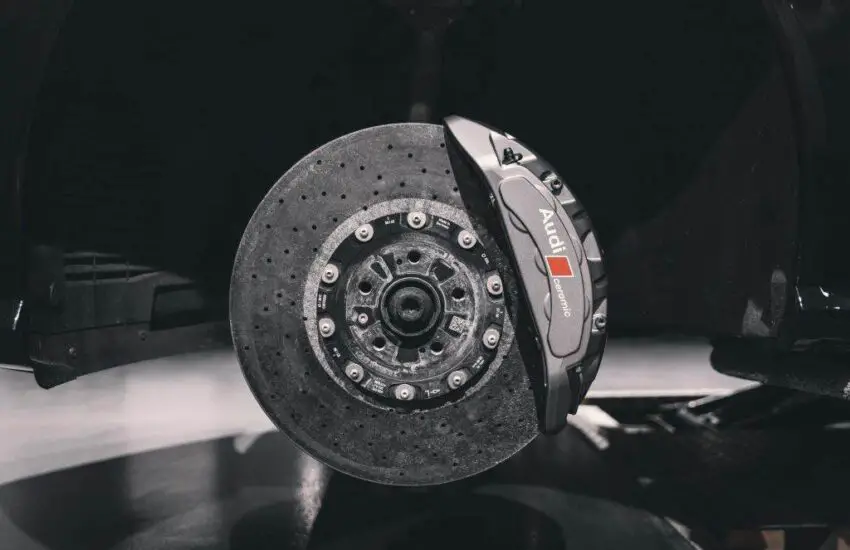
Drilled and slotted rotors are a type of brake rotor designed to improve a vehicle’s braking performance. The rotors are drilled with holes and grooves, which increases the surface area and enhances rotor ventilation. This can help dissipate heat more effectively and provide better braking performance.
These rotors have been known for some time, but they have become increasingly popular lately. Initially, they were mainly used in race cars and high-performance vehicles. The first drilled and slotted rotors were made of cast iron. But with technological advancements, they are now made from more effective materials such as carbon ceramic, composites, and aluminum. These rotors have been used in motorsports for over a century. And over time, the technology has evolved, and they are now accessible for everyday use vehicles.
Advantages and Disadvantages of Drilled and Slotted Rotors
Below are the advantages and disadvantages of drilled and slotted rotors for your reference.
Advantages of Drilled and Slotted Rotors
Improved Braking Performance
Drilled and slotted rotors offer driving performance that is more in demand than ever, thanks to their increased surface and ventilation effects. The holes and grooves on the rotor increase the surface area, allowing for more friction between the brake pads and the rotor. This additional friction improves the vehicle’s braking performance.
Drilling holes and grooves also allows for better heat dissipation. Temperature is one of the biggest enemies of brake performance, as it can cause brakes to fade or lose braking power. They can provide better and more stable braking performance by dissipating the heat generated during braking.
Increased Heat Dissipation
Holes and slots are drilled into the surface of the fan blades for more effective heat dissipation. This increased ventilation on the rotor allows hot air to escape and cooler air to enter the rotor. This helps reduce the temperature of the rotor and brake pads, preventing them from overheating and deforming.
Improved Braking in Wet Weather
The holes and grooves drilled into the rotor surface can push water away from the braking surface. When driving in rainy weather, water can accumulate on the brake disc, reducing the friction between the brake pads and the disc. This can reduce braking force, thereby improving braking performance in wet conditions. With better wet-weather braking, vehicle owners can enjoy a safer and more comfortable driving experience in the rain.
Enhanced Aesthetics
Drilled and slotted rotors can give the vehicle a sportier appearance, which can enhance its overall aesthetic look. The holes and grooves drilled on the rotor can give the car a sporty and high-performance look. This can be particularly appealing to car owners who want to customize and improve their vehicle’s appearance. Overall, they can be a way to stand out and make the car more unique.
Drilled and slotted rotors benefit not only performance but also the vehicle’s aesthetics. (Photo: WOLFANGO)
Increased Stopping Power
Thanks to the improved design and ventilation system, drilled and slotted rotors have better stopping power than conventional types. The holes and grooves on the rotor increase the surface area, allowing for more friction between the brake pads and the rotor. This additional friction improves the vehicle’s braking performance.
Drilled and slotted rotors also allow for better heat dissipation. This keeps the rotor and brake pads cooler, preventing the brake pads from overheating and losing their braking power. This can significantly affect the vehicle’s braking power, especially in high-performance or high-speed driving conditions.
Better Performance on High-Speed Vehicles
The rotors can perform better in high-speed and high-performance driving conditions. Thanks to improved ventilation and design, drilled and slotted rotors can withstand higher temperatures and braking loads than conventional rotors.
They can also help improve the vehicle’s braking performance at high speeds, providing a safer and more enjoyable drive.
Extends Brake Pad Lifespan
Improved ventilation of drilled and slotted rotors can help extend the lifespan of brake pads. Drilled and slotted rotors can reduce brake pad wear by dissipating the heat generated during braking.
Additionally, the increased surface area of the rotor gives the brake pads more space to grip the rotor, resulting in a more even distribution of braking pressure. This can help avoid uneven wear on the brake pads. With a longer brake pad lifespan, vehicle owners can save time and money on brake pad replacement costs.
Reduced Vibrations
The design of drilled and slotted rotors reduces vibrations during braking, providing a better driving feel. The slotted or drilled holes will disperse heat, thereby reducing the annoying vibrations created during braking.
Additionally, the increased surface area of the rotor can help distribute braking pressure more evenly, which can also help reduce vibrations. This can result in a smoother and more comfortable driving experience.
Easy to Clean
The drilled holes and slots make it easier to clean brake dust, rust, and other contaminants. The drilled holes and slots can help remove dirt and brake debris. Since they are much easier to clean than conventional rotors, which can be quite difficult because brake dust and dirt can accumulate on the rotor surface. This can help keep the rotor surface clean and extend the rotor’s lifespan.
Better Durability
The design of drilled and slotted rotors makes them more durable and resistant to wear. The increased surface area of the rotor can help distribute braking pressure more evenly, which can help prevent rotor wear.
Additionally, the improved ventilation of drilled and slotted rotors can prevent the rotor from warping and cracking, which can extend its lifespan.
Reduced Brake Fade
Drilled and slotted rotors provide better cooling, which can reduce brake fade during high-performance driving. The rotor can become very hot during high-speed operation or under high-performance conditions, which can cause the brake pads to lose friction with the rotor and result in brake fade.
The fan blades are drilled and slotted for better ventilation, can dissipate heat more effectively, and can reduce brake fade. This can result in a safer and more enjoyable driving experience.
Better Warp Resistance
Thanks to the design of drilled and slotted rotors, they are less prone to warping or cracking under high temperatures and heavy use. The increased ventilation of drilled and slotted rotors can provide more effective heat dissipation, preventing the rotor from warping and cracking.
Additionally, the increased surface area of the rotor can help distribute braking pressure more evenly, which can also help prevent warping and cracking.
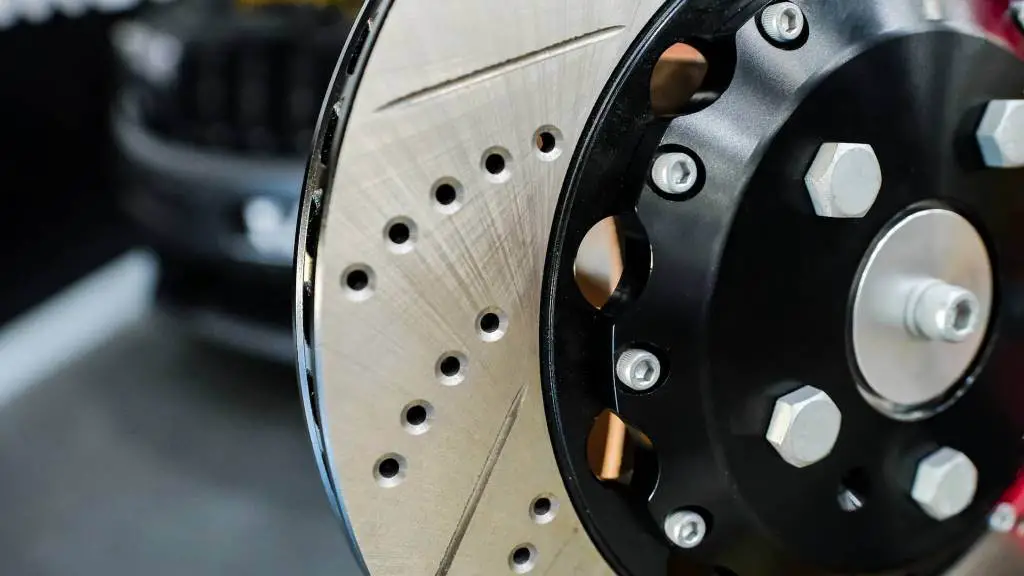
Drilled and slotted rotors are suitable for high-performance cars but are also available for everyday use vehicles. (Photo: Smith Repair)
Disadvantages of Drilled and Slotted Rotors
Noise
Drilled and slotted rotors can make more noise than standard rotors, especially during high-speed braking. The drilled and slotted design can cause more vibration in the brake pads, leading to noticeable squealing or squeaking.
Compatibility Issues
Drilled and slotted rotors are not compatible with all vehicles and braking systems. It is essential to check the compatibility of drilled and slotted rotors with the specific vehicle make and model before purchasing and installing them. Additionally, drilled and slotted rotors may require specific types of pads and braking systems to function properly.
Reduced Brake Feel
Drilled and slotted brake rotors can negatively affect the “feel” of the brake pedal. Designs with holes and grooves can result in less pedal resistance, making it difficult for the driver to accurately gauge the braking force applied. This can lead to a less safe and less precise driving experience.
More Heat
Drilled and slotted rotors can generate more heat than standard rotors, leading to increased brake fade. This is because the hole and groove design can cause the brake pads to overheat more effectively, which can cause the brake pads to lose their ability to grip the rotor and reduce overall braking force. This can be particularly challenging during high-speed driving or in emergency braking situations.
Reduced Energy Efficiency
Drilled and slotted rotors can harm fuel efficiency. This type of rotor design pushes the brake pads to create more drag, forcing the vehicle to consume more fuel to maintain a steady speed. The disadvantages frequently affect vehicles on highways or over long distances.
Reduced Resale Value
Drilled and slotted rotors can negatively affect a vehicle’s resale value. Slotted models are often considered performance upgrades, making a vehicle less attractive to potential buyers who are not interested in performance enhancements.
Additionally, additional wear due to drilled and slotted rotors can negatively impact the vehicle’s resale value.
Reduced Stopping Force
Drilled and slotted rotors can reduce the overall stopping force of the vehicle’s braking system. Designs with holes and grooves can put extra stress on the rotors and brake pads, causing them to wear out more quickly, thus reducing their effectiveness. This can be particularly challenging in emergency braking situations, where maximum stopping force is required.
Requires More Maintenance
You may not know it, but drilled and slotted rotors require more maintenance to perform as typically as conventional rotors. Their design, with holes and grooves, can create more dust and debris, clogging the brake pads and causing them to wear out faster.
Additionally, the design can cause the blades to rust more quickly, requiring more frequent cleaning and anti-rust treatment.
Reduced Comfort
Drilled and slotted brake rotors can reduce the overall comfort of your vehicle’s braking system. The drill and slot design can produce more noise and vibrations, which can be transmitted through the brake pedal, causing discomfort for the driver and passengers.
Reduced Safety
Drilled and slotted rotors can reduce the overall safety of the vehicle’s braking system. Drilling and slotting designs can lead to faster wear of the brake pads, reducing their effectiveness and potentially increasing the vehicle’s stopping distance. A design with holes and grooves can more effectively cause the rotor to crack or warp, leading to brake failure.
Conclusion
We have gone through some advantages and disadvantages of drilled and slotted rotors. I hope this helps you decide on every necessary step with this type of rotor and to always be aware of the proper ways to maintain your car.