

Whether it’s fitting a new set of tires according to the season or swapping a flat tire on the highway, changing tires is an essential skill that every driver should have in their back pocket. You can do it at the garage or wait for your breakdown service to help you on the roadside, but it’s always faster, cheaper, and often more effective to be able to do it yourself. It will make you feel good and much more confident too! Here is a step-by-step guide on how to change a tire yourself and the types of tools you’ll need to get back on the road hassle-free.
Contenthide
- 1 What tools do you need to change a tire
- 2 6 tips for changing tires yourself
WHAT TOOLS DO YOU NEED TO CHANGE A TIRE

Before starting to change a tire, it is essential that we have the right equipment to ensure we can swap the tires safely and effectively.
You will need the following tools:
- Car jack
This is the essential equipment for changing a tire. Car jacks come in different sizes, with different load capacities and different features. To change your tires at home or on the roadside, you will need a jack with a load capacity of at least 2 tons. You should also check the maximum lift height to ensure the jack will lift your vehicle high enough off the ground. The correct lift height for your car can be found in the vehicle manual; check this before buying a car jack. - The cross wrench
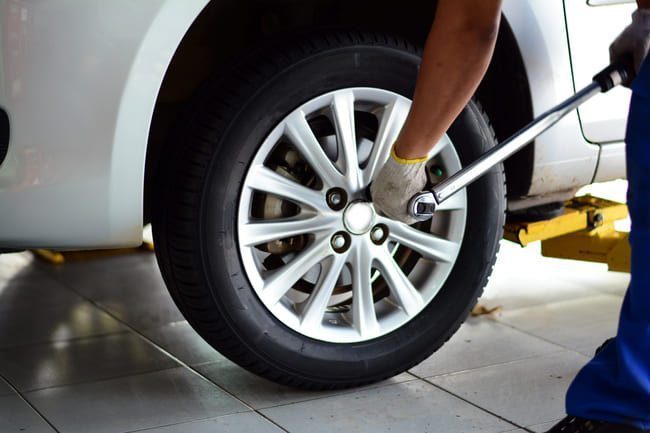
Also known as a lug wrench or a 4-way wheel brace, the cross wrench is used to loosen the wheel nuts (or lug nuts) and to tighten them after changing the tires. Typically, the wrench widths on a cross wrench for cars are suitable for the most common wheel nut sizes. However, you should check that the cross wrench matches your wheel nut size before purchasing. - The torque wrench
A torque wrench is essential for changing a tire. Using a torque wrench, you can ensure that the wheel nuts are properly tightened. Each car type has a specific torque value that is recommended, and ensuring this matches is extremely important for the wheel’s seating and grip. For most cars, the specific torque is usually between 110 Nm and 120 Nm (Newton-meters), and this depends on the vehicle model, rim size, design (steel or aluminum rims), and the number of bolts. You can find the value suitable for your wheels in the car manual. - Wire brush
Pieces of rust or dirt may have accumulated on the wheel hub, on the wheel studs, and on the axle. Changing the tire can be a great opportunity to clean it, and a wire brush is the perfect tool for the job. - A grease pencil / some kind of marker
This is not essential, but it is certainly useful to be able to use a grease pencil to mark the original positions of your tires. This is important when you change your tires and store the old ones for winter or summer. We suggest using the following abbreviations: FL = front left, FR = front right, RL = rear left, RR = rear right.
6 TIPS FOR CHANGING TIRES YOURSELF
- Find a flat surface and prepare the car.
You must ensure you have a solid, flat surface that will prevent the car from rolling. You can also block the wheel on the opposite side with a board or a stone. If you are near a road, park as far away from traffic as possible and turn on your hazard lights. Avoid trying to change a tire on soft ground (grass) and hills. Engage the handbrake and put your vehicle in first gear or reverse if it’s a manual car, park if it’s an automatic. If you are on the roadside changing a flat tire, also make sure to set up your warning signal so that approaching drivers know there is a stationary vehicle and something is wrong. It’s also a good idea to check the spare tire before mounting it – there’s nothing worse than going to the effort of mounting a new tire only to realize it’s flat. - Loosen the wheel nuts.
Start by leveling the plastic hubcaps or wheel covers so that the metal wheel nuts are exposed. Using the cross wrench, loosen the wheel nuts by turning counterclockwise. At this point, you don’t want to make them too loose or remove them completely, just enough to break the resistance. Keeping the wheel on the ground when you first loosen the nuts will ensure you are turning the nuts instead of the wheel. If there is a lot of resistance and you find it difficult, you can use your knee and foot for leverage on the cross wrench. - Jack up the car.
The scissor jack is the most common and widely available jack for changing wheels yourself. It uses a screw to move the jack up and down. It is worth noting that before deciding where to place the jack, many cars have molded plastic along the bottom. If you don’t place the jack in the right spot, it will crack the plastic when you start lifting. Placing a small piece of wood underneath will also help maintain stability, if you have one handy.
If you are unsure of the correct place to put the jack, take a look at your vehicle’s manual, but most often, the best place for the jack is on the side of the car near the flat tire. For most modern unibody cars, there is a small notch or mark just behind the front wheel arches, or in front of the rear wheel arches, where the jack is meant to be placed. For most vans or older cars that have a frame, look to place the jack on one of the frame beams just before the front tire or in front of the rear tire.
Although it may seem obvious, it is important to mention that you should NEVER place your hands or legs under the vehicle as it would be extremely dangerous if the car fell.
Jacking can take some time, and patience is key here, so proceed slowly until the car is 10 – to 15 cm off the ground or until the wheel you are changing is lifted a few centimeters off the ground. When lifting, make sure the car is stable. If you notice any instability, perhaps due to poor jack placement, lower the jack and resolve the issue before fully lifting the car. If you notice the jack lifting crooked or tilted, lower it and reposition it so it can lift straight. - Remove the wheel nuts and the flat tire.
Now that the car is raised, you can start removing the wheel nuts. Use the cross wrench again and make sure to keep the nuts nearby once they have been removed. Once that is done, remove the flat tire. If the car is old, it’s possible the tire is stuck due to rust. You can try hitting the inner half of the tire with a rubber mallet to loosen the tire, or use the spare wheel to hit the outer half. If you wish to clean the inside with your brush, now is the time to do it, before mounting the new tire.
- Mount the new tire on the wheel.
Center the spare or replacement tire on the wheel studs (also called hub bolts) where the wheel nuts were. Make sure to install the spare tire in the correct direction and not backwards. The valve stem of a ring tire must be turned outward, away from the vehicle. If your vehicle uses acorn-type wheel nuts, it is easy to make a mistake and put them back on backwards. Make sure the thinner part of the wheel nut faces the wheel when tightening.
Tighten by hand as much as possible, then use the cross wrench to tighten them so they are firm and won’t slip. Do not tighten them completely yet, as we will wait for the car to be back on the ground. - Lower the car and tighten the bolts.
Once the wheel is back on the car, you can start using the jack to lower it to the ground. Again, be patient and take your time, even though it should be a bit easier than lifting the car. Remove the jack from under the car when it is back on the ground, then start tightening the wheel nuts.
It is important to ensure equal torque is applied to all wheel nuts. Using the cross wrench, tighten the nuts as much as possible in a star pattern – this means starting by tightening the bottom nut, then tightening the opposite stud, then moving to an un-tightened stud opposite to it, and so on, until they are all tightened. This ensures the tire is balanced, and you can check this using your torque wrench. Now, the job is done and you have changed a car tire yourself!